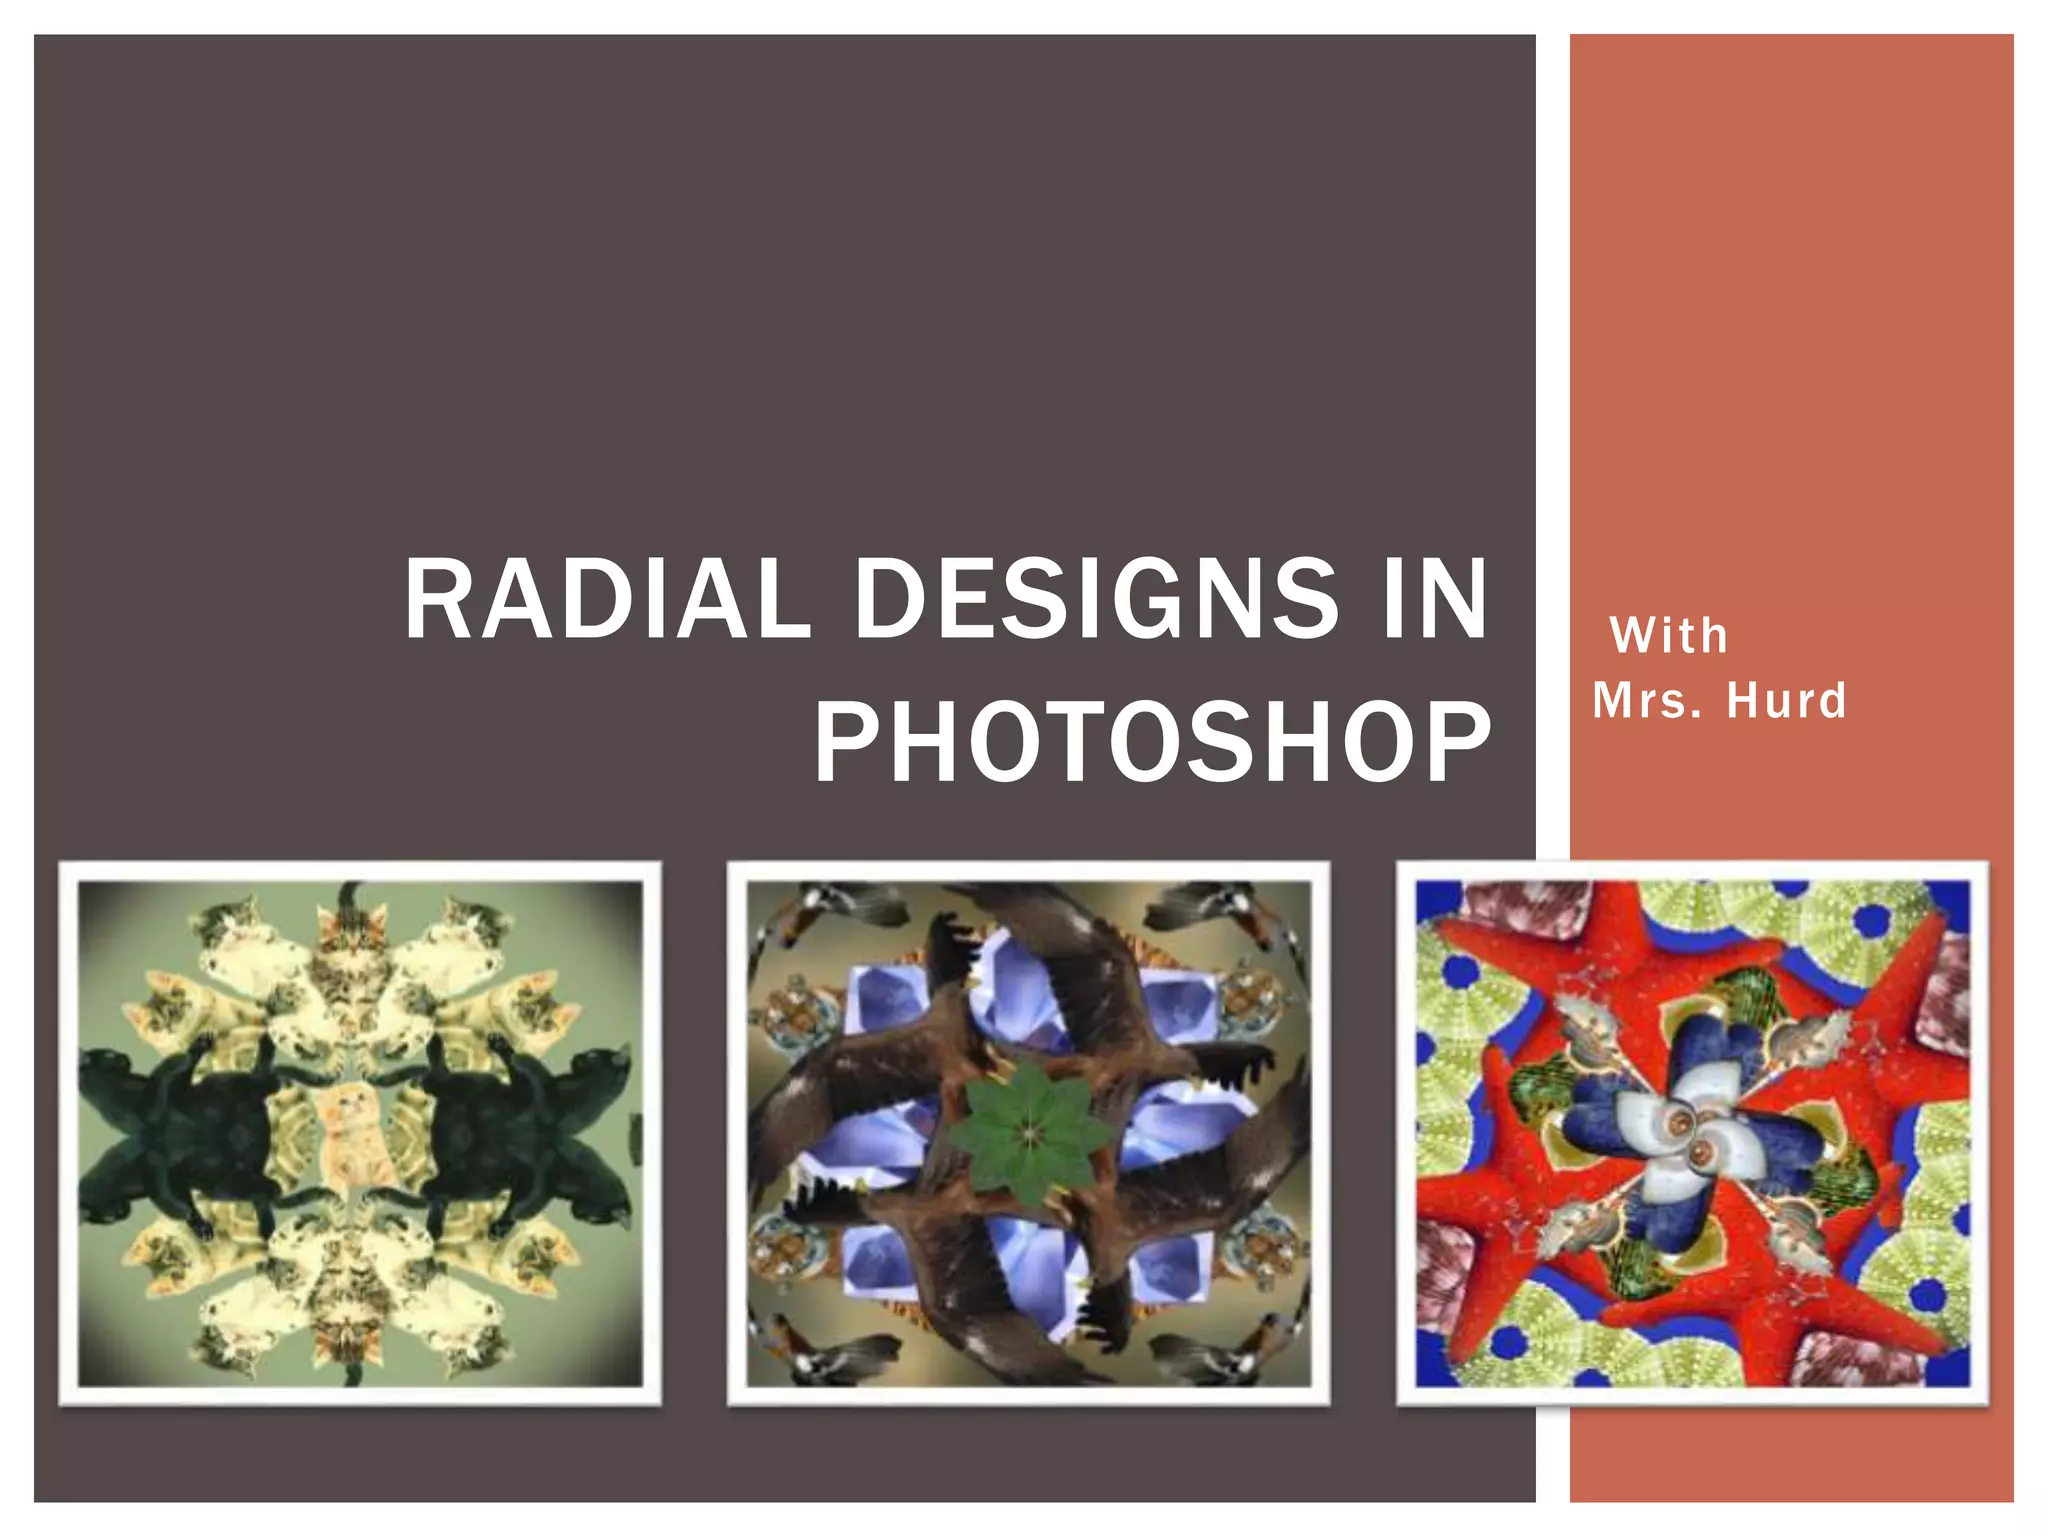
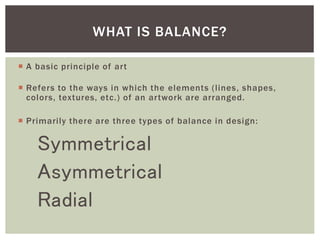
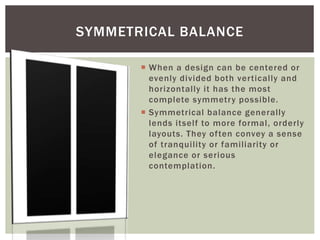
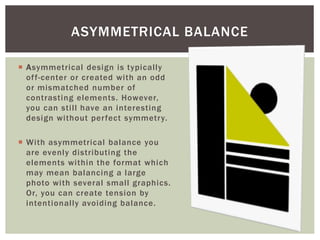
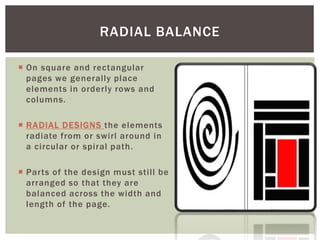
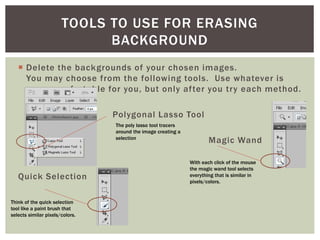
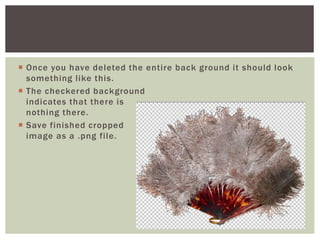
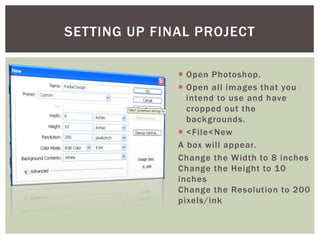
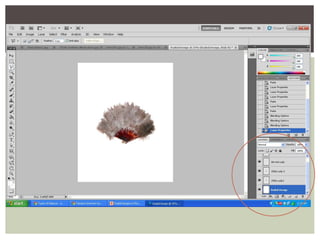
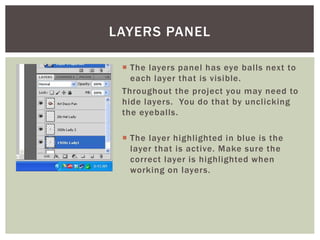
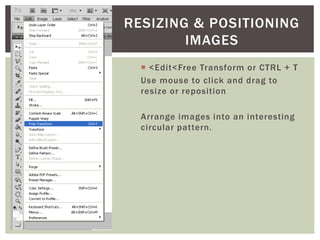
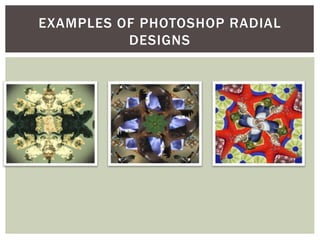
The document discusses different types of balance in design, including symmetrical, asymmetrical, and radial balance. It provides examples and definitions of each type. The main focus is on radial balance, where elements radiate from or swirl around a central point in a circular or spiral pattern. The document then provides step-by-step instructions for creating a radial design in Photoshop using multiple images arranged in a circular composition.
How to Make a Web 2.0 Play Button in Adobe Illustrator CS6ZillionDesigns
Check out our extremely easy step-by-step guide to making a Play Button in Adobe Illustrator. We promise our guide helps you learn how to create 3D buttons without a design generator no matter what their shape. Visit our blog for more tips and tutorials. http//www.zilliondesigns.com/blog
Inkscape Beginner Tutorial: How to Make a Yoga Class FlyerFlyer Tutor
Learn how to use the Free Open Source Program - Inkscape, to make a Yoga Class Flyer from beginning to end. With this Inkscape Tutorial you will learn how to do Document Setup, Create Rectangle, Set Object Size, Edit Fill and Stroke Color, Convert to Curves, Add Nodes, Adjust Line Segment, Curve Line Segment, Create Duplicates, Arrange Order, Insert Circles, Find Royalty Free Clipart, Import Image, Ungroup Images, Flip Images Horizontally, Find Free Fonts, Insert and Format Text, Add Drop Shadow, and Save your File.
toolbars and axis , how to import file from autocad to sketchup , basic tools of sketchup , how to extrude walls , how to make a window (quick way ) , how to see dimensions, commands - position camera, walk and look around. All this can be learned in this presentation. A guide for beginners.
Photoshop is unlike other common software interfaces which emulate virtual typewriters or graphing paper. Photoshop creates an artist's virtual studio/darkroom. When you open the program you see a toolbox on the left with tools you will use to manipulate your images, and on the right, a white square which is your "canvas" or work area. The gray area surrounding the canvas is not part of your image, but only defines its edges.
This presentation shows you a few different ideas on how to bring your presentations up a notch by presenting quotes in a more creative way. We'll show you exactly how to recreate each design. Don't forget to check out the helpful resources at the end of the deck.
This presentation was created 100% in PowerPoint. View more presentation and production ideas on our blog: https://www.macroproductions.net/blog/
2. A basic principle of art
Refers to the ways in which the elements (lines, shapes,
colors, textures, etc.) of an artwork are arranged.
Primarily there are three types of balance in design:
Symmetrical
Asymmetrical
Radial
WHAT IS BALANCE?
3. When a design can be centered or
evenly divided both vertically and
horizontally it has the most
complete symmetry possible.
Symmetrical balance generally
lends itself to more formal, orderly
layouts. They often convey a sense
of tranquility or familiarity or
elegance or serious
contemplation.
SYMMETRICAL BALANCE
4. Asymmetrical design is typically
off-center or created with an odd
or mismatched number of
contrasting elements. However,
you can still have an interesting
design without perfect symmetry.
With asymmetrical balance you
are evenly distributing the
elements within the format which
may mean balancing a large
photo with several small graphics.
Or, you can create tension by
intentionally avoiding balance.
ASYMMETRICAL BALANCE
5. On square and rectangular
pages we generally place
elements in orderly rows and
columns.
RADIAL DESIGNS the elements
radiate from or swirl around in
a circular or spiral path.
Parts of the design must still be
arranged so that they are
balanced across the width and
length of the page.
RADIAL BALANCE
6. We will be creating our very own Radial Design.
Step One: Choose an interesting subject (person, place, or
thing) and save (at least) two reference photos to your
student file or jump drive as a jpeg. We will be editing
these for our design. Two is the minimum, you may have
more!
Step Two: Open Adobe Photoshop
LET’S GET STARTED!
7.
8. Step 3: Open images in Photoshop. They will appear in tabs
towards the top of the screen.
Remember that two images are just the MINIMUM requirement.
I encourage to have more. They all should tie together some
how as well.
Also remember to make a duplicate layer of your image by right
clicking and selecting duplicate image.
You will work on the duplicate to protect your original.
9.
10. Delete the backgrounds of your chosen images.
You may choose from the following tools. Use whatever is
more comfortable for you, but only after you try each method.
Polygonal Lasso Tool
Magic Wand
Quick Selection
TOOLS TO USE FOR ERASING
BACKGROUND
The poly lasso tool tracers
around the image creating a
selection
With each click of the mouse
the magic wand tool selects
everything that is similar in
pixels/colors.
Think of the quick selection
tool like a paint brush that
selects similar pixels/colors.
11. Once you have deleted the entire back ground it should look
something like this.
The checkered background
indicates that there is
nothing there.
Save finished cropped
image as a .png file.
12. Open Photoshop.
Open all images that you
intend to use and have
cropped out the
backgrounds.
<File<New
A box will appear.
Change the Width to 8 inches
Change the Height to 10
inches
Change the Resolution to 200
pixels/ink
SETTING UP FINAL PROJECT
13. <Window
A drop down menu will appear,
Make sure you have a check mark
next to the same ones as this
image.
14. Go back to one of your saved images and select
<Edit<Copy
Paste into your Radial Design
Each time you past an image it should appear as a new layer,
name the layer whatever the object is
Copy and paste all your images into the Radial Design
It should look like the following slide
RADIAL DESIGN SET UP
15.
16. The layers panel has eye balls next to
each layer that is visible.
Throughout the project you may need to
hide layers. You do that by unclicking
the eyeballs.
The layer highlighted in blue is the
layer that is active. Make sure the
correct layer is highlighted when
working on layers.
LAYERS PANEL
17. <Edit<Free Transform or CTRL + T
Use mouse to click and drag to
resize or reposition
Arrange images into an interesting
circular pattern.
RESIZING & POSITIONING
IMAGES