Download to read offline


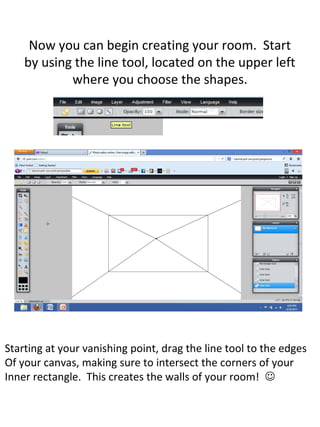
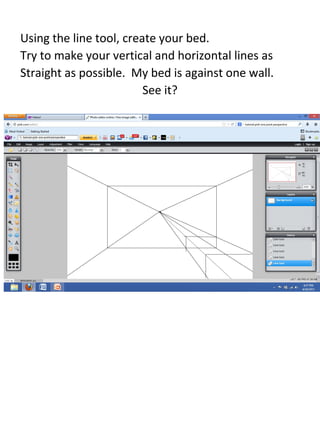

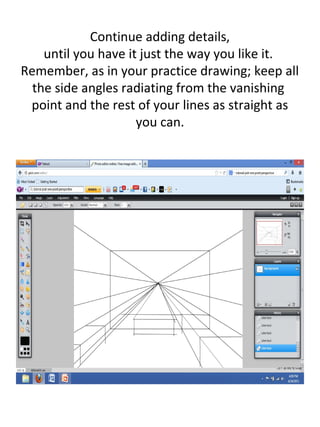


This document provides instructions for a computer assisted art lesson on creating a 1 point perspective drawing using the Pixlr online editor. The instructions guide the student through selecting tools to create a canvas, vanishing point, rectangle to define the room space, and use of line and shape tools to draw walls, furniture like a bed and desk, and add details like windows to build out a room interior in 1 point perspective. The student is advised to keep angles radiating from the vanishing point and use the eraser tool to clean up lines.


