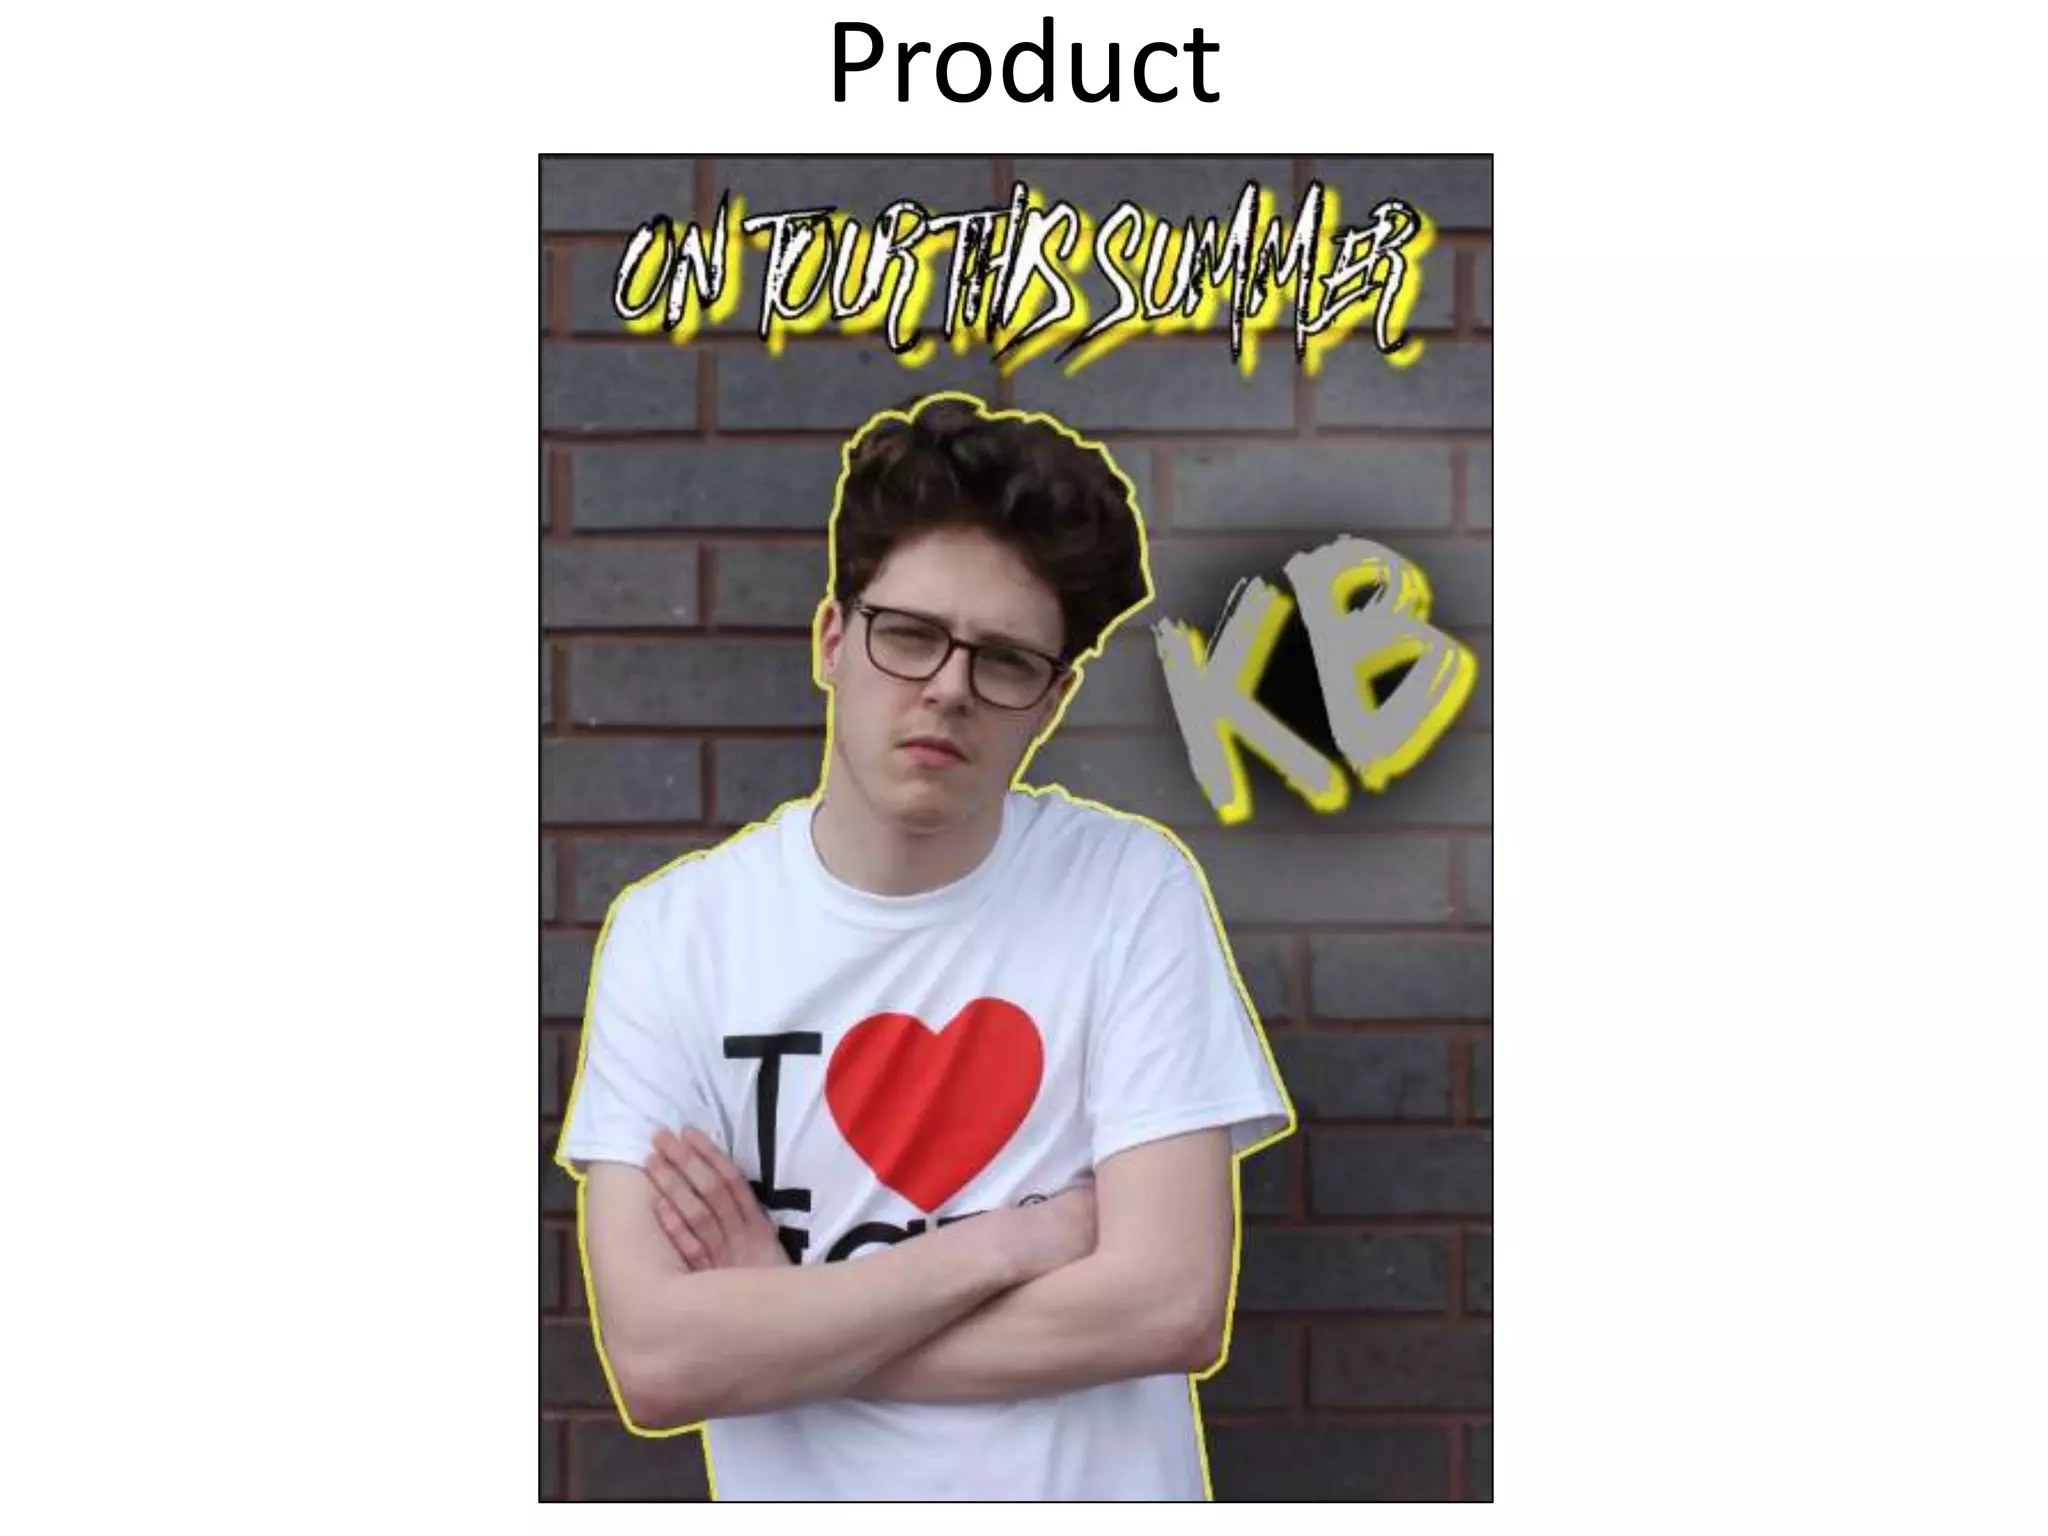
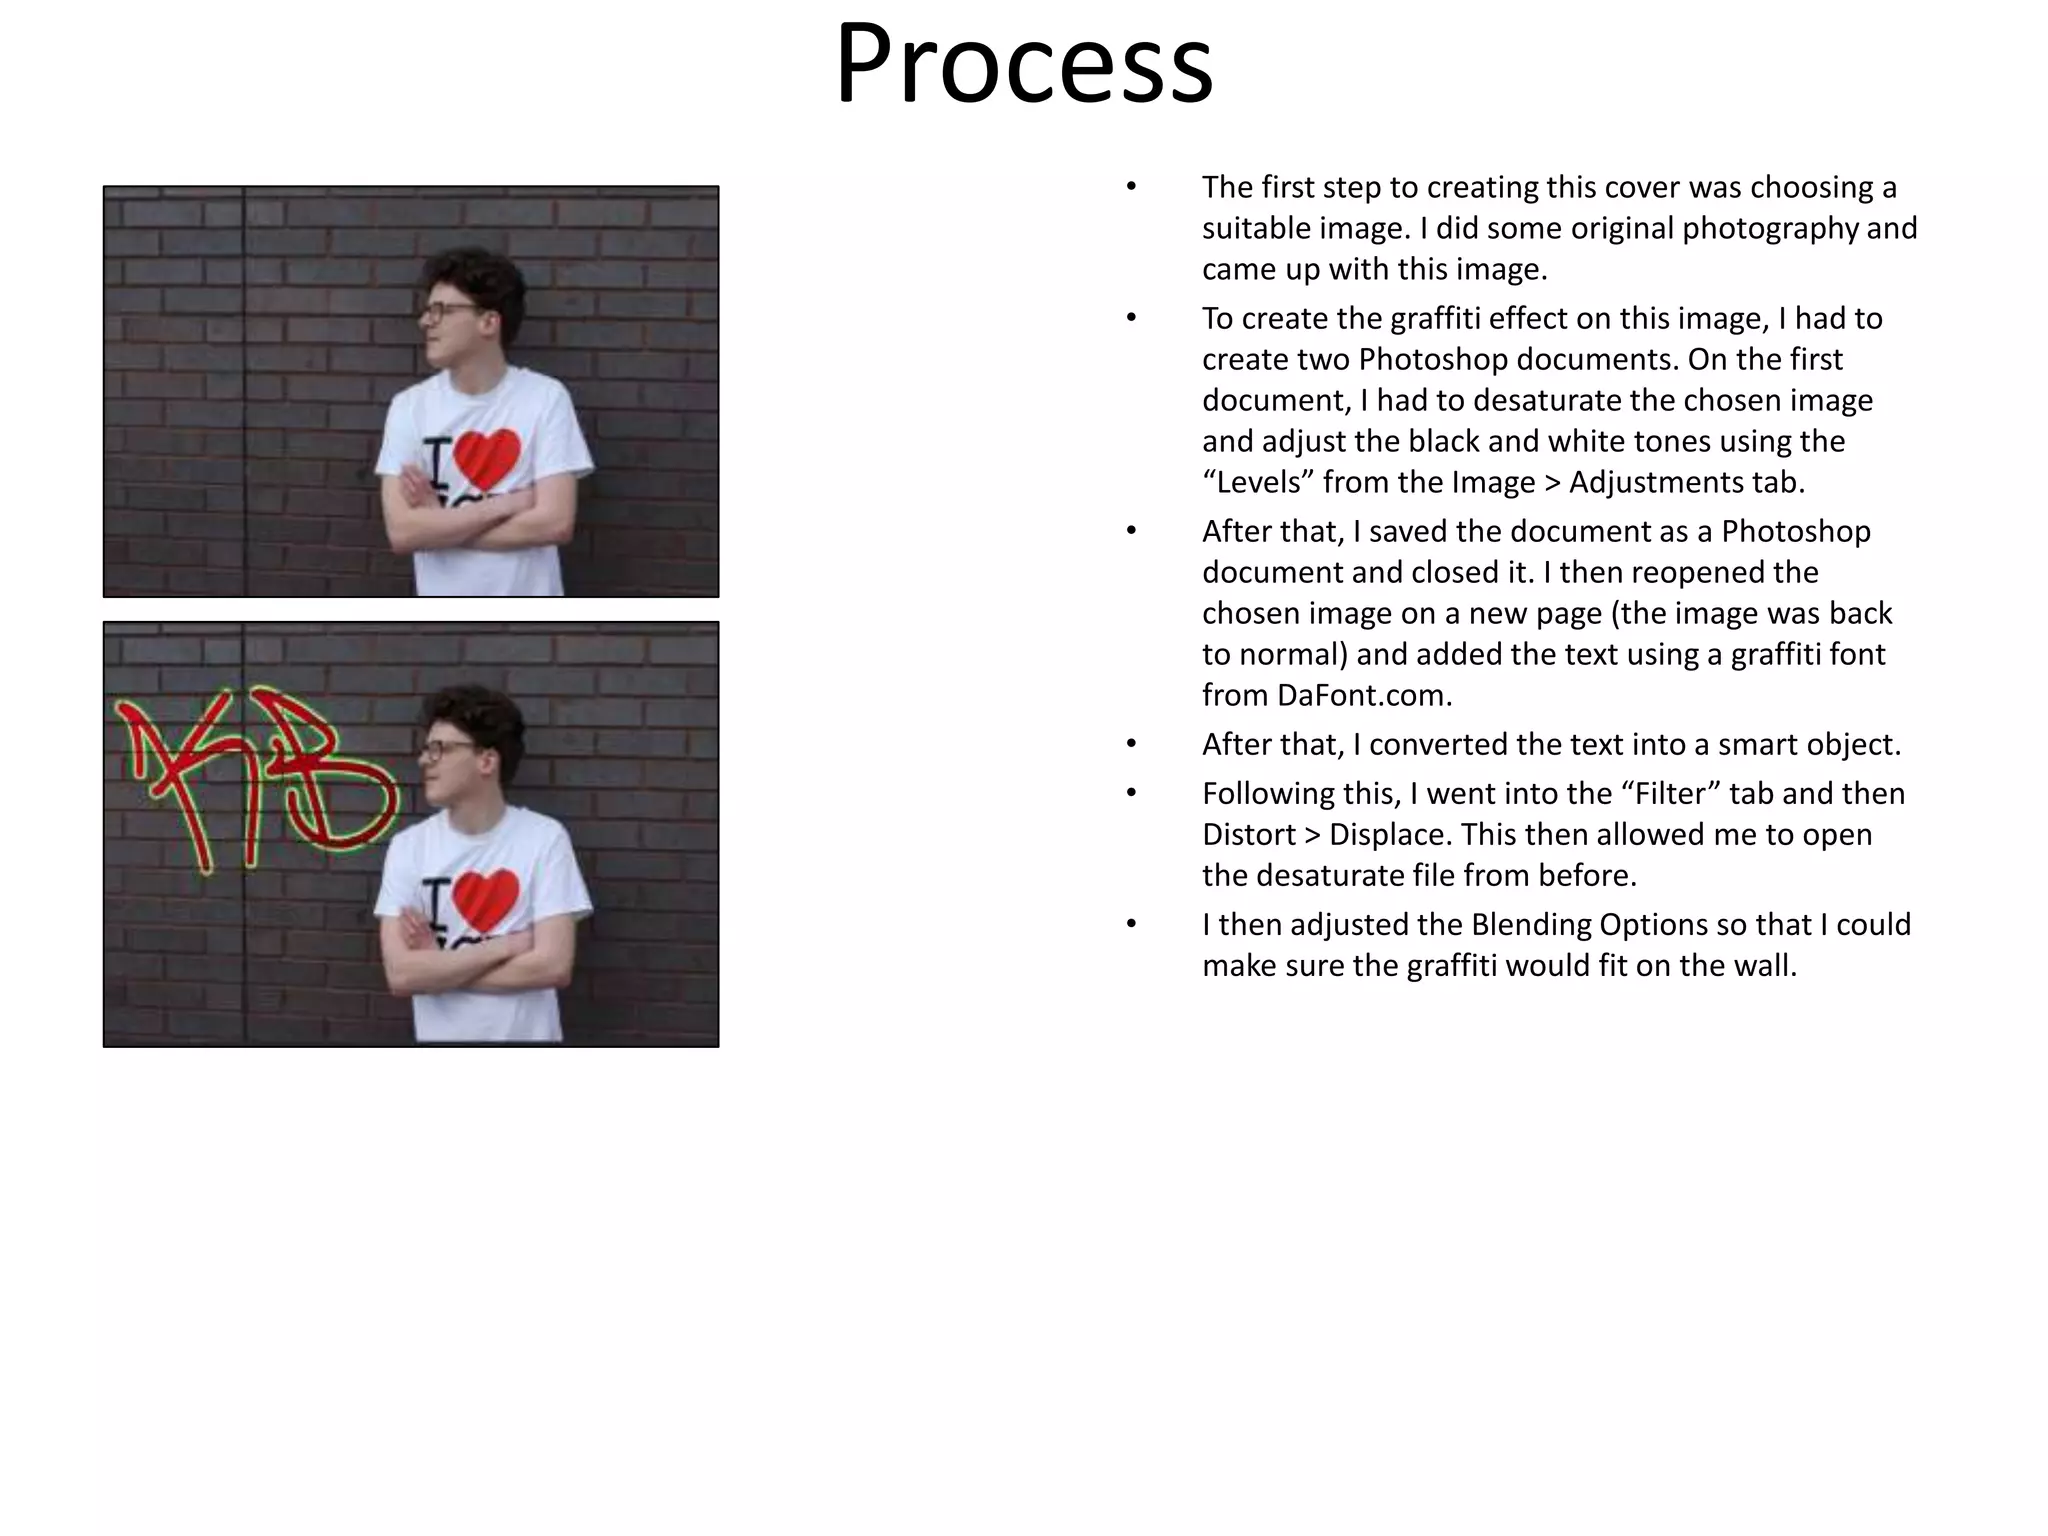
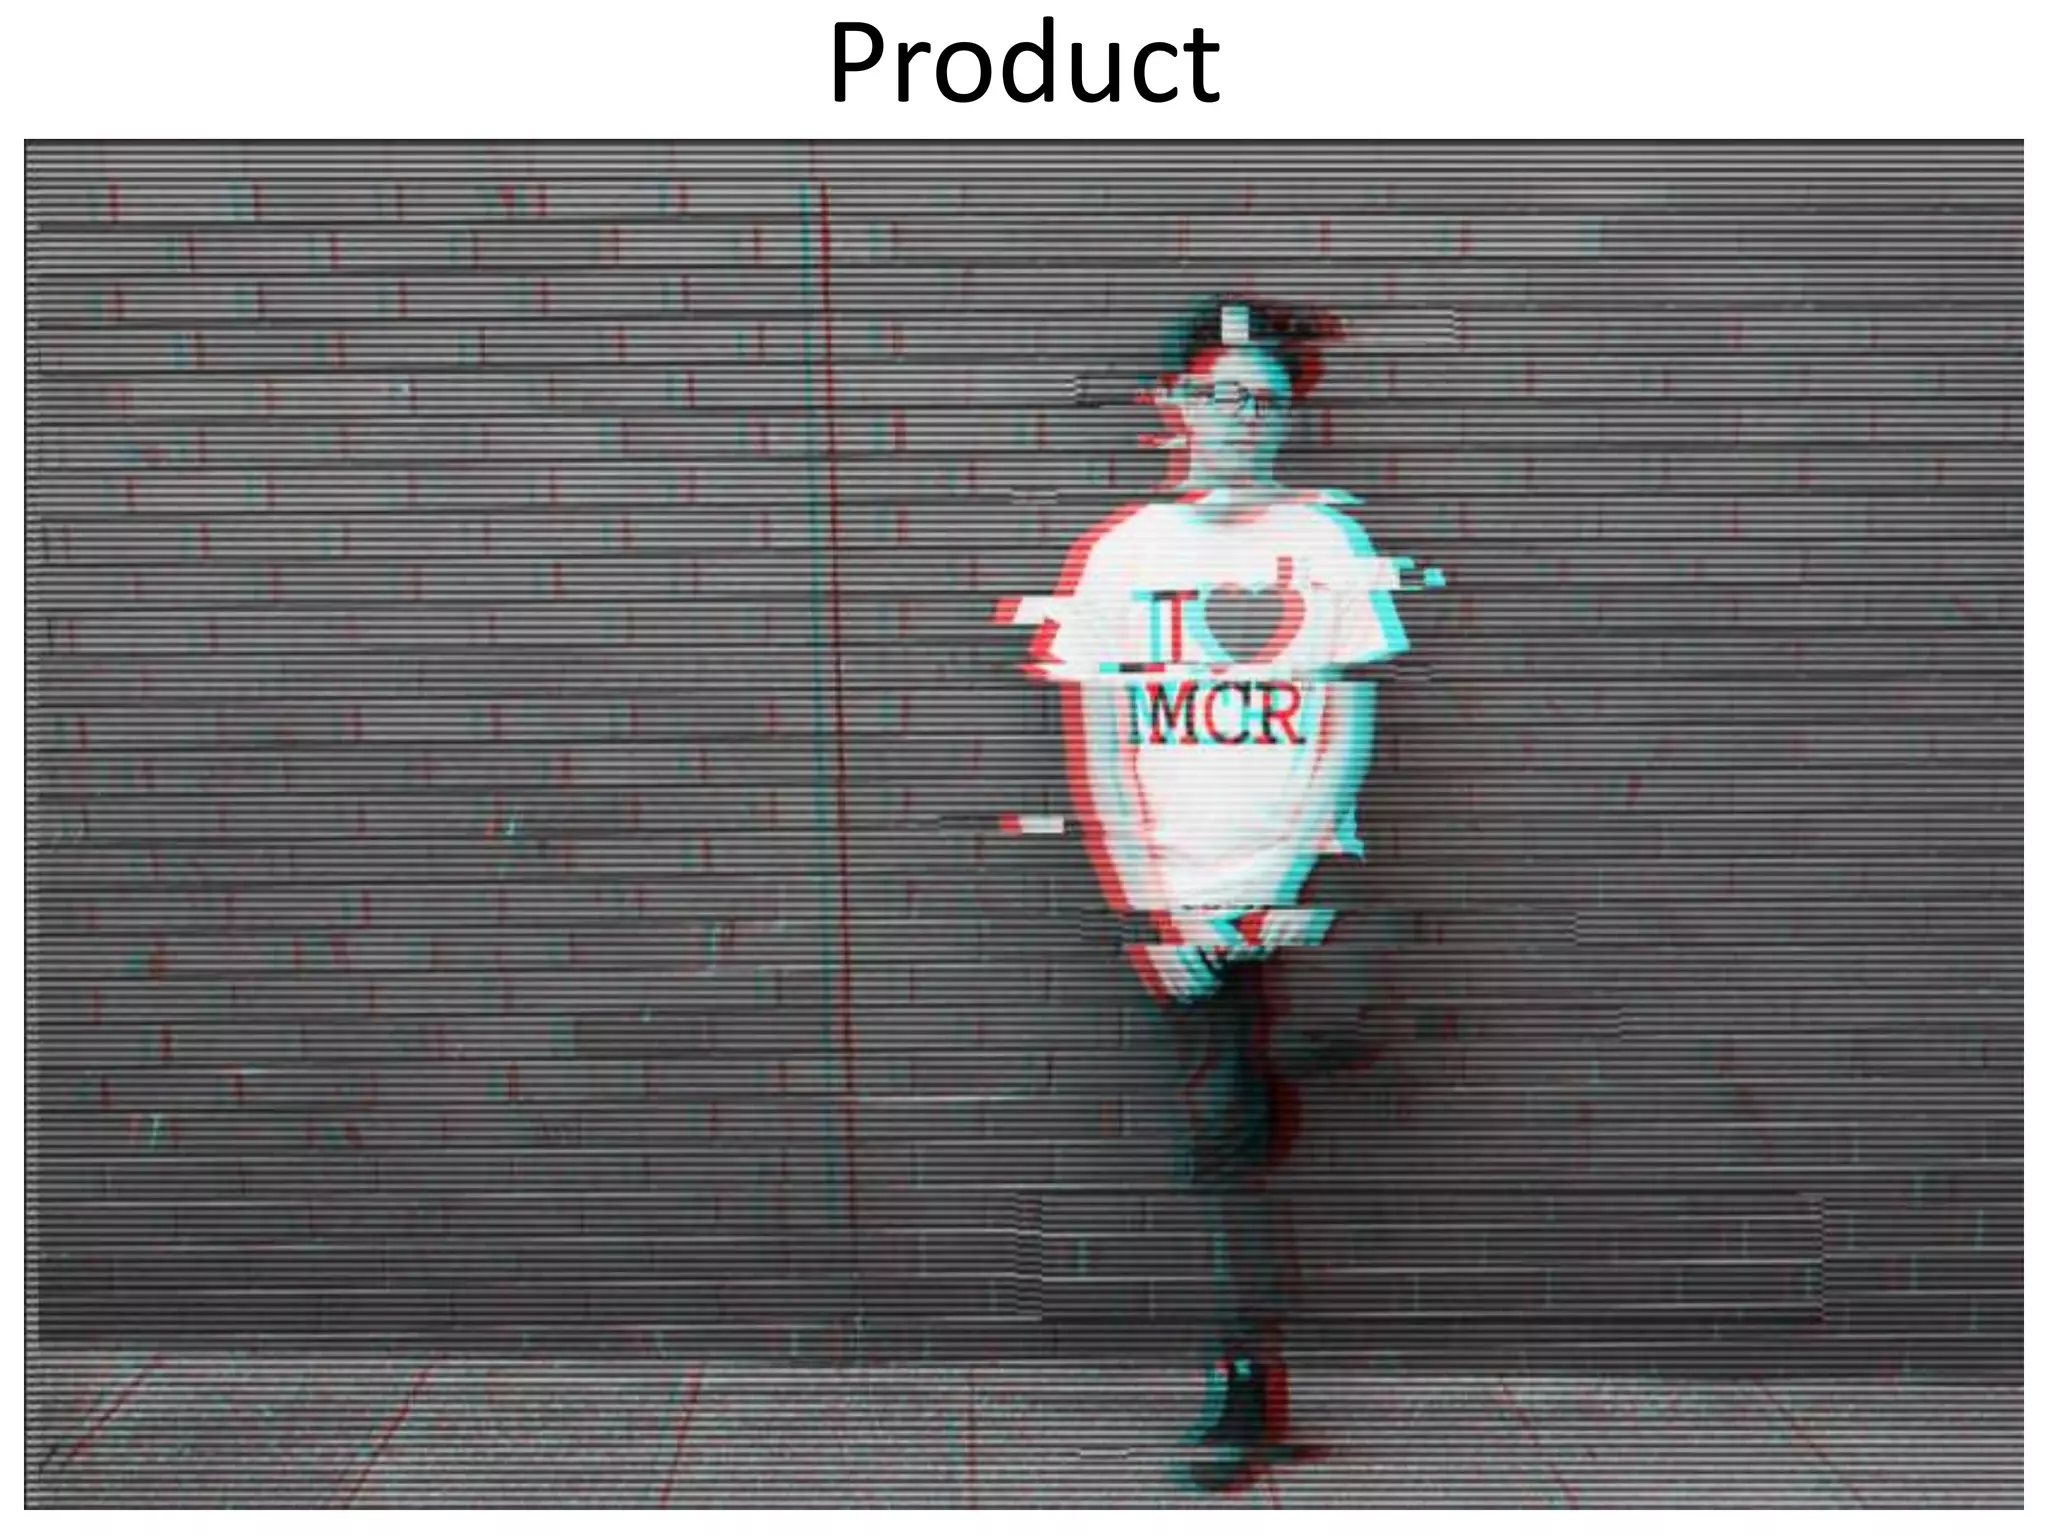
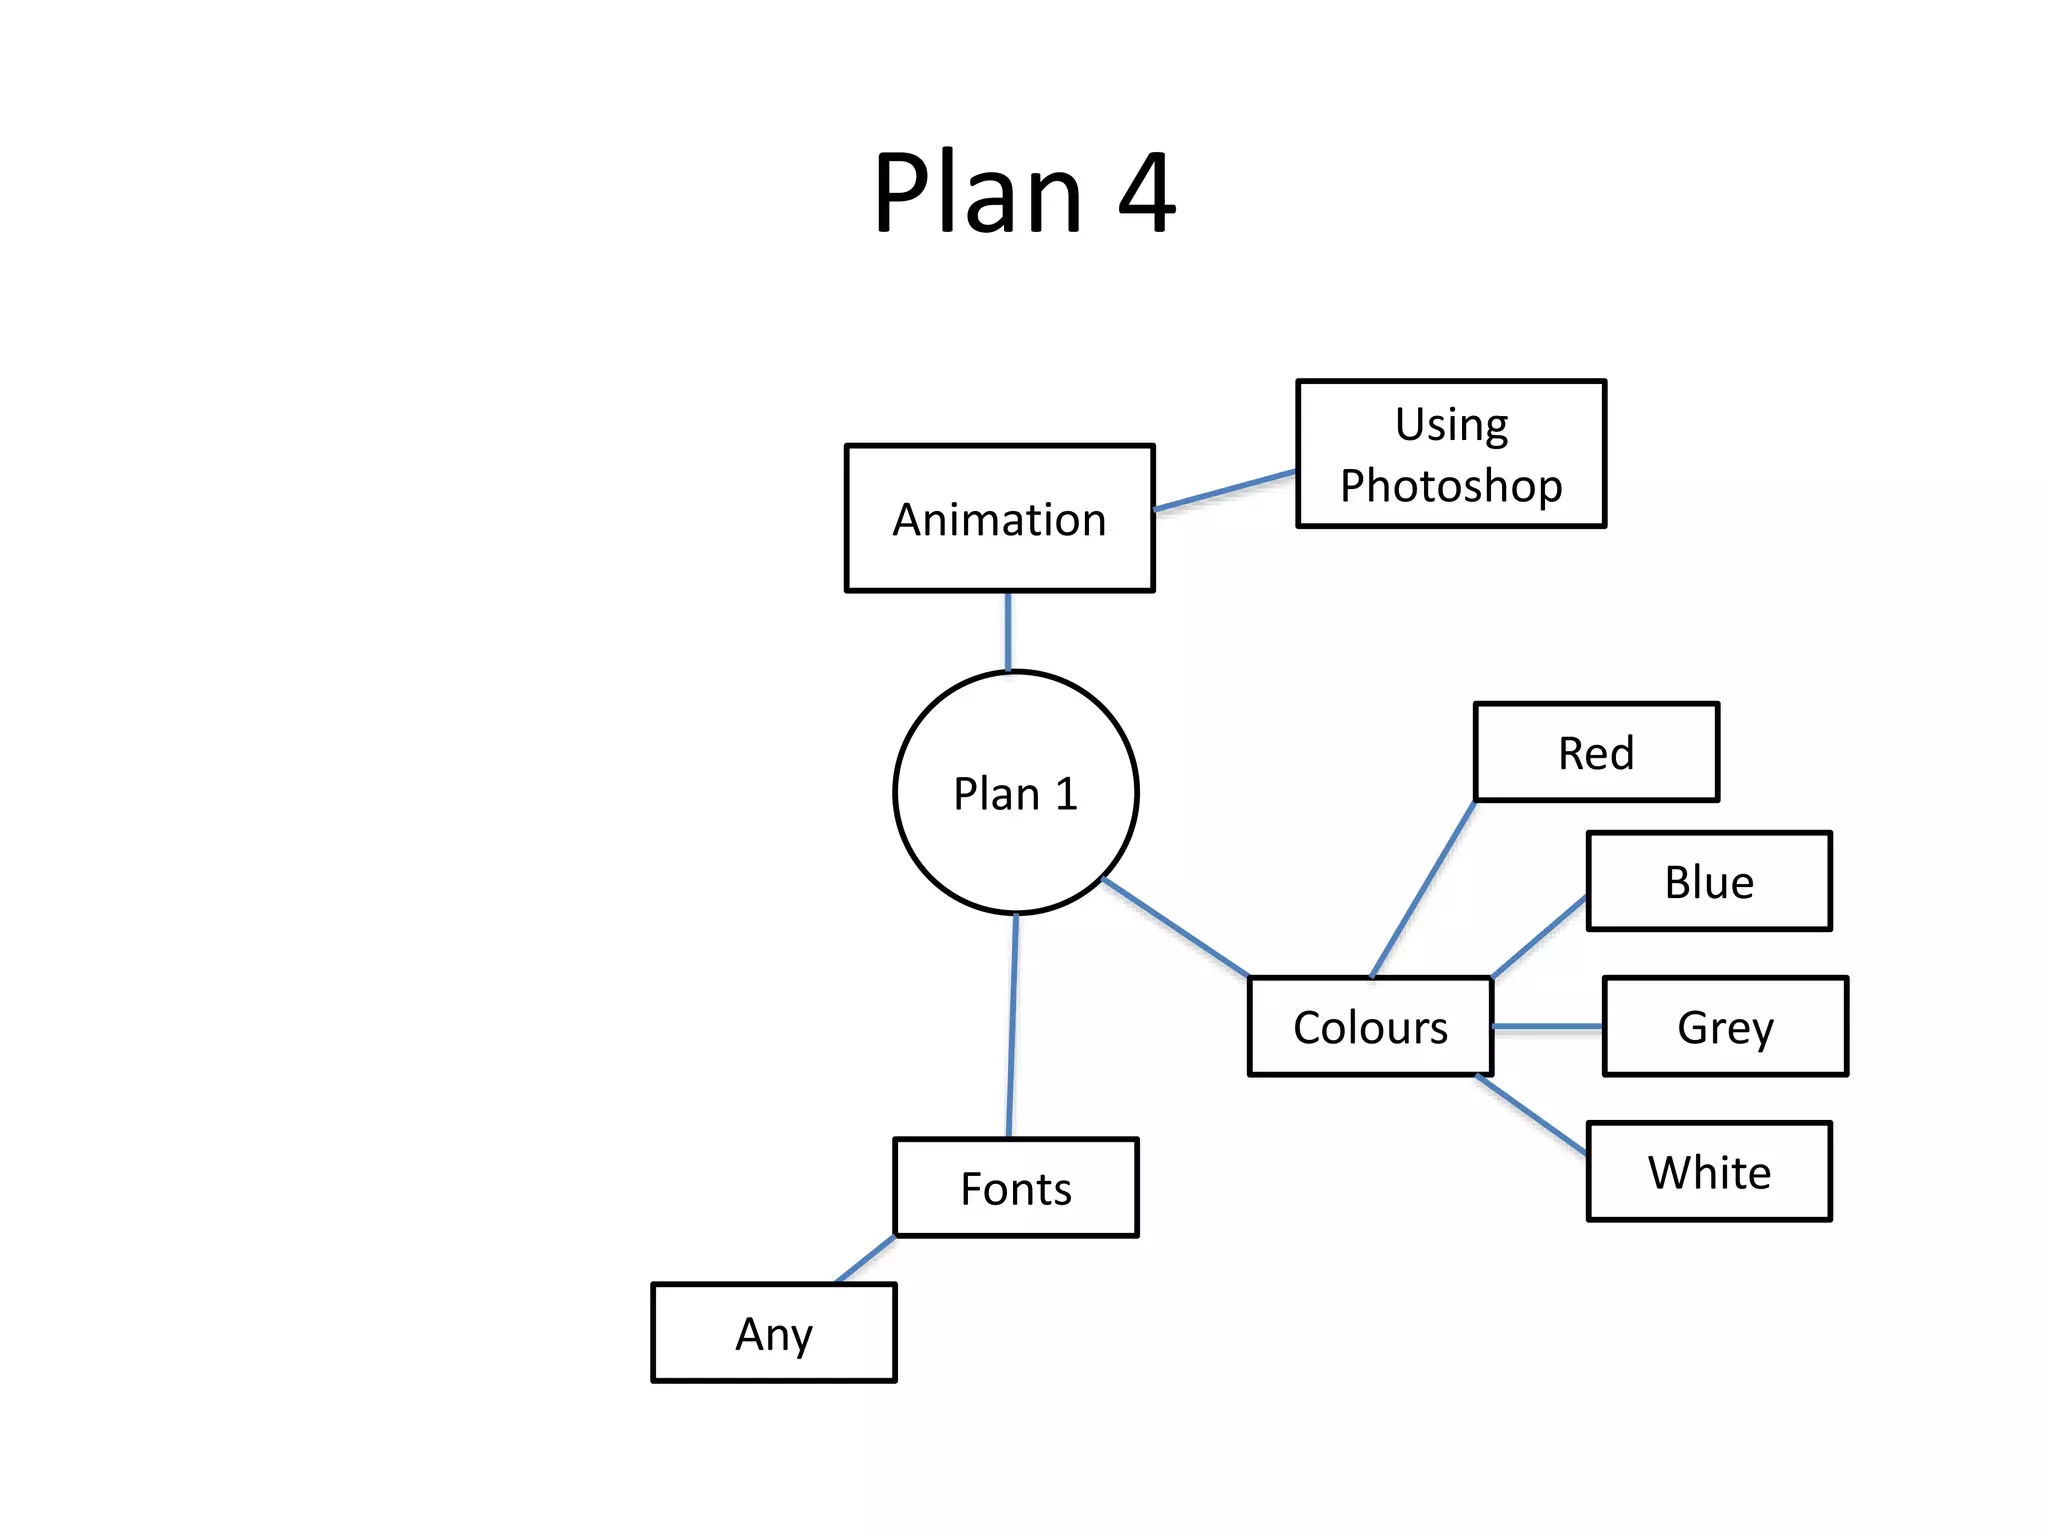
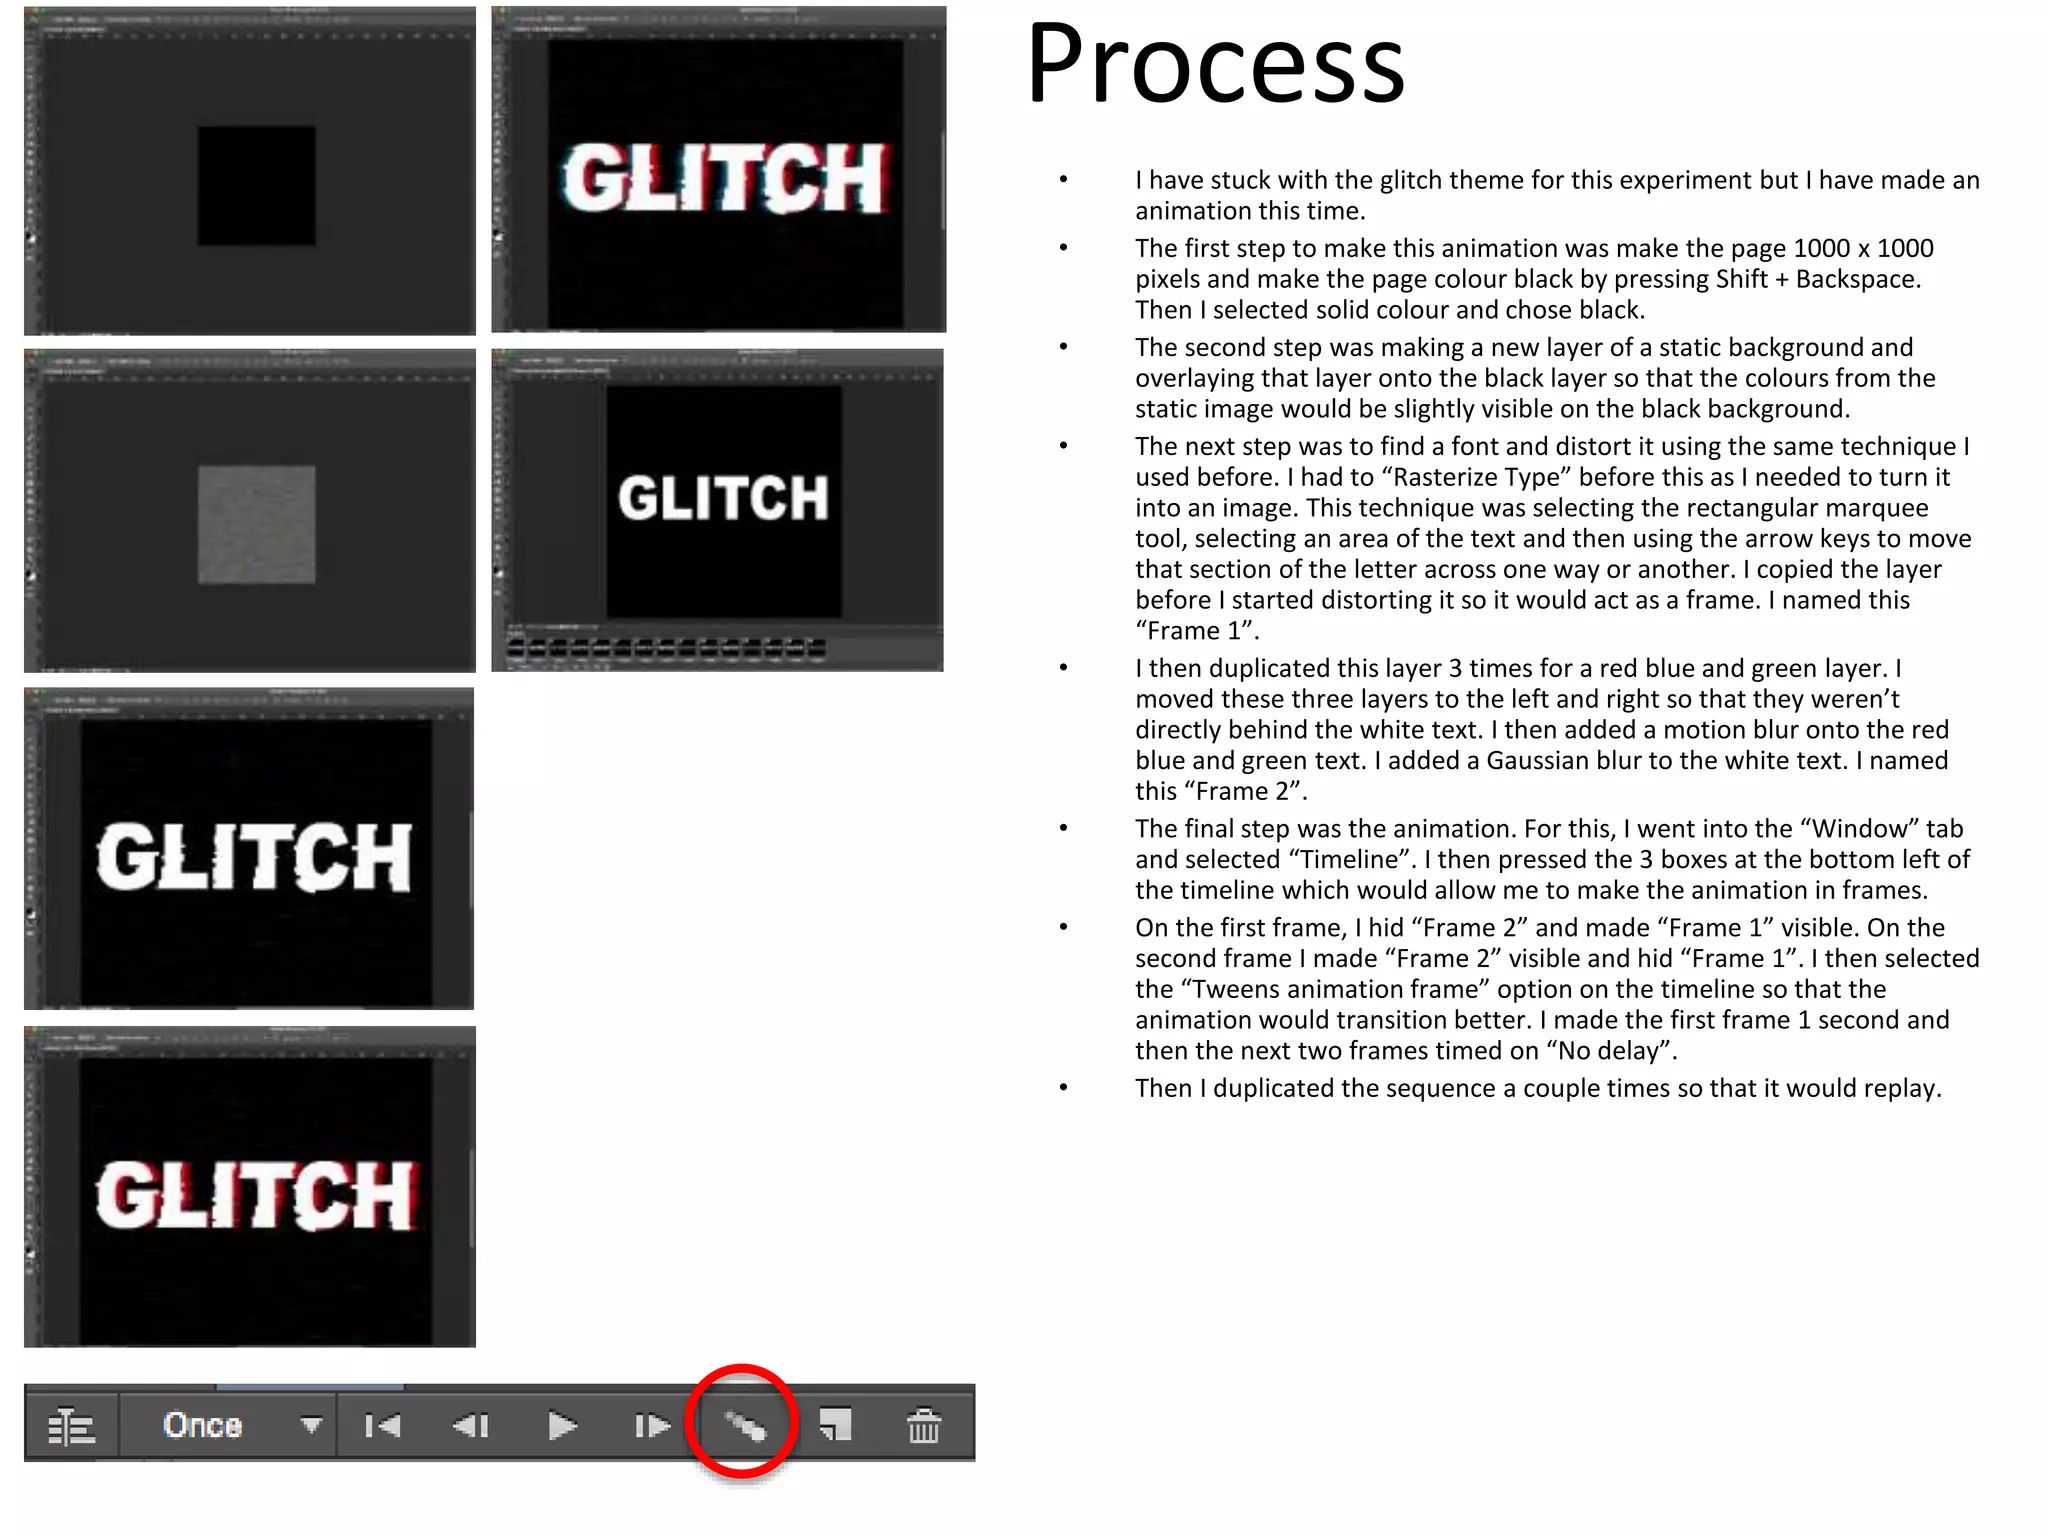
Graphics Experts Ltd is the right solution for all of your graphic design needs. We offer affordable, professional services that encompass everything from image masking, shadow creation, web image optimization, and clipping path to image manipulation, image retouching, color adjustments, photo editing, vehicle enhancement, and even illustration.
The Roman Empire A Historical Colossus.pdfkaushalkr1407
The Roman Empire, a vast and enduring power, stands as one of history's most remarkable civilizations, leaving an indelible imprint on the world. It emerged from the Roman Republic, transitioning into an imperial powerhouse under the leadership of Augustus Caesar in 27 BCE. This transformation marked the beginning of an era defined by unprecedented territorial expansion, architectural marvels, and profound cultural influence.
The empire's roots lie in the city of Rome, founded, according to legend, by Romulus in 753 BCE. Over centuries, Rome evolved from a small settlement to a formidable republic, characterized by a complex political system with elected officials and checks on power. However, internal strife, class conflicts, and military ambitions paved the way for the end of the Republic. Julius Caesar’s dictatorship and subsequent assassination in 44 BCE created a power vacuum, leading to a civil war. Octavian, later Augustus, emerged victorious, heralding the Roman Empire’s birth.
Under Augustus, the empire experienced the Pax Romana, a 200-year period of relative peace and stability. Augustus reformed the military, established efficient administrative systems, and initiated grand construction projects. The empire's borders expanded, encompassing territories from Britain to Egypt and from Spain to the Euphrates. Roman legions, renowned for their discipline and engineering prowess, secured and maintained these vast territories, building roads, fortifications, and cities that facilitated control and integration.
The Roman Empire’s society was hierarchical, with a rigid class system. At the top were the patricians, wealthy elites who held significant political power. Below them were the plebeians, free citizens with limited political influence, and the vast numbers of slaves who formed the backbone of the economy. The family unit was central, governed by the paterfamilias, the male head who held absolute authority.
Culturally, the Romans were eclectic, absorbing and adapting elements from the civilizations they encountered, particularly the Greeks. Roman art, literature, and philosophy reflected this synthesis, creating a rich cultural tapestry. Latin, the Roman language, became the lingua franca of the Western world, influencing numerous modern languages.
Roman architecture and engineering achievements were monumental. They perfected the arch, vault, and dome, constructing enduring structures like the Colosseum, Pantheon, and aqueducts. These engineering marvels not only showcased Roman ingenuity but also served practical purposes, from public entertainment to water supply.
Operation “Blue Star” is the only event in the history of Independent India where the state went into war with its own people. Even after about 40 years it is not clear if it was culmination of states anger over people of the region, a political game of power or start of dictatorial chapter in the democratic setup.
The people of Punjab felt alienated from main stream due to denial of their just demands during a long democratic struggle since independence. As it happen all over the word, it led to militant struggle with great loss of lives of military, police and civilian personnel. Killing of Indira Gandhi and massacre of innocent Sikhs in Delhi and other India cities was also associated with this movement.
How to Create Map Views in the Odoo 17 ERPCeline George
The map views are useful for providing a geographical representation of data. They allow users to visualize and analyze the data in a more intuitive manner.
This is a presentation by Dada Robert in a Your Skill Boost masterclass organised by the Excellence Foundation for South Sudan (EFSS) on Saturday, the 25th and Sunday, the 26th of May 2024.
He discussed the concept of quality improvement, emphasizing its applicability to various aspects of life, including personal, project, and program improvements. He defined quality as doing the right thing at the right time in the right way to achieve the best possible results and discussed the concept of the "gap" between what we know and what we do, and how this gap represents the areas we need to improve. He explained the scientific approach to quality improvement, which involves systematic performance analysis, testing and learning, and implementing change ideas. He also highlighted the importance of client focus and a team approach to quality improvement.
Synthetic Fiber Construction in lab .pptxPavel ( NSTU)
Synthetic fiber production is a fascinating and complex field that blends chemistry, engineering, and environmental science. By understanding these aspects, students can gain a comprehensive view of synthetic fiber production, its impact on society and the environment, and the potential for future innovations. Synthetic fibers play a crucial role in modern society, impacting various aspects of daily life, industry, and the environment. ynthetic fibers are integral to modern life, offering a range of benefits from cost-effectiveness and versatility to innovative applications and performance characteristics. While they pose environmental challenges, ongoing research and development aim to create more sustainable and eco-friendly alternatives. Understanding the importance of synthetic fibers helps in appreciating their role in the economy, industry, and daily life, while also emphasizing the need for sustainable practices and innovation.
Welcome to TechSoup New Member Orientation and Q&A (May 2024).pdfTechSoup
In this webinar you will learn how your organization can access TechSoup's wide variety of product discount and donation programs. From hardware to software, we'll give you a tour of the tools available to help your nonprofit with productivity, collaboration, financial management, donor tracking, security, and more.
Palestine last event orientationfvgnh .pptxRaedMohamed3
An EFL lesson about the current events in Palestine. It is intended to be for intermediate students who wish to increase their listening skills through a short lesson in power point.
Instructions for Submissions thorugh G- Classroom.pptxJheel Barad
This presentation provides a briefing on how to upload submissions and documents in Google Classroom. It was prepared as part of an orientation for new Sainik School in-service teacher trainees. As a training officer, my goal is to ensure that you are comfortable and proficient with this essential tool for managing assignments and fostering student engagement.
The Indian economy is classified into different sectors to simplify the analysis and understanding of economic activities. For Class 10, it's essential to grasp the sectors of the Indian economy, understand their characteristics, and recognize their importance. This guide will provide detailed notes on the Sectors of the Indian Economy Class 10, using specific long-tail keywords to enhance comprehension.
For more information, visit-www.vavaclasses.com
3. Process
• I have made a poster for a summer tour that this
fictional artist will perform at. The steps to creating
this were basic and easy.
• The first thing I did was cut around the artist using
the polygonal tool. I didn’t use the quick select tool
because I couldn’t get it to work on this picture.
• After this, I added a simple stroke effect around the
cut out image. This adds colour and makes the
picture stand out.
• Following this, I then found some brush fonts from
the website DaFont.com and experimented with the
type of effects that looked good such as “Gradient
Overlay” and “Drop Shadow”.
• I then added a Gaussian Blur from the “Filter” bar
to the background just to make everything else
stand out that fraction more.
• The final step to this poster was adding a black fade
circle image underneath the “KB” text. I chose to do
this because I makes the text blend better with the
background.
5. Reflection
• What elements of your experiments will you
include in your final product?
• From this experiment, the features that I liked were the black fade circle
and the brush fonts. I will try and use these techniques in an alternative
way when I make my final product. I also like the blur tool so I will find a
way to use this. A potential way that I could use this tool would be to blur
the edges of the album cover/poster so that everything that’s in the
middle stands out. The final thing from this experiment that I could use
would be the stroke around the artist. I think this technique is very simple
but very effective. I’m not sure how I could use it yet because I don’t want
to use it in the same way as I used it in my experiment. I will definitely
make my final product a lot more complex and use a lot more techniques
than I have used in this experiment.
6. Plan 2
Plan 1
CD COVER
ColoursImages
Fonts
GraffitiBrush
Green
Yellow
White
Red
Original
Desaturated
Scenic
7. Process
• The first step to creating this cover was choosing a
suitable image. I did some original photography and
came up with this image.
• To create the graffiti effect on this image, I had to
create two Photoshop documents. On the first
document, I had to desaturate the chosen image
and adjust the black and white tones using the
“Levels” from the Image > Adjustments tab.
• After that, I saved the document as a Photoshop
document and closed it. I then reopened the
chosen image on a new page (the image was back
to normal) and added the text using a graffiti font
from DaFont.com.
• After that, I converted the text into a smart object.
• Following this, I went into the “Filter” tab and then
Distort > Displace. This then allowed me to open
the desaturate file from before.
• I then adjusted the Blending Options so that I could
make sure the graffiti would fit on the wall.
9. Reflection
• What elements of your experiments will you
include in your final product?
• From this experiment, I will definitely include the graffiti effect. It wont be
the main subject of the cover but I could put some graffiti in the
background somewhere. I didn’t include much else on this experiment as
the graffiti was quite complex. I will aim to include a lot of complex
techniques on my final product. The pose of the photo is definitely a
strong point of the experiment. I think that the way he is looking at the
graffiti is effective because it shows that the music from the album will
leave his mark.
11. Process
• I have made a glitch effect for this experiment. The first
step to creating this was finding the image and
duplicating it within Photoshop using CMD + J.
• I then made the image black and white using the Image
> Adjustments tab. I also duplicated this layer and
unchecked the red in RGB channels on Blending Options.
• The next step was to separate these layers slightly so
that you could see the red and blue.
• Then, I added an image that would strengthen the glitch
effect and selected Overlay in Blending Options. I also
changed the opacity to about 60% so it didn’t make the
red and blue disappear.
• Following this, I grouped all the layers apart from the
back ground, copied it and used CMD + E. This flattened
the layers in the copied group.
• I then selected the Rectangular marquee tool. This
would create the little glitch sections by selecting a small
area with the tool, pressing CMD and then dragging it
slightly to the side. I did this multiple times.
• I then clicked the “Create new fill or adjustment layer”
icon, selected the “Gradient” option, changed the
gradient to the last pattern and changed the “Style”
option to “Radial”. I selected the “Reverse” option and
changed the scale to about 500.
• The final step was to change the overall opacity of the
layer to about 50%.
13. Reflection
• What elements of your experiments will you
include in your final product?
• I have learned a lot of new techniques in this experiment such as
flattening an image and using new blending options. I will try and use
these techniques in my final product and maybe even use the glitch effect.
I think it is very effective in making the viewer look at the picture.
15. Process
• I have stuck with the glitch theme for this experiment but I have made an
animation this time.
• The first step to make this animation was make the page 1000 x 1000
pixels and make the page colour black by pressing Shift + Backspace.
Then I selected solid colour and chose black.
• The second step was making a new layer of a static background and
overlaying that layer onto the black layer so that the colours from the
static image would be slightly visible on the black background.
• The next step was to find a font and distort it using the same technique I
used before. I had to “Rasterize Type” before this as I needed to turn it
into an image. This technique was selecting the rectangular marquee
tool, selecting an area of the text and then using the arrow keys to move
that section of the letter across one way or another. I copied the layer
before I started distorting it so it would act as a frame. I named this
“Frame 1”.
• I then duplicated this layer 3 times for a red blue and green layer. I
moved these three layers to the left and right so that they weren’t
directly behind the white text. I then added a motion blur onto the red
blue and green text. I added a Gaussian blur to the white text. I named
this “Frame 2”.
• The final step was the animation. For this, I went into the “Window” tab
and selected “Timeline”. I then pressed the 3 boxes at the bottom left of
the timeline which would allow me to make the animation in frames.
• On the first frame, I hid “Frame 2” and made “Frame 1” visible. On the
second frame I made “Frame 2” visible and hid “Frame 1”. I then selected
the “Tweens animation frame” option on the timeline so that the
animation would transition better. I made the first frame 1 second and
then the next two frames timed on “No delay”.
• Then I duplicated the sequence a couple times so that it would replay.