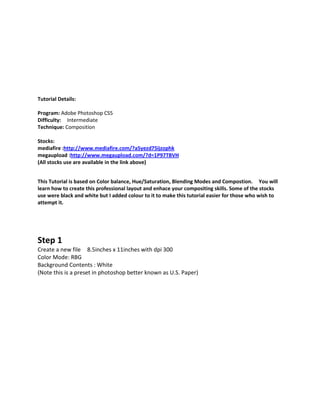
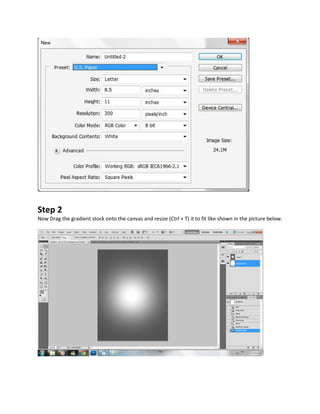
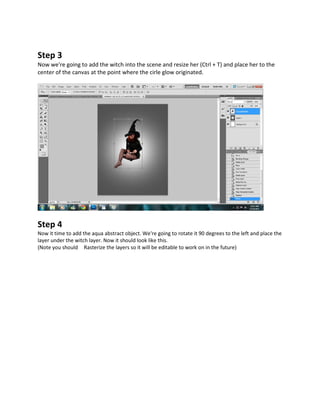
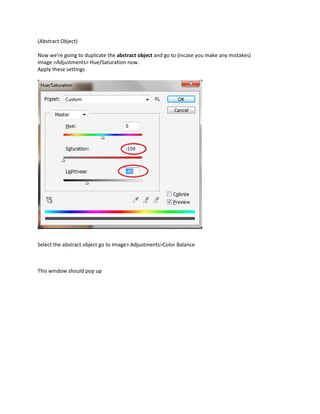
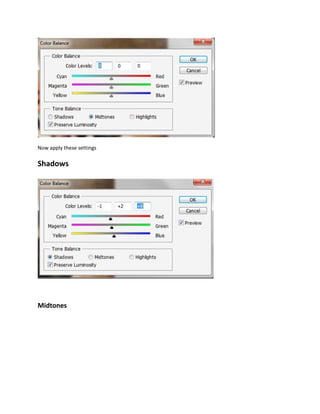
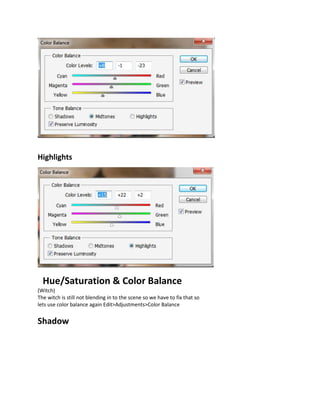
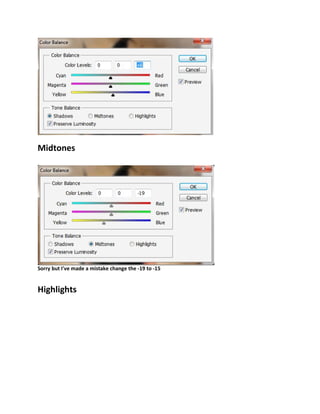
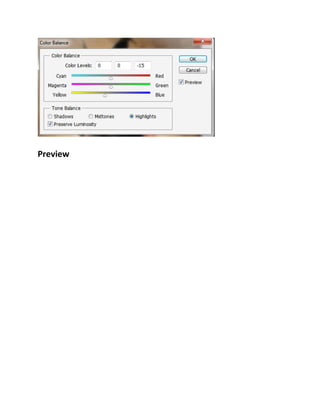
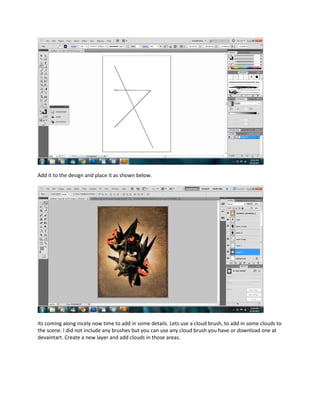
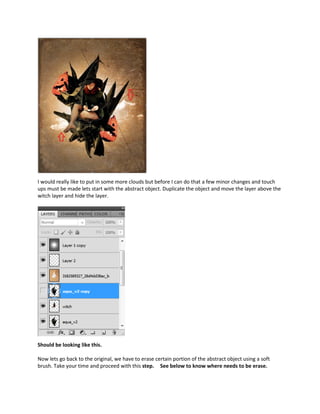
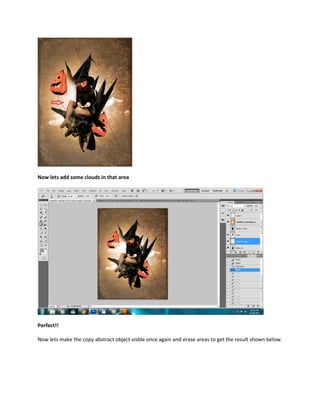
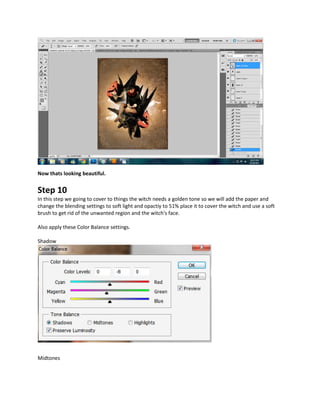
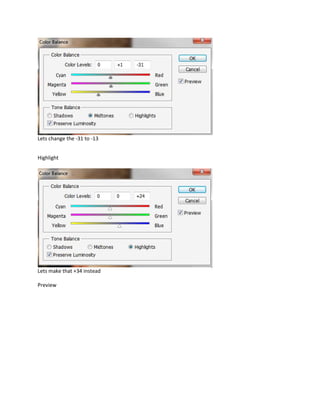
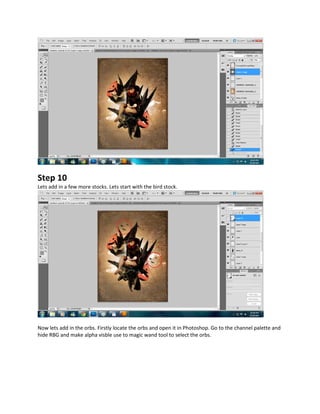
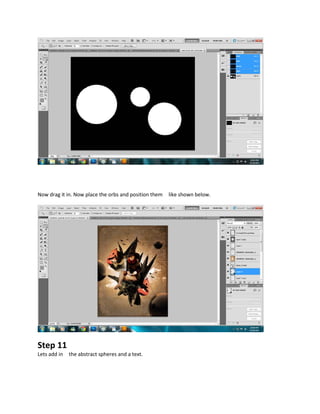
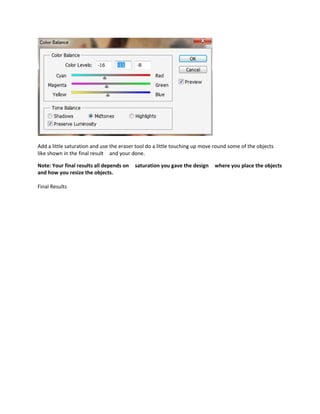
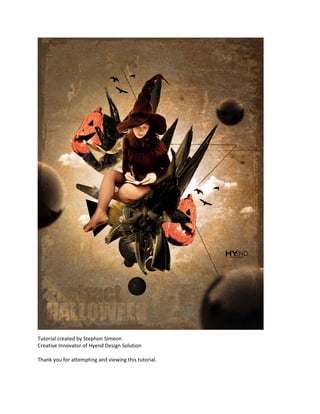
Tutorial Details:

Program: Adobe Photoshop CS5
Difficulty: Intermediate
Technique: Composition

Stocks:
mediafire :http://www.mediafire.com/?a5yezd75ijzophk
megaupload :http://www.megaupload.com/?d=1P97TBVH
(All stocks use are available in the link above)


This Tutorial is based on Color balance, Hue/Saturation, Blending Modes and Compostion. You will
learn how to create this professional layout and enhace your compositing skills. Some of the stocks
use were black and white but I added colour to it to make this tutorial easier for those who wish to
attempt it.


Step 1
Create a new file 8.5inches x 11inches with dpi 300
Color Mode: RBG
Background Contents : White
(Note this is a preset in photoshop better known as U.S. Paper)
Step 2
Now Drag the gradient stock onto the canvas and resize (Ctrl + T) it to fit like shown in the picture below.
Step 3
Now we're going to add the witch into the scene and resize her (Ctrl + T) and place her to the
center of the canvas at the point where the cirle glow originated.


Step 4
Now it time to add the aqua abstract object. We're going to rotate it 90 degrees to the left and place the
layer under the witch layer. Now it should look like this.
(Note you should Rasterize the layers so it will be editable to work on in the future)
Step 5
Now its time to add in the halloween pumpkins. Position the first pumpkin like this .


Now we're going to duplicate this layer and go to Edit>Transform>Flip Horizontal
Now we should position the 2nd pumkin like shown below also merge the layers and placing them
below the abstract object. Too merge layers hold ctrl and select the layers and then right click and select
Merge Layers. The end result should be looking like this.


Step 6
As you can see its starting to look pretty good note all we have been doing thus far is creating the
layout.
Now its time to work on the color scheme for this design we're going to add a paper texture above all
the layers and set the blending mode to overlay and erase the part where is covering the witch.


As you can realize the color of the pumpkins have change giving the pumpkin a rich color now this
technique is use to add either color or pattern to a object.
Lets continue now!!

Remember the gradient layer from earlier on? Well we are going to duplicate it   and place it above all
layer and change the blending mode to overlay and change the FILL to 47%

This is to darken the edges. Results should look like this.
Next : we are going to be working on the edges creating a frame.


Step 7
Now we're going to add Crumpled Grunge Paper stock in and scale it to fit the screen (Ctrl + T)
Then we're going on the tools palette and select the Magic eraser tool.


Now we're going to select the white area on the Crumpled Grunge Paper stock. It will delete most of
the white area on the stock now we its time to apply these blending settings to
the layer. Blending Mode : Overlay       Fill : 34%
After applying these settings take the erase tool and erase (using soft brush) any fragments left behind
in the center of the design.

Current Result


The color of the abstract object is totally off and not blending in to the scene its time to deal with this
matter. Next we're going to be using hue/saturation &color balance.

Step 8
Hue/Saturation & Color Balance
(Abstract Object)

Now we're going to duplicate the abstract object and go to (incase you make any mistakes)
Image >Adjustments> Hue/Saturation now.
Apply these settings


Select the abstract object go to Image> Adjustments>Color Balance


This window should pop up
Now apply these settings

Shadows


Midtones
Highlights


  Hue/Saturation & Color Balance
(Witch)
The witch is still not blending in to the scene so we have to fix that so
lets use color balance again Edit>Adjustments>Color Balance


Shadow
Midtones


Sorry but I've made a mistake change the -19 to -15


Highlights
Preview
Step 9
There are 2 ways of doing this next step, this can be done either using photoshop or illustrator but i
prefer to do it in illustrator. You can use which ever one your more comfortable with. Create a new file
and draw this using the line tool.
Add it to the design and place it as shown below.


Its coming along nicely now time to add in some details. Lets use a cloud brush, to add in some clouds to
the scene. I did not include any brushes but you can use any cloud brush you have or download one at
devaintart. Create a new layer and add clouds in those areas.
I would really like to put in some more clouds but before I can do that a few minor changes and touch
ups must be made lets start with the abstract object. Duplicate the object and move the layer above the
witch layer and hide the layer.


Should be looking like this.

Now lets go back to the original, we have to erase certain portion of the abstract object using a soft
brush. Take your time and proceed with this step. See below to know where needs to be erase.
Now lets add some clouds in that area


Perfect!!

Now lets make the copy abstract object visble once again and erase areas to get the result shown below.
Now thats looking beautiful.


Step 10
In this step we going to cover to things the witch needs a golden tone so we will add the paper and
change the blending settings to soft light and opactiy to 51% place it to cover the witch and use a soft
brush to get rid of the unwanted region and the witch's face.

Also apply these Color Balance settings.

Shadow


Midtones
Lets change the -31 to -13


Highlight


Lets make that +34 instead

Preview
Step 10
Lets add in a few more stocks. Lets start with the bird stock.


Now lets add in the orbs. Firstly locate the orbs and open it in Photoshop. Go to the channel palette and
hide RBG and make alpha visble use to magic wand tool to select the orbs.
Now drag it in. Now place the orbs and position them   like shown below.


Step 11
Lets add in   the abstract spheres and a text.
Use the text tool and type "Halloween" use IMPACT FONT (grey) and rasterize the layer making it
editable (duplicate it before moving on) use the magic wand tool and select each letter now hide the
layer and hit shift+ctrl+c and the hit ctrl+v. Now move the layer.
Now go to the original and apply these blending settings.
Now use the text tool and type "abstract" IMPACT FONT (grey) and repeat the last step. Use these
blending settings.
Now the last thing go to the witch layer and go to Image>Adjustments>Shadow/Highlights


Add a Triangle into the design and place it as shown below. Select the Polygon Tool and change the sides
to 3 and select shape layers.
Settings after selecting polygon tool (change to 3).


Now add these final Color balance settings
Add a little saturation and use the eraser tool do a little touching up move round some of the objects
like shown in the final result and your done.

Note: Your final results all depends on   saturation you gave the design    where you place the objects
and how you resize the objects.

Final Results
Tutorial created by Stephon Simeon
Creative Innovator of Hyend Design Solution

Thank you for attempting and viewing this tutorial.
Abstract Halloween Tutorial

Abstract Halloween Tutorial

  • 2.
    Tutorial Details: Program: AdobePhotoshop CS5 Difficulty: Intermediate Technique: Composition Stocks: mediafire :http://www.mediafire.com/?a5yezd75ijzophk megaupload :http://www.megaupload.com/?d=1P97TBVH (All stocks use are available in the link above) This Tutorial is based on Color balance, Hue/Saturation, Blending Modes and Compostion. You will learn how to create this professional layout and enhace your compositing skills. Some of the stocks use were black and white but I added colour to it to make this tutorial easier for those who wish to attempt it. Step 1 Create a new file 8.5inches x 11inches with dpi 300 Color Mode: RBG Background Contents : White (Note this is a preset in photoshop better known as U.S. Paper)
  • 3.
    Step 2 Now Dragthe gradient stock onto the canvas and resize (Ctrl + T) it to fit like shown in the picture below.
  • 4.
    Step 3 Now we'regoing to add the witch into the scene and resize her (Ctrl + T) and place her to the center of the canvas at the point where the cirle glow originated. Step 4 Now it time to add the aqua abstract object. We're going to rotate it 90 degrees to the left and place the layer under the witch layer. Now it should look like this. (Note you should Rasterize the layers so it will be editable to work on in the future)
  • 5.
    Step 5 Now itstime to add in the halloween pumpkins. Position the first pumpkin like this . Now we're going to duplicate this layer and go to Edit>Transform>Flip Horizontal
  • 6.
    Now we shouldposition the 2nd pumkin like shown below also merge the layers and placing them below the abstract object. Too merge layers hold ctrl and select the layers and then right click and select Merge Layers. The end result should be looking like this. Step 6 As you can see its starting to look pretty good note all we have been doing thus far is creating the layout. Now its time to work on the color scheme for this design we're going to add a paper texture above all
  • 7.
    the layers andset the blending mode to overlay and erase the part where is covering the witch. As you can realize the color of the pumpkins have change giving the pumpkin a rich color now this technique is use to add either color or pattern to a object. Lets continue now!! Remember the gradient layer from earlier on? Well we are going to duplicate it and place it above all layer and change the blending mode to overlay and change the FILL to 47% This is to darken the edges. Results should look like this.
  • 8.
    Next : weare going to be working on the edges creating a frame. Step 7 Now we're going to add Crumpled Grunge Paper stock in and scale it to fit the screen (Ctrl + T) Then we're going on the tools palette and select the Magic eraser tool. Now we're going to select the white area on the Crumpled Grunge Paper stock. It will delete most of the white area on the stock now we its time to apply these blending settings to the layer. Blending Mode : Overlay Fill : 34% After applying these settings take the erase tool and erase (using soft brush) any fragments left behind in the center of the design. Current Result The color of the abstract object is totally off and not blending in to the scene its time to deal with this matter. Next we're going to be using hue/saturation &color balance. Step 8 Hue/Saturation & Color Balance
  • 9.
    (Abstract Object) Now we'regoing to duplicate the abstract object and go to (incase you make any mistakes) Image >Adjustments> Hue/Saturation now. Apply these settings Select the abstract object go to Image> Adjustments>Color Balance This window should pop up
  • 10.
    Now apply thesesettings Shadows Midtones
  • 11.
    Highlights Hue/Saturation& Color Balance (Witch) The witch is still not blending in to the scene so we have to fix that so lets use color balance again Edit>Adjustments>Color Balance Shadow
  • 12.
    Midtones Sorry but I'vemade a mistake change the -19 to -15 Highlights
  • 13.
  • 14.
    Step 9 There are2 ways of doing this next step, this can be done either using photoshop or illustrator but i prefer to do it in illustrator. You can use which ever one your more comfortable with. Create a new file and draw this using the line tool.
  • 15.
    Add it tothe design and place it as shown below. Its coming along nicely now time to add in some details. Lets use a cloud brush, to add in some clouds to the scene. I did not include any brushes but you can use any cloud brush you have or download one at devaintart. Create a new layer and add clouds in those areas.
  • 16.
    I would reallylike to put in some more clouds but before I can do that a few minor changes and touch ups must be made lets start with the abstract object. Duplicate the object and move the layer above the witch layer and hide the layer. Should be looking like this. Now lets go back to the original, we have to erase certain portion of the abstract object using a soft brush. Take your time and proceed with this step. See below to know where needs to be erase.
  • 17.
    Now lets addsome clouds in that area Perfect!! Now lets make the copy abstract object visble once again and erase areas to get the result shown below.
  • 18.
    Now thats lookingbeautiful. Step 10 In this step we going to cover to things the witch needs a golden tone so we will add the paper and change the blending settings to soft light and opactiy to 51% place it to cover the witch and use a soft brush to get rid of the unwanted region and the witch's face. Also apply these Color Balance settings. Shadow Midtones
  • 19.
    Lets change the-31 to -13 Highlight Lets make that +34 instead Preview
  • 20.
    Step 10 Lets addin a few more stocks. Lets start with the bird stock. Now lets add in the orbs. Firstly locate the orbs and open it in Photoshop. Go to the channel palette and hide RBG and make alpha visble use to magic wand tool to select the orbs.
  • 21.
    Now drag itin. Now place the orbs and position them like shown below. Step 11 Lets add in the abstract spheres and a text.
  • 22.
    Use the texttool and type "Halloween" use IMPACT FONT (grey) and rasterize the layer making it editable (duplicate it before moving on) use the magic wand tool and select each letter now hide the layer and hit shift+ctrl+c and the hit ctrl+v. Now move the layer. Now go to the original and apply these blending settings.
  • 23.
    Now use thetext tool and type "abstract" IMPACT FONT (grey) and repeat the last step. Use these blending settings.
  • 24.
    Now the lastthing go to the witch layer and go to Image>Adjustments>Shadow/Highlights Add a Triangle into the design and place it as shown below. Select the Polygon Tool and change the sides to 3 and select shape layers.
  • 25.
    Settings after selectingpolygon tool (change to 3). Now add these final Color balance settings
  • 26.
    Add a littlesaturation and use the eraser tool do a little touching up move round some of the objects like shown in the final result and your done. Note: Your final results all depends on saturation you gave the design where you place the objects and how you resize the objects. Final Results
  • 27.
    Tutorial created byStephon Simeon Creative Innovator of Hyend Design Solution Thank you for attempting and viewing this tutorial.