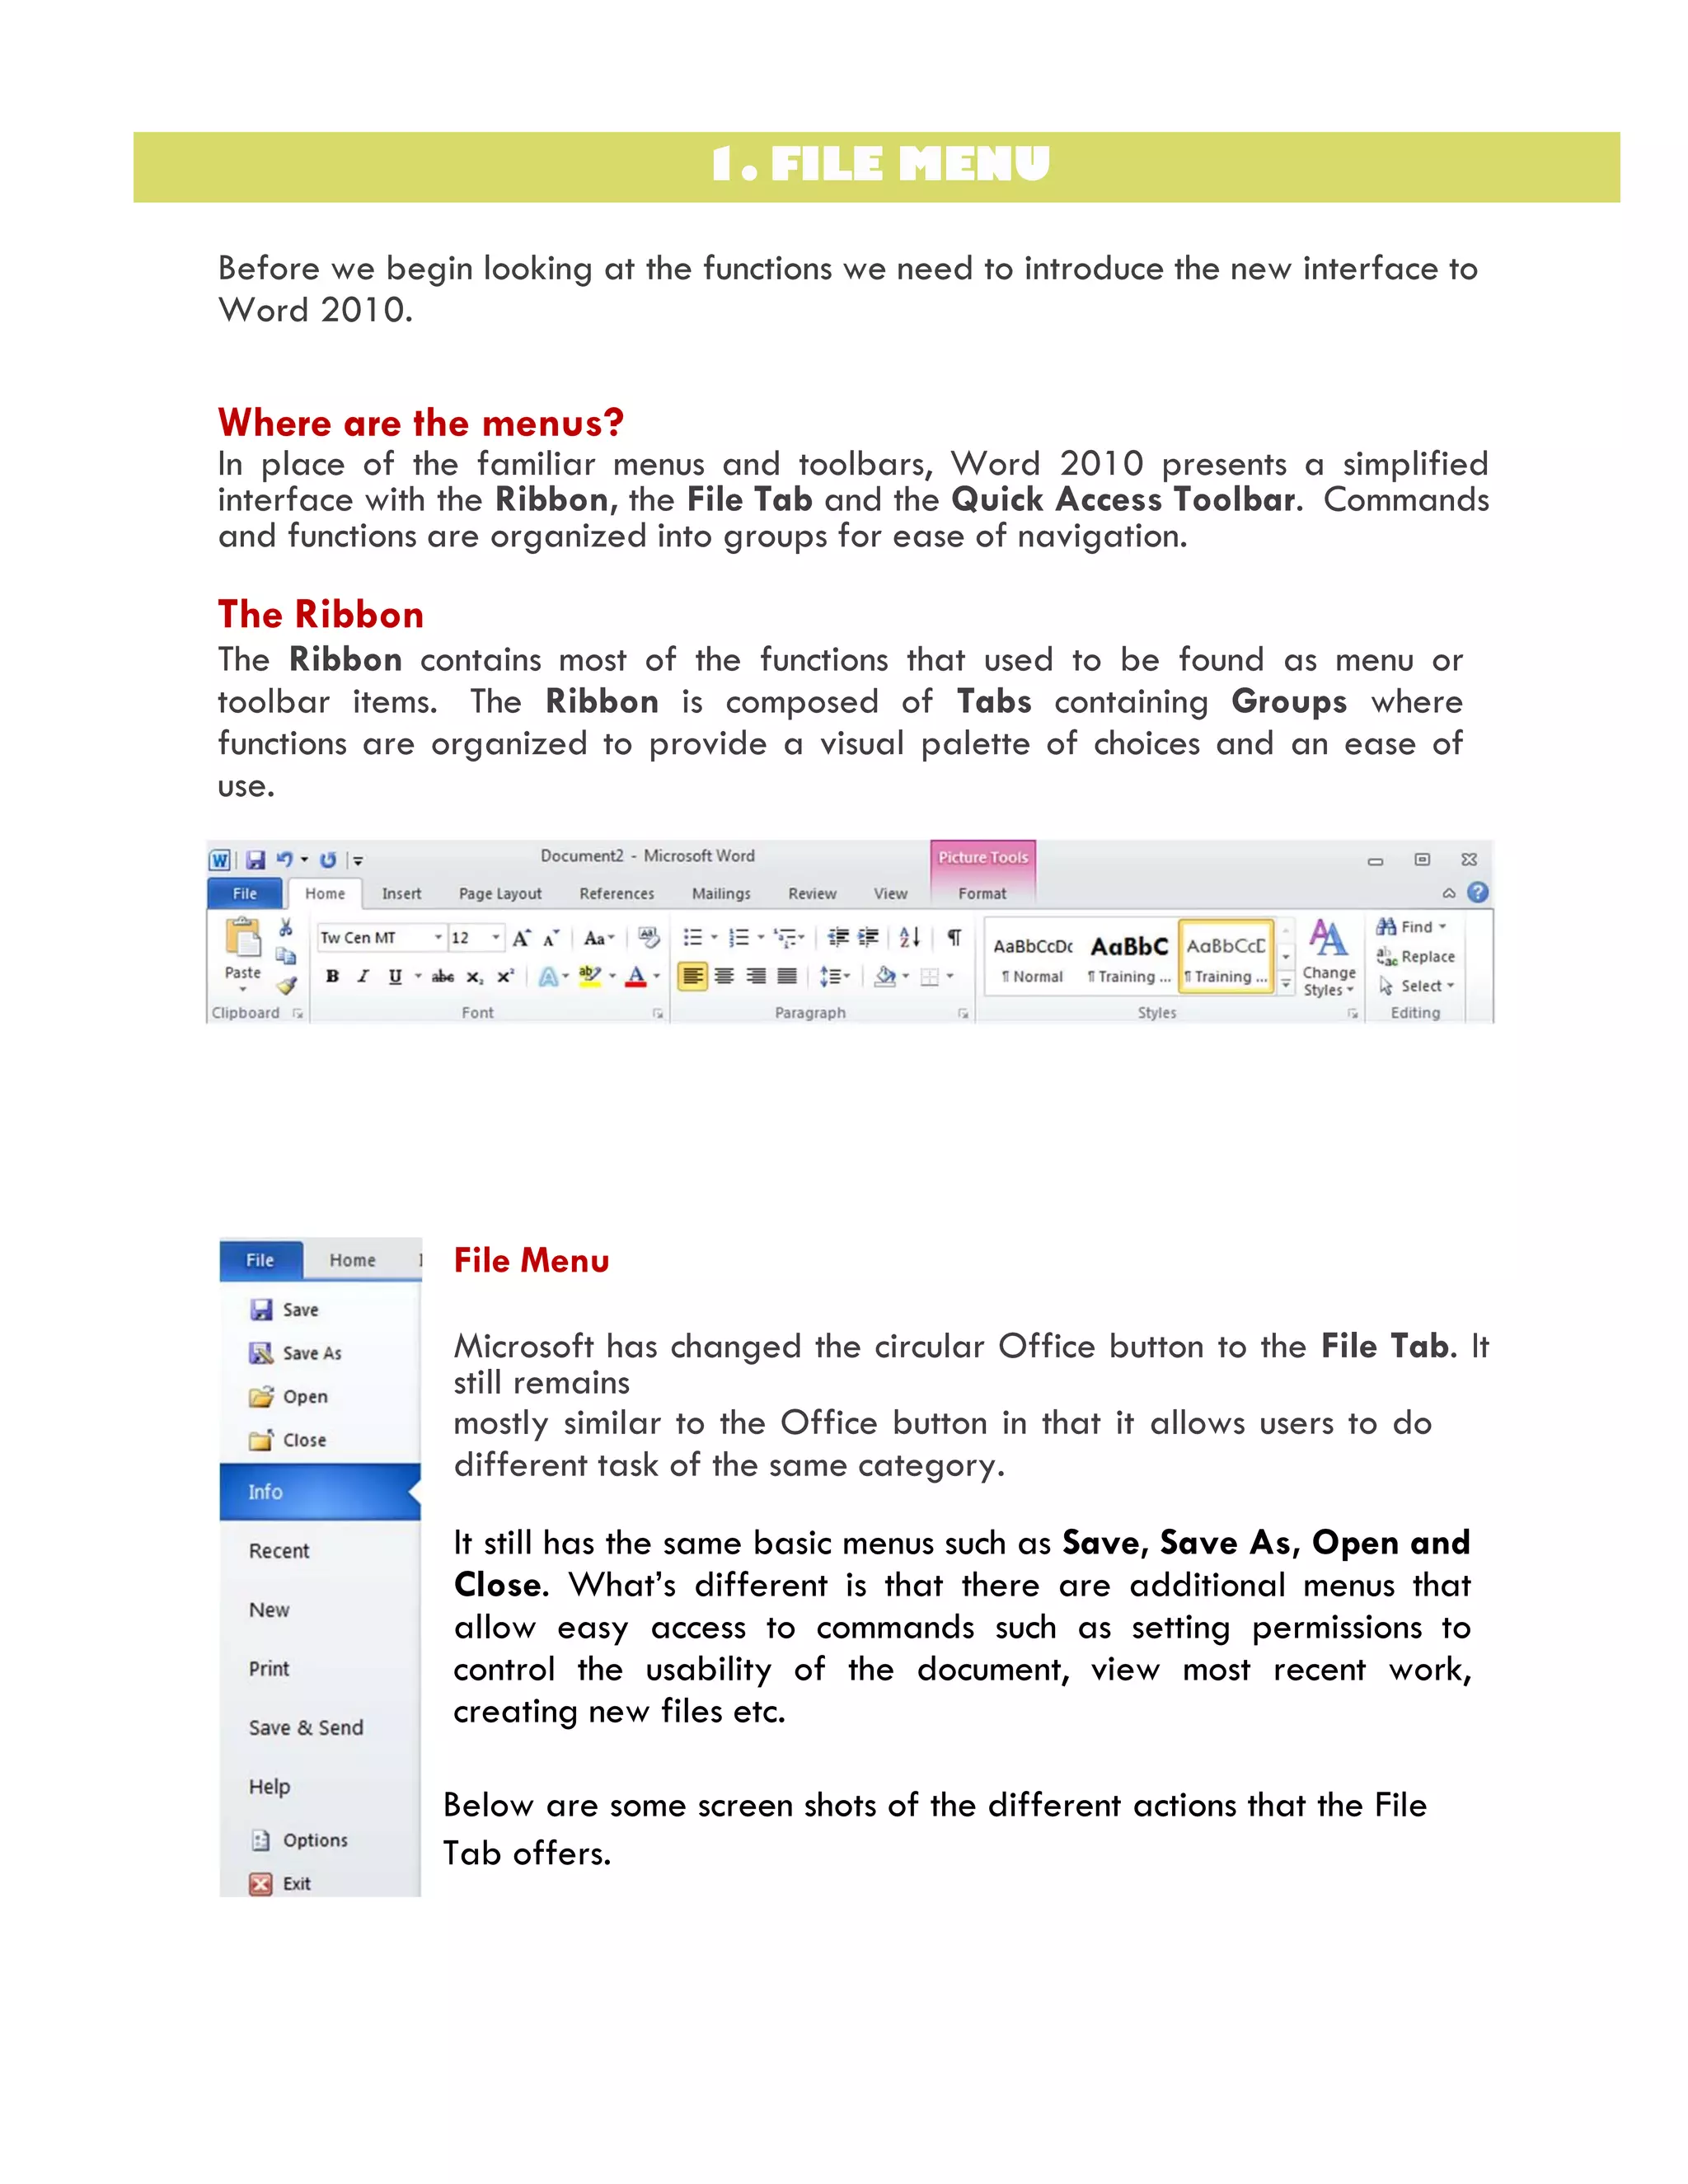
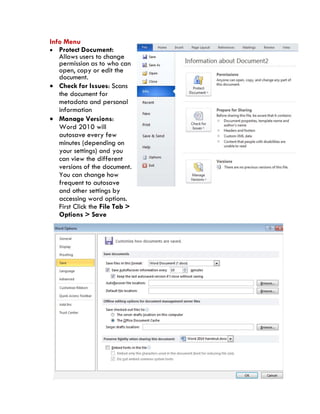
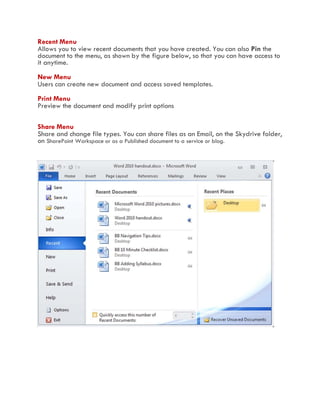
1. FILE MENU
Before we begin looking at the functions we need to introduce the new interface to
Word 2010.
Where are the menus?
In place of the familiar menus and toolbars, Word 2010 presents a simplified
interface with the Ribbon, the File Tab and the Quick Access Toolbar. Commands
and functions are organized into groups for ease of navigation.
The Ribbon
The Ribbon contains most of the functions that used to be found as menu or
toolbar items. The Ribbon is composed of Tabs containing Groups where
functions are organized to provide a visual palette of choices and an ease of
use.
File Menu
Microsoft has changed the circular Office button to the File Tab. It
still remains
mostly similar to the Office button in that it allows users to do
different task of the same category.
It still has the same basic menus such as Save, Save As, Open and
Close. What’s different is that there are additional menus that
allow easy access to commands such as setting permissions to
control the usability of the document, view most recent work,
creating new files etc.
Below are some screen shots of the different actions that the File
Tab offers.
Info Menu
 Protect Document:
Allows users to change
permission as to who can
open, copy or edit the
document.
 Check for Issues: Scans
the document for
metadata and personal
information
 Manage Versions:
Word 2010 will
autosave every few
minutes (depending on
your settings) and you
can view the different
versions of the document.
You can change how
frequent to autosave
and other settings by
accessing word options.
First Click the File Tab >
Options > Save
Recent Menu
Allows you to view recent documents that you have created. You can also Pin the
document to the menu, as shown by the figure below, so that you can have access to
it anytime.
New Menu
Users can create new document and access saved templates.
Print Menu
Preview the document and modify print options
Share Menu
Share and change file types. You can share files as an Email, on the Skydrive folder,
on SharePoint Workspace or as a Published document to a service or blog.
Quick Access Toolbar
The Quick Access Toolbar
provides access to common
commands via an icon
toolbar. Like in the previous
version, you can customize
the commands that are
open in the Quick launch
tool bar. To add or remove
the commands:
1. Click on the CUSTOMIZE
QUICK ACCESS TOOL BAR
button located next to it.
2. Click MORE COMMANDS…
to launch WORD OPTIONS,
making that the CUSTOMIZE
RIBBON tab is highlighted.
3. Choose a command from the
left and click to add
command to the Quick Access
Toolbar.
4. To remove a command, select
the command from the right
side and click:
NOTE: You can also add most commonly used commands by clicking and
checking on the commands as shown in the figure
Online Help
Use the Microsoft Office Word Help for quick answers to Word 2010 questions.
Click on the Help button in the upper right corner of the Ribbon and type in a
question.

MS Word 2010 tutorial 3

  • 1.
    1. FILE MENU Beforewe begin looking at the functions we need to introduce the new interface to Word 2010. Where are the menus? In place of the familiar menus and toolbars, Word 2010 presents a simplified interface with the Ribbon, the File Tab and the Quick Access Toolbar. Commands and functions are organized into groups for ease of navigation. The Ribbon The Ribbon contains most of the functions that used to be found as menu or toolbar items. The Ribbon is composed of Tabs containing Groups where functions are organized to provide a visual palette of choices and an ease of use. File Menu Microsoft has changed the circular Office button to the File Tab. It still remains mostly similar to the Office button in that it allows users to do different task of the same category. It still has the same basic menus such as Save, Save As, Open and Close. What’s different is that there are additional menus that allow easy access to commands such as setting permissions to control the usability of the document, view most recent work, creating new files etc. Below are some screen shots of the different actions that the File Tab offers.
  • 2.
    Info Menu  ProtectDocument: Allows users to change permission as to who can open, copy or edit the document.  Check for Issues: Scans the document for metadata and personal information  Manage Versions: Word 2010 will autosave every few minutes (depending on your settings) and you can view the different versions of the document. You can change how frequent to autosave and other settings by accessing word options. First Click the File Tab > Options > Save
  • 3.
    Recent Menu Allows youto view recent documents that you have created. You can also Pin the document to the menu, as shown by the figure below, so that you can have access to it anytime. New Menu Users can create new document and access saved templates. Print Menu Preview the document and modify print options Share Menu Share and change file types. You can share files as an Email, on the Skydrive folder, on SharePoint Workspace or as a Published document to a service or blog.
  • 4.
    Quick Access Toolbar TheQuick Access Toolbar provides access to common commands via an icon toolbar. Like in the previous version, you can customize the commands that are open in the Quick launch tool bar. To add or remove the commands: 1. Click on the CUSTOMIZE QUICK ACCESS TOOL BAR button located next to it. 2. Click MORE COMMANDS… to launch WORD OPTIONS, making that the CUSTOMIZE RIBBON tab is highlighted. 3. Choose a command from the left and click to add command to the Quick Access Toolbar. 4. To remove a command, select the command from the right side and click: NOTE: You can also add most commonly used commands by clicking and checking on the commands as shown in the figure
  • 5.
    Online Help Use theMicrosoft Office Word Help for quick answers to Word 2010 questions. Click on the Help button in the upper right corner of the Ribbon and type in a question.