SlideShare a Scribd company logo
SAMPLE COLLECTION
Blood Specimen Collection and Processing
The first step in acquiring a quality lab test result for
any patient is the specimen collection procedure.
The venipuncture procedure is complex, requiring both
knowledge and skill to perform.
Venipuncture Procedure:
 The first step to the collection is to positively identify the
patient by two forms of identification; ask the patient to state
and spell his/her name and give you his/her birth date.
Check these against the requisition (paper or electronic).
 Check the requisition form for requested tests, other patient
information and any special draw requirements. Gather the
tubes and supplies that you will need for the draw.
 Position the patient in a chair, or sitting or lying on a bed.
 Wash your hands.
 Select a suitable site for venipuncture, by placing the
tourniquet 3 to 4 inches above the selected puncture site on
the patient. Do not put the tourniquet on too tightly or leave
it on the patient longer than 1 minute.
 When a vein is selected, cleanse the area in a circular motion,
beginning at the site and working outward. Allow the area to
air dry. After the area is cleansed, it should not be touched
again.
 Ask the patient to make a fist; avoid “pumping the fist.” Swiftly
insert the needle through the skin into the lumen of the vein.
The needle should form a 15-30 degree angle with the arm
surface.
 When the tube is filled, remove the tourniquet.
 Remove the needle from the patient's arm using a swift
backward motion.
 Place gauze immediately on the puncture site. Apply and hold
adequate pressure to avoid formation of a hematoma. After
holding pressure for 1-2 minutes, tape a fresh piece of gauze
or Band-Aid to the puncture site.
 Dispose of contaminated materials/supplies in designated
containers.
VENIPUNCTURE BUTTERFLY
NEEDLE METHOD
 This is used in case of senior citizens
Sites to draw blood
Median cubital vein:
 a superficial vein, most commonly used for venipuncture, it lies between
the cephalic and basilic veins.
Cephalic vein:
 Seen in both forearm and arm
Basilic vein:
 Seen in forearm and arm, it divides to join the brachial vein.
Note: The larger median cubital and cephalic veins are the
usual choice.
Foot veins are a last resort because of the higher probability of
complications.
Fingerstick Procedure
The best locations for fingersticks are the 3rd (middle) and 4th
(ring) fingers. Do not use the tip of the finger or the center of the
finger. Avoid the side of the finger where there is less soft tissue, where
vessels and nerves are located, and where the bone is closer to the
surface. The 2nd (index) finger tends to have thicker, callused skin. The
fifth finger tends to have less soft tissue overlying the bone. Avoid
puncturing a finger that is cold or cyanotic, swollen, scarred, or
covered with a rash.
 When a site is selected, cleanse the selected puncture area.
 Massage the finger toward the selected site prior to the
puncture.
 Using a sterile safety lancet, make a skin puncture just off the
center of the finger pad. The puncture should be made
perpendicular to the ridges of the fingerprint so that the drop
of blood does not run down the ridges.
 Wipe away the first drop of blood, which tends to contain
excess tissue fluid.
 Collect drops of blood into the collection tube/device by
gentle pressure on the finger. Avoid excessive pressure
or “milking” that may squeeze tissue fluid into the drop
of blood.
 Cap, rotate and invert the collection device to mix the
blood collected.
 Have the patient hold a small gauze pad over the
puncture site for a few minutes to stop the bleeding.
 Dispose of contaminated materials/supplies in
designated containers.
Heelstick Procedure (infants)
 Prewarming the infant's heel (42° C for 3 to 5 minutes) is important
to increase the flow of blood for collection.
 Clean the site to be punctured with an alcohol sponge. Dry the
cleaned area.
 Hold the baby's foot firmly to avoid sudden movement.
 Using a sterile blood safety lancet, puncture the side of the heel.
 Wipe away the first drop of blood with a piece of clean, dry cotton
gauze. Since newborns do not often bleed immediately, use gentle
pressure to produce a rounded drop of blood. Do not use excessive
pressure because the blood may become diluted with tissue fluid.
 When finished, elevate the heel, place a piece of clean, dry cotton on
the puncture site, and hold it in place until the bleeding has
stopped. Apply tape or Band-Aid to area if needed.
Order of Draw
 Blood collection tubes must be drawn in a specific order to avoid cross-contamination of
additives between tubes. The recommended order of draw for plastic vacutainer tubes is:
 First - blood culture bottle or tube (yellow or yellow-black top)
 Second - coagulation tube (light blue top).
 Third - non-additive tube (red top)
 Last draw - additive tubes in this order:
 SST (red-gray or gold top). Contains a gel separator and clot activator.
 Sodium heparin (dark green top)
 PST (light green top). Contains lithium heparin anticoagulant and a gel separator.
 EDTA (lavender top)
 Oxalate/fluoride (light gray top) or other additives
 Note: Tubes with additives must be thoroughly mixed. Clotting or erroneous test results
may be obtained when the blood is not thoroughly mixed with the additive.
S.No Colour Additive Inversion Use
1. Gold Clot activator & gel for
serum separation
5 Serum determination,
screening & diagnostic test
Blood clot time-30min
2. Light green Lithium heparin & gel for
plasma separation
8 Plasma determination
3. Red Clot activator(plastic) 5 Serum determination,
screening & diagnostic test
Blood clot time-60min
4. Royal blue *Clot activator (plastic
serum)
*K2 EDTA(plastic)
5
8
For trace element &
toxicology.
Special stopper formulation
provides low levels of trace
elements.
5. Green Sodium heparin lithium
heparin
8 For plasma determination
6. Grey Sodium fluoride/ Na2
EDTA
8 Glucose determination.
Sodium fluoride is a
antiglycolytic agent
Yellow Acid citrate dextrose
additives(ACD): Solution
A:22g/L trisodium citrate,
8g/L citric acid, 24.5g/L
dextrose
Solution B: 13.2g/L
trisodium citrate, 4.8g/L
citric acid, 14.7g/L dextrose
8
8
Blood bank studies,
phenotyping & DNA
paternity testing
Lavender Spray-coated 8 K2EDTA for whole blood
hematology
determination. K2EDTA-
routine
immunohematology
testing & blood donor
screening
White K2EDTA with gel 8 Molecular diagnostic test
method(not limited to
PCR & or branched DNA
[bDNA] amplification
technique)
Light blue *Buffered sodium citrate
0.09M(3.2%) plastic
*citrate, theophylline,
adenosine, dipyridamole
(CTAD)
3-4
3-4
Coagulation
determination. CTAD for
selected platelet function
assays & routine
coagulation test
Labelling the sample
 A properly labelled sample is essential so that the results of
the test match the patient. The key elements in labelling
are:
 Patient's surname, first and middle names.
 Patient's ID number. NOTE: Both of the above MUST match
the information on the requisition form.
 Date, time and initials of the phlebotomist must be on the
label of EACH tube or electronically entered.
 Automated systems may include labels with bar codes.
Areas to Avoid When Choosing a Site for Blood Draw
 Extensive scars from burns and surgery - it is difficult to puncture the scar
tissue and obtain a specimen.
 The upper extremity on the side of a previous mastectomy - test results
may be affected because of lymphedema.
 Hematoma - may cause erroneous test results. If another site is not
available, collect the specimen distal to the hematoma.
 Intravenous therapy (IV) / blood transfusions - fluid may dilute the
specimen, so collect from the opposite arm if possible.
 Cannula/fistula/heparin lock - hospitals have special policies regarding
these devices. In general, blood should not be drawn from an arm with a
fistula or cannula without consulting the attending physician.
 Edematous extremities - tissue fluid accumulation alters test results.
Techniques to Prevent Hemolysis (which can interfere with many tests):
 Mix all tubes with anticoagulant additives gently (vigorous shaking can
cause hemolysis) 5-10 times.
 Avoid drawing blood from a hematoma; select another draw site.
 If using a needle and syringe, avoid drawing the plunger back too
 Make sure the venipuncture site is dry before proceeding with draw.
 Avoid a probing, traumatic venipuncture.
 Avoid prolonged tourniquet application (no more than 2 minutes; less
1 minute is optimal).
 Avoid massaging, squeezing, or probing a site.
 Avoid excessive fist clenching.
 If blood flow into tube slows, adjust needle position to remain in the
of the lumen.
SAMPLE REJECTION:
 Sample container is not labelled correctly.
 Sample is insufficient.
 Wrong sample container is chosen.
 The sample tube is not sealed properly or if it is broken.
 Blood clot within the sample or a haemolysed sample
 Temperature should be maintained at 2 to 8°C.
 Sample should be processed within 2 hours.
Blood Sample Handling and Processing
Pre-centrifugation Handling:
 Vacutainer tubes should be stored at 4-25°C (39-77°F).
 Tubes should not be used beyond the designated expiration
date.
 Mix all gel barrier and additive tubes by gentle inversion 5
to10 times immediately after the draw. This assists in the
clotting process. This also assures homogenous mixing of the
additives with the blood in all types of additive tubes.
 Serum separator tubes should clot for a full 30 minutes in a
vertical position prior to centrifugation. Short clotting times
can result in fibrin formation, which may interfere with
complete gel barrier formation.
Blood Sample Centrifugation – It is recommended that serum be physically
separated from contact with cells as soon as possible, with a maximum time limit
2 hours from the time of collection.
 Complete gel barrier formation (gel barrier tubes) is time, temperature and G-
force dependent. The uniformity of the barrier is time dependent; an
barrier could result from shortened centrifugation times.
 In general, for a horizontal, swing-bucket centrifuge, the recommended spin
time is 10 minutes. For a fixed-angle centrifuge, the recommended spin time is
15 minutes.
 NOTE: Gel flow may be impeded if chilled before or after centrifugation.
 Tubes should remain closed at all times during the centrifugation process.
 Place the closed tubes in the centrifuge as a “balanced load” noting the
following:
 Opposing tube holders must be identical and contain the same cushion or none at
 Opposing tube holders must be empty or loaded with equally weighted samples
(tubes of the same size and equal in fill).
 If an odd number of samples is to be spun, fill a tube with water to match the weight
of the unpaired sample and place it across from this sample.
WASTE DISPOSAL
 BLACK: Paper, food materials, stationery items.
 YELLOW: Experimental animal organs, body organs,
removedtissue from body, cotton, bandage, swab, pathological
tissues,surgical masks,microbiological & surgical wastes.
 GREEN: Syringe cover,reagent plastic bottle, saline bottle,needle
cap, plastic disposal, plastic tumbler, Dettol,plastic and water
bottle.
 RED : IV sets, tubes, syringes(without needle), sample
containers(blood and urine),gloves , test tissues(plastic) and
catheter.
 WHITE: Needle, butterfly needle, blade, guide wires, test tube(
glass), glassware waste.
RBC ZINC TEST
 Zinc found in serum is totally bound to protein
with over 60% being bound to albumin.
 Increased levels are found in patients
associated with gastrointestinal disorders
accompanied with nausea, vomiting, high fever
and a metallic taste.
 Decreased levels are found in cirrhosis, lung
carcinoma, sickle cell anemia, acute myocardial
infarction, renal failure, corticosteroid and oral
contraceptive therapy.
PRINCIPLE:
Zinc in an alkaline medium reacts with Nitro-PAPS to form a purple
complex. Intensity of the complex formed is directly proportional to the
of zinc present in the sample.
alkaline
Zinc + Nitro-PAPS→Purple coloured complex
medium
SAMPLE MATERIAL:
 Serum (free from hemolysis)
 Zinc is reported to be stable in serum for 7 days at 2-8°C.
REAGENT PREPARATION:
Working Reagent:
 Pour the contents of 1 bottle of L2(Enzyme Reagent 2) into 1
of bottle of L1(Enzyme Reagent 1). This working reagent is
stable for at least 2 weeks when stored at 2-8°C.
 Alternatively for flexibility as much of working reagent may
made as and when desired by mixing together 4 parts of
L1(Enzyme Reagent 1)and 1 part of L2 (Enzyme Reagent 2).
Alternatively 0.8ml of L1 and 0.2ml of L2may also be used
instead of 1ml of the working reagent directly during the
assay .
REAGENT PREPARATION:
Working Reagent:
 Pour the contents of 1 bottle of L2(Enzyme Reagent 2)
into 1 of bottle of L1(Enzyme Reagent 1). This working
reagent is stable for at least 2 weeks when stored at 2-
8°C.
 Alternatively for flexibility as much of working reagent
may be made as and when desired by mixing together
parts of L1(Enzyme Reagent 1)and 1 part of L2 (Enzyme
Reagent 2). Alternatively 0.8ml of L1 and 0.2ml of L2may
also be used instead of 1ml of the working reagent
directly during the assay .
PROCEDURE:
 Pipette into clean dry test tubes labelled as Blank(B),
Standard(S) and Test(T):
Mix well and incubate at R.T.(25°C) for 5 min. Measure the absorbance
of the standard(Abs.S) and Test Sample (Abs.T) against the Blank,
20 min at570 nm.
ADDITION
SEQUENCE
B
(ml)
S
(ml)
T
(ml)
Working Reagent 1.0 1.0 1.0
Distilled water 0.05 - -
Zinc Standard(S) - 0.05 -
Sample - - 0.05
CALCULATION:
 Zinc in µg/dl = Abs.T/Abs.S × 200
NORMAL REFERENCE VALUES:
 Serum : 60-120 µg/dl
 Urine :100-1000µg/24hrs.
NOTE:
 Chelating agents such as EDTA, oxalate and citrate,
present even in traces, prevent the formation of the
complex; hence necessary care should be taken during
the assay.
BLOOD SMEAR
 A blood smear is a diagnostic test used to look for abnormalities within the blood. The cell
types are examined under a microscope for unusual shapes or sizes. There are three main
cells within the blood that the test focuses on:
 red cells (which carry oxygen throughout the body)
 white cells (which function as part of the body’s immune system)
 platelets (which are important for blood clotting)
PROCEDURE:
1. Ensure that the slide is clean since dirt and grease will affect the quality of the smear. Slides
should not be left uncovered on the top of the bench.
2. Using a small pipette or microhaemocrit tube, place a drop of fresh whole blood 4mm in
diameter near the frosted end of the horizontal slide.
3. Rest the spreader slide at a 25° angle on the horizontal slide. Bring the slide carefully up to
the drop of blood.
4. The drop should flow along the edge of the spreader slide.
5. Keep the spreader slide at a 25° angle with light but firm pressure against the horizontal
slide. Increasing the angle results in a thicker smear, whereas a lesser angle gives a thinner
smear.
6. Draw the spreader slide rapidly and smoothly over the length of the horizontal slide,
leaving a thin, even film of blood.
7. Leave the slide to air dry on a flat surface.
8. Label the slide using a pencil with the animal and owner’s name, and the date of
sampling.
9. Place the slide in a slide mailer (available on request). This protects the slide from
scratches and moisture.
10. Store slides at room temperature prior to despatch – do not refrigerate.
NOTE: EDTA blood must not be used. Use fresh blood.
LEISHMAN STAINING
PRINCIPLE:
Leishman's stain is applied in conventional staining techniques to
stain chromosomes. These techniques leave centromers constricted, thus
enabling the measurement of chromosome length, centromeric position, and
arm ratio. Slides can be easily destained and banded by most banding
procedures.
PROCEDURE:
1. Use smears that are as thin as possible and air-dried. Fully cover the smears
with Leishman’s Stain solution. Stain for 2 minutes.
2. Add twice the amount of distilled water and mix by swirling. Incubate for at
least 10 min.
3. Rinse thoroughly with distilled water.
4. Dry the slides using blotting paper and air-dry.
INTERPRETATION:
 Erythrocytes: light pink to brown
 Cores of lymphocytes: deep, dark blue to blue-violet
 Cytoplasm of lymphocytes: light blue
 Nuclei of neutrophil, polymorphonuclear leukocytes:
a deep blue to blue-violet
 Granules of neutrophilic polymorphonuclear
leukocytes: red
 Cores of eosinophil leukocytes: blue violet
 Granules of eosinophilic leukocytes: deep red
 Cores of basophilic leukocytes: blue violet
HIV 1&2 WESTERN BLOT
 HIV 1&2 WESTERN BLOT is an invitro qualitative immunoassay for
the detection antibodies to HIV -1 and HIV-2 in human serum or
plasma.
 The most common immunoassay used for the detection of
antibodies to HIV 1 and HIV2 are the enzyme linked immuno
sorbent assay(ELISA), rapid test and the immunoblot or western
blot assay which are easy to perform.
 The western blot test can be used as more specific and
supplemental assay on human serum or plasma specimen found
repeatedly reactive using ELISA.
 The HIV 1 viral antigens are separated by gel
electrophoresis and electrically transferred to
nitrocellulose membrane strip which is impregnated with
a specific HIV 2 antigen band.
 Each strip also has an internal serum inbuilt quality
control band. In individuals infected with HIV, antigen
appears first before anti-HIV but due to seroconversion,
the antigen is lost and antibody develops within 1 – 2
months after infection and thereby the level of antibody
increases.
 However p24 antibodies level decreases with time in
advance stage of infection.
PRINCIPLE:
 The HIV1 & 2 western blot is manufactured from HIV-1 cell line.
HIV-1 viral antigen is purified and then separated by SDS gel
electrophoresis. SDS denatures viral components and yields
which migrate in the gel according to their molecular weight to
produce various bands.
 Lower molecular weight components migrate faster and are found
at the bottom of the gel, while high molecular weight proteins
remain near the top.
 They are then transferred from SDS-PAGE gel on to nitrocellulose
membrane which is also impregnated with HIV-2 antigen (gp36)
a control band.
 The membrane is cut and packaged as strips. To perform the assay,
the strip is incubated with the patient serum/plasma diluted in a
buffer. Antibodies to HIV-1 & 2 if present, bind to viral antigens
located on the strip. Unbound material is washed off and then the
strip is incubated with anti-human IgG conjugated to alkaline
phosphatase.
 After washing the unbound conjugate, substrate (BCIP/NBT)
is added which results in the staining of bands. If antibodies
to HIV-1 antigens are present in the sera, any two
ENVELOPE and more of the following bands will be seen:
p17, p24, p31, gp41, p51/p55,p66,gp120 & gp160.
 If antibodies to HIV-2 antigen are present, HIV-2 band is
also observed along with some of the other bands. If HIV
specific antibodies are not present, the band pattern does
not meet the required criteria.
MATERIALS REQUIRED:
 HIV Test strips: Strips blotted with HIV-1 viral lysate and specific HIV-2 antigen and anti-human IgG as control
 Wash buffer concentrate 20x
 Diluent buffer concentrate 10x
 Blotting powder
 Enzyme conjugate concentrate 100x:Rabbit anti-human IgG conjugated with alkaline phosphatase
 Substrate:BCIP+NBT(5-Bromo,4-chloro ,3 indolyl phosphate+nitro blue tetrazolium)
 Negative control:inactivated normal human serum containing sodium azide as preservative.Non-reactive for
HIV1&2,HCV and HbsAg
 Positive control: inactivated human serum with antibodies to HIV 1. Non-reactive for HbsAg and HCV.
 Incubation Tray: One tray with lid cover for one strip
 Forcep
 Measuring Spoon for bloting powder
 Band Monitor Scale
 Rotary Shaker (60-70 r.p.m.)
 Pipette and tips
 Timer
 Vortex mixer/Magnetic stirrer
 Aspirator with Sodium Hypochlorite/suitable disinfectant
Specimen Collection, Preparation & Storage:
Collect blood in a clean dry sterlized vial and allow it
clot. Separate the serum by centrifugation at room
temperature. It is recommended that FRESH samples
should be used.
If serum is not to be assayed immediately, it should be
stored at 2-8° C or frozen at -20°C. Serum may be stored
2-8° C for upto3 days and stored frozen at -20°C for 3
months.
Bring specimen (serum/plasma) to room temperature
(25-30°C) and mix each specimen thoroughly prior to use.
Do not heat or repeatedly freeze/ thaw specimen.
 REAGENT PREPARATION:
 Bring all reagents to room temperature (25-30°C) before use. Prepare the
following reagents just before starting assay procedure and use within 24
hrs.
 Preparation of Working Wash Buffer: For each strip 20ml working wash buffer is
required. Dilute 1ml, wash buffer concentrate (20X) to 20ml with distilled water
and mix well.
 Preparation of Sample and Conjugate Diluent Buffer:
 For the preparation of the working diluent buffer, take 0.5ml of diluent
buffer concentrate (10X) and 4.5ml of distilled water to this concentrate.
Then add 2 spoons of blotting powder using the measuring spoon only
given in the kit. Mix the working diluent buffer properly before use.
 Preparation of working conjugate: It should be prepared fresh just before use.
Dilute enzyme conjugate 1:100 with working diluent buffer. Add 20µl of
conjugate (100x) to 2ml of working diluent buffer.
 Substrate Solution: Substrate solution is ready to use. Pipette 2ml of substrate
solution directly from bottle using a clean pipette and cap tightly after use.
PROCEDURE-RAPID ASSAY:
 NOTE : Bring the test kit and sample to Room Temperature (25-30ºC) before use and all incubations are to be
carried out on a Rotary shaker (60-70 r.p.m.) at Room Temperature.
 Remove required number of strips and trays from the kit. Place one strip in each tray with numbered
side up. Note down the strip number with respect to samples & control on the worksheet for correct
identification. Always include strips for positive and negative controls with each run.
 Prepare working wash buffer according to the number of tests to be run.
 Add 2ml of working wash buffer to each tray and incubate the strips for at least 5 minutes at room
temperature. Remove buffer by aspiration.
 Prepare working diluent buffer according to the no. of tests to be run.
 Add 2ml of working diluent buffer to each tray, add 20µl of patient sera and controls to appropriate
wells.
 Cover trays and incubate for 1 hr. at room temperature (25-30ºC) on a Rotary Shaker. Take care to
mark the cover also, to prevent interchange of covers which may lead to cross contamination.
 Carefully remove covers, aspirate solution completely from tray and discard into sodium/calcium hypochlorite
solution.
 Wash each strip with 2ml working wash buffer 3 times for 5 minutes each with shaking.
 Prepare working conjugate solution according to the number of tests to be run.
 Add 2 ml. of working conjugate solution to each tray. Cover tray with corresponding cover and incubate on Rotary
Shaker for 1 hour. Never interchange the cover of trays to avoid contamination.
 Aspirate conjugate, wash each strip with 2 ml working wash buffer 4 times for 5 minutes each with shaking. Aspirate
wash solution completely from the tray at the end of the last washing.
 Add 2 ml substrate solution to each tray, cover tray and incubate for 0.5-15 minutes away from the light preferably
in dark till bands develop. Make a careful decision to decide the time of incubation from 0.5 min. to 15 min.
 Continue to observe the reaction till gp160/gp120/gp41 appear and stop the reaction after their appearances so as
to avoid excessive background making the observation difficult.
 However, in case the above bands do not appear, then continue the reaction upto the point
(a) before strong background is formed on the strip
(b) upto 15 minutes, whichever is earlier.
 Aspirate substrate, add distilled water and wash strips to stop the reaction. Remove the strips on paper towels and
mount on worksheet keeping numbered side up. Observe band pattern and grade the results. For storage keep
strips in dark.
Molwt (k.Da) Gene Antigen Description
gp 120 ENV Polymeric form
ofgp 41
Broad diffused
band
gp160 ENV Outer membrane
p66 POL Reverse
Transcriptase
Discreet band
p55 GAG Precursor protein Fused Spread
band/Single band
p51 POL Reverse
transcriptase
p41 ENV Transmembrane Appears as 2-3
different
bands/diffused
band
p31 POL Endonuclease Single band
p24 GAG Core protein Broad band
p17 GAG Core protein Broad band
INTERPRETATION:
INTERPRETATION PATTERN:
 POSITIVE:
 HIV-1 POSITIVE a). 2 ENV (either of 2 ENV; gp160, gp41, gp120) + 1GAG (p17, p24, p55) or1POL (p31, p51, p66)
 HIV-1 POSITIVE with HIV 2 indicated: b). 2 ENV (either of 2 ENV; gp160, gp41, gp120 + 1GAG (p17, p24, p55)) or 1 POL (p31, p51, p66) +
HIV-2 Band
 HIV-1 NEGATIVE with HIV-2 Indicated: Only Control band + HIV-2 BAND
 INDETERMINATE:
 a). 1 ENV (either of 1 ENV; gp160, gp41, gp120)+ 1GAG (p17, p24)+ 1POL, (p31)
 Viral Specific bands present but pattern does not meet the criteria for POSITIVE
 b). GAG (p17, p24) + POL (p31)
 c). Only GAG (p17, p24
 d). Only POL (p31)
 Indeterminate with HIV-2 indicated: Viral Specific bands present but pattern does
 not meet the criteria for POSITIVE + HIV-2 BAND
 NEGATIVE:
 Only control band or control band with p51/55/p17 band
 INVALID:
 No Control band
LEAD CARE II BLOOD LEAD ANALYZER:
The Lead Care II Blood Lead Analyzer is a CLIA-waived device.
The lead care treatment reagent contains dilute hydrochloric acid
solution which may cause eye, skin and respiratory system
irritation.
TEST KIT COMPONENTS:
 Kit box
 Sensors
 Controls
 Treatment reagent tubes
 Use only fresh, whole blood. Mix the blood with treatment reagent within 24hrs
of collection.
TEST KIT CONTENTS:
 Droppers
 Treatment reagents tube
 Capillary tubes and plungers
 Calibration button
 Controls solutions
 Blood lead sensors
 Labels
 Package insert
 CONTROL PREPARATION:
 Label a fresh treatment reagent tube “level I control”
 Mix thoroughly
 Holding the capillary tube almost horizontally with the green band on the top, fill the tube
50µl black line.
 Wipe the outside of the capillary tube to remove any excess control
 Place the capillary tube into the treatment reagent tube. Insert a plunger into the top of
capillary tube and push down, ensuring the entire volume of controls is dispensed into the
treatment reagent.
 Invert the tube 8-10 times to mix the sample completely. Control material in treatment
reagent tube will appear red.
 **Repeat this process for “level II control”
CAUTION: Do not proceed to patient sample unless both level I & II control results are with the
acceptable range.
SAMPLE PREPARATION:
 Label the tube with the patient ID using labels provided
 Holding the capillary tube almost horizontally with the green band
the top, fill the tube to 50µl black line (or) if using blood from a
make sure the blood is well mixed by inverting the tube 8-10 times
before sampling
 Remove excess blood from outside of the tube with a clean wipe or
gauze.
 Inspect the capillary tube for proper filling. Make sure there are no
gaps, air bubbles or any excess blood on the outside of capillary.
 Place the capillary tube into the treatment reagent tube. Insert a
plunger into the top of the capillary tube and push down, ensuring
the entire volume of controls is dispensed into the treatment
 Invert the tube 8-10 times to mix the sample completely.
 The sample is ready when the mixture turns brown.
SAMPLE ANALYSIS:
 Insert the sensor (with black bars facing up) completely into the analyser until you hear a
beep
 Make sure the sensor lot number matches the display
 Make sure the sample is thoroughly mixed.
 Squeeze the walls of the dropper and insert into the sample.Release the pressure to drop
some sample into the dropper
 Touch the dropper tip to the X on the sensor and squeeze the walls to dispense the
sample.the analyser will beep and begin the three minute countdown.
 Wait for 3 minutes until the test is done. The analyser will beep and display the lead result
in µg/dl Pb.
 Record the test results.
 Remove the used sensor immediately after recording the test result
 Discard materials in appropriate containers.
 The analyser displays “low” when it detects a blood lead level below 3.3µg/dl. Low results
should be recorded as <3.3µg/dl
INTERPRETATION:
 LOW- < 3.3µg/dl
 HIGH- > 65.0µg/dl
RENAL STONE ANALYSIS
PRINCIPLE:
 To identify the chemical composition present in renal
stone when it is filtered out of the urine or removed from the urinary tract.
MATERIALS REQUIRED:
 Sample(renal stone)
 Test tube
 1N HCL
 Ammonia solution
PROCEDURE AND INTERPRETATION:
 2ml of 1N HCL is added to a pinch of renal stone and mixed well.
 Brisk effervescence while adding stone- presence of carbonate.
 If no effervescence is seen, then the tube is kept in boiling water bath for 10min and
cooled.
 Then ammonia solution is added on the sides of the tube.
 Cloudy appearance confirms the presence of oxalate
 If there is no change in both the tests the stone is confirmed as phosphate
FOOD INTOLERANCE TEST:
Technology
The Genarrayt® microarray is produced by printing hundreds of protein
spots onto a specially-prepared glass slide, each spot measuring only 130
μm across.
The assay methodology is straight forward and similar to typical
immunoassays.
The Genarrayt® system includes a recommended wash station, micro-
centrifuge and scanner to ensure optimum assay performance.
On completion of the assay, the microarray slide is scanned using a high
resolution optical scanner. The data are processed by the Genarrayt®
Report Writer software, which presents final results in a simple,
straightforward manner.
This powerful approach has been applied in the Genarrayt® 200+ Food IgG
test to the study and diagnosis of intolerance to over 200 specific foods.
 Assay Methodology
 The Genarrayt® food IgG assay is straightforward and all incubations are
room temperature. It takes only 2h to complete 1-4 slides containing 16-64
patient samples.
 The method is summarised below:
 1. Load slide into a FAST FrameTM and add blocking buffer.Incubate for 15
minutes.
 2. Flick-dry, add diluted patient sample and incubate for 30 minutes.
 3. Wash slide, add conjugate and incubate for 30 minutes.
 4. Wash slide, add TMB substrate and incubate for 10 minutes
 5. Remove slide from FASTFrameTM, wash in the Genarrayt® wash station
and dry in the Genarrayt® centrifuge for 30 seconds.
 6. The microarrays are then ready to scan.
• Genarrayt® slides are scanned in a high resolution optical
scanner.
• Using appropriate software each microarray is analysed and
reviewed in detail.
• Data for each slide is saved in a single exportable file which is
accessible to a range of data-
handling software packages.
INTERPRETATION:
NORMAL : < 24U/ml
BORDERLINE : 24-30U/ml
ELEVATED : >30U/ml

More Related Content

What's hot

Blood collection and preservation
Blood collection  and preservationBlood collection  and preservation
Blood collection and preservation
globalsoin
 
Collection, transport and processing of clinical specimens: CSF
Collection, transport and processing of clinical specimens: CSFCollection, transport and processing of clinical specimens: CSF
Collection, transport and processing of clinical specimens: CSF
RaghaviPillai
 

What's hot (20)

Sample collection and safety procedure in laboratory
Sample collection and safety procedure in laboratorySample collection and safety procedure in laboratory
Sample collection and safety procedure in laboratory
 
Blood collection and its types
Blood collection and its typesBlood collection and its types
Blood collection and its types
 
Blood collection
Blood collectionBlood collection
Blood collection
 
Phlebotomy
PhlebotomyPhlebotomy
Phlebotomy
 
Urine preservative
Urine preservative Urine preservative
Urine preservative
 
Phlebotomy
PhlebotomyPhlebotomy
Phlebotomy
 
Blood collection and preservation
Blood collection  and preservationBlood collection  and preservation
Blood collection and preservation
 
Donor selection ppt
Donor selection pptDonor selection ppt
Donor selection ppt
 
Phlebotomy
PhlebotomyPhlebotomy
Phlebotomy
 
Blood collection, handling, and anticoagulants
Blood collection, handling, and anticoagulantsBlood collection, handling, and anticoagulants
Blood collection, handling, and anticoagulants
 
Blood collection sunil
Blood collection sunil Blood collection sunil
Blood collection sunil
 
Routine examination of stool
Routine examination of stoolRoutine examination of stool
Routine examination of stool
 
COLLECTION AND TRANSPORTATION OF CLINICAL SAMPLES
COLLECTION AND TRANSPORTATION OF CLINICAL SAMPLESCOLLECTION AND TRANSPORTATION OF CLINICAL SAMPLES
COLLECTION AND TRANSPORTATION OF CLINICAL SAMPLES
 
Collection and handling of blood
Collection and handling of bloodCollection and handling of blood
Collection and handling of blood
 
Specimen collection part 1
Specimen collection part 1Specimen collection part 1
Specimen collection part 1
 
Collection, transport and processing of clinical specimens: CSF
Collection, transport and processing of clinical specimens: CSFCollection, transport and processing of clinical specimens: CSF
Collection, transport and processing of clinical specimens: CSF
 
Blood specimen collection
Blood specimen collectionBlood specimen collection
Blood specimen collection
 
Body fluids
Body fluidsBody fluids
Body fluids
 
Phlebotomy -2[1]
Phlebotomy -2[1]Phlebotomy -2[1]
Phlebotomy -2[1]
 
Activated Partial Thromboplastin Time(APTT)
Activated Partial Thromboplastin Time(APTT)Activated Partial Thromboplastin Time(APTT)
Activated Partial Thromboplastin Time(APTT)
 

Similar to Laboratory Blood/ Specimen collection

Types of punctures
Types of puncturesTypes of punctures
Types of punctures
fatehia awny
 
Specimen Collection (updated)
Specimen Collection (updated)Specimen Collection (updated)
Specimen Collection (updated)
Tristin Anderson
 
Collectionandhandlingofblood 131025051900-phpapp01(2)
Collectionandhandlingofblood 131025051900-phpapp01(2)Collectionandhandlingofblood 131025051900-phpapp01(2)
Collectionandhandlingofblood 131025051900-phpapp01(2)
fatehia awny
 
Cannulation venepuncture print
Cannulation venepuncture printCannulation venepuncture print
Cannulation venepuncture print
sandalidia
 
Blood collection, precautions to prevent hemolysis and
Blood collection, precautions to prevent hemolysis andBlood collection, precautions to prevent hemolysis and
Blood collection, precautions to prevent hemolysis and
Sowmya Srinivas
 

Similar to Laboratory Blood/ Specimen collection (20)

Eritro intro01
Eritro intro01Eritro intro01
Eritro intro01
 
Sample Collection & Processing.pptxDr Rajju Tiwari M.D. biochemistry
Sample Collection & Processing.pptxDr Rajju Tiwari M.D. biochemistrySample Collection & Processing.pptxDr Rajju Tiwari M.D. biochemistry
Sample Collection & Processing.pptxDr Rajju Tiwari M.D. biochemistry
 
Subjective assignment 2
Subjective assignment 2Subjective assignment 2
Subjective assignment 2
 
sample collection & rejection .pptx is used in hospital
sample collection & rejection .pptx is used in hospitalsample collection & rejection .pptx is used in hospital
sample collection & rejection .pptx is used in hospital
 
Automation in biochemistry, Micro biology and Hematology of 21st century
Automation in biochemistry, Micro biology and Hematology of 21st centuryAutomation in biochemistry, Micro biology and Hematology of 21st century
Automation in biochemistry, Micro biology and Hematology of 21st century
 
Types of punctures
Types of puncturesTypes of punctures
Types of punctures
 
Specimen Collection (updated)
Specimen Collection (updated)Specimen Collection (updated)
Specimen Collection (updated)
 
The best PHLEBOTOMY powerpoint presentation
The best PHLEBOTOMY powerpoint presentationThe best PHLEBOTOMY powerpoint presentation
The best PHLEBOTOMY powerpoint presentation
 
Venous blood coolection
Venous  blood coolectionVenous  blood coolection
Venous blood coolection
 
BLOOD SAMPLE COLLECTION PPT.pptx
BLOOD SAMPLE COLLECTION PPT.pptxBLOOD SAMPLE COLLECTION PPT.pptx
BLOOD SAMPLE COLLECTION PPT.pptx
 
setting up procedure for iv drips
setting up procedure for iv dripssetting up procedure for iv drips
setting up procedure for iv drips
 
Collection of Blood and Anticoagula.pptx
Collection of Blood and Anticoagula.pptxCollection of Blood and Anticoagula.pptx
Collection of Blood and Anticoagula.pptx
 
Collectionandhandlingofblood 131025051900-phpapp01(2)
Collectionandhandlingofblood 131025051900-phpapp01(2)Collectionandhandlingofblood 131025051900-phpapp01(2)
Collectionandhandlingofblood 131025051900-phpapp01(2)
 
Blood Banking.. Experiment # 2
Blood Banking.. Experiment # 2Blood Banking.. Experiment # 2
Blood Banking.. Experiment # 2
 
Cannulation venepuncture print
Cannulation venepuncture printCannulation venepuncture print
Cannulation venepuncture print
 
BLOOD COLLECTION TECHNIQUES.pptx
BLOOD COLLECTION TECHNIQUES.pptxBLOOD COLLECTION TECHNIQUES.pptx
BLOOD COLLECTION TECHNIQUES.pptx
 
ABG procedure WHO guidelines and normal values of parameters.
ABG procedure WHO guidelines and normal values of parameters.ABG procedure WHO guidelines and normal values of parameters.
ABG procedure WHO guidelines and normal values of parameters.
 
Blood Collection Routine Venipuncture
Blood Collection Routine VenipunctureBlood Collection Routine Venipuncture
Blood Collection Routine Venipuncture
 
Blood collection, precautions to prevent hemolysis and
Blood collection, precautions to prevent hemolysis andBlood collection, precautions to prevent hemolysis and
Blood collection, precautions to prevent hemolysis and
 
Specimen collection cc
Specimen collection ccSpecimen collection cc
Specimen collection cc
 

More from priyanka raviraj

More from priyanka raviraj (12)

Basics of protein biochemistry
Basics of protein biochemistryBasics of protein biochemistry
Basics of protein biochemistry
 
CROP PROSPECTS and FOOD SITUATION, 2020
CROP PROSPECTS and FOOD SITUATION, 2020CROP PROSPECTS and FOOD SITUATION, 2020
CROP PROSPECTS and FOOD SITUATION, 2020
 
Guide TO FINDING YOUR NATURAL TALENTS AND STRENGTHS
Guide TO FINDING YOUR NATURAL TALENTS AND STRENGTHSGuide TO FINDING YOUR NATURAL TALENTS AND STRENGTHS
Guide TO FINDING YOUR NATURAL TALENTS AND STRENGTHS
 
CLINICAL LABORATORY TECHNIQUES
CLINICAL   LABORATORY  TECHNIQUESCLINICAL   LABORATORY  TECHNIQUES
CLINICAL LABORATORY TECHNIQUES
 
Metabolomic Profiling of Spent Biomass Of Marine Microalgae, Chlorella vulgaris
Metabolomic Profiling of Spent Biomass Of Marine Microalgae, Chlorella vulgarisMetabolomic Profiling of Spent Biomass Of Marine Microalgae, Chlorella vulgaris
Metabolomic Profiling of Spent Biomass Of Marine Microalgae, Chlorella vulgaris
 
Photochemistry Mediated Synthesis and Characterization of Thyroxine Capped Si...
Photochemistry Mediated Synthesis and Characterization of Thyroxine Capped Si...Photochemistry Mediated Synthesis and Characterization of Thyroxine Capped Si...
Photochemistry Mediated Synthesis and Characterization of Thyroxine Capped Si...
 
Rna polymerase
Rna polymeraseRna polymerase
Rna polymerase
 
Dna
DnaDna
Dna
 
Bacteriophage vectors
Bacteriophage vectorsBacteriophage vectors
Bacteriophage vectors
 
Bacterial plasmids
Bacterial plasmidsBacterial plasmids
Bacterial plasmids
 
Third Generation Sequencing
Third Generation Sequencing Third Generation Sequencing
Third Generation Sequencing
 
Sericulture
SericultureSericulture
Sericulture
 

Recently uploaded

Gliese 12 b: A Temperate Earth-sized Planet at 12 pc Ideal for Atmospheric Tr...
Gliese 12 b: A Temperate Earth-sized Planet at 12 pc Ideal for Atmospheric Tr...Gliese 12 b: A Temperate Earth-sized Planet at 12 pc Ideal for Atmospheric Tr...
Gliese 12 b: A Temperate Earth-sized Planet at 12 pc Ideal for Atmospheric Tr...
Sérgio Sacani
 
Seminar on Halal AGriculture and Fisheries.pptx
Seminar on Halal AGriculture and Fisheries.pptxSeminar on Halal AGriculture and Fisheries.pptx
Seminar on Halal AGriculture and Fisheries.pptx
RUDYLUMAPINET2
 
Exomoons & Exorings with the Habitable Worlds Observatory I: On the Detection...
Exomoons & Exorings with the Habitable Worlds Observatory I: On the Detection...Exomoons & Exorings with the Habitable Worlds Observatory I: On the Detection...
Exomoons & Exorings with the Habitable Worlds Observatory I: On the Detection...
Sérgio Sacani
 
Jet reorientation in central galaxies of clusters and groups: insights from V...
Jet reorientation in central galaxies of clusters and groups: insights from V...Jet reorientation in central galaxies of clusters and groups: insights from V...
Jet reorientation in central galaxies of clusters and groups: insights from V...
Sérgio Sacani
 
Detectability of Solar Panels as a Technosignature
Detectability of Solar Panels as a TechnosignatureDetectability of Solar Panels as a Technosignature
Detectability of Solar Panels as a Technosignature
Sérgio Sacani
 

Recently uploaded (20)

Lab report on liquid viscosity of glycerin
Lab report on liquid viscosity of glycerinLab report on liquid viscosity of glycerin
Lab report on liquid viscosity of glycerin
 
Gliese 12 b: A Temperate Earth-sized Planet at 12 pc Ideal for Atmospheric Tr...
Gliese 12 b: A Temperate Earth-sized Planet at 12 pc Ideal for Atmospheric Tr...Gliese 12 b: A Temperate Earth-sized Planet at 12 pc Ideal for Atmospheric Tr...
Gliese 12 b: A Temperate Earth-sized Planet at 12 pc Ideal for Atmospheric Tr...
 
Seminar on Halal AGriculture and Fisheries.pptx
Seminar on Halal AGriculture and Fisheries.pptxSeminar on Halal AGriculture and Fisheries.pptx
Seminar on Halal AGriculture and Fisheries.pptx
 
NuGOweek 2024 full programme - hosted by Ghent University
NuGOweek 2024 full programme - hosted by Ghent UniversityNuGOweek 2024 full programme - hosted by Ghent University
NuGOweek 2024 full programme - hosted by Ghent University
 
Exomoons & Exorings with the Habitable Worlds Observatory I: On the Detection...
Exomoons & Exorings with the Habitable Worlds Observatory I: On the Detection...Exomoons & Exorings with the Habitable Worlds Observatory I: On the Detection...
Exomoons & Exorings with the Habitable Worlds Observatory I: On the Detection...
 
Structures and textures of metamorphic rocks
Structures and textures of metamorphic rocksStructures and textures of metamorphic rocks
Structures and textures of metamorphic rocks
 
GBSN - Biochemistry (Unit 5) Chemistry of Lipids
GBSN - Biochemistry (Unit 5) Chemistry of LipidsGBSN - Biochemistry (Unit 5) Chemistry of Lipids
GBSN - Biochemistry (Unit 5) Chemistry of Lipids
 
Constraints on Neutrino Natal Kicks from Black-Hole Binary VFTS 243
Constraints on Neutrino Natal Kicks from Black-Hole Binary VFTS 243Constraints on Neutrino Natal Kicks from Black-Hole Binary VFTS 243
Constraints on Neutrino Natal Kicks from Black-Hole Binary VFTS 243
 
Multi-source connectivity as the driver of solar wind variability in the heli...
Multi-source connectivity as the driver of solar wind variability in the heli...Multi-source connectivity as the driver of solar wind variability in the heli...
Multi-source connectivity as the driver of solar wind variability in the heli...
 
Hemoglobin metabolism: C Kalyan & E. Muralinath
Hemoglobin metabolism: C Kalyan & E. MuralinathHemoglobin metabolism: C Kalyan & E. Muralinath
Hemoglobin metabolism: C Kalyan & E. Muralinath
 
INSIGHT Partner Profile: Tampere University
INSIGHT Partner Profile: Tampere UniversityINSIGHT Partner Profile: Tampere University
INSIGHT Partner Profile: Tampere University
 
A Giant Impact Origin for the First Subduction on Earth
A Giant Impact Origin for the First Subduction on EarthA Giant Impact Origin for the First Subduction on Earth
A Giant Impact Origin for the First Subduction on Earth
 
Jet reorientation in central galaxies of clusters and groups: insights from V...
Jet reorientation in central galaxies of clusters and groups: insights from V...Jet reorientation in central galaxies of clusters and groups: insights from V...
Jet reorientation in central galaxies of clusters and groups: insights from V...
 
Detectability of Solar Panels as a Technosignature
Detectability of Solar Panels as a TechnosignatureDetectability of Solar Panels as a Technosignature
Detectability of Solar Panels as a Technosignature
 
SCHIZOPHRENIA Disorder/ Brain Disorder.pdf
SCHIZOPHRENIA Disorder/ Brain Disorder.pdfSCHIZOPHRENIA Disorder/ Brain Disorder.pdf
SCHIZOPHRENIA Disorder/ Brain Disorder.pdf
 
Gliese 12 b, a temperate Earth-sized planet at 12 parsecs discovered with TES...
Gliese 12 b, a temperate Earth-sized planet at 12 parsecs discovered with TES...Gliese 12 b, a temperate Earth-sized planet at 12 parsecs discovered with TES...
Gliese 12 b, a temperate Earth-sized planet at 12 parsecs discovered with TES...
 
electrochemical gas sensors and their uses.pptx
electrochemical gas sensors and their uses.pptxelectrochemical gas sensors and their uses.pptx
electrochemical gas sensors and their uses.pptx
 
THE IMPORTANCE OF MARTIAN ATMOSPHERE SAMPLE RETURN.
THE IMPORTANCE OF MARTIAN ATMOSPHERE SAMPLE RETURN.THE IMPORTANCE OF MARTIAN ATMOSPHERE SAMPLE RETURN.
THE IMPORTANCE OF MARTIAN ATMOSPHERE SAMPLE RETURN.
 
Shuaib Y-basedComprehensive mahmudj.pptx
Shuaib Y-basedComprehensive mahmudj.pptxShuaib Y-basedComprehensive mahmudj.pptx
Shuaib Y-basedComprehensive mahmudj.pptx
 
GBSN - Microbiology (Lab 2) Compound Microscope
GBSN - Microbiology (Lab 2) Compound MicroscopeGBSN - Microbiology (Lab 2) Compound Microscope
GBSN - Microbiology (Lab 2) Compound Microscope
 

Laboratory Blood/ Specimen collection

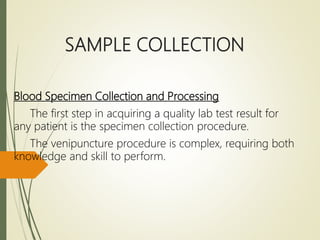
  • 1. SAMPLE COLLECTION Blood Specimen Collection and Processing The first step in acquiring a quality lab test result for any patient is the specimen collection procedure. The venipuncture procedure is complex, requiring both knowledge and skill to perform.
  • 2. Venipuncture Procedure:  The first step to the collection is to positively identify the patient by two forms of identification; ask the patient to state and spell his/her name and give you his/her birth date. Check these against the requisition (paper or electronic).  Check the requisition form for requested tests, other patient information and any special draw requirements. Gather the tubes and supplies that you will need for the draw.  Position the patient in a chair, or sitting or lying on a bed.  Wash your hands.  Select a suitable site for venipuncture, by placing the tourniquet 3 to 4 inches above the selected puncture site on the patient. Do not put the tourniquet on too tightly or leave it on the patient longer than 1 minute.
  • 3.  When a vein is selected, cleanse the area in a circular motion, beginning at the site and working outward. Allow the area to air dry. After the area is cleansed, it should not be touched again.  Ask the patient to make a fist; avoid “pumping the fist.” Swiftly insert the needle through the skin into the lumen of the vein. The needle should form a 15-30 degree angle with the arm surface.  When the tube is filled, remove the tourniquet.
  • 4.  Remove the needle from the patient's arm using a swift backward motion.  Place gauze immediately on the puncture site. Apply and hold adequate pressure to avoid formation of a hematoma. After holding pressure for 1-2 minutes, tape a fresh piece of gauze or Band-Aid to the puncture site.  Dispose of contaminated materials/supplies in designated containers.
  • 5. VENIPUNCTURE BUTTERFLY NEEDLE METHOD  This is used in case of senior citizens
  • 6. Sites to draw blood Median cubital vein:  a superficial vein, most commonly used for venipuncture, it lies between the cephalic and basilic veins. Cephalic vein:  Seen in both forearm and arm Basilic vein:  Seen in forearm and arm, it divides to join the brachial vein.
  • 7. Note: The larger median cubital and cephalic veins are the usual choice. Foot veins are a last resort because of the higher probability of complications.
  • 8. Fingerstick Procedure The best locations for fingersticks are the 3rd (middle) and 4th (ring) fingers. Do not use the tip of the finger or the center of the finger. Avoid the side of the finger where there is less soft tissue, where vessels and nerves are located, and where the bone is closer to the surface. The 2nd (index) finger tends to have thicker, callused skin. The fifth finger tends to have less soft tissue overlying the bone. Avoid puncturing a finger that is cold or cyanotic, swollen, scarred, or covered with a rash.
  • 9.  When a site is selected, cleanse the selected puncture area.  Massage the finger toward the selected site prior to the puncture.  Using a sterile safety lancet, make a skin puncture just off the center of the finger pad. The puncture should be made perpendicular to the ridges of the fingerprint so that the drop of blood does not run down the ridges.  Wipe away the first drop of blood, which tends to contain excess tissue fluid.
  • 10.  Collect drops of blood into the collection tube/device by gentle pressure on the finger. Avoid excessive pressure or “milking” that may squeeze tissue fluid into the drop of blood.  Cap, rotate and invert the collection device to mix the blood collected.  Have the patient hold a small gauze pad over the puncture site for a few minutes to stop the bleeding.  Dispose of contaminated materials/supplies in designated containers.
  • 11. Heelstick Procedure (infants)  Prewarming the infant's heel (42° C for 3 to 5 minutes) is important to increase the flow of blood for collection.  Clean the site to be punctured with an alcohol sponge. Dry the cleaned area.  Hold the baby's foot firmly to avoid sudden movement.
  • 12.  Using a sterile blood safety lancet, puncture the side of the heel.  Wipe away the first drop of blood with a piece of clean, dry cotton gauze. Since newborns do not often bleed immediately, use gentle pressure to produce a rounded drop of blood. Do not use excessive pressure because the blood may become diluted with tissue fluid.  When finished, elevate the heel, place a piece of clean, dry cotton on the puncture site, and hold it in place until the bleeding has stopped. Apply tape or Band-Aid to area if needed.
  • 13. Order of Draw  Blood collection tubes must be drawn in a specific order to avoid cross-contamination of additives between tubes. The recommended order of draw for plastic vacutainer tubes is:  First - blood culture bottle or tube (yellow or yellow-black top)  Second - coagulation tube (light blue top).  Third - non-additive tube (red top)  Last draw - additive tubes in this order:  SST (red-gray or gold top). Contains a gel separator and clot activator.  Sodium heparin (dark green top)  PST (light green top). Contains lithium heparin anticoagulant and a gel separator.  EDTA (lavender top)  Oxalate/fluoride (light gray top) or other additives  Note: Tubes with additives must be thoroughly mixed. Clotting or erroneous test results may be obtained when the blood is not thoroughly mixed with the additive.
  • 14.
  • 15. S.No Colour Additive Inversion Use 1. Gold Clot activator & gel for serum separation 5 Serum determination, screening & diagnostic test Blood clot time-30min 2. Light green Lithium heparin & gel for plasma separation 8 Plasma determination 3. Red Clot activator(plastic) 5 Serum determination, screening & diagnostic test Blood clot time-60min 4. Royal blue *Clot activator (plastic serum) *K2 EDTA(plastic) 5 8 For trace element & toxicology. Special stopper formulation provides low levels of trace elements. 5. Green Sodium heparin lithium heparin 8 For plasma determination 6. Grey Sodium fluoride/ Na2 EDTA 8 Glucose determination. Sodium fluoride is a antiglycolytic agent
  • 16. Yellow Acid citrate dextrose additives(ACD): Solution A:22g/L trisodium citrate, 8g/L citric acid, 24.5g/L dextrose Solution B: 13.2g/L trisodium citrate, 4.8g/L citric acid, 14.7g/L dextrose 8 8 Blood bank studies, phenotyping & DNA paternity testing Lavender Spray-coated 8 K2EDTA for whole blood hematology determination. K2EDTA- routine immunohematology testing & blood donor screening White K2EDTA with gel 8 Molecular diagnostic test method(not limited to PCR & or branched DNA [bDNA] amplification technique) Light blue *Buffered sodium citrate 0.09M(3.2%) plastic *citrate, theophylline, adenosine, dipyridamole (CTAD) 3-4 3-4 Coagulation determination. CTAD for selected platelet function assays & routine coagulation test
  • 17. Labelling the sample  A properly labelled sample is essential so that the results of the test match the patient. The key elements in labelling are:  Patient's surname, first and middle names.  Patient's ID number. NOTE: Both of the above MUST match the information on the requisition form.  Date, time and initials of the phlebotomist must be on the label of EACH tube or electronically entered.  Automated systems may include labels with bar codes.
  • 18. Areas to Avoid When Choosing a Site for Blood Draw  Extensive scars from burns and surgery - it is difficult to puncture the scar tissue and obtain a specimen.  The upper extremity on the side of a previous mastectomy - test results may be affected because of lymphedema.  Hematoma - may cause erroneous test results. If another site is not available, collect the specimen distal to the hematoma.  Intravenous therapy (IV) / blood transfusions - fluid may dilute the specimen, so collect from the opposite arm if possible.  Cannula/fistula/heparin lock - hospitals have special policies regarding these devices. In general, blood should not be drawn from an arm with a fistula or cannula without consulting the attending physician.  Edematous extremities - tissue fluid accumulation alters test results.
  • 19. Techniques to Prevent Hemolysis (which can interfere with many tests):  Mix all tubes with anticoagulant additives gently (vigorous shaking can cause hemolysis) 5-10 times.  Avoid drawing blood from a hematoma; select another draw site.  If using a needle and syringe, avoid drawing the plunger back too  Make sure the venipuncture site is dry before proceeding with draw.  Avoid a probing, traumatic venipuncture.  Avoid prolonged tourniquet application (no more than 2 minutes; less 1 minute is optimal).  Avoid massaging, squeezing, or probing a site.  Avoid excessive fist clenching.  If blood flow into tube slows, adjust needle position to remain in the of the lumen.
  • 20. SAMPLE REJECTION:  Sample container is not labelled correctly.  Sample is insufficient.  Wrong sample container is chosen.  The sample tube is not sealed properly or if it is broken.  Blood clot within the sample or a haemolysed sample  Temperature should be maintained at 2 to 8°C.  Sample should be processed within 2 hours.
  • 21. Blood Sample Handling and Processing Pre-centrifugation Handling:  Vacutainer tubes should be stored at 4-25°C (39-77°F).  Tubes should not be used beyond the designated expiration date.  Mix all gel barrier and additive tubes by gentle inversion 5 to10 times immediately after the draw. This assists in the clotting process. This also assures homogenous mixing of the additives with the blood in all types of additive tubes.  Serum separator tubes should clot for a full 30 minutes in a vertical position prior to centrifugation. Short clotting times can result in fibrin formation, which may interfere with complete gel barrier formation.
  • 22. Blood Sample Centrifugation – It is recommended that serum be physically separated from contact with cells as soon as possible, with a maximum time limit 2 hours from the time of collection.  Complete gel barrier formation (gel barrier tubes) is time, temperature and G- force dependent. The uniformity of the barrier is time dependent; an barrier could result from shortened centrifugation times.  In general, for a horizontal, swing-bucket centrifuge, the recommended spin time is 10 minutes. For a fixed-angle centrifuge, the recommended spin time is 15 minutes.  NOTE: Gel flow may be impeded if chilled before or after centrifugation.  Tubes should remain closed at all times during the centrifugation process.  Place the closed tubes in the centrifuge as a “balanced load” noting the following:  Opposing tube holders must be identical and contain the same cushion or none at  Opposing tube holders must be empty or loaded with equally weighted samples (tubes of the same size and equal in fill).  If an odd number of samples is to be spun, fill a tube with water to match the weight of the unpaired sample and place it across from this sample.
  • 23. WASTE DISPOSAL  BLACK: Paper, food materials, stationery items.  YELLOW: Experimental animal organs, body organs, removedtissue from body, cotton, bandage, swab, pathological tissues,surgical masks,microbiological & surgical wastes.  GREEN: Syringe cover,reagent plastic bottle, saline bottle,needle cap, plastic disposal, plastic tumbler, Dettol,plastic and water bottle.  RED : IV sets, tubes, syringes(without needle), sample containers(blood and urine),gloves , test tissues(plastic) and catheter.  WHITE: Needle, butterfly needle, blade, guide wires, test tube( glass), glassware waste.
  • 24. RBC ZINC TEST  Zinc found in serum is totally bound to protein with over 60% being bound to albumin.  Increased levels are found in patients associated with gastrointestinal disorders accompanied with nausea, vomiting, high fever and a metallic taste.  Decreased levels are found in cirrhosis, lung carcinoma, sickle cell anemia, acute myocardial infarction, renal failure, corticosteroid and oral contraceptive therapy.
  • 25. PRINCIPLE: Zinc in an alkaline medium reacts with Nitro-PAPS to form a purple complex. Intensity of the complex formed is directly proportional to the of zinc present in the sample. alkaline Zinc + Nitro-PAPS→Purple coloured complex medium
  • 26. SAMPLE MATERIAL:  Serum (free from hemolysis)  Zinc is reported to be stable in serum for 7 days at 2-8°C. REAGENT PREPARATION: Working Reagent:  Pour the contents of 1 bottle of L2(Enzyme Reagent 2) into 1 of bottle of L1(Enzyme Reagent 1). This working reagent is stable for at least 2 weeks when stored at 2-8°C.  Alternatively for flexibility as much of working reagent may made as and when desired by mixing together 4 parts of L1(Enzyme Reagent 1)and 1 part of L2 (Enzyme Reagent 2). Alternatively 0.8ml of L1 and 0.2ml of L2may also be used instead of 1ml of the working reagent directly during the assay .
  • 27. REAGENT PREPARATION: Working Reagent:  Pour the contents of 1 bottle of L2(Enzyme Reagent 2) into 1 of bottle of L1(Enzyme Reagent 1). This working reagent is stable for at least 2 weeks when stored at 2- 8°C.  Alternatively for flexibility as much of working reagent may be made as and when desired by mixing together parts of L1(Enzyme Reagent 1)and 1 part of L2 (Enzyme Reagent 2). Alternatively 0.8ml of L1 and 0.2ml of L2may also be used instead of 1ml of the working reagent directly during the assay .
  • 28. PROCEDURE:  Pipette into clean dry test tubes labelled as Blank(B), Standard(S) and Test(T): Mix well and incubate at R.T.(25°C) for 5 min. Measure the absorbance of the standard(Abs.S) and Test Sample (Abs.T) against the Blank, 20 min at570 nm. ADDITION SEQUENCE B (ml) S (ml) T (ml) Working Reagent 1.0 1.0 1.0 Distilled water 0.05 - - Zinc Standard(S) - 0.05 - Sample - - 0.05
  • 29. CALCULATION:  Zinc in µg/dl = Abs.T/Abs.S × 200 NORMAL REFERENCE VALUES:  Serum : 60-120 µg/dl  Urine :100-1000µg/24hrs. NOTE:  Chelating agents such as EDTA, oxalate and citrate, present even in traces, prevent the formation of the complex; hence necessary care should be taken during the assay.
  • 30. BLOOD SMEAR  A blood smear is a diagnostic test used to look for abnormalities within the blood. The cell types are examined under a microscope for unusual shapes or sizes. There are three main cells within the blood that the test focuses on:  red cells (which carry oxygen throughout the body)  white cells (which function as part of the body’s immune system)  platelets (which are important for blood clotting) PROCEDURE: 1. Ensure that the slide is clean since dirt and grease will affect the quality of the smear. Slides should not be left uncovered on the top of the bench. 2. Using a small pipette or microhaemocrit tube, place a drop of fresh whole blood 4mm in diameter near the frosted end of the horizontal slide. 3. Rest the spreader slide at a 25° angle on the horizontal slide. Bring the slide carefully up to the drop of blood. 4. The drop should flow along the edge of the spreader slide. 5. Keep the spreader slide at a 25° angle with light but firm pressure against the horizontal slide. Increasing the angle results in a thicker smear, whereas a lesser angle gives a thinner smear.
  • 31. 6. Draw the spreader slide rapidly and smoothly over the length of the horizontal slide, leaving a thin, even film of blood. 7. Leave the slide to air dry on a flat surface. 8. Label the slide using a pencil with the animal and owner’s name, and the date of sampling. 9. Place the slide in a slide mailer (available on request). This protects the slide from scratches and moisture. 10. Store slides at room temperature prior to despatch – do not refrigerate. NOTE: EDTA blood must not be used. Use fresh blood.
  • 32. LEISHMAN STAINING PRINCIPLE: Leishman's stain is applied in conventional staining techniques to stain chromosomes. These techniques leave centromers constricted, thus enabling the measurement of chromosome length, centromeric position, and arm ratio. Slides can be easily destained and banded by most banding procedures. PROCEDURE: 1. Use smears that are as thin as possible and air-dried. Fully cover the smears with Leishman’s Stain solution. Stain for 2 minutes. 2. Add twice the amount of distilled water and mix by swirling. Incubate for at least 10 min. 3. Rinse thoroughly with distilled water. 4. Dry the slides using blotting paper and air-dry.
  • 33. INTERPRETATION:  Erythrocytes: light pink to brown  Cores of lymphocytes: deep, dark blue to blue-violet  Cytoplasm of lymphocytes: light blue  Nuclei of neutrophil, polymorphonuclear leukocytes: a deep blue to blue-violet  Granules of neutrophilic polymorphonuclear leukocytes: red  Cores of eosinophil leukocytes: blue violet  Granules of eosinophilic leukocytes: deep red  Cores of basophilic leukocytes: blue violet
  • 34. HIV 1&2 WESTERN BLOT  HIV 1&2 WESTERN BLOT is an invitro qualitative immunoassay for the detection antibodies to HIV -1 and HIV-2 in human serum or plasma.  The most common immunoassay used for the detection of antibodies to HIV 1 and HIV2 are the enzyme linked immuno sorbent assay(ELISA), rapid test and the immunoblot or western blot assay which are easy to perform.  The western blot test can be used as more specific and supplemental assay on human serum or plasma specimen found repeatedly reactive using ELISA.
  • 35.  The HIV 1 viral antigens are separated by gel electrophoresis and electrically transferred to nitrocellulose membrane strip which is impregnated with a specific HIV 2 antigen band.  Each strip also has an internal serum inbuilt quality control band. In individuals infected with HIV, antigen appears first before anti-HIV but due to seroconversion, the antigen is lost and antibody develops within 1 – 2 months after infection and thereby the level of antibody increases.  However p24 antibodies level decreases with time in advance stage of infection.
  • 36. PRINCIPLE:  The HIV1 & 2 western blot is manufactured from HIV-1 cell line. HIV-1 viral antigen is purified and then separated by SDS gel electrophoresis. SDS denatures viral components and yields which migrate in the gel according to their molecular weight to produce various bands.  Lower molecular weight components migrate faster and are found at the bottom of the gel, while high molecular weight proteins remain near the top.  They are then transferred from SDS-PAGE gel on to nitrocellulose membrane which is also impregnated with HIV-2 antigen (gp36) a control band.  The membrane is cut and packaged as strips. To perform the assay, the strip is incubated with the patient serum/plasma diluted in a buffer. Antibodies to HIV-1 & 2 if present, bind to viral antigens located on the strip. Unbound material is washed off and then the strip is incubated with anti-human IgG conjugated to alkaline phosphatase.
  • 37.  After washing the unbound conjugate, substrate (BCIP/NBT) is added which results in the staining of bands. If antibodies to HIV-1 antigens are present in the sera, any two ENVELOPE and more of the following bands will be seen: p17, p24, p31, gp41, p51/p55,p66,gp120 & gp160.  If antibodies to HIV-2 antigen are present, HIV-2 band is also observed along with some of the other bands. If HIV specific antibodies are not present, the band pattern does not meet the required criteria.
  • 38. MATERIALS REQUIRED:  HIV Test strips: Strips blotted with HIV-1 viral lysate and specific HIV-2 antigen and anti-human IgG as control  Wash buffer concentrate 20x  Diluent buffer concentrate 10x  Blotting powder  Enzyme conjugate concentrate 100x:Rabbit anti-human IgG conjugated with alkaline phosphatase  Substrate:BCIP+NBT(5-Bromo,4-chloro ,3 indolyl phosphate+nitro blue tetrazolium)  Negative control:inactivated normal human serum containing sodium azide as preservative.Non-reactive for HIV1&2,HCV and HbsAg  Positive control: inactivated human serum with antibodies to HIV 1. Non-reactive for HbsAg and HCV.  Incubation Tray: One tray with lid cover for one strip  Forcep  Measuring Spoon for bloting powder  Band Monitor Scale  Rotary Shaker (60-70 r.p.m.)  Pipette and tips  Timer  Vortex mixer/Magnetic stirrer  Aspirator with Sodium Hypochlorite/suitable disinfectant
  • 39. Specimen Collection, Preparation & Storage: Collect blood in a clean dry sterlized vial and allow it clot. Separate the serum by centrifugation at room temperature. It is recommended that FRESH samples should be used. If serum is not to be assayed immediately, it should be stored at 2-8° C or frozen at -20°C. Serum may be stored 2-8° C for upto3 days and stored frozen at -20°C for 3 months. Bring specimen (serum/plasma) to room temperature (25-30°C) and mix each specimen thoroughly prior to use. Do not heat or repeatedly freeze/ thaw specimen.
  • 40.  REAGENT PREPARATION:  Bring all reagents to room temperature (25-30°C) before use. Prepare the following reagents just before starting assay procedure and use within 24 hrs.  Preparation of Working Wash Buffer: For each strip 20ml working wash buffer is required. Dilute 1ml, wash buffer concentrate (20X) to 20ml with distilled water and mix well.  Preparation of Sample and Conjugate Diluent Buffer:  For the preparation of the working diluent buffer, take 0.5ml of diluent buffer concentrate (10X) and 4.5ml of distilled water to this concentrate. Then add 2 spoons of blotting powder using the measuring spoon only given in the kit. Mix the working diluent buffer properly before use.  Preparation of working conjugate: It should be prepared fresh just before use. Dilute enzyme conjugate 1:100 with working diluent buffer. Add 20µl of conjugate (100x) to 2ml of working diluent buffer.  Substrate Solution: Substrate solution is ready to use. Pipette 2ml of substrate solution directly from bottle using a clean pipette and cap tightly after use.
  • 41. PROCEDURE-RAPID ASSAY:  NOTE : Bring the test kit and sample to Room Temperature (25-30ºC) before use and all incubations are to be carried out on a Rotary shaker (60-70 r.p.m.) at Room Temperature.  Remove required number of strips and trays from the kit. Place one strip in each tray with numbered side up. Note down the strip number with respect to samples & control on the worksheet for correct identification. Always include strips for positive and negative controls with each run.  Prepare working wash buffer according to the number of tests to be run.  Add 2ml of working wash buffer to each tray and incubate the strips for at least 5 minutes at room temperature. Remove buffer by aspiration.  Prepare working diluent buffer according to the no. of tests to be run.  Add 2ml of working diluent buffer to each tray, add 20µl of patient sera and controls to appropriate wells.  Cover trays and incubate for 1 hr. at room temperature (25-30ºC) on a Rotary Shaker. Take care to mark the cover also, to prevent interchange of covers which may lead to cross contamination.
  • 42.  Carefully remove covers, aspirate solution completely from tray and discard into sodium/calcium hypochlorite solution.  Wash each strip with 2ml working wash buffer 3 times for 5 minutes each with shaking.  Prepare working conjugate solution according to the number of tests to be run.  Add 2 ml. of working conjugate solution to each tray. Cover tray with corresponding cover and incubate on Rotary Shaker for 1 hour. Never interchange the cover of trays to avoid contamination.  Aspirate conjugate, wash each strip with 2 ml working wash buffer 4 times for 5 minutes each with shaking. Aspirate wash solution completely from the tray at the end of the last washing.  Add 2 ml substrate solution to each tray, cover tray and incubate for 0.5-15 minutes away from the light preferably in dark till bands develop. Make a careful decision to decide the time of incubation from 0.5 min. to 15 min.  Continue to observe the reaction till gp160/gp120/gp41 appear and stop the reaction after their appearances so as to avoid excessive background making the observation difficult.  However, in case the above bands do not appear, then continue the reaction upto the point (a) before strong background is formed on the strip (b) upto 15 minutes, whichever is earlier.  Aspirate substrate, add distilled water and wash strips to stop the reaction. Remove the strips on paper towels and mount on worksheet keeping numbered side up. Observe band pattern and grade the results. For storage keep strips in dark.
  • 43. Molwt (k.Da) Gene Antigen Description gp 120 ENV Polymeric form ofgp 41 Broad diffused band gp160 ENV Outer membrane p66 POL Reverse Transcriptase Discreet band p55 GAG Precursor protein Fused Spread band/Single band p51 POL Reverse transcriptase p41 ENV Transmembrane Appears as 2-3 different bands/diffused band p31 POL Endonuclease Single band p24 GAG Core protein Broad band p17 GAG Core protein Broad band INTERPRETATION:
  • 44.
  • 45. INTERPRETATION PATTERN:  POSITIVE:  HIV-1 POSITIVE a). 2 ENV (either of 2 ENV; gp160, gp41, gp120) + 1GAG (p17, p24, p55) or1POL (p31, p51, p66)  HIV-1 POSITIVE with HIV 2 indicated: b). 2 ENV (either of 2 ENV; gp160, gp41, gp120 + 1GAG (p17, p24, p55)) or 1 POL (p31, p51, p66) + HIV-2 Band  HIV-1 NEGATIVE with HIV-2 Indicated: Only Control band + HIV-2 BAND  INDETERMINATE:  a). 1 ENV (either of 1 ENV; gp160, gp41, gp120)+ 1GAG (p17, p24)+ 1POL, (p31)  Viral Specific bands present but pattern does not meet the criteria for POSITIVE  b). GAG (p17, p24) + POL (p31)  c). Only GAG (p17, p24  d). Only POL (p31)  Indeterminate with HIV-2 indicated: Viral Specific bands present but pattern does  not meet the criteria for POSITIVE + HIV-2 BAND  NEGATIVE:  Only control band or control band with p51/55/p17 band  INVALID:  No Control band
  • 46. LEAD CARE II BLOOD LEAD ANALYZER: The Lead Care II Blood Lead Analyzer is a CLIA-waived device. The lead care treatment reagent contains dilute hydrochloric acid solution which may cause eye, skin and respiratory system irritation.
  • 47. TEST KIT COMPONENTS:  Kit box  Sensors  Controls  Treatment reagent tubes  Use only fresh, whole blood. Mix the blood with treatment reagent within 24hrs of collection. TEST KIT CONTENTS:  Droppers  Treatment reagents tube  Capillary tubes and plungers  Calibration button  Controls solutions  Blood lead sensors  Labels  Package insert
  • 48.  CONTROL PREPARATION:  Label a fresh treatment reagent tube “level I control”  Mix thoroughly  Holding the capillary tube almost horizontally with the green band on the top, fill the tube 50µl black line.  Wipe the outside of the capillary tube to remove any excess control  Place the capillary tube into the treatment reagent tube. Insert a plunger into the top of capillary tube and push down, ensuring the entire volume of controls is dispensed into the treatment reagent.  Invert the tube 8-10 times to mix the sample completely. Control material in treatment reagent tube will appear red.  **Repeat this process for “level II control” CAUTION: Do not proceed to patient sample unless both level I & II control results are with the acceptable range.
  • 49. SAMPLE PREPARATION:  Label the tube with the patient ID using labels provided  Holding the capillary tube almost horizontally with the green band the top, fill the tube to 50µl black line (or) if using blood from a make sure the blood is well mixed by inverting the tube 8-10 times before sampling  Remove excess blood from outside of the tube with a clean wipe or gauze.  Inspect the capillary tube for proper filling. Make sure there are no gaps, air bubbles or any excess blood on the outside of capillary.  Place the capillary tube into the treatment reagent tube. Insert a plunger into the top of the capillary tube and push down, ensuring the entire volume of controls is dispensed into the treatment  Invert the tube 8-10 times to mix the sample completely.  The sample is ready when the mixture turns brown.
  • 50. SAMPLE ANALYSIS:  Insert the sensor (with black bars facing up) completely into the analyser until you hear a beep  Make sure the sensor lot number matches the display  Make sure the sample is thoroughly mixed.  Squeeze the walls of the dropper and insert into the sample.Release the pressure to drop some sample into the dropper  Touch the dropper tip to the X on the sensor and squeeze the walls to dispense the sample.the analyser will beep and begin the three minute countdown.  Wait for 3 minutes until the test is done. The analyser will beep and display the lead result in µg/dl Pb.  Record the test results.  Remove the used sensor immediately after recording the test result  Discard materials in appropriate containers.  The analyser displays “low” when it detects a blood lead level below 3.3µg/dl. Low results should be recorded as <3.3µg/dl INTERPRETATION:  LOW- < 3.3µg/dl  HIGH- > 65.0µg/dl
  • 51. RENAL STONE ANALYSIS PRINCIPLE:  To identify the chemical composition present in renal stone when it is filtered out of the urine or removed from the urinary tract. MATERIALS REQUIRED:  Sample(renal stone)  Test tube  1N HCL  Ammonia solution PROCEDURE AND INTERPRETATION:  2ml of 1N HCL is added to a pinch of renal stone and mixed well.  Brisk effervescence while adding stone- presence of carbonate.  If no effervescence is seen, then the tube is kept in boiling water bath for 10min and cooled.  Then ammonia solution is added on the sides of the tube.  Cloudy appearance confirms the presence of oxalate  If there is no change in both the tests the stone is confirmed as phosphate
  • 52. FOOD INTOLERANCE TEST: Technology The Genarrayt® microarray is produced by printing hundreds of protein spots onto a specially-prepared glass slide, each spot measuring only 130 μm across. The assay methodology is straight forward and similar to typical immunoassays. The Genarrayt® system includes a recommended wash station, micro- centrifuge and scanner to ensure optimum assay performance. On completion of the assay, the microarray slide is scanned using a high resolution optical scanner. The data are processed by the Genarrayt® Report Writer software, which presents final results in a simple, straightforward manner. This powerful approach has been applied in the Genarrayt® 200+ Food IgG test to the study and diagnosis of intolerance to over 200 specific foods.
  • 53.
  • 54.  Assay Methodology  The Genarrayt® food IgG assay is straightforward and all incubations are room temperature. It takes only 2h to complete 1-4 slides containing 16-64 patient samples.  The method is summarised below:  1. Load slide into a FAST FrameTM and add blocking buffer.Incubate for 15 minutes.  2. Flick-dry, add diluted patient sample and incubate for 30 minutes.  3. Wash slide, add conjugate and incubate for 30 minutes.  4. Wash slide, add TMB substrate and incubate for 10 minutes  5. Remove slide from FASTFrameTM, wash in the Genarrayt® wash station and dry in the Genarrayt® centrifuge for 30 seconds.  6. The microarrays are then ready to scan.
  • 55. • Genarrayt® slides are scanned in a high resolution optical scanner. • Using appropriate software each microarray is analysed and reviewed in detail. • Data for each slide is saved in a single exportable file which is accessible to a range of data- handling software packages.
  • 56. INTERPRETATION: NORMAL : < 24U/ml BORDERLINE : 24-30U/ml ELEVATED : >30U/ml