Downloaded 1,369 times


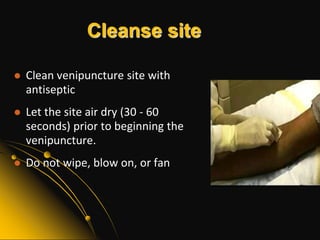


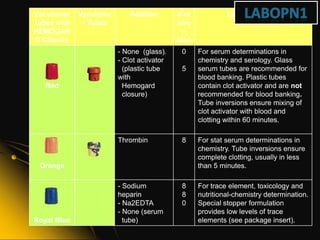


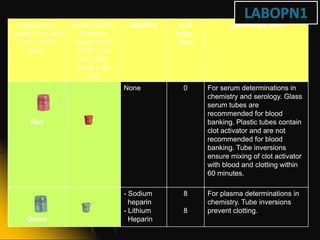

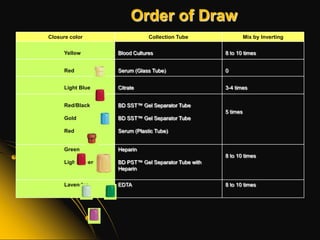

This document provides information and guidelines on blood specimen collection through venipuncture. It discusses identifying patients, preparing the collection site and equipment, performing the venipuncture using proper technique, and handling and processing the specimens. Specific topics covered include selecting appropriate vein sites, using tourniquets and antiseptics, avoiding complications, and processing and storing specimens according to their test requirements. The goal is to provide high quality specimens by following standard procedures.


![Phlebotomy -2[1]](https://cdn.slidesharecdn.com/ss_thumbnails/phlebotomy-21-181028045815-thumbnail.jpg?width=640&height=640&fit=bounds)


