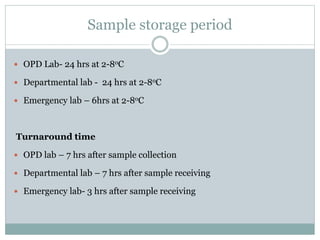
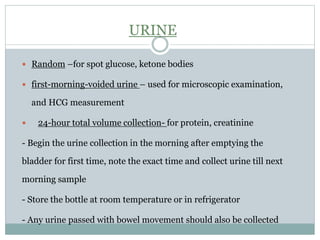
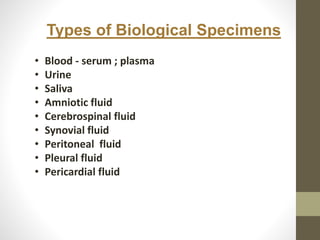
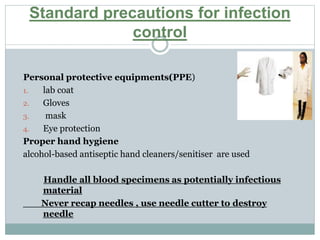
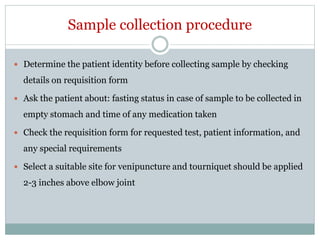
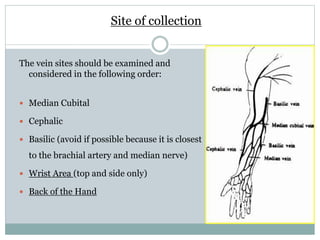
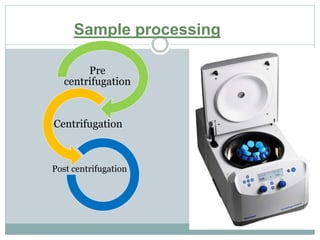
3. Standard precautions for infection
control
Personal protective equipments(PPE)
1. lab coat
2. Gloves
3. mask
4. Eye protection
Proper hand hygiene
alcohol-based antiseptic hand cleaners/senitiser are used
Handle all blood specimens as potentially infectious
material
Never recap needles , use needle cutter to destroy
needle
4. Artery
Capillary
BLOOD
Phlebotomy is the process of making an incision in
a vein with a needle to collect blood
Person authorized to perform the procedure are-
Laboratory technicians/trained nurses and intern
MBBS students
5. Sample collection procedure
Determine the patient identity before collecting sample by checking
details on requisition form
Ask the patient about: fasting status in case of sample to be collected in
empty stomach and time of any medication taken
Check the requisition form for requested test, patient information, and
any special requirements
Select a suitable site for venipuncture and tourniquet should be applied
2-3 inches above elbow joint
6. Site of collection
The vein sites should be examined and
considered in the following order:
Median Cubital
Cephalic
Basilic (avoid if possible because it is closest
to the brachial artery and median nerve)
Wrist Area (top and side only)
Back of the Hand
7. If a vein is not readily apparent, a number of techniques may be used to make
palpation easier:
Massage arm or apply warm cloth to dilate vein
Bend arm very slightly, relaxing the muscles of the antecubital
Lower arm below the heart to allow veins to fill to capacity
Close patient’s hand to dilate vein
Pumping of fist should be avoided
it falsely elevates potassium, phosphate, lactate ,lowers pH
and hence increases ionized calcium conc
8. Precautions when using a tourniquet
Do not apply tourniquet above a central venous catheter or the side of a
mastectomy
The tourniquet should not be left on the site for longer than one minute
during the collection due to the possible occurrence of
hemoconcentration and localised stasis which may result in high value
for protein based analytes and PCV
Clean venipuncture site with 70% alcohol/ isopropyl using circular
motion from centre to periphery
Allow the area to dry before venipuncture
Anchor the vein and smoothly insert the needle with bevel up
Release the tourniquet as soon as blood begins to flow
9. Identify the correct vaccutainer
Collect the proper amount of blood in proper order according to
National Committee For Clinical Laboratory (NCCLS) guidelines-
10.
11. Syringe method-
If using a syringe, be careful not to pull too hard on the plunger as this
may damage red cells
Do not force blood from the syringe into the tubes, which may also
cause damage to red cells
Using the syringe method of collection, the order of tube fill is
different-
Blood culture bottle are filled first
Tubes for coagulation testing ( blue vaccutainer)
Tubes with anticoagulant
Tube without anticoagulant must be filled last
To avoid hemolysis- mix tubes with anticoagulant additives gently
5-10 times
12. Additive carry-over
This can occur when blood in a additive tube touches the needle during
venipuncture or during transfer from a syringe
Most problem are seen with EDTA
Least with HEPARIN, as it occurs in blood naturally
Carry-over least likely to occur if tubes fill from the bottom up which
keeps the tube contents away from the needle
Order of draw reduces the risk of specimen contamination and additive
carry-over
13. If an incomplete collection or no blood is obtained
Change the position of needle
Adjust the angle, the bevel may be against the vein wall
Loosen the tourniquet
Try another tube, it may be due to loss of vaccum in vaccutainer
this may lead to short draw and incorrect ratio of blood and anticoagulant
• Plastic (polyethylene terphthalate) tubes are preferred over glass tubes as
they decrease likelihood of breakage and hence exposure to infectious
material.
14. Precautions
If swelling is noticed during venipuncture, immediately release
tourniquet, remove needle and apply pressure using gauze pad
If first attempt fails, pull needle back slowly, relocate vein, pull skin
taut (anchor vein), and redirect needle
Do not attempt to stick patient more than two times contact another
phlebotomist
If patient feels a shooting, electric-like pain, tingling, or numbness,
remove the needle, notify nurse or physician, and document the
incident
15. Apply direct pressure to puncture site for 30-60 seconds or until
bleeding stops
- For patients with a known bleeding disorder immediately after
removing butterfly needle apply direct pressure to puncture site until
bleeding stops for up to 10 minutes, even if blood was not obtained
16. Order of Draw from Catheter Lines
1. Draw 3–5 ml of blood in a syringe and discard
2. Blood for blood culture
3. Blood for anticoagulated tubes (lavender, green light blue, etc.)
4. Blood for clot tubes (red)
17. Skin puncture
method of choice in paediatric patients
Accessible veins in sick infants must be reserved exclusively for
parenteral therapy
Skin puncture is useful in adults with (1) extreme obesity, (2)
severe burns, and (3) thrombotic tendencies.
Skin puncture is often preferred in geriatric patients because
skin is thinner and less elastic; thus a hematoma is more likely to
occur from a venipuncture
18. Sites for skin puncture
Adults : finger tip
earlobe
Infants: heel
big toe (not in <1 year)
19. Best locations for a finger
stick is the 3rd and 4th
fingers of the non-
dominant hand
Perform the stick to side of
the center of the finger.
NEVER use the tip or
center of the finger
Finger stick procedure
20. • Cleanse fingertip
• Avoid fingers that are cold,
cyanotic, swollen, scarred or
covered with a rash
Massage to warm the finger
NOTE: Do NOT squeeze or apply
strong repetitive pressure to the
site, this may result in hemolysis or
increase tissue fluid in the blood
causing incorrect glucose results
21. Heel stick
hold the heel with the forefinger at the
arch and the thumb proximal to the
puncture site at the ankle.
After blood collection is complete, elevate
the heel place a piece of clean dry cotton e
until bleeding has stopped
22. Record the date and time of sample collection
Check for sample label
Check if sample transported in appropriate boxes with biohazard signs
23. transport of Sample
A requisition form must accompany each sample submitted to
laboratory
Requisition form must contain proper information:
initials of Patient name, CR No./ OPD no. age and sex, diagnosis,
doctor’s signature
Date and time of sample collection should be mentioned Maintain
identification
Transport on ice - BGA
lactate
protect from light – bilurubin
26. Pre centrifugation Phase
Ideally, all measurements should be performed within 45 minutes to 1
hour after collection
Blood should be stoppered in the original container until ready for
separation
To be kept at room temp till plasma /serum is separated
27. Centrifugation Phase
Plasma
Centrifuge the anticoagulated blood for at least 15 minutes at 2000
to 3000 g to obtain cell-free plasma
Serum
When coagulation is complete, centrifuge the sample for at least 10
minutes at a minimum speed of 1500 g
When separating serum or plasma, the temperature should not
drop below 15 °C or exceed 24 °C
28. Precautions during centrifugation
Temperature maintenance
Keep tubes stoppered
to decrease evaporation
prevent aerosolization
prevent CO2 loss and hence
pH changes
29. The Lipaemic Sample
This can be due to food intake, after intestinal absorption,
triglycerides are present in plasma as chylomicrons and their
metabolites (remnants) for 6 to 12 h
30. To avoid lipaemia
patient should fast at least 12 hours before blood samples are
taken
In patients receiving parenteral infusion of lipids a period of 8
hours of interruption of the treatment is necessary
Centrifugation
for s.lipids – at 12000g for 10 mins
The method of choice for removal of turbidity from
serum and plasma is a 10 min centrifugation in a
centrifuge with 10000 g
31. Prevention of bilirubin interference
The high prevalence of hyperbilirubinaemia in patients from
intensive care, gastroenterological surgical or paediatric departments
--Blanking procedures are useful to eliminate spectral bilirubin
interferences
K4 [Fe(CN)6] effectively eliminates bilirubin interference in H2O2-
forming enzymatic methods
32. Sample storage period
OPD Lab- 24 hrs at 2-8oC
Departmental lab - 24 hrs at 2-8oC
Emergency lab – 6hrs at 2-8oC
Turnaround time
OPD lab – 7 hrs after sample collection
Departmental lab – 7 hrs after sample receiving
Emergency lab- 3 hrs after sample receiving
33. URINE
Random –for spot glucose, ketone bodies
first-morning-voided urine – used for microscopic examination,
and HCG measurement
24-hour total volume collection- for protein, creatinine
- Begin the urine collection in the morning after emptying the
bladder for first time, note the exact time and collect urine till next
morning sample
- Store the bottle at room temperature or in refrigerator
- Any urine passed with bowel movement should also be collected