Downloaded 1,967 times

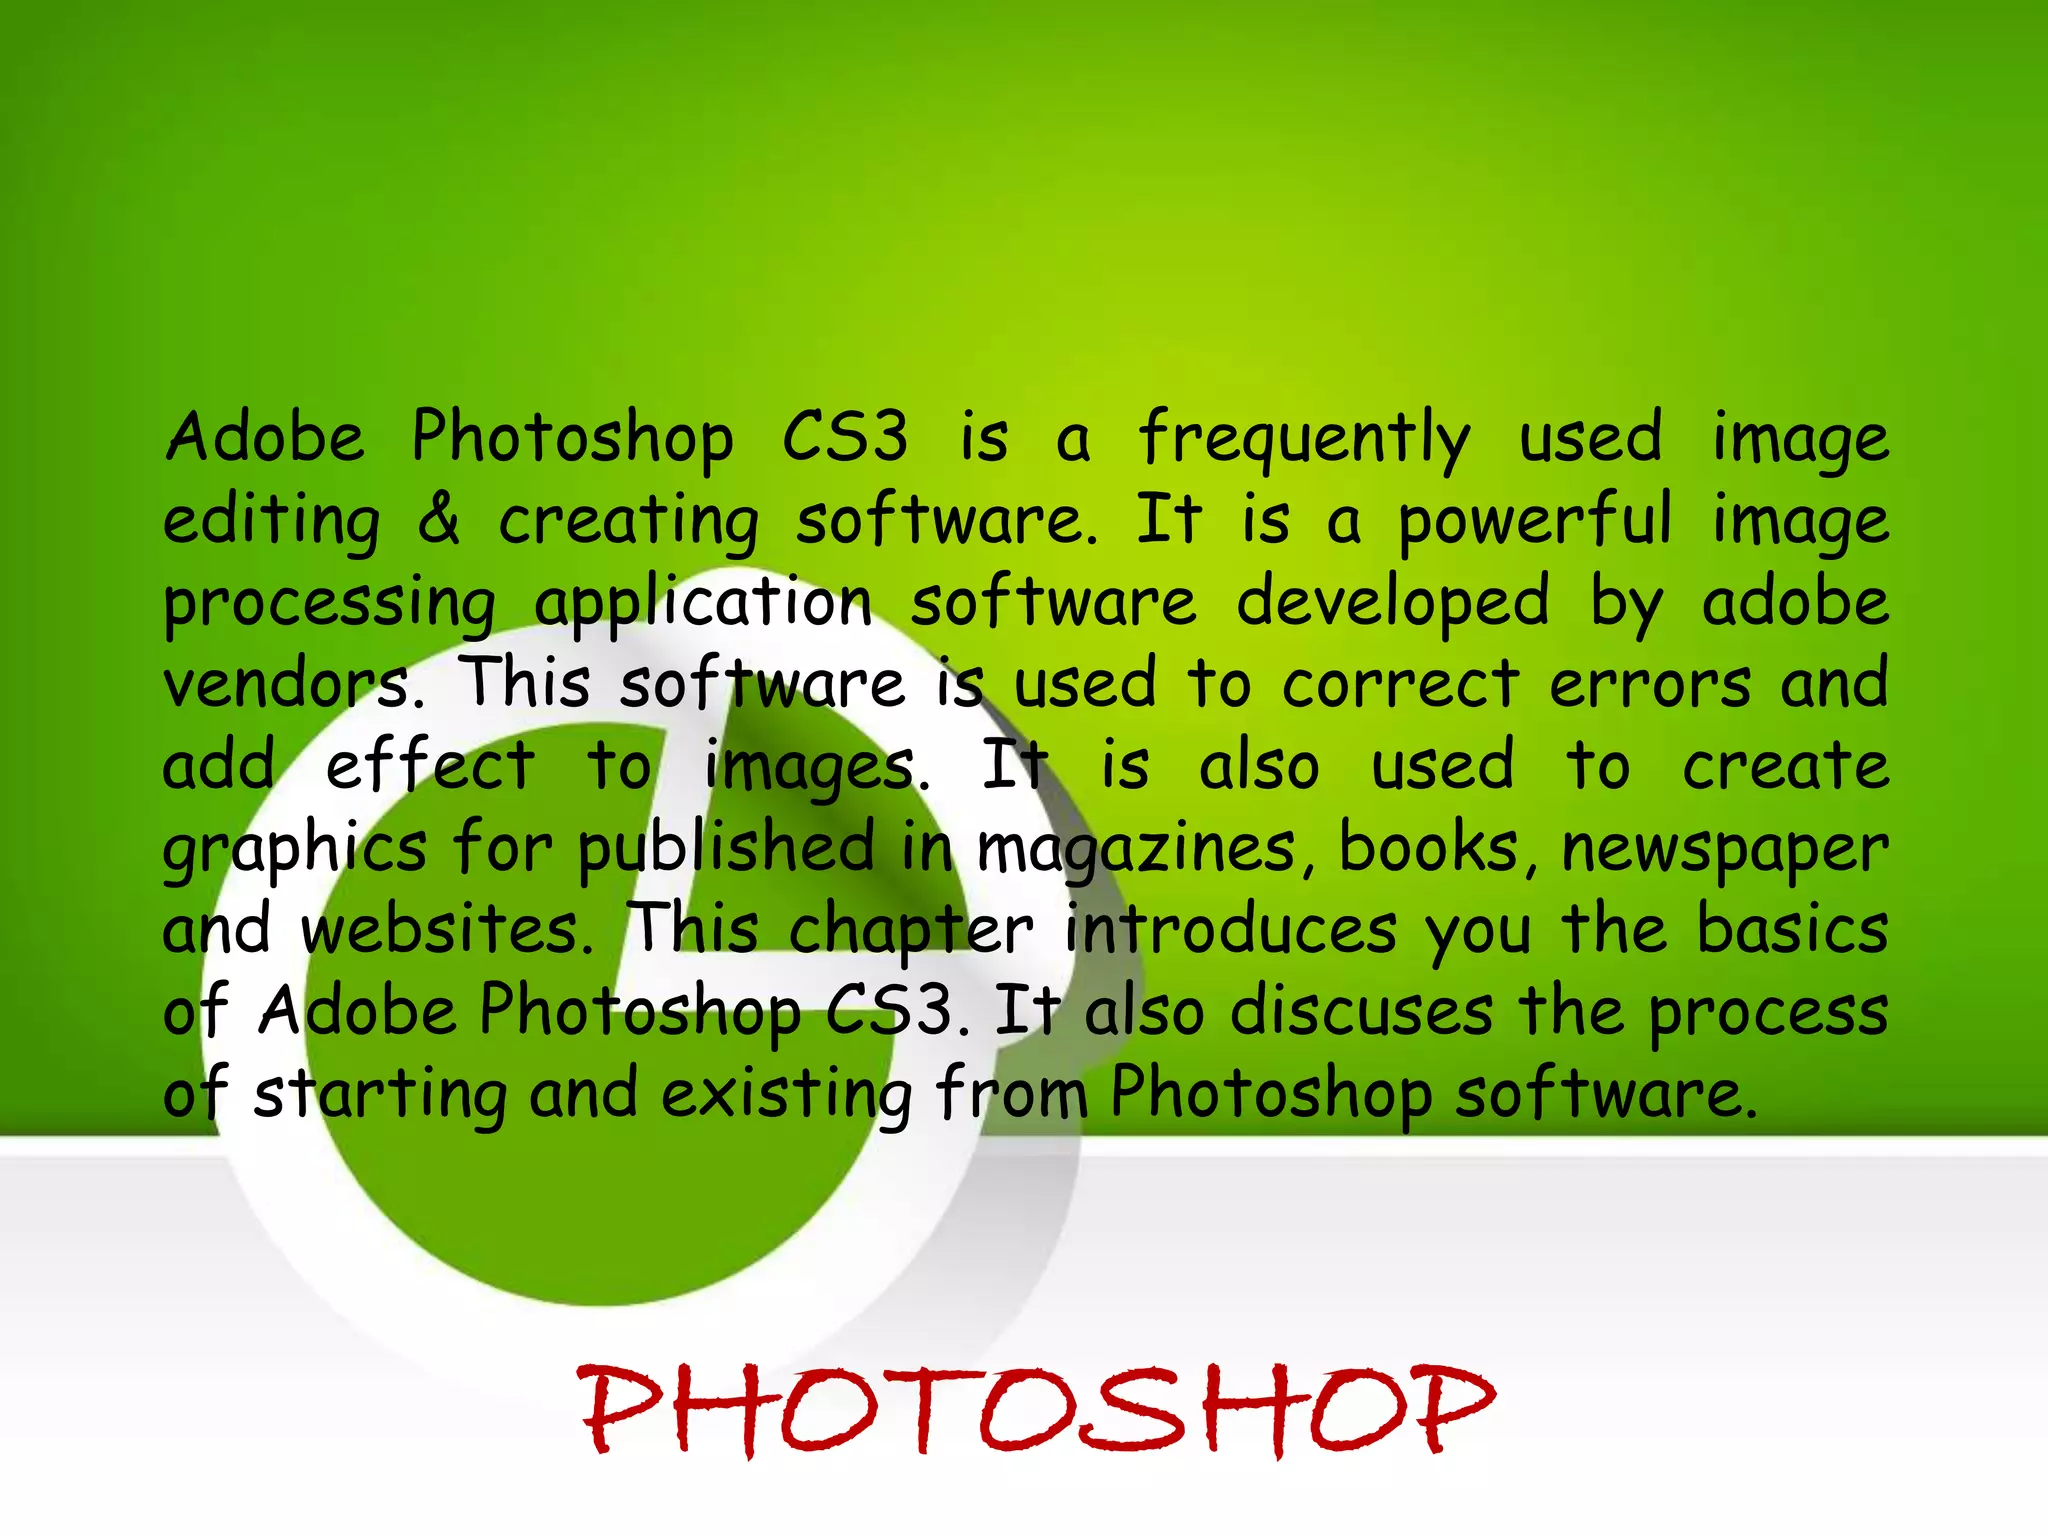
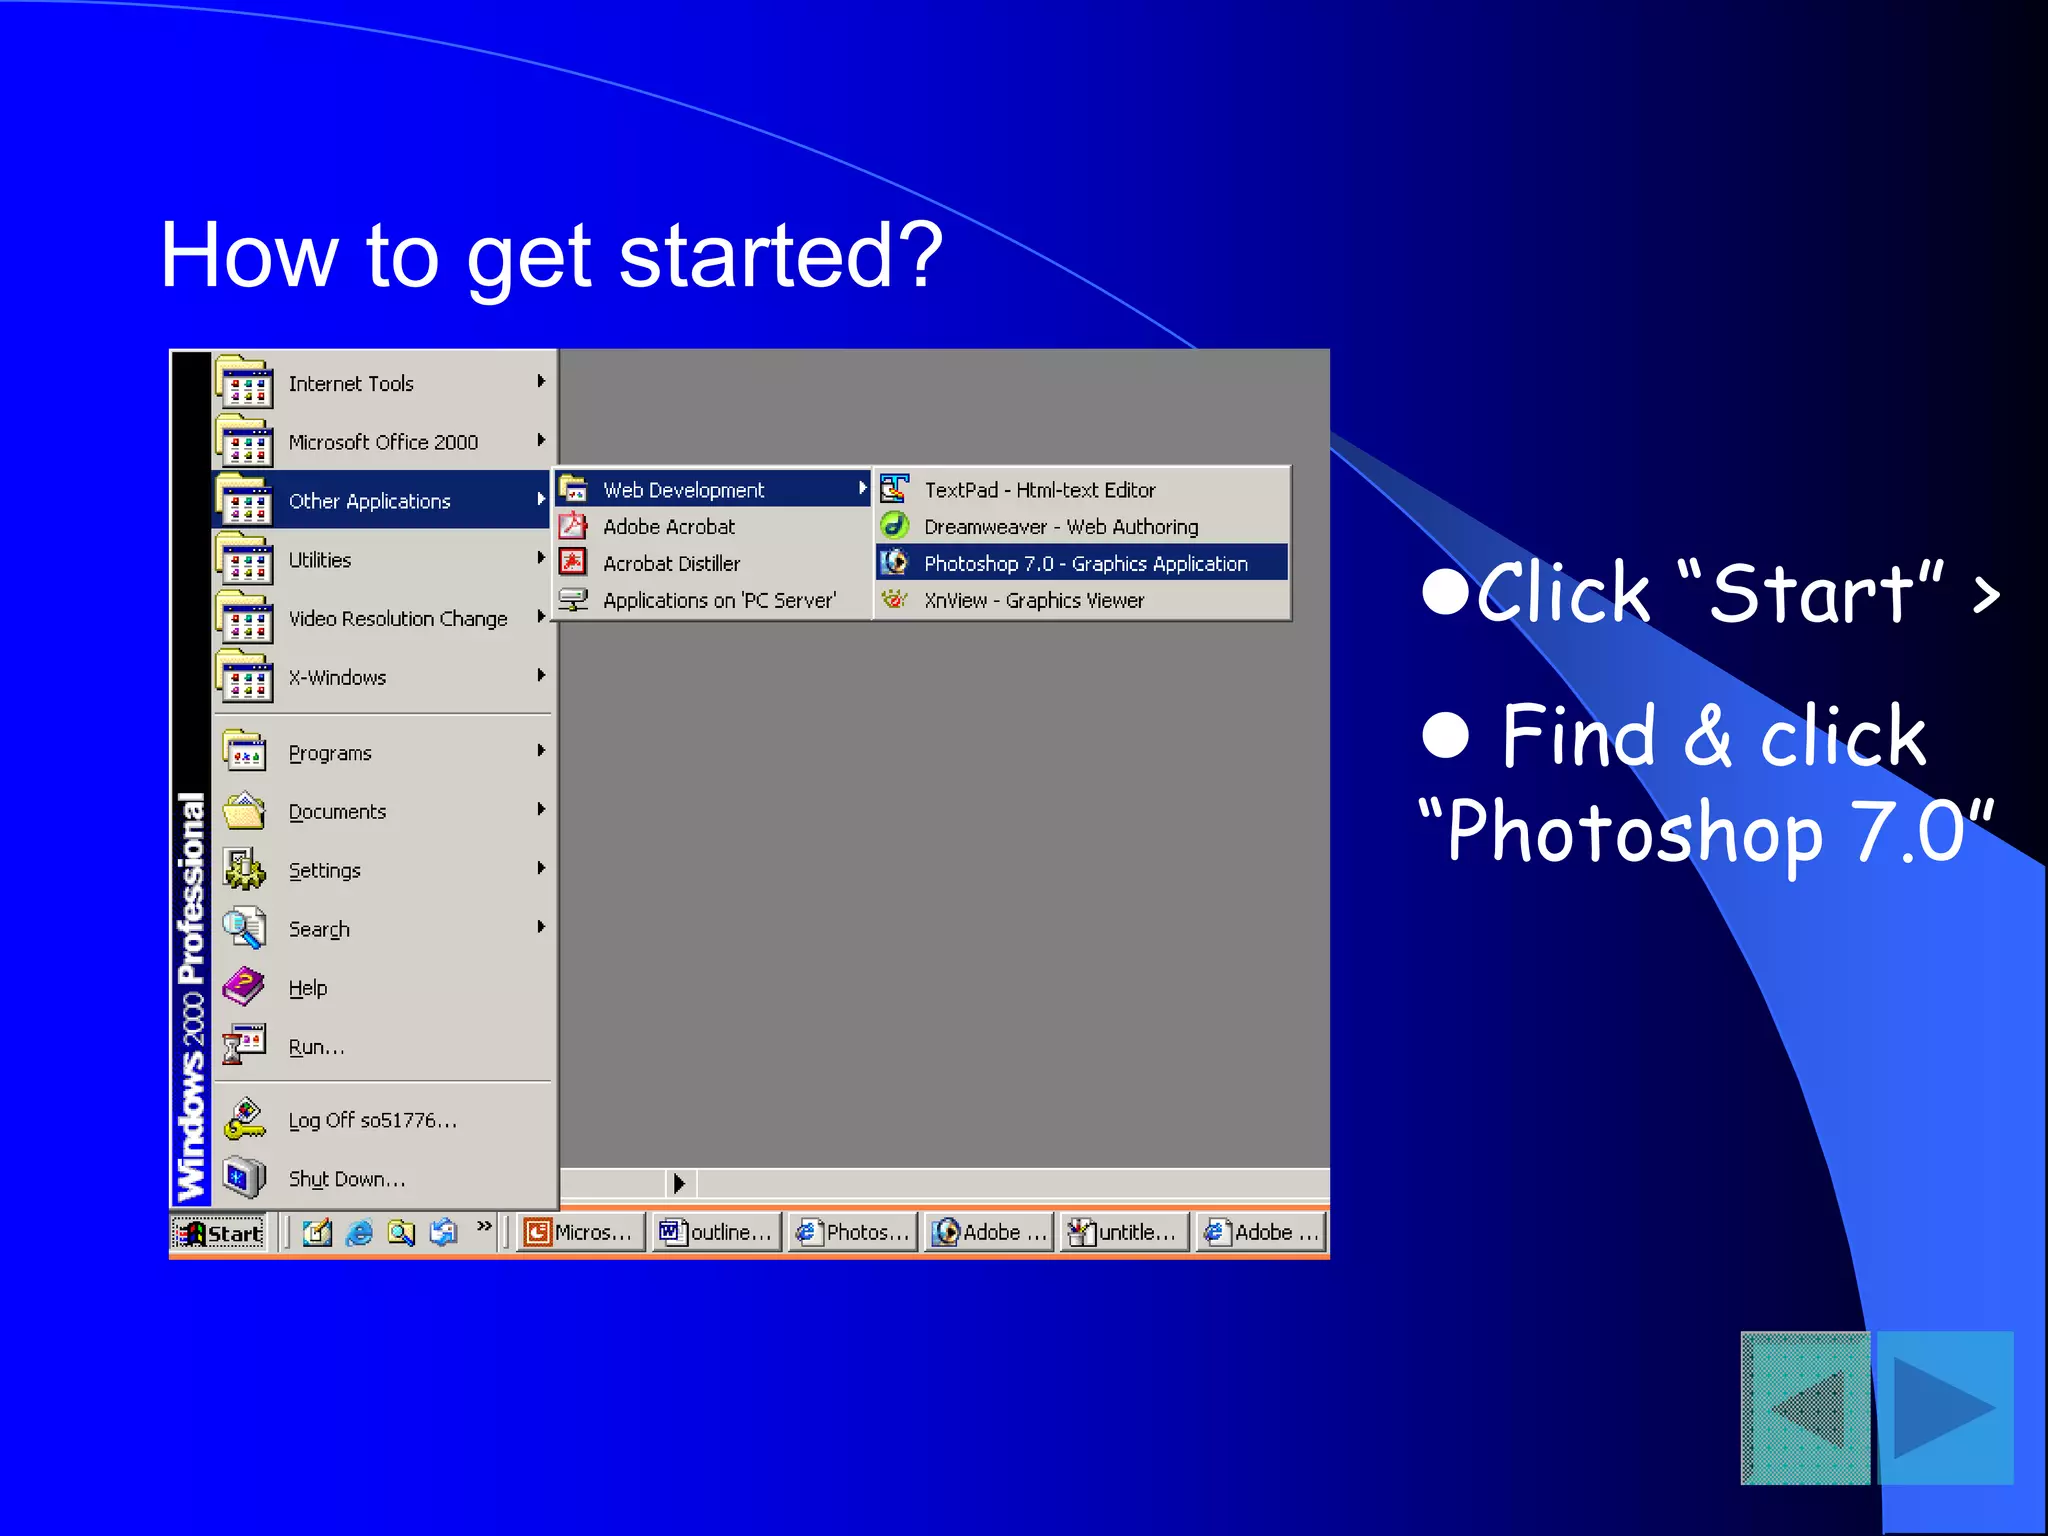
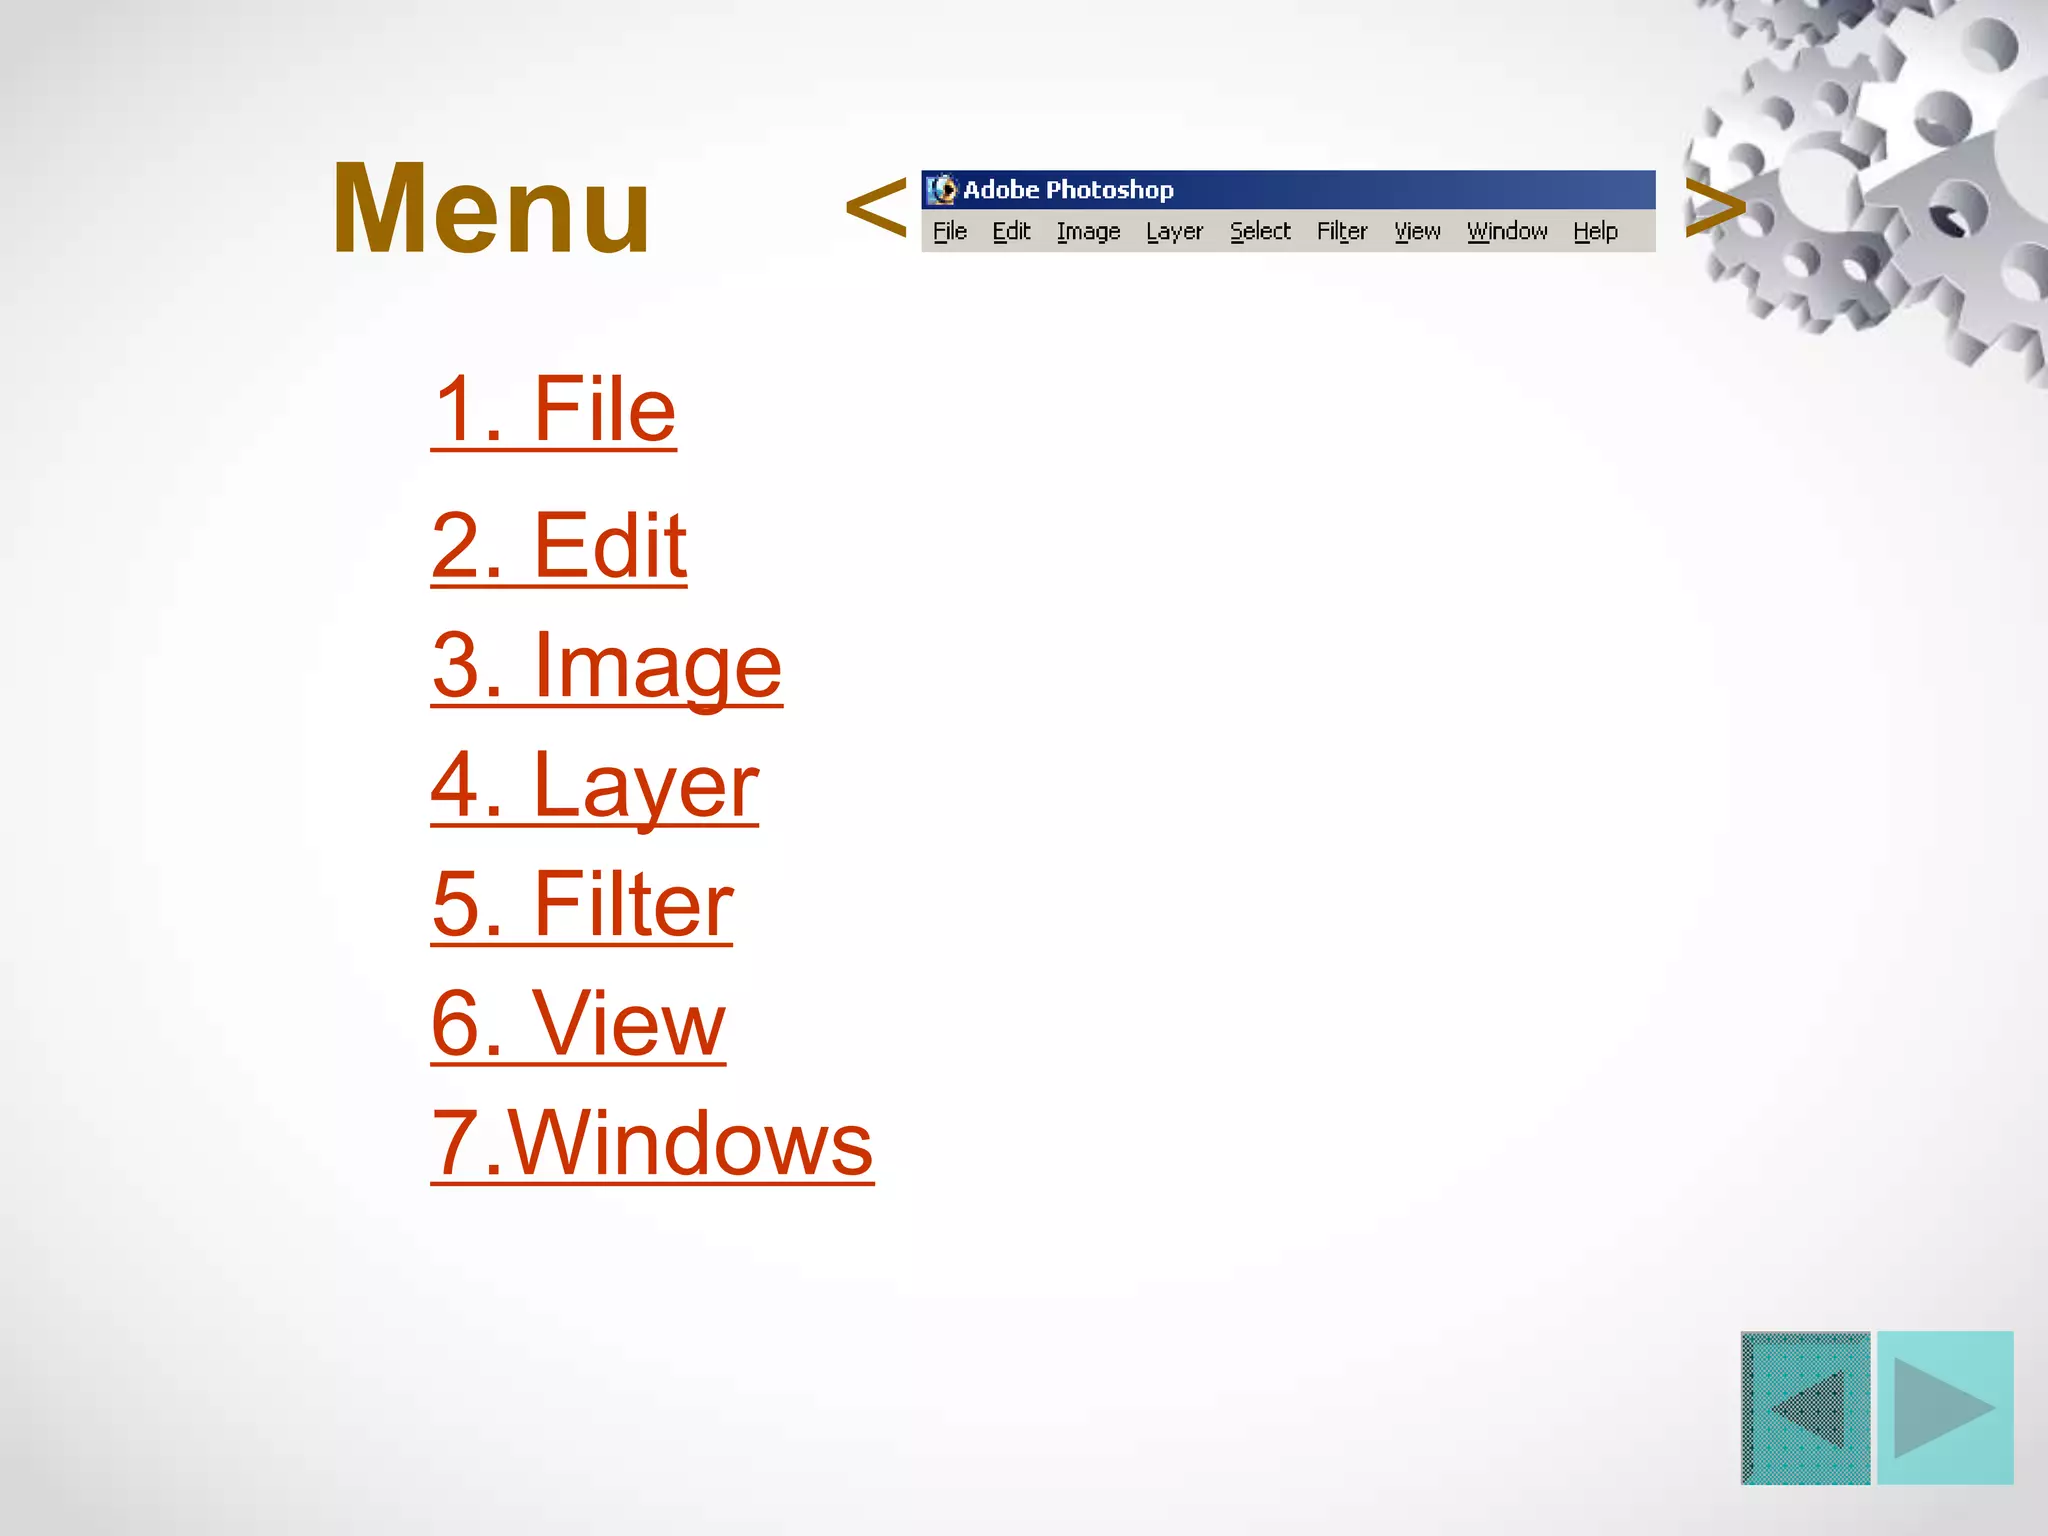
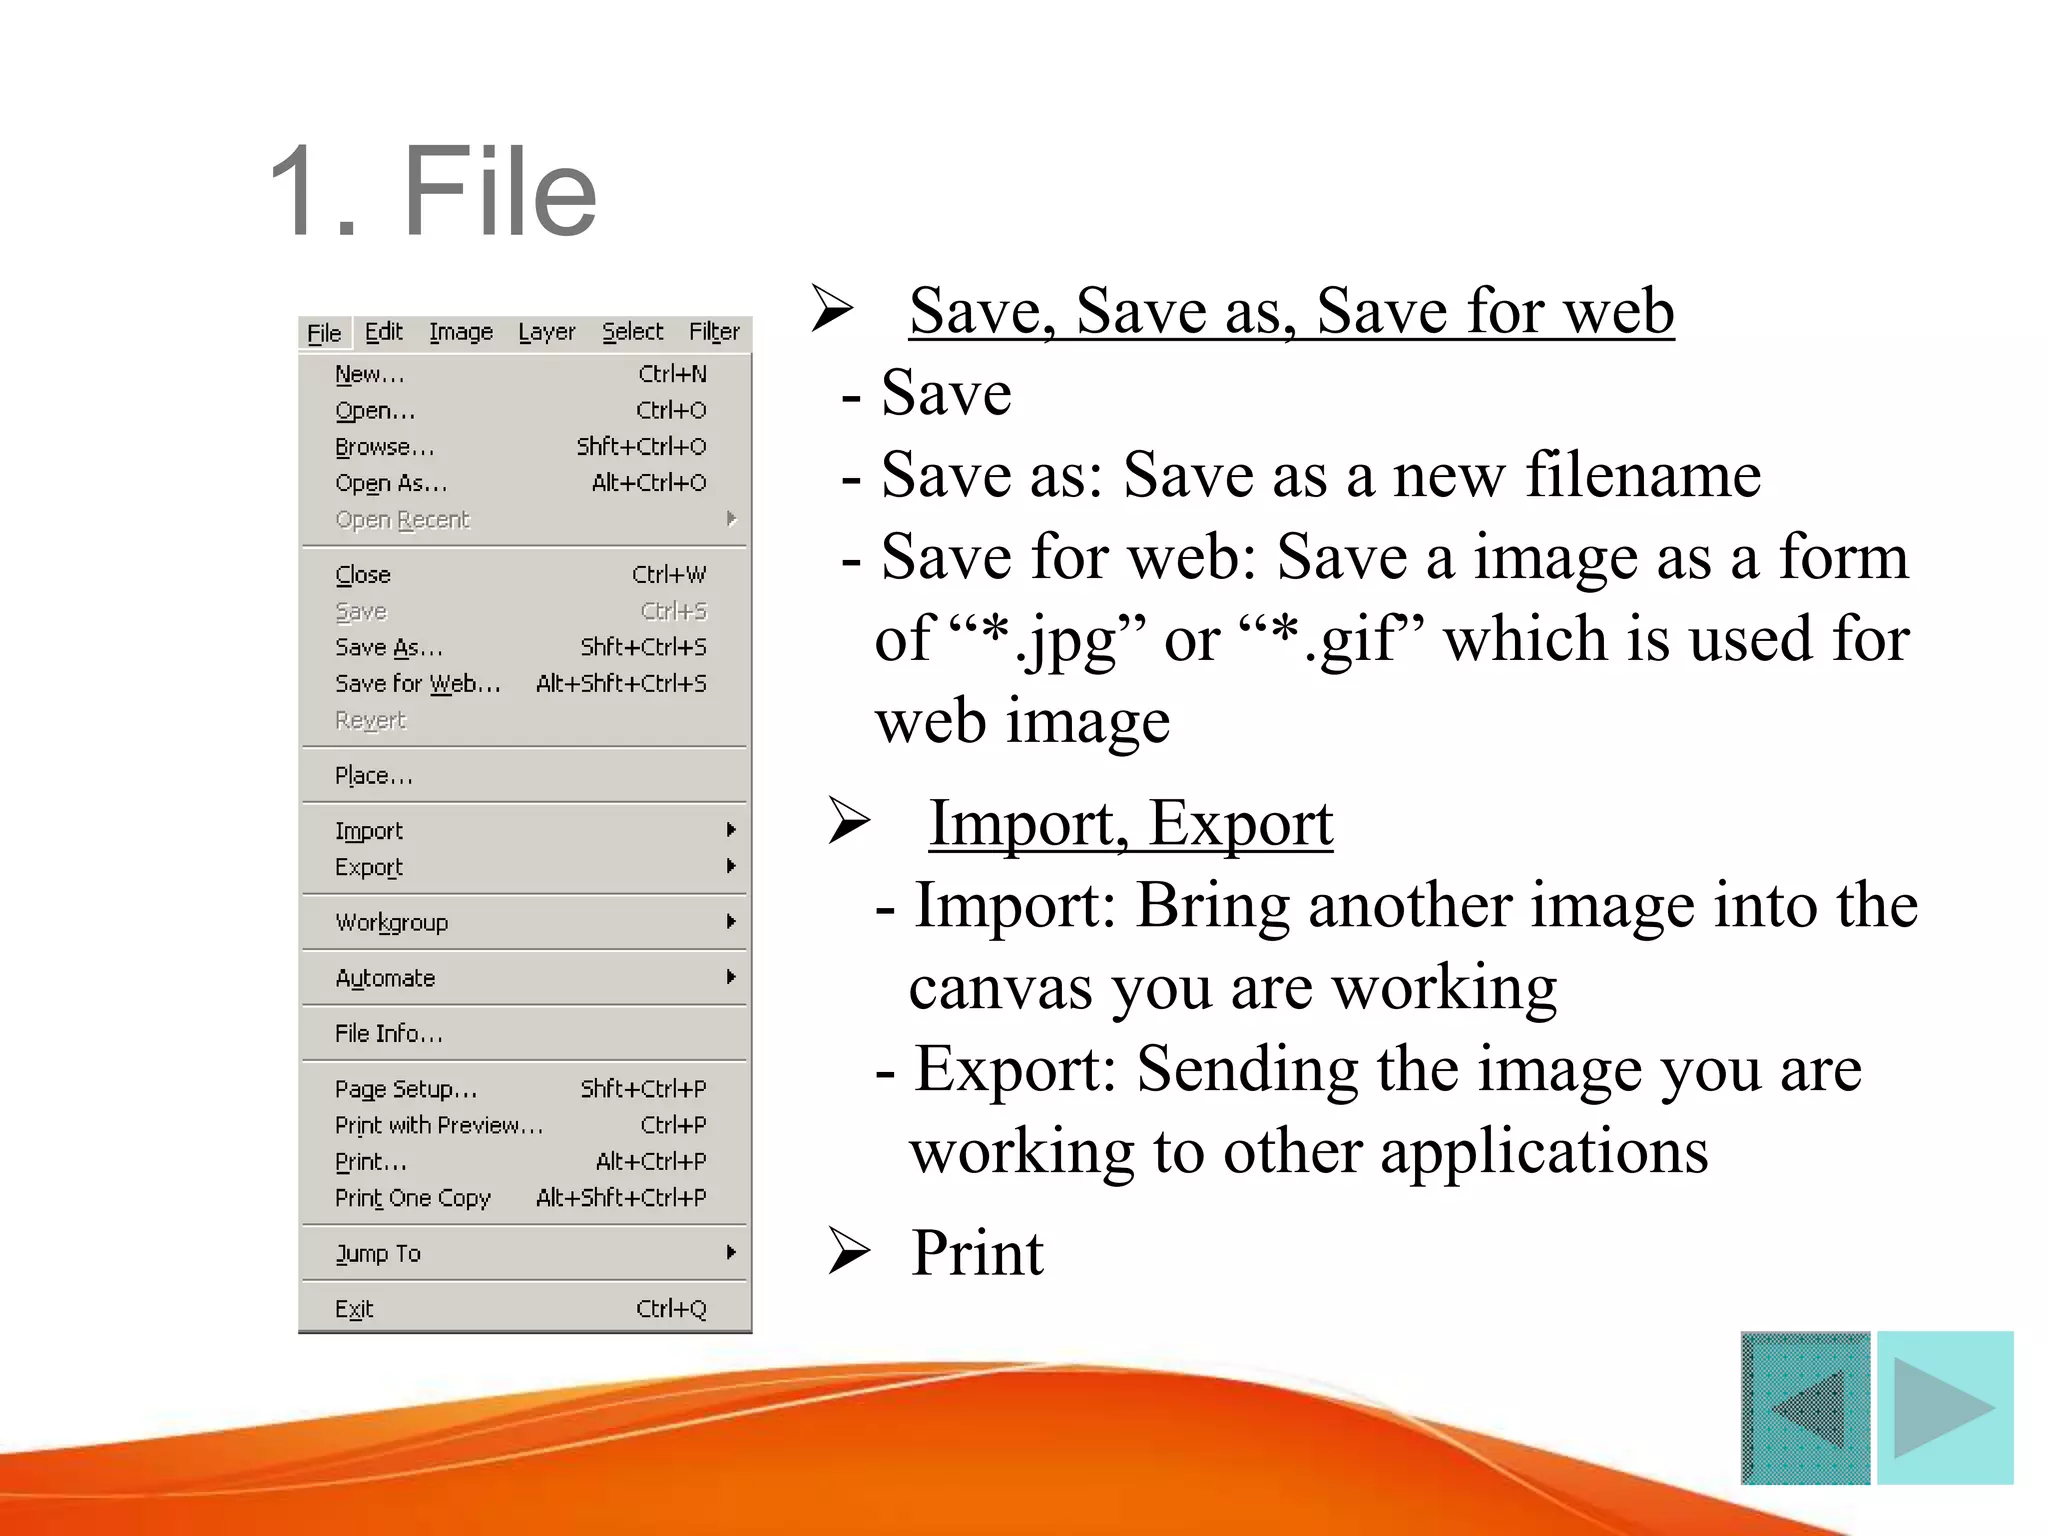
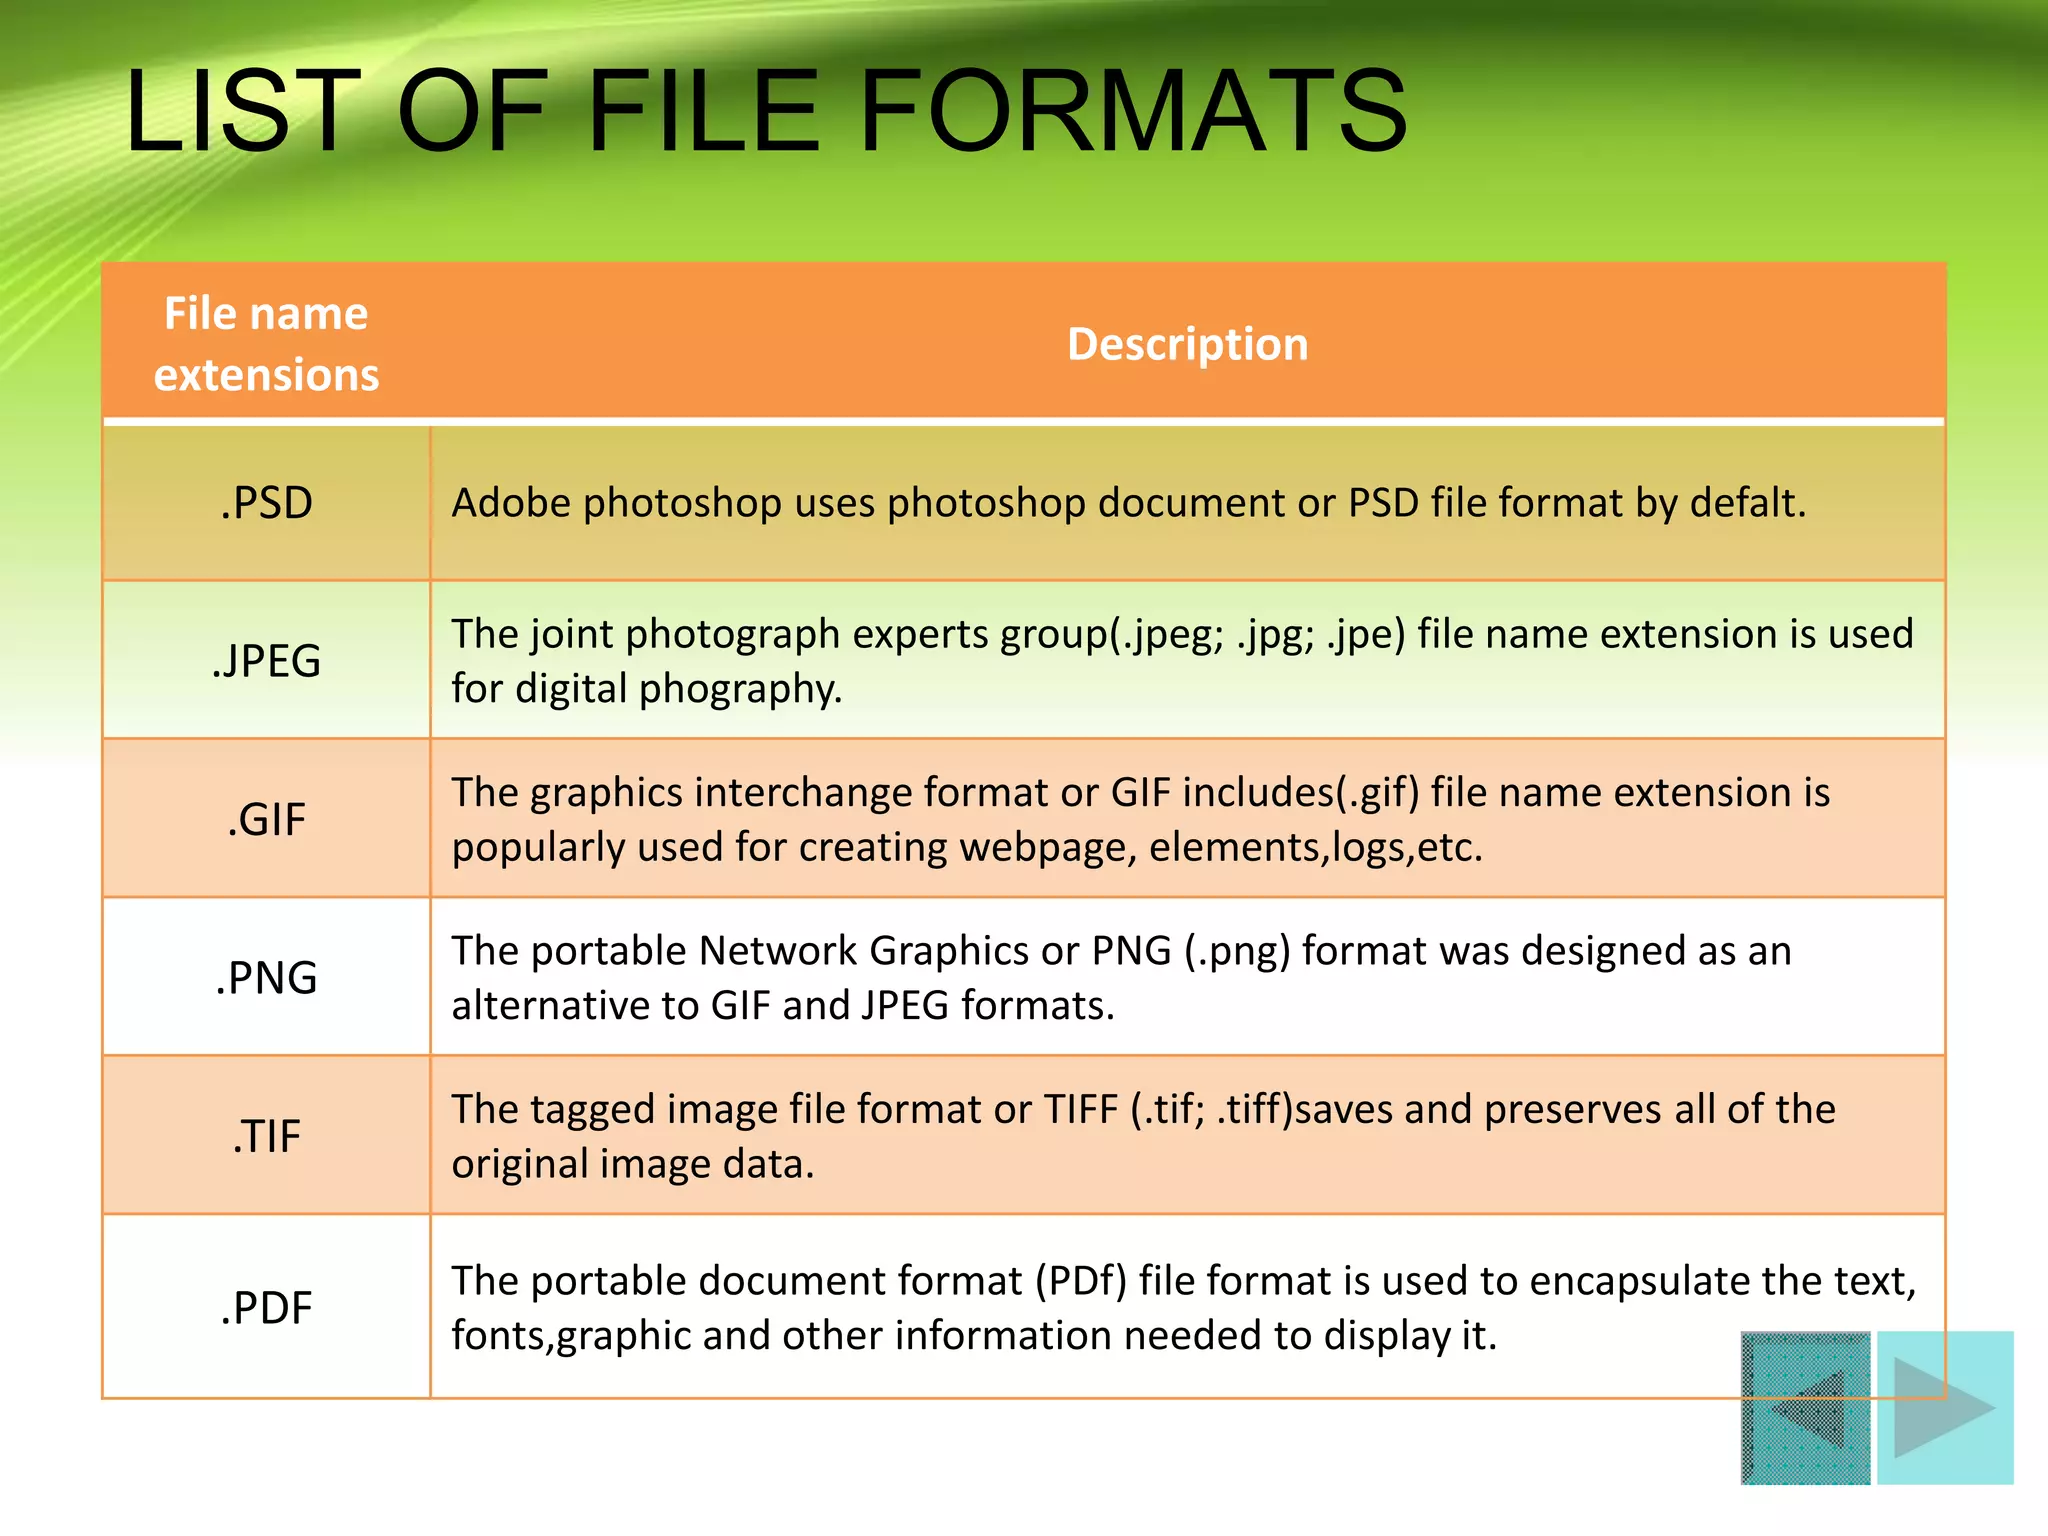
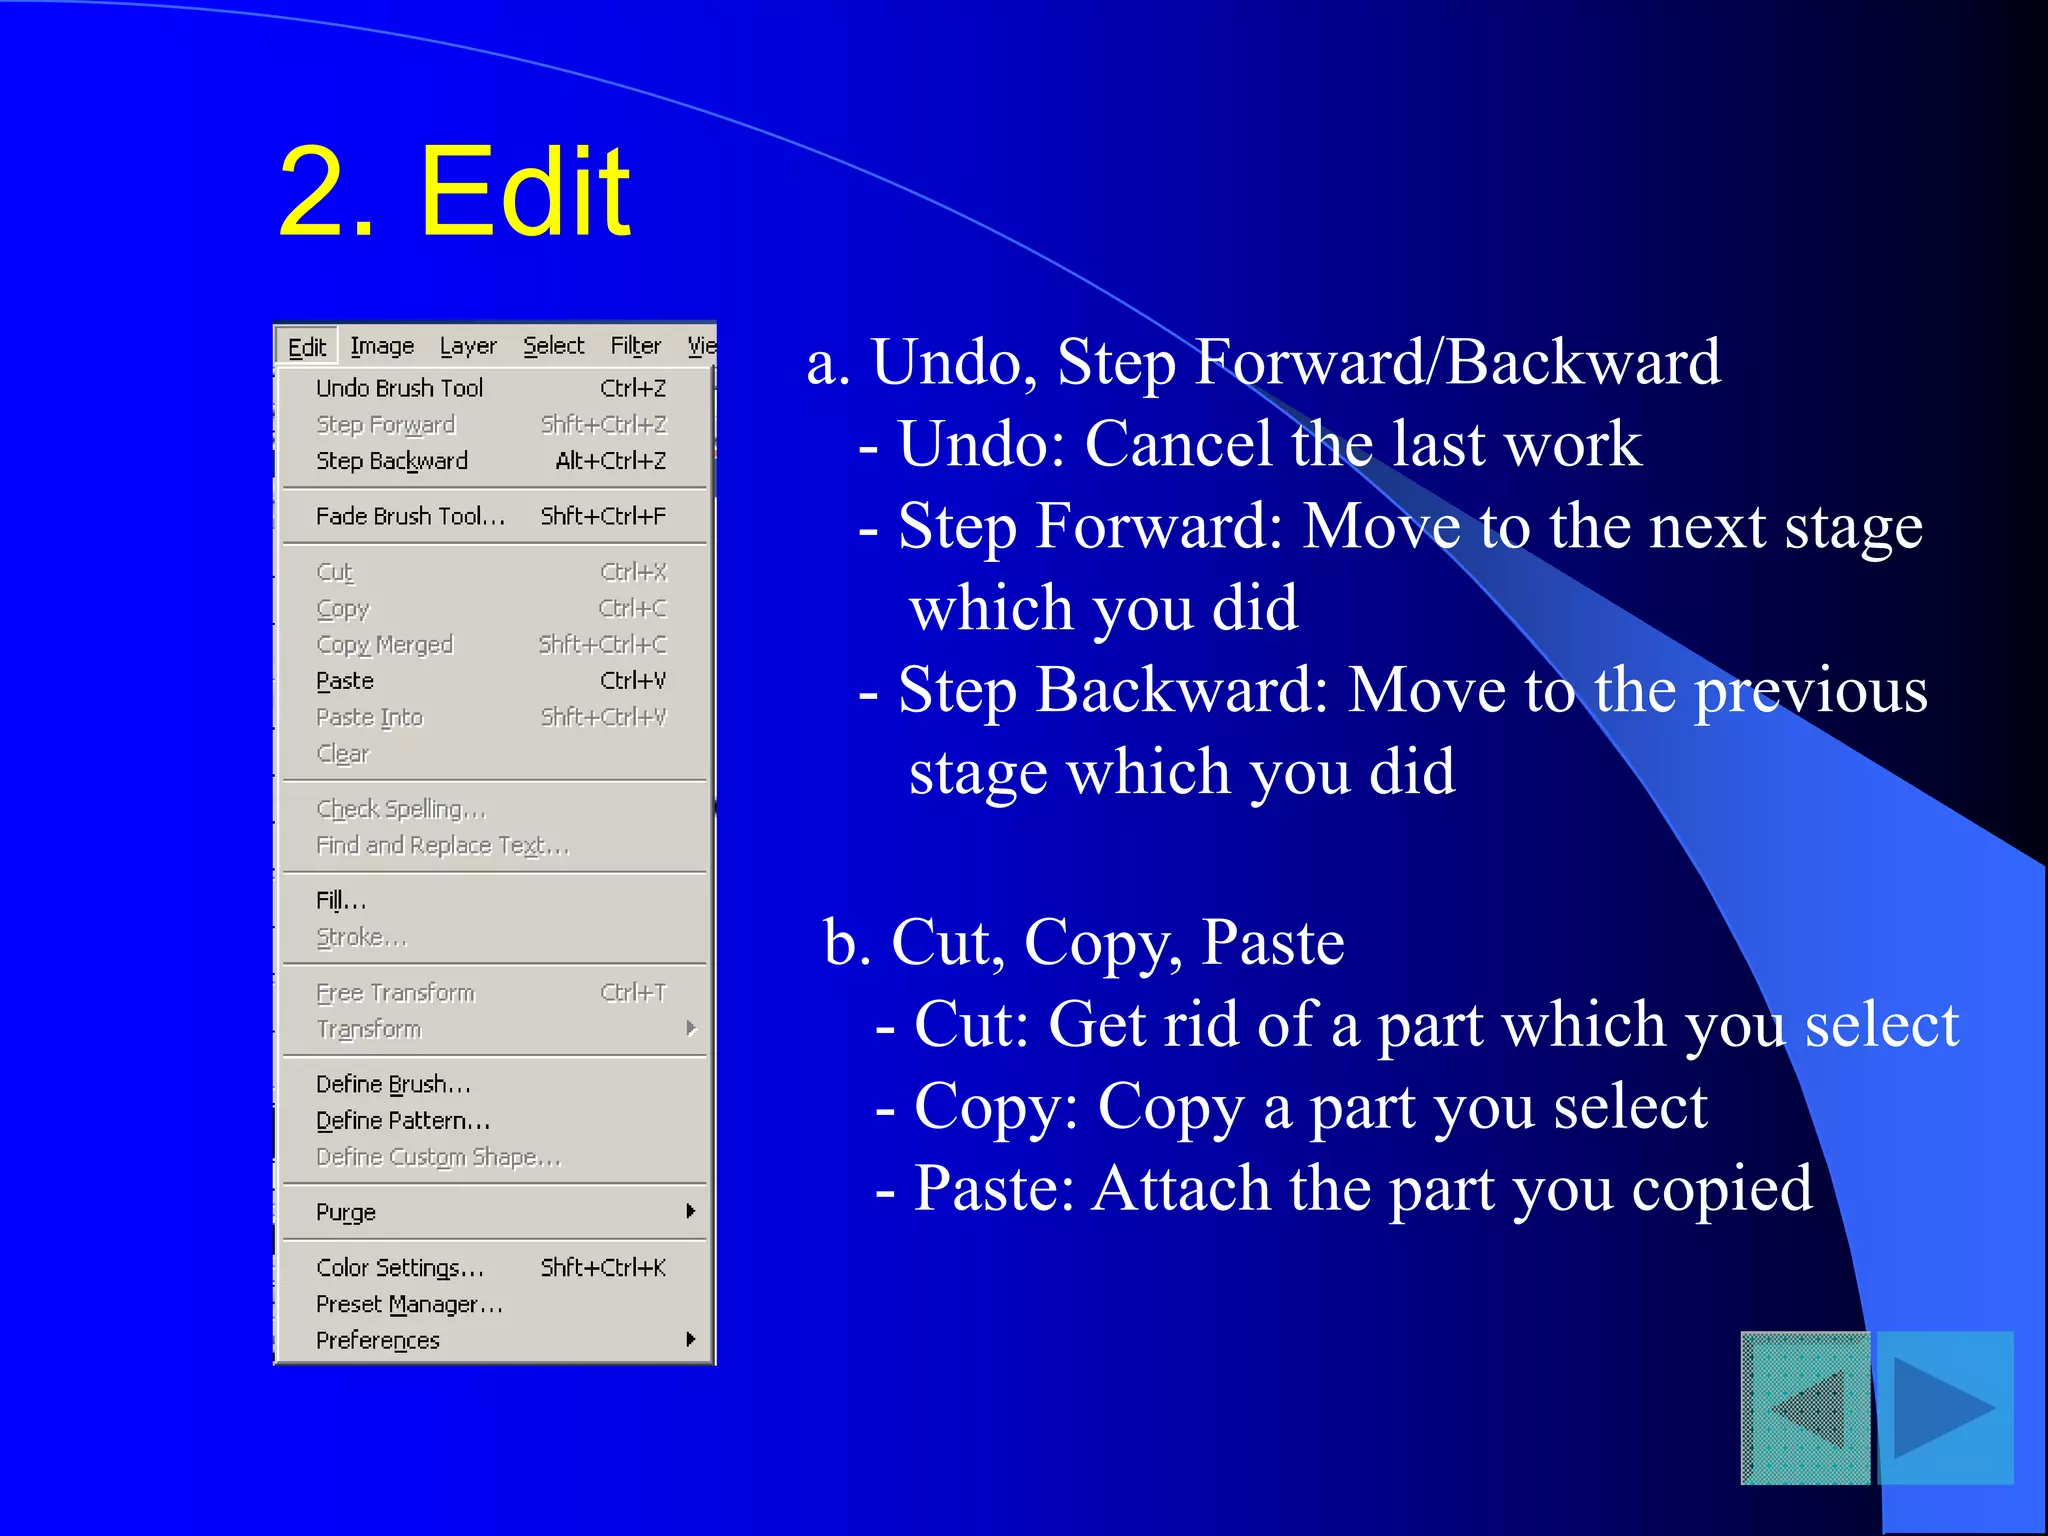
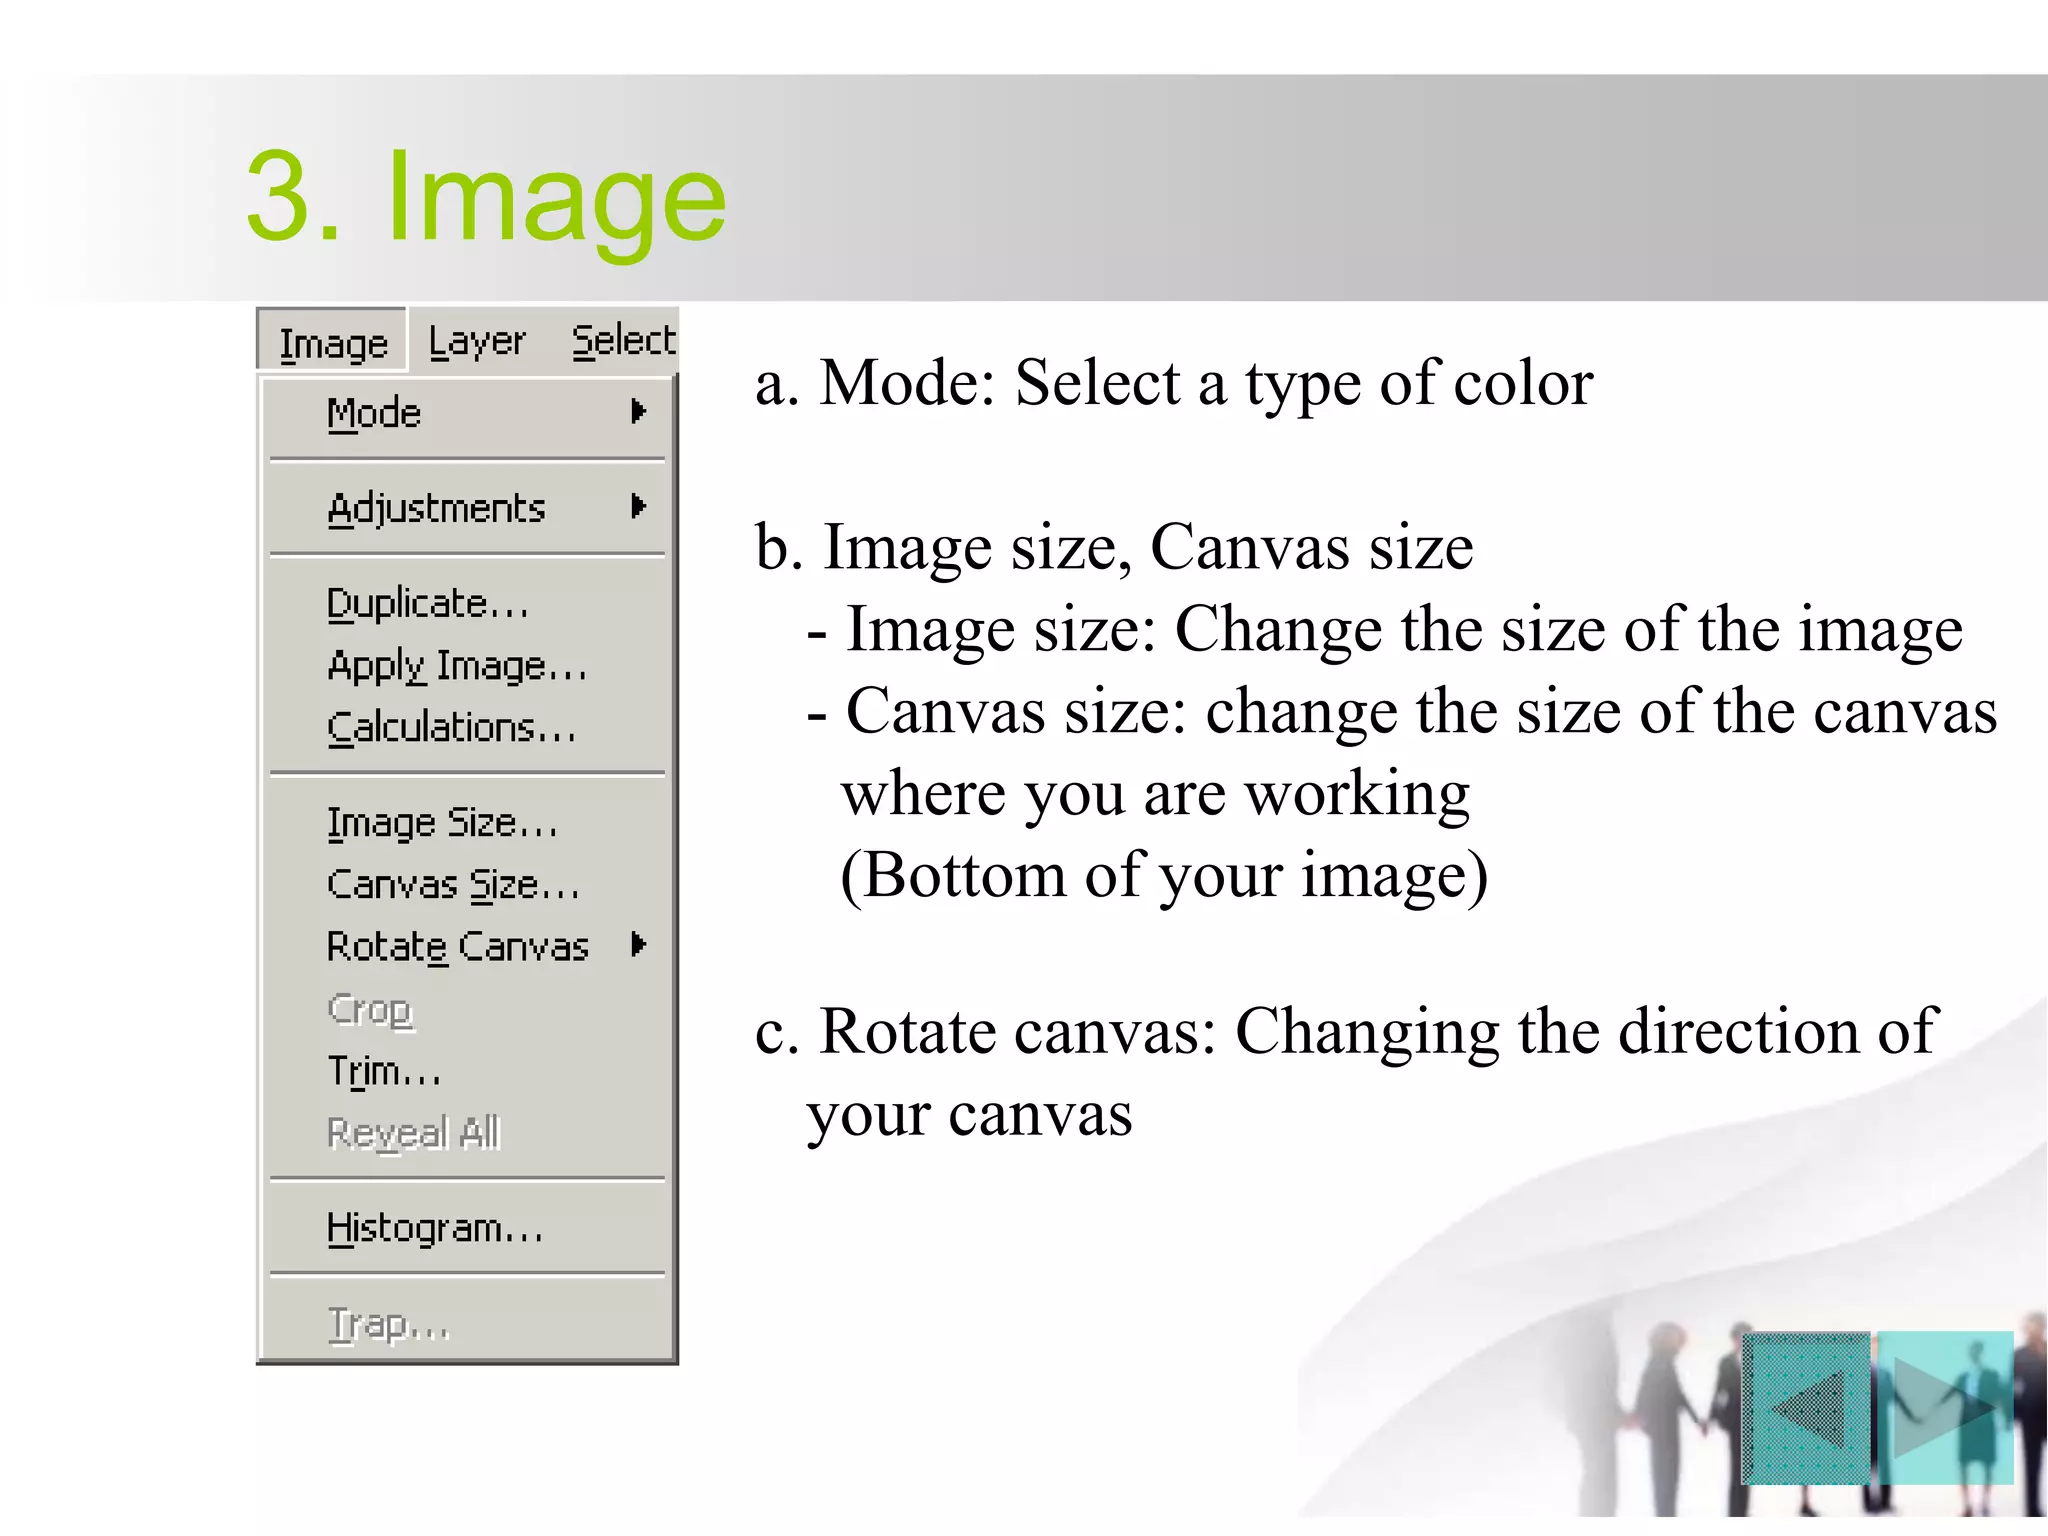
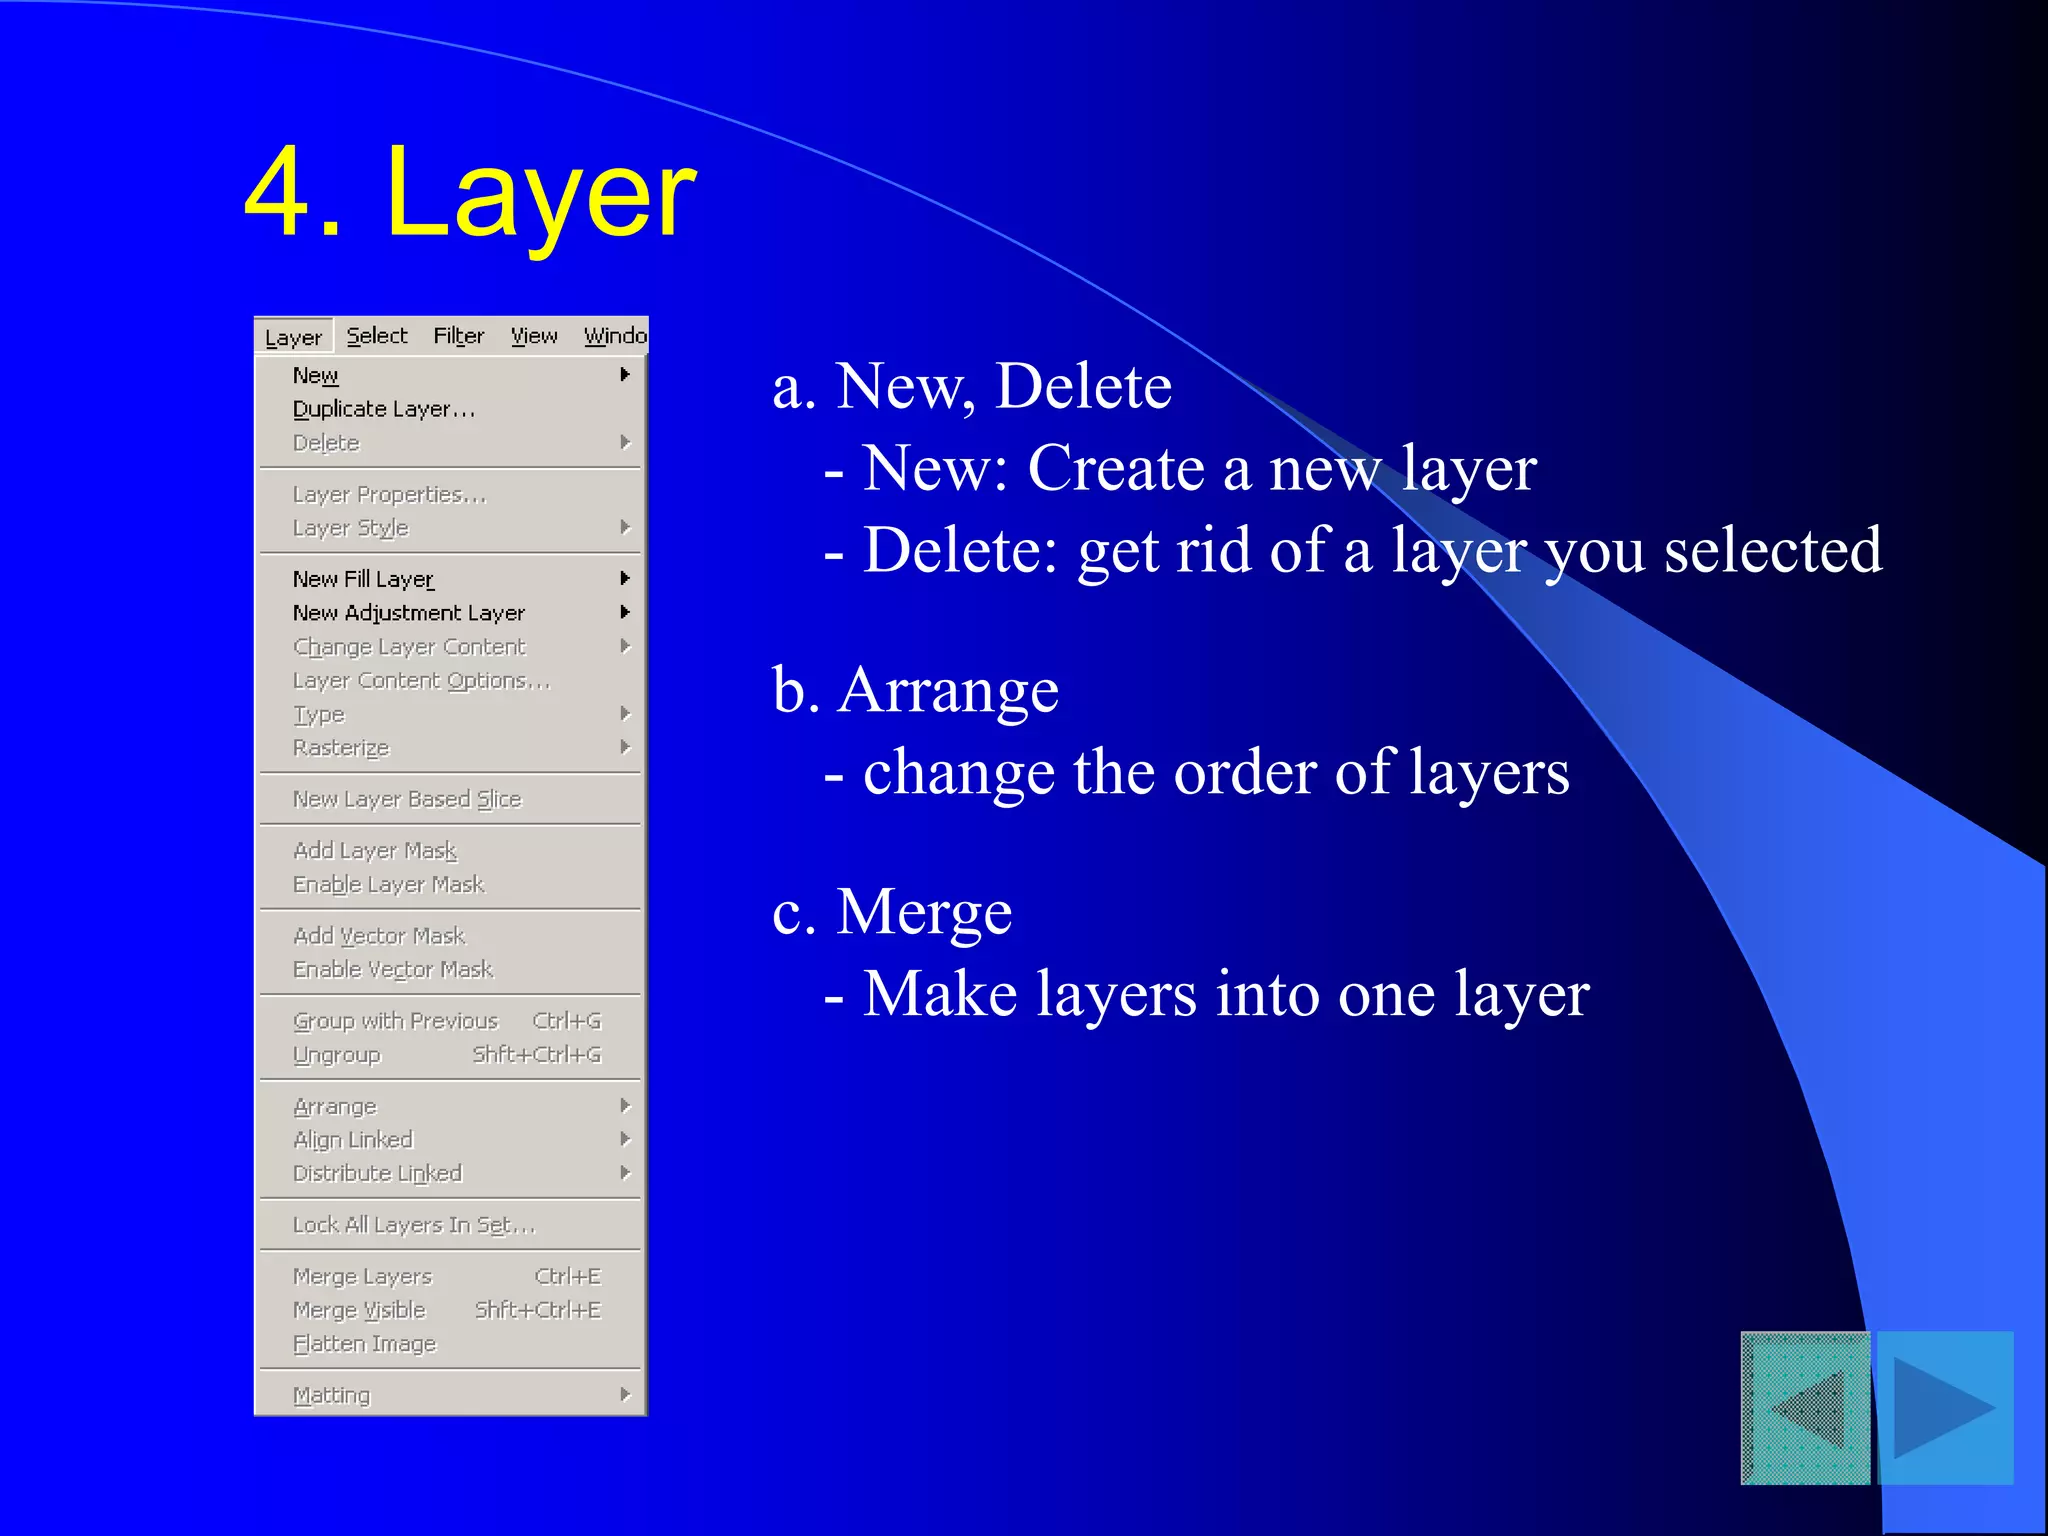
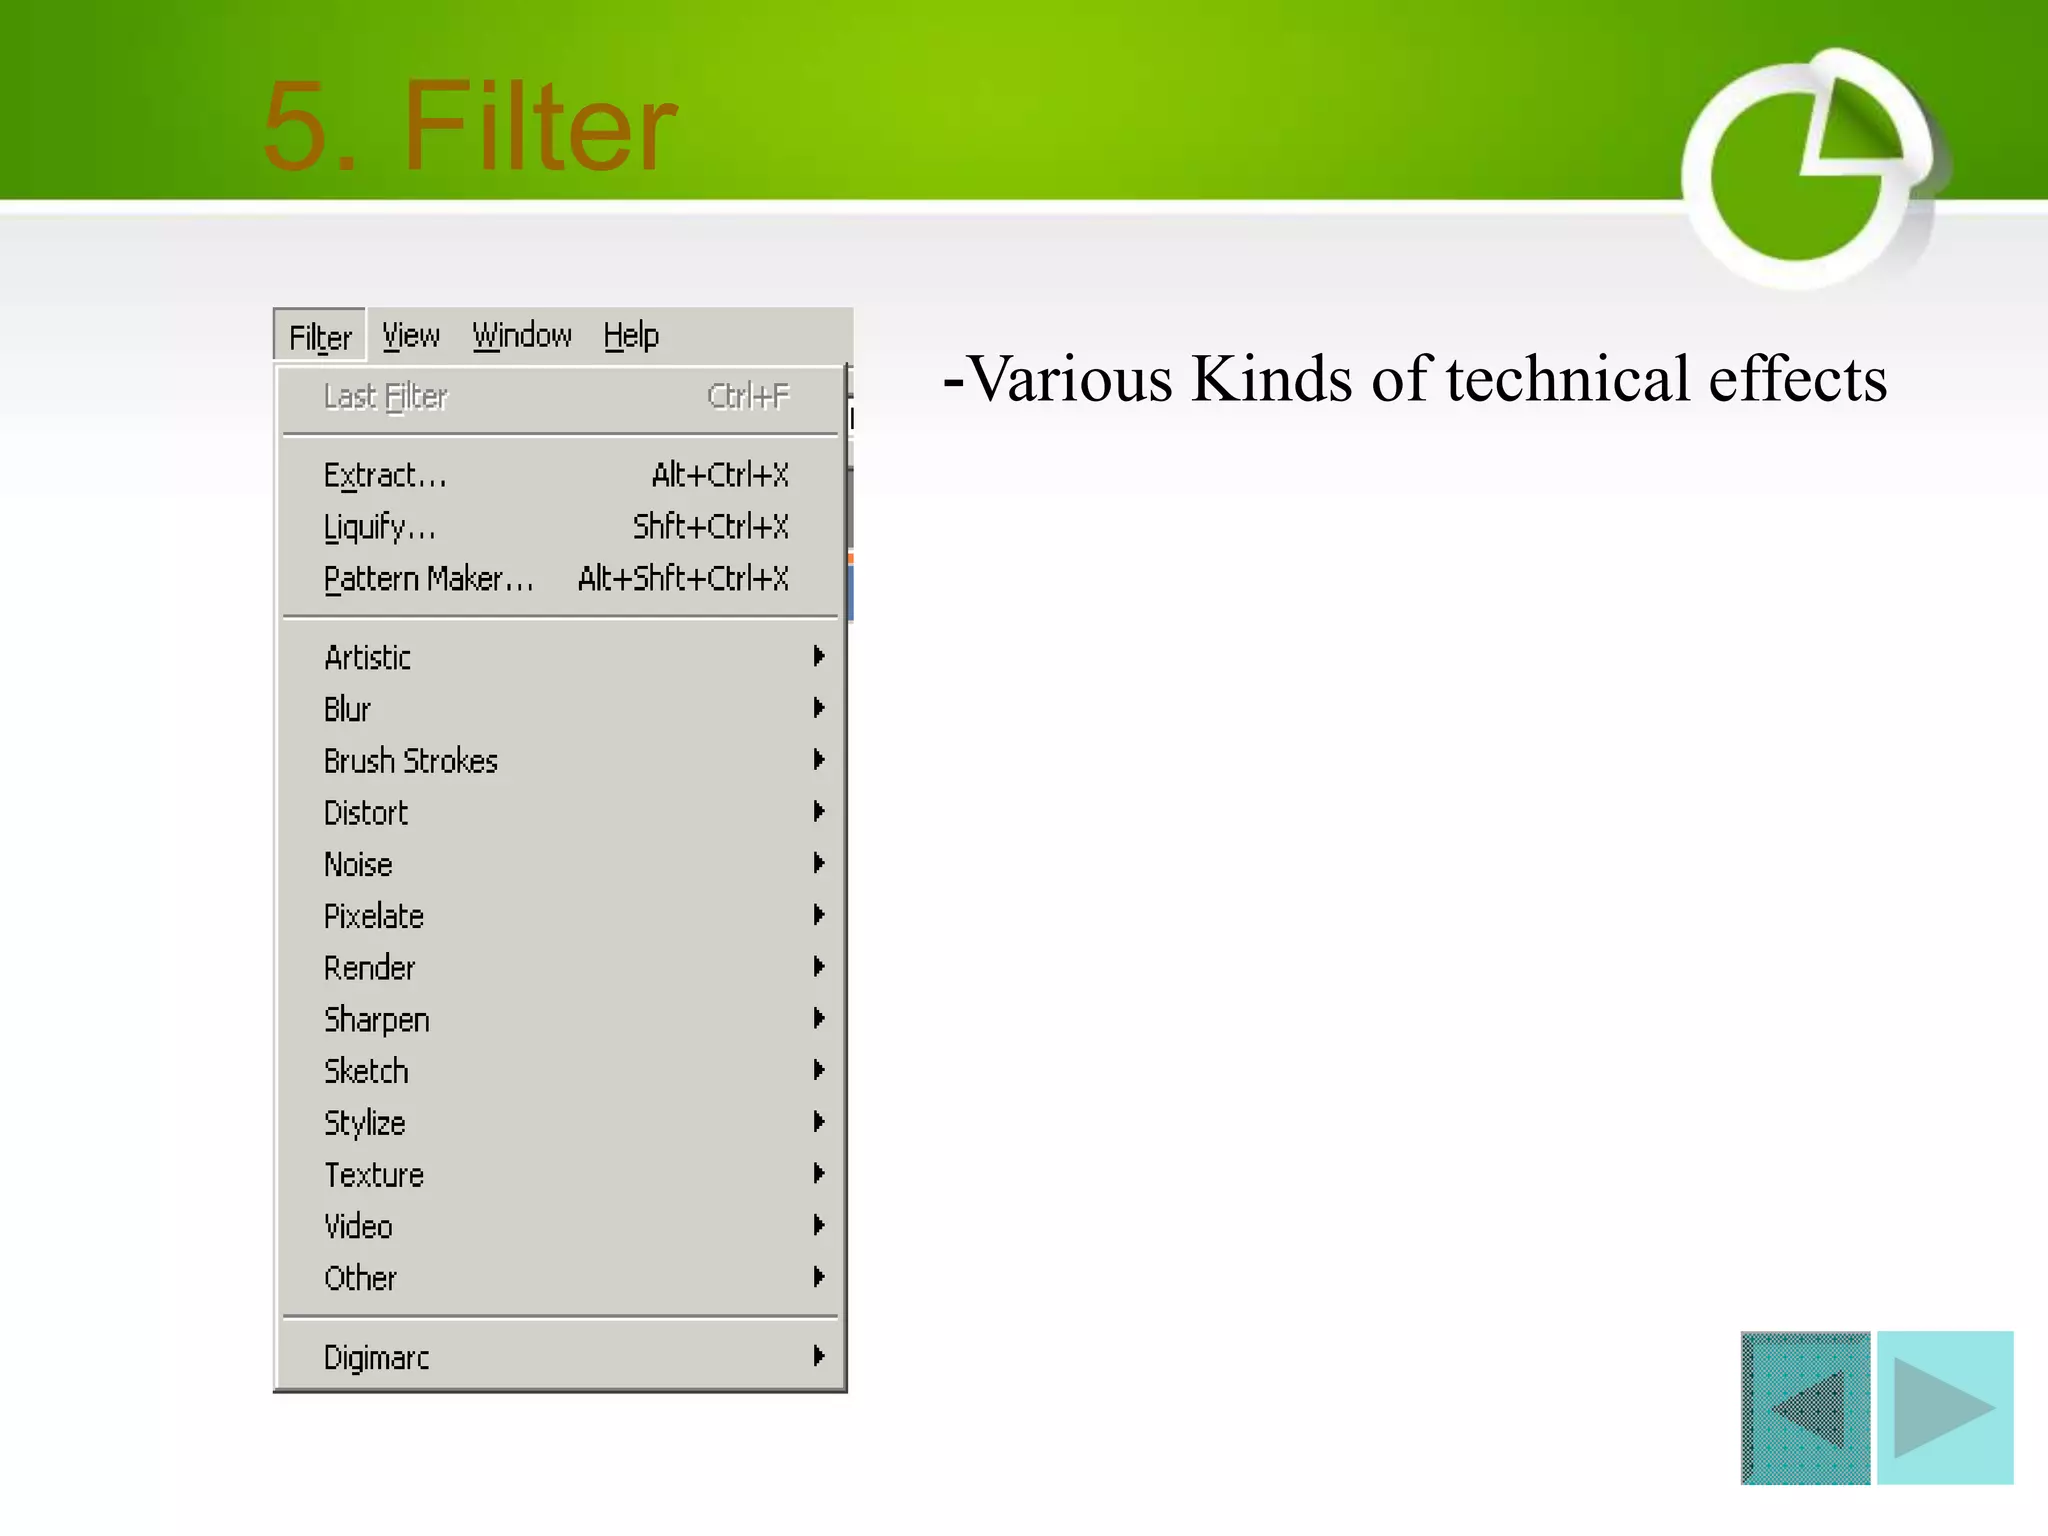
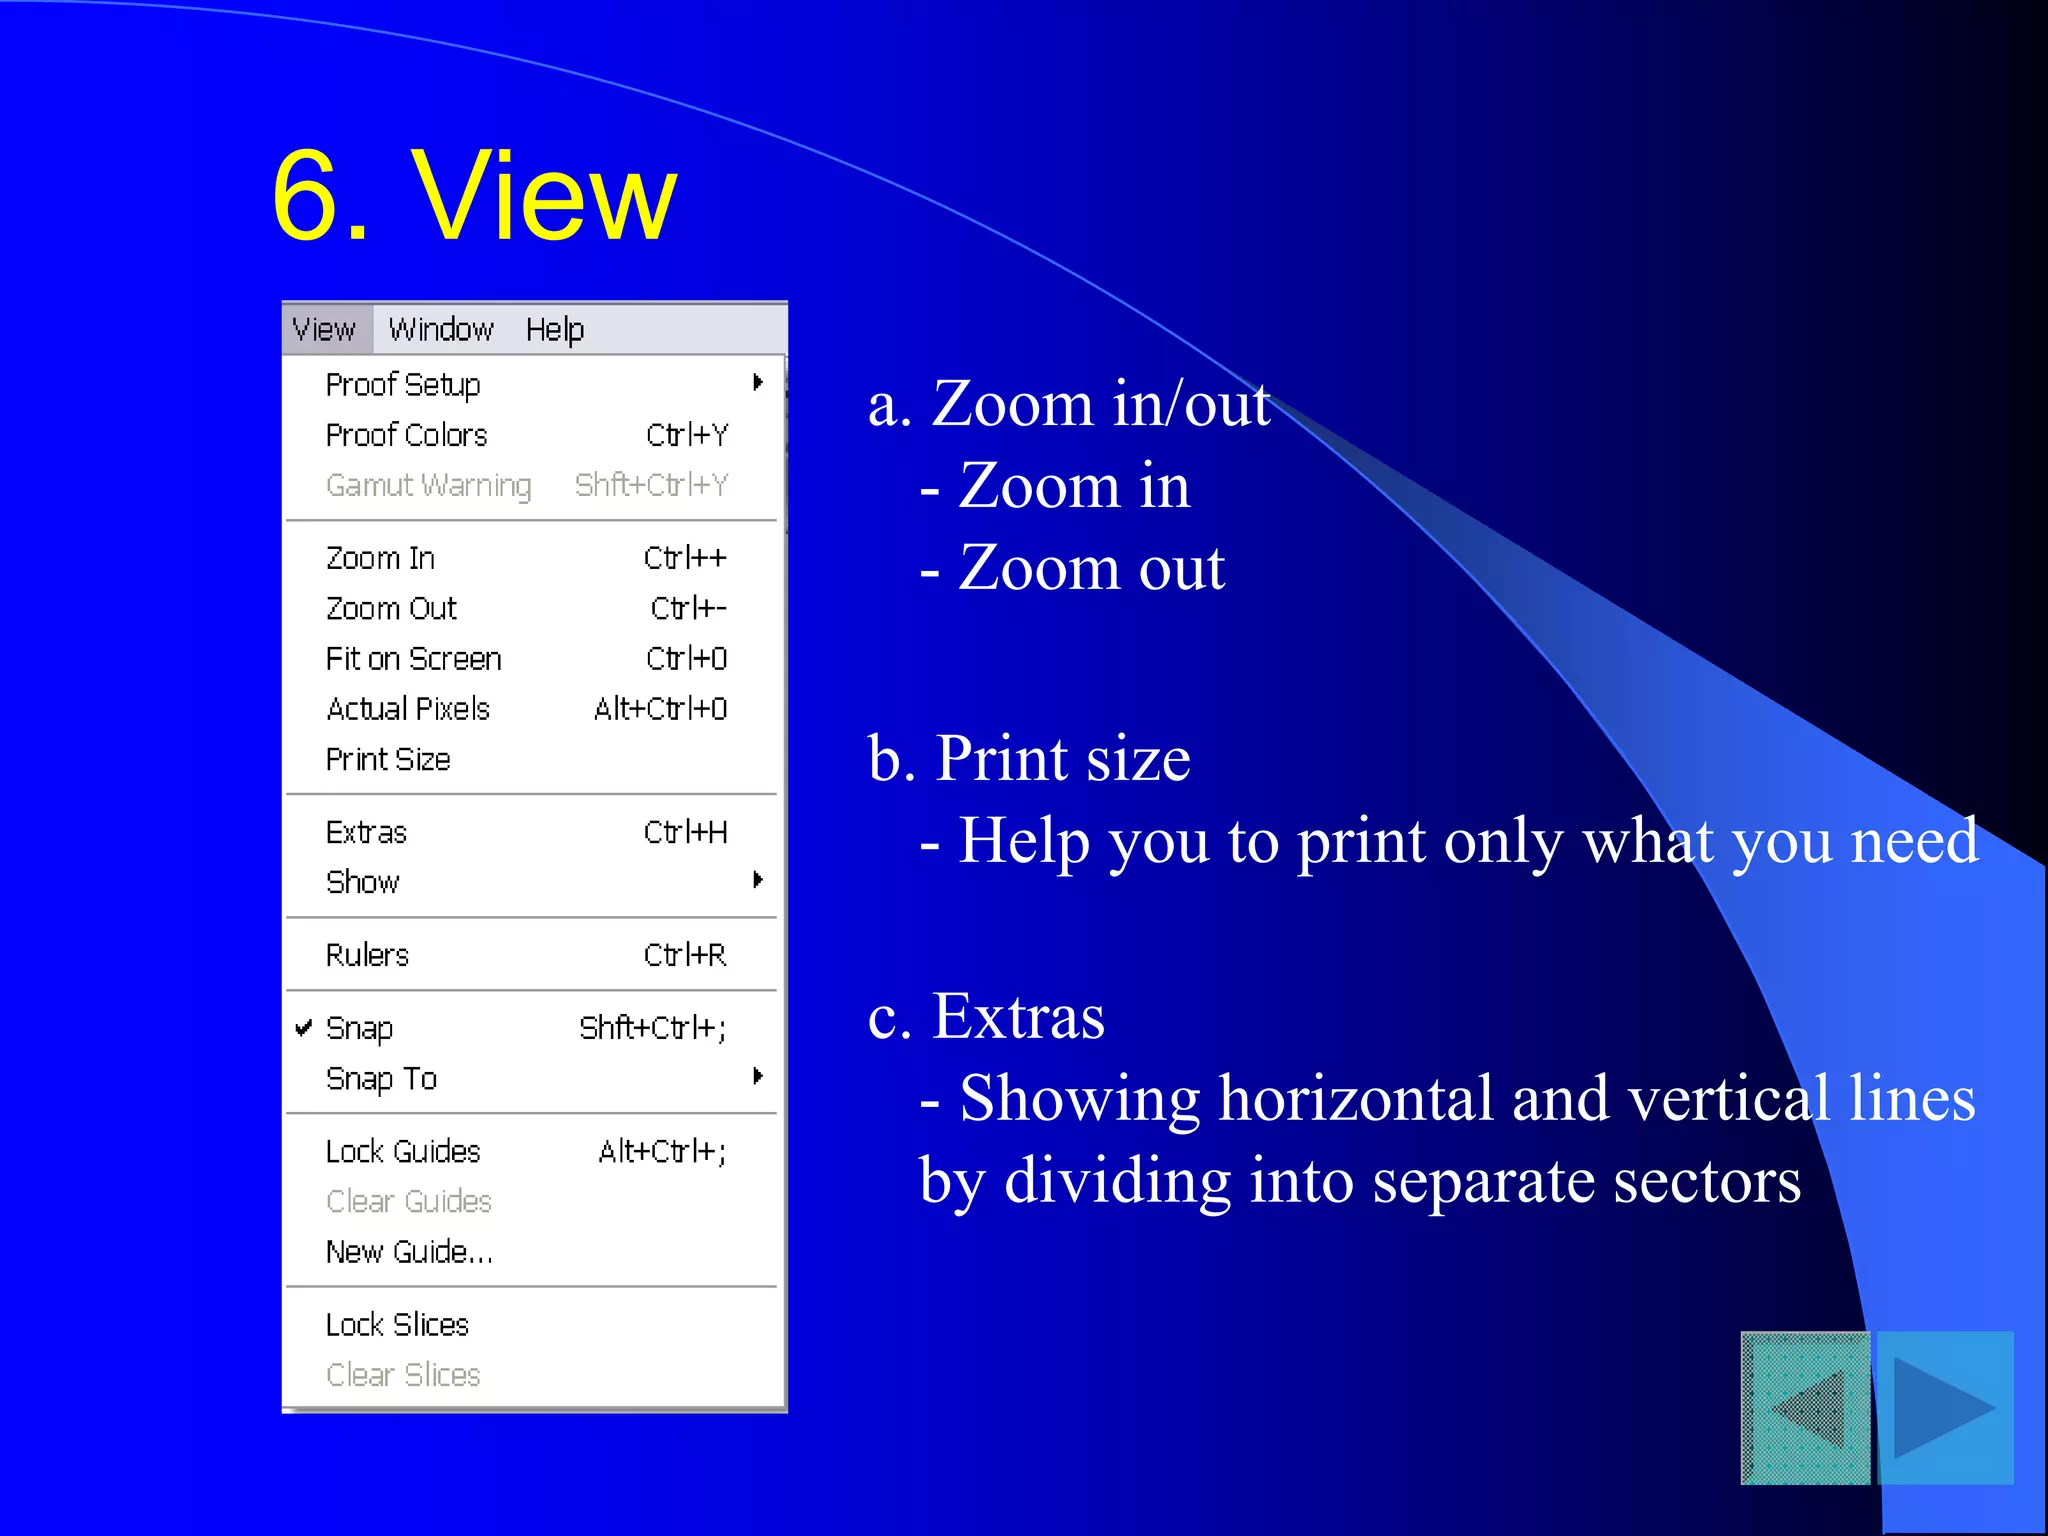

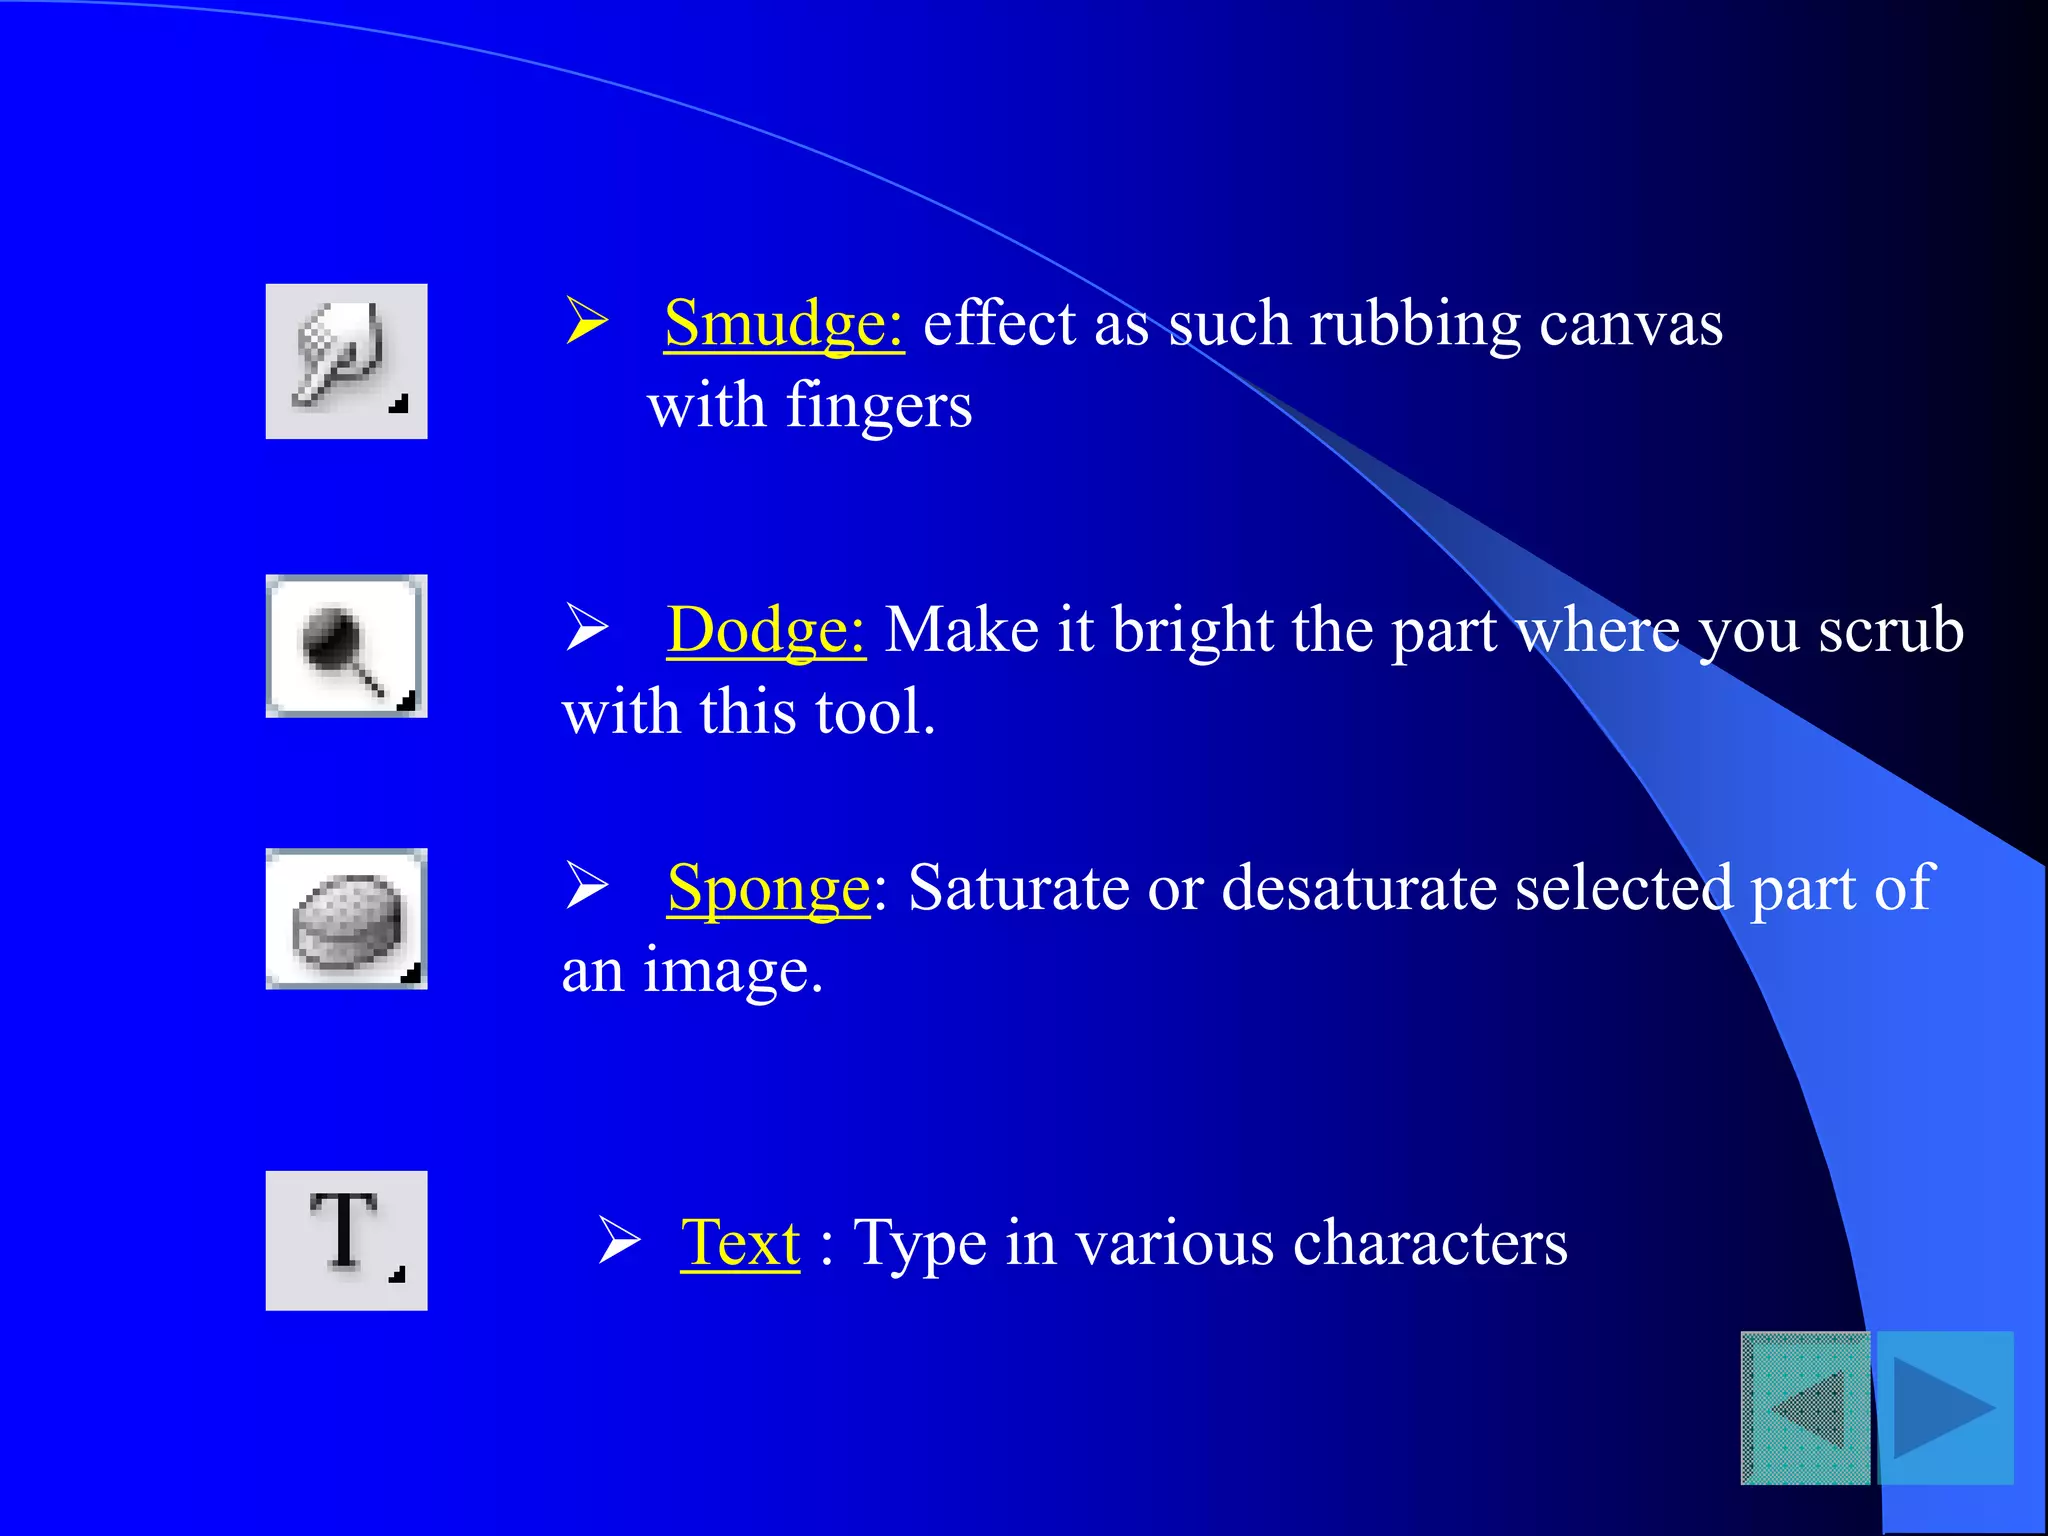
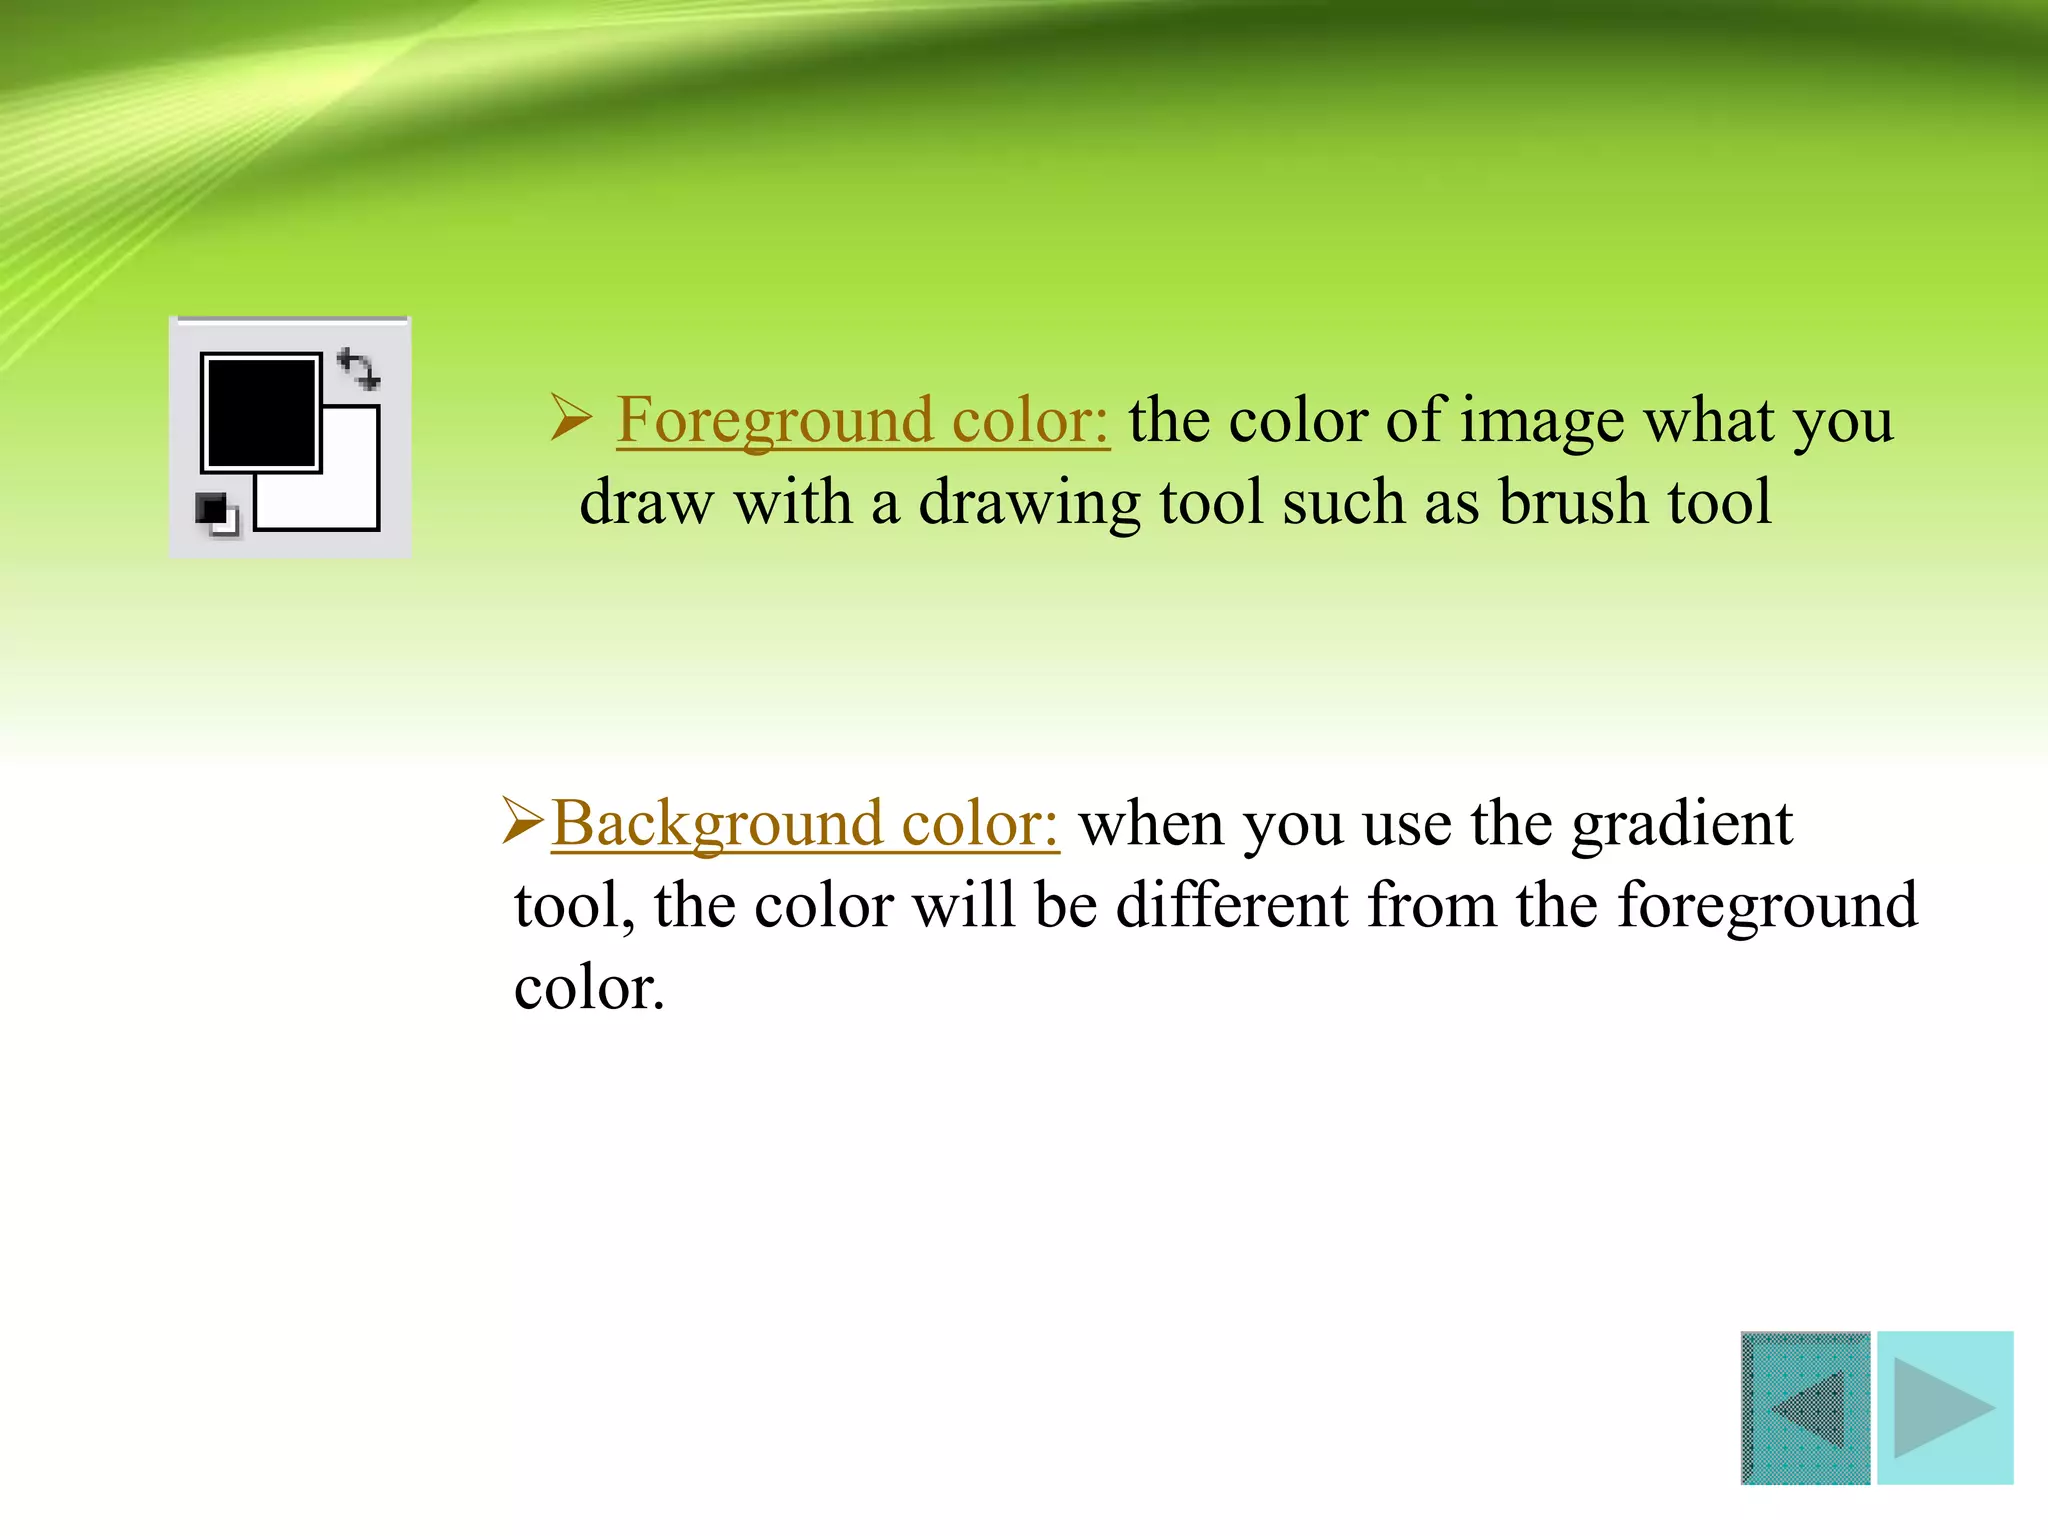
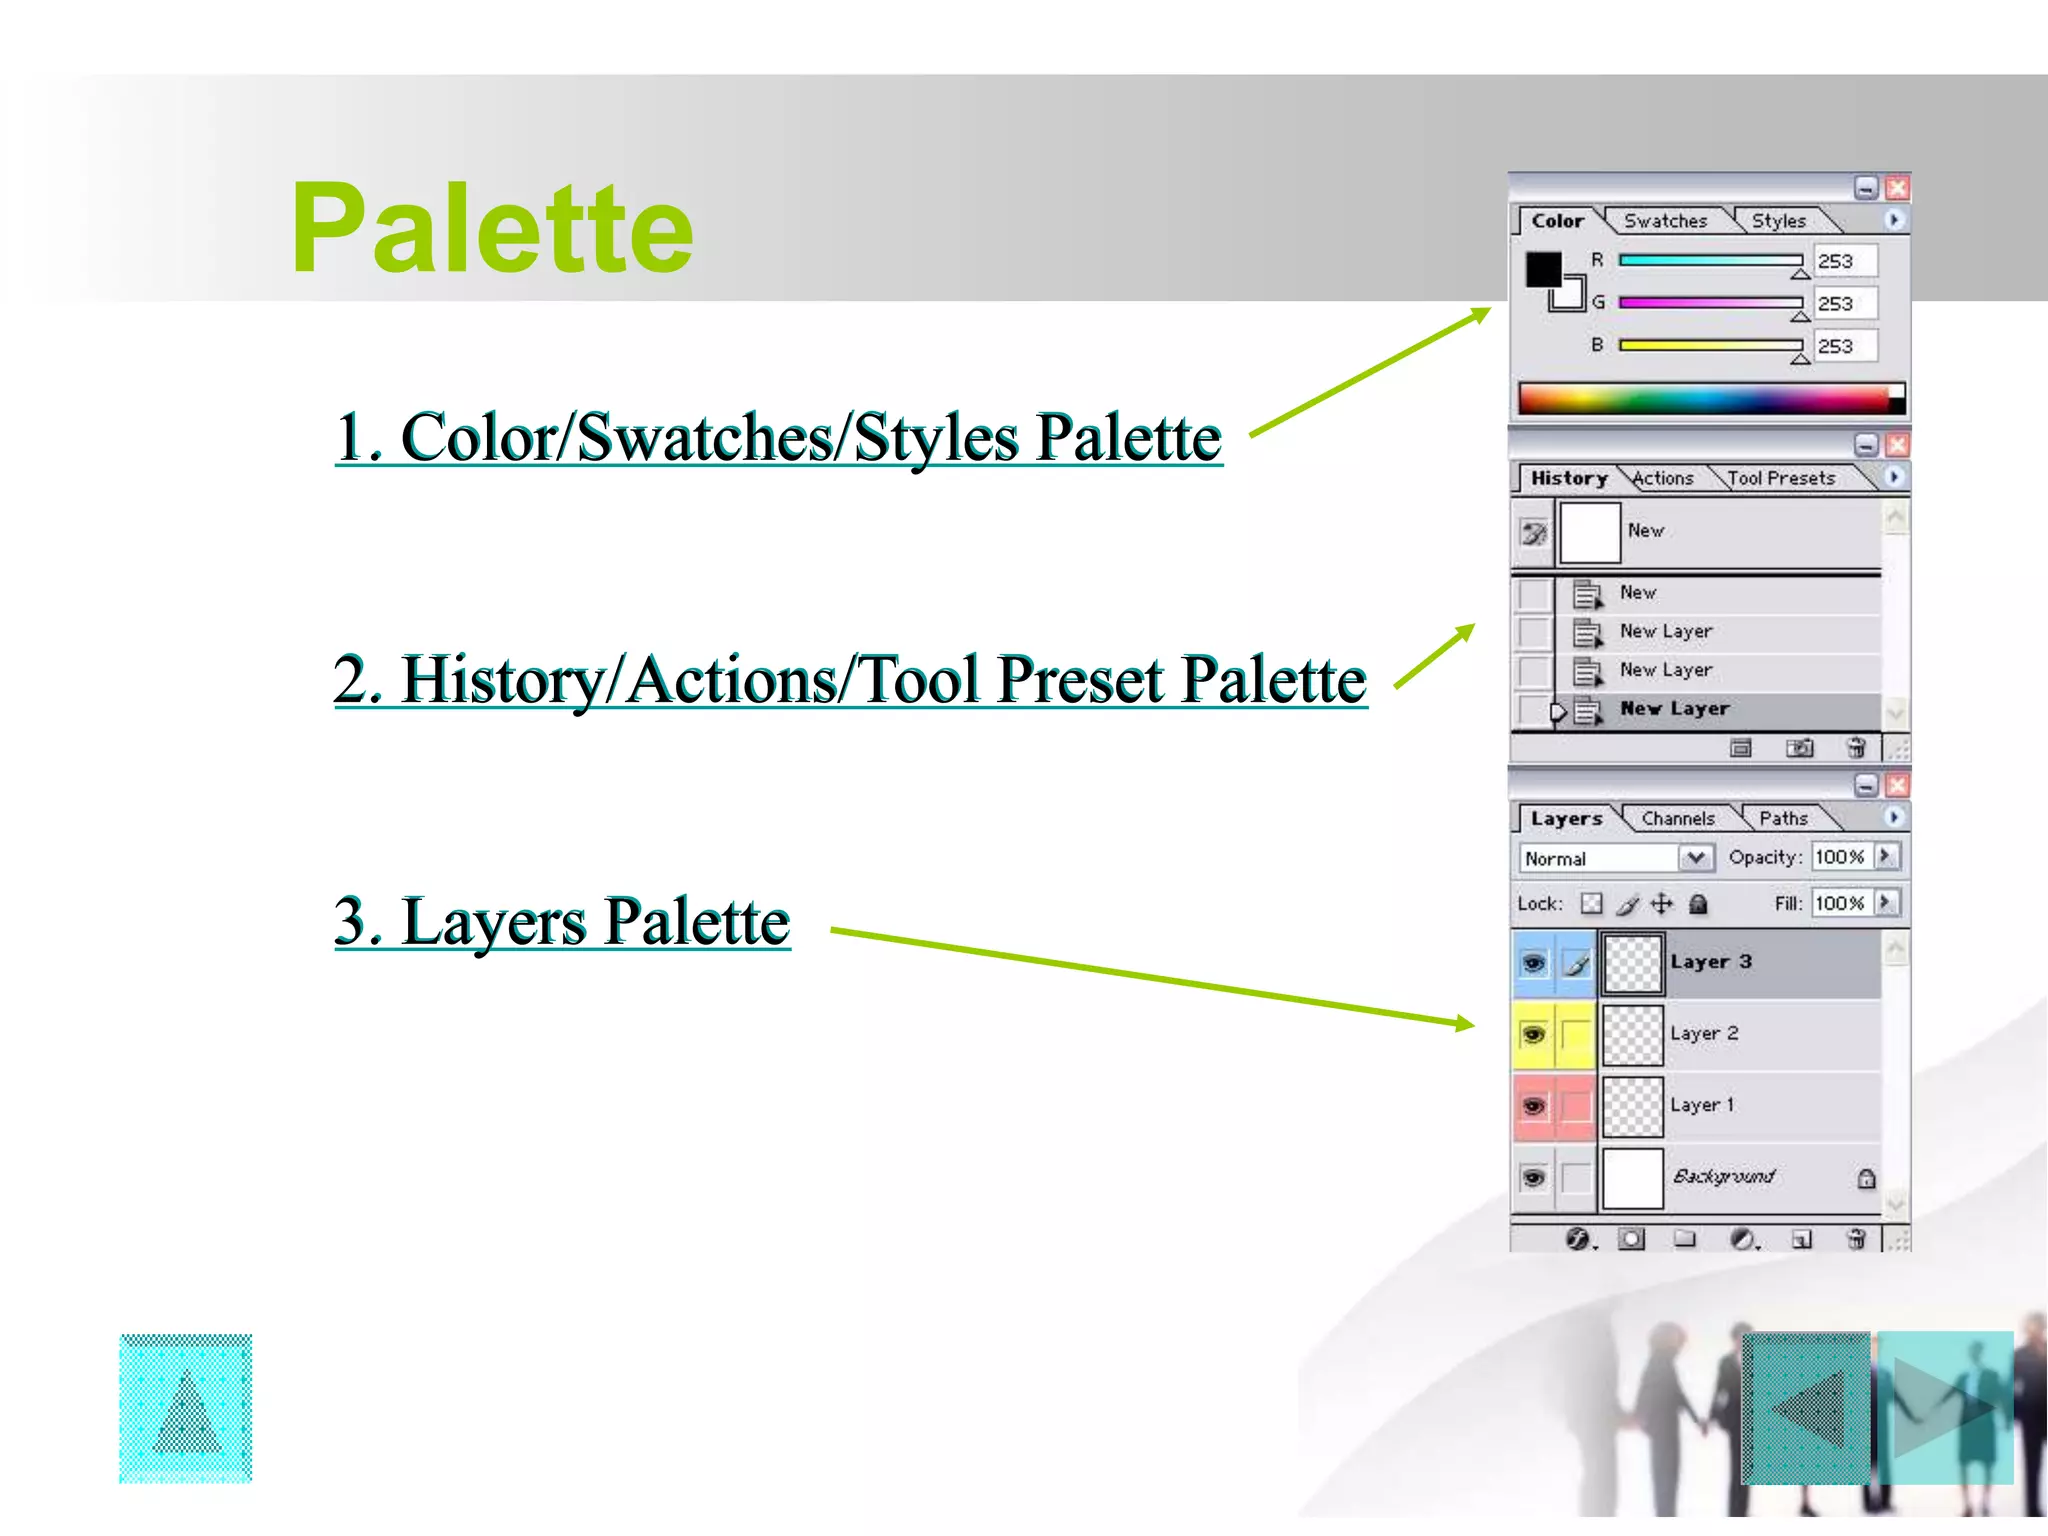
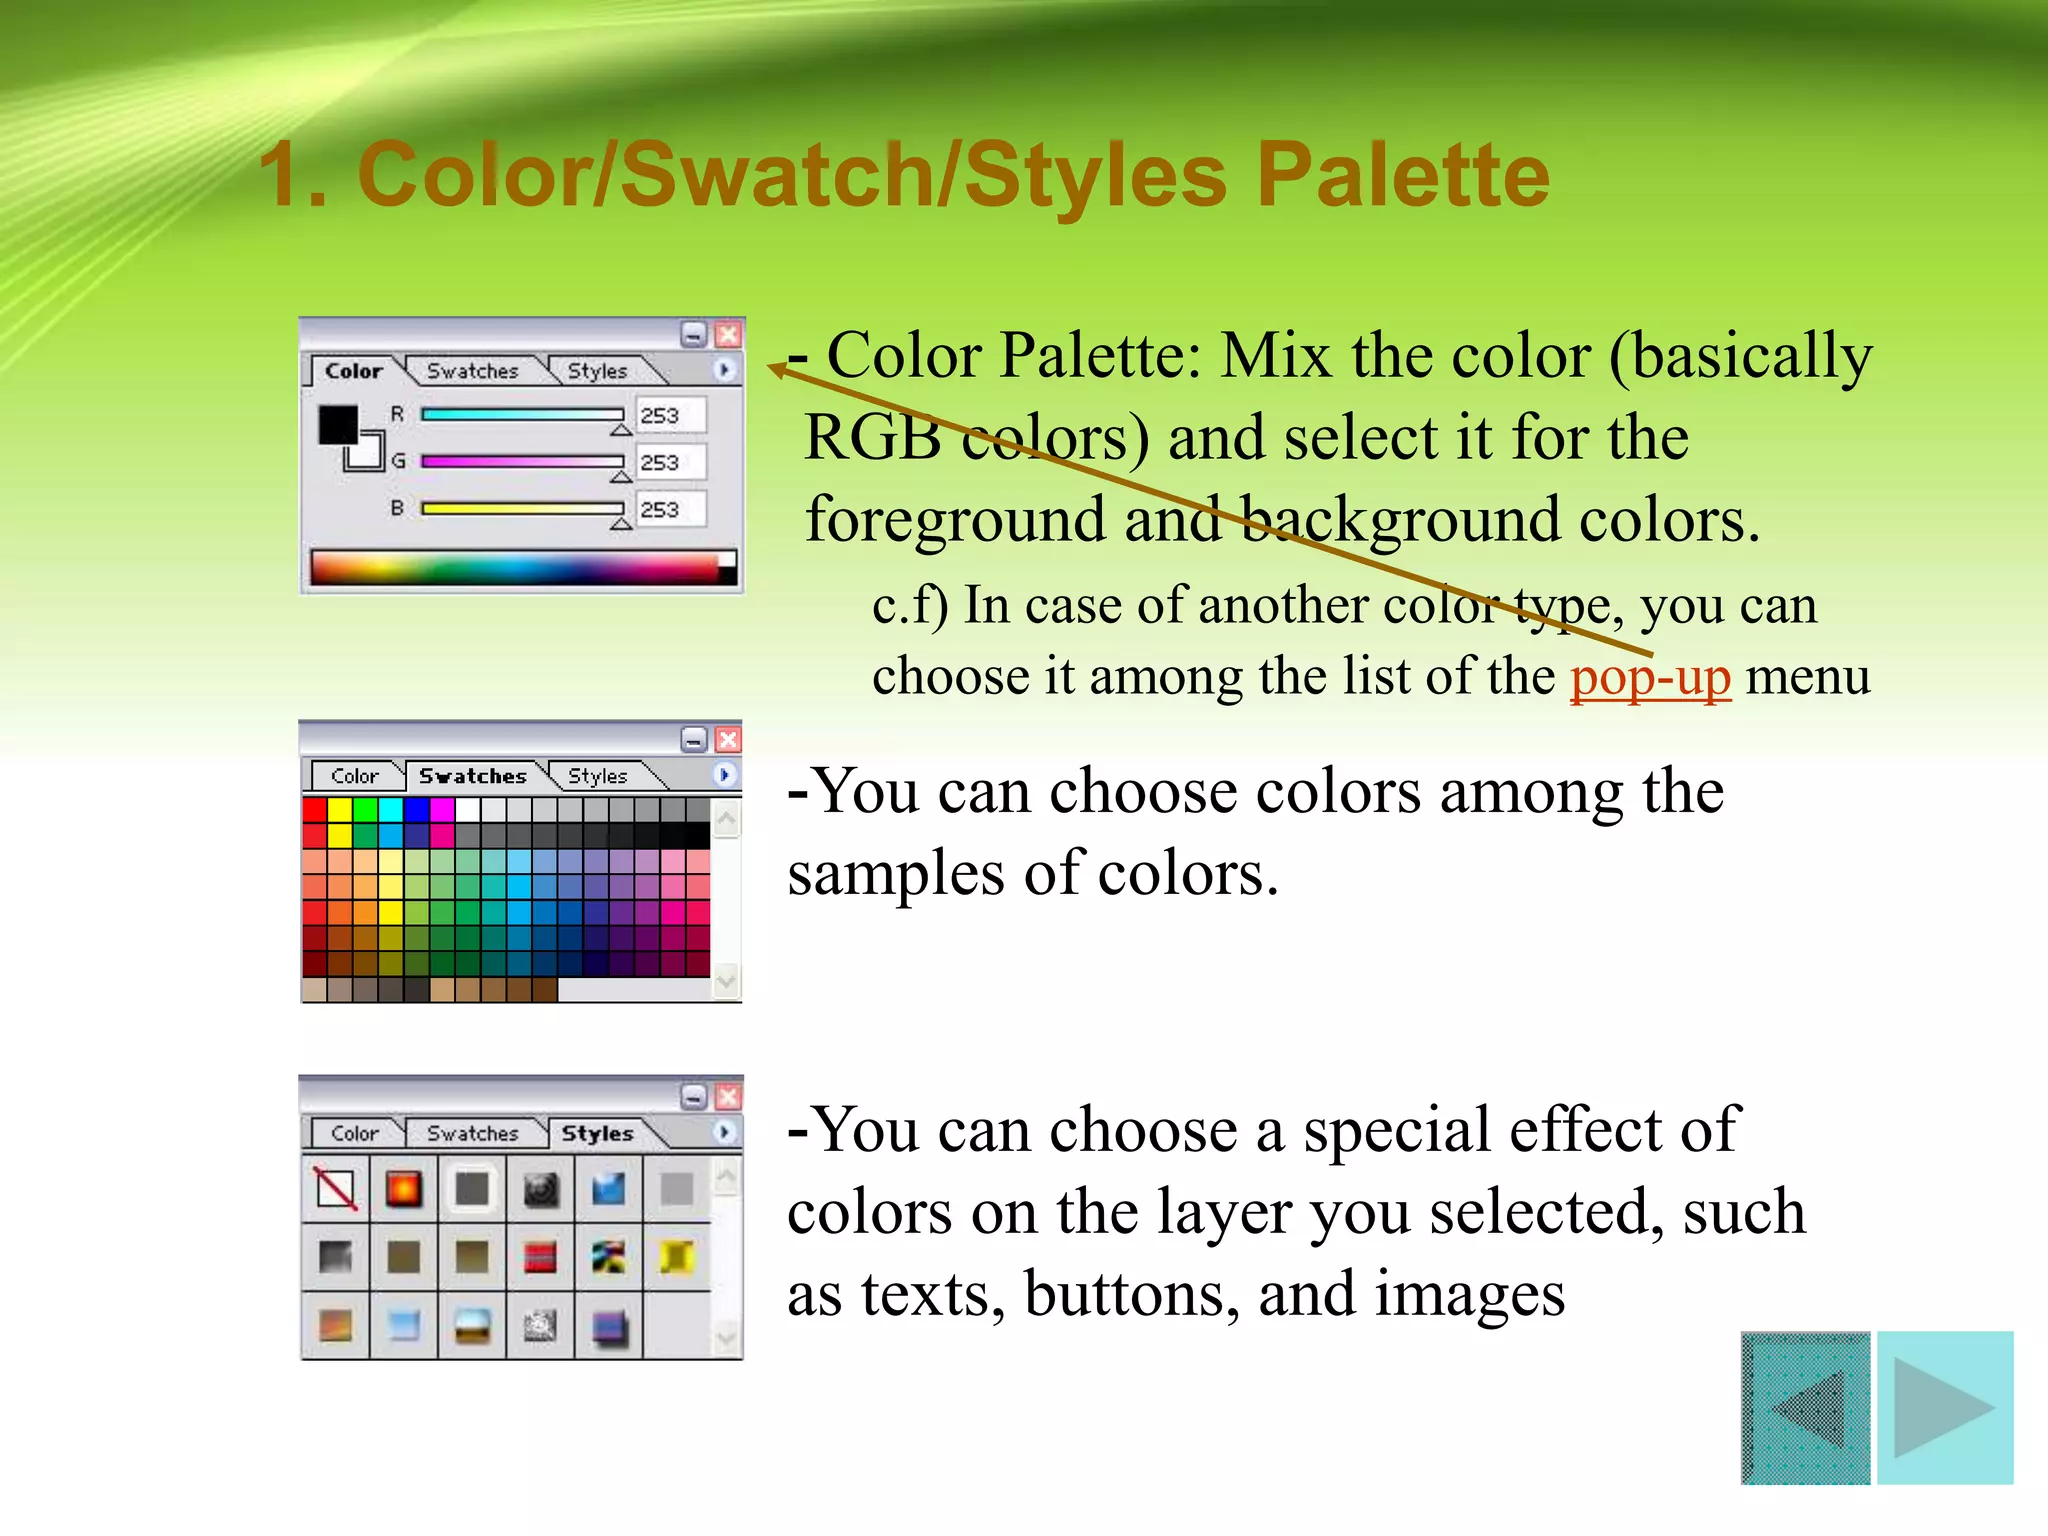
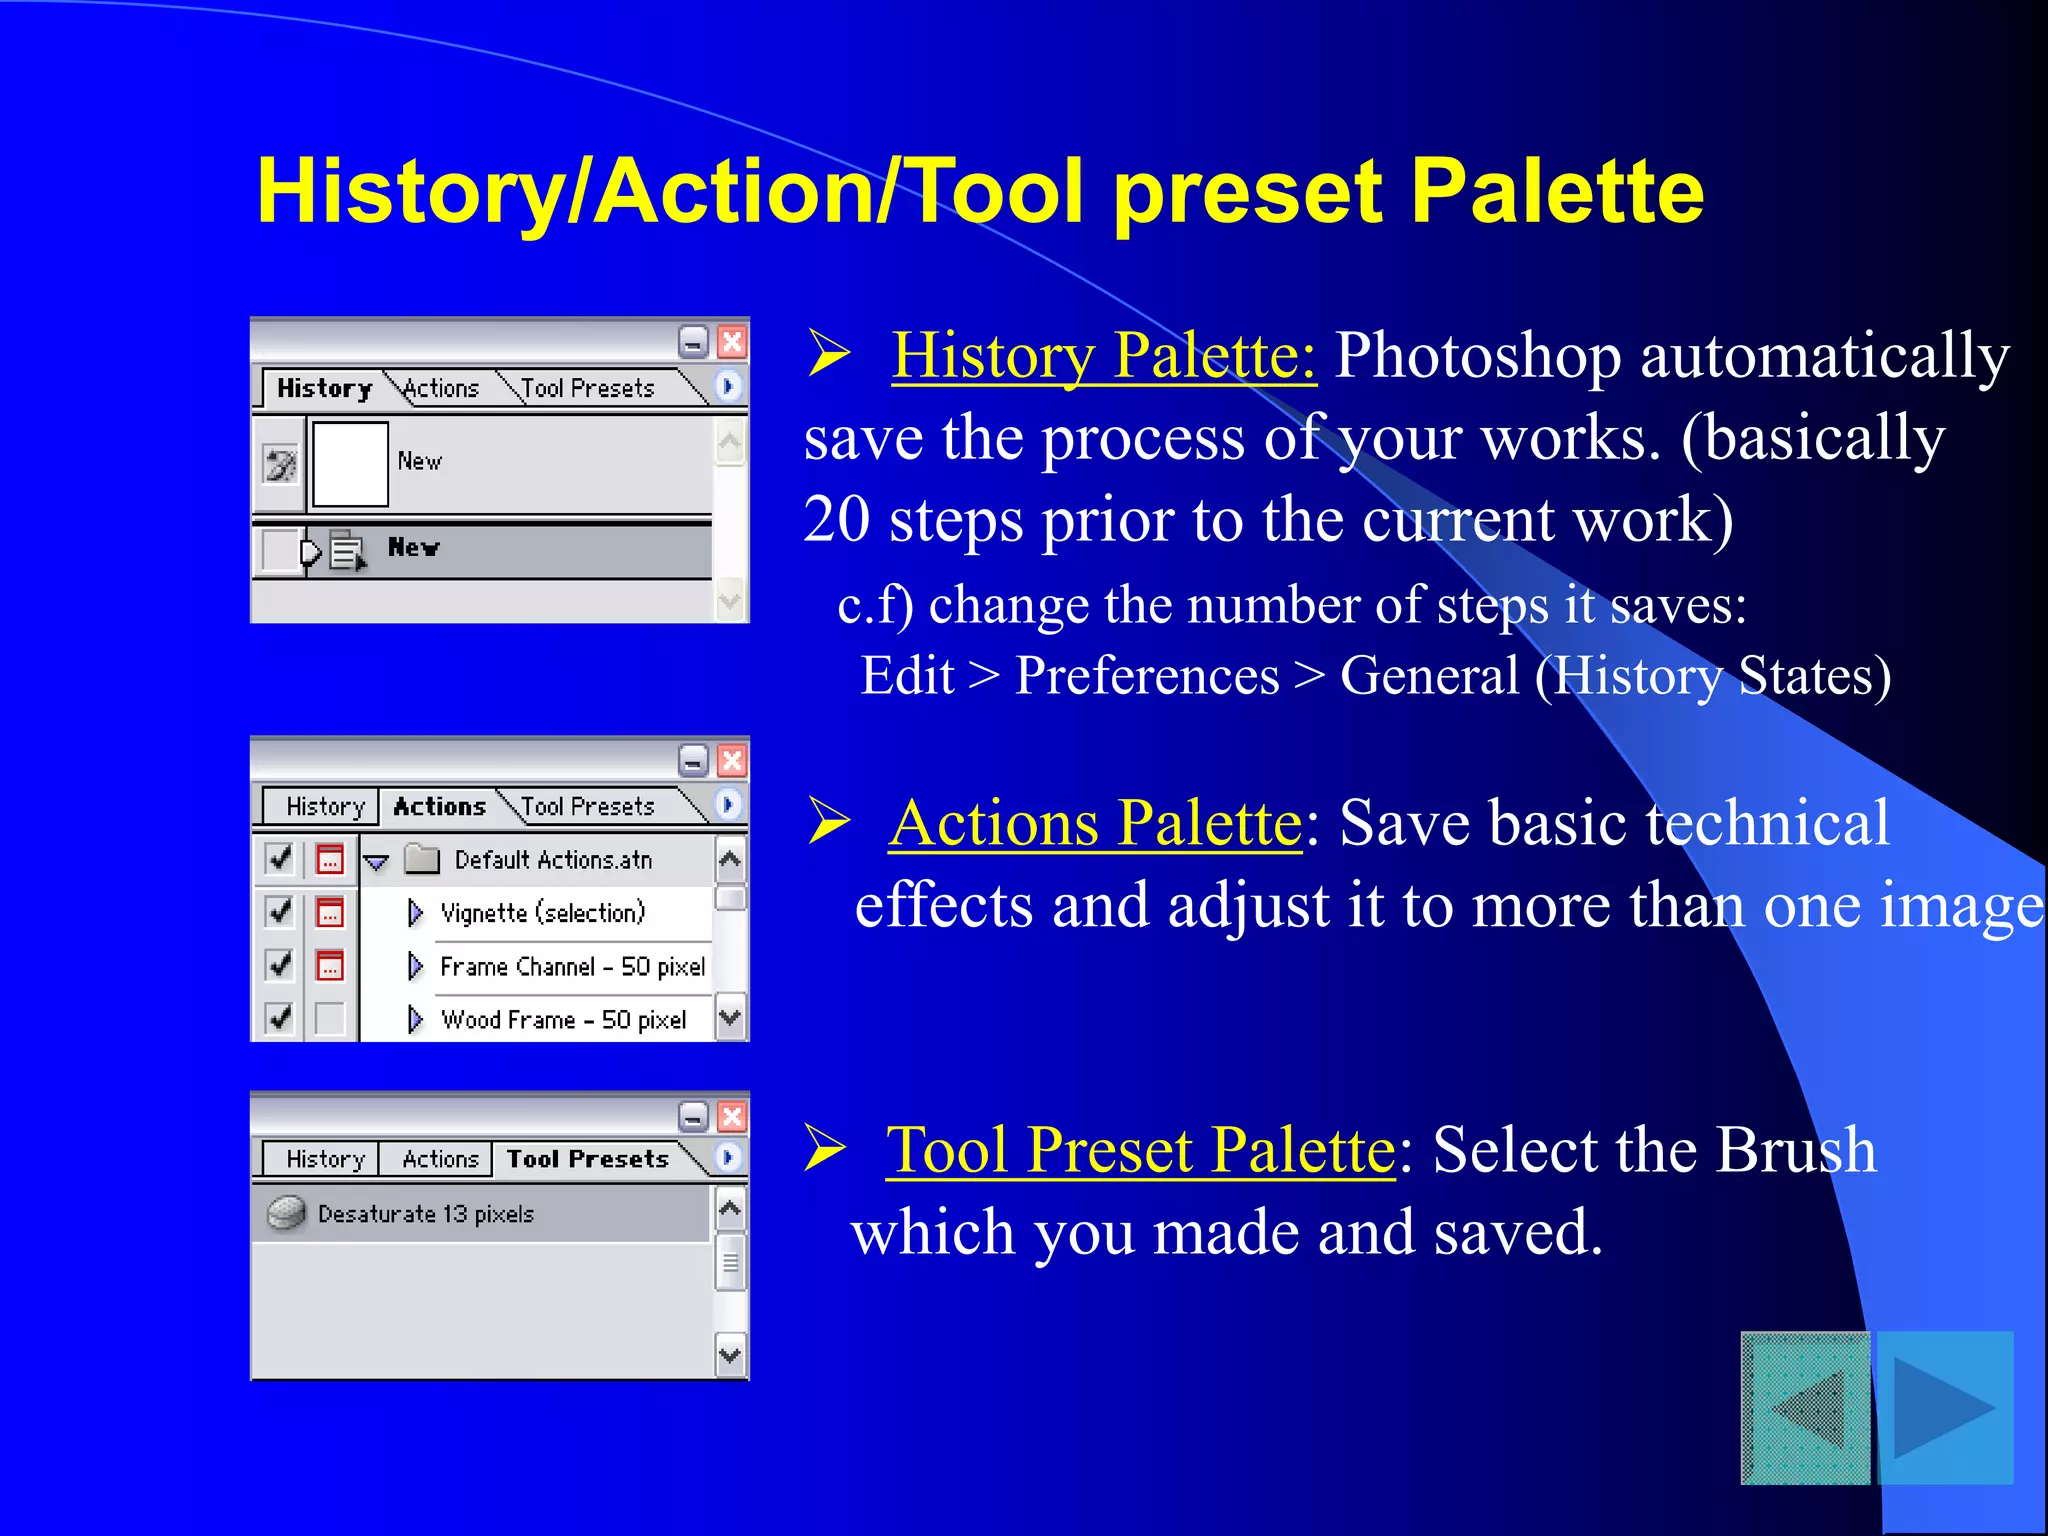
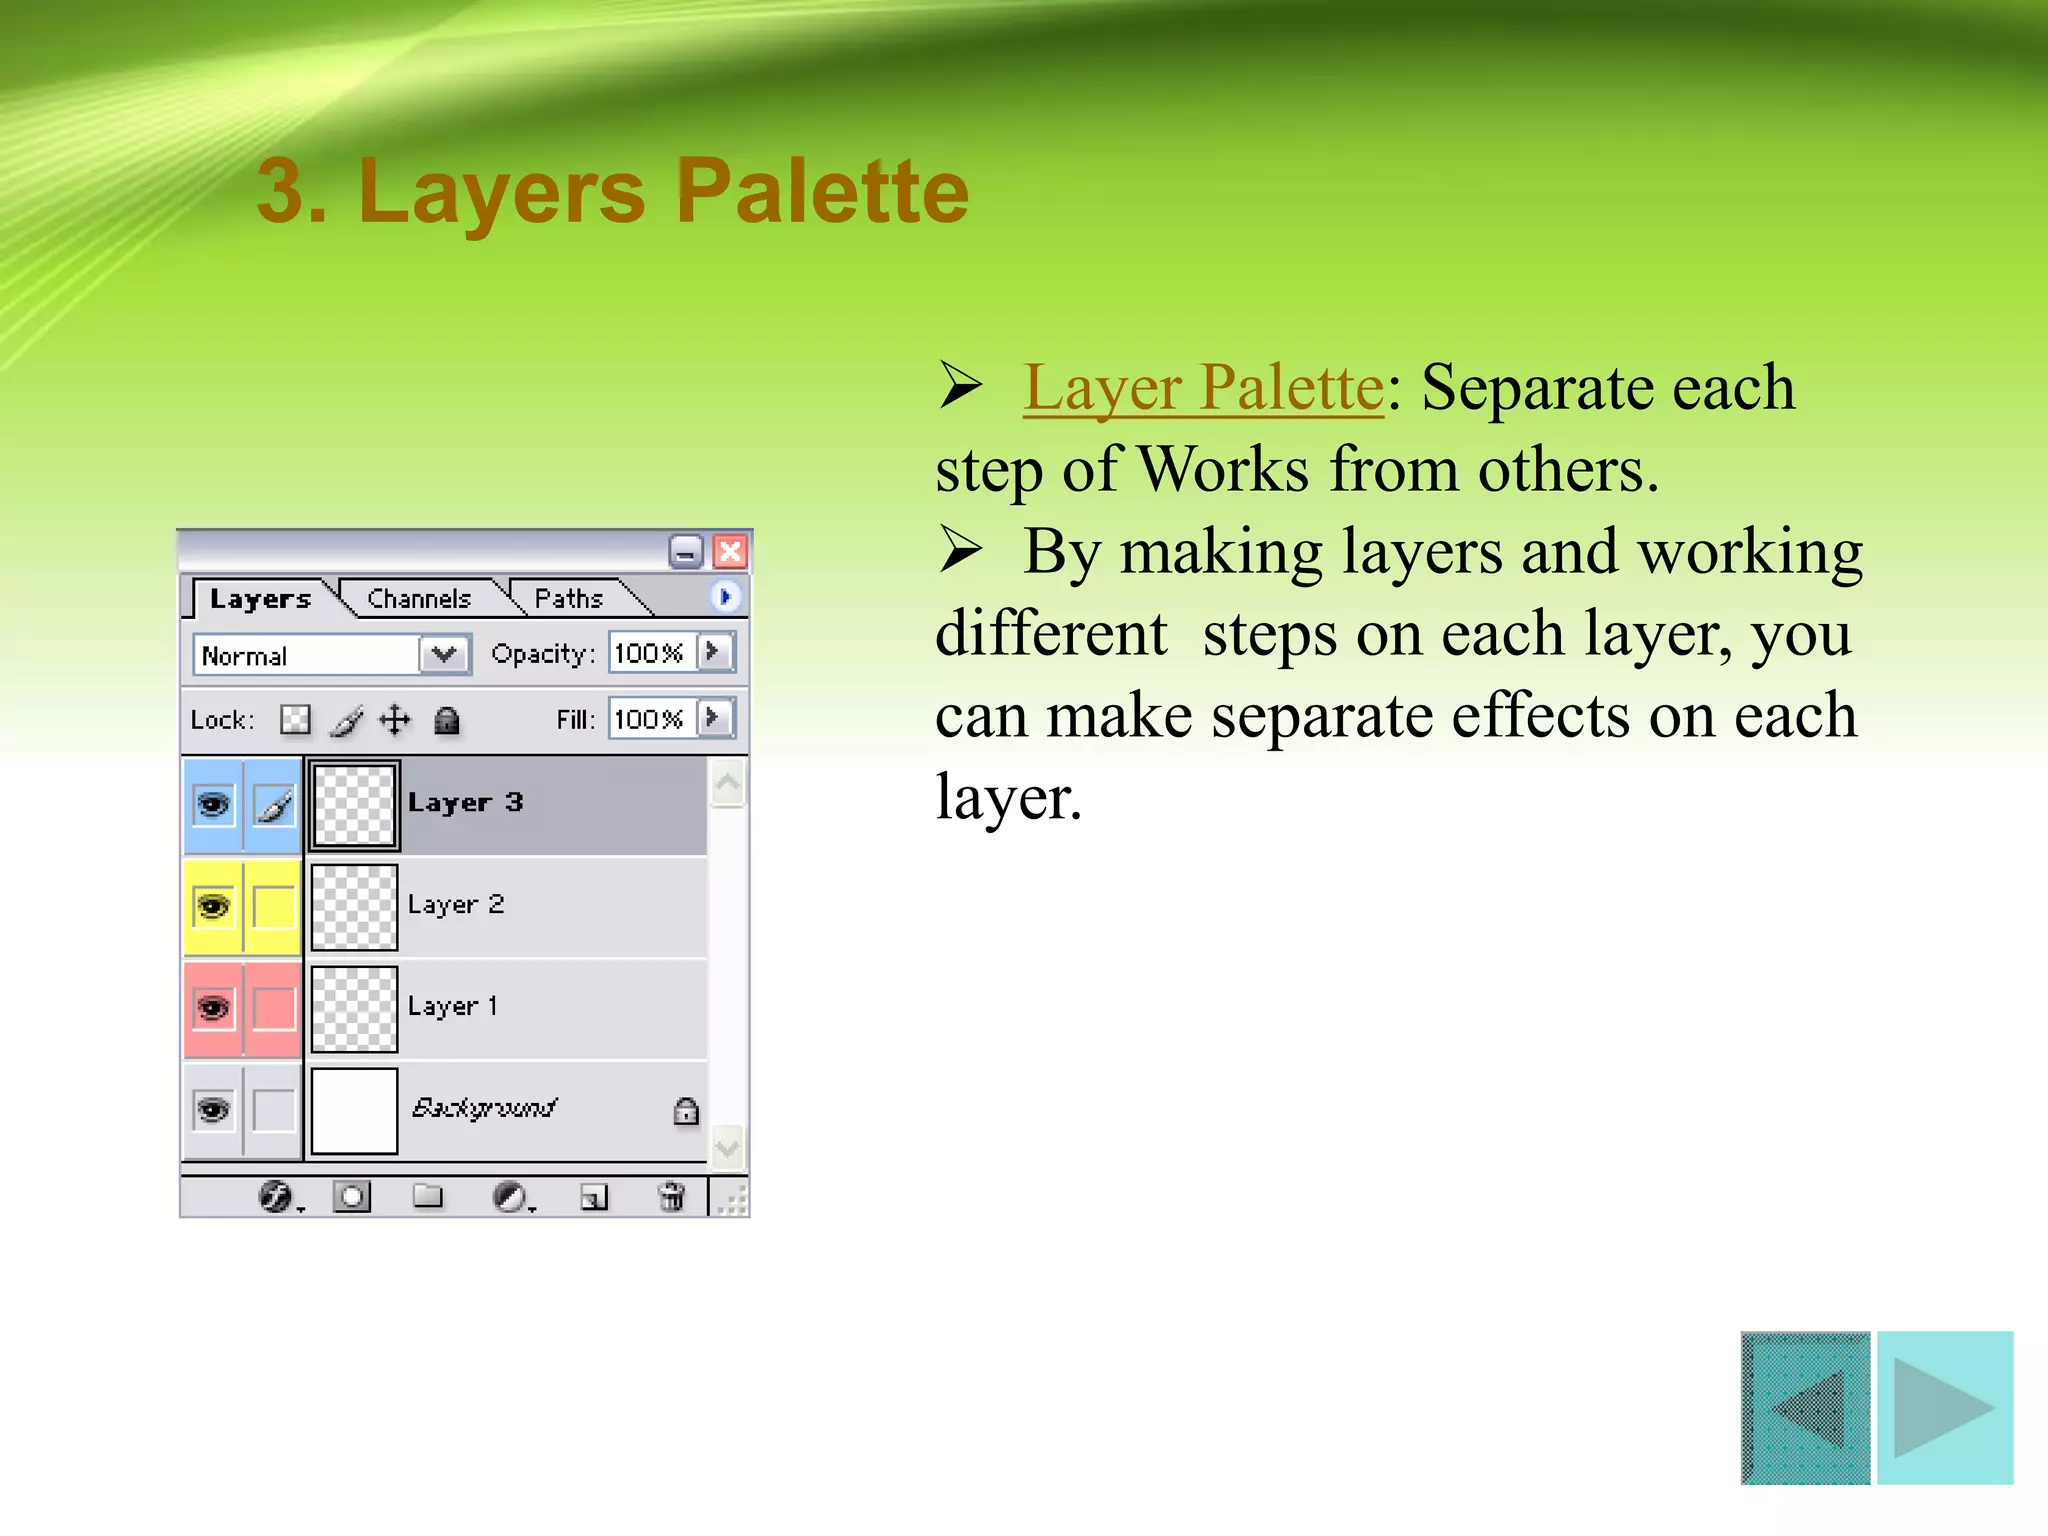


The document serves as an introductory guide to Adobe Photoshop CS3, detailing its capabilities for image creation and editing. It outlines essential functions such as saving, importing/exporting files, utilizing layers and various editing tools. Additionally, the document explains basic operations and tool functionalities within the software, making it a foundational resource for new users.


