Model Attribute Check Company Auto PropertyCeline George
In Odoo, the multi-company feature allows you to manage multiple companies within a single Odoo database instance. Each company can have its own configurations while still sharing common resources such as products, customers, and suppliers.
Instructions for Submissions thorugh G- Classroom.pptxJheel Barad
This presentation provides a briefing on how to upload submissions and documents in Google Classroom. It was prepared as part of an orientation for new Sainik School in-service teacher trainees. As a training officer, my goal is to ensure that you are comfortable and proficient with this essential tool for managing assignments and fostering student engagement.
Operation “Blue Star” is the only event in the history of Independent India where the state went into war with its own people. Even after about 40 years it is not clear if it was culmination of states anger over people of the region, a political game of power or start of dictatorial chapter in the democratic setup.
The people of Punjab felt alienated from main stream due to denial of their just demands during a long democratic struggle since independence. As it happen all over the word, it led to militant struggle with great loss of lives of military, police and civilian personnel. Killing of Indira Gandhi and massacre of innocent Sikhs in Delhi and other India cities was also associated with this movement.
Embracing GenAI - A Strategic ImperativePeter Windle
Artificial Intelligence (AI) technologies such as Generative AI, Image Generators and Large Language Models have had a dramatic impact on teaching, learning and assessment over the past 18 months. The most immediate threat AI posed was to Academic Integrity with Higher Education Institutes (HEIs) focusing their efforts on combating the use of GenAI in assessment. Guidelines were developed for staff and students, policies put in place too. Innovative educators have forged paths in the use of Generative AI for teaching, learning and assessments leading to pockets of transformation springing up across HEIs, often with little or no top-down guidance, support or direction.
This Gasta posits a strategic approach to integrating AI into HEIs to prepare staff, students and the curriculum for an evolving world and workplace. We will highlight the advantages of working with these technologies beyond the realm of teaching, learning and assessment by considering prompt engineering skills, industry impact, curriculum changes, and the need for staff upskilling. In contrast, not engaging strategically with Generative AI poses risks, including falling behind peers, missed opportunities and failing to ensure our graduates remain employable. The rapid evolution of AI technologies necessitates a proactive and strategic approach if we are to remain relevant.
Acetabularia Information For Class 9 .docxvaibhavrinwa19
Acetabularia acetabulum is a single-celled green alga that in its vegetative state is morphologically differentiated into a basal rhizoid and an axially elongated stalk, which bears whorls of branching hairs. The single diploid nucleus resides in the rhizoid.
Introduction to AI for Nonprofits with Tapp NetworkTechSoup
Dive into the world of AI! Experts Jon Hill and Tareq Monaur will guide you through AI's role in enhancing nonprofit websites and basic marketing strategies, making it easy to understand and apply.
Honest Reviews of Tim Han LMA Course Program.pptxtimhan337
Personal development courses are widely available today, with each one promising life-changing outcomes. Tim Han’s Life Mastery Achievers (LMA) Course has drawn a lot of interest. In addition to offering my frank assessment of Success Insider’s LMA Course, this piece examines the course’s effects via a variety of Tim Han LMA course reviews and Success Insider comments.
The Roman Empire A Historical Colossus.pdfkaushalkr1407
The Roman Empire, a vast and enduring power, stands as one of history's most remarkable civilizations, leaving an indelible imprint on the world. It emerged from the Roman Republic, transitioning into an imperial powerhouse under the leadership of Augustus Caesar in 27 BCE. This transformation marked the beginning of an era defined by unprecedented territorial expansion, architectural marvels, and profound cultural influence.
The empire's roots lie in the city of Rome, founded, according to legend, by Romulus in 753 BCE. Over centuries, Rome evolved from a small settlement to a formidable republic, characterized by a complex political system with elected officials and checks on power. However, internal strife, class conflicts, and military ambitions paved the way for the end of the Republic. Julius Caesar’s dictatorship and subsequent assassination in 44 BCE created a power vacuum, leading to a civil war. Octavian, later Augustus, emerged victorious, heralding the Roman Empire’s birth.
Under Augustus, the empire experienced the Pax Romana, a 200-year period of relative peace and stability. Augustus reformed the military, established efficient administrative systems, and initiated grand construction projects. The empire's borders expanded, encompassing territories from Britain to Egypt and from Spain to the Euphrates. Roman legions, renowned for their discipline and engineering prowess, secured and maintained these vast territories, building roads, fortifications, and cities that facilitated control and integration.
The Roman Empire’s society was hierarchical, with a rigid class system. At the top were the patricians, wealthy elites who held significant political power. Below them were the plebeians, free citizens with limited political influence, and the vast numbers of slaves who formed the backbone of the economy. The family unit was central, governed by the paterfamilias, the male head who held absolute authority.
Culturally, the Romans were eclectic, absorbing and adapting elements from the civilizations they encountered, particularly the Greeks. Roman art, literature, and philosophy reflected this synthesis, creating a rich cultural tapestry. Latin, the Roman language, became the lingua franca of the Western world, influencing numerous modern languages.
Roman architecture and engineering achievements were monumental. They perfected the arch, vault, and dome, constructing enduring structures like the Colosseum, Pantheon, and aqueducts. These engineering marvels not only showcased Roman ingenuity but also served practical purposes, from public entertainment to water supply.
June 3, 2024 Anti-Semitism Letter Sent to MIT President Kornbluth and MIT Cor...Levi Shapiro
Letter from the Congress of the United States regarding Anti-Semitism sent June 3rd to MIT President Sally Kornbluth, MIT Corp Chair, Mark Gorenberg
Dear Dr. Kornbluth and Mr. Gorenberg,
The US House of Representatives is deeply concerned by ongoing and pervasive acts of antisemitic
harassment and intimidation at the Massachusetts Institute of Technology (MIT). Failing to act decisively to ensure a safe learning environment for all students would be a grave dereliction of your responsibilities as President of MIT and Chair of the MIT Corporation.
This Congress will not stand idly by and allow an environment hostile to Jewish students to persist. The House believes that your institution is in violation of Title VI of the Civil Rights Act, and the inability or
unwillingness to rectify this violation through action requires accountability.
Postsecondary education is a unique opportunity for students to learn and have their ideas and beliefs challenged. However, universities receiving hundreds of millions of federal funds annually have denied
students that opportunity and have been hijacked to become venues for the promotion of terrorism, antisemitic harassment and intimidation, unlawful encampments, and in some cases, assaults and riots.
The House of Representatives will not countenance the use of federal funds to indoctrinate students into hateful, antisemitic, anti-American supporters of terrorism. Investigations into campus antisemitism by the Committee on Education and the Workforce and the Committee on Ways and Means have been expanded into a Congress-wide probe across all relevant jurisdictions to address this national crisis. The undersigned Committees will conduct oversight into the use of federal funds at MIT and its learning environment under authorities granted to each Committee.
• The Committee on Education and the Workforce has been investigating your institution since December 7, 2023. The Committee has broad jurisdiction over postsecondary education, including its compliance with Title VI of the Civil Rights Act, campus safety concerns over disruptions to the learning environment, and the awarding of federal student aid under the Higher Education Act.
• The Committee on Oversight and Accountability is investigating the sources of funding and other support flowing to groups espousing pro-Hamas propaganda and engaged in antisemitic harassment and intimidation of students. The Committee on Oversight and Accountability is the principal oversight committee of the US House of Representatives and has broad authority to investigate “any matter” at “any time” under House Rule X.
• The Committee on Ways and Means has been investigating several universities since November 15, 2023, when the Committee held a hearing entitled From Ivory Towers to Dark Corners: Investigating the Nexus Between Antisemitism, Tax-Exempt Universities, and Terror Financing. The Committee followed the hearing with letters to those institutions on January 10, 202
2024.06.01 Introducing a competency framework for languag learning materials ...Sandy Millin
http://sandymillin.wordpress.com/iateflwebinar2024
Published classroom materials form the basis of syllabuses, drive teacher professional development, and have a potentially huge influence on learners, teachers and education systems. All teachers also create their own materials, whether a few sentences on a blackboard, a highly-structured fully-realised online course, or anything in between. Despite this, the knowledge and skills needed to create effective language learning materials are rarely part of teacher training, and are mostly learnt by trial and error.
Knowledge and skills frameworks, generally called competency frameworks, for ELT teachers, trainers and managers have existed for a few years now. However, until I created one for my MA dissertation, there wasn’t one drawing together what we need to know and do to be able to effectively produce language learning materials.
This webinar will introduce you to my framework, highlighting the key competencies I identified from my research. It will also show how anybody involved in language teaching (any language, not just English!), teacher training, managing schools or developing language learning materials can benefit from using the framework.
How to Make a Field invisible in Odoo 17Celine George
It is possible to hide or invisible some fields in odoo. Commonly using “invisible” attribute in the field definition to invisible the fields. This slide will show how to make a field invisible in odoo 17.
Unit 8 - Information and Communication Technology (Paper I).pdfThiyagu K
This slides describes the basic concepts of ICT, basics of Email, Emerging Technology and Digital Initiatives in Education. This presentations aligns with the UGC Paper I syllabus.
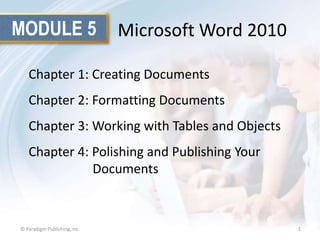
In Module 5, you learn about Microsoft Word 2010. Chapter 1 covers creating documents including entering and editing text. Chapter 2 deals with formatting tools that help improve the look of your documents. In Chapter 3, you work with tables to help organize information and objects to add visual appeal. Finally, Chapter 4 covers features for reviewing and finalizing your document and printing it or publishing it online.
The third chapter in the Word module deals with working with tables and objects.
There are several features in Word that help you organize information and add visual appeal to your documents. Tables organize information into rows and columns, allowing you to convey a great deal of data in a small, neat space. You can also insert visual objects, including photos, illustrations, and shapes to better illustrate a point or make your document more attractive.
In this chapter, you will also learn how to build tables and insert and manipulate objects.
You are helping to organize an open house to celebrate The Chocolate Museum’s 10th year in operation. The Museum will give each guest a small tote bag containing a pad and pen stamped with the Museum’s logo, a bar of chocolate from a local chocolate company, and a recipe for Mexican Hot Chocolate. Your boss has asked you to create the recipe document, including a table of ingredients, fun illustrations and pictures of hot chocolate, and recipe instructions.
Tables use columns and rows to help organize sets of information and show relationships among separate pieces of information. For example, imagine a table used to compare the nutritional information for types of snacks. The first column of the table lists the name of each snack. The second column lists the quantity of calories in each snack. The third column lists the quantity of carbohydrates in each snack. The fourth column lists the quantity of fats in each snack. By reading down the table’s columns you could compare the nutritional ingredients of each type of snack, and might use that information to help you select which snack to eat.
In this skill, you will use M5-C3-S1-HCRecipe.docx tocreate a table to list the amounts of each recipe ingredient in the first column and the type of ingredient in the second column. Click in the blank line between the words Ingredients and Steps. The insertion point will be resting where you want the table to be inserted. Another Way: You can also click the boxes that appear in order to insert a table containing up to eight rows and columns.
Enter the desired number in to the Number of columns field and the Number of rows field. Click the OK button to create the table in your document. Another Way: Click the arrows on the right side of each of the number fields to change the number of rows and columns.
You can access Quick Tables from the Table button in the Insert tab. Quick Tables includes common table styles that you might find useful, such as two column lists or calendars.
If you have entered text outside of a table, you canconvert that information into table form. You must provide an indicator to mark where each new column begins. For these indicators, or separators, people often use tabs, but you can also use commas, paragraphs, or single characters such as hyphens.
Notice inM5-C3-S1-HCRecipe.docx,the text under the heading Steps is selected from the start of Step 1 through the end of Step 7. The step list includes tabs to separate the step numbers from the step descriptions. Click the Insert tab and then click the Table button. Click Convert Text to Table.Tip:Before using the Convert Text to Table feature, verify that you have inserted column and row separators. Click the Show/Hide button in the Paragraph group on the Home tab to display the arrows that represent tabs and the paragraph symbols that indicate paragraph breaks.
In the Convert Text to Table dialog box, be sure that the correct option is selected under the Separate text at section. Click the OK button to set the options selected.Tip:Note that the AutoFit behavior section of the Convert Text to Table dialog box defaults to Auto in the Fixed column width option. The Auto setting will adjust column widths to fit the text in them, as shown in the images on the next slide.
Here you see that the text has been converted to a table.
To convert a table back to text you click the Convert to Text button in the Data group in the Table Tools Layout tab. You will then get a choice of what to use as a separator in the text (tabs, paragraphs, commas, or another symbol you indicate).
Sometimes in order to fit more text on a page or improve the design, you may want to change the page orientation of a document. Word offers two types of document orientations. By default, Word documents are set up in portrait orientation, where the height of a page is greater than the width. You can change this to landscape orientation, where the width of a page is greater than the height.Although you should try to set the page orientation before entering content, you may need to make a change once the content is entered. Tip:Apply the correct page orientation as early as you can while building a document so there are no surprises about how text or inserted objects, such as pictures, might shift on the page once the new margin settings are applied.
Here is M5-C3-S3-HCRecipe.docx, in Portrait orientation. To change to Landscape orientation, go to the Page Layout tab and select the Orientation button in the Page Setup group.
Here is the same document in Landscape orientation.Tip:You should view how your text balances on a page once you change the page orientation. Use the Print Preview feature (click the File tab and then Print) to see how your printed document will look. Check it over carefully and make necessary adjustments before printing.
The standard page size for most documents is 8½” × 11”. Sometimes you may have a landscape orientation document that runs slightly longer than a single page. To fit it on one page, consider printing to another paper size, such as 8½” × 14”. See Module 5 Chapter 1 for more about adjusting margins in Word.
At times you will need to add more data to an already-created table. To accommodate the additional data, you can easily insert new columns or rows. If it is not already open, open M5-C3-S3-HCRecipe.docx, the file you saved in the previous skill, and save the file as M5-C3-S4-HCRecipe.
In this skill, you will insert a heading row in one of your tables. UsingM5-C3-S3-HCRecipe.docx,we will insert a row above the selected row.Tip:To insert a column rather than a row, simply select a column and then click the Insert Left or Insert Right button in the Table Tools Layout tab.
Tip:When you insert a new column, you may find that the column width does not accommodate the data within it very well. You can resize columns by placing your cursor over a column dividing line until the cursor turns into two vertical lines with arrows facing left and right. Click and drag the divider to the right or left to adjust column widths.
If you need to delete a row or column, there are a couple of ways to do so. Place your mouse pointer at the top of the column(s) or to the left of a row(s) until the pointer turns to a solid black arrow and click to select it. You may need to double-click to select a row. Right-click, and in the shortcut menu that appears, select either Delete Rows or Delete Columns.
In Slide Show View, click the Answer button for Question 1 after you believe that you know the correct answer. The correct answer will be displayed. Then click the Answer button for Question 2 and the answer will appear. Continue repeating these steps for all four questions in order. When complete, click the Next Slide button.These Checkpoints are designed to provide you with an opportunity to reflect on a few concepts at a time.
Not all tables are made up of consistent sets of rows and columns. Some may combine the top row into a single cell that contains a table title. In other cases, you may want to combine a set of cells so they create a larger block in a table based form, just as a passport has a large square for the person’s picture and other lines containing personal data. The process of combining rows or columns is called merging. If it is not already open, open M5-C3-S4-HCRecipe.docx, the file you saved in the previous skill, and save the file as M5-C3-S5-HCRecipe.
Here, in M5-C3-S4-HCRecipe.docx, you will notice that the text in the first row of the second table is selected. Clicking the Layout tab and the Merge Cell button will merge the selected cells.Tip:You can merge rows, columns, or rows and columns, based on the combination of rows and/or columns you select before clicking Merge Cells.
Use a table and the merge function to build forms or documents such as resumes.
There are a variety of ways you can format a table. You can add shading or modify the thickness or color of the lines that define the table cells. You can also specify which border lines should be displayed and which should not.
In this skill (using M5-C3-S5-HCRecipe.docx),you will learn how to alter a table so that it has no borders showing at all. To select the table, right-click within the table, point to Select, and then click Table. Another way: Click and drag to select all the cells of the table.
Using the arrow on the Borders button in the Table Tools Design tab, select the appropriate formatting.Tip: You can apply shading to individual cells of your table to help visually separate cell contents instead of relying on borders to do so.
The gallery of table styles is found on the Table Tools Design tab. Just click in a table and move your pointing device over the various style options in the gallery, which are simultaneously previewed on your table. When you see one that you like, click on it and the style is applied to your table instantly!
Word includes a feature called Shapes that lets you easily draw a variety of shapes in your documents, from lines to stars and arrows. You can use these shapes to build flow charts or simple illustrations to help you make a point or add visual appeal. Open M5-C3-S7-HCRecipe.docx, the student data file, and save the file as M5-C3-S7-HCRecipe in your Module 5 working folder.
Using M5-C3-S7-HCRecipe.docx,a shape has been selected from the Shapes button on the Insert tab.Another Way: Right-click an object and choose Format AutoShape to choose a fill color from the Format AutoShape dialog box.
Use the SmartArt feature in the Illustrations group in the Insert tab to insert certain types of diagrams, such as an organizational chart or pyramid diagram. Once you have drawn a SmartArt object, you can click in individual elements of the diagram and entertext labels.
Microsoft provides a rich repository of illustrations, pictures, and audio and video clips for use in your documents. These items can help you pack a design punch with very little effort. You use the Clip Art task pane to locate and insert objects installed with the Office program and from Office.com.
Here you see theM5-C3-S7-HCRecipe.docx document with the Clip Art button selected. Make sure there is a check mark in the Include Office.com content check box and click the Go button to see the clip art images. Click the image to insert it in your document.
Your documents can benefit from these clips if they will be published online where viewers can click on links to play audio and video content.
Objects do not always appear in a size that suits your document. You can easily resize graphic objects by using the handles located in each corner or along the sides of the selected object. If you need to maintain the object’s original proportions, resize by dragging a corner handle. If you don’t want to retain the object’s original proportions, resize the image by dragging a side handle.
Using M5-C3-S8-HCRecipe.docx, you can resize the object by clicking and dragging one of the corner or side handles. Use the alignment buttons in the Paragraph group on the Home tab to align the object on the page.Another Way: Right-click the object and select Format Picture. Change the settings in the Height and Width fields in the Crop section to half of the original number values.
When you place an object in a document, the object is by default set off, or separated, from the text. Thus, you may have text above and below the object, but not next to or behind it. To adjust how the object and text are arranged, select the picture, then click the Wrap Text button in the Arrange group on the Picture Tools Format tab. In this drop-down menu you have many arrangement options such as placing the picture behind the text, in front of the text, or in line with the text.
Some objects will contribute more clearly to your document’s message if they are rotated from their original orientation, either to fit with your page design and with other objects or to suggest a relationship between objects. You can also rotate an object to suggest movement. It is easy to rotate objects by using the rotation handle, which displays as a green circle above a selected object.
In this document (M5-C3-S9-HCRecipe.docx), the saucepan is inserted as if it’s sitting flat on a stove. However, rotating it to bring the handle upward suggests that you are pouring the contents into cups, which is the result described in the recipe text. Another way: Select an object and click the Rotate button in the Arrange group on the Picture Tools Format tab. Tip:Rotating the object in this way may cause it to jump to the next page. You can fix or prevent this by either deleting any extra spacing before the object or resizing the object to be smaller.
Click the WordArt button in the Text group on the Home tab and select a WordArt style to insert a text box that reads Your text here. Select the placeholder text and type to customize the text. Make further formatting changes to the WordArt text by clicking options in the Drawing Tools Format tab, which is available when the WordArt object is active.
In Slide Show View, click the Answer button for Question 5 after you believe that you know the correct answer. The correct answer will be displayed. Then click the Answer button for Question 6 and the answer will appear. Continue repeating these steps for all four questions in order. When complete, click the Next Slide button.