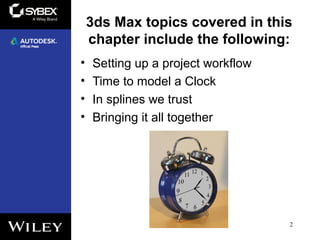
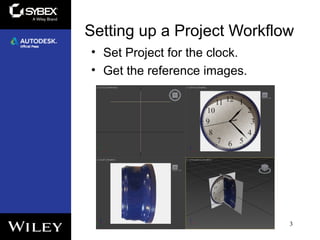
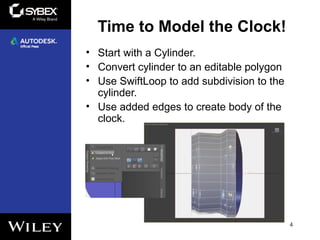
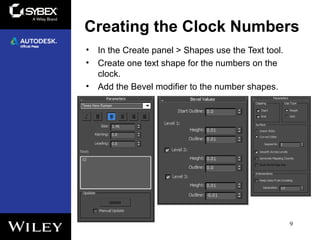
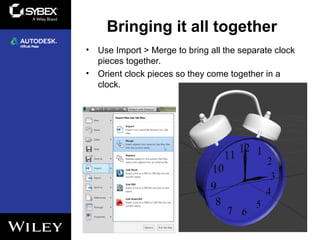
3ds Max 2015 Essentials
Chapter 2: Your First 3ds Max Project
3ds Max topics covered in this
chapter include the following:
• Setting up a project workflow
• Time to model a Clock
• In splines we trust
• Bringing it all together
2
Setting up a Project Workflow
• Set Project for the clock.
• Get the reference images.
3
• Start with a Cylinder.
• Convert cylinder to an editable polygon
• Use SwiftLoop to add subdivision to the
cylinder.
• Use added edges to create body of the
clock.
4
Time to Model the Clock!
• Select polygons that represent the
front face of the clock.
• Use Bevel to indent the face of the
clock.
5
Time to Model the Clock!
In Splines We Trust
6
• Using the Line tool create the handle.
• In the Rendering rollout, check Enable In
Renderer and Enable In Viewport.
• Convert the handle object to an editable
polygon and edit the handle ends to flatten
them.
In Splines We Trust
• Using the line tool, create outline of the
clock bell.
• Add the Lathe modifier to the bell shape.
7
In Splines We Trust
• Using the line tool, create the outline of the clock hands.
• Add the Extrude modifier to the clock hands shape.
8
Creating the Clock Numbers
• In the Create panel > Shapes use the Text tool.
• Create one text shape for the numbers on the
clock.
• Add the Bevel modifier to the number shapes.
9
Bringing it all together
• Use Import > Merge to bring all the separate clock
pieces together.
• Orient clock pieces so they come together in a
clock.
10

Max2015 ch02

  • 1.
    3ds Max 2015Essentials Chapter 2: Your First 3ds Max Project
  • 2.
    3ds Max topicscovered in this chapter include the following: • Setting up a project workflow • Time to model a Clock • In splines we trust • Bringing it all together 2
  • 3.
    Setting up aProject Workflow • Set Project for the clock. • Get the reference images. 3
  • 4.
    • Start witha Cylinder. • Convert cylinder to an editable polygon • Use SwiftLoop to add subdivision to the cylinder. • Use added edges to create body of the clock. 4 Time to Model the Clock!
  • 5.
    • Select polygonsthat represent the front face of the clock. • Use Bevel to indent the face of the clock. 5 Time to Model the Clock!
  • 6.
    In Splines WeTrust 6 • Using the Line tool create the handle. • In the Rendering rollout, check Enable In Renderer and Enable In Viewport. • Convert the handle object to an editable polygon and edit the handle ends to flatten them.
  • 7.
    In Splines WeTrust • Using the line tool, create outline of the clock bell. • Add the Lathe modifier to the bell shape. 7
  • 8.
    In Splines WeTrust • Using the line tool, create the outline of the clock hands. • Add the Extrude modifier to the clock hands shape. 8
  • 9.
    Creating the ClockNumbers • In the Create panel > Shapes use the Text tool. • Create one text shape for the numbers on the clock. • Add the Bevel modifier to the number shapes. 9
  • 10.
    Bringing it alltogether • Use Import > Merge to bring all the separate clock pieces together. • Orient clock pieces so they come together in a clock. 10