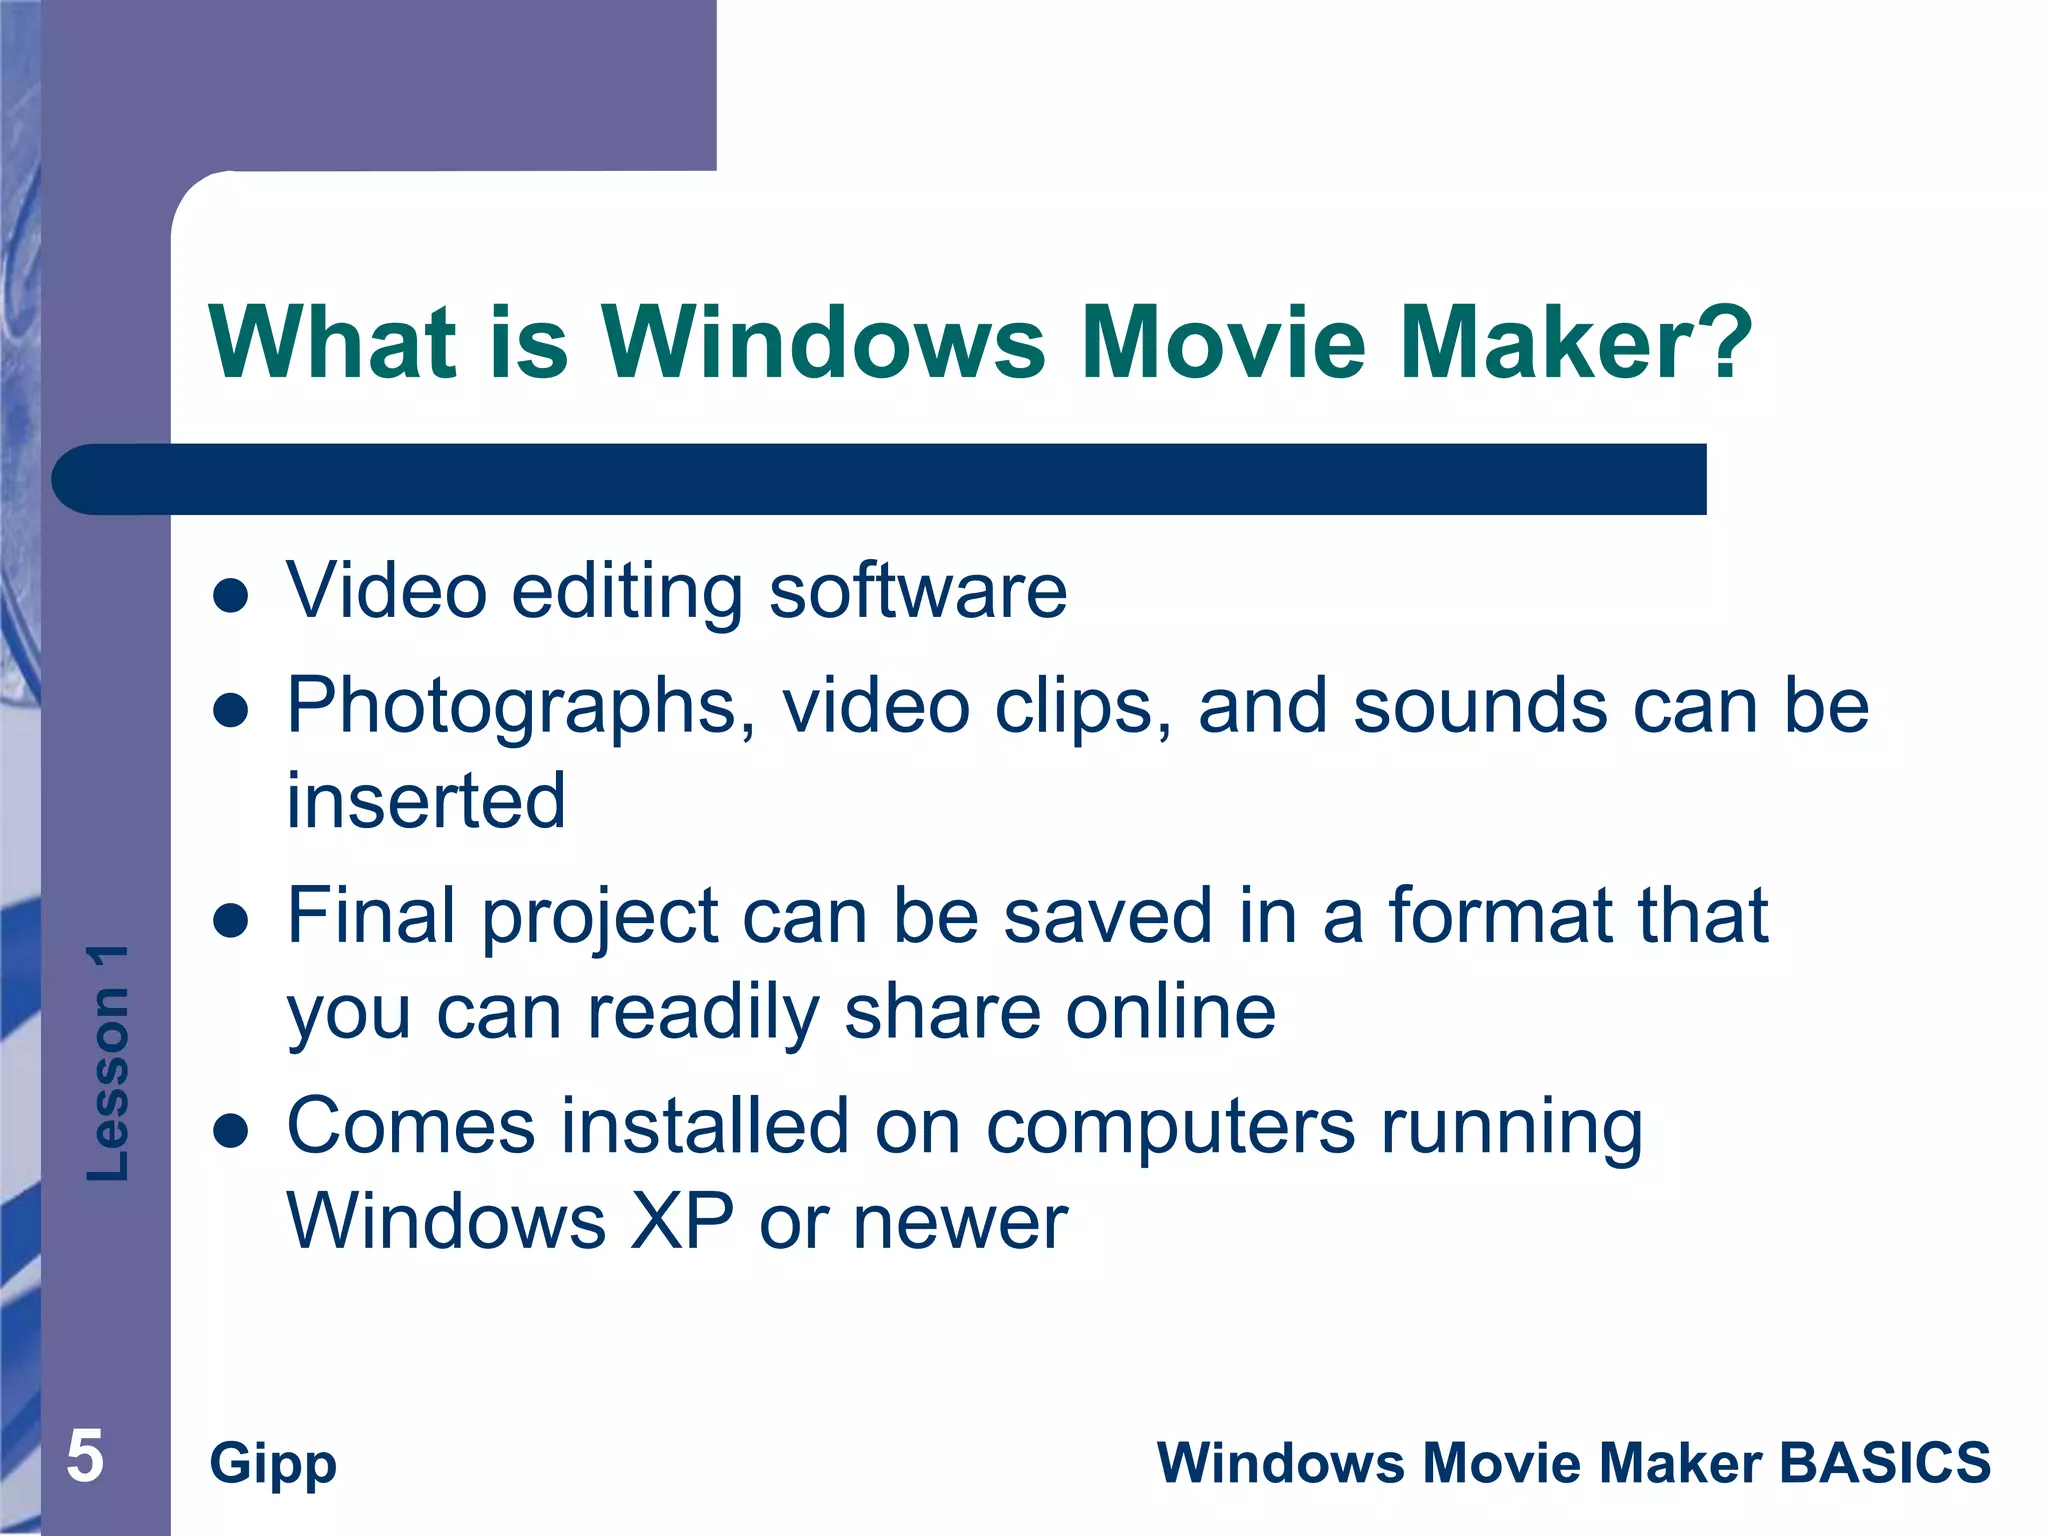
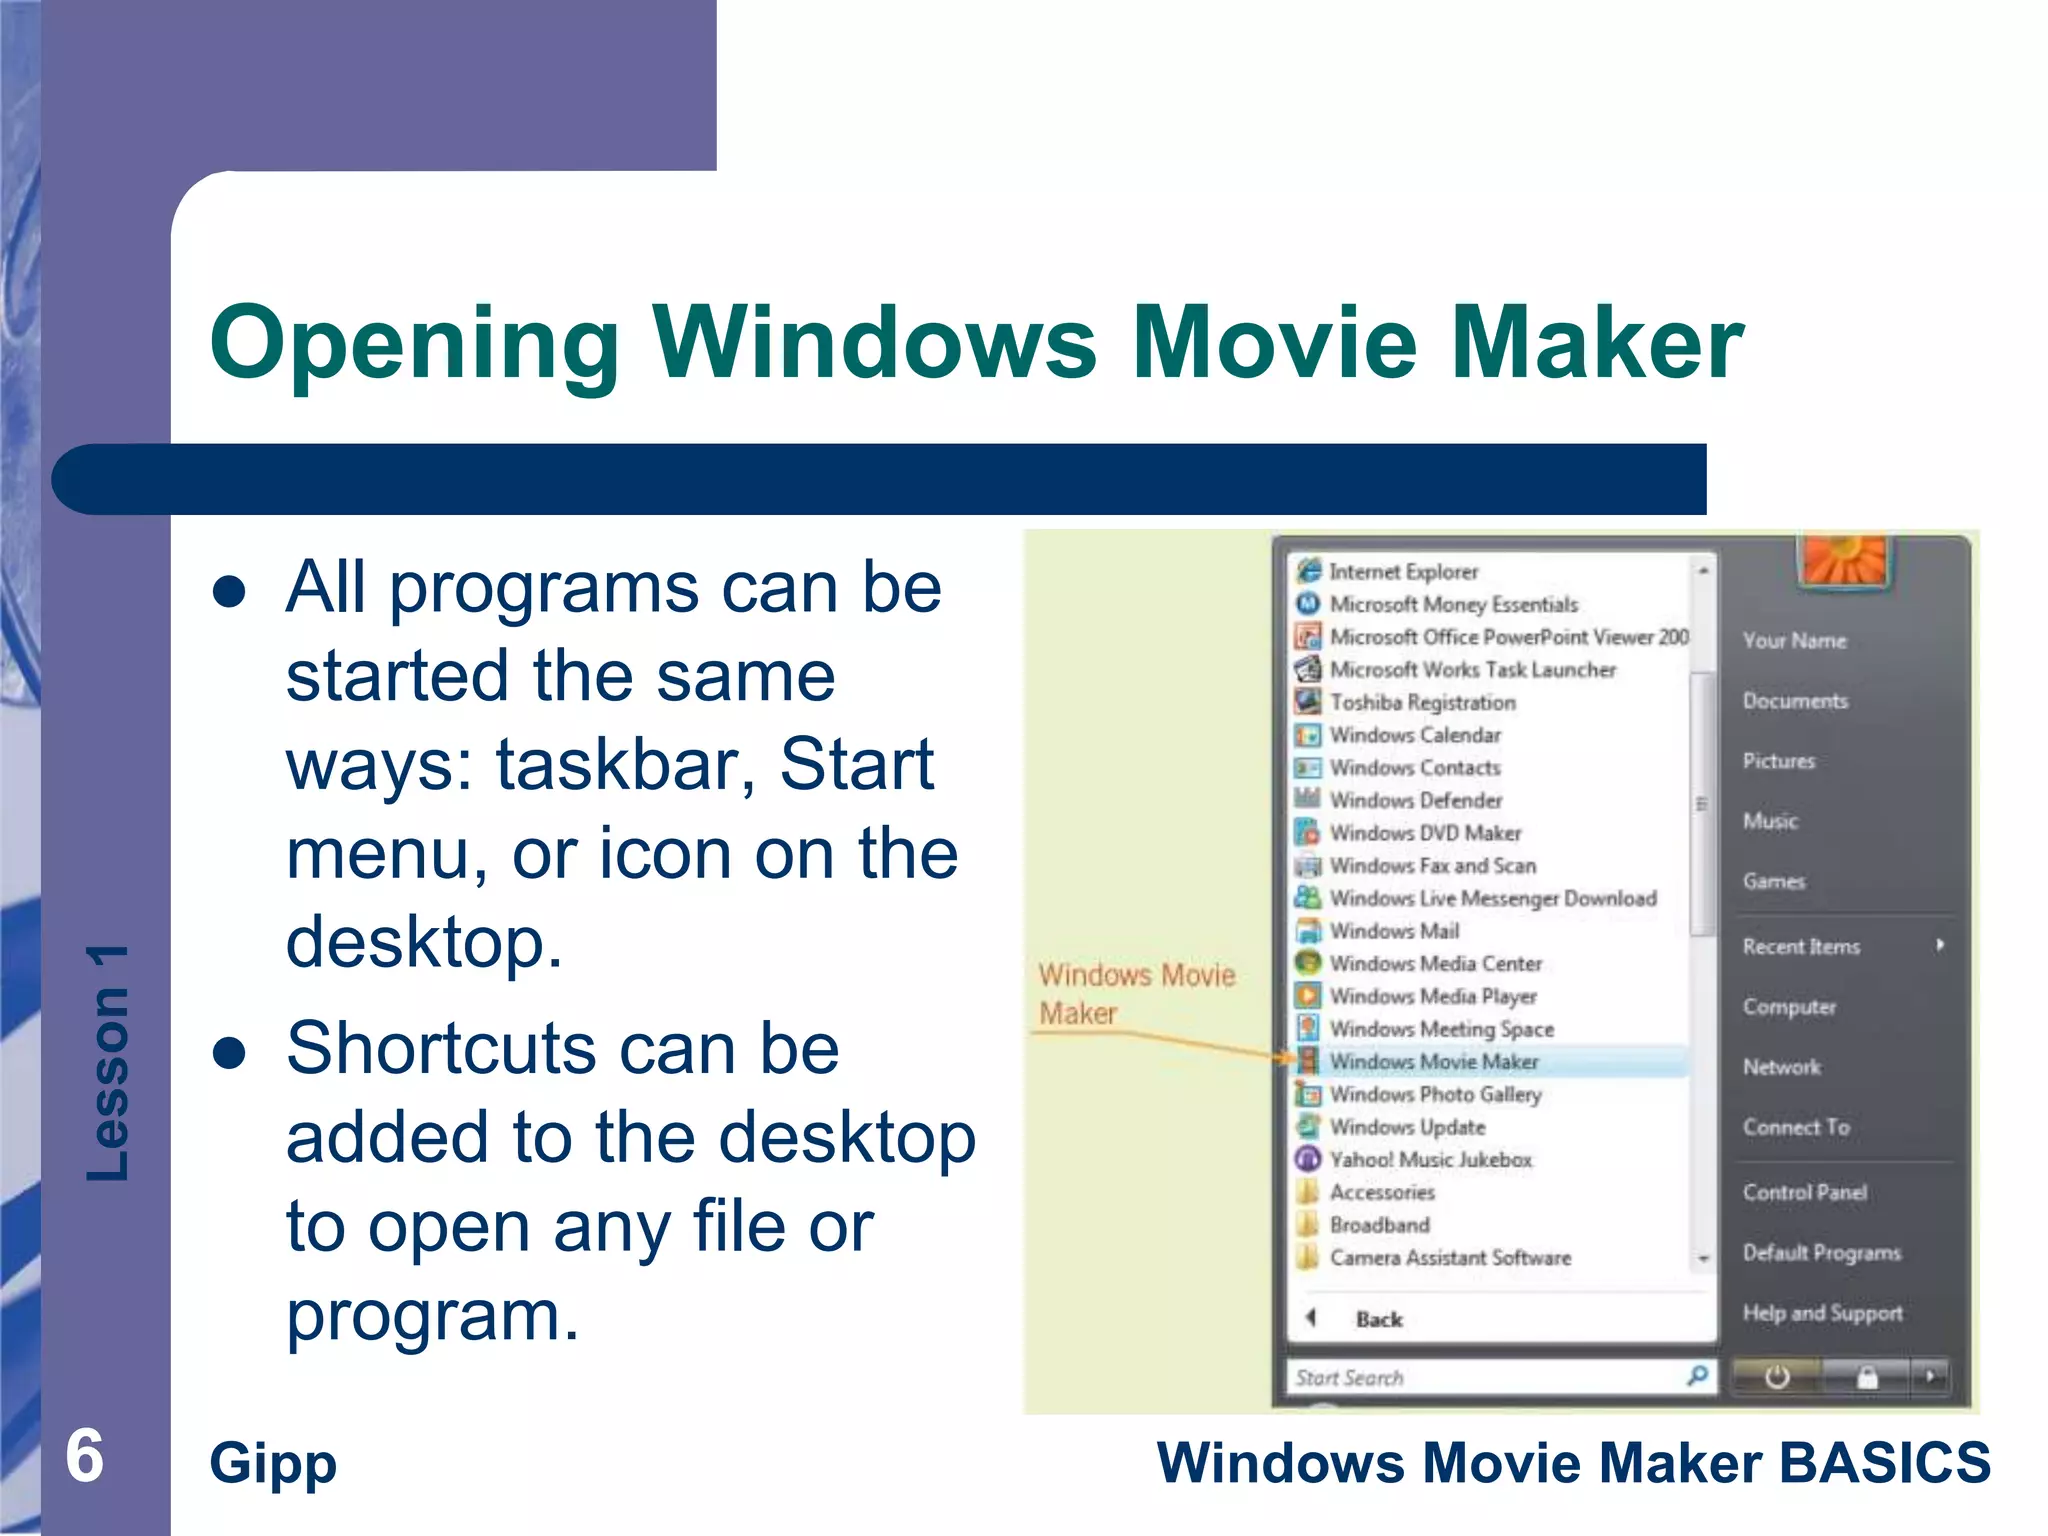
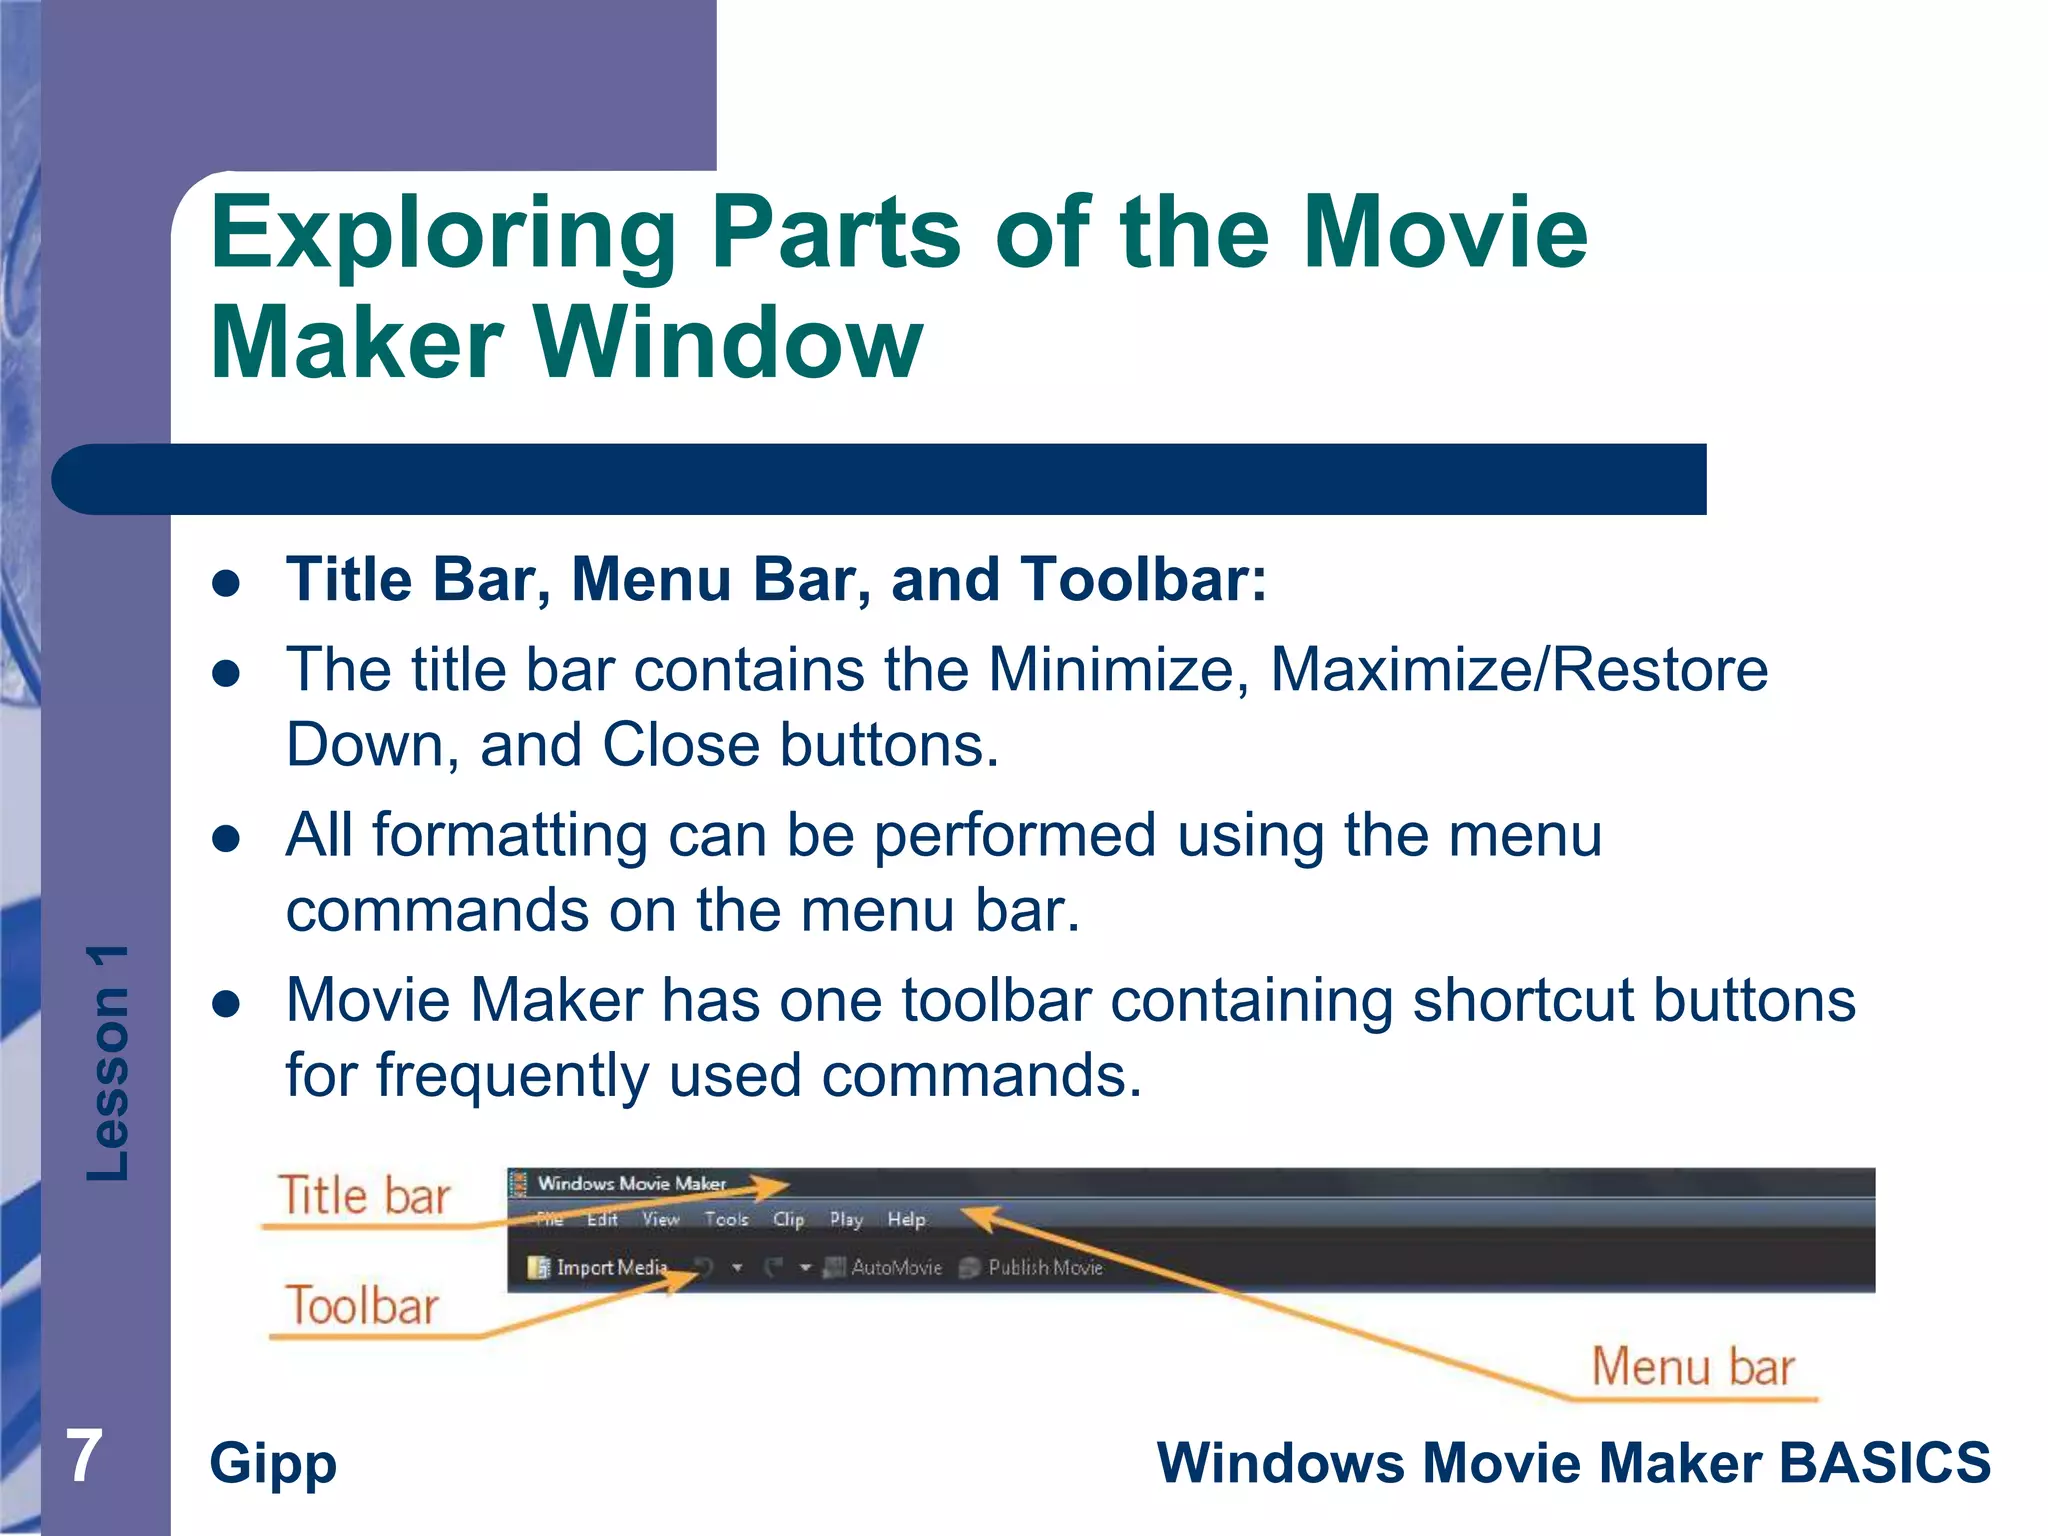
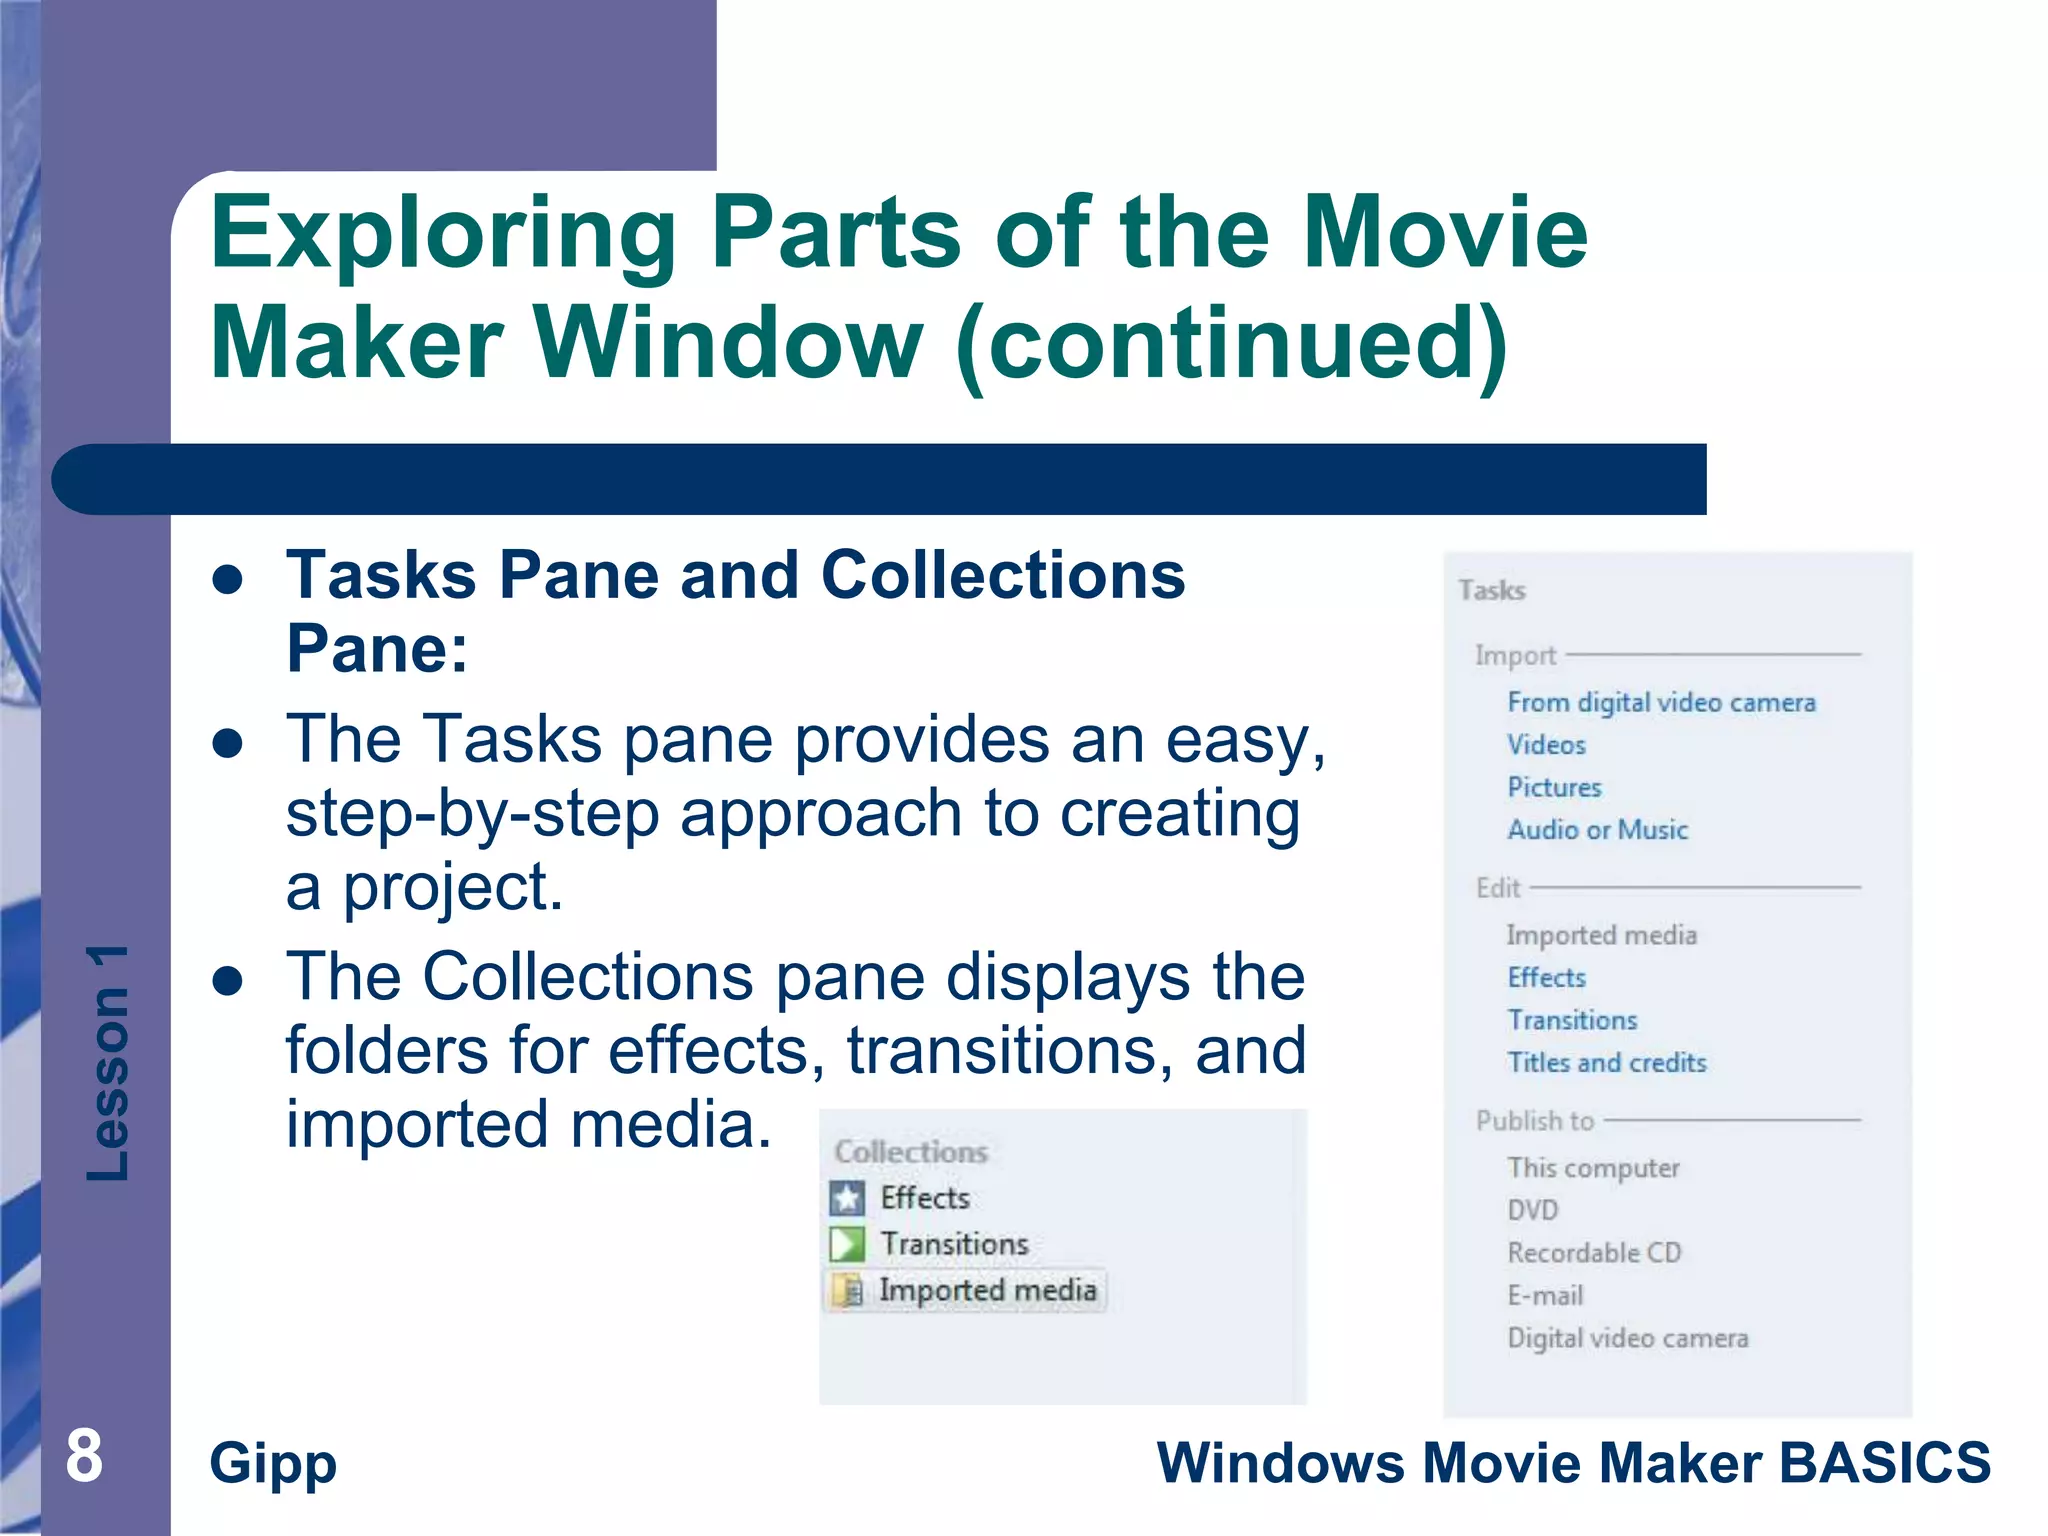
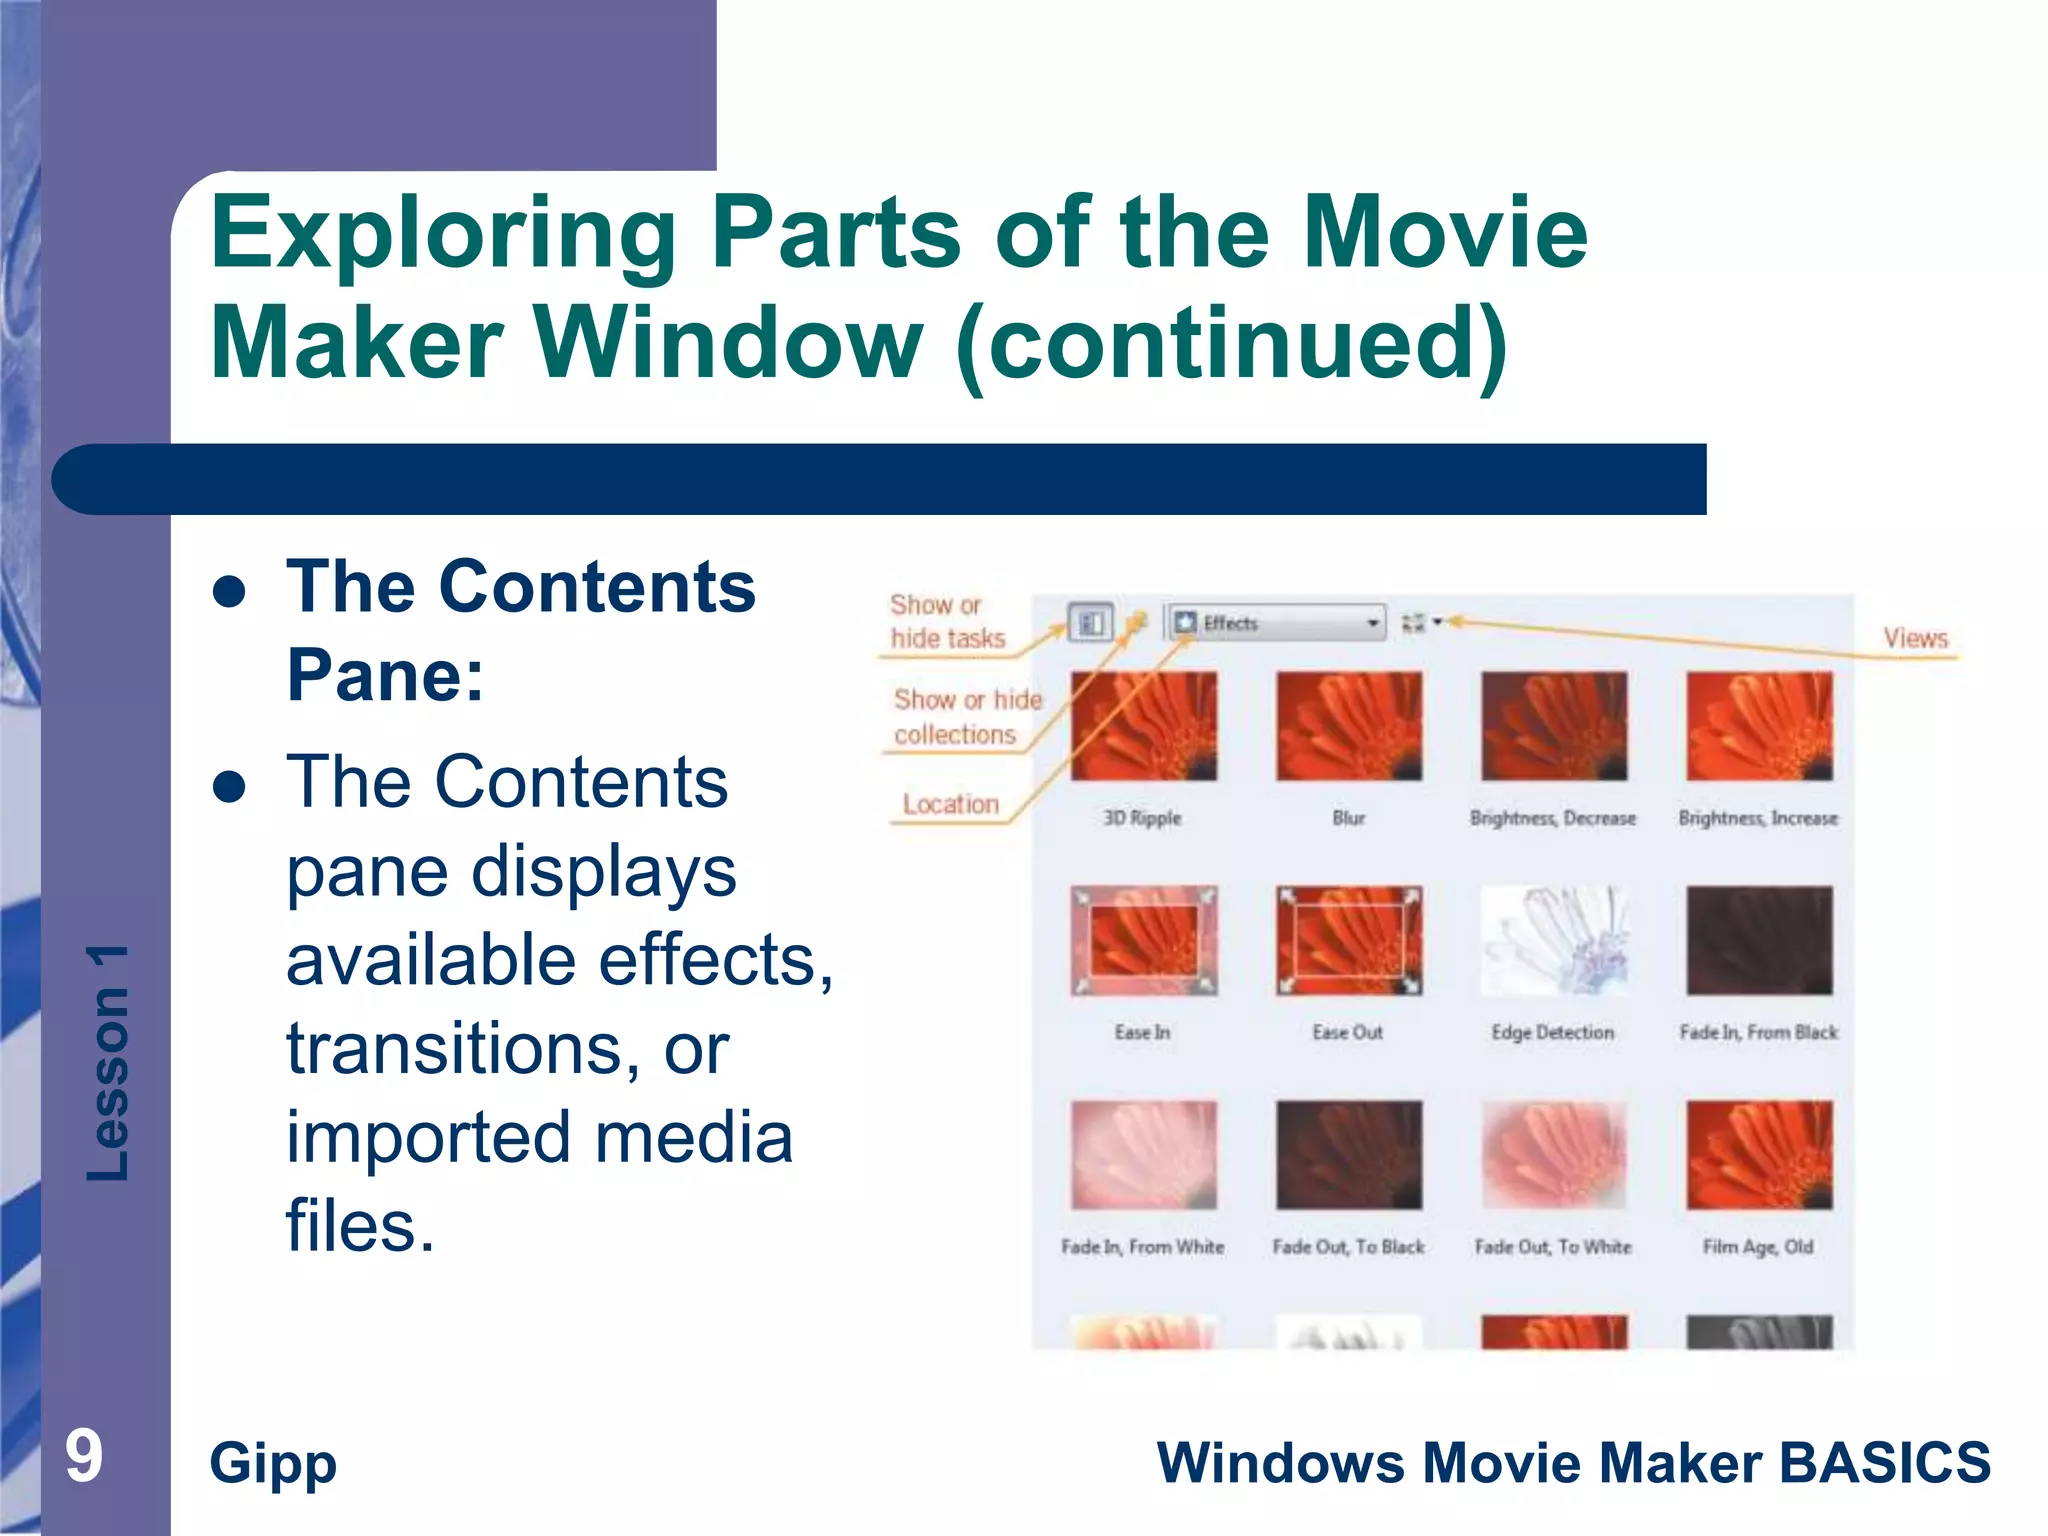
1
Lesson 1
Exploring Windows Movie Maker
Windows Movie Maker
BASICS
Gipp
Lesson1
Gipp Windows Movie Maker BASICS
About the Presentations
 The presentations cover the objectives found in
the opening of each lesson.
 All lesson objectives are listed in the beginning
of each presentation.
 You may customize the presentations to fit your
class needs.
 Some figures from the lessons are included. A
complete set of images from the book can be
found on the Instructor Resources disc.
2
Lesson1
Gipp Windows Movie Maker BASICS33
Objectives
 Open Windows Movie Maker
 Describe various parts of the Movie Maker
window
 Verify default settings
 Open an existing project
 Preview the video
 Use the Help feature
Lesson1
Gipp Windows Movie Maker BASICS44
Vocabulary
 Collections pane
 Contents pane
 Menu bar
 Preview Monitor
 Storyboard
 Tasks pane
 Thumbnail
 Timeline
 Title bar
 Toolbar
Lesson1
Gipp Windows Movie Maker BASICS
What is Windows Movie Maker?
 Video editing software
 Photographs, video clips, and sounds can be
inserted
 Final project can be saved in a format that
you can readily share online
 Comes installed on computers running
Windows XP or newer
5
Lesson1
Gipp Windows Movie Maker BASICS66
Opening Windows Movie Maker
 All programs can be
started the same
ways: taskbar, Start
menu, or icon on the
desktop.
 Shortcuts can be
added to the desktop
to open any file or
program.
Lesson1
Gipp Windows Movie Maker BASICS77
Exploring Parts of the Movie
Maker Window
 Title Bar, Menu Bar, and Toolbar:
 The title bar contains the Minimize, Maximize/Restore
Down, and Close buttons.
 All formatting can be performed using the menu
commands on the menu bar.
 Movie Maker has one toolbar containing shortcut buttons
for frequently used commands.
Lesson1
Gipp Windows Movie Maker BASICS
Exploring Parts of the Movie
Maker Window (continued)
 Tasks Pane and Collections
Pane:
 The Tasks pane provides an easy,
step-by-step approach to creating
a project.
 The Collections pane displays the
folders for effects, transitions, and
imported media.
8
Lesson1
Gipp Windows Movie Maker BASICS
Exploring Parts of the Movie
Maker Window (continued)
 The Contents
Pane:
 The Contents
pane displays
available effects,
transitions, or
imported media
files.
9
Lesson1
Gipp Windows Movie Maker BASICS
Exploring Parts of the Movie
Maker Window (continued)
 The Storyboard, Timeline, and Preview Monitor:
 The Storyboard appears at the bottom of the screen
and shows a scene sequence of a multimedia
project.
 The Timeline can be shown in place of the
Storyboard, which displays the timing duration for
photographs, video, and audio/music.
 The Preview Monitor is displayed on the right side of
the screen and is used to preview the movie.
10
Lesson1
Gipp Windows Movie Maker BASICS1111
Setting Defaults
 The size of each pane can be adjusted.
 To resize any parts of the window, let the mouse
pointer hover on the white line separating the
parts of the window until a two-headed arrow
appears. Click and drag to resize the panes as
desired.
 You can change the default saving location for
temporary files on the General tab in the Options
dialog box.
Lesson1
Gipp Windows Movie Maker BASICS
Setting Defaults (continued)
 Use the Advanced tab in the
Options dialog box to
change default durations.
 The default picture duration
is 5 seconds.
 The default transition
duration is 1.25 seconds.
 The aspect ratio can also be
changed to either 4:3
(standard) or 16:9 (wide-
screen).
12
Lesson1
Gipp Windows Movie Maker BASICS13
Opening an Existing Project
13
 If your computer doesn’t know where the individual
files of a project are located, the photos or video
clips will not appear.
 A red X appears in the Storyboard or Timeline
indicating the computer doesn’t know where the
project files are.
 Click File and Open to open an existing project.
Lesson1
Gipp Windows Movie Maker BASICS14
Preview the Video
14
 Exploring the Video with the Storyboard:
 Video clips and photographs can be dragged from
one place to another in the Storyboard.
 Click the Rewind Storyboard button on the
Storyboard to go to the beginning of the Storyboard.
 The Next Frame button on the Preview Monitor
advances the movie one frame at a time.
Lesson1
Gipp Windows Movie Maker BASICS15
Preview the Video (continued)
 Exploring the Video with the Timeline:
 Viewing the video in the Timeline allows you to
adjust the duration of time that photographs and
video clips are displayed.
15
Lesson1
Gipp Windows Movie Maker BASICS16
Using Movie Maker Help
 You can use the Help feature of
Windows Movie Maker whenever
you need help on a specific topic.
 Click Help from the Menu bar and
then Help Topics to open the
Windows Help and Support
screen.
 You can search by keyword in
the Help section.
16
Lesson1
Gipp Windows Movie Maker BASICS17
Summary
In this lesson, you learned:
 You can create movies using photographs, video clips,
sounds, effects, transitions, and titles in Movie Maker.
 Windows Movie Maker is installed on all computers with
Windows XP or newer operating system versions.
 The Preview Monitor displays a preview of the video.
 You can use the Storyboard or the Timeline to organize
the video.
 The Storyboard is a rough draft that outlines the
sequence of a multimedia project; objects can be easily
moved in this view.
17
Lesson1
Gipp Windows Movie Maker BASICS18
Summary (continued)
 The Timeline allows you to edit the duration of video,
photographs, audio, and title overlays.
 Clicking Tools and Options will allow you to change
default settings.
 Movie Maker will display a red X on the Storyboard or
Timeline if your computer does not know where the files
are stored.
 The Movie Maker Help screen will answer many of your
questions and assist you with common functions.
18

Exploring Movie Maker

  • 1.
    1 Lesson 1 Exploring WindowsMovie Maker Windows Movie Maker BASICS Gipp
  • 2.
    Lesson1 Gipp Windows MovieMaker BASICS About the Presentations  The presentations cover the objectives found in the opening of each lesson.  All lesson objectives are listed in the beginning of each presentation.  You may customize the presentations to fit your class needs.  Some figures from the lessons are included. A complete set of images from the book can be found on the Instructor Resources disc. 2
  • 3.
    Lesson1 Gipp Windows MovieMaker BASICS33 Objectives  Open Windows Movie Maker  Describe various parts of the Movie Maker window  Verify default settings  Open an existing project  Preview the video  Use the Help feature
  • 4.
    Lesson1 Gipp Windows MovieMaker BASICS44 Vocabulary  Collections pane  Contents pane  Menu bar  Preview Monitor  Storyboard  Tasks pane  Thumbnail  Timeline  Title bar  Toolbar
  • 5.
    Lesson1 Gipp Windows MovieMaker BASICS What is Windows Movie Maker?  Video editing software  Photographs, video clips, and sounds can be inserted  Final project can be saved in a format that you can readily share online  Comes installed on computers running Windows XP or newer 5
  • 6.
    Lesson1 Gipp Windows MovieMaker BASICS66 Opening Windows Movie Maker  All programs can be started the same ways: taskbar, Start menu, or icon on the desktop.  Shortcuts can be added to the desktop to open any file or program.
  • 7.
    Lesson1 Gipp Windows MovieMaker BASICS77 Exploring Parts of the Movie Maker Window  Title Bar, Menu Bar, and Toolbar:  The title bar contains the Minimize, Maximize/Restore Down, and Close buttons.  All formatting can be performed using the menu commands on the menu bar.  Movie Maker has one toolbar containing shortcut buttons for frequently used commands.
  • 8.
    Lesson1 Gipp Windows MovieMaker BASICS Exploring Parts of the Movie Maker Window (continued)  Tasks Pane and Collections Pane:  The Tasks pane provides an easy, step-by-step approach to creating a project.  The Collections pane displays the folders for effects, transitions, and imported media. 8
  • 9.
    Lesson1 Gipp Windows MovieMaker BASICS Exploring Parts of the Movie Maker Window (continued)  The Contents Pane:  The Contents pane displays available effects, transitions, or imported media files. 9
  • 10.
    Lesson1 Gipp Windows MovieMaker BASICS Exploring Parts of the Movie Maker Window (continued)  The Storyboard, Timeline, and Preview Monitor:  The Storyboard appears at the bottom of the screen and shows a scene sequence of a multimedia project.  The Timeline can be shown in place of the Storyboard, which displays the timing duration for photographs, video, and audio/music.  The Preview Monitor is displayed on the right side of the screen and is used to preview the movie. 10
  • 11.
    Lesson1 Gipp Windows MovieMaker BASICS1111 Setting Defaults  The size of each pane can be adjusted.  To resize any parts of the window, let the mouse pointer hover on the white line separating the parts of the window until a two-headed arrow appears. Click and drag to resize the panes as desired.  You can change the default saving location for temporary files on the General tab in the Options dialog box.
  • 12.
    Lesson1 Gipp Windows MovieMaker BASICS Setting Defaults (continued)  Use the Advanced tab in the Options dialog box to change default durations.  The default picture duration is 5 seconds.  The default transition duration is 1.25 seconds.  The aspect ratio can also be changed to either 4:3 (standard) or 16:9 (wide- screen). 12
  • 13.
    Lesson1 Gipp Windows MovieMaker BASICS13 Opening an Existing Project 13  If your computer doesn’t know where the individual files of a project are located, the photos or video clips will not appear.  A red X appears in the Storyboard or Timeline indicating the computer doesn’t know where the project files are.  Click File and Open to open an existing project.
  • 14.
    Lesson1 Gipp Windows MovieMaker BASICS14 Preview the Video 14  Exploring the Video with the Storyboard:  Video clips and photographs can be dragged from one place to another in the Storyboard.  Click the Rewind Storyboard button on the Storyboard to go to the beginning of the Storyboard.  The Next Frame button on the Preview Monitor advances the movie one frame at a time.
  • 15.
    Lesson1 Gipp Windows MovieMaker BASICS15 Preview the Video (continued)  Exploring the Video with the Timeline:  Viewing the video in the Timeline allows you to adjust the duration of time that photographs and video clips are displayed. 15
  • 16.
    Lesson1 Gipp Windows MovieMaker BASICS16 Using Movie Maker Help  You can use the Help feature of Windows Movie Maker whenever you need help on a specific topic.  Click Help from the Menu bar and then Help Topics to open the Windows Help and Support screen.  You can search by keyword in the Help section. 16
  • 17.
    Lesson1 Gipp Windows MovieMaker BASICS17 Summary In this lesson, you learned:  You can create movies using photographs, video clips, sounds, effects, transitions, and titles in Movie Maker.  Windows Movie Maker is installed on all computers with Windows XP or newer operating system versions.  The Preview Monitor displays a preview of the video.  You can use the Storyboard or the Timeline to organize the video.  The Storyboard is a rough draft that outlines the sequence of a multimedia project; objects can be easily moved in this view. 17
  • 18.
    Lesson1 Gipp Windows MovieMaker BASICS18 Summary (continued)  The Timeline allows you to edit the duration of video, photographs, audio, and title overlays.  Clicking Tools and Options will allow you to change default settings.  Movie Maker will display a red X on the Storyboard or Timeline if your computer does not know where the files are stored.  The Movie Maker Help screen will answer many of your questions and assist you with common functions. 18