Download to read offline


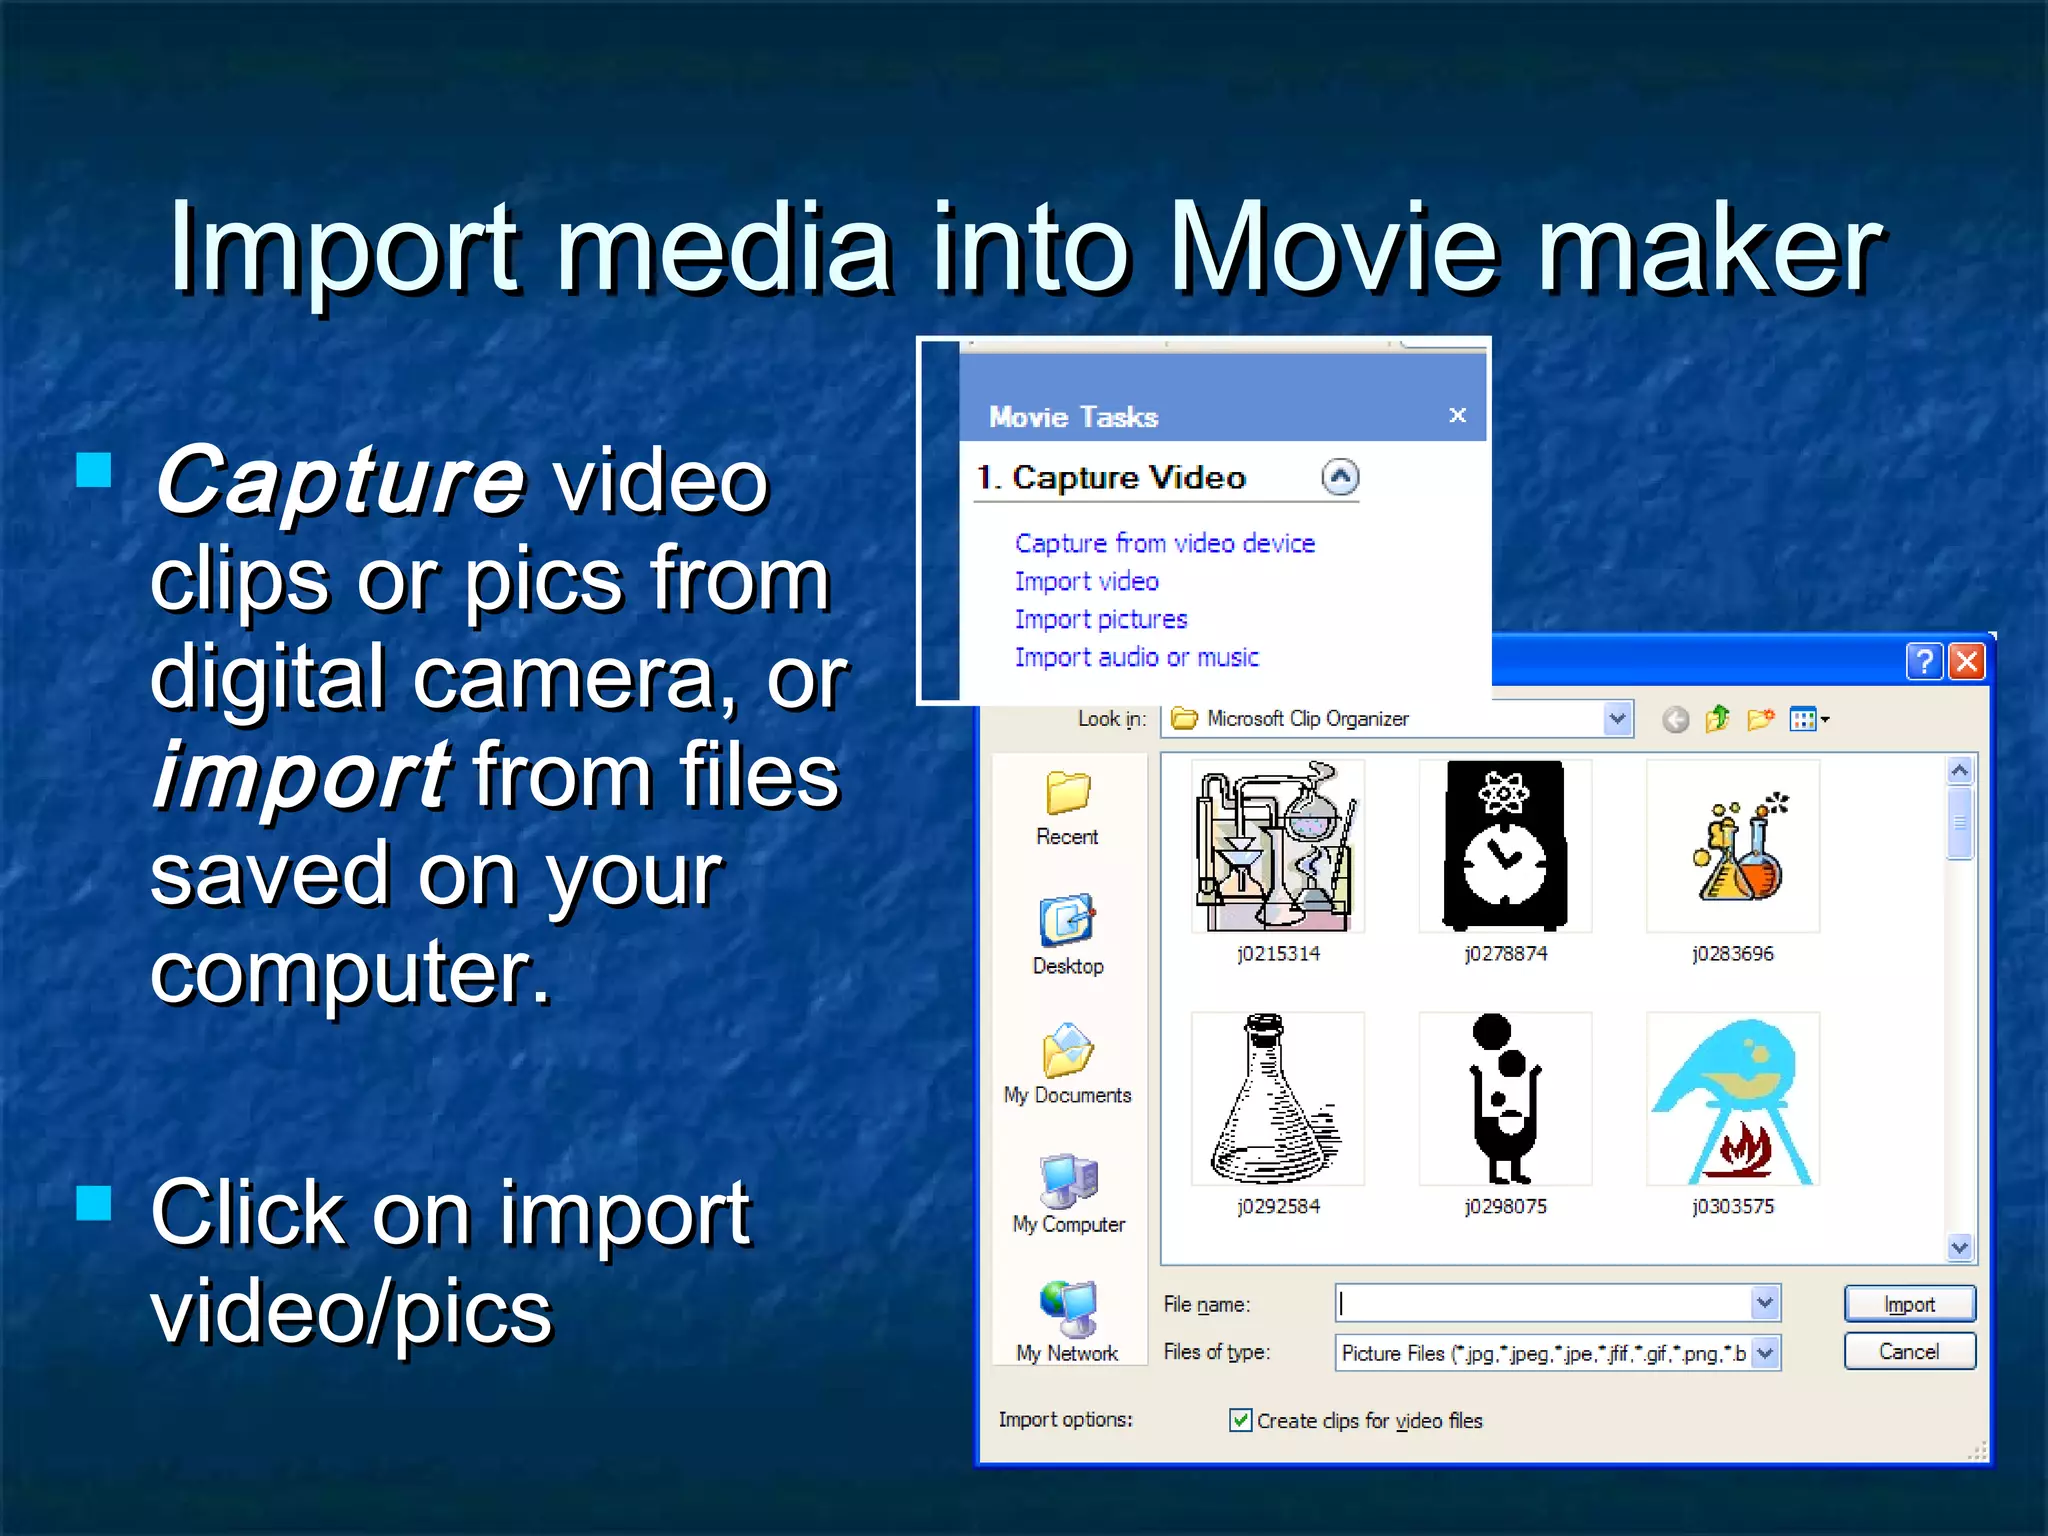

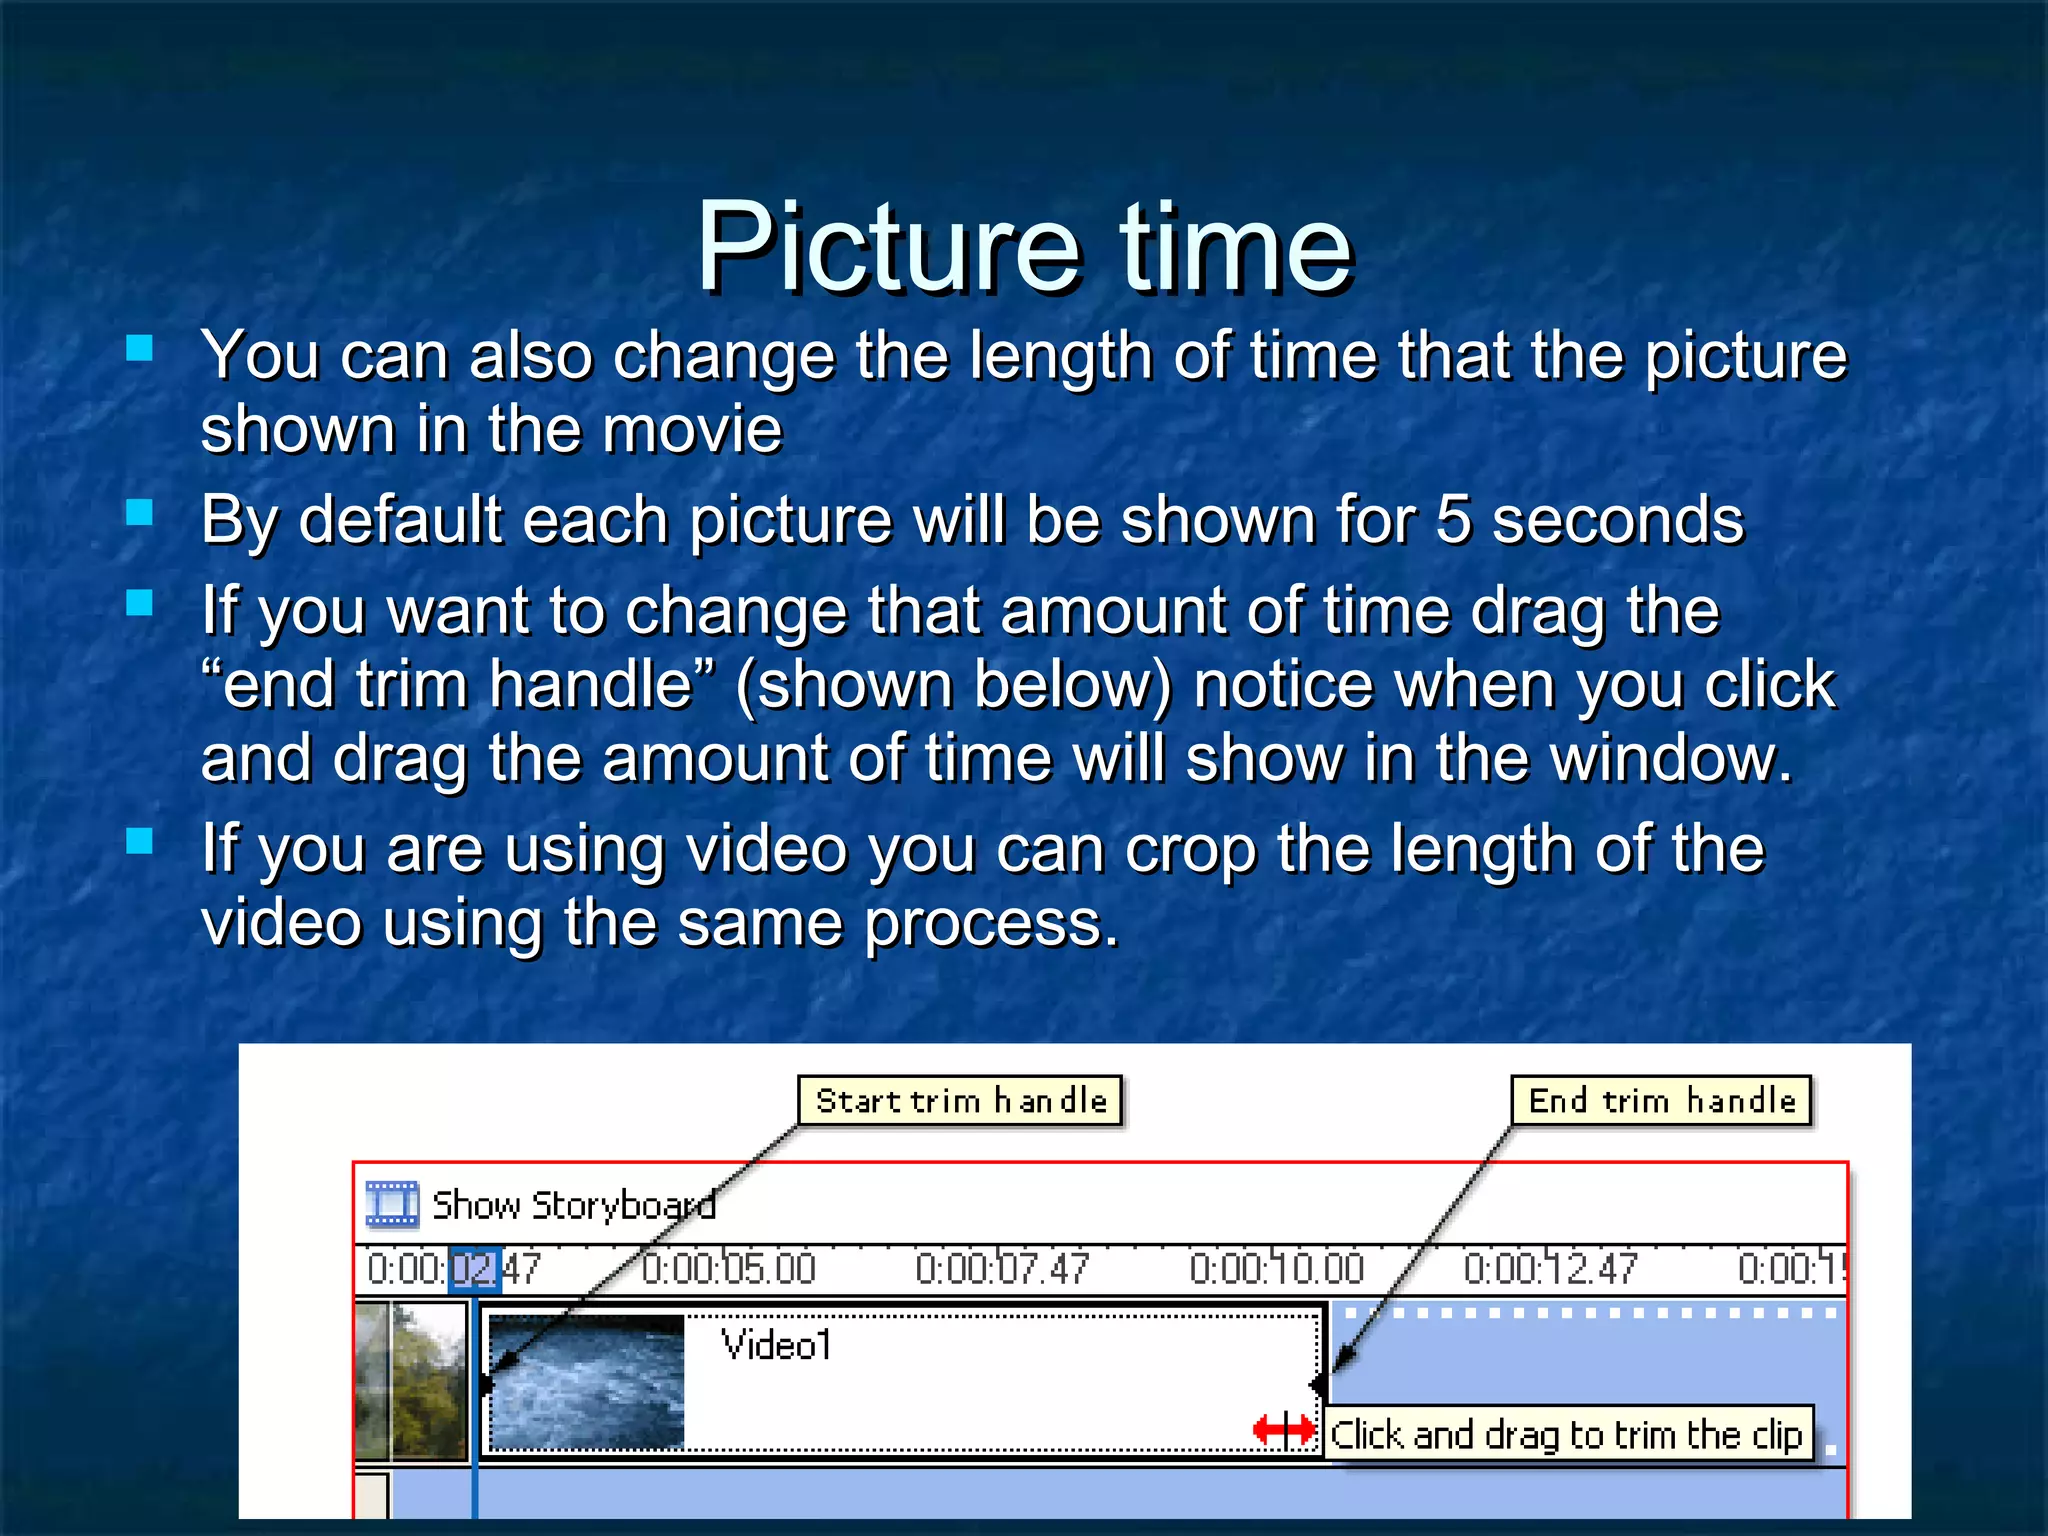

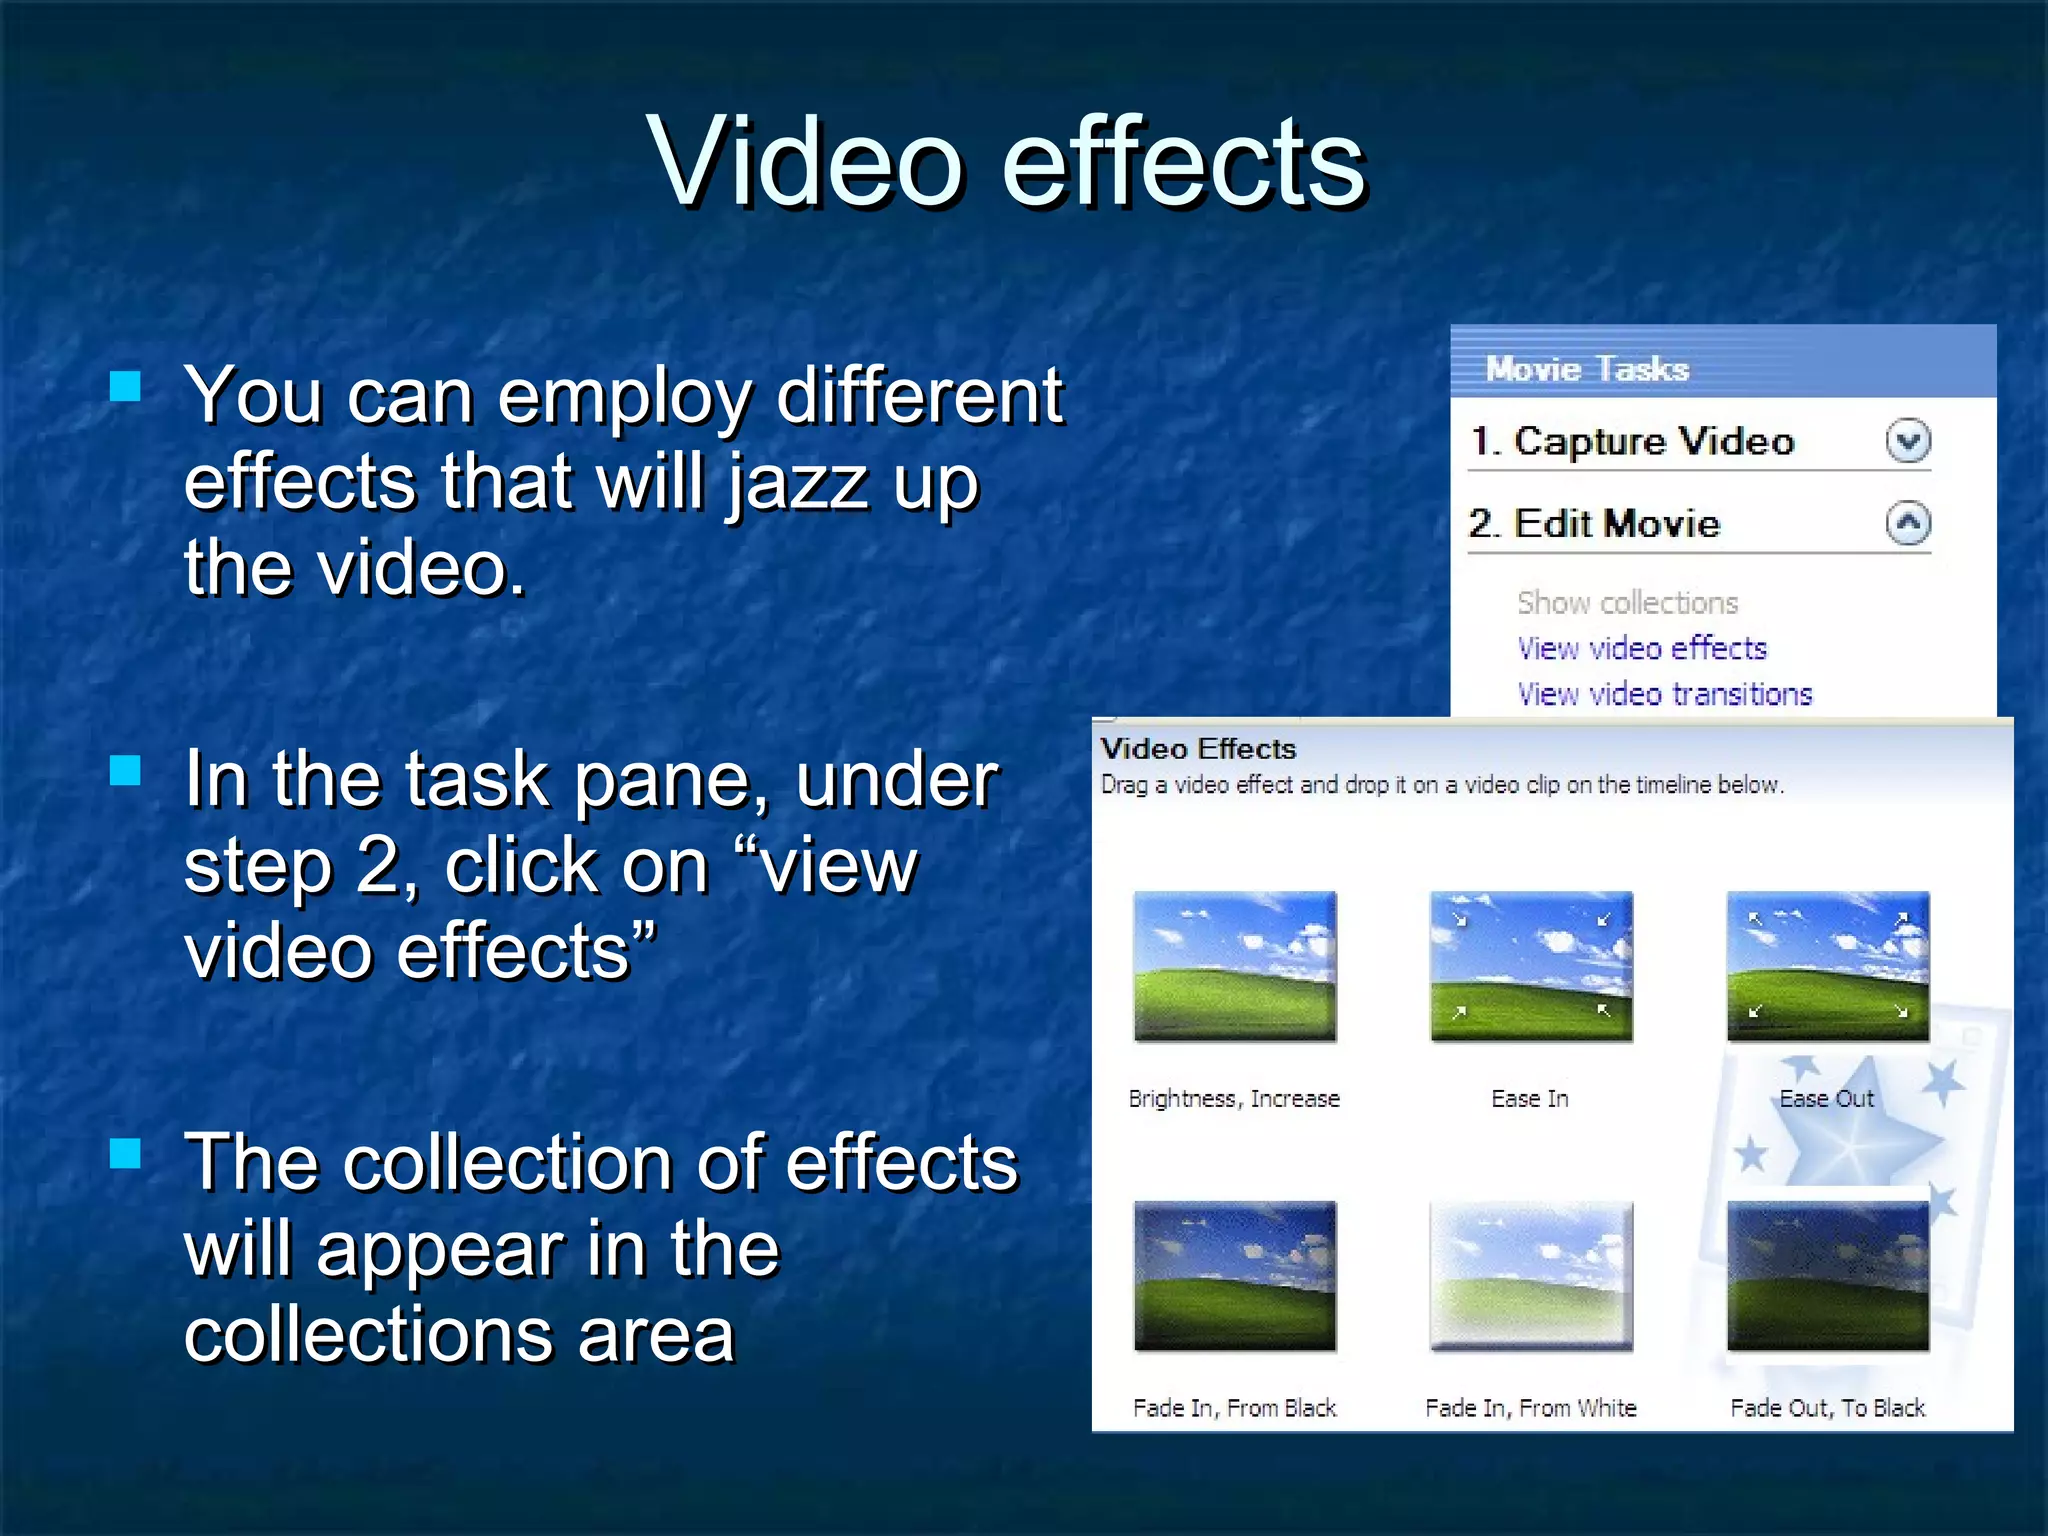


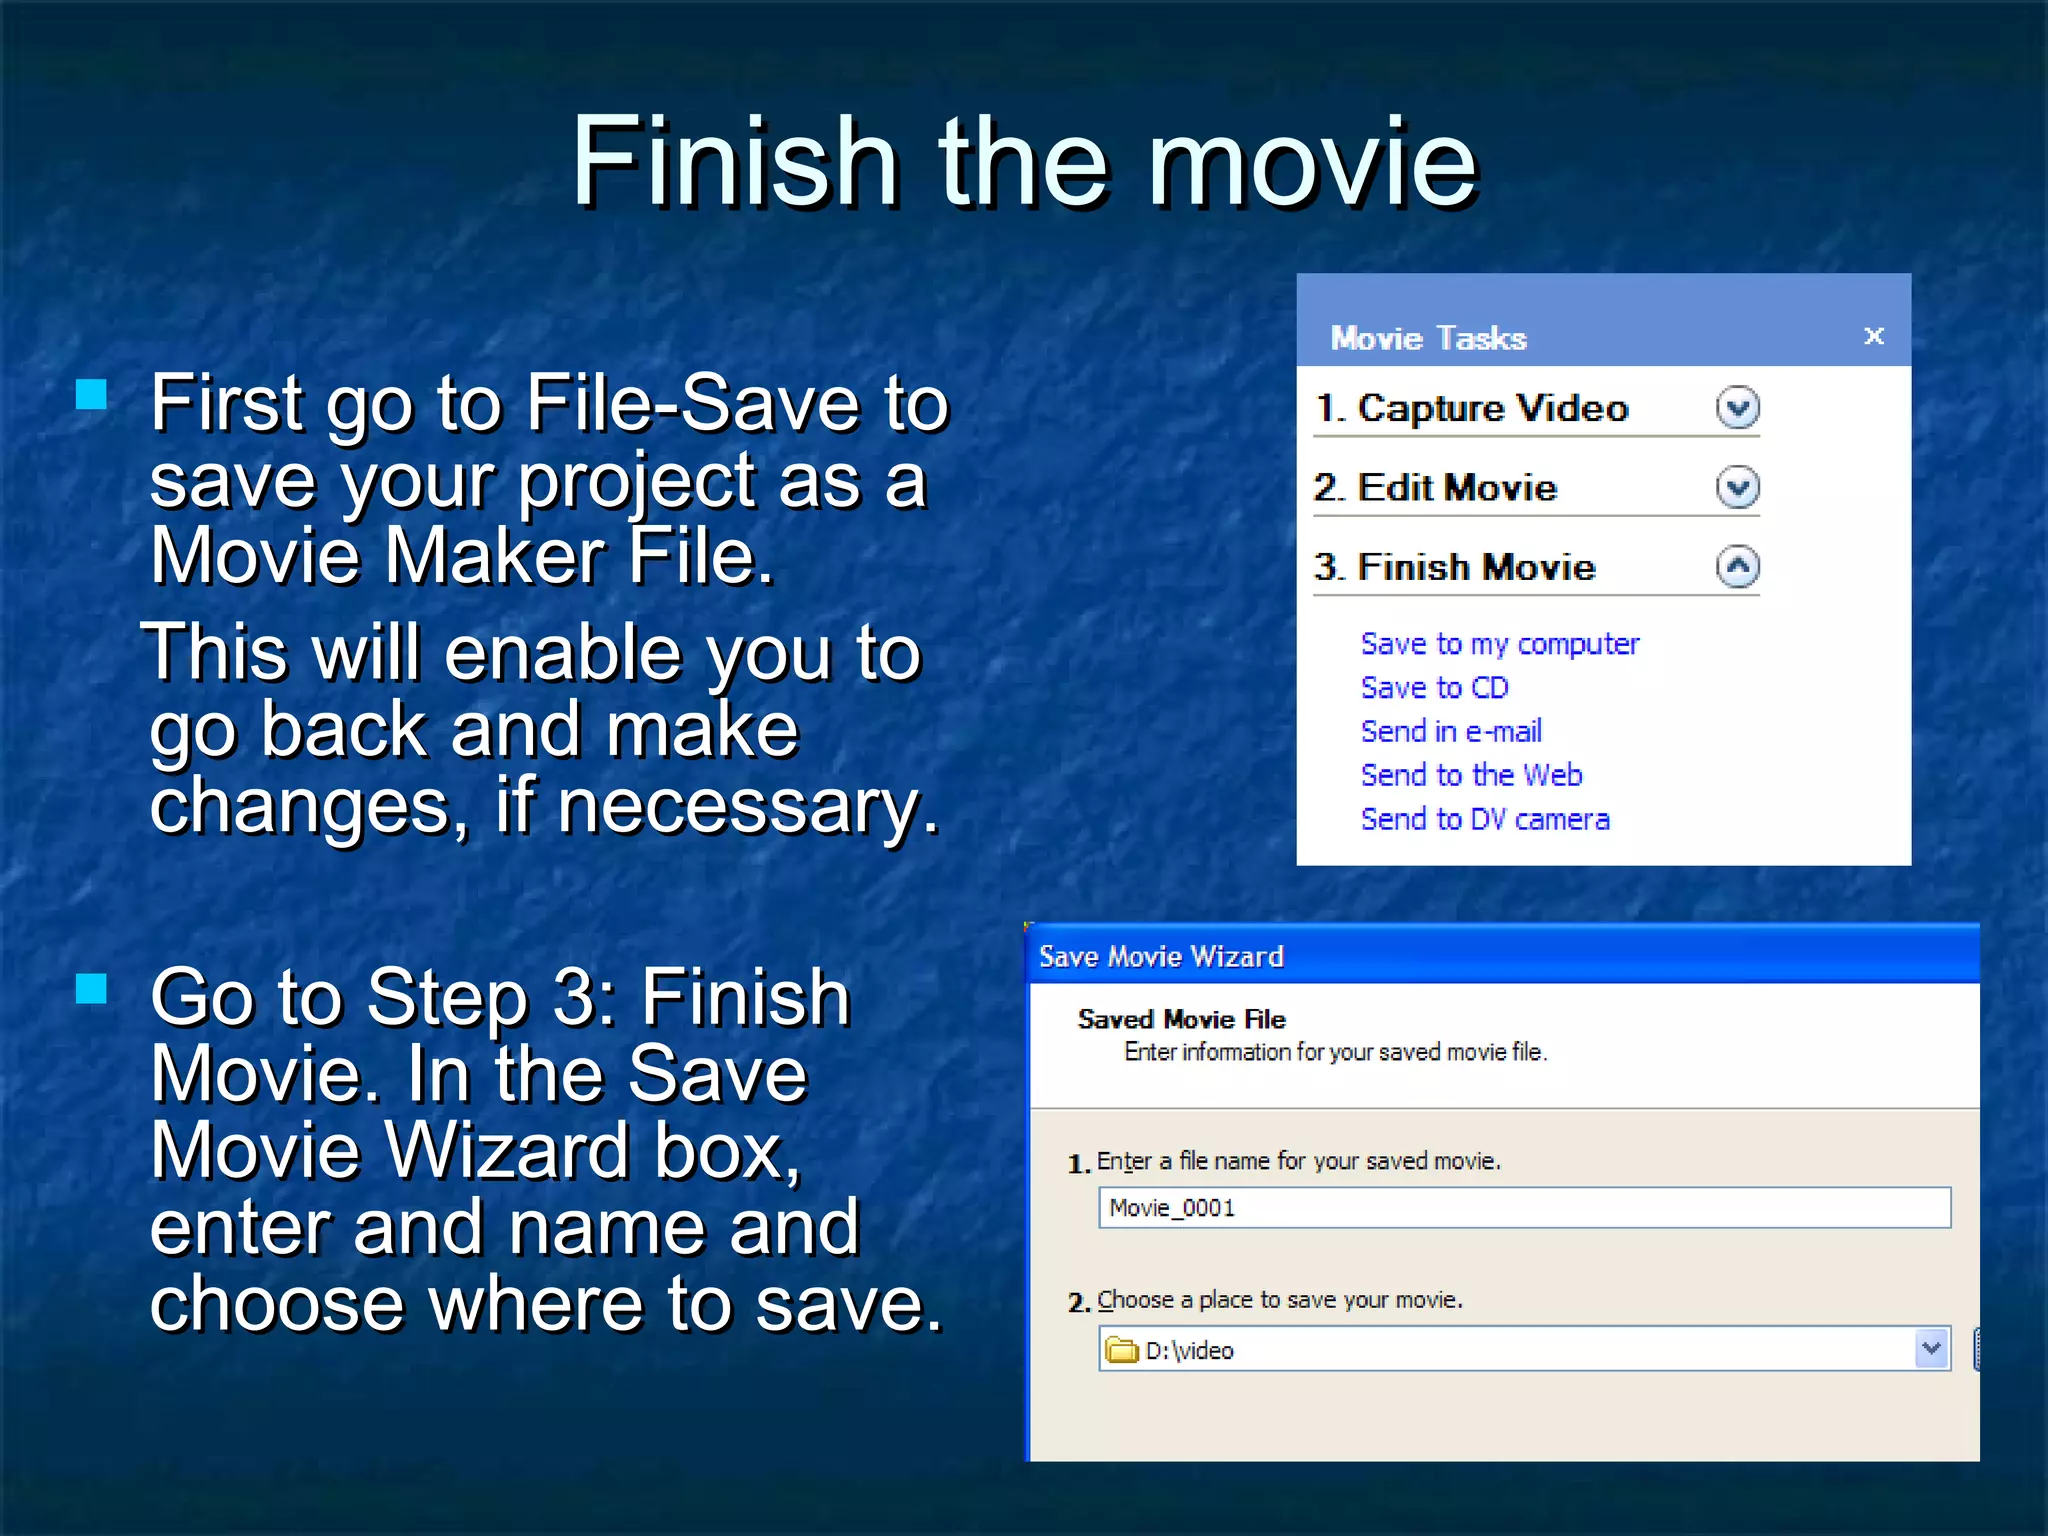


This document provides an overview of how to use Windows Movie Maker to create video productions. It describes the four panes of the Movie Maker interface and the three main tasks of capturing/importing media, editing, and finishing the movie. Step-by-step instructions are given for importing pictures and video clips, adding transitions and effects, incorporating titles and credits, and adjusting audio. The document also explains how to preview the movie, save the project file, and output the finished video production.


