Downloaded 393 times


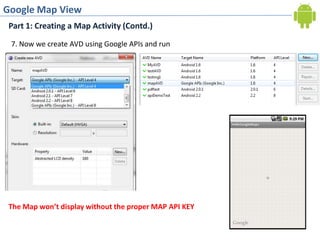
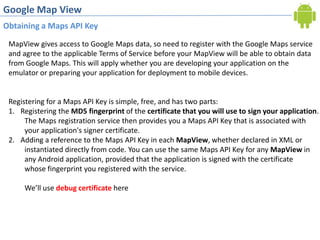
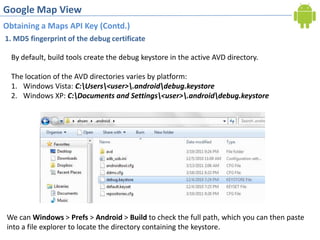
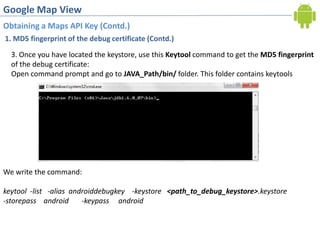


This document discusses how to add Google Maps functionality to an Android application. It involves several steps: 1. Creating a MapActivity that extends the base MapActivity class and includes the Google Maps library. This allows embedding a map view in the application. 2. Obtaining a Google Maps API key by registering the debug certificate fingerprint and adding the key to the map view XML. This allows accessing Google Maps data. 3. Adding overlay items to the map by creating an ItemizedOverlay class, populating it with OverlayItem objects that have GeoPoint locations, and adding the overlay to the map view. This places markers on the map.


![Day 5: Android User Interface [View Widgets]](https://cdn.slidesharecdn.com/ss_thumbnails/android1-7-130407053041-phpapp02-thumbnail.jpg?width=640&height=640&fit=bounds)