Download as PDF, PPTX


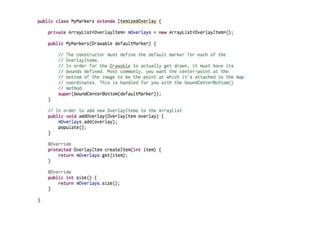
![Ge]ng
Last
Known
Loca+on
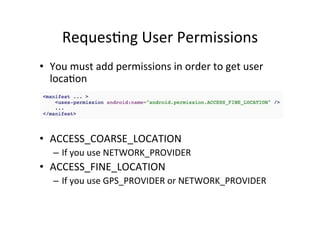
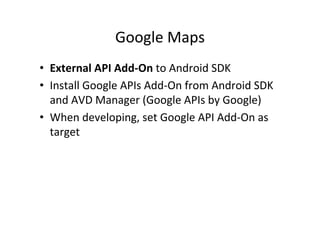
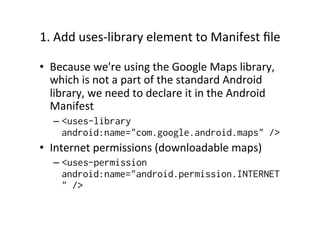
• First
loca+on
can
take
+me.
Use
cached
loca+on!
– Loca+on
lastKnownLoca+on
=
loca+onManager.getLastKnownLoca+on(Loca+onManager
.NETWORK_PROVIDER);](https://image.slidesharecdn.com/00-android-location-and-maps-110810020443-phpapp01/85/Android-Location-and-Maps-8-320.jpg)
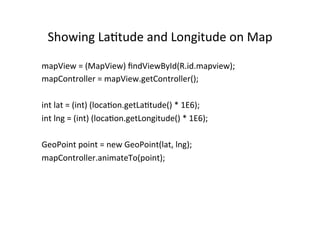

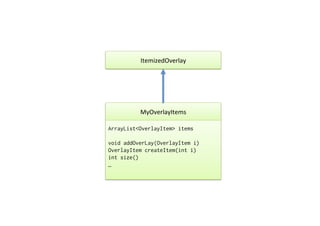

The document discusses Android location services and maps. It provides an overview of the Android location framework for determining a device's location and listening for location updates. It also discusses using the Google Maps external library for displaying and managing maps. It covers topics like requesting location updates, permissions, and displaying latitude and longitude on a map. It also discusses custom markers and overlays for displaying graphics on maps.


![Lecture Slides for Location based Services [Android]](https://cdn.slidesharecdn.com/ss_thumbnails/lbs-111012094135-phpapp01-thumbnail.jpg?width=640&height=640&fit=bounds)


![[Android] Maps, Geocoding and Location-Based Services](https://cdn.slidesharecdn.com/ss_thumbnails/trainingandroidlesson8-130304083435-phpapp01-thumbnail.jpg?width=640&height=640&fit=bounds)