Downloaded 278 times
![Android Application Development Being Active Through Activities Ahsanul Karim [email_address] Sentinel Solutions Ltd. http://www.sentinelbd.com](https://image.slidesharecdn.com/android1-1-110813062028-phpapp02/85/Day-3-Getting-Active-Through-Activities-1-320.jpg)
![Android Application Development Being Active Through Activities Ahsanul Karim [email_address] Sentinel Solutions Ltd. http://www.sentinelbd.com](https://image.slidesharecdn.com/android1-1-110813062028-phpapp02/75/Day-3-Getting-Active-Through-Activities-1-2048.jpg)
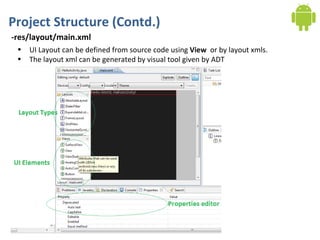
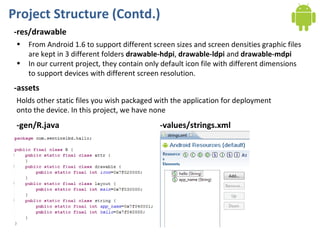
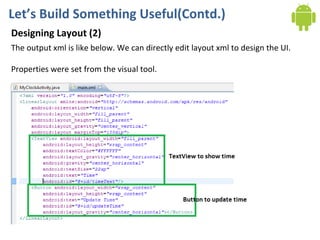
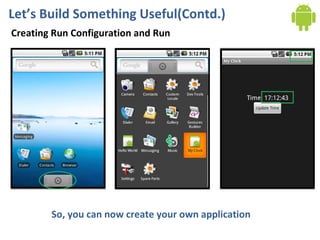
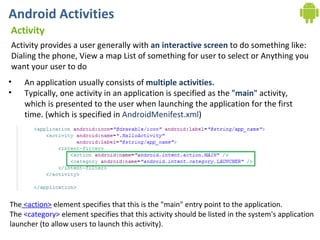
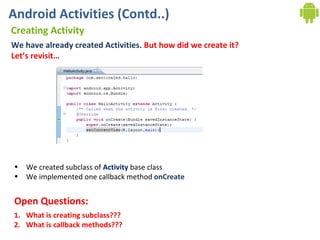
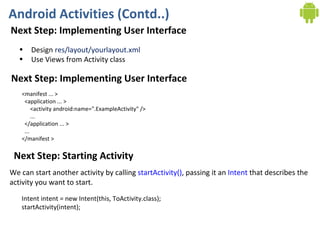
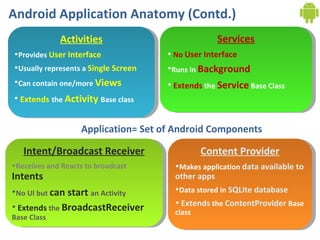
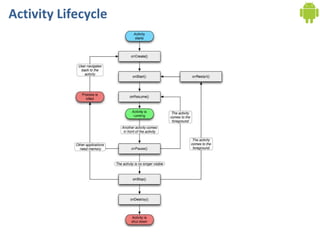

The document discusses Android application development and activities. It covers the anatomy of an Android application including activities, services, content providers, and broadcast receivers. It also discusses the lifecycle of activities and how to create activities that load layouts and handle user interactions through callbacks like onCreate(). An example is provided of building an app with an activity to display the current time when a button is pressed to demonstrate designing user interfaces and adding interactivity.


![Day 5: Android User Interface [View Widgets]](https://cdn.slidesharecdn.com/ss_thumbnails/android1-7-130407053041-phpapp02-thumbnail.jpg?width=640&height=640&fit=bounds)