Download as PDF, PPTX


![@Override
protected void onCreate(Bundle savedInstanceState) {
super.onCreate(savedInstanceState);
setContentView(R.layout.activity_main);
// Set up the action bar to show a dropdown list.
final ActionBar actionBar = getActionBar();
actionBar.setDisplayShowTitleEnabled(false);
actionBar.setNavigationMode(ActionBar.NAVIGATION_MODE_LIST);
final String[] dropdownValues =
getResources().getStringArray(R.array.dropdown);
// Specify a SpinnerAdapter to populate the dropdown list.
ArrayAdapter<String> adapter = new
ArrayAdapter<String>(actionBar.getThemedContext(),
http://eglobiotraining.com](https://image.slidesharecdn.com/actionbarlecture-130801100909-phpapp02/85/Action-Bar-in-Android-44-320.jpg)


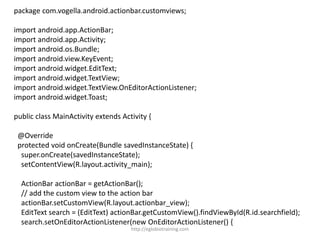
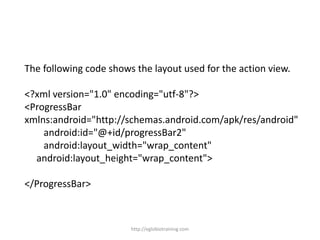
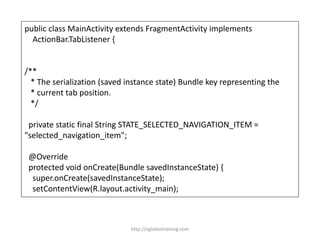
This document provides a tutorial on using the Action Bar in Android applications. It discusses what the Action Bar is, how to add actions and menu items, customize the Action Bar, use navigation features like tabs and dropdown menus, and more advanced topics like custom views, contextual action modes, and action providers. Code examples are provided throughout to demonstrate various Action Bar features and capabilities.


![Lecture Slides for Preferences and Menus [Android ]](https://cdn.slidesharecdn.com/ss_thumbnails/09-prefandmenu-111012094105-phpapp02-thumbnail.jpg?width=640&height=640&fit=bounds)