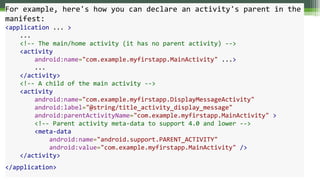
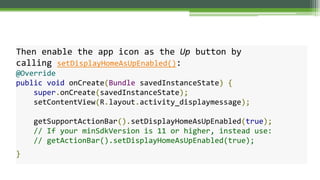
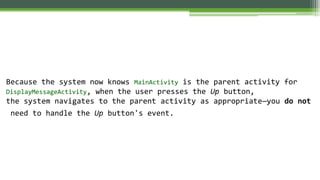
Download to read offline


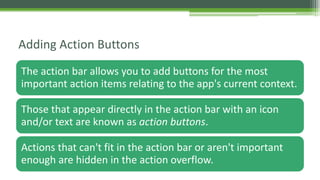
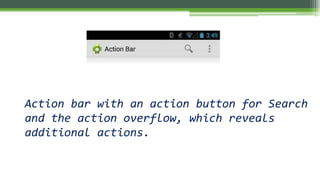
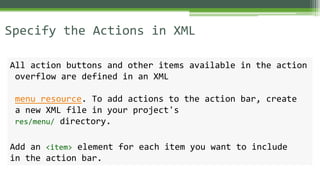
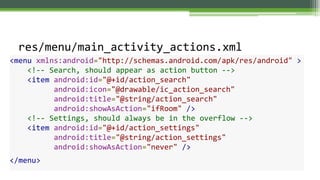
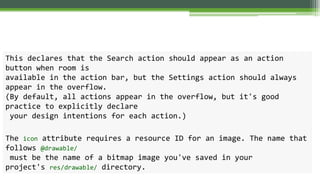
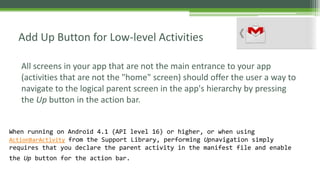


The action bar provides consistency across Android apps and allows adding navigation features, search, and other actions. It displays the activity title and app icon. To add an action bar, activities must extend ActionBarActivity if supporting older Android versions, or set the theme if supporting API 11+. Action buttons and menu items are defined in XML and inflated into the action bar. Clicking items calls onOptionsItemSelected() to handle the action. The up button navigates to the parent activity.