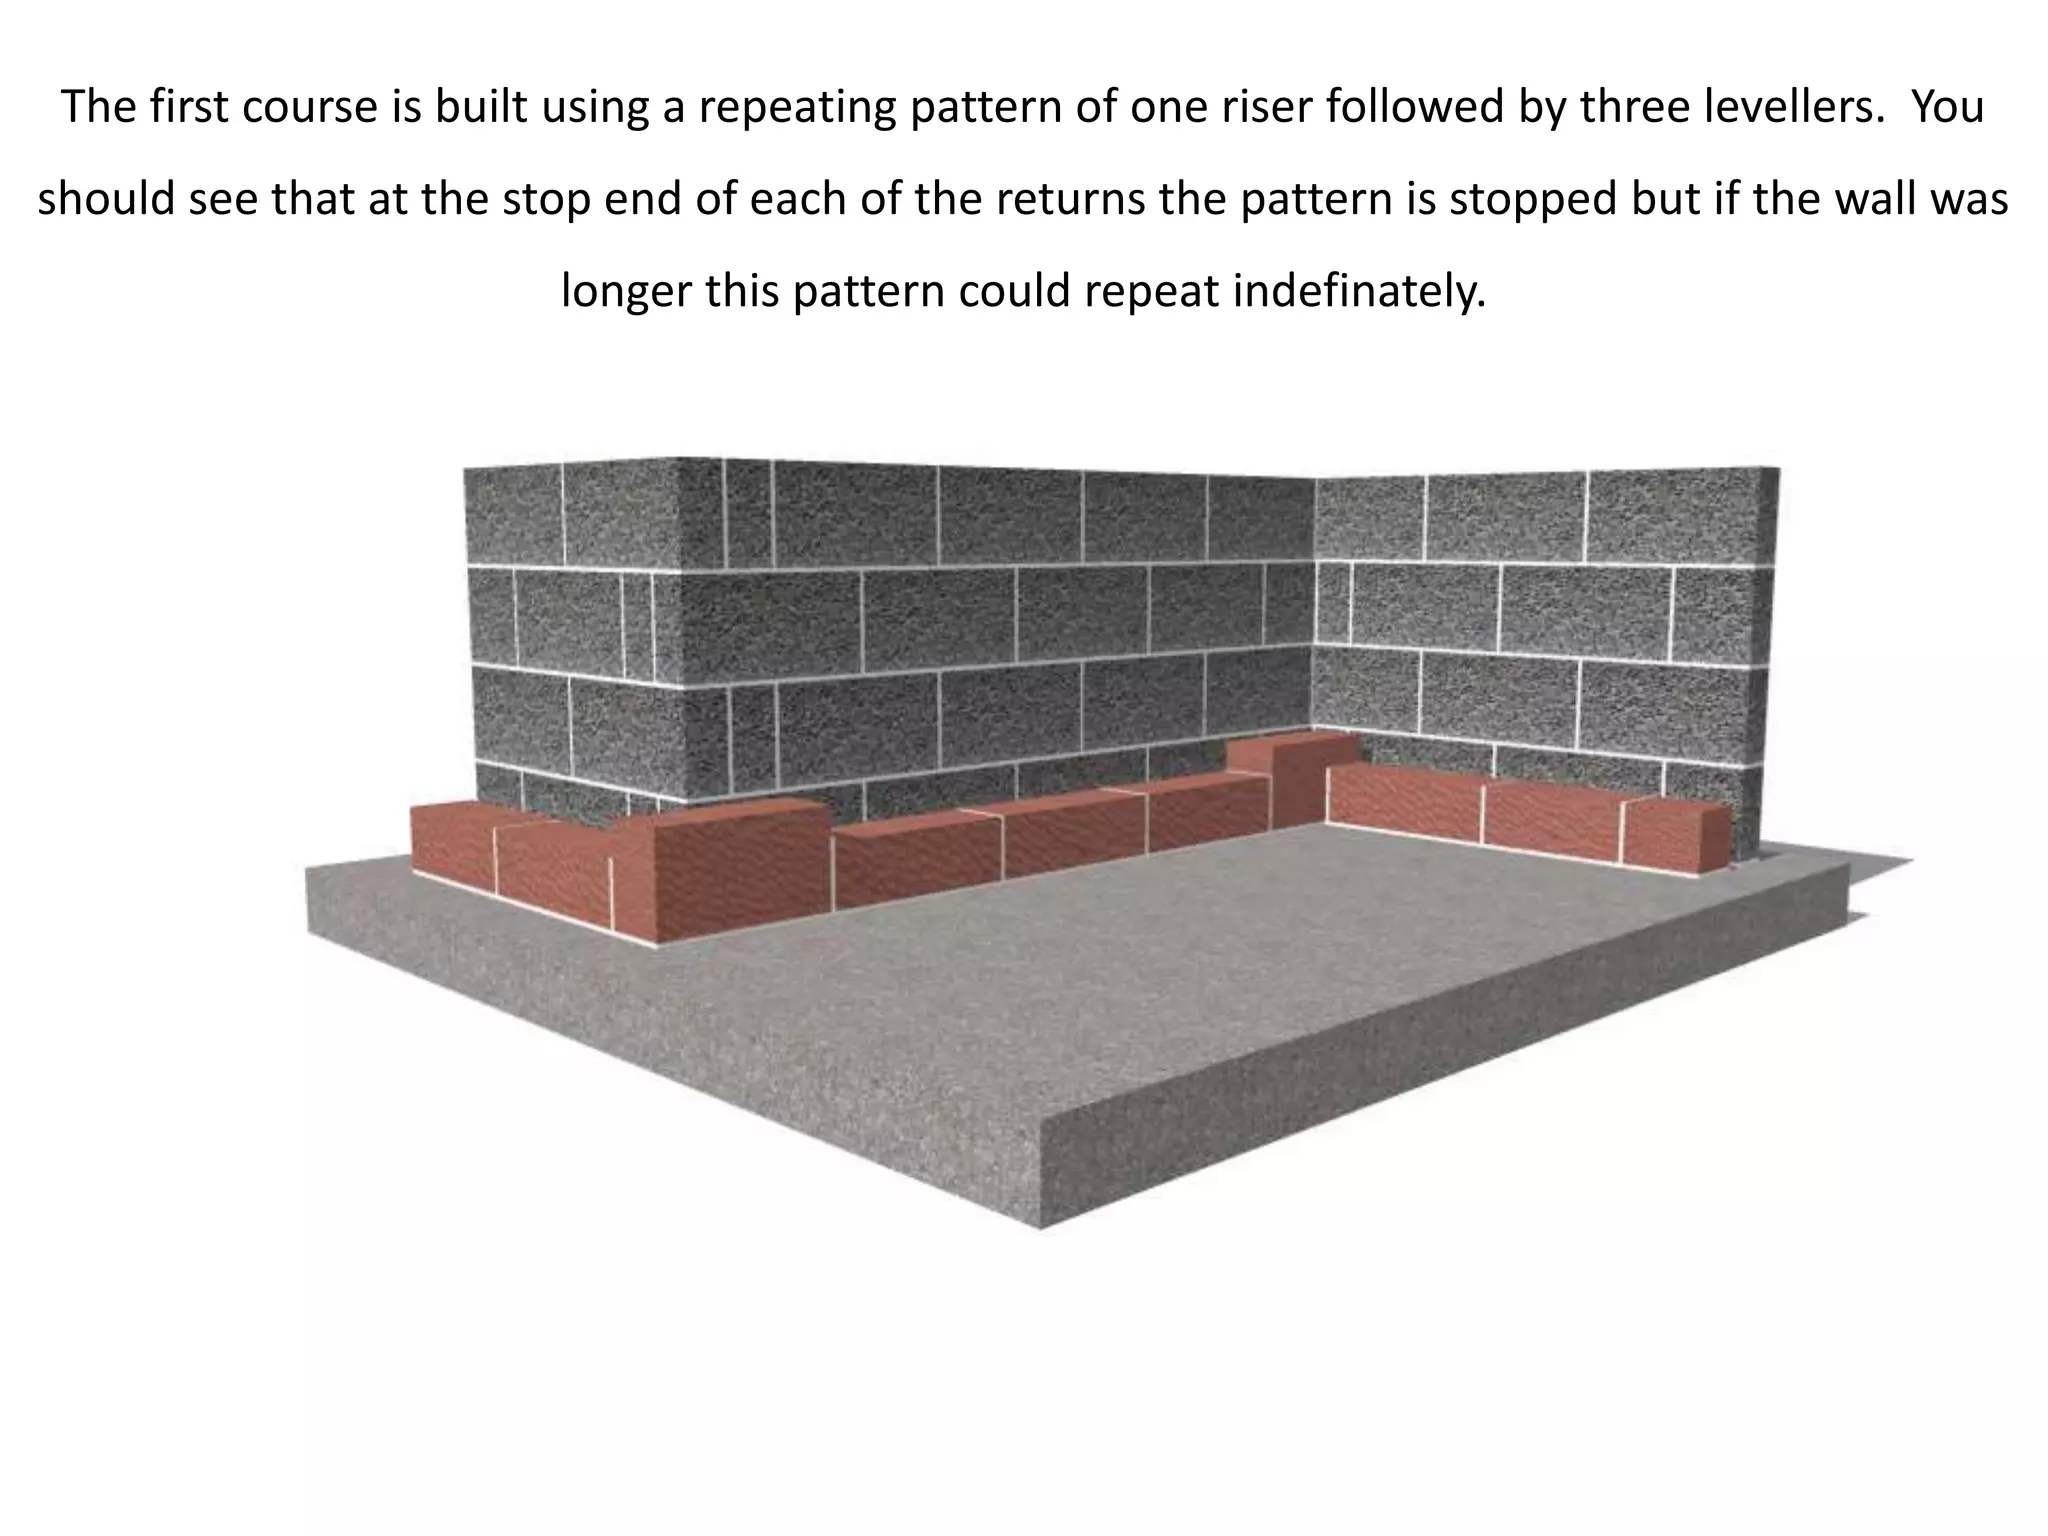
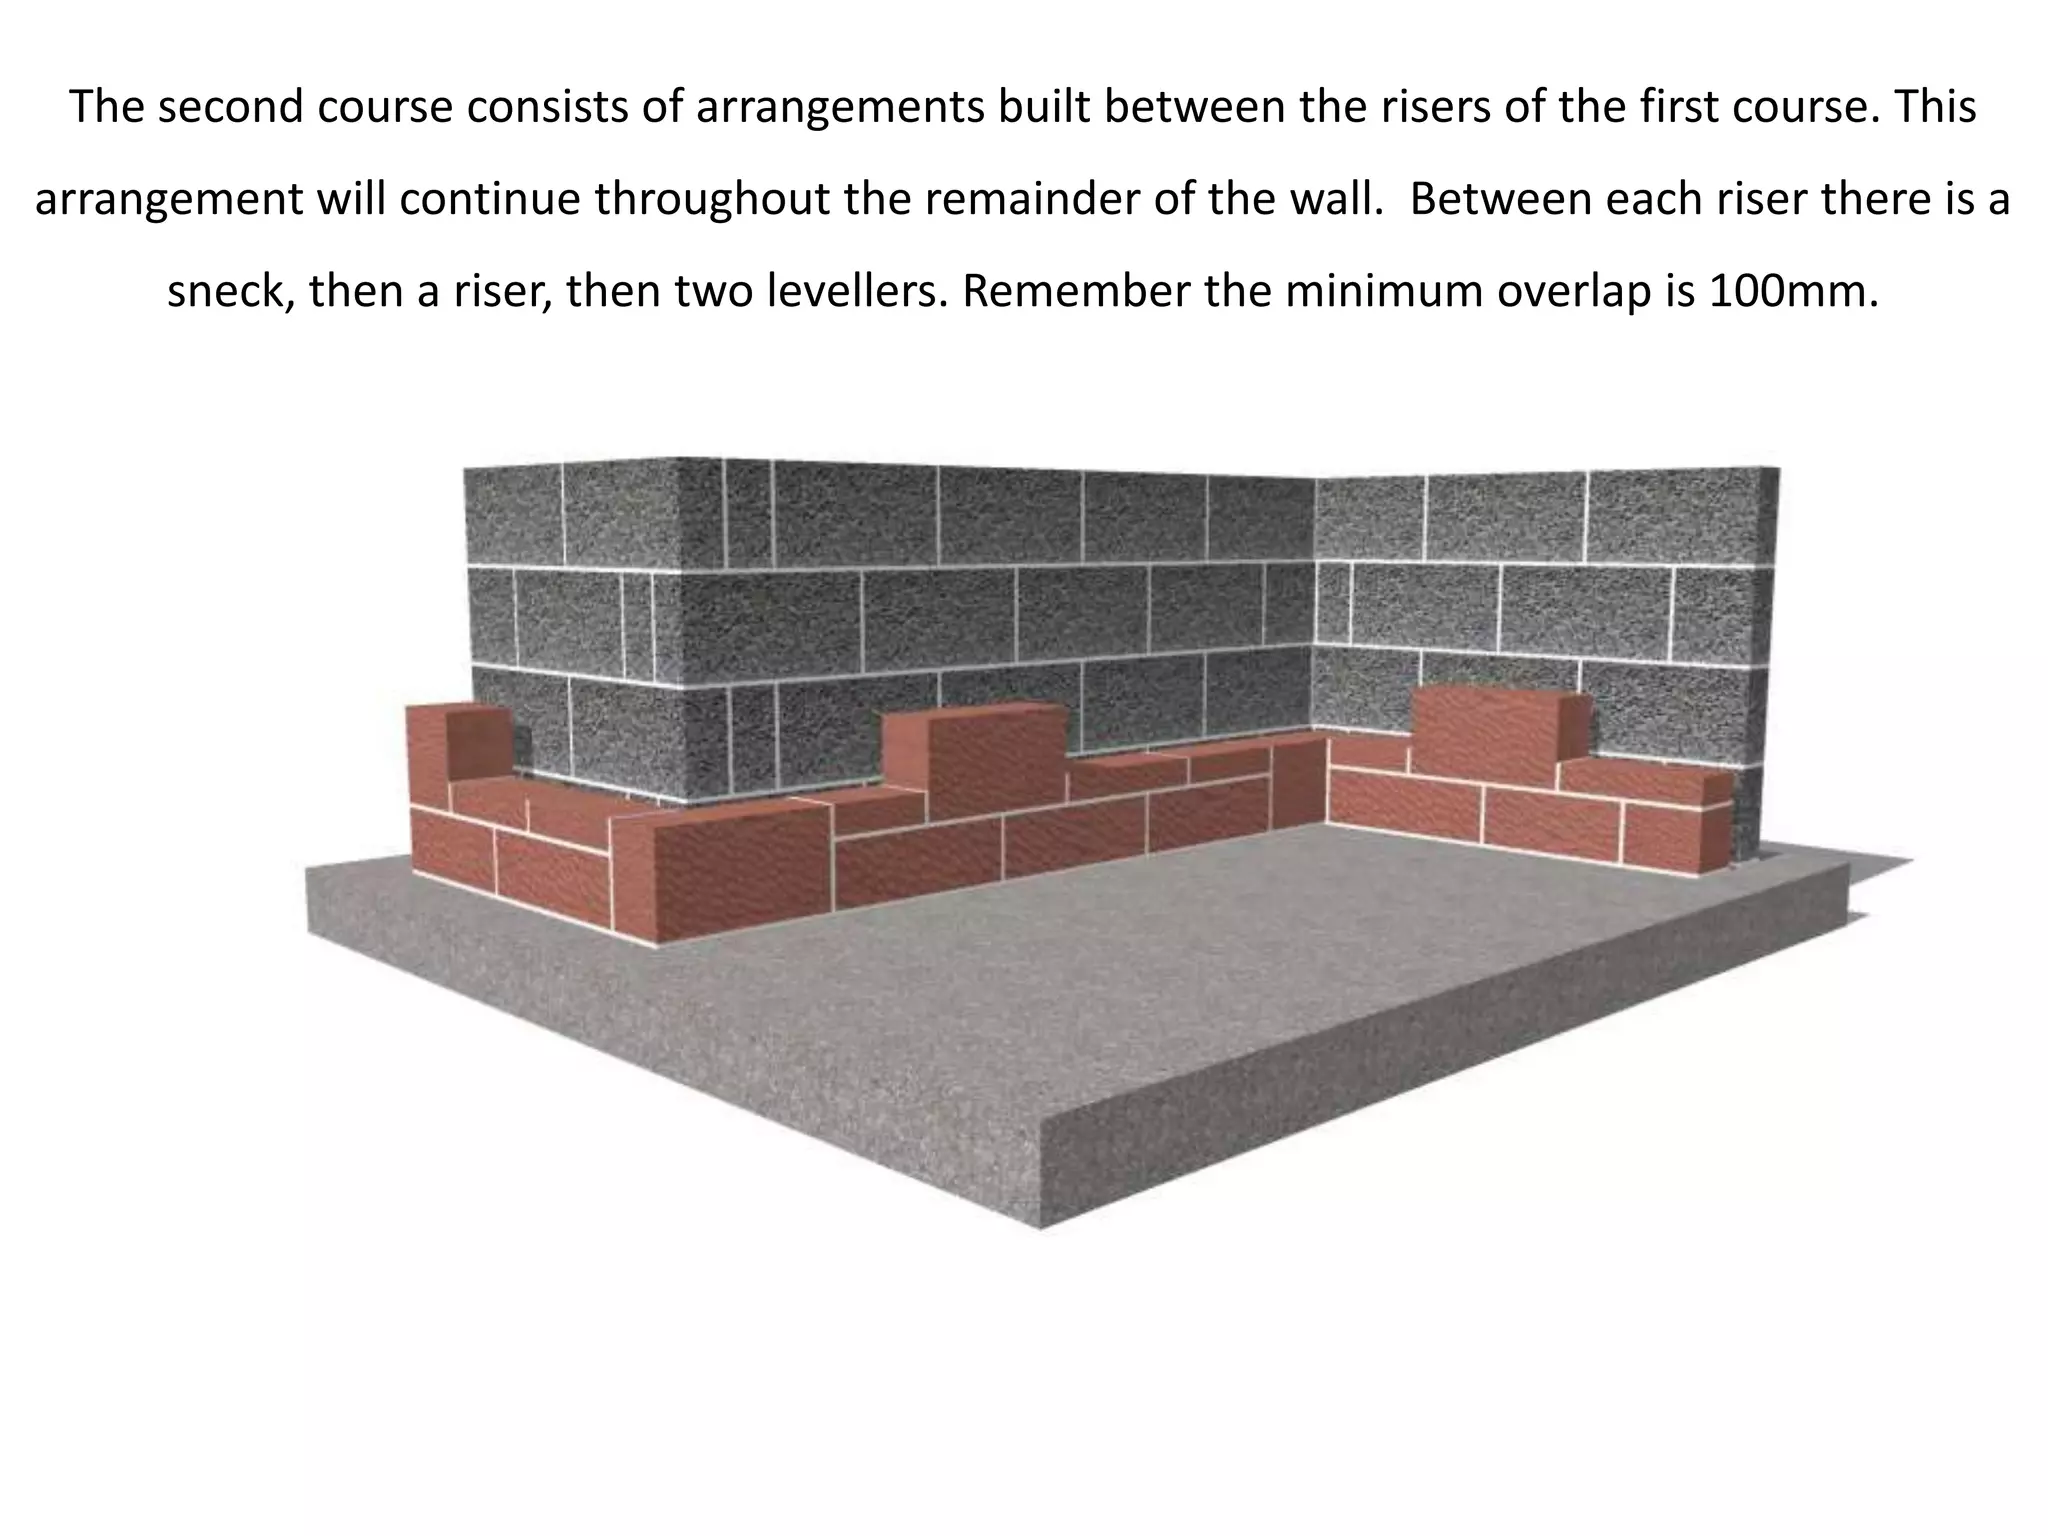
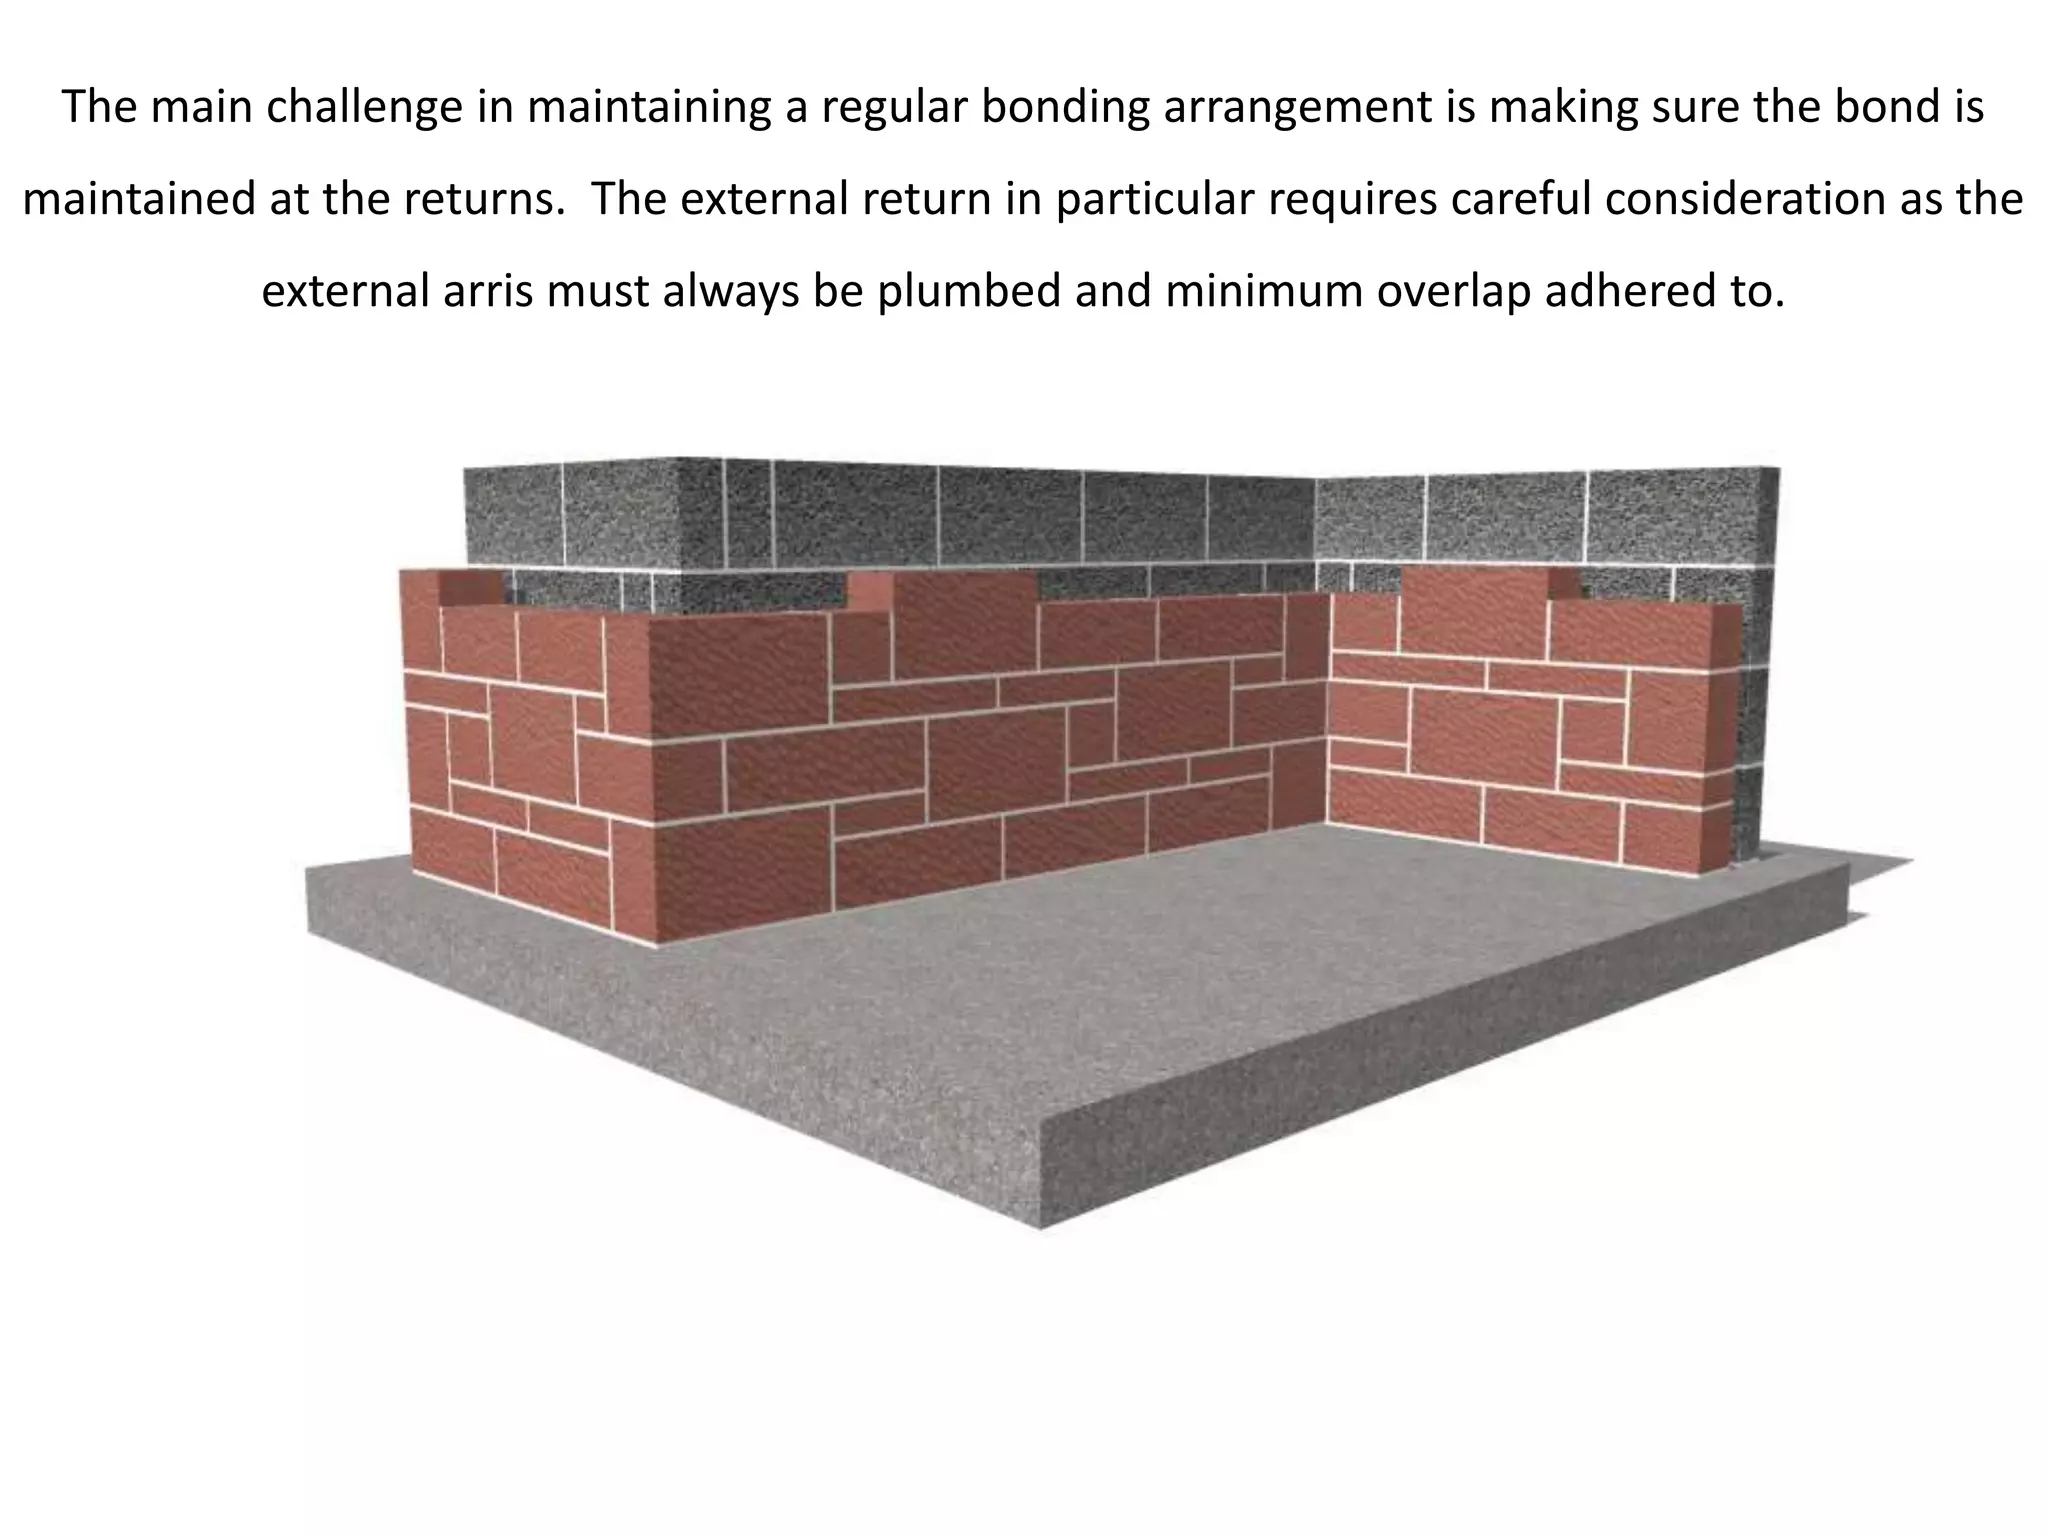
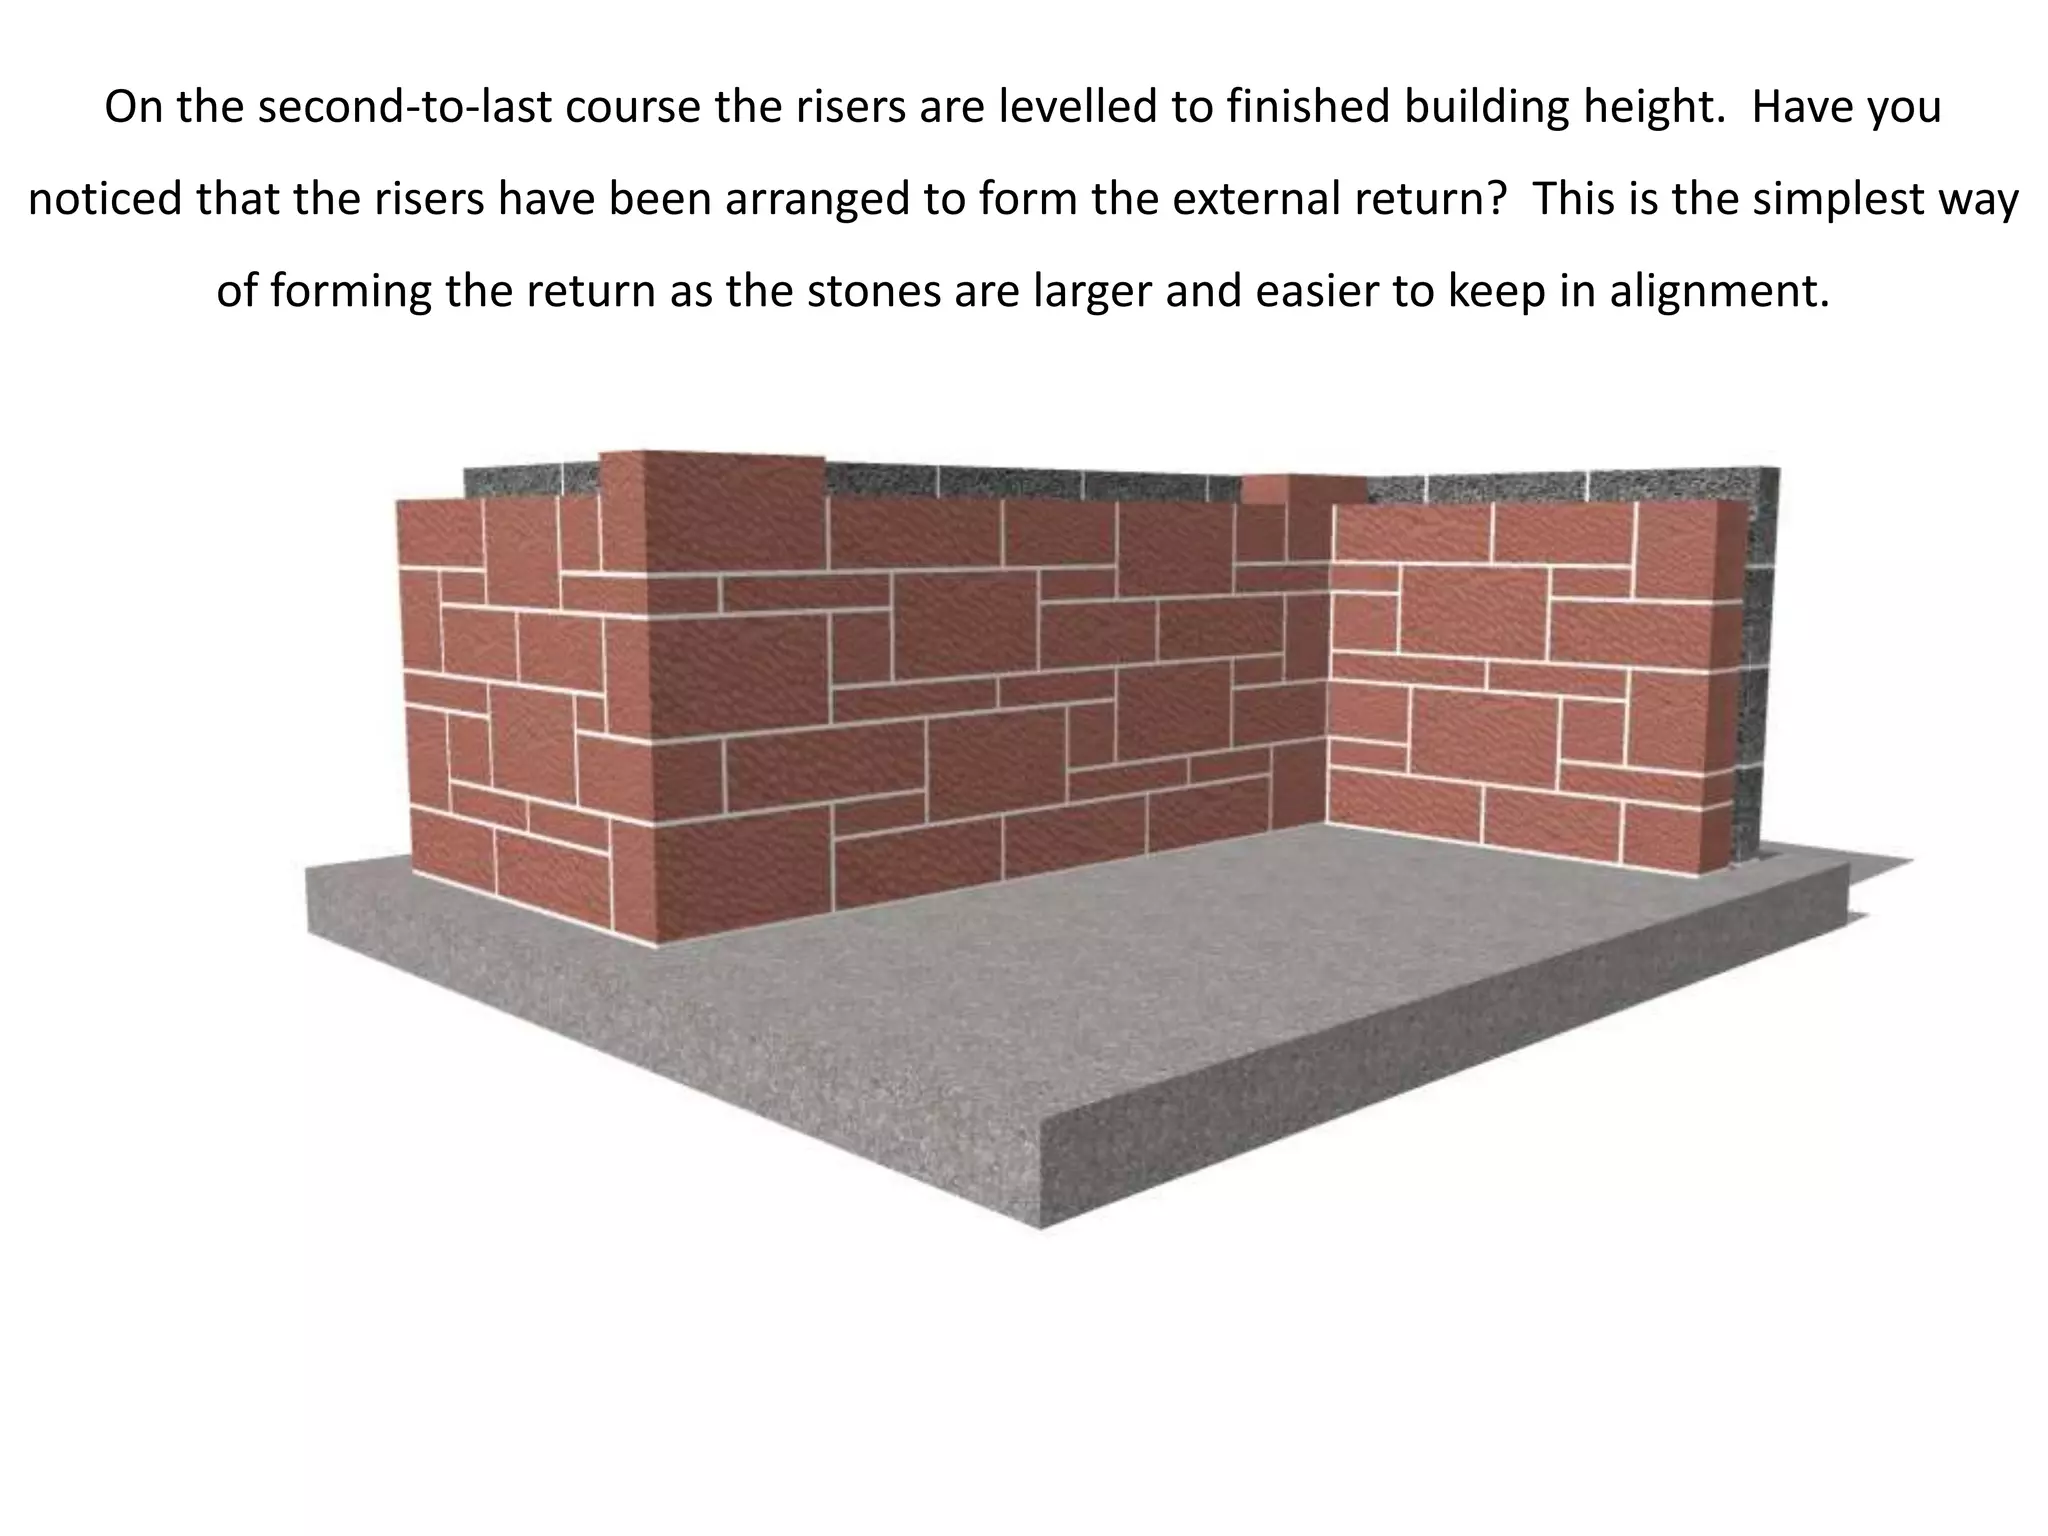
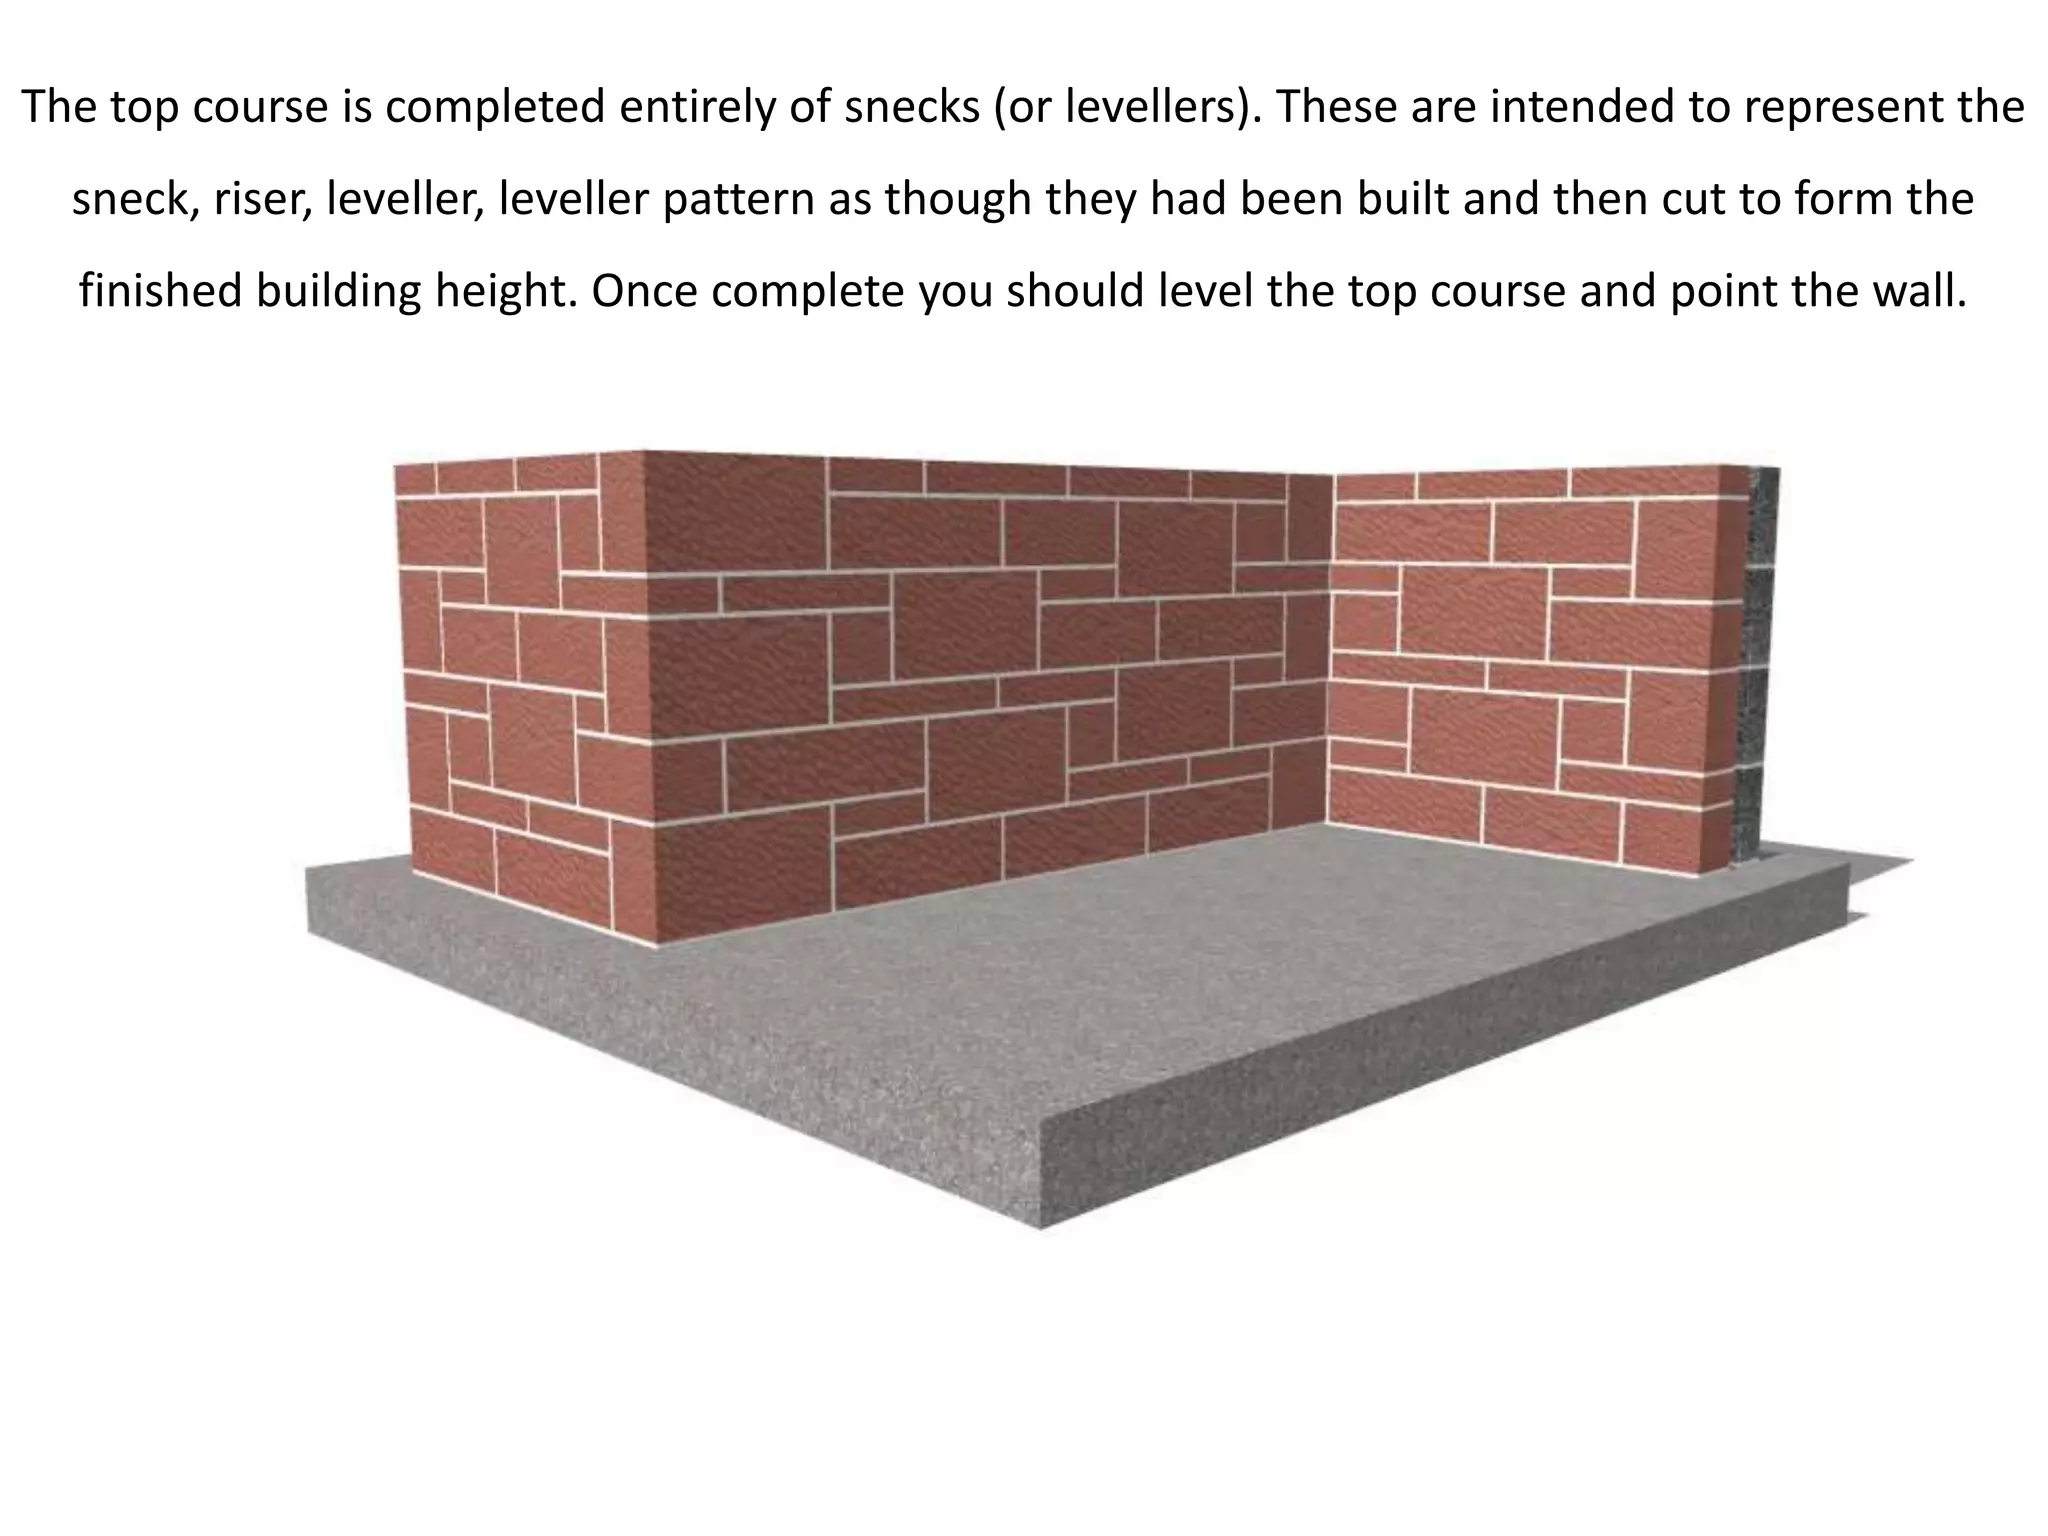
Snecked Rubble Walling
A step-by-step guide for stonemasons


                           Stonemasonry Department 2013
The aim of this presentation is to introduce you to the method of building snecked rubble
  walling against a block backing. By the end of the lesson you should have developed an
understanding of the bonding arrangement and process for constructing this type of walling.
The first course is built using a repeating pattern of one riser followed by three levellers. You
should see that at the stop end of each of the returns the pattern is stopped but if the wall was
                          longer this pattern could repeat indefinately.
The second course consists of arrangements built between the risers of the first course. This
arrangement will continue throughout the remainder of the wall. Between each riser there is a
      sneck, then a riser, then two levellers. Remember the minimum overlap is 100mm.
The third course is similar to the second. A sneck is followed by a riser and two levellers. You
may find that more cuts are required on this course as you need to ensure that the bonding
   requirements are followed. Remember there are a maximum of three heads to a joint.
As you progress higher up the wall you should see that the pattern continues; sneck, riser,
leveller, leveller. By this stage of the construction you should be becoming more familiar with
   the bonding arrangements and able to plan each course with the next course in mind.
The main challenge in maintaining a regular bonding arrangement is making sure the bond is
maintained at the returns. The external return in particular requires careful consideration as the
           external arris must always be plumbed and minimum overlap adhered to.
As you approach the top of the wall you should see a pattern emerging where the position of
the risers form elongated diamond shapes. You should also notice that the courses alternate
                     between 1/3 height stones and 2/3 height stones.
On the second-to-last course the risers are levelled to finished building height. Have you
noticed that the risers have been arranged to form the external return? This is the simplest way
         of forming the return as the stones are larger and easier to keep in alignment.
The top course is completed entirely of snecks (or levellers). These are intended to represent the
  sneck, riser, leveller, leveller pattern as though they had been built and then cut to form the
  finished building height. Once complete you should level the top course and point the wall.
Developed by The Stonemasonry Department
          City of Glasgow College
                    2013

Snecked rubble step by step

  • 1.
    Snecked Rubble Walling Astep-by-step guide for stonemasons Stonemasonry Department 2013
  • 2.
    The aim ofthis presentation is to introduce you to the method of building snecked rubble walling against a block backing. By the end of the lesson you should have developed an understanding of the bonding arrangement and process for constructing this type of walling.
  • 3.
    The first courseis built using a repeating pattern of one riser followed by three levellers. You should see that at the stop end of each of the returns the pattern is stopped but if the wall was longer this pattern could repeat indefinately.
  • 4.
    The second courseconsists of arrangements built between the risers of the first course. This arrangement will continue throughout the remainder of the wall. Between each riser there is a sneck, then a riser, then two levellers. Remember the minimum overlap is 100mm.
  • 5.
    The third courseis similar to the second. A sneck is followed by a riser and two levellers. You may find that more cuts are required on this course as you need to ensure that the bonding requirements are followed. Remember there are a maximum of three heads to a joint.
  • 6.
    As you progresshigher up the wall you should see that the pattern continues; sneck, riser, leveller, leveller. By this stage of the construction you should be becoming more familiar with the bonding arrangements and able to plan each course with the next course in mind.
  • 7.
    The main challengein maintaining a regular bonding arrangement is making sure the bond is maintained at the returns. The external return in particular requires careful consideration as the external arris must always be plumbed and minimum overlap adhered to.
  • 8.
    As you approachthe top of the wall you should see a pattern emerging where the position of the risers form elongated diamond shapes. You should also notice that the courses alternate between 1/3 height stones and 2/3 height stones.
  • 9.
    On the second-to-lastcourse the risers are levelled to finished building height. Have you noticed that the risers have been arranged to form the external return? This is the simplest way of forming the return as the stones are larger and easier to keep in alignment.
  • 10.
    The top courseis completed entirely of snecks (or levellers). These are intended to represent the sneck, riser, leveller, leveller pattern as though they had been built and then cut to form the finished building height. Once complete you should level the top course and point the wall.
  • 11.
    Developed by TheStonemasonry Department City of Glasgow College 2013