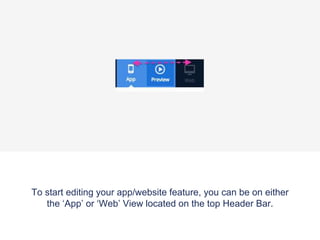
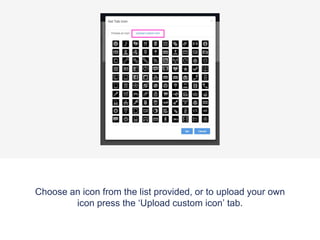
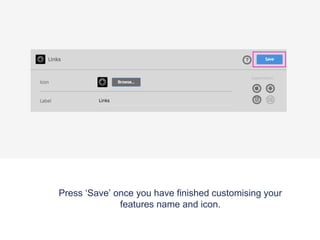
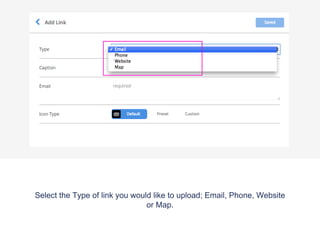
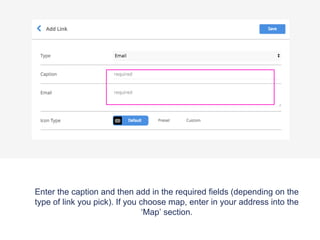
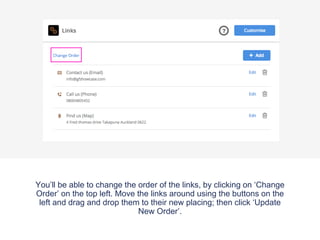
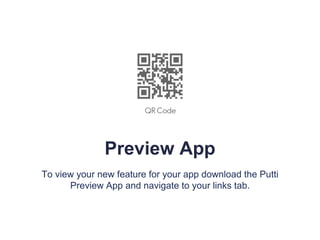
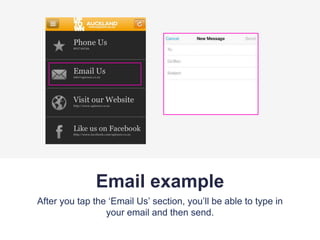
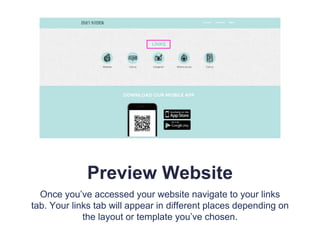
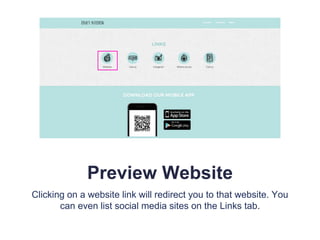
To start editing your app/website feature, you can be on either
the ‘App’ or ‘Web’ View located on the top Header Bar.
Access the ‘Features’ tab on the App Panel
Once the ‘Features’ tab has been selected the app panel will appear with a
list of the features that are already applied to your app. On the top right of the
panel there is a ‘Manage’ button, click this to access the features menu
where you can pick and choose which features you would like on your app.
Select the ‘Links’ feature. ‘Add’ the feature and then move it to where
you would like it to be placed on your app panel.
Press ‘Close' once you’ve finished.
Select the ‘Links’ tab now located on your app panel.
For a detailed description of what the ‘Links’ feature does
hover over the question mark button
Click the customise button to change the name or the icon
of your links feature.
To chose an icon or to upload your own custom icon press
the ‘Browse’ button.
Choose an icon from the list provided, or to upload your own
icon press the ‘Upload custom icon’ tab.
To upload your custom icon drag and drop your 60 x 60 pixel image into the
blue area, or press browse to find your icon manually. Press set when you
have chosen your icon.
Press ‘Save’ once you have finished customising your
features name and icon.
To start adding links click the ‘Add’ button.
Select the Type of link you would like to upload; Email, Phone, Website
or Map.
Enter the caption and then add in the required fields (depending on the
type of link you pick). If you choose map, enter in your address into the
‘Map’ section.
Choose to keep the default icon, pick from the Preset list or add your
custom icon by dragging and dropping your 140 x140 pixel image into the
blue dotted area.
Hit ‘Save’ once you’re finished
Keep clicking the ‘Add’ button to insert more links.
You’ll be able to change the order of the links, by clicking on ‘Change
Order’ on the top left. Move the links around using the buttons on the
left and drag and drop them to their new placing; then click ‘Update
New Order’.
Along each link, you’ll see an ‘Edit’ and ‘Delete’ button. Press ‘Edit if
you would like to make changes to your link, or to remove it
completely press the ‘Delete’ button
Preview App
To view your new feature for your app download the Putti
Preview App and navigate to your links tab.
Email example
After you tap the ‘Email Us’ section, you’ll be able to type in
your email and then send.
Webpage example
When you press the website link you will be taken directly to
the url.
Phone example
Tap the ‘Call Us’ section to make a call instantly.
Preview Website
If you have chosen to have a responsive website then make sure
you have completed the ‘Layout’ section of the CMS (under ‘Web’
View). Click ‘Preview’ on the top header bar to view the Links tab
on your website.
Preview Website
Once you’ve accessed your website navigate to your links
tab. Your links tab will appear in different places depending on
the layout or template you’ve chosen.
Preview Website
Clicking on a website link will redirect you to that website. You
can even list social media sites on the Links tab.
Preview Website
If you've entered an address, clicking on that link will point
you to that exact location on Google Maps.
Preview Website
Lastly, if it's a telephone number, then clicking on it will prompt
you to make a call via your phone dialler or by other calling
applications if you've enabled them on your phone settings.

Putti links tutorial

  • 1.
    To start editingyour app/website feature, you can be on either the ‘App’ or ‘Web’ View located on the top Header Bar.
  • 2.
    Access the ‘Features’tab on the App Panel
  • 3.
    Once the ‘Features’tab has been selected the app panel will appear with a list of the features that are already applied to your app. On the top right of the panel there is a ‘Manage’ button, click this to access the features menu where you can pick and choose which features you would like on your app.
  • 4.
    Select the ‘Links’feature. ‘Add’ the feature and then move it to where you would like it to be placed on your app panel. Press ‘Close' once you’ve finished.
  • 5.
    Select the ‘Links’tab now located on your app panel.
  • 6.
    For a detaileddescription of what the ‘Links’ feature does hover over the question mark button
  • 7.
    Click the customisebutton to change the name or the icon of your links feature.
  • 8.
    To chose anicon or to upload your own custom icon press the ‘Browse’ button.
  • 9.
    Choose an iconfrom the list provided, or to upload your own icon press the ‘Upload custom icon’ tab.
  • 10.
    To upload yourcustom icon drag and drop your 60 x 60 pixel image into the blue area, or press browse to find your icon manually. Press set when you have chosen your icon.
  • 11.
    Press ‘Save’ onceyou have finished customising your features name and icon.
  • 12.
    To start addinglinks click the ‘Add’ button.
  • 13.
    Select the Typeof link you would like to upload; Email, Phone, Website or Map.
  • 14.
    Enter the captionand then add in the required fields (depending on the type of link you pick). If you choose map, enter in your address into the ‘Map’ section.
  • 15.
    Choose to keepthe default icon, pick from the Preset list or add your custom icon by dragging and dropping your 140 x140 pixel image into the blue dotted area. Hit ‘Save’ once you’re finished
  • 16.
    Keep clicking the‘Add’ button to insert more links.
  • 17.
    You’ll be ableto change the order of the links, by clicking on ‘Change Order’ on the top left. Move the links around using the buttons on the left and drag and drop them to their new placing; then click ‘Update New Order’.
  • 18.
    Along each link,you’ll see an ‘Edit’ and ‘Delete’ button. Press ‘Edit if you would like to make changes to your link, or to remove it completely press the ‘Delete’ button
  • 19.
    Preview App To viewyour new feature for your app download the Putti Preview App and navigate to your links tab.
  • 20.
    Email example After youtap the ‘Email Us’ section, you’ll be able to type in your email and then send.
  • 21.
    Webpage example When youpress the website link you will be taken directly to the url.
  • 22.
    Phone example Tap the‘Call Us’ section to make a call instantly.
  • 23.
    Preview Website If youhave chosen to have a responsive website then make sure you have completed the ‘Layout’ section of the CMS (under ‘Web’ View). Click ‘Preview’ on the top header bar to view the Links tab on your website.
  • 24.
    Preview Website Once you’veaccessed your website navigate to your links tab. Your links tab will appear in different places depending on the layout or template you’ve chosen.
  • 25.
    Preview Website Clicking ona website link will redirect you to that website. You can even list social media sites on the Links tab.
  • 26.
    Preview Website If you'veentered an address, clicking on that link will point you to that exact location on Google Maps.
  • 27.
    Preview Website Lastly, ifit's a telephone number, then clicking on it will prompt you to make a call via your phone dialler or by other calling applications if you've enabled them on your phone settings.