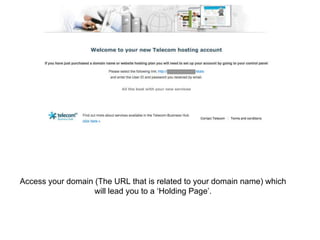
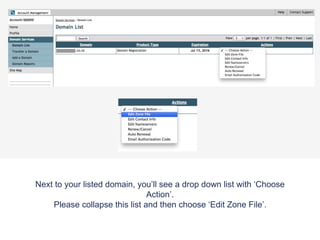
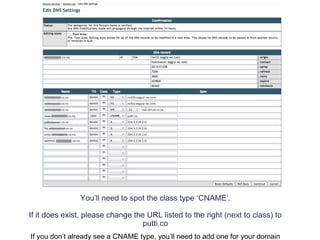
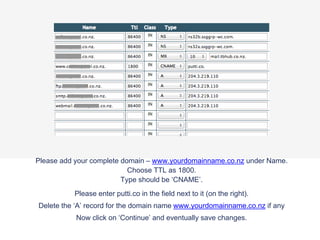
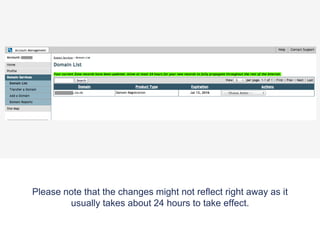
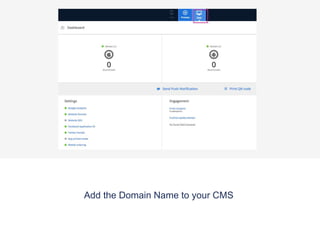
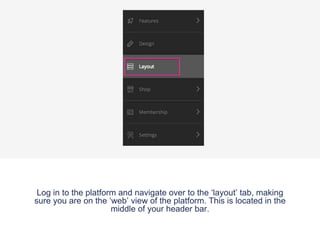
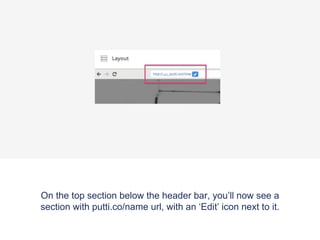
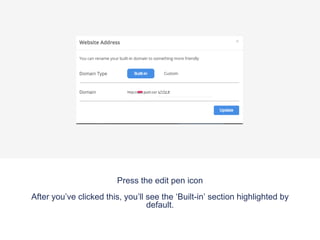
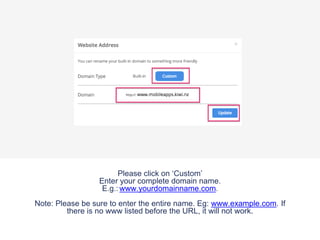
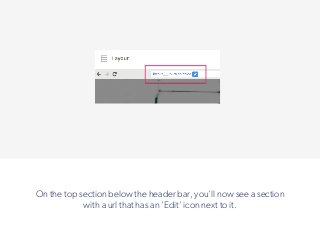
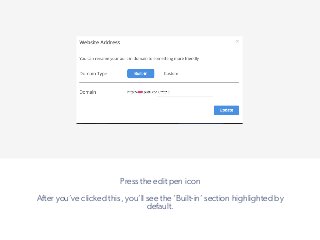
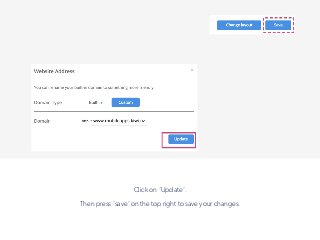
!
Type your domain name (URL) into the address bar on any internet
browser. This will lead you to a Telecom holding page’.
Click on the highlighted link (your domain name) and enter in the
User ID and password you have been provided by Spark.
!
!
Click on ‘Domain List’ on the domain services panel
!
Next to your listed domain, you’ll see a drop down list with
‘Choose Action’. Collapse the list and choose ‘Edit Zone File’.
Under the ‘Type’ column look for ‘CNAME’
If this is listed, then change the URL listed to the right (next to type) to putti.co.
If this is listed, then change the URL listed to the right (next to type) to;
putti.co. (if you are a Putti customer)
sparkweb.putti.nz. (If you are a Spark Business customer)
!
For your domain to successfully transfer make sure to type the
address including the full stops
e.g. putti.co. or sparkweb.putti.nz.
!
If don’t have a CNAME category then you will need to add one
!
Add your complete domain – www.yourdomainname.co.nz under Name.
MAKE SURE TO HAVE WWW. LISTED BEFORE YOUR URL, IF ANY CASE THE DOMAIN IS LISTED
WITHOUT IT, THE WHOLE DOMAIN LINK WILL BREAK
!
Choose TTL as 1800.
Type should be ‘CNAME’.
Please enter putti.co. (If you are a Putti customer)
or sparkweb.putti.nz. (If you are a Spark business customer)
in the field next to it on the right.
Now click on ‘Continue’ and it will eventually save your changes
!
Make sure to follow the previous details correctly otherwise your
domain name will not point to your Putti website correctly
!
Please note that the changes might not reflect right away as it usually
takes about 24 hours to take effect.
Add the Domain Name to your CMS 
!
Log in to the platform and navigate over to the ‘layout’ tab, making sure
you are on the ‘web’ view of the platform. This is located in the middle of
your header bar.
!
On the top section below the header bar, you’ll now see a section
with a url that has an ‘Edit’ icon next to it.
!
Press the edit pen icon
After you’ve clicked this, you’ll see the ‘Built-in’ section highlighted by
default.
!
Please click on ‘Custom’
Enter your complete domain name.
E.g.:www.yourdomainname.com.
Note: Please be sure to enter the entire name. Eg: www.example.com. If there
is no www listed before the URL, it will not work.
!
Click on ‘Update’.
 
Then press ‘save’ on the top right to save your changes.
 
!
Spark CNAME Transfer

Spark CNAME Transfer

  • 1.
    ! Type your domainname (URL) into the address bar on any internet browser. This will lead you to a Telecom holding page’.
  • 2.
    Click on thehighlighted link (your domain name) and enter in the User ID and password you have been provided by Spark. !
  • 3.
    ! Click on ‘DomainList’ on the domain services panel
  • 4.
    ! Next to yourlisted domain, you’ll see a drop down list with ‘Choose Action’. Collapse the list and choose ‘Edit Zone File’.
  • 5.
    Under the ‘Type’column look for ‘CNAME’ If this is listed, then change the URL listed to the right (next to type) to putti.co.
  • 6.
    If this islisted, then change the URL listed to the right (next to type) to; putti.co. (if you are a Putti customer) sparkweb.putti.nz. (If you are a Spark Business customer)
  • 7.
    ! For your domainto successfully transfer make sure to type the address including the full stops e.g. putti.co. or sparkweb.putti.nz.
  • 8.
    ! If don’t havea CNAME category then you will need to add one
  • 9.
    ! Add your completedomain – www.yourdomainname.co.nz under Name. MAKE SURE TO HAVE WWW. LISTED BEFORE YOUR URL, IF ANY CASE THE DOMAIN IS LISTED WITHOUT IT, THE WHOLE DOMAIN LINK WILL BREAK
  • 10.
    ! Choose TTL as1800. Type should be ‘CNAME’. Please enter putti.co. (If you are a Putti customer) or sparkweb.putti.nz. (If you are a Spark business customer) in the field next to it on the right. Now click on ‘Continue’ and it will eventually save your changes
  • 11.
    ! Make sure tofollow the previous details correctly otherwise your domain name will not point to your Putti website correctly
  • 12.
    ! Please note thatthe changes might not reflect right away as it usually takes about 24 hours to take effect.
  • 13.
    Add the DomainName to your CMS  !
  • 14.
    Log in tothe platform and navigate over to the ‘layout’ tab, making sure you are on the ‘web’ view of the platform. This is located in the middle of your header bar. !
  • 15.
    On the topsection below the header bar, you’ll now see a section with a url that has an ‘Edit’ icon next to it. !
  • 16.
    Press the editpen icon After you’ve clicked this, you’ll see the ‘Built-in’ section highlighted by default. !
  • 17.
    Please click on‘Custom’ Enter your complete domain name. E.g.:www.yourdomainname.com. Note: Please be sure to enter the entire name. Eg: www.example.com. If there is no www listed before the URL, it will not work. !
  • 18.
    Click on ‘Update’.   Thenpress ‘save’ on the top right to save your changes.   !