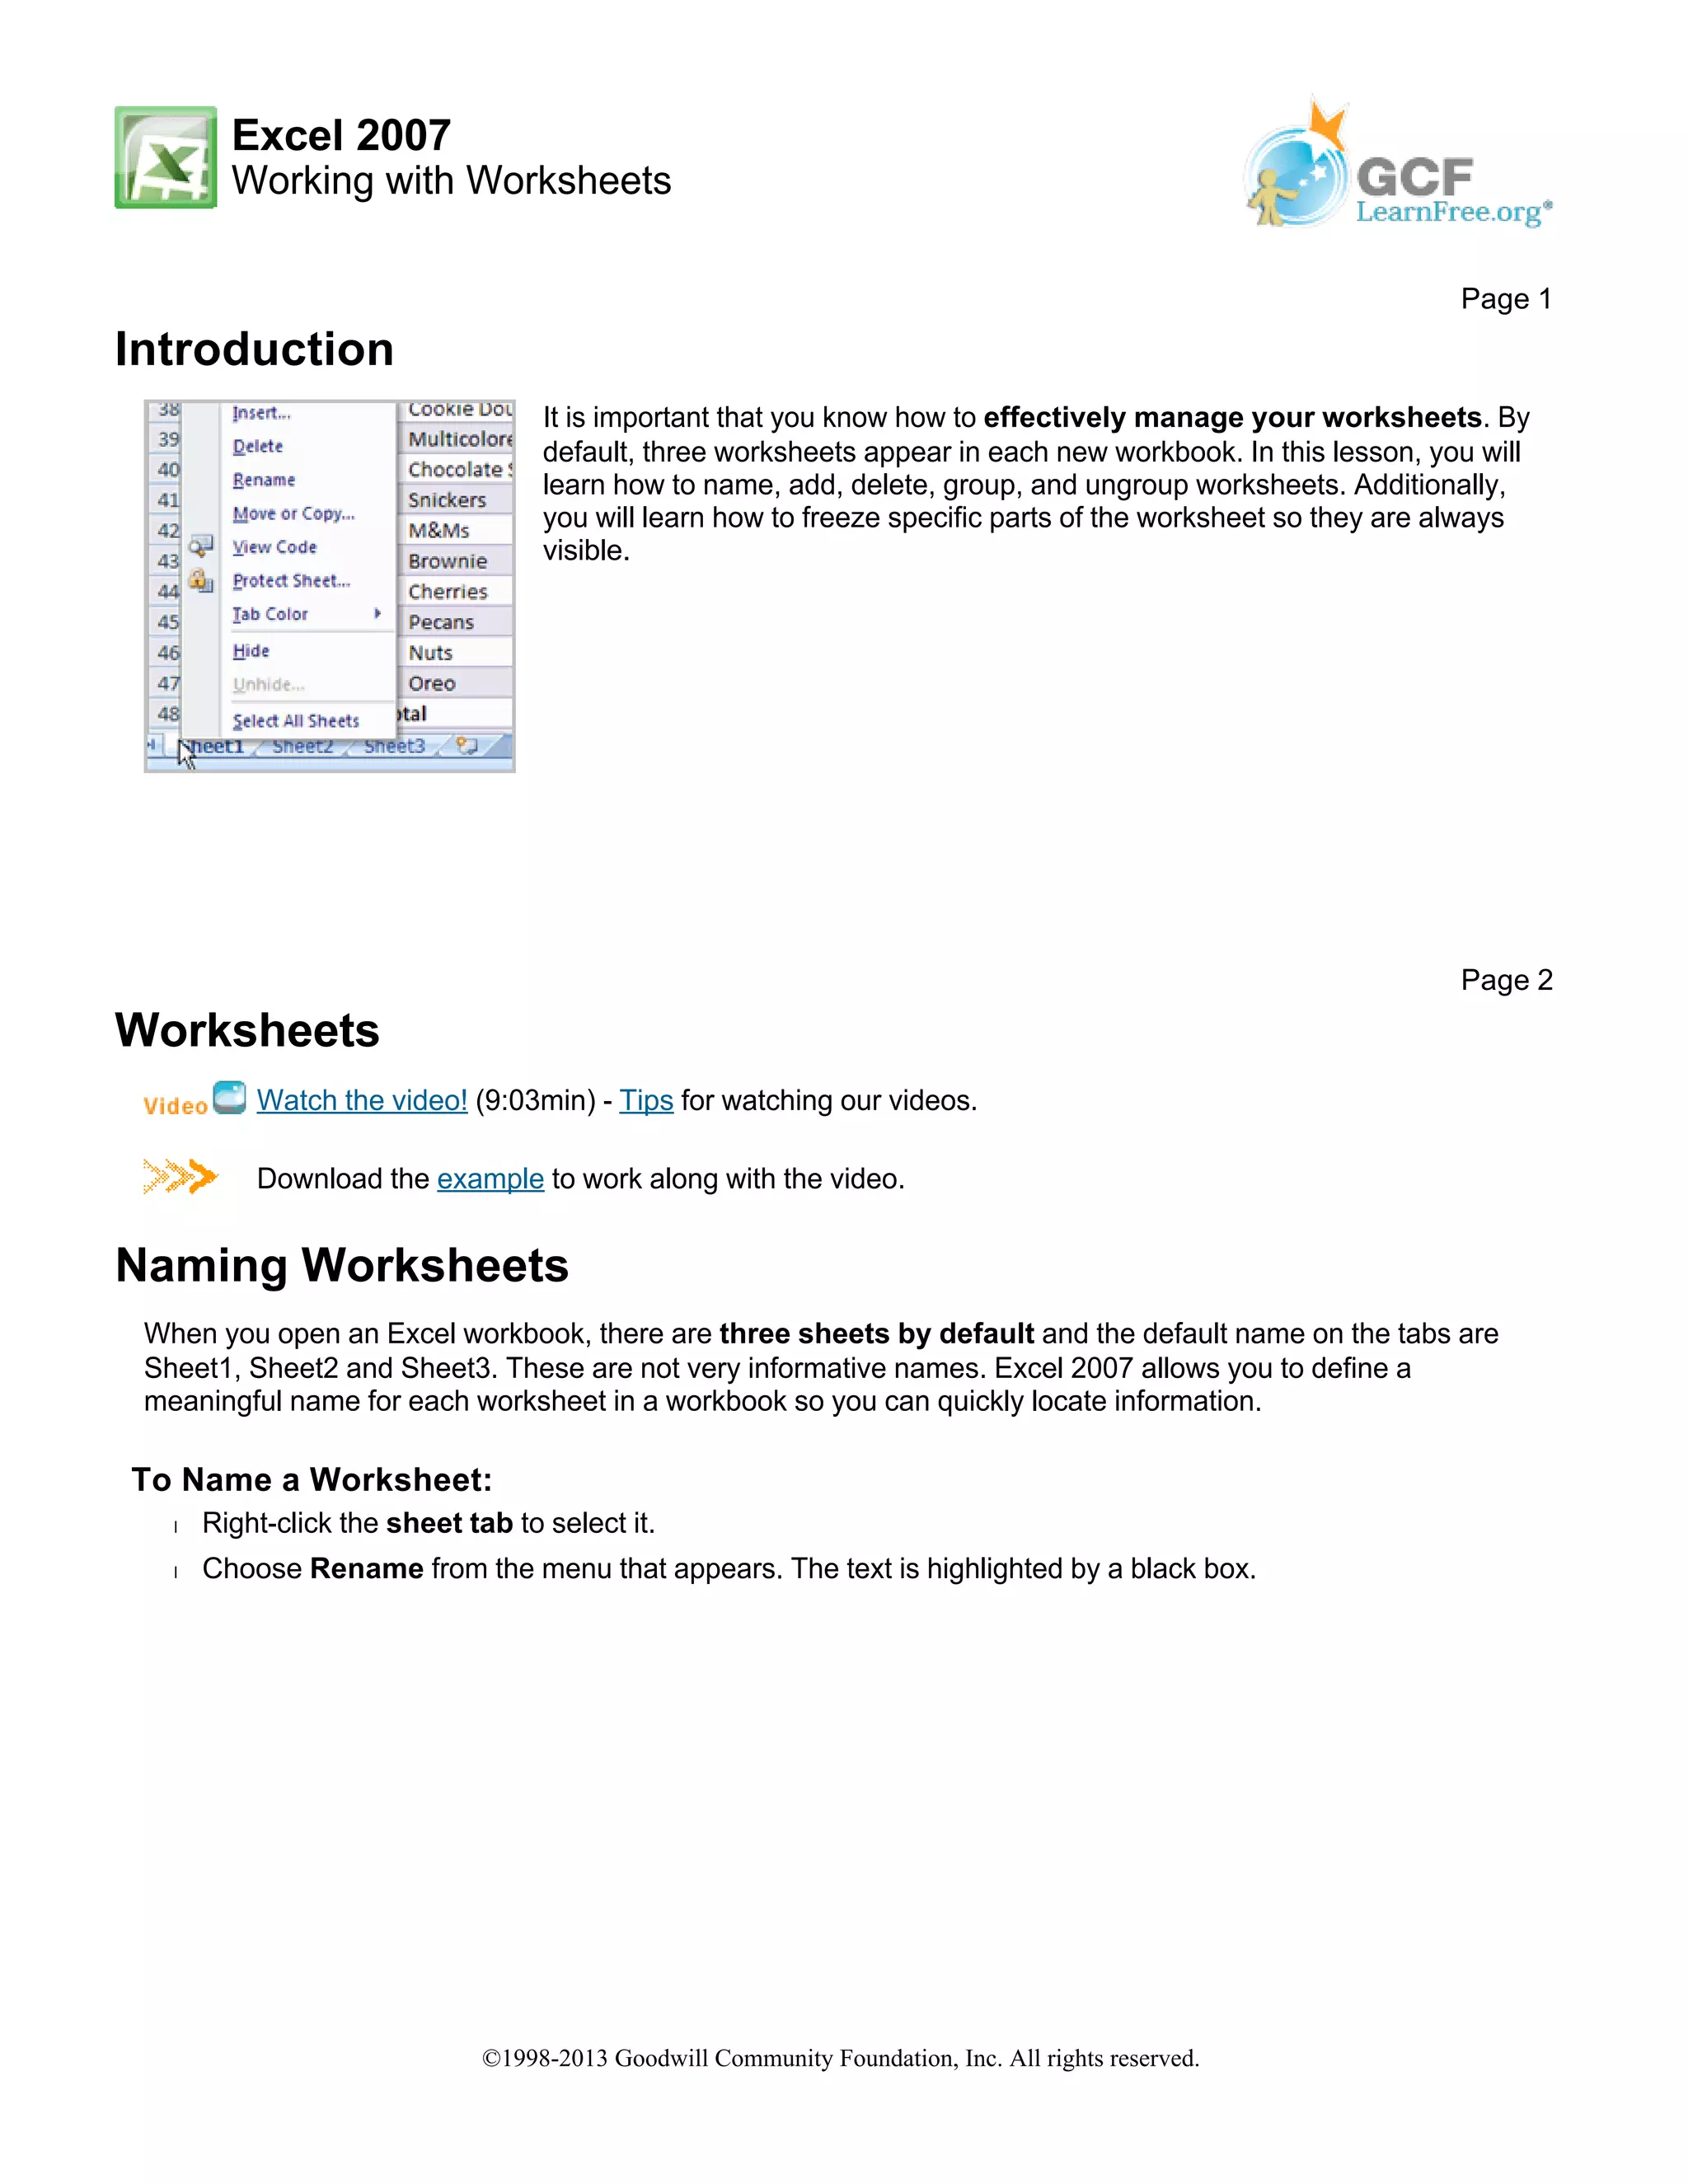
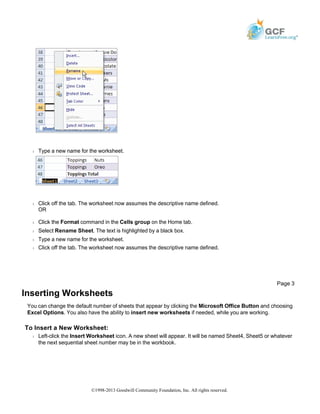
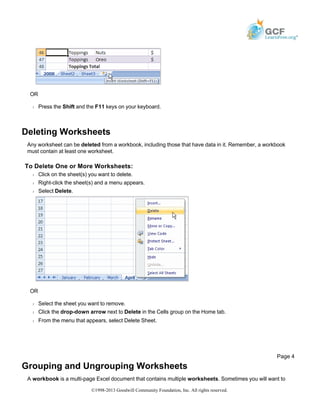
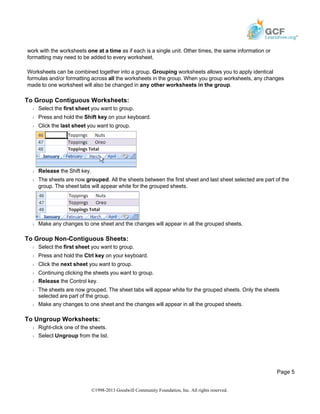
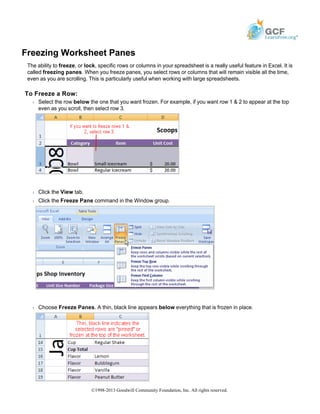
More Related Content
More from Hassan Samoon (13)
Print13
- 1. Excel 2007
Working with Worksheets
Introduction
Worksheets
Watch the video! (9:03min) - Tips for watching our videos.
Download the example to work along with the video.
Naming Worksheets
When you open an Excel workbook, there are three sheets by default and the default name on the tabs are
Sheet1, Sheet2 and Sheet3. These are not very informative names. Excel 2007 allows you to define a
meaningful name for each worksheet in a workbook so you can quickly locate information.
To Name a Worksheet:
Š Right-click the sheet tab to select it.
Š Choose Rename from the menu that appears. The text is highlighted by a black box.
Page 1
It is important that you know how to effectively manage your worksheets. By
default, three worksheets appear in each new workbook. In this lesson, you will
learn how to name, add, delete, group, and ungroup worksheets. Additionally,
you will learn how to freeze specific parts of the worksheet so they are always
visible.
Page 2
©1998-2013 Goodwill Community Foundation, Inc. All rights reserved.
- 2. Š Type a new name for the worksheet.
Š Click off the tab. The worksheet now assumes the descriptive name defined.
OR
Š Click the Format command in the Cells group on the Home tab.
Š Select Rename Sheet. The text is highlighted by a black box.
Š Type a new name for the worksheet.
Š Click off the tab. The worksheet now assumes the descriptive name defined.
Inserting Worksheets
You can change the default number of sheets that appear by clicking the Microsoft Office Button and choosing
Excel Options. You also have the ability to insert new worksheets if needed, while you are working.
To Insert a New Worksheet:
Š Left-click the Insert Worksheet icon. A new sheet will appear. It will be named Sheet4, Sheet5 or whatever
the next sequential sheet number may be in the workbook.
Page 3
©1998-2013 Goodwill Community Foundation, Inc. All rights reserved.
- 3. OR
Š Press the Shift and the F11 keys on your keyboard.
Deleting Worksheets
Any worksheet can be deleted from a workbook, including those that have data in it. Remember, a workbook
must contain at least one worksheet.
To Delete One or More Worksheets:
Š Click on the sheet(s) you want to delete.
Š Right-click the sheet(s) and a menu appears.
Š Select Delete.
OR
Š Select the sheet you want to remove.
Š Click the drop-down arrow next to Delete in the Cells group on the Home tab.
Š From the menu that appears, select Delete Sheet.
Grouping and Ungrouping Worksheets
A workbook is a multi-page Excel document that contains multiple worksheets. Sometimes you will want to
Page 4
©1998-2013 Goodwill Community Foundation, Inc. All rights reserved.
- 4. work with the worksheets one at a time as if each is a single unit. Other times, the same information or
formatting may need to be added to every worksheet.
Worksheets can be combined together into a group. Grouping worksheets allows you to apply identical
formulas and/or formatting across all the worksheets in the group. When you group worksheets, any changes
made to one worksheet will also be changed in any other worksheets in the group.
To Group Contiguous Worksheets:
Š Select the first sheet you want to group.
Š Press and hold the Shift key on your keyboard.
Š Click the last sheet you want to group.
Š Release the Shift key.
Š The sheets are now grouped. All the sheets between the first sheet and last sheet selected are part of the
group. The sheet tabs will appear white for the grouped sheets.
Š Make any changes to one sheet and the changes will appear in all the grouped sheets.
To Group Non-Contiguous Sheets:
Š Select the first sheet you want to group.
Š Press and hold the Ctrl key on your keyboard.
Š Click the next sheet you want to group.
Š Continuing clicking the sheets you want to group.
Š Release the Control key.
Š The sheets are now grouped. The sheet tabs will appear white for the grouped sheets. Only the sheets
selected are part of the group.
Š Make any changes to one sheet and the changes will appear in all the grouped sheets.
To Ungroup Worksheets:
Š Right-click one of the sheets.
Š Select Ungroup from the list.
Page 5
©1998-2013 Goodwill Community Foundation, Inc. All rights reserved.
- 5. Freezing Worksheet Panes
The ability to freeze, or lock, specific rows or columns in your spreadsheet is a really useful feature in Excel. It is
called freezing panes. When you freeze panes, you select rows or columns that will remain visible all the time,
even as you are scrolling. This is particularly useful when working with large spreadsheets.
To Freeze a Row:
Š Select the row below the one that you want frozen. For example, if you want row 1 & 2 to appear at the top
even as you scroll, then select row 3.
Š Click the View tab.
Š Click the Freeze Pane command in the Window group.
Š Choose Freeze Panes. A thin, black line appears below everything that is frozen in place.
©1998-2013 Goodwill Community Foundation, Inc. All rights reserved.
- 6. Š Scroll down in the worksheet to see the pinned rows.
To Unfreeze a Pane:
Š Click the Freeze Pane command.
Š Select the Unfreeze command.
To Freeze a Column:
Š Select the column to the right of the column(s) you want frozen. For example, if you want columns A & B to
always appear on the left, just select column C.
Š Click the View tab.
Š Click the Freeze Pane command in the Window group.
Š Choose Freeze Pane. A thin, black line appears to the right of the frozen area.
Š Scroll across in the worksheet to see the pinned columns.
Challenge!
Use the Inventory workbook or any workbook you choose to complete this challenge.
Page 6
Š Rename Sheet1 to January, Sheet2 to February and Sheet3 to March.
Š Insert two worksheets and name them April and May.
Š If necessary, move the April and May worksheets so they are immediately
following the March sheet.
Š Use the Grouping feature so that all the sheets contain the same information as
the January sheet.
Š Delete the May sheet.
Š Freeze rows 1 and 2 on the January sheet.
©1998-2013 Goodwill Community Foundation, Inc. All rights reserved.