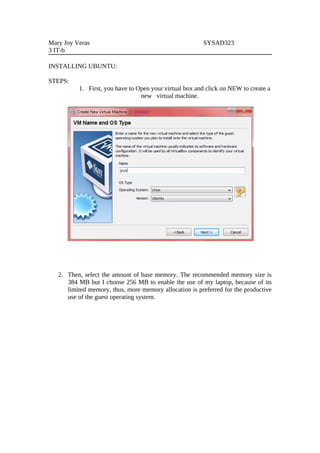
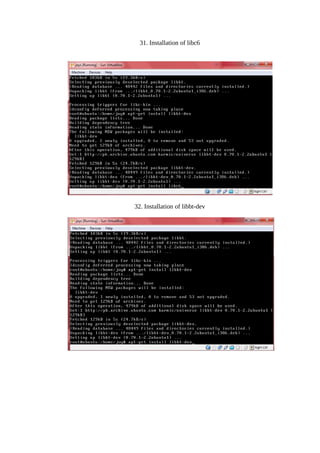
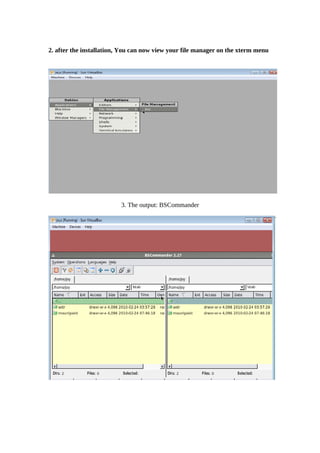
Mary Joy Veras                                          SYSAD323
3 IT-b

INSTALLING UBUNTU:

STEPS:
          1. First, you have to Open your virtual box and click on NEW to create a
                                 new virtual machine.


   2. Then, select the amount of base memory. The recommended memory size is
      384 MB but I choose 256 MB to enable the use of my laptop, because of its
      limited memory, thus, more memory allocation is preferred for the productive
      use of the guest operating system.
•   Then, create new Virtual Hard Disk
       •   Be sure to have your iso file obtain at the laboratory.
       •   Then click Next


3. Select the type of virtual hard disk. I choose dynamically expanding storage so
   that it will grow up to the size specified as the guest OS claims disk space.
       • Then, click NEXT
4. Then on the next step you will select the location and size of the virtual Disk.
   The default size is 8.00 GB.

       •   Then click NEXT
5. A new hard disk will be created after you press the FINISH button.


6. Select your virtual machine and click the settings button, select storage and
select the virtual cd Drive that you will use and browse the ubuntu iso file.
7. On the setting, select System then then change the size of the base memory
to proceed to next step.


8. Lastly this is the output. Then select the virtual machine you make and click
start to run.
9. The Virtual Machine starts, Then you have to install the ubuntu by following
   the instruction.


10. This is the Ubuntu Installer main menu. Click YES to determine your
    keyboard layout.
11.Click Continue for the keyboard layout detection complete.


        12. The virtual machine will scan the Cd Rom
13. It will load the additional components.


14. Click continue to configure the network
15. Enter hostname then continue.


16. Partition the disks. Click the Guided with set up LVM then enter.
17. Just select the highlighted word


          19. Select YES
20.SELECT Continue the system


21. Write the changes to disk , Click YES!
22. Select CONTINUE


23. Assign the user and the password
24. Verify the password


25. Encrypt your directory, Click YES!
26. You can now log in to your Ubuntu Using the user name and password
                                  you set.


27. Now you will :
    • apt-get update
    • apt-get upgrade
    • apt-get install samba smbfs smbclient
    • apt-get install g++ gcc cpp
    • apt-get install libgcc libgcc1-dbg libstdc++6-4.3-dev libgmp3-dev
    • apt-get install imlib11 automake make giblib1 perl
    • apt- get install libxxf86gba-dev xserver-xorg-dev x-windows-system
      xdm xserver-xorg-core
    • then restart your virtual box
28. Then Install the libfontconfig1
29. Installation of libcg-dev


    30. Installation of libbt-dev
31. Installation of libc6


32. Installation of libbt-dev
33. Installation of libbt


34. Installation of libfontconfig1-dbg
35. Installation of libfontconfig1-dev


36. Installation of blacbox, xterm and xinit:
          apt-get install blackbox
          apt-get install xterm menu
          apt-get install xinit
37. Output of installing blackbox


    38. The output of xterm
39. The output of installing menu


     40. the xterm terminal
INSTALLING WEB BROWSER USING DPKG

1. download a deb file of your desire web browser. Then Create a directory
   which is extr and mountpoint. You have to mount the file using:
                  mount /dev/sdb1 /home/joy/mountpoint.


2. Then go to the directory where you mount it: cd mountpoint.
3. Then cp the file to extr: cp iceweasel_1.5.0.8pre2.deb /home/joy/extr
   Then go to the directory extr to check the file.


4. Then type: dpkg –i iceweasel_1.5.0.8pre2.deb then wait for the process to
finish. If there’s any dependencies like I’ve encountered. Just install it.
5. Output: THE ICEWEASEL


INSTALLATION OF FILE MANAGER: THE BSCommander(double panel)

   1. In installing file manager, I acquired a .tar.gz file from the net. I extracted
      the content using tar-xvzf bsc_2.27_x86.tar.gz. Then cd to the extracted
      directory and type ./configure, make and make install.
2. after the installation, You can now view your file manager on the xterm menu


                          3. The output: BSCommander

Os Virtualization

  • 1.
    Mary Joy Veras SYSAD323 3 IT-b INSTALLING UBUNTU: STEPS: 1. First, you have to Open your virtual box and click on NEW to create a new virtual machine. 2. Then, select the amount of base memory. The recommended memory size is 384 MB but I choose 256 MB to enable the use of my laptop, because of its limited memory, thus, more memory allocation is preferred for the productive use of the guest operating system.
  • 2.
    Then, create new Virtual Hard Disk • Be sure to have your iso file obtain at the laboratory. • Then click Next 3. Select the type of virtual hard disk. I choose dynamically expanding storage so that it will grow up to the size specified as the guest OS claims disk space. • Then, click NEXT
  • 3.
    4. Then onthe next step you will select the location and size of the virtual Disk. The default size is 8.00 GB. • Then click NEXT
  • 4.
    5. A newhard disk will be created after you press the FINISH button. 6. Select your virtual machine and click the settings button, select storage and select the virtual cd Drive that you will use and browse the ubuntu iso file.
  • 5.
    7. On thesetting, select System then then change the size of the base memory to proceed to next step. 8. Lastly this is the output. Then select the virtual machine you make and click start to run.
  • 6.
    9. The VirtualMachine starts, Then you have to install the ubuntu by following the instruction. 10. This is the Ubuntu Installer main menu. Click YES to determine your keyboard layout.
  • 7.
    11.Click Continue forthe keyboard layout detection complete. 12. The virtual machine will scan the Cd Rom
  • 8.
    13. It willload the additional components. 14. Click continue to configure the network
  • 9.
    15. Enter hostnamethen continue. 16. Partition the disks. Click the Guided with set up LVM then enter.
  • 10.
    17. Just selectthe highlighted word 19. Select YES
  • 11.
    20.SELECT Continue thesystem 21. Write the changes to disk , Click YES!
  • 12.
    22. Select CONTINUE 23.Assign the user and the password
  • 13.
    24. Verify thepassword 25. Encrypt your directory, Click YES!
  • 14.
    26. You cannow log in to your Ubuntu Using the user name and password you set. 27. Now you will : • apt-get update • apt-get upgrade • apt-get install samba smbfs smbclient • apt-get install g++ gcc cpp • apt-get install libgcc libgcc1-dbg libstdc++6-4.3-dev libgmp3-dev • apt-get install imlib11 automake make giblib1 perl • apt- get install libxxf86gba-dev xserver-xorg-dev x-windows-system xdm xserver-xorg-core • then restart your virtual box
  • 15.
    28. Then Installthe libfontconfig1
  • 16.
    29. Installation oflibcg-dev 30. Installation of libbt-dev
  • 17.
    31. Installation oflibc6 32. Installation of libbt-dev
  • 18.
    33. Installation oflibbt 34. Installation of libfontconfig1-dbg
  • 19.
    35. Installation oflibfontconfig1-dev 36. Installation of blacbox, xterm and xinit: apt-get install blackbox apt-get install xterm menu apt-get install xinit
  • 20.
    37. Output ofinstalling blackbox 38. The output of xterm
  • 21.
    39. The outputof installing menu 40. the xterm terminal
  • 22.
    INSTALLING WEB BROWSERUSING DPKG 1. download a deb file of your desire web browser. Then Create a directory which is extr and mountpoint. You have to mount the file using: mount /dev/sdb1 /home/joy/mountpoint. 2. Then go to the directory where you mount it: cd mountpoint.
  • 23.
    3. Then cpthe file to extr: cp iceweasel_1.5.0.8pre2.deb /home/joy/extr Then go to the directory extr to check the file. 4. Then type: dpkg –i iceweasel_1.5.0.8pre2.deb then wait for the process to finish. If there’s any dependencies like I’ve encountered. Just install it.
  • 24.
    5. Output: THEICEWEASEL INSTALLATION OF FILE MANAGER: THE BSCommander(double panel) 1. In installing file manager, I acquired a .tar.gz file from the net. I extracted the content using tar-xvzf bsc_2.27_x86.tar.gz. Then cd to the extracted directory and type ./configure, make and make install.
  • 25.
    2. after theinstallation, You can now view your file manager on the xterm menu 3. The output: BSCommander