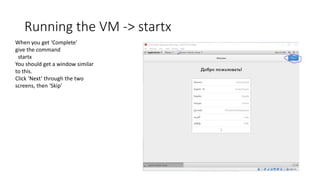
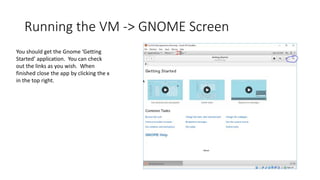
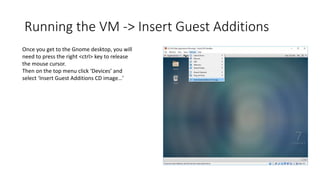
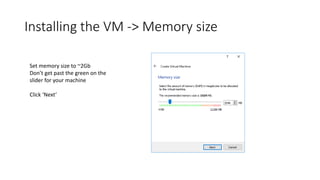
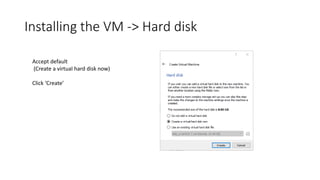
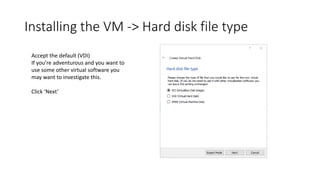
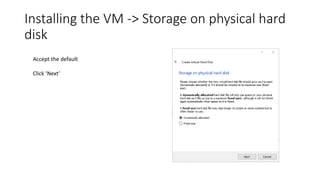
This document provides step-by-step instructions for installing a CentOS 7 virtual machine using VirtualBox. It describes downloading VirtualBox and the CentOS 7 ISO, creating a new virtual machine, configuring storage, network, and shared folders, installing CentOS 7, setting the root password and creating a user, installing updates and desktop packages, and launching the GNOME desktop environment. The instructions also cover inserting guest additions and restarting to enable full mouse and screen functionality in the virtual machine.


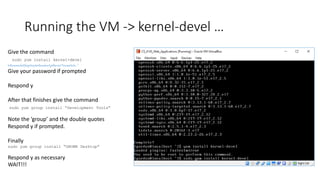
![Running the VM -> Update
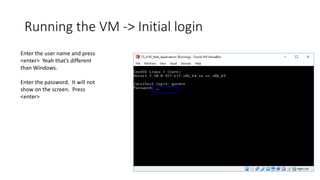
Enter the command:
sudo yum update<enter>
Since this will be the first time you
have used sudo, it will print a
message and ask for your user
password. Enter it.
Respond with y when asked
“Is this ok [y/d/N]”
and when asked again
WAIT!](https://image.slidesharecdn.com/virtualmachine-160914073945/85/Virtual-machine-35-320.jpg)