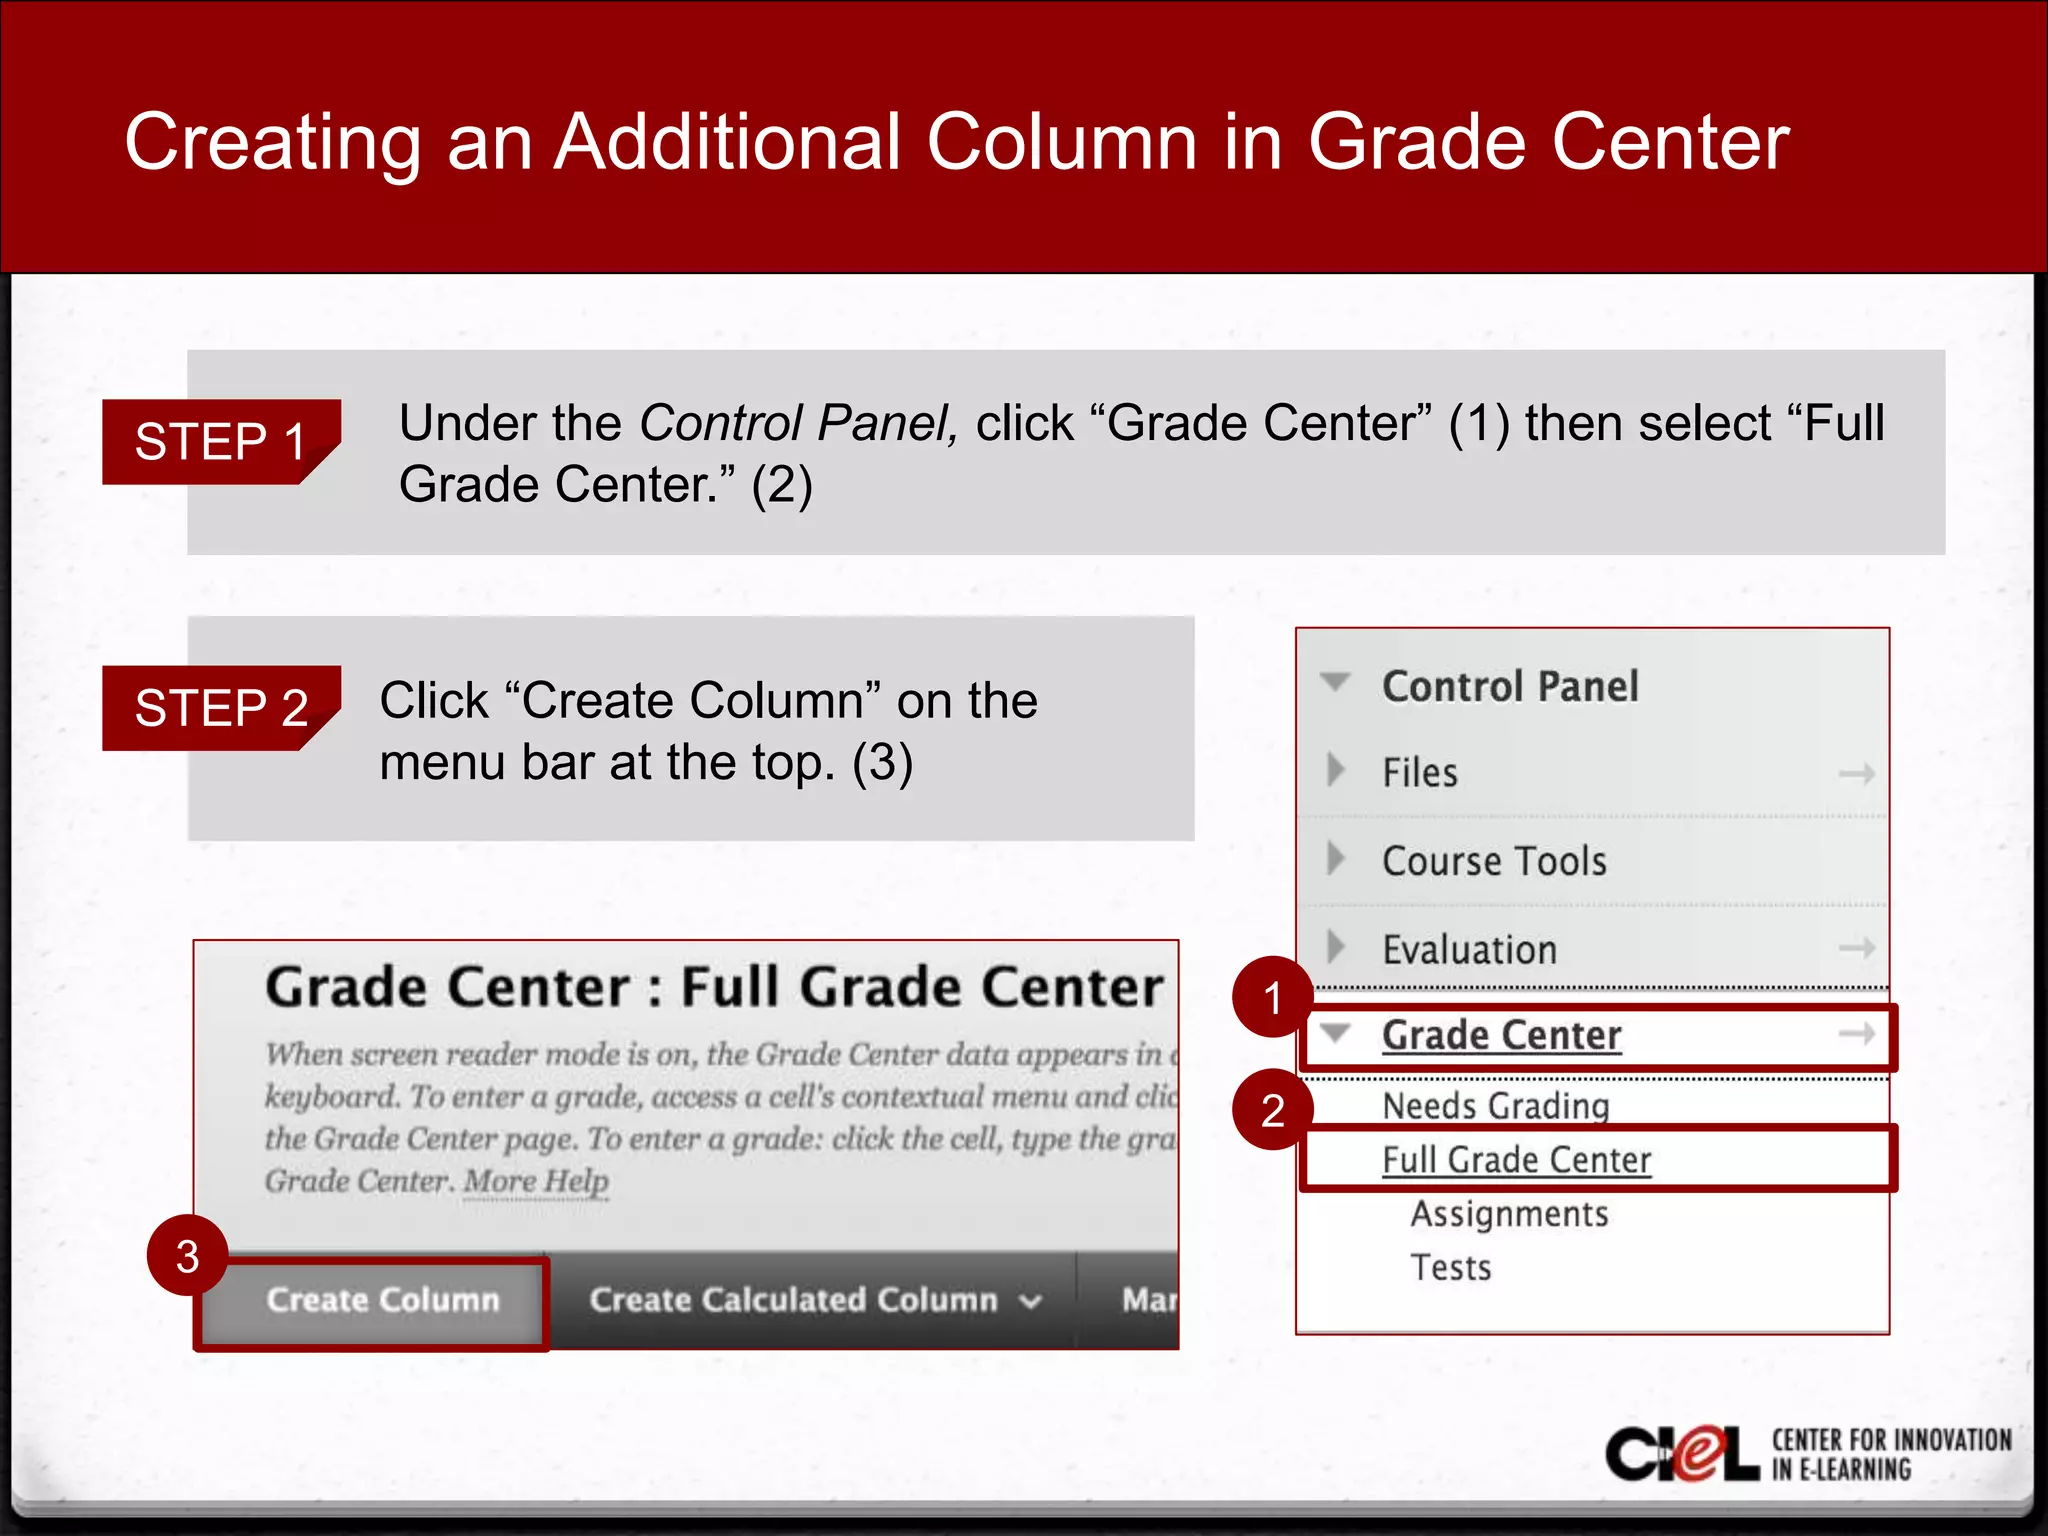
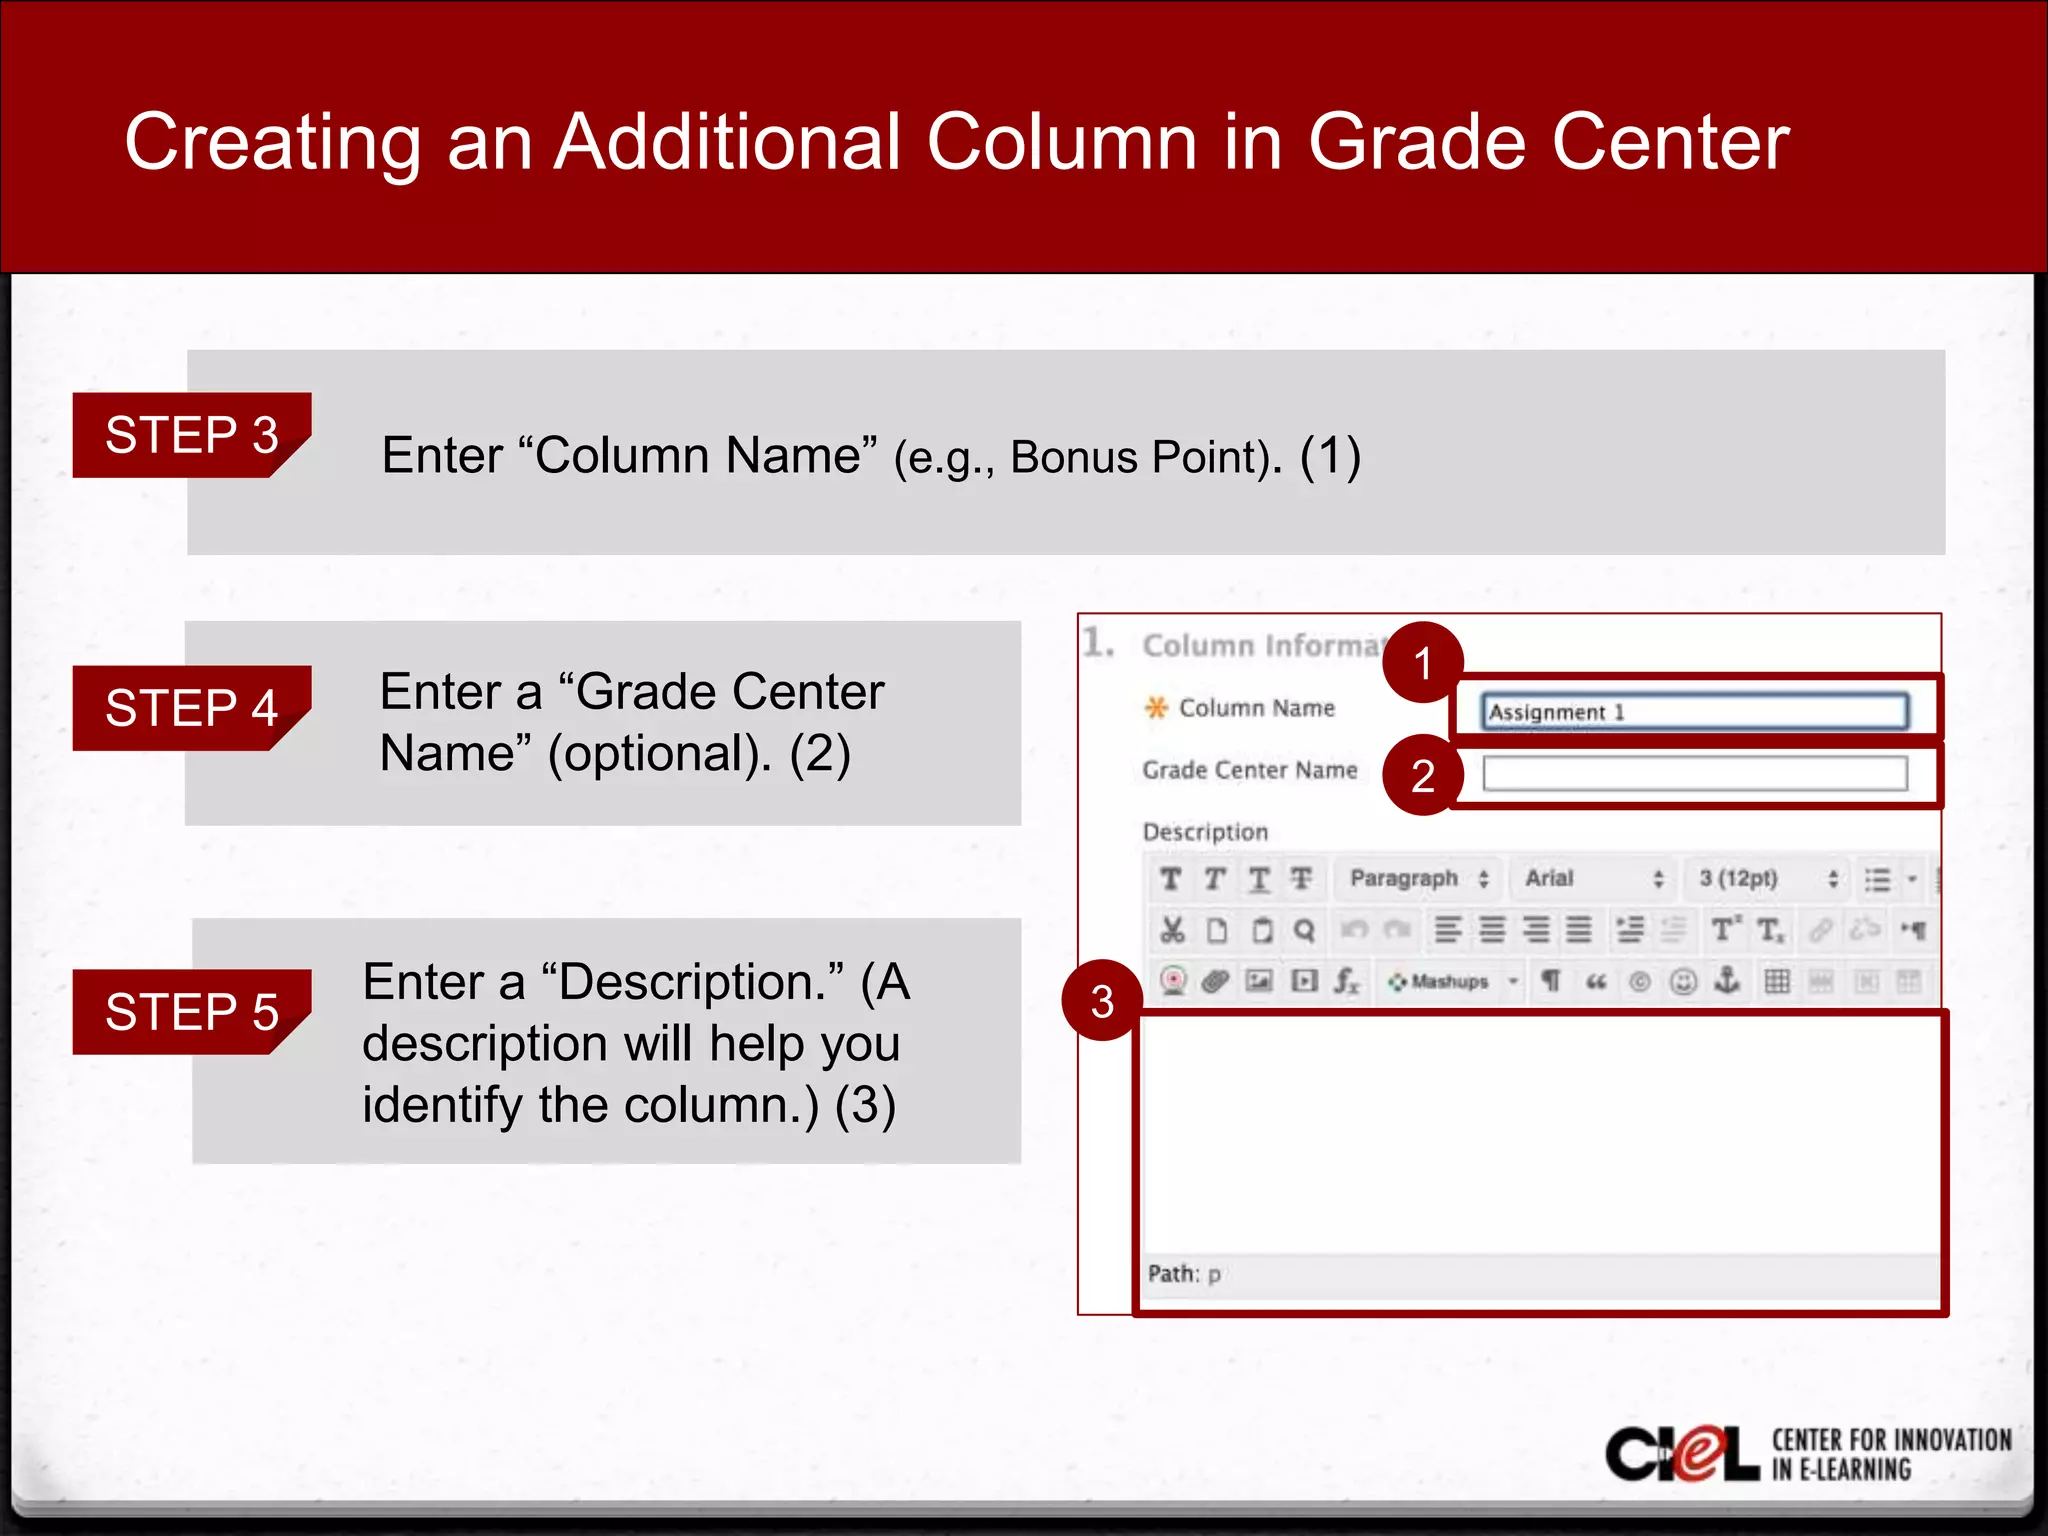
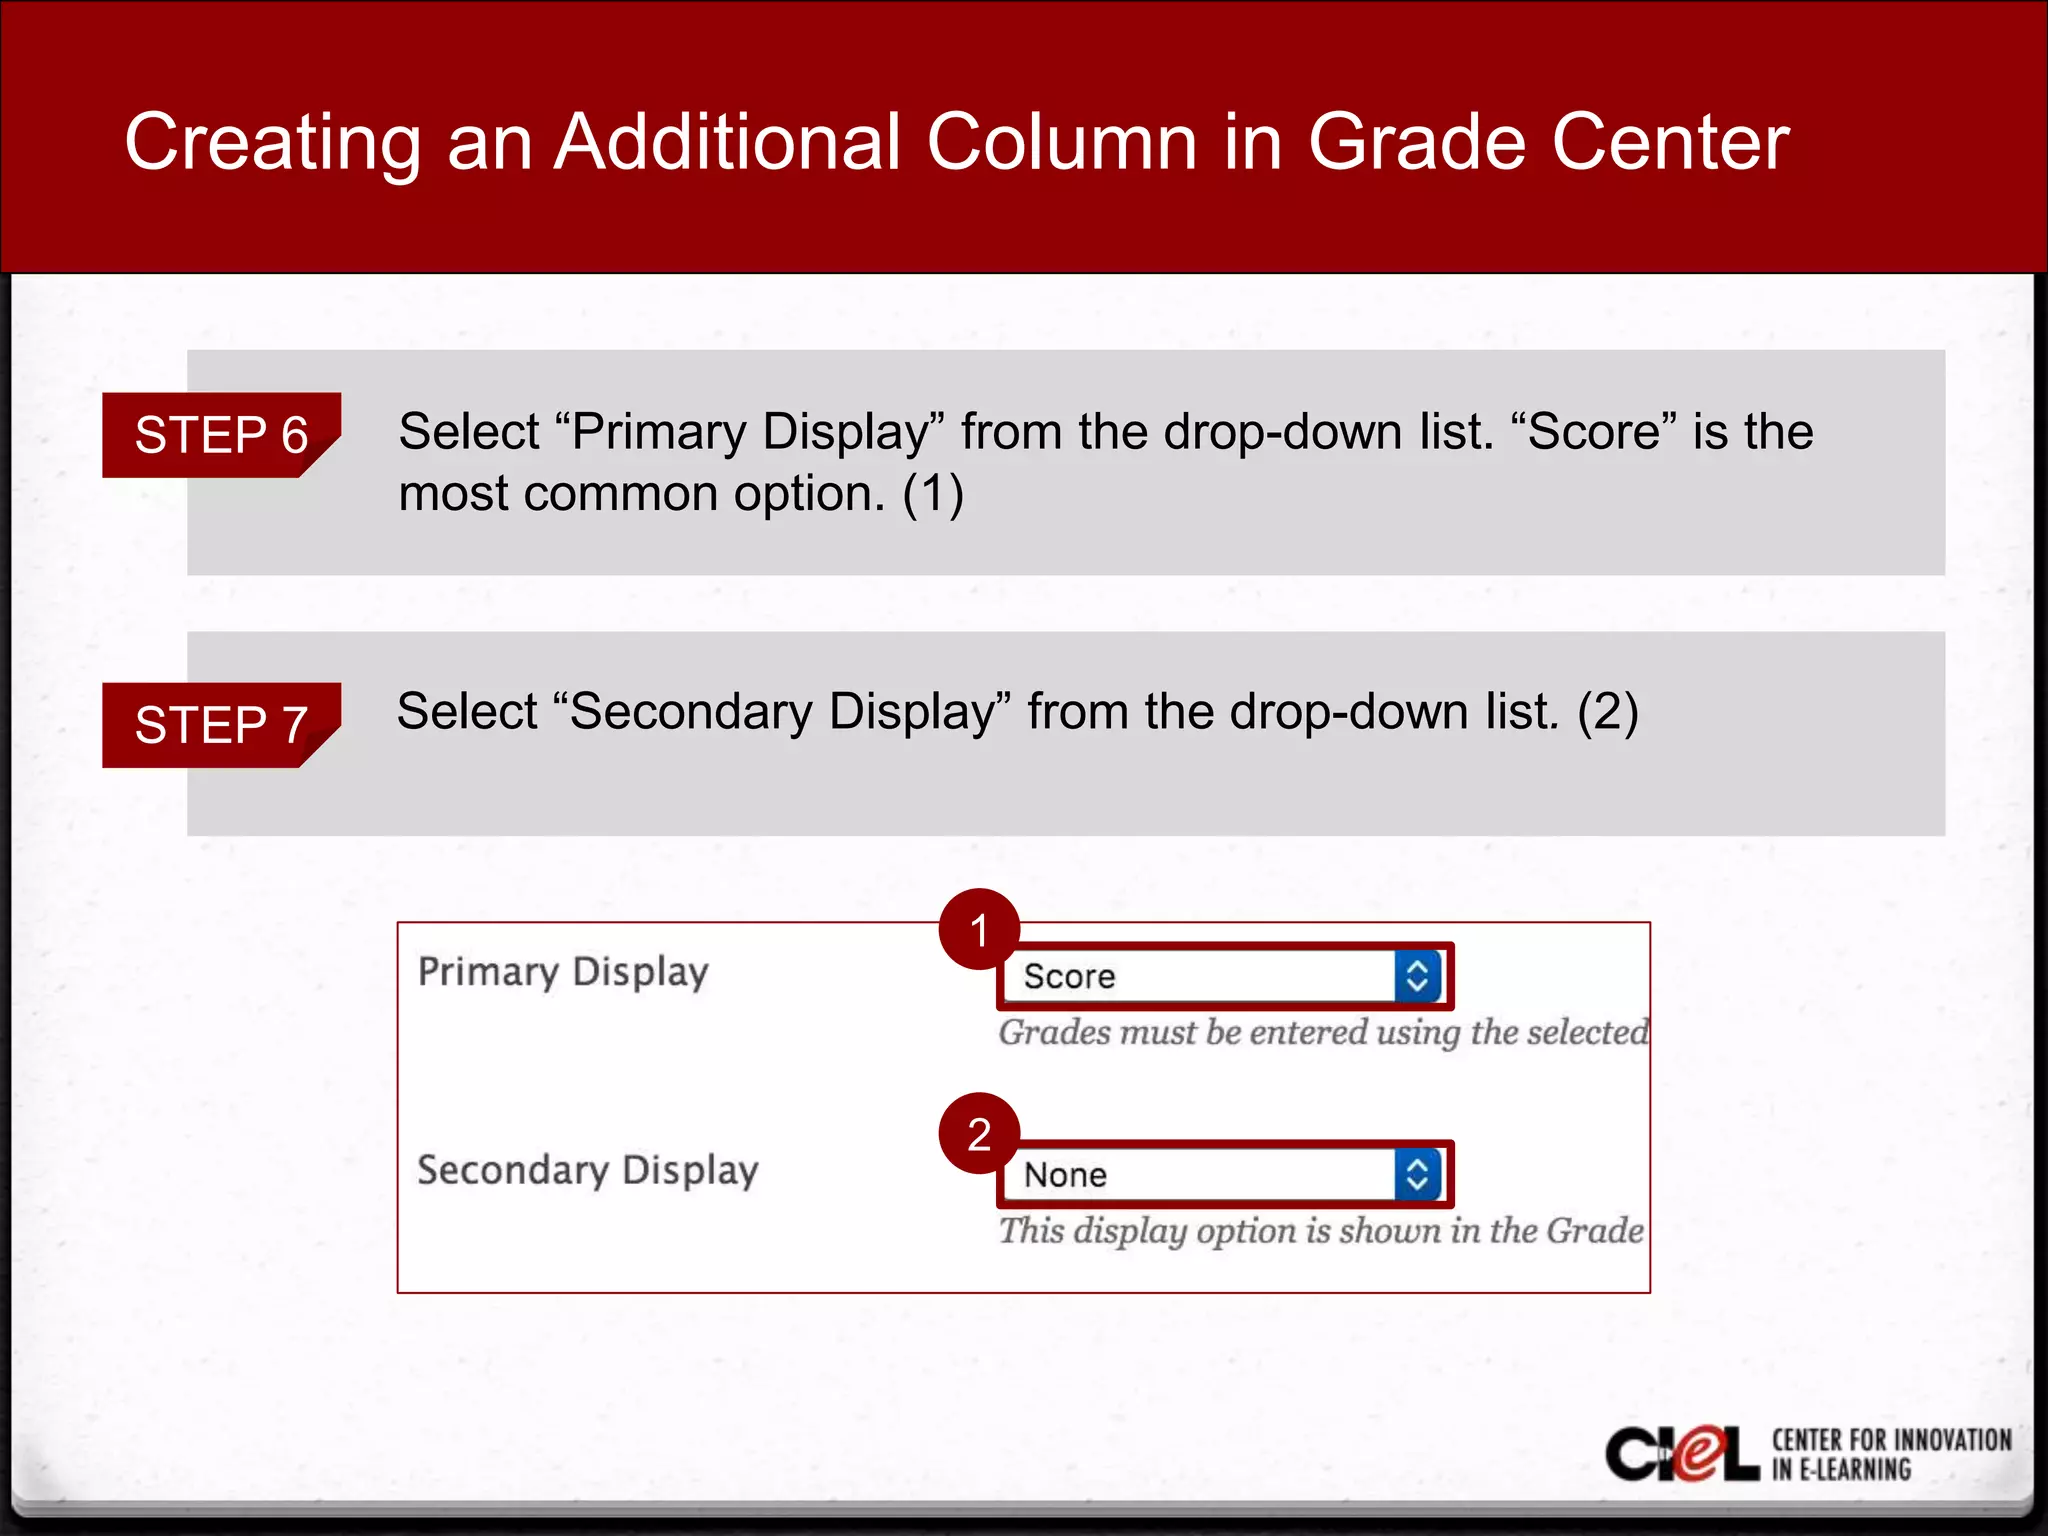
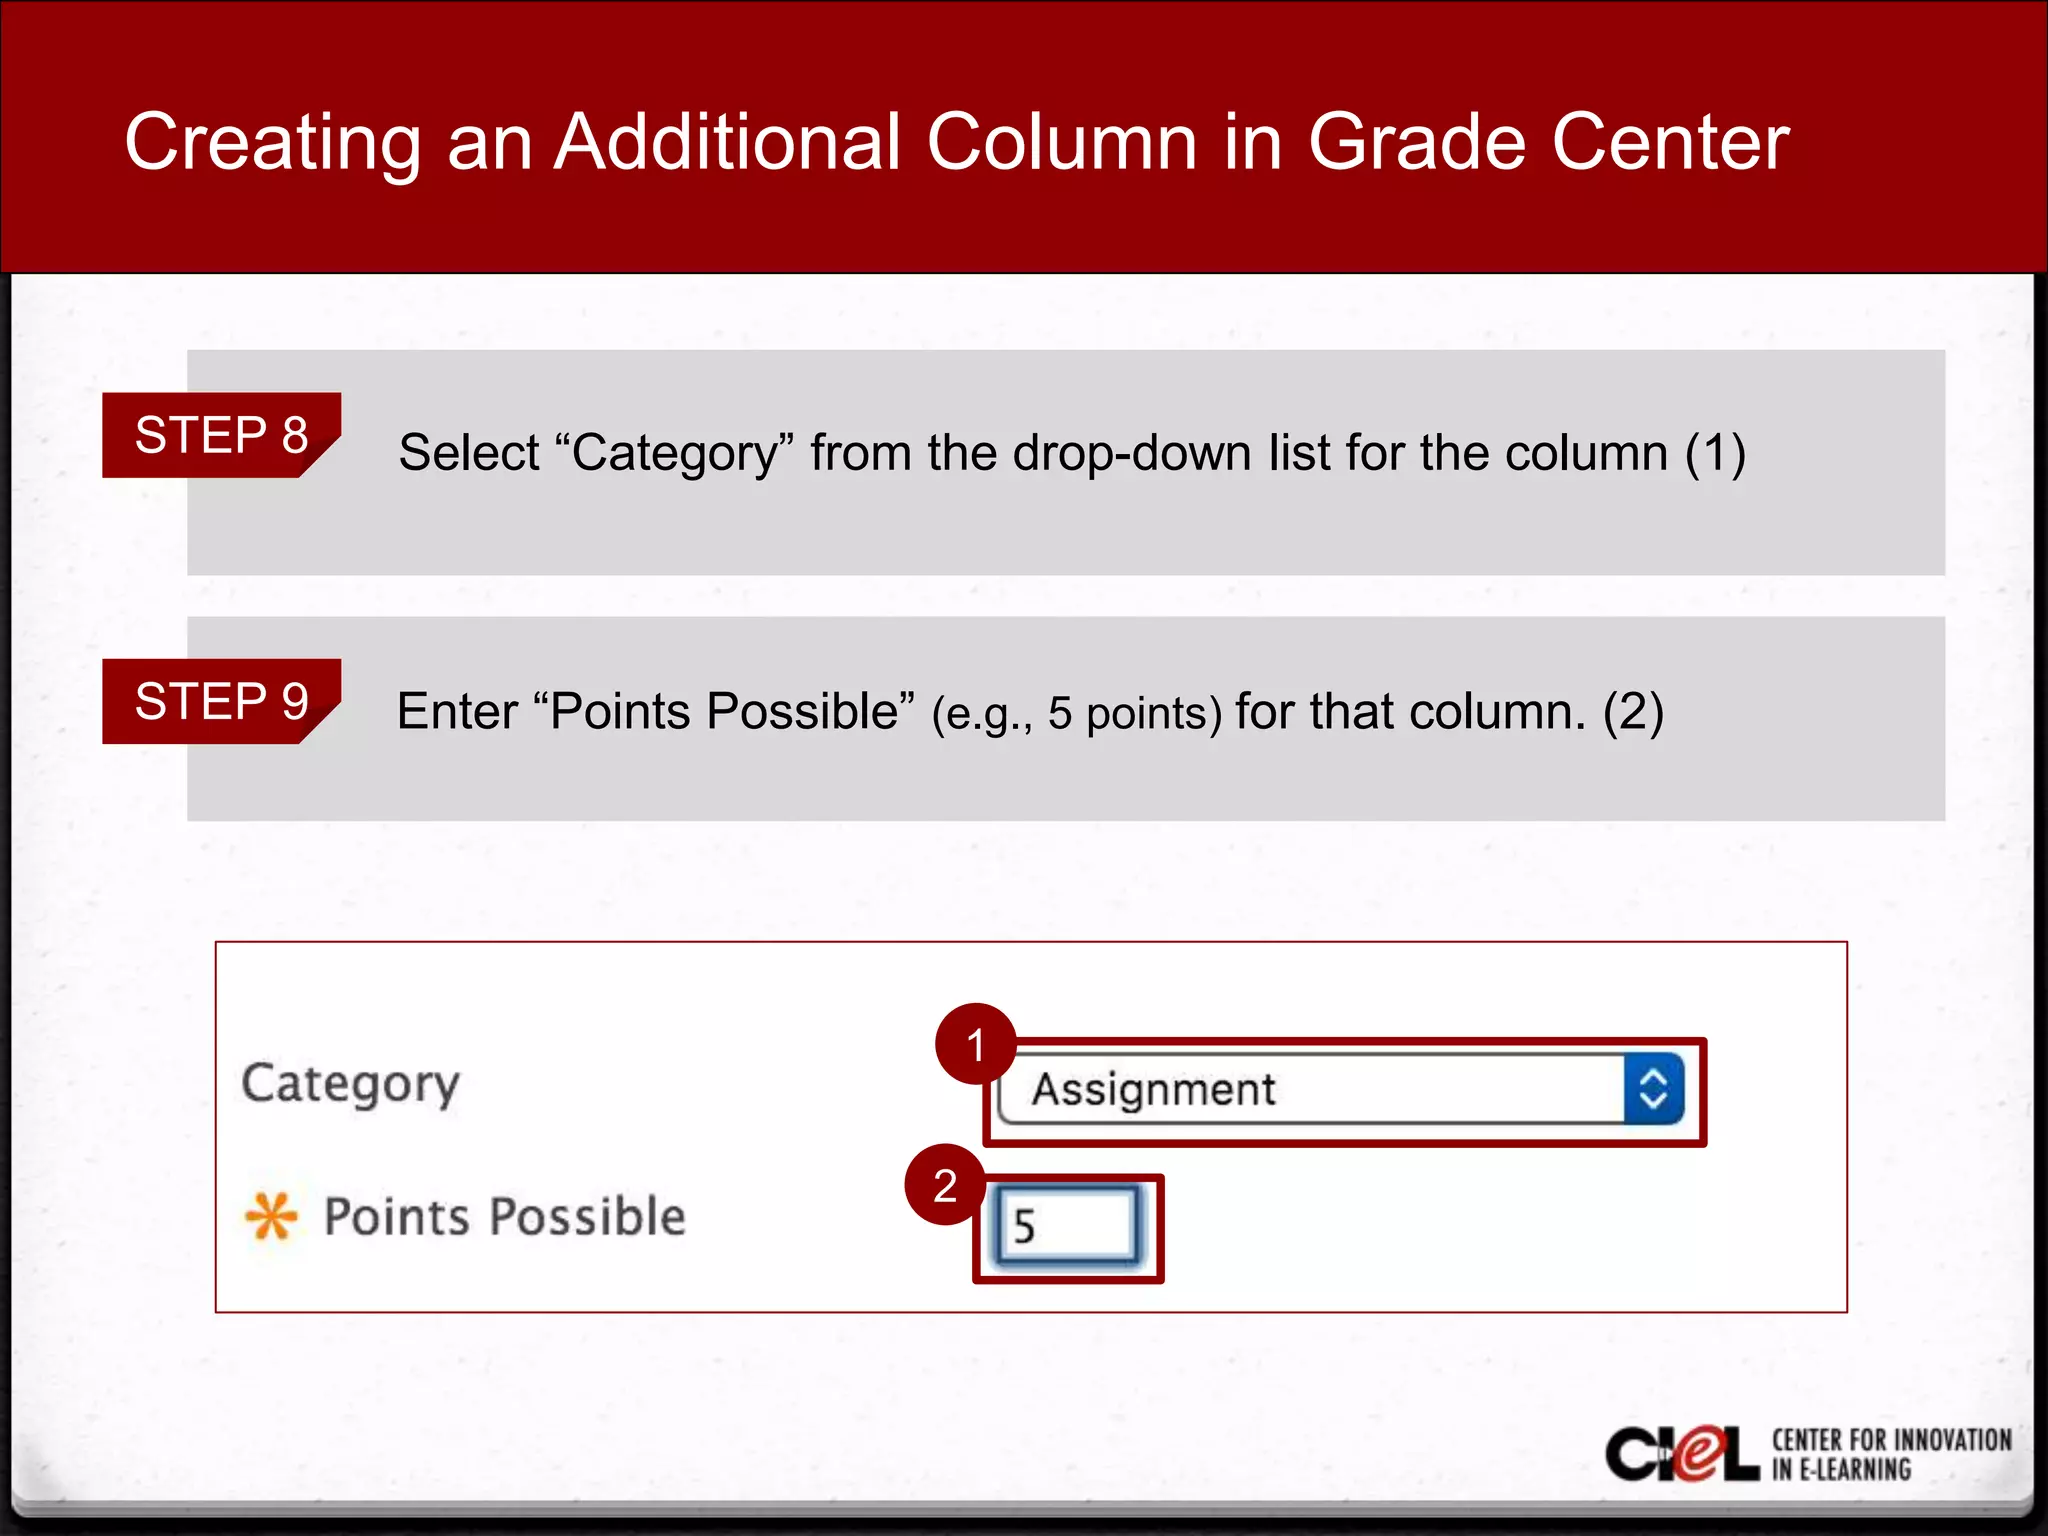
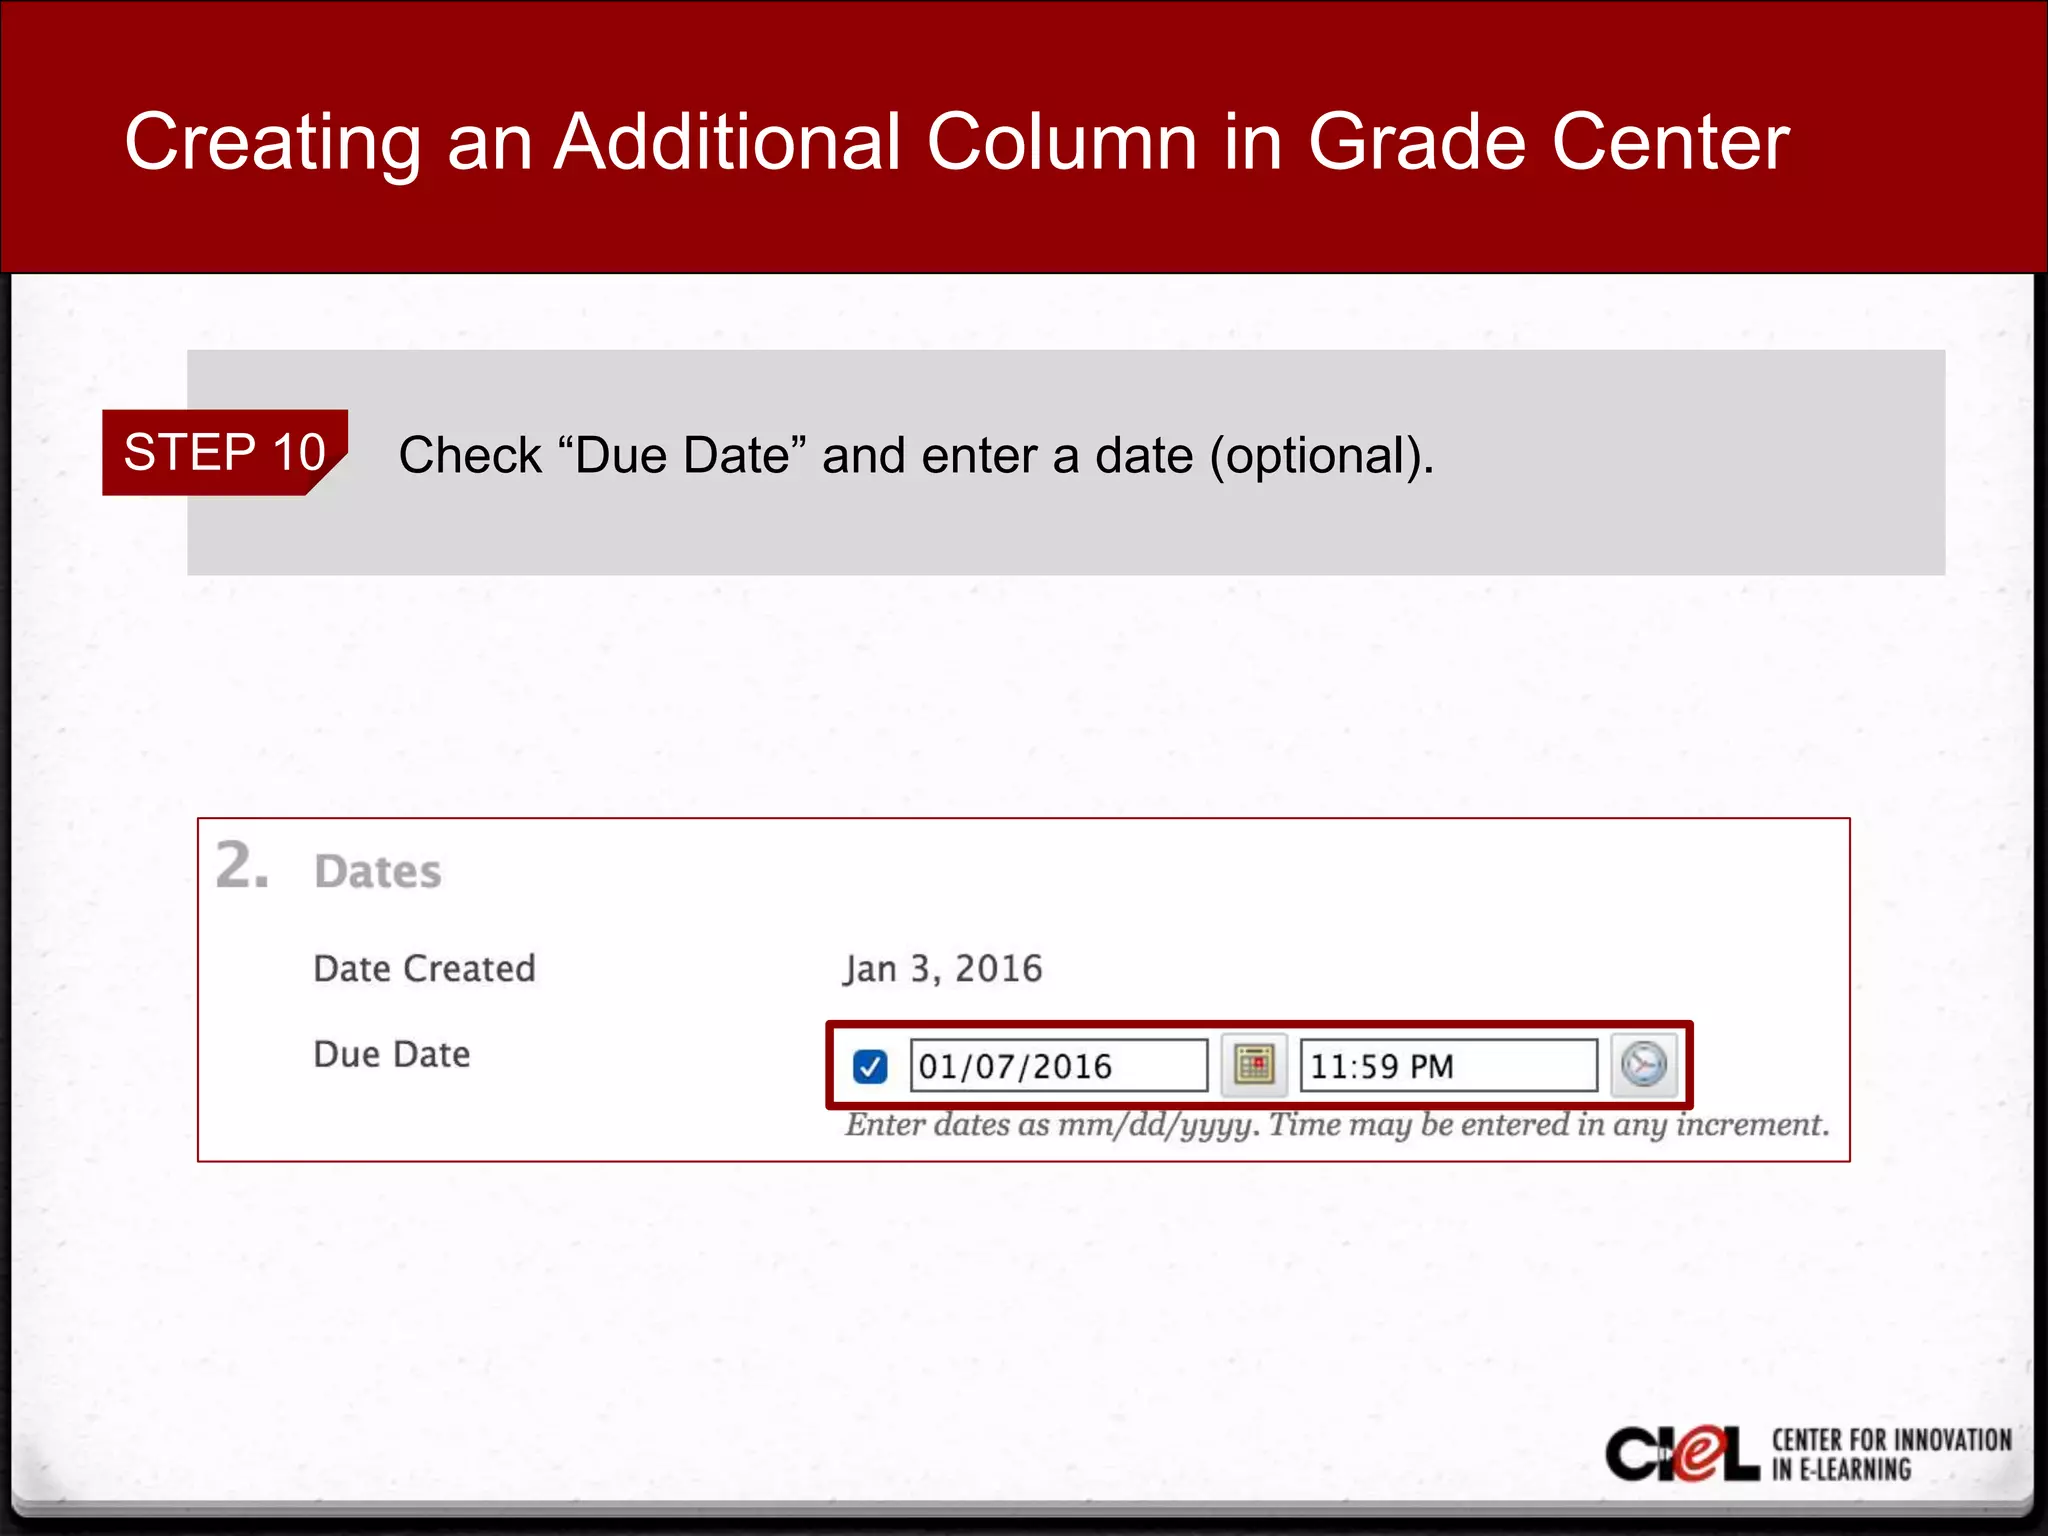
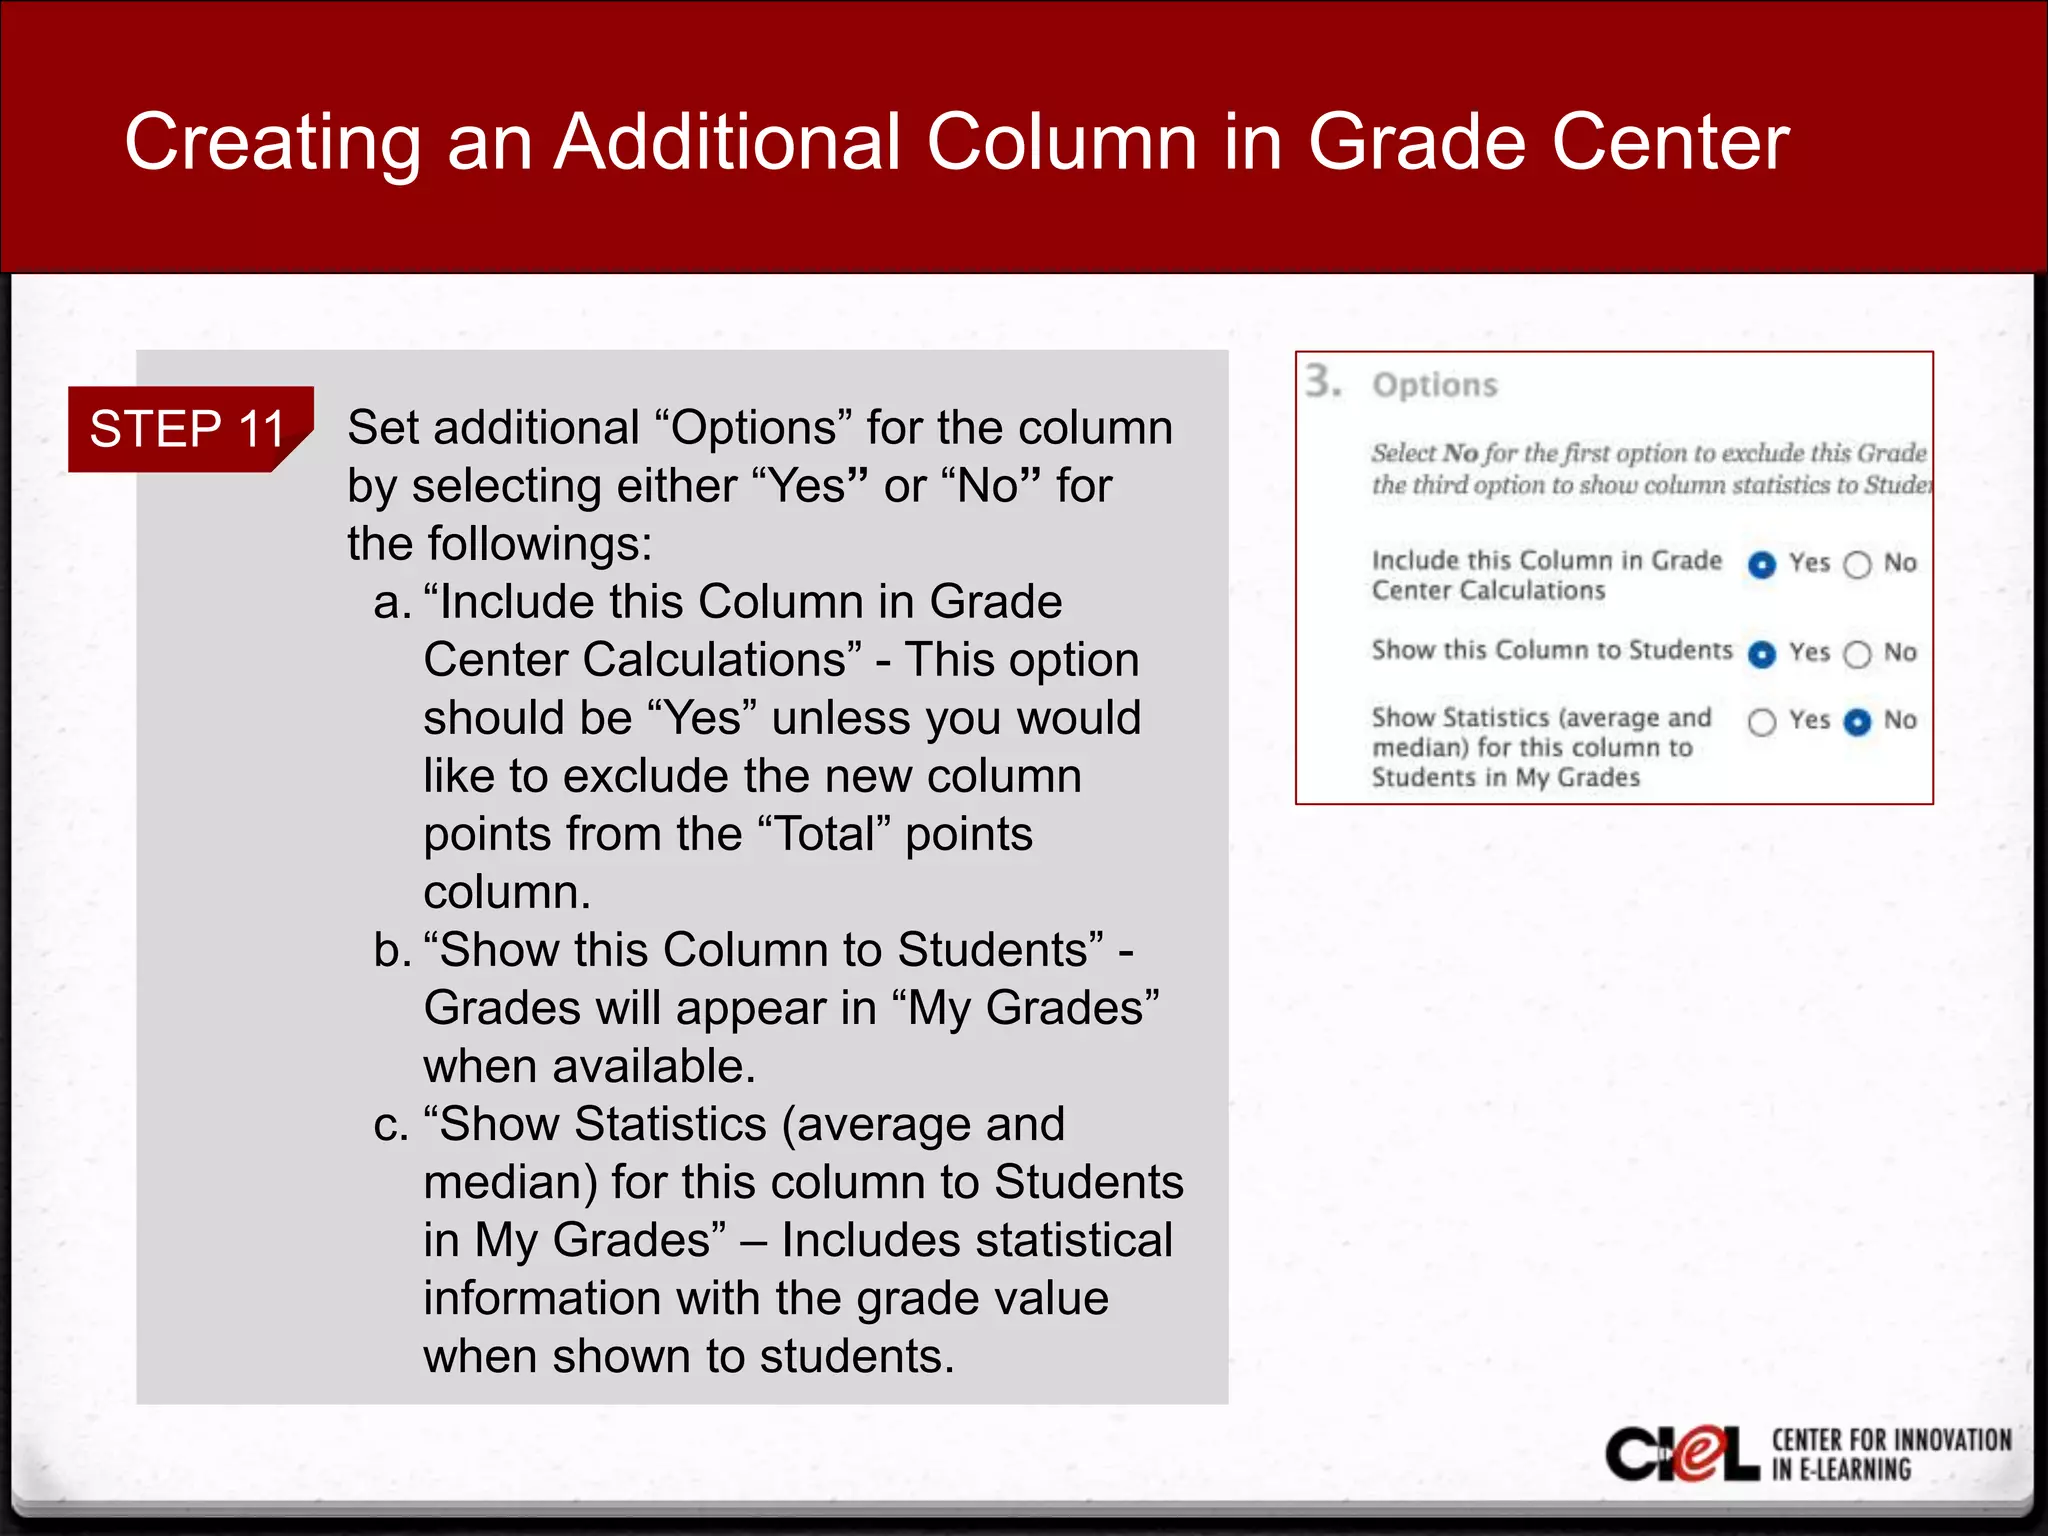
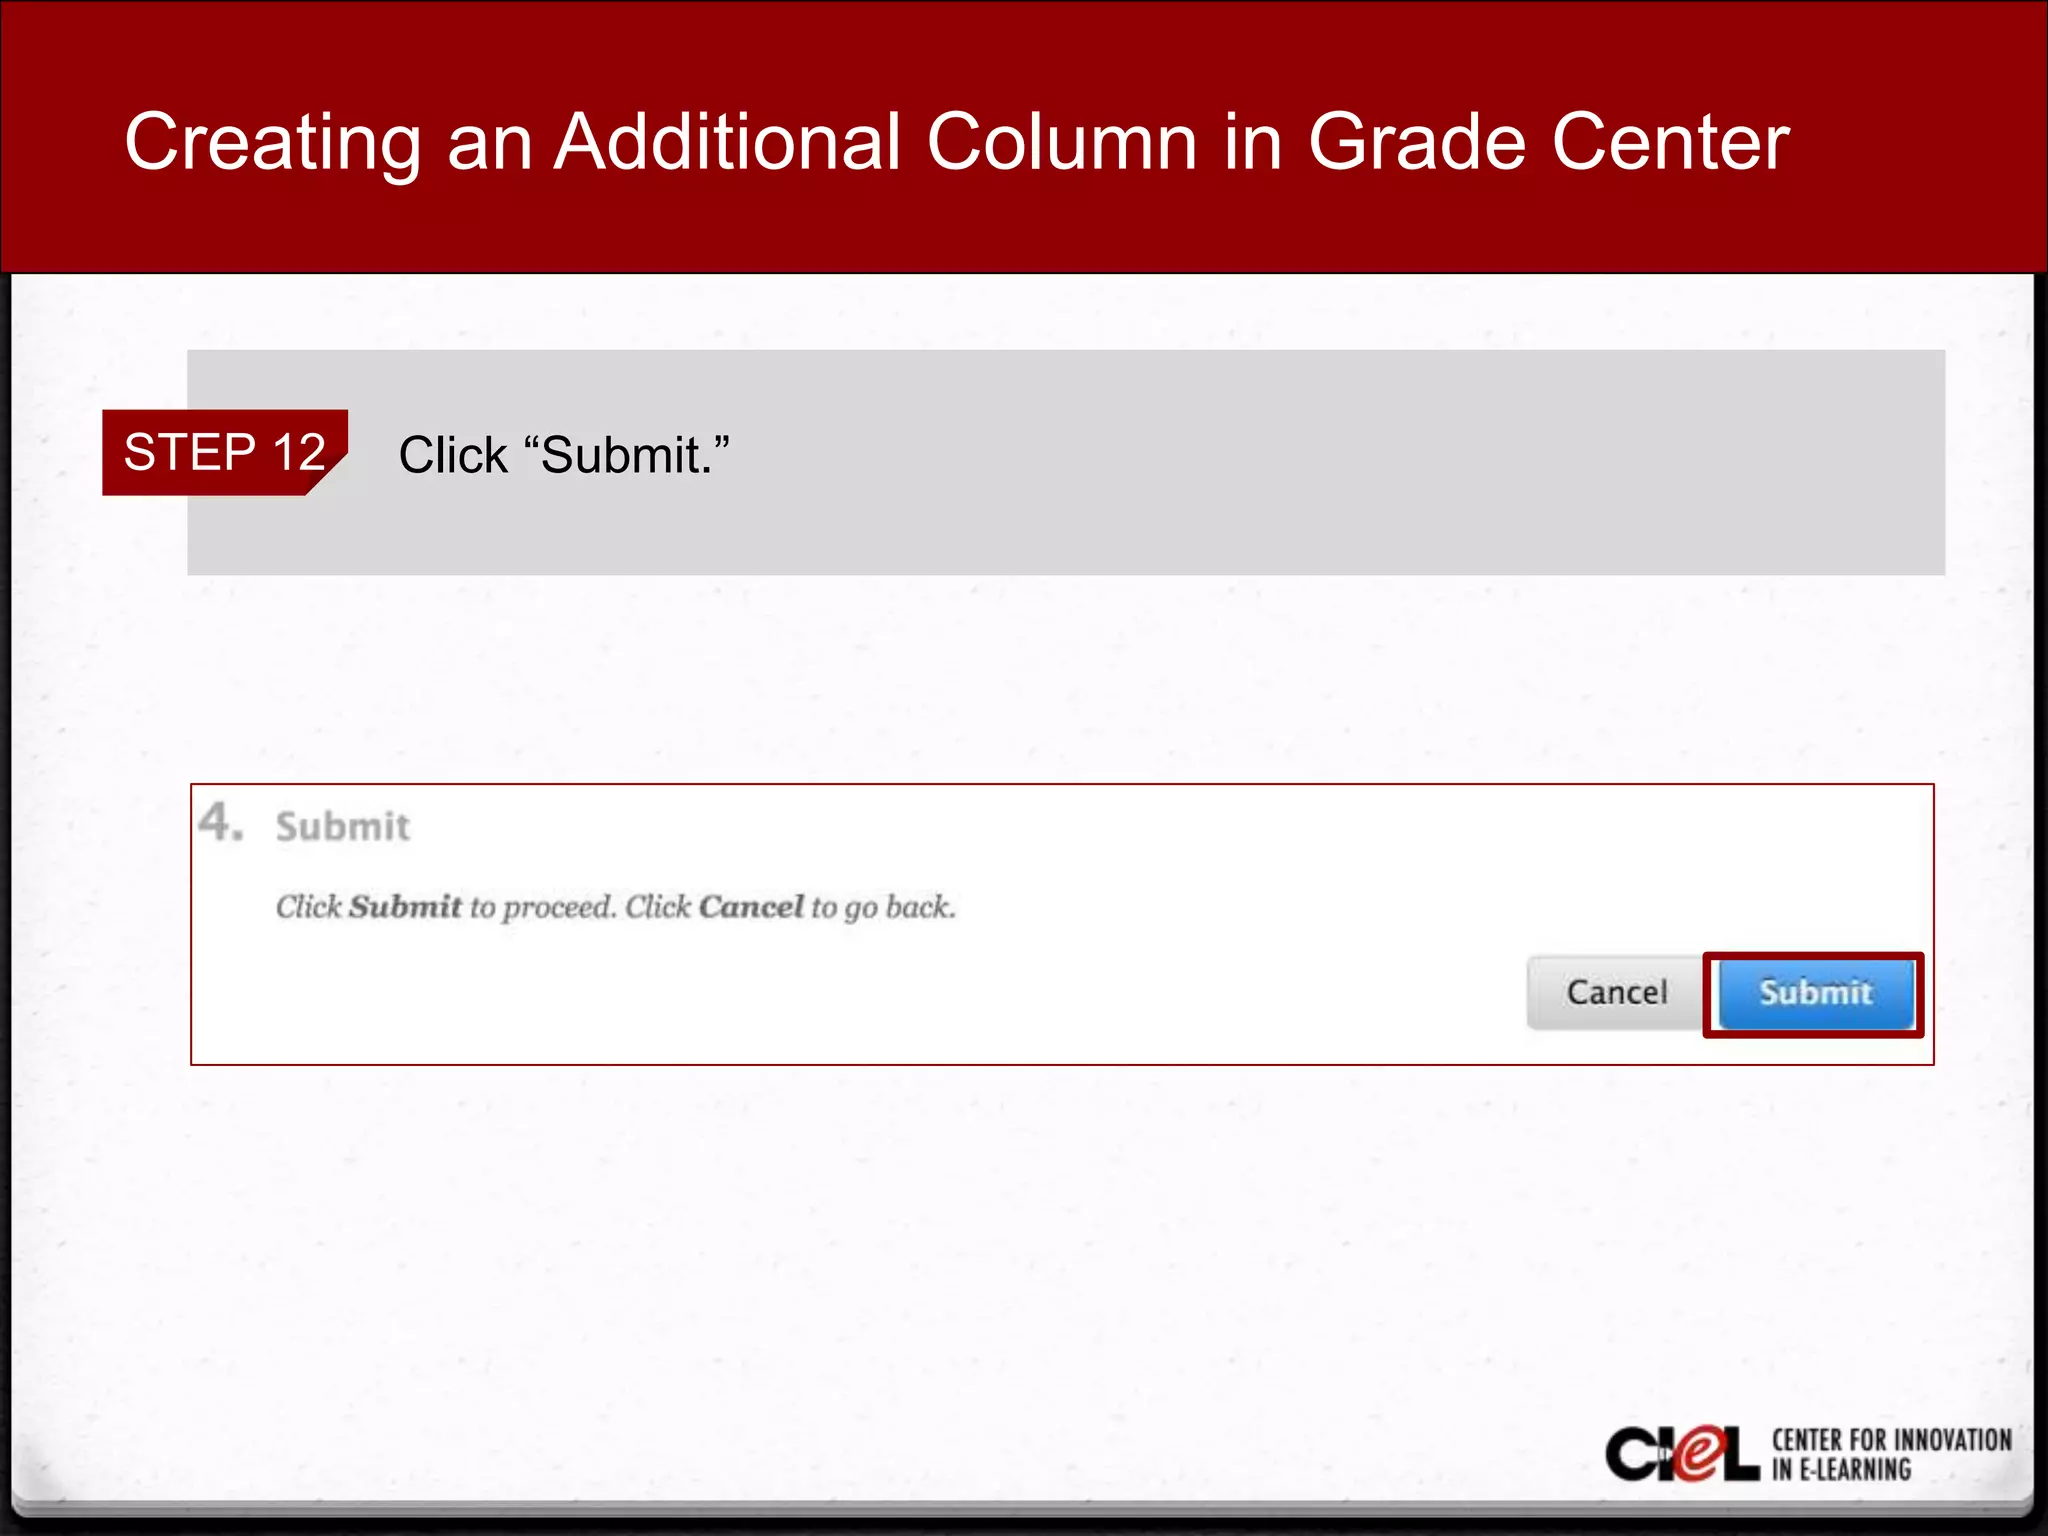
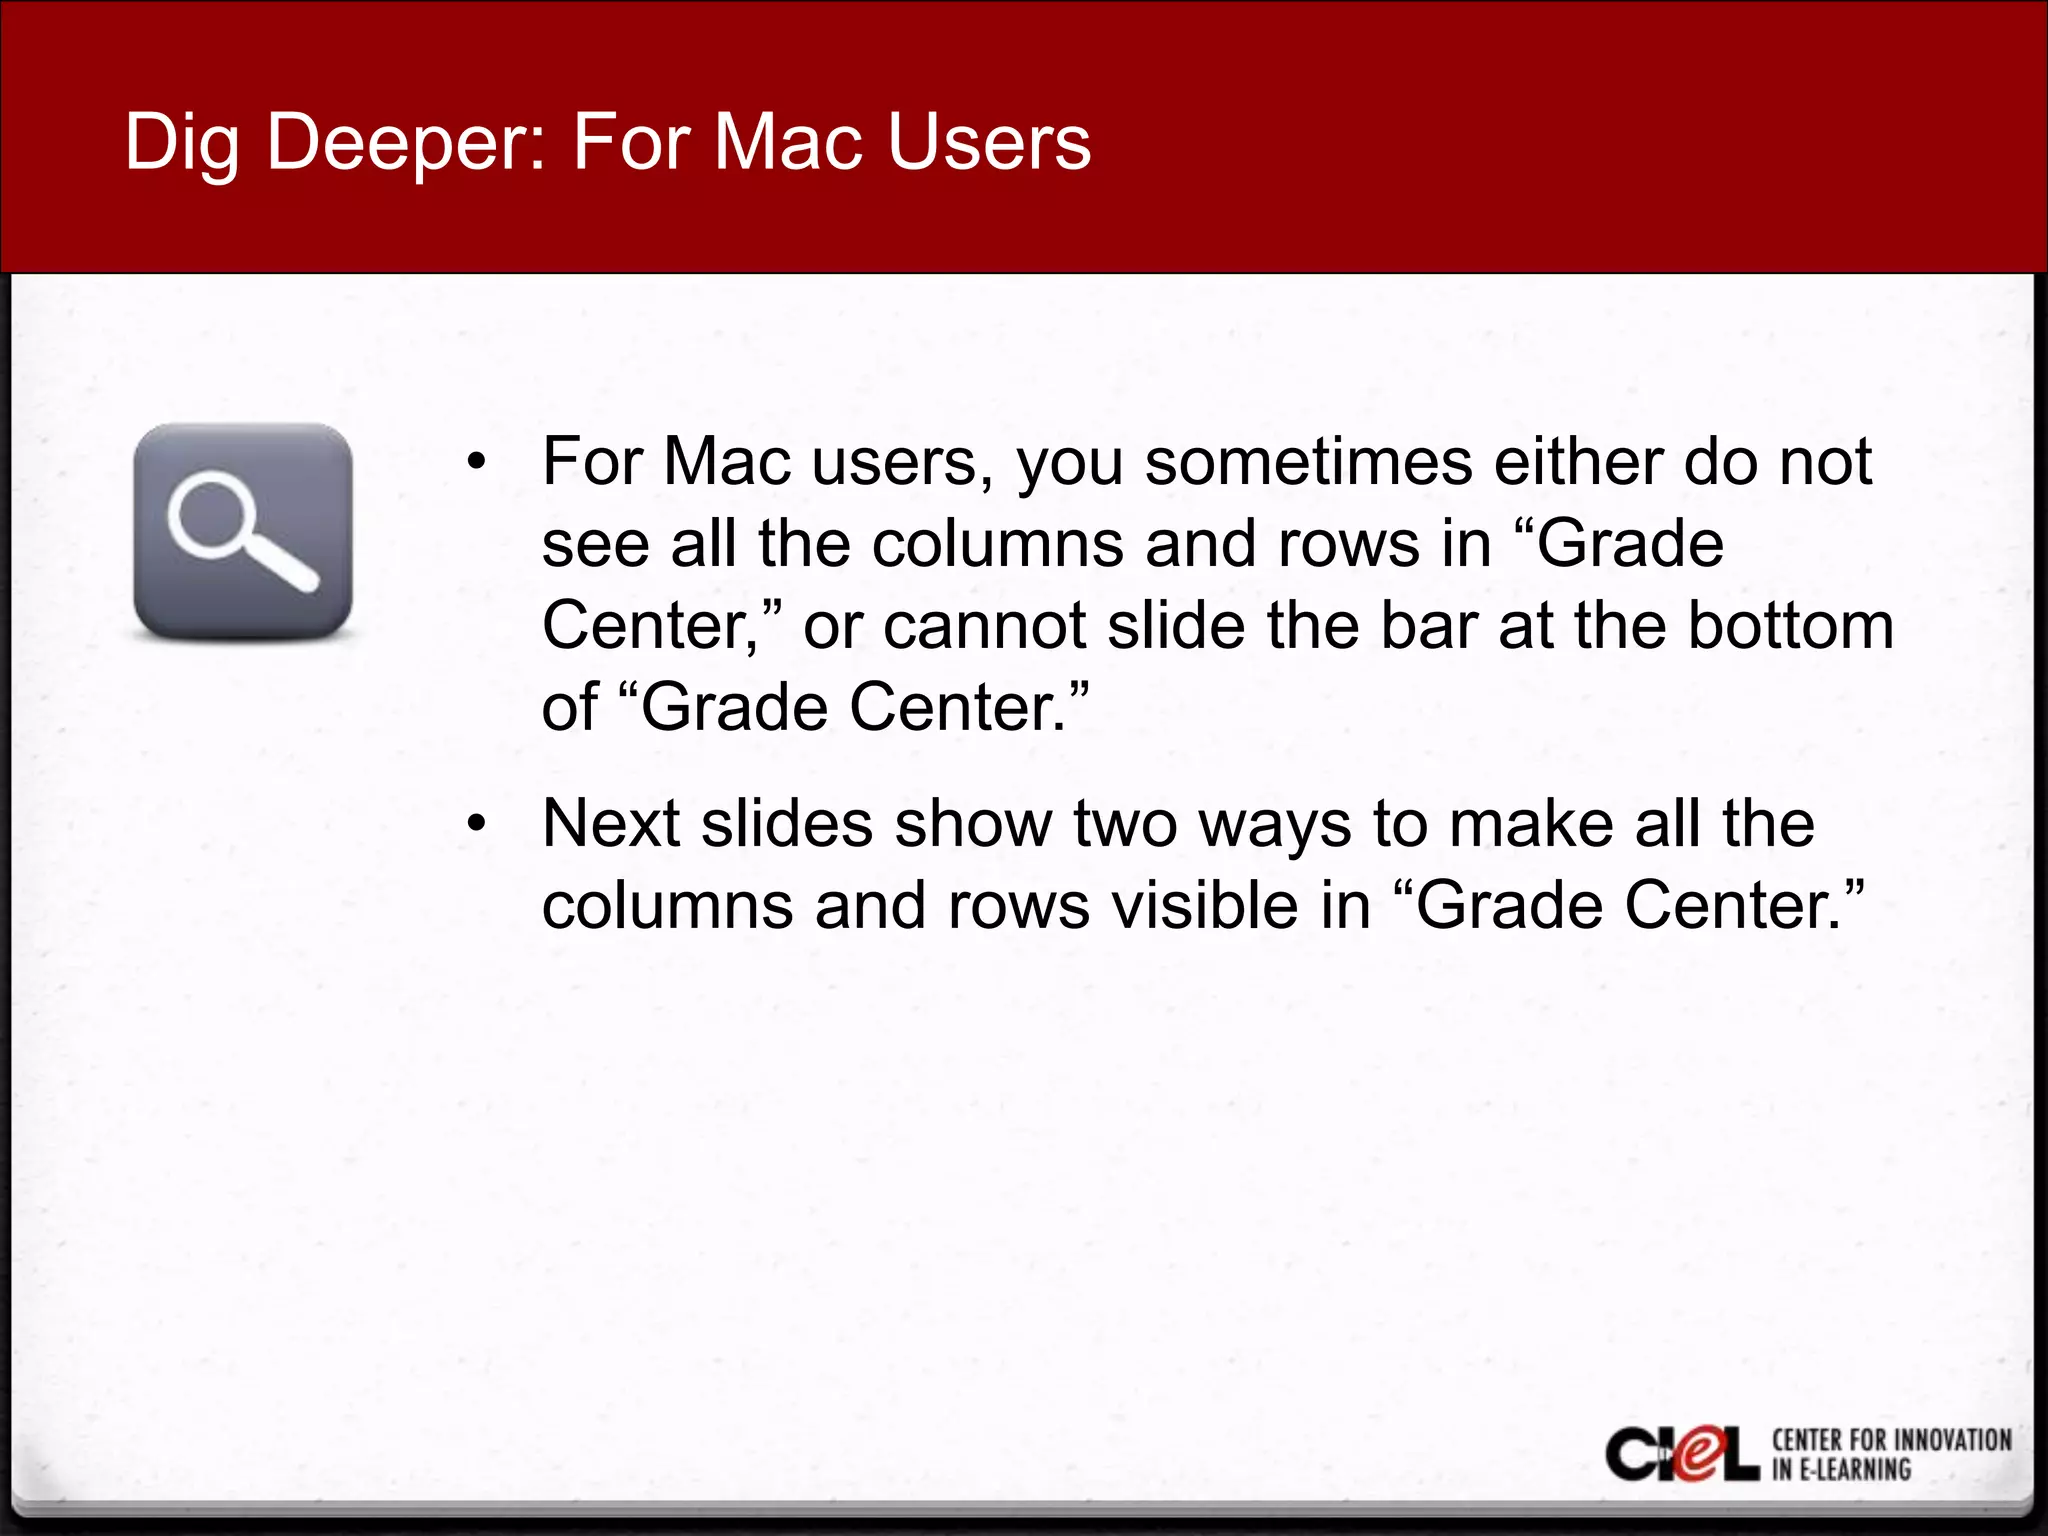
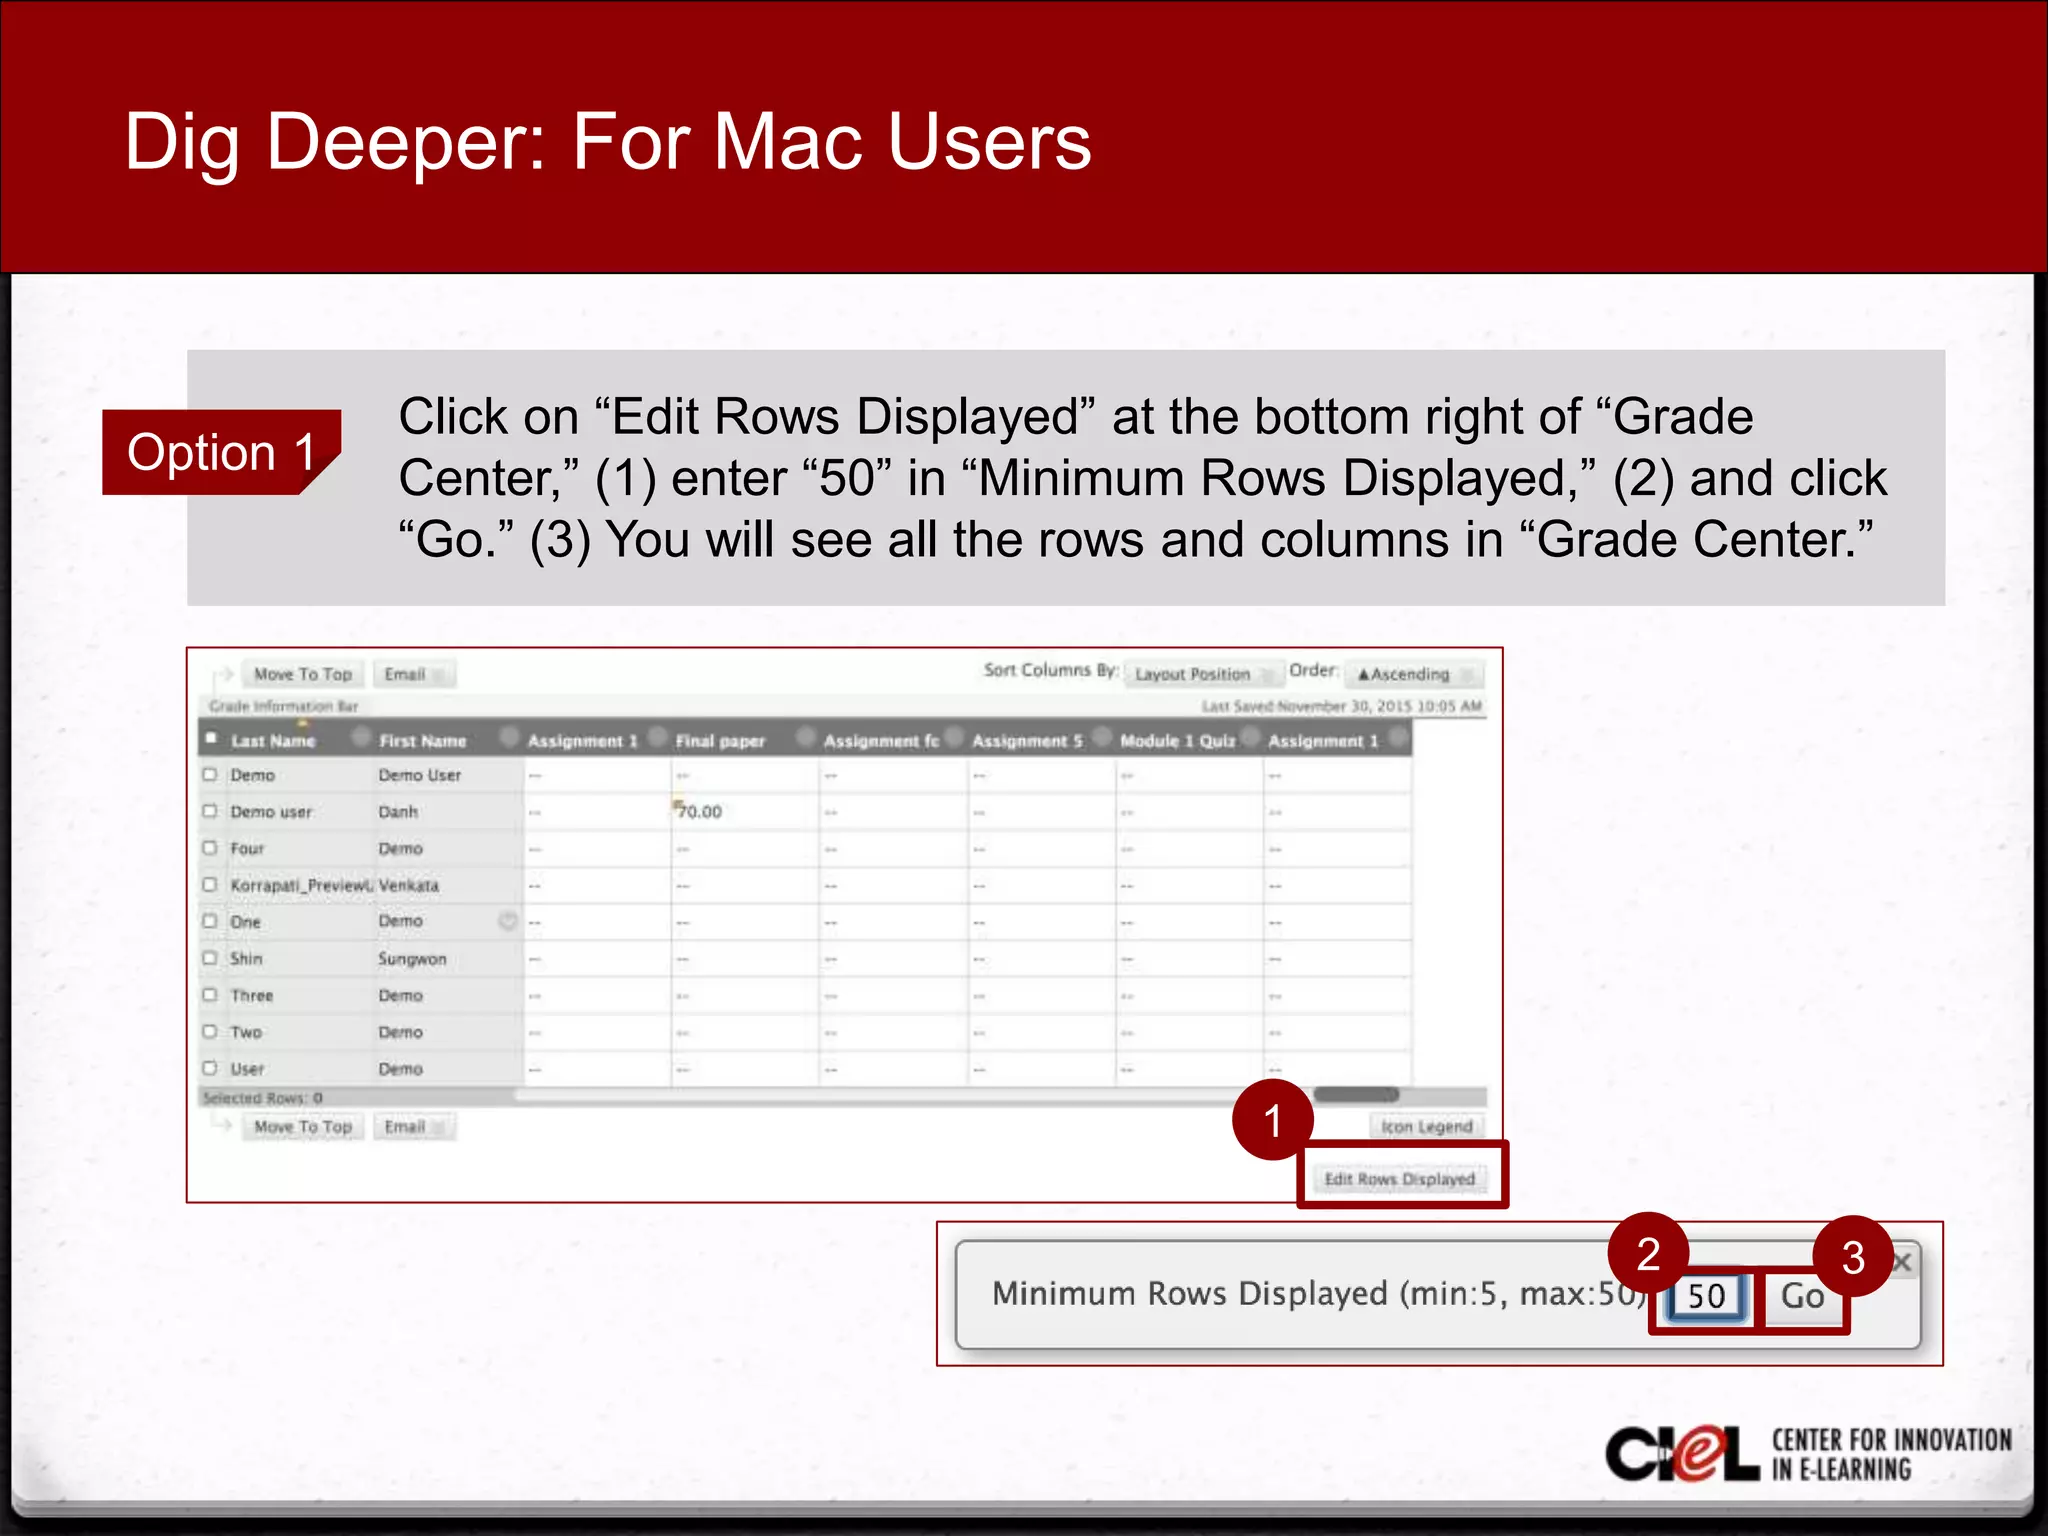
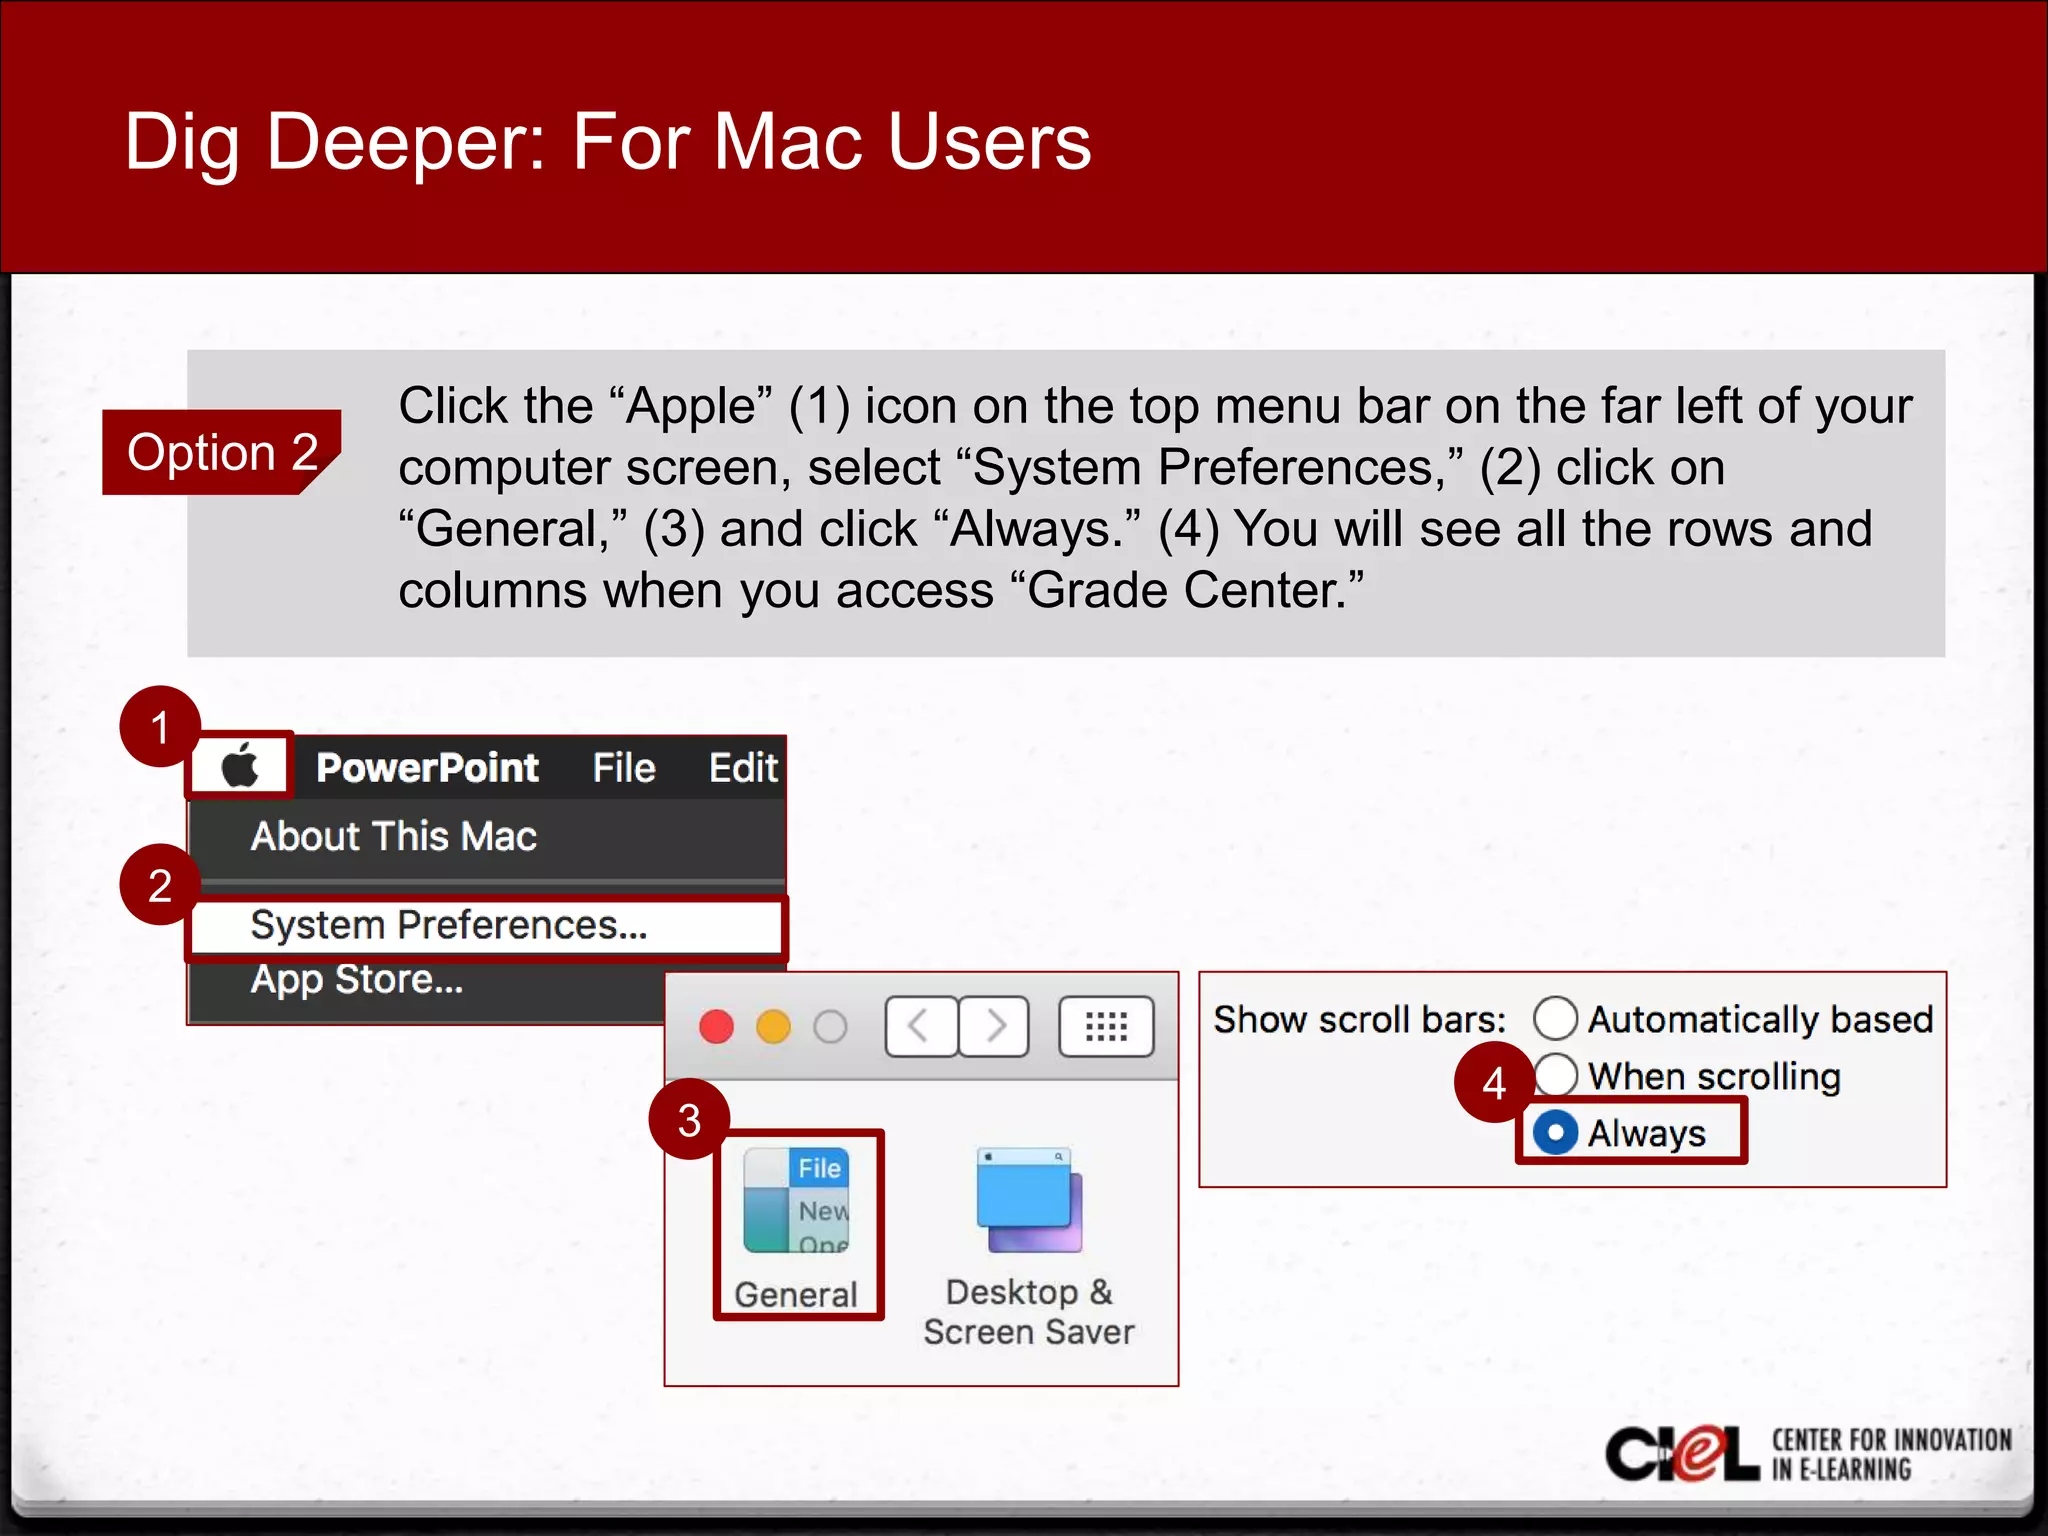
2. Creating an Additional Column in Grade Center
STEP 1 Under the Control Panel, click “Grade Center” (1) then select “Full
Grade Center.” (2)
STEP 2 Click “Create Column” on the
menu bar at the top. (3)
1
3
2
3. Creating an Additional Column in Grade Center
STEP 3 Enter “Column Name” (e.g., Bonus Point). (1)
STEP 4 Enter a “Grade Center
Name” (optional). (2)
STEP 5
Enter a “Description.” (A
description will help you
identify the column.) (3)
1
3
2
4. Creating an Additional Column in Grade Center
STEP 6 Select “Primary Display” from the drop-down list. “Score” is the
most common option. (1)
STEP 7 Select “Secondary Display” from the drop-down list. (2)
1
2
5. Creating an Additional Column in Grade Center
STEP 8 Select “Category” from the drop-down list for the column (1)
STEP 9 Enter “Points Possible” (e.g., 5 points) for that column. (2)
1
2
6. Creating an Additional Column in Grade Center
STEP 10 Check “Due Date” and enter a date (optional).
7. Creating an Additional Column in Grade Center
STEP 11 Set additional “Options” for the column
by selecting either “Yes” or “No” for
the followings:
a. “Include this Column in Grade
Center Calculations” - This option
should be “Yes” unless you would
like to exclude the new column
points from the “Total” points
column.
b. “Show this Column to Students” -
Grades will appear in “My Grades”
when available.
c. “Show Statistics (average and
median) for this column to Students
in My Grades” – Includes statistical
information with the grade value
when shown to students.
9. Dig Deeper: Options for Primary Display
• Score: Select to display the achieved score.
• Letter: Select to display a letter grade based on
a percentage range defined in the “Grade
Center.”
• Text: Select to display a text comment you enter
manually. (e.g., “Satisfactory” or “Unsatisfactory”)
• Percentage: Select to display a percentage
calculated from the achieved score.
• Complete/Incomplete: Select to display a check
mark when the item is submitted.
10. Dig Deeper: For Mac Users
• For Mac users, you sometimes either do not
see all the columns and rows in “Grade
Center,” or cannot slide the bar at the bottom
of “Grade Center.”
• Next slides show two ways to make all the
columns and rows visible in “Grade Center.”
11. Dig Deeper: For Mac Users
Option 1
Click on “Edit Rows Displayed” at the bottom right of “Grade
Center,” (1) enter “50” in “Minimum Rows Displayed,” (2) and click
“Go.” (3) You will see all the rows and columns in “Grade Center.”
1
32
12. Dig Deeper: For Mac Users
Option 2
Click the “Apple” (1) icon on the top menu bar on the far left of your
computer screen, select “System Preferences,” (2) click on
“General,” (3) and click “Always.” (4) You will see all the rows and
columns when you access “Grade Center.”
1
2
3
4
13. From this task, you have learned how to manually
create an additional column (e.g., Bonus Points) in
“Grade Center.”
Review
14. Room 151, College of Education Building
(806) 742-0222
ciel.educ@ttu.edu