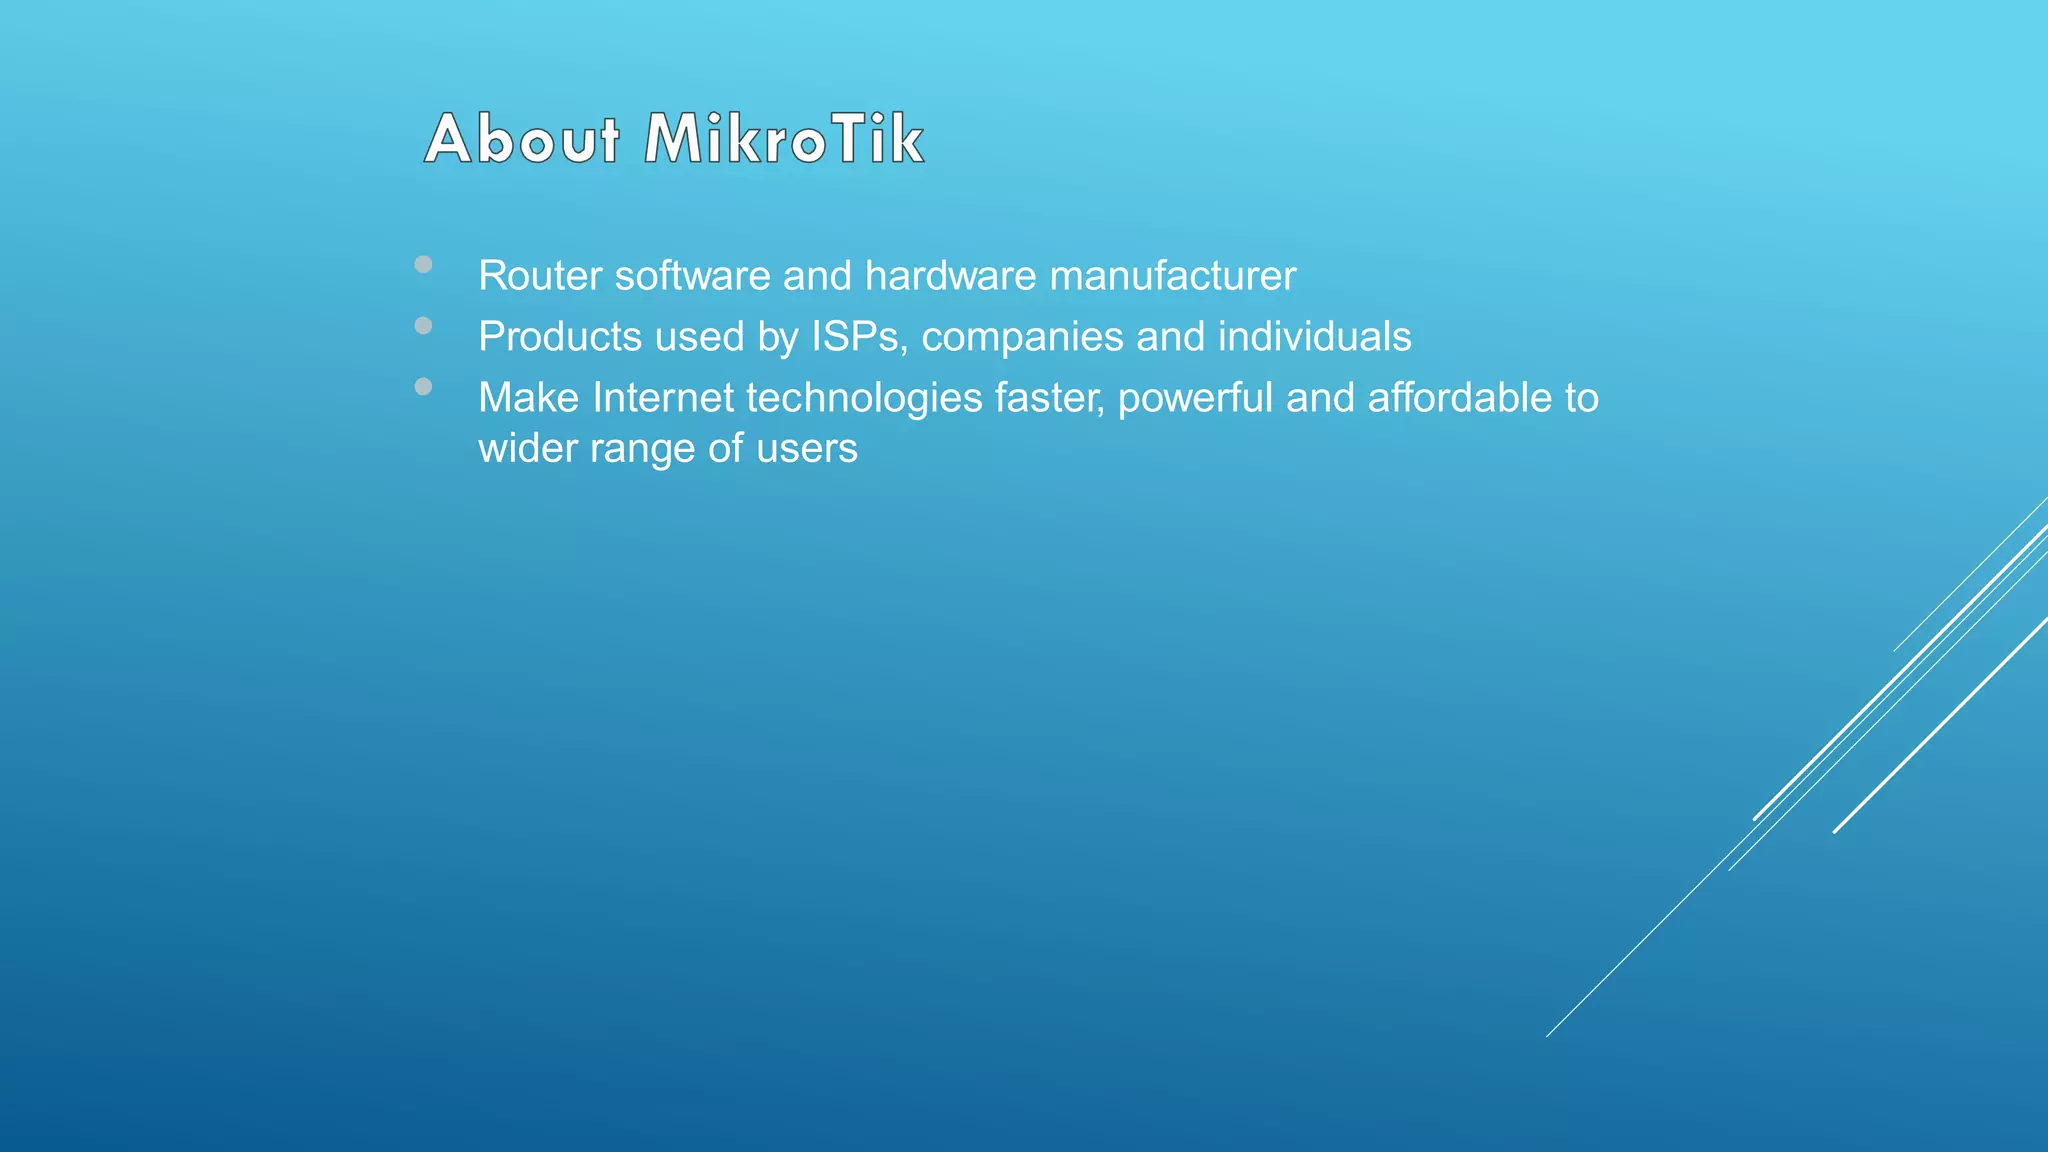
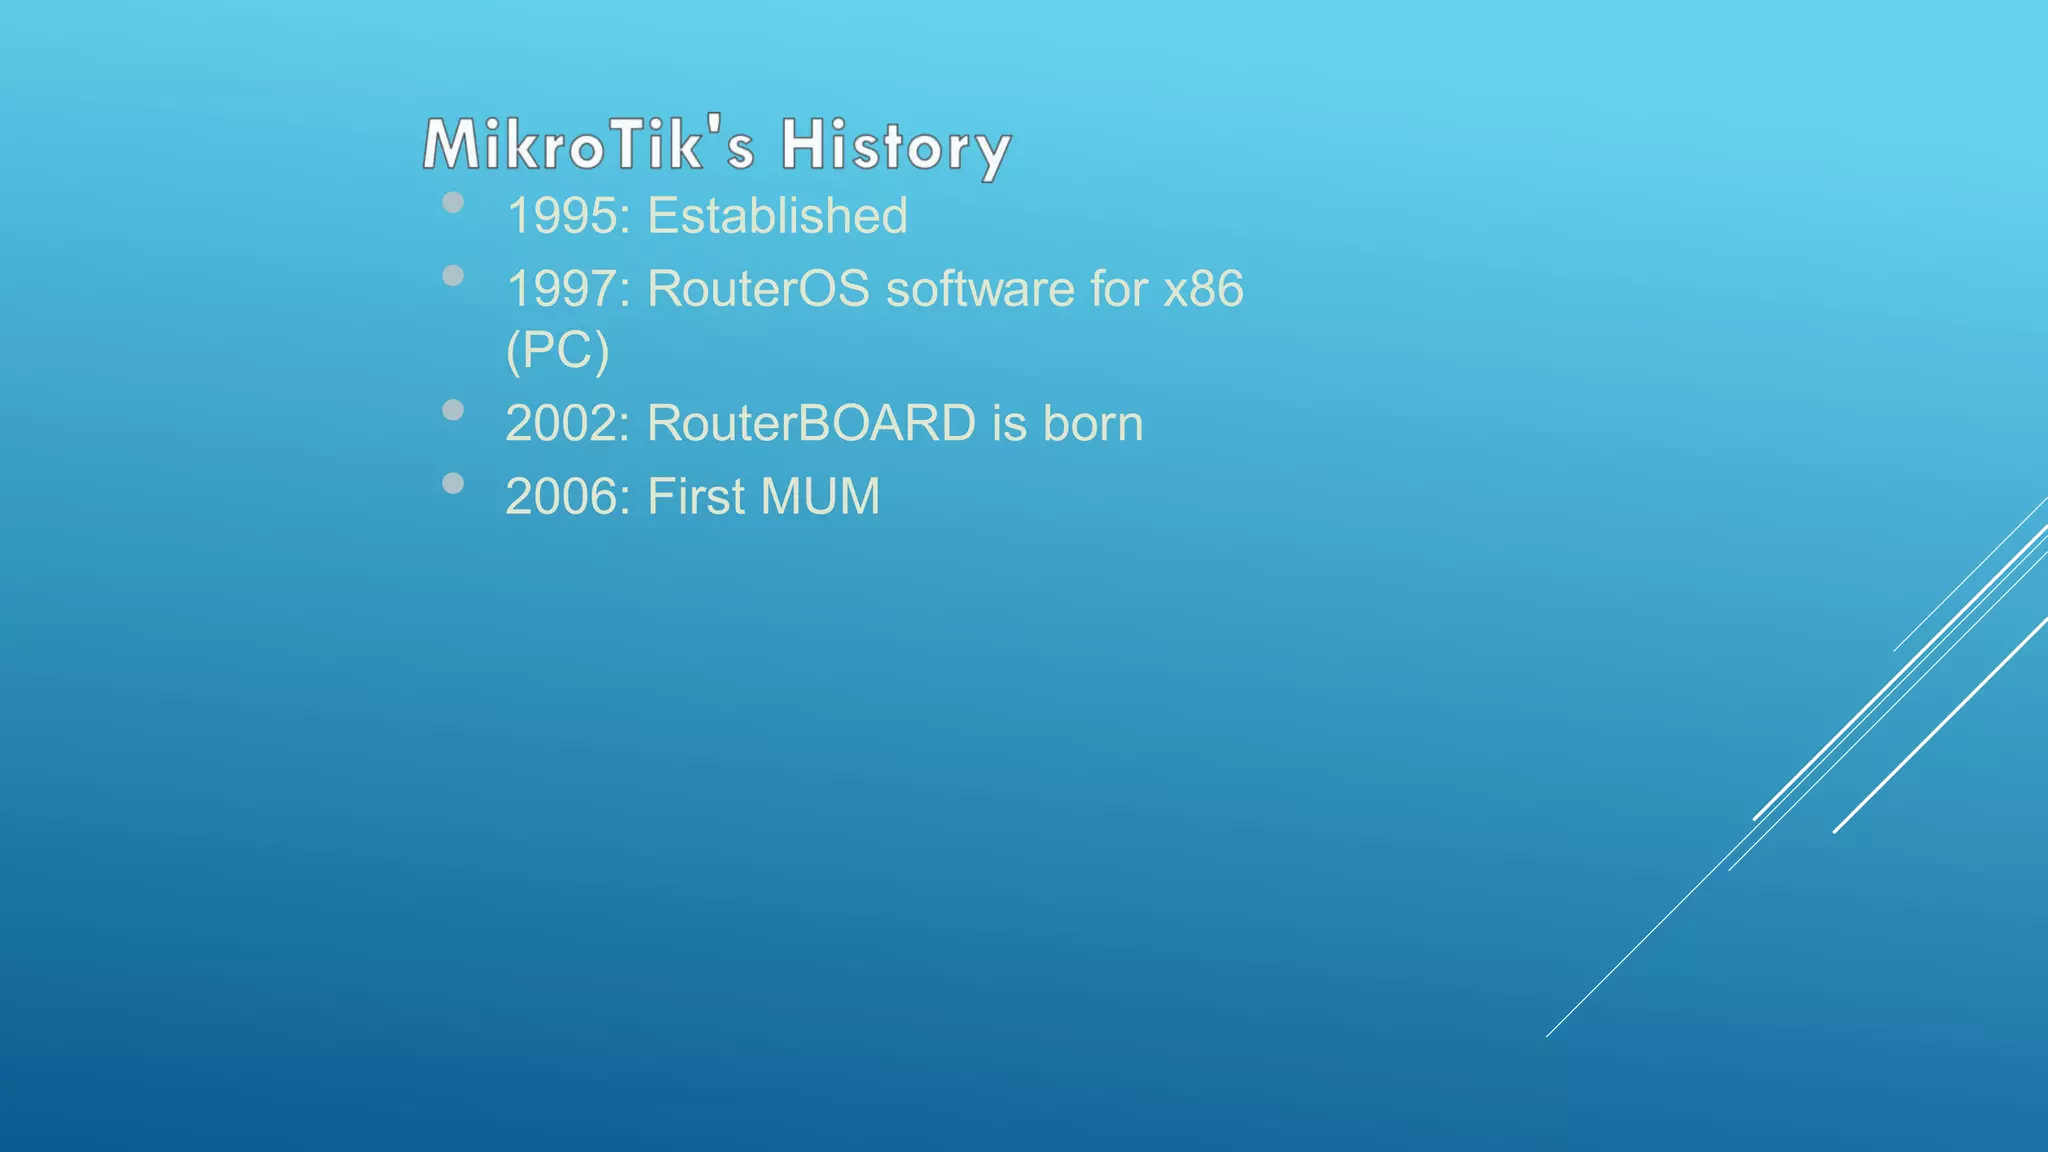
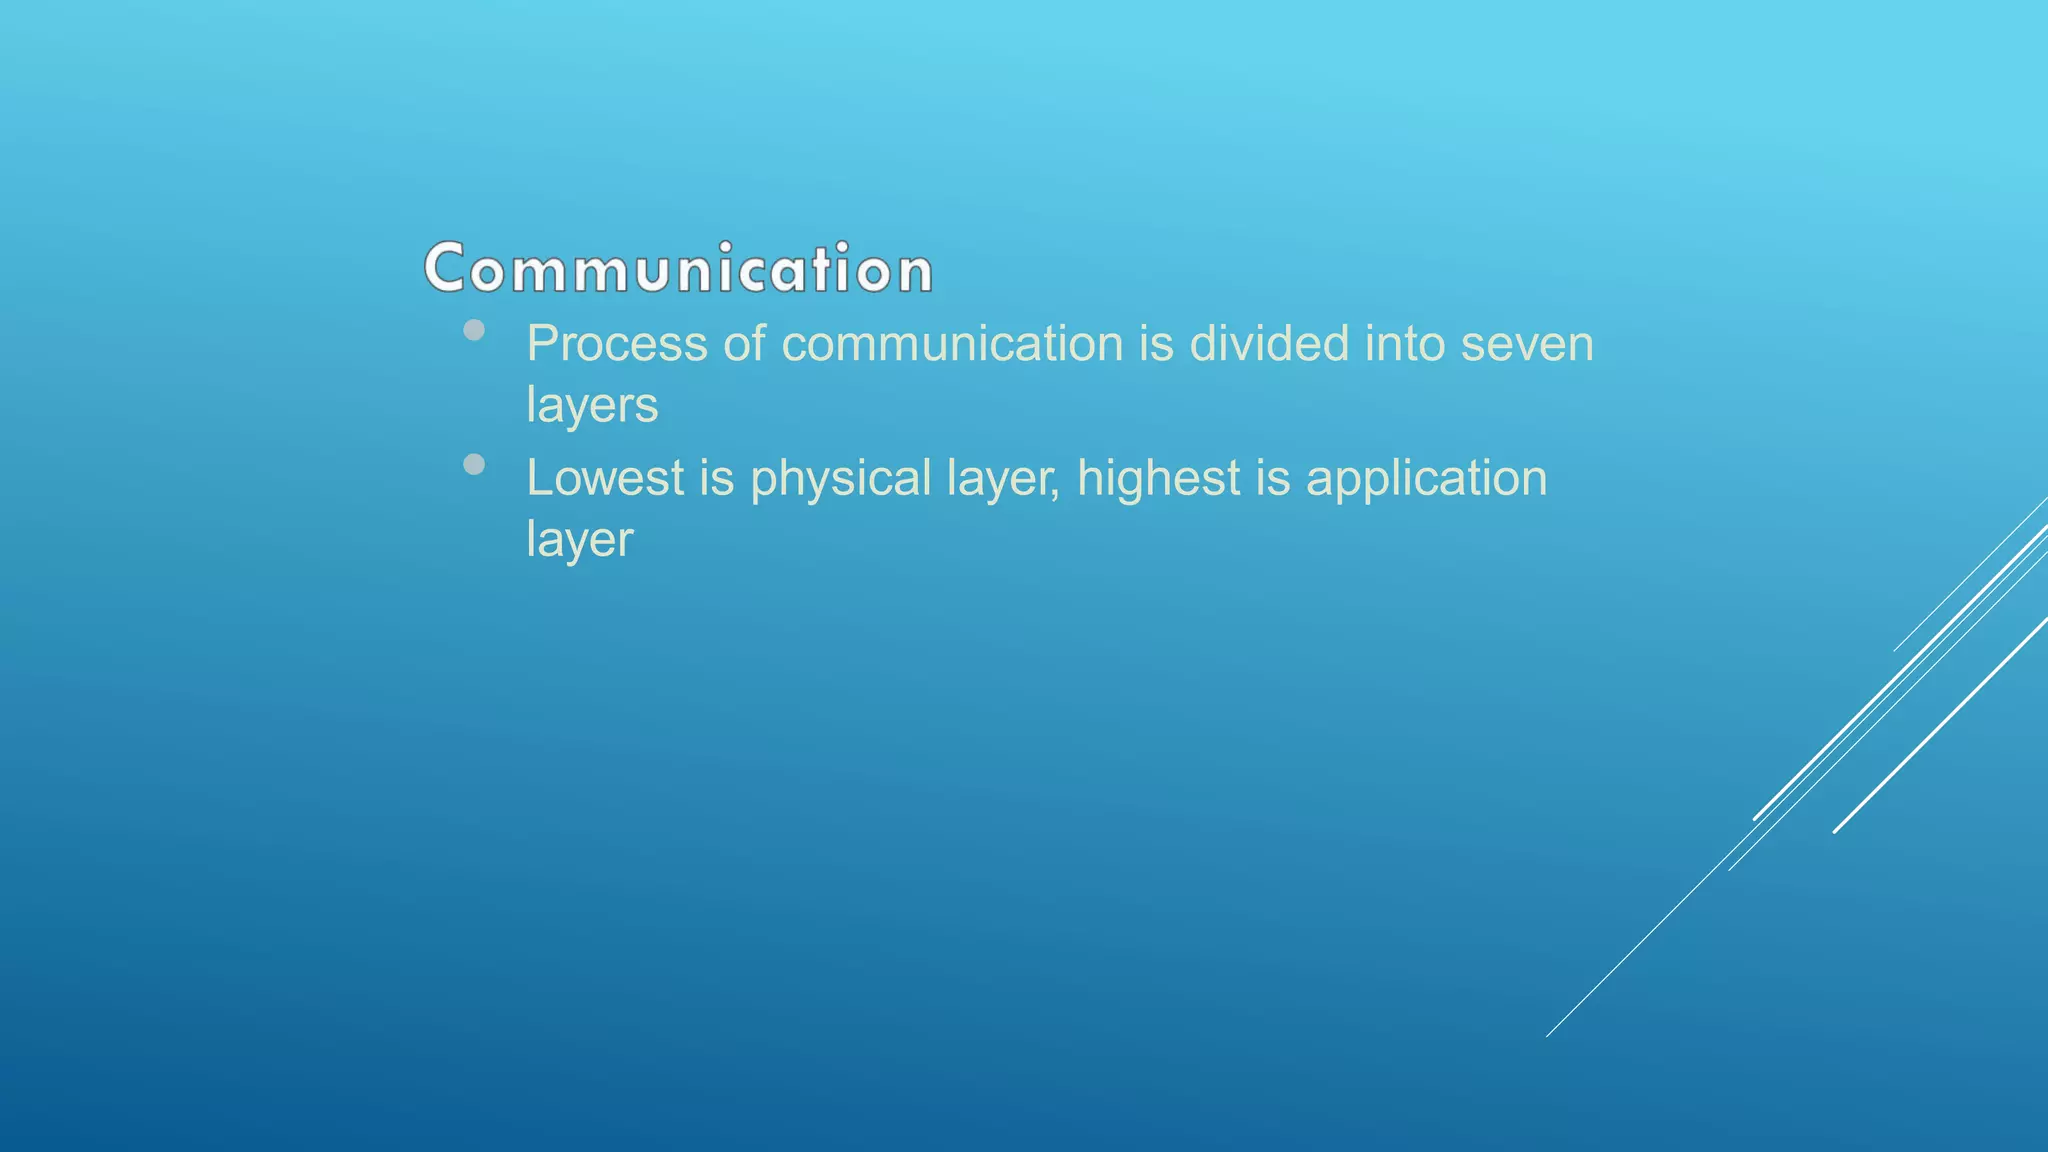
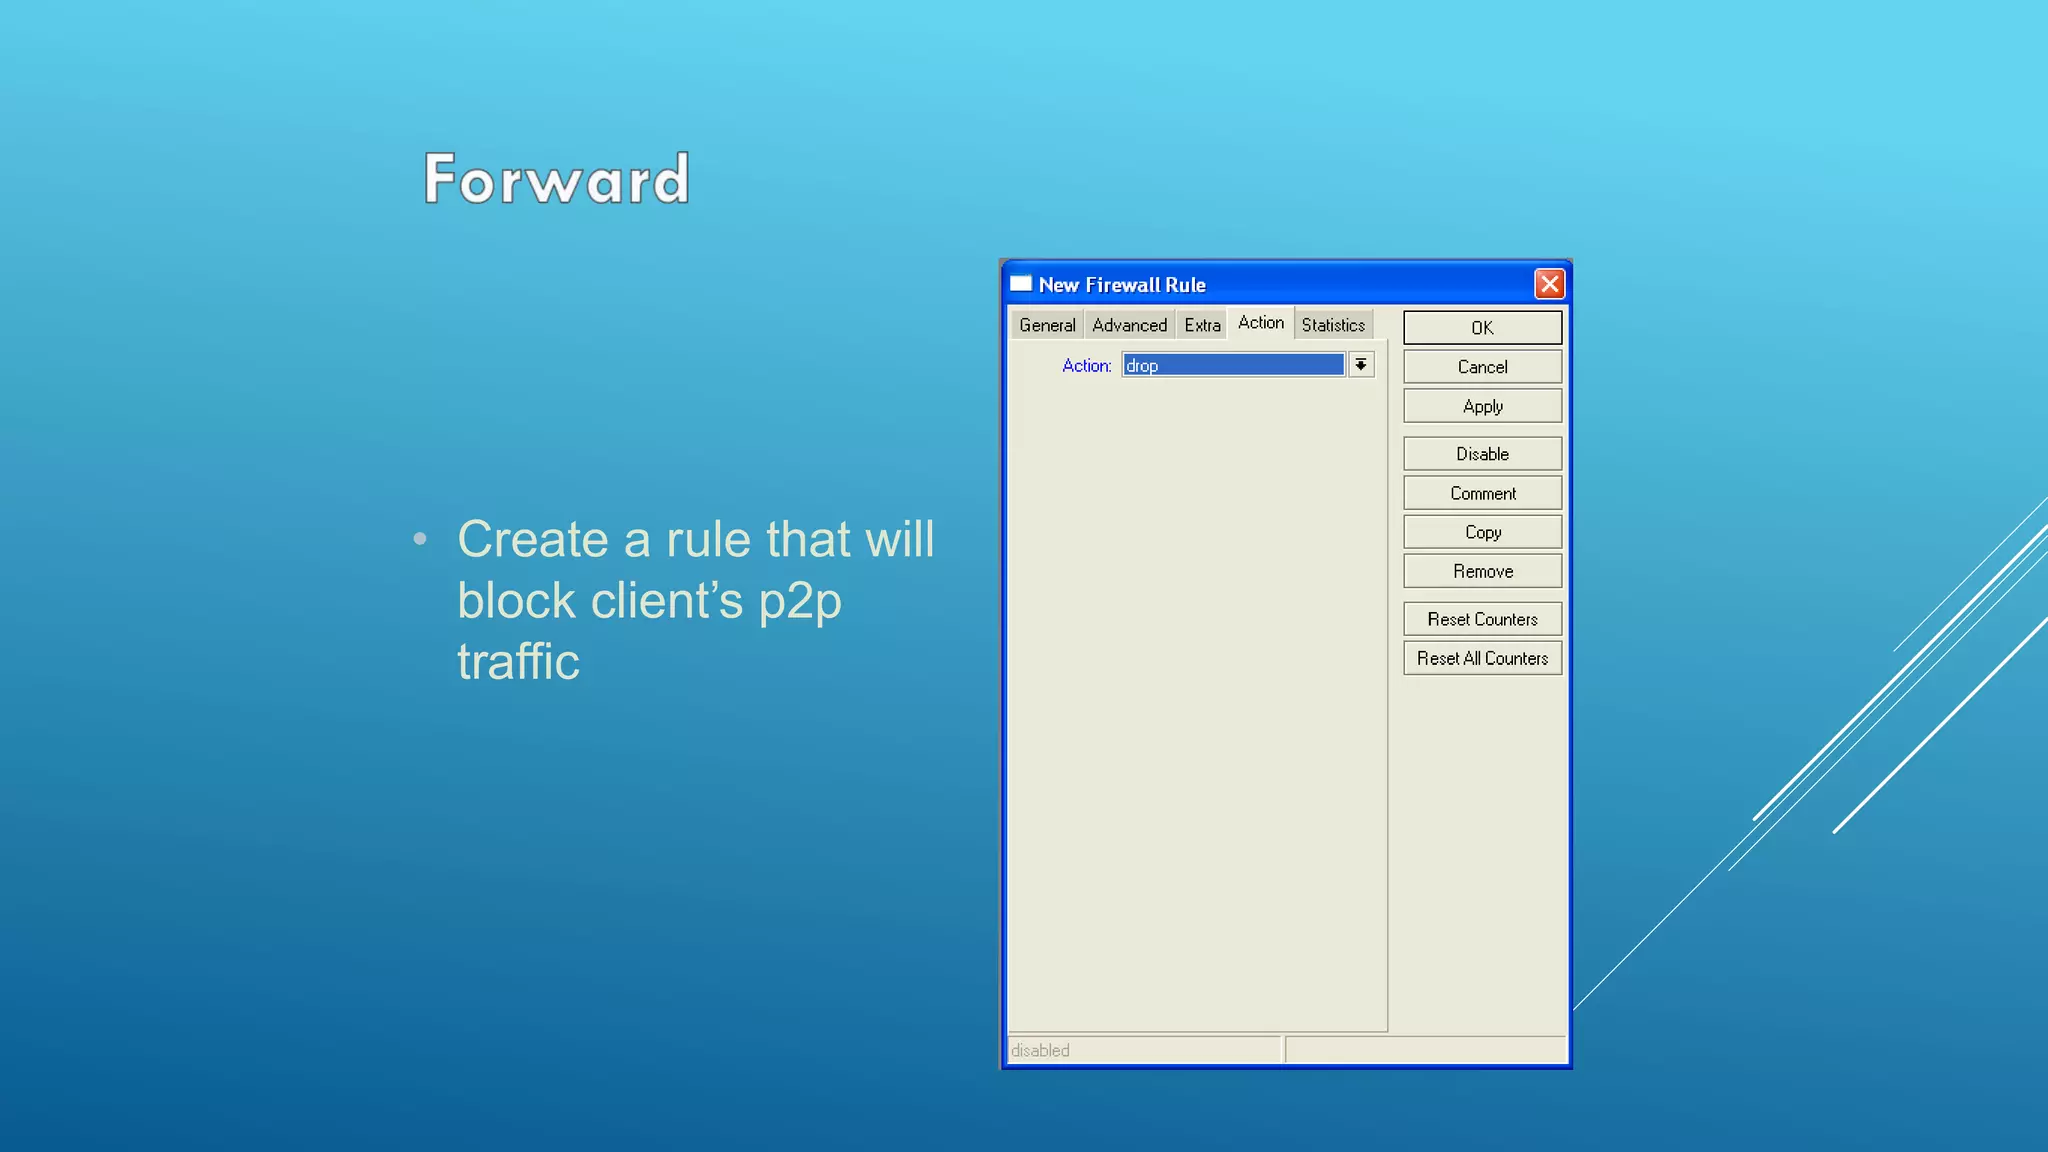
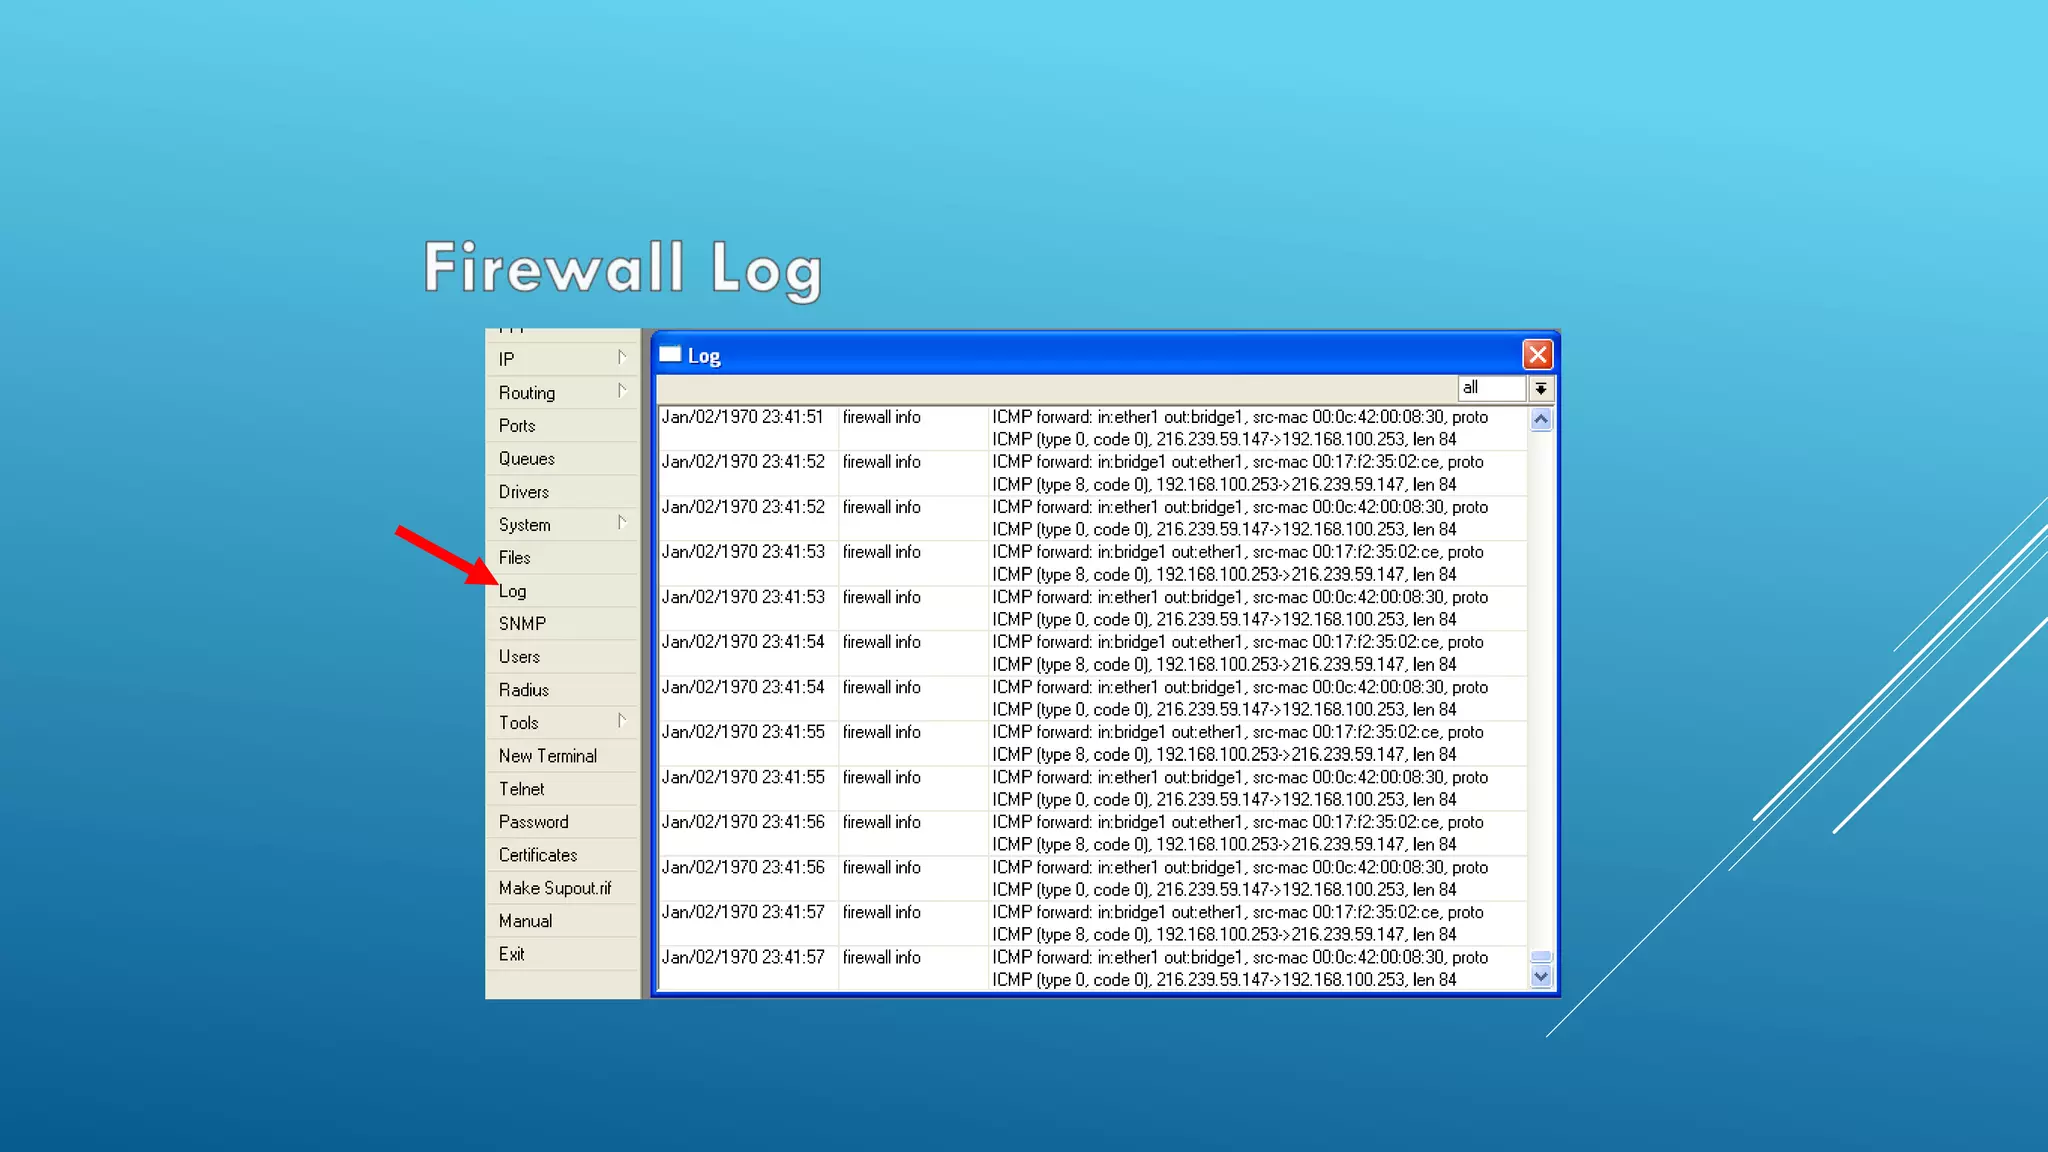
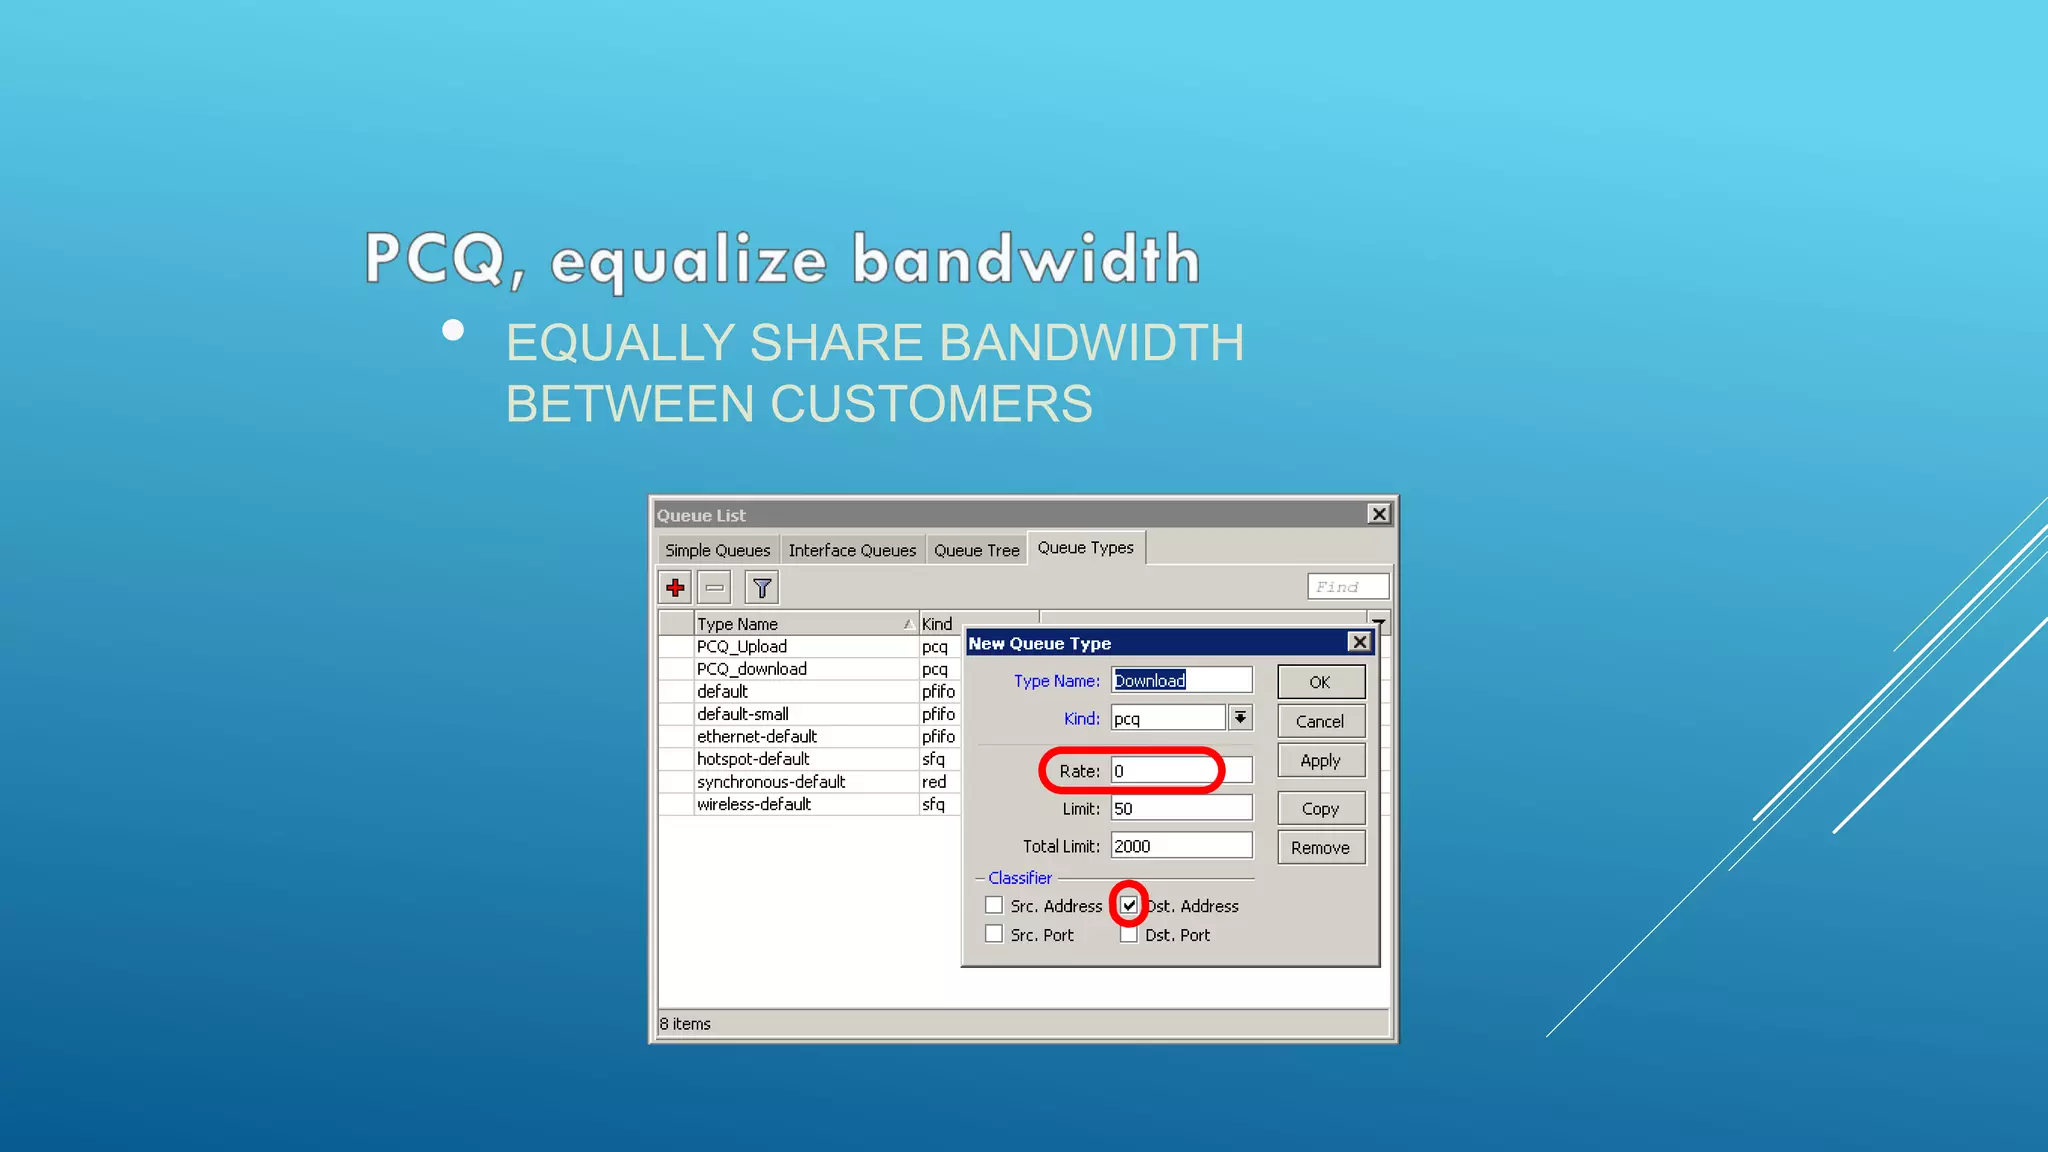
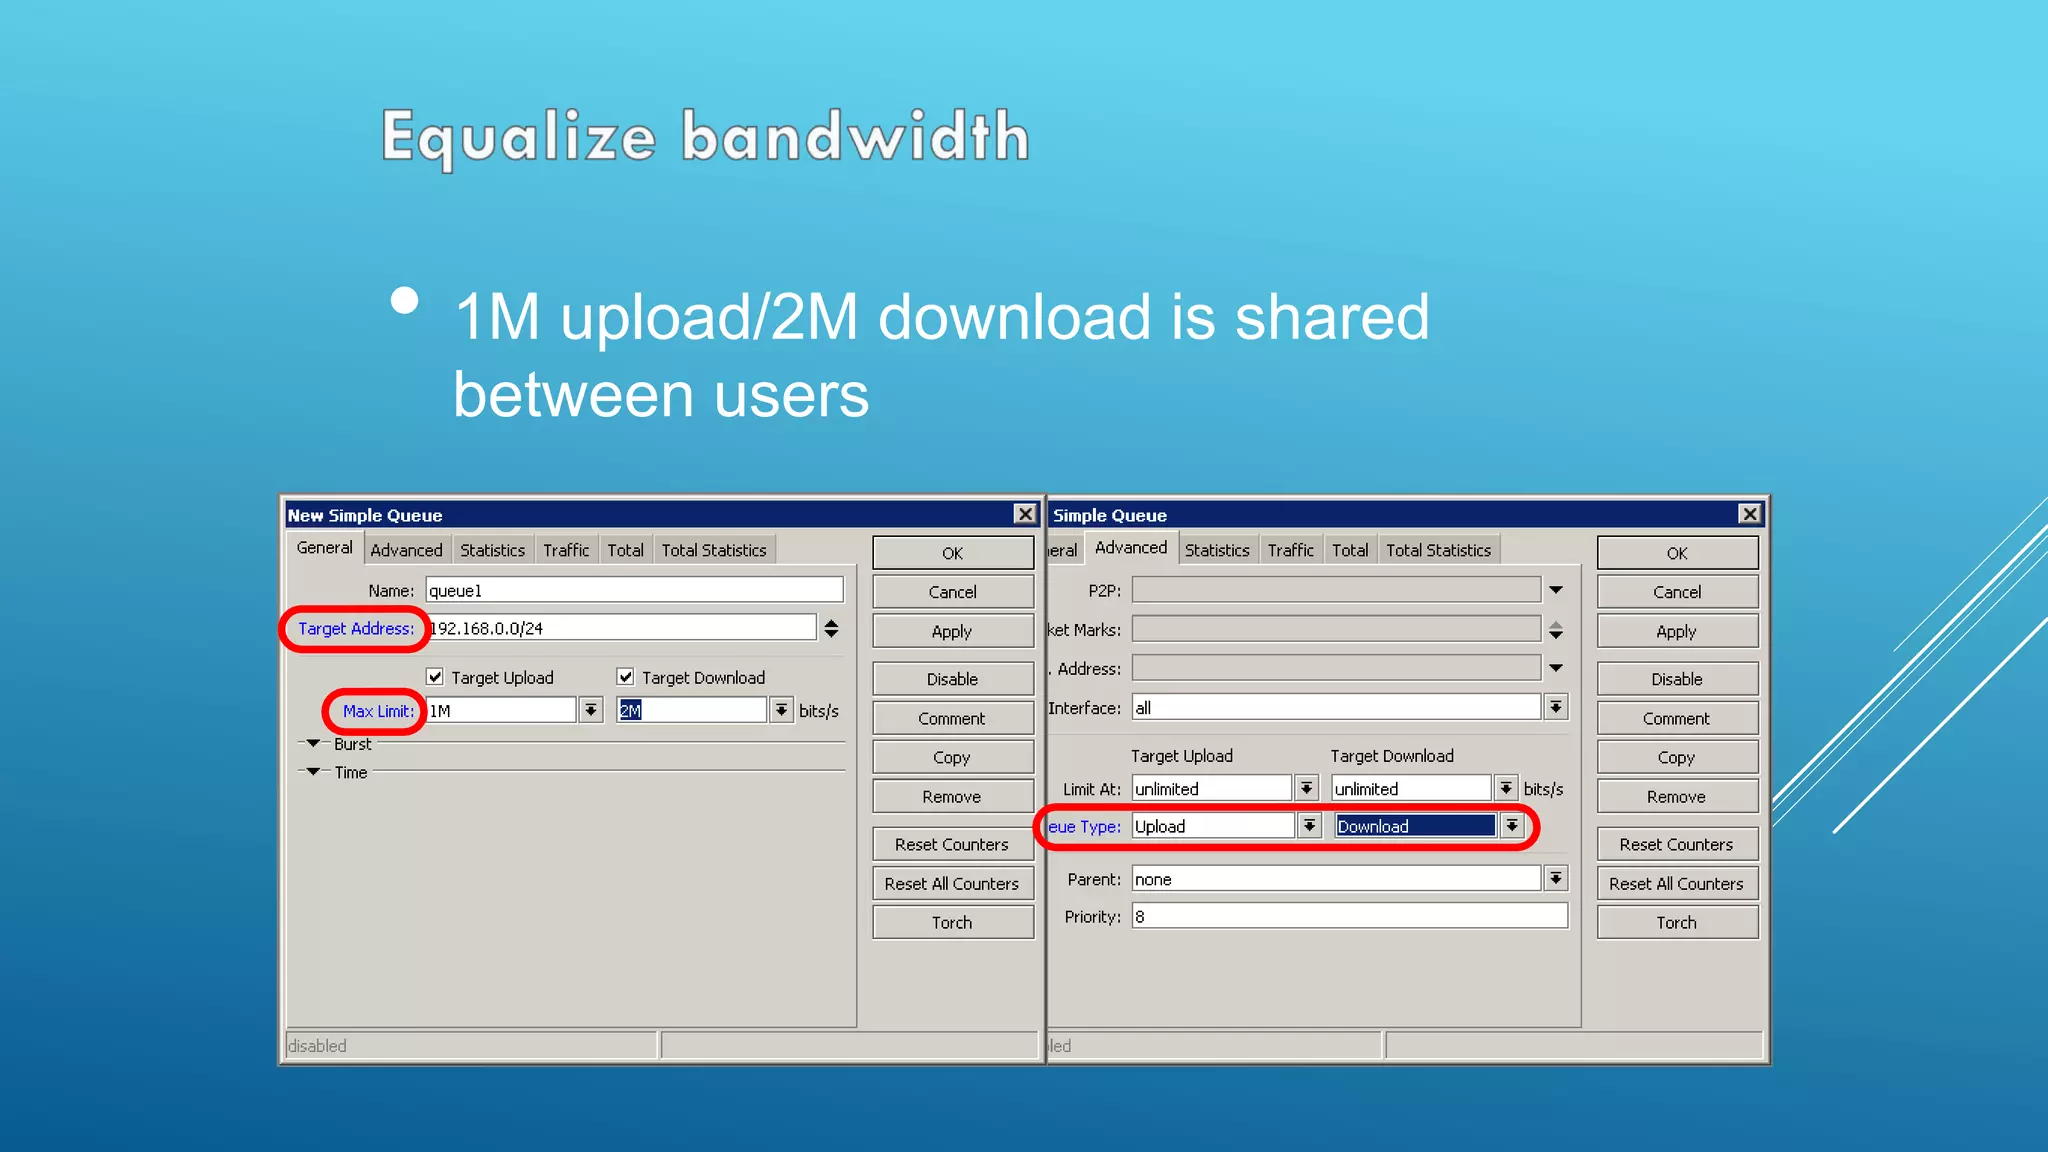
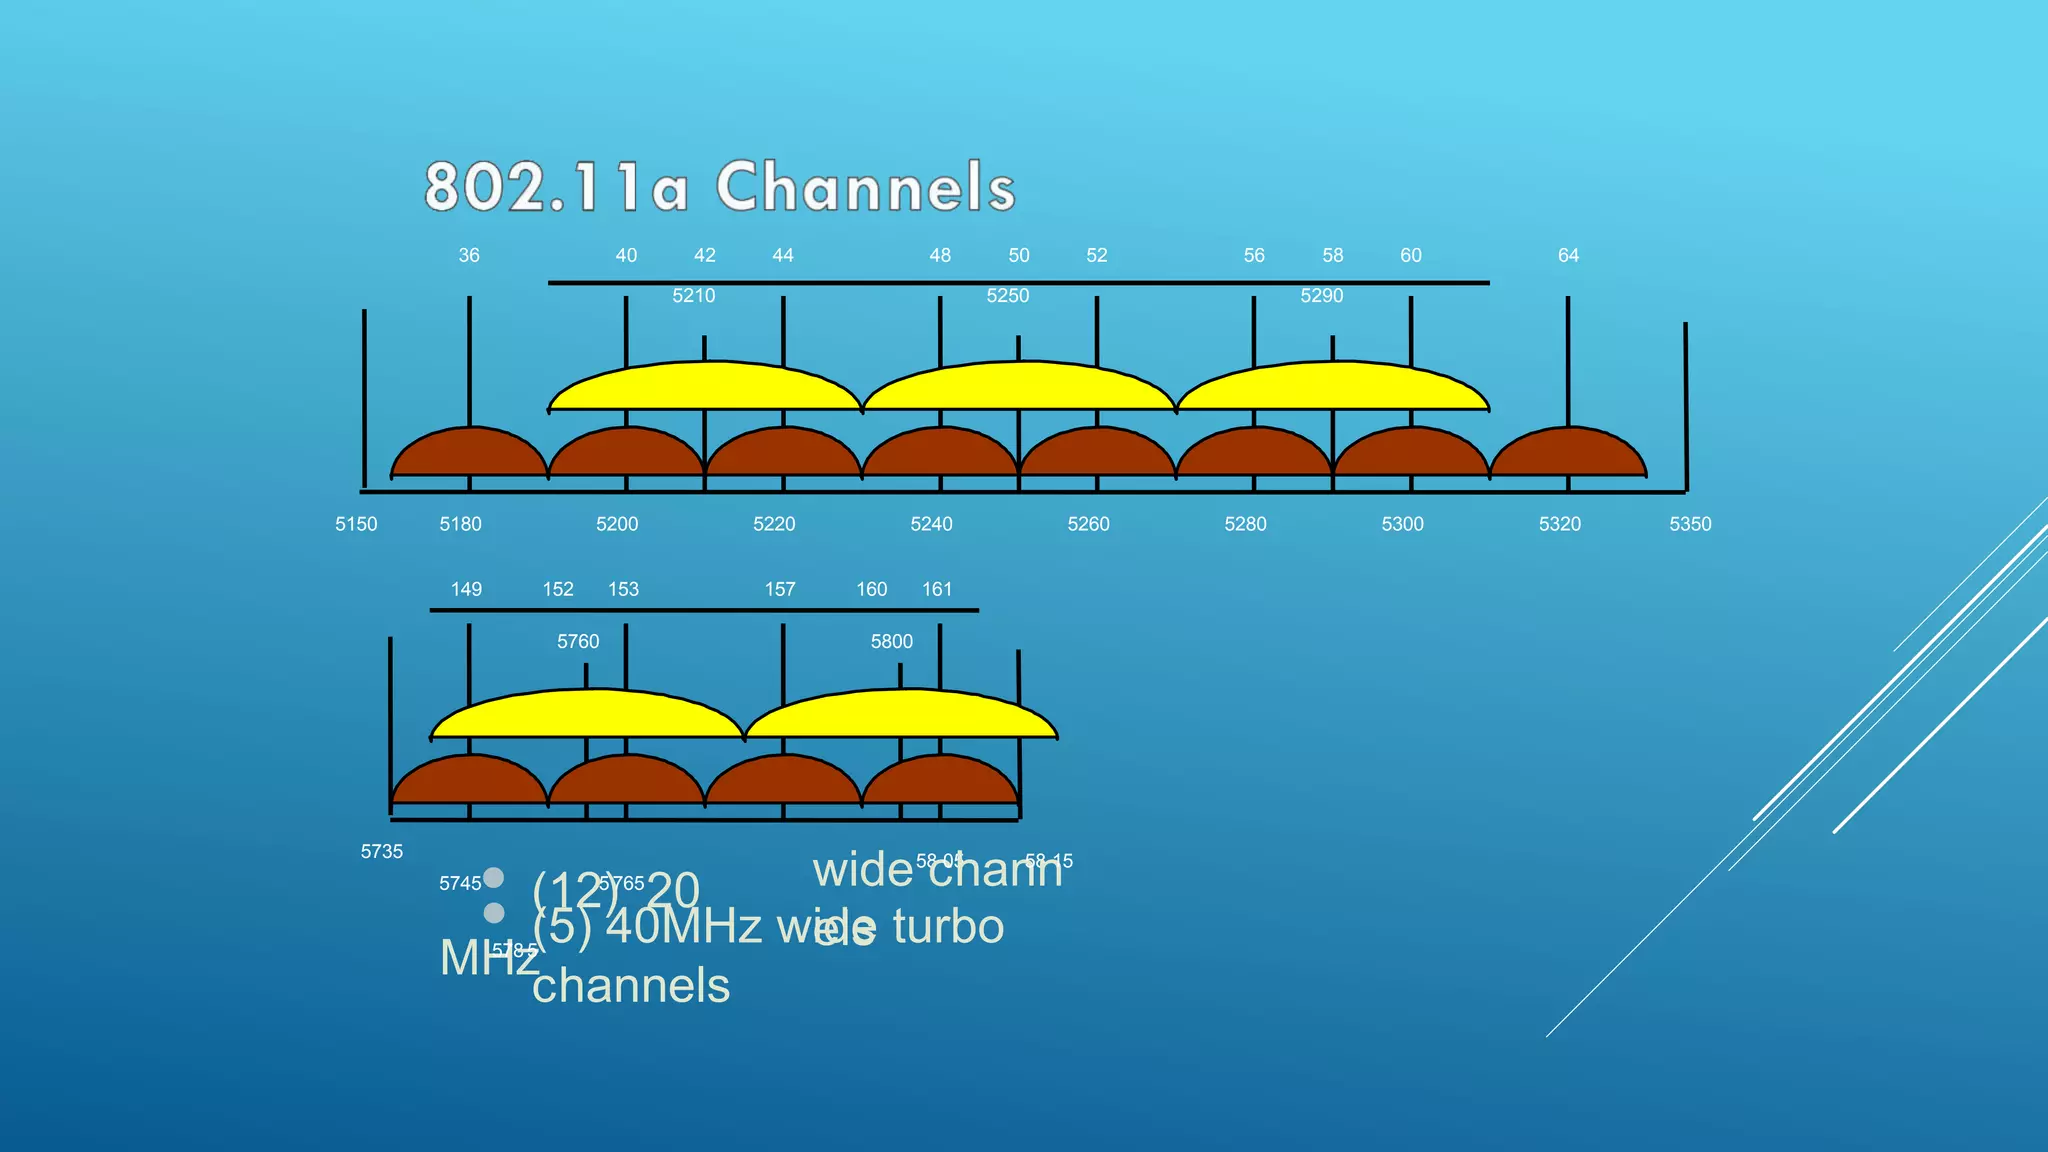
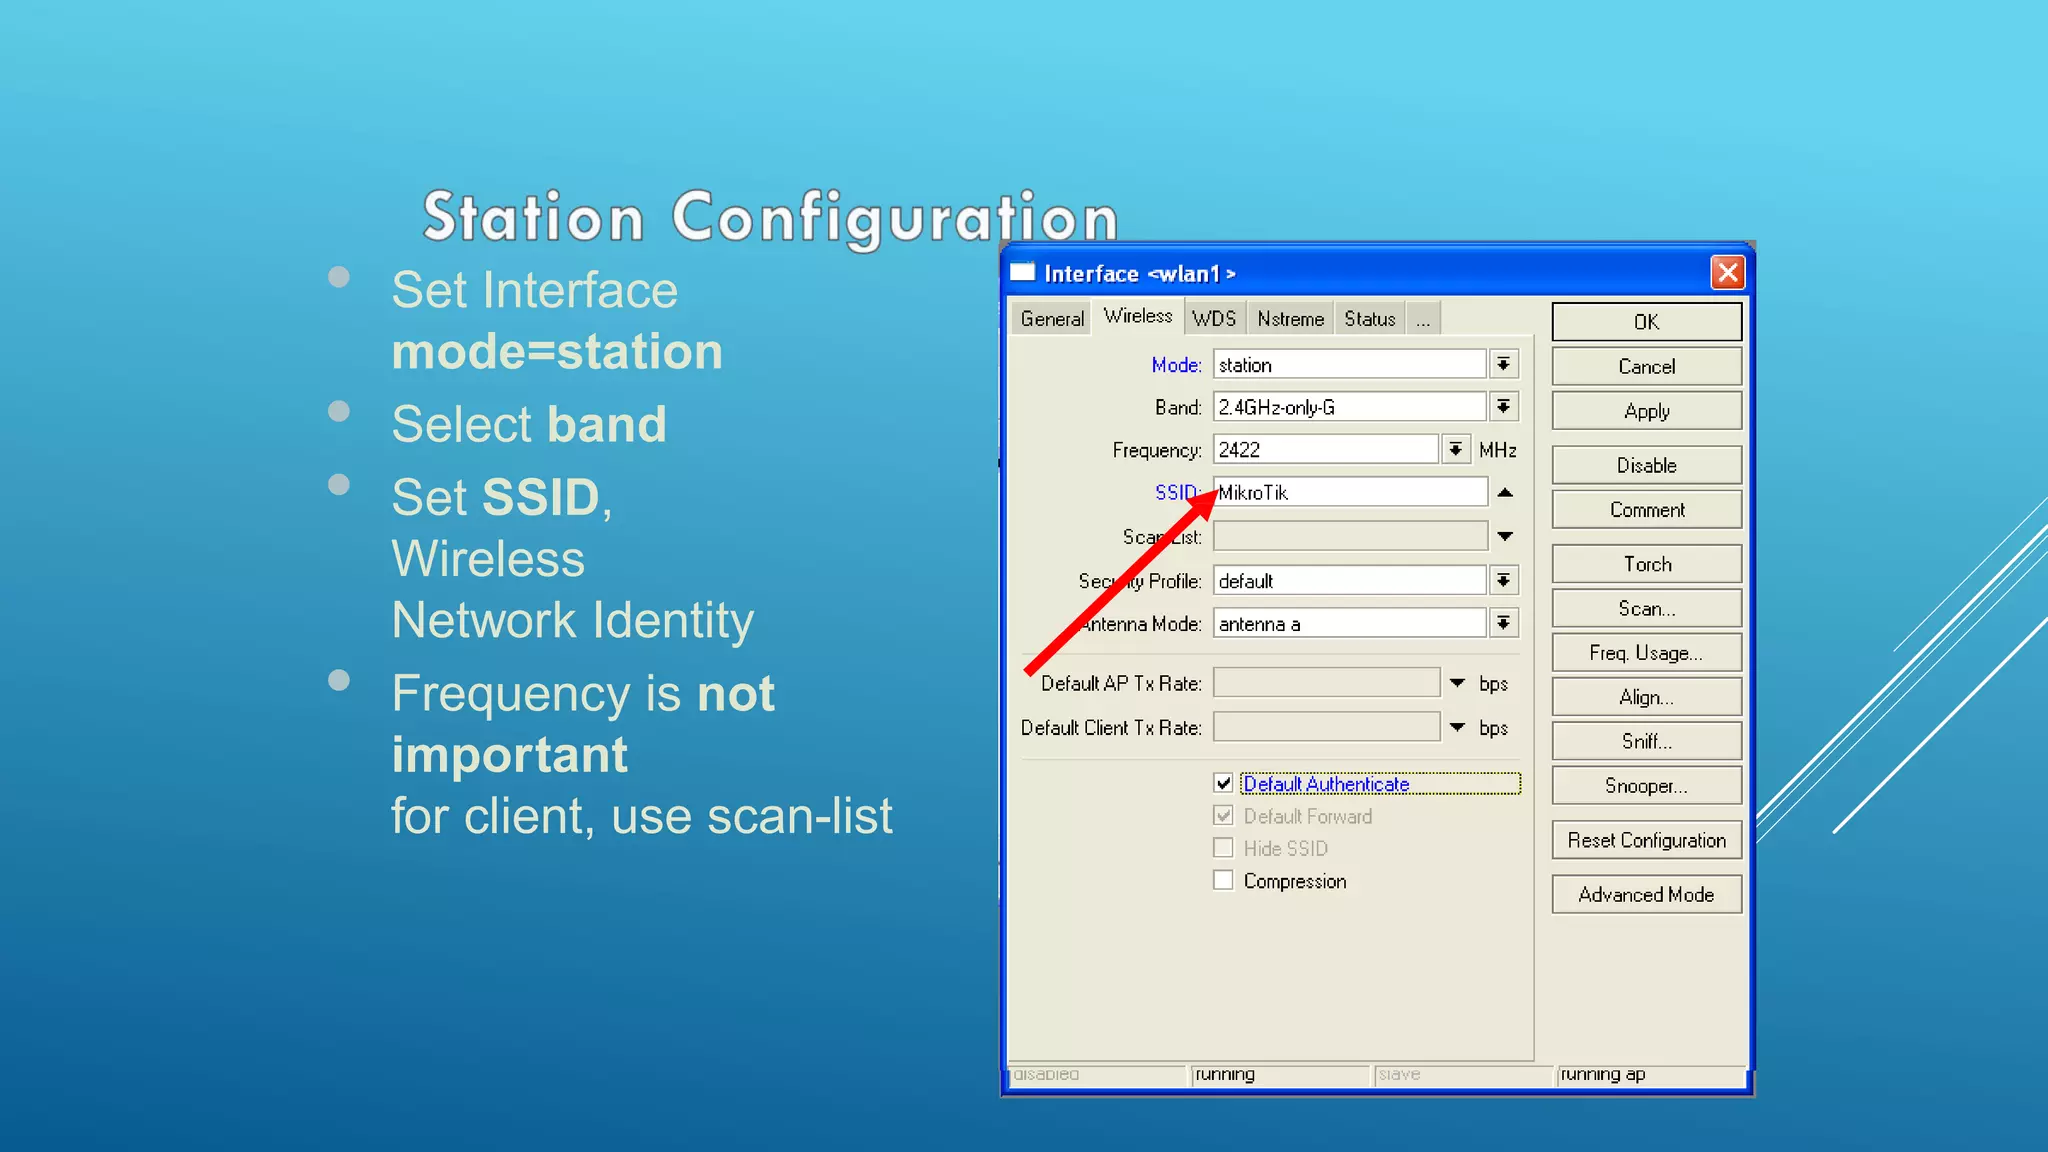
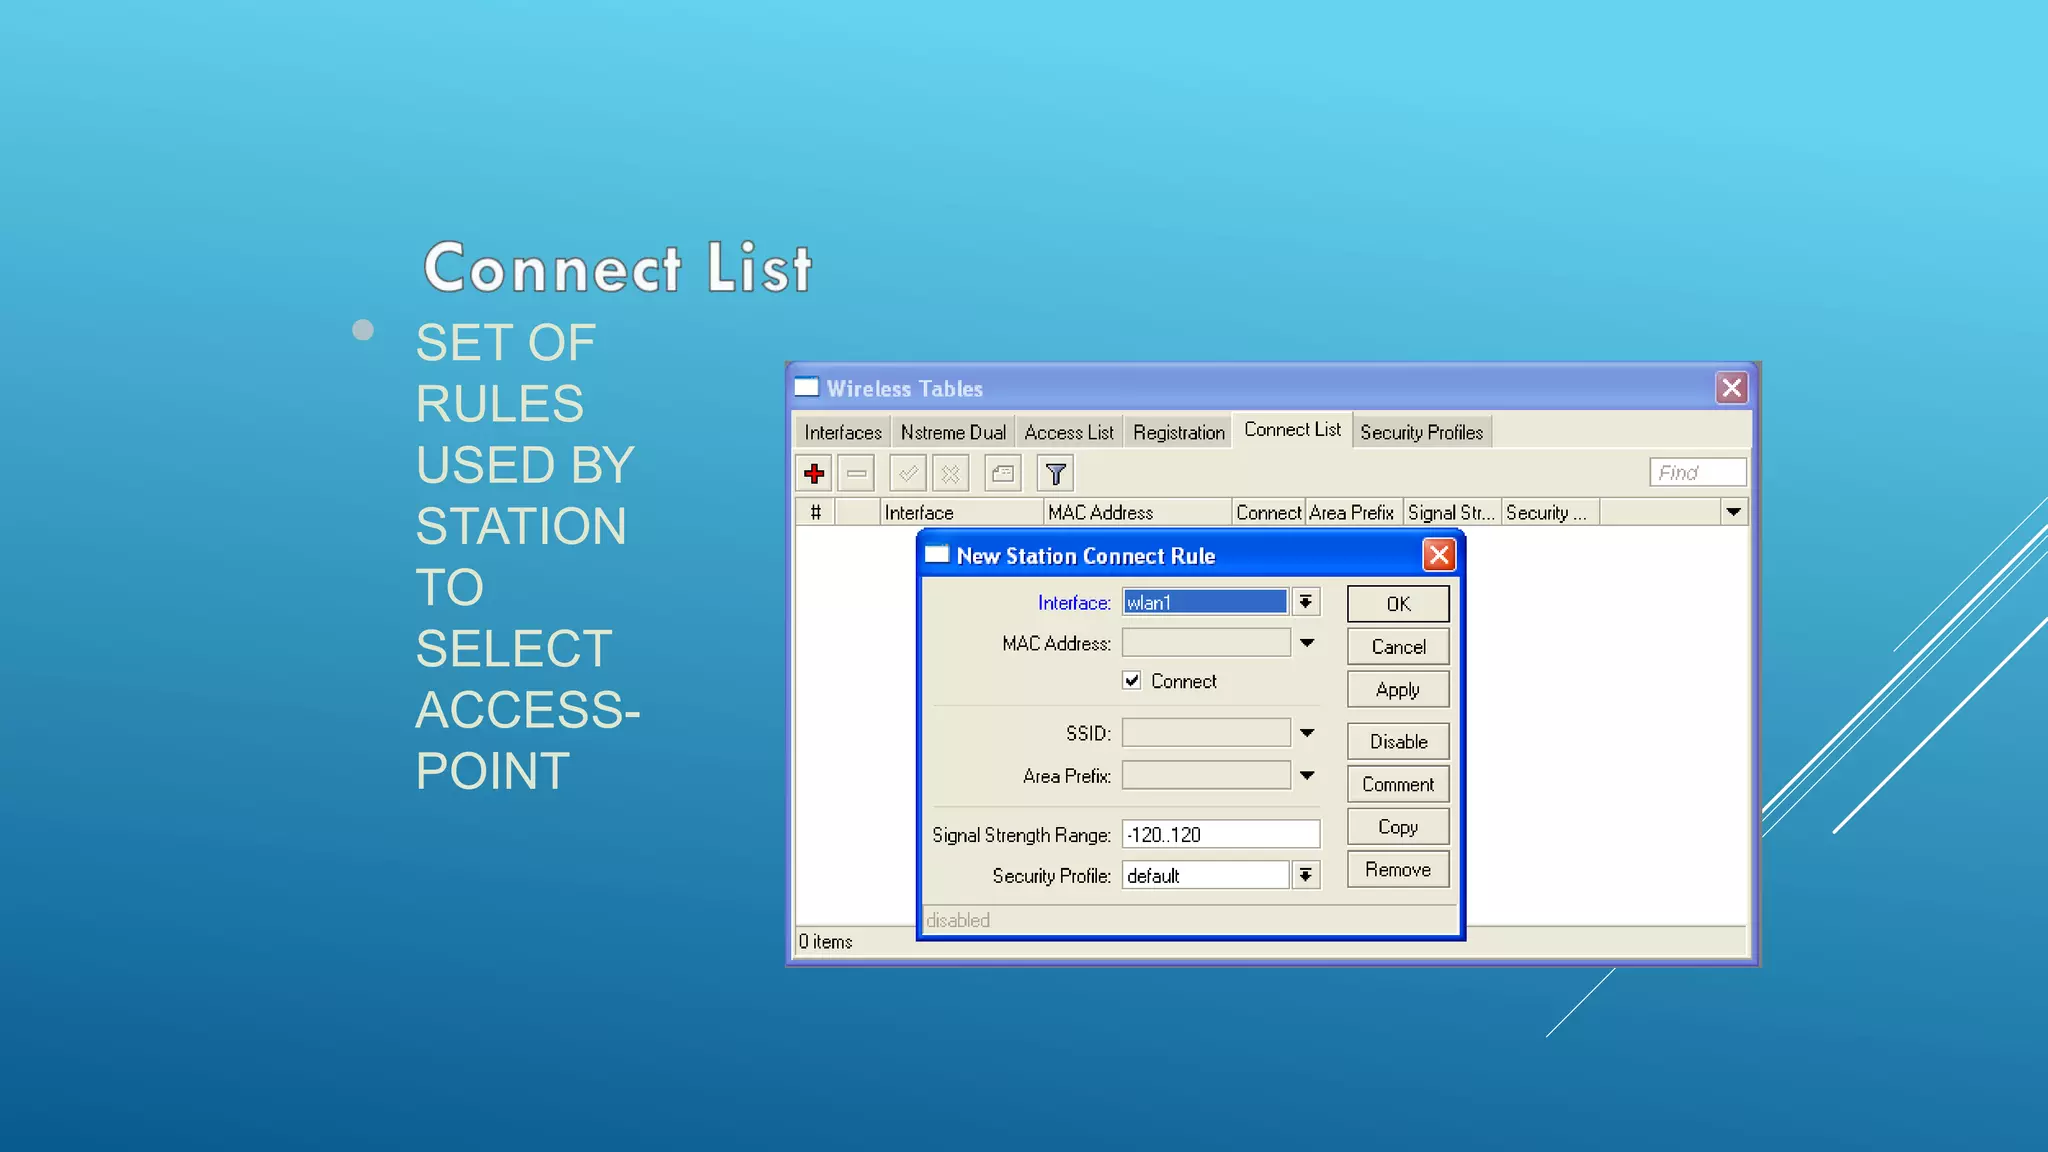
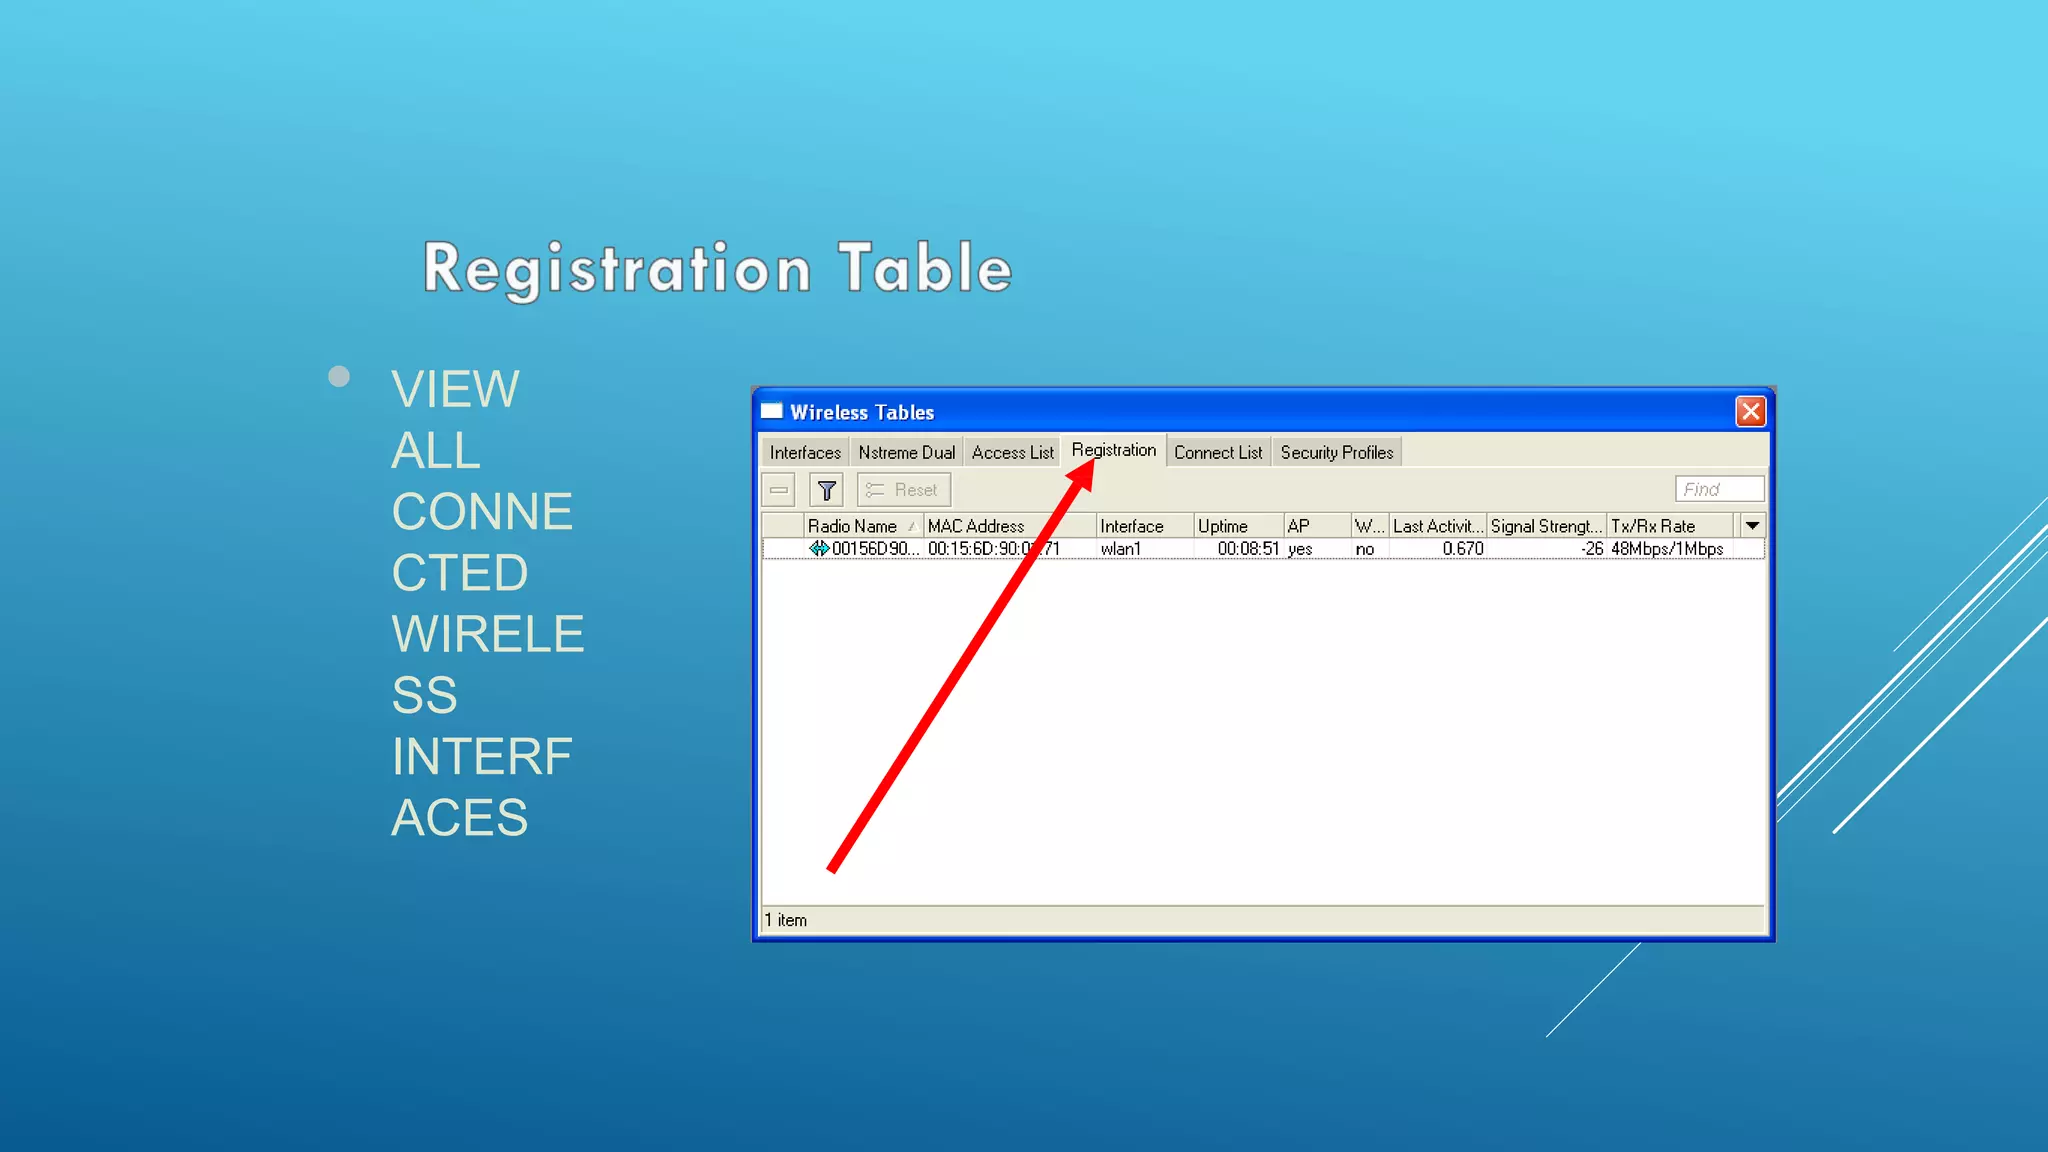
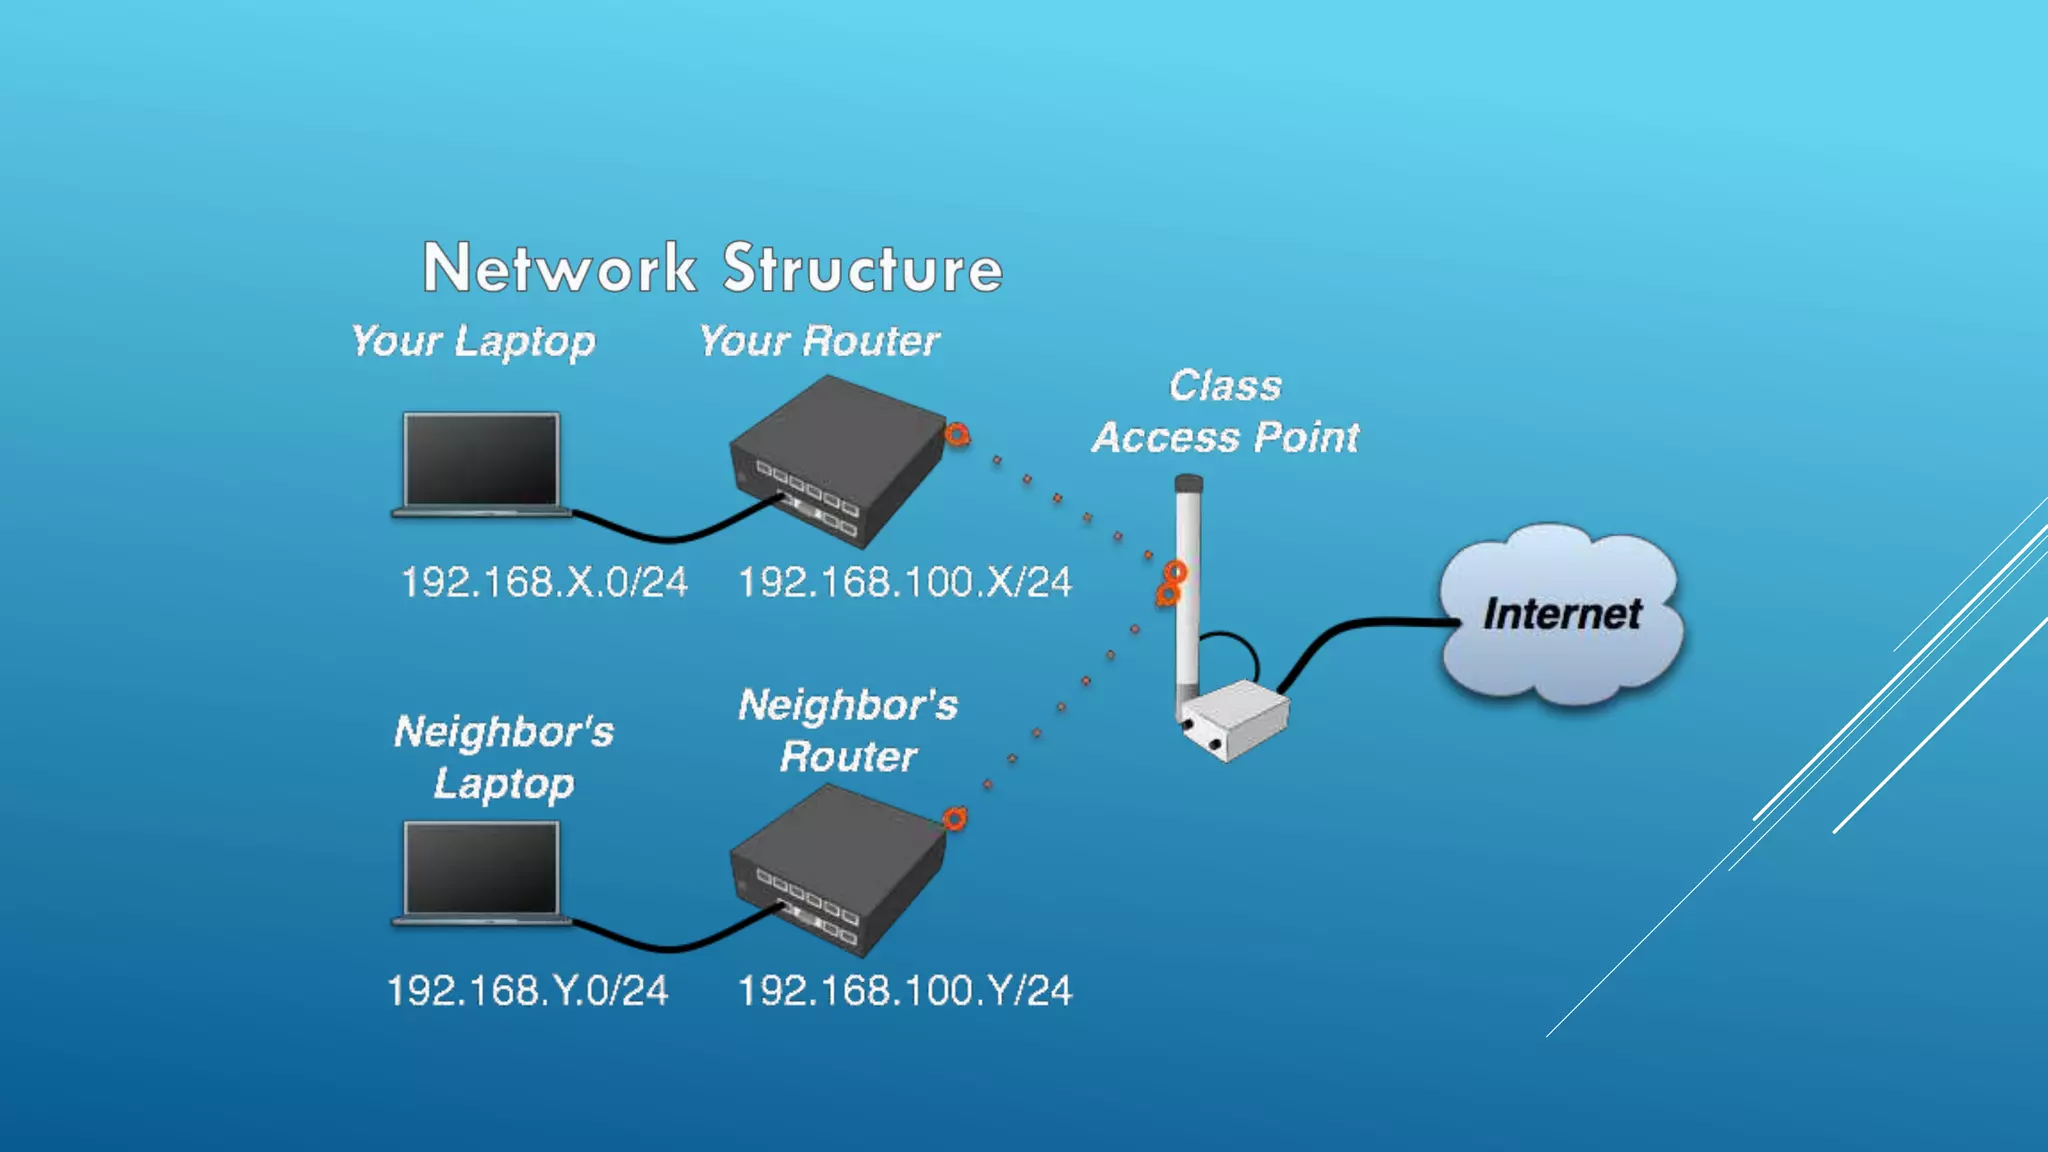
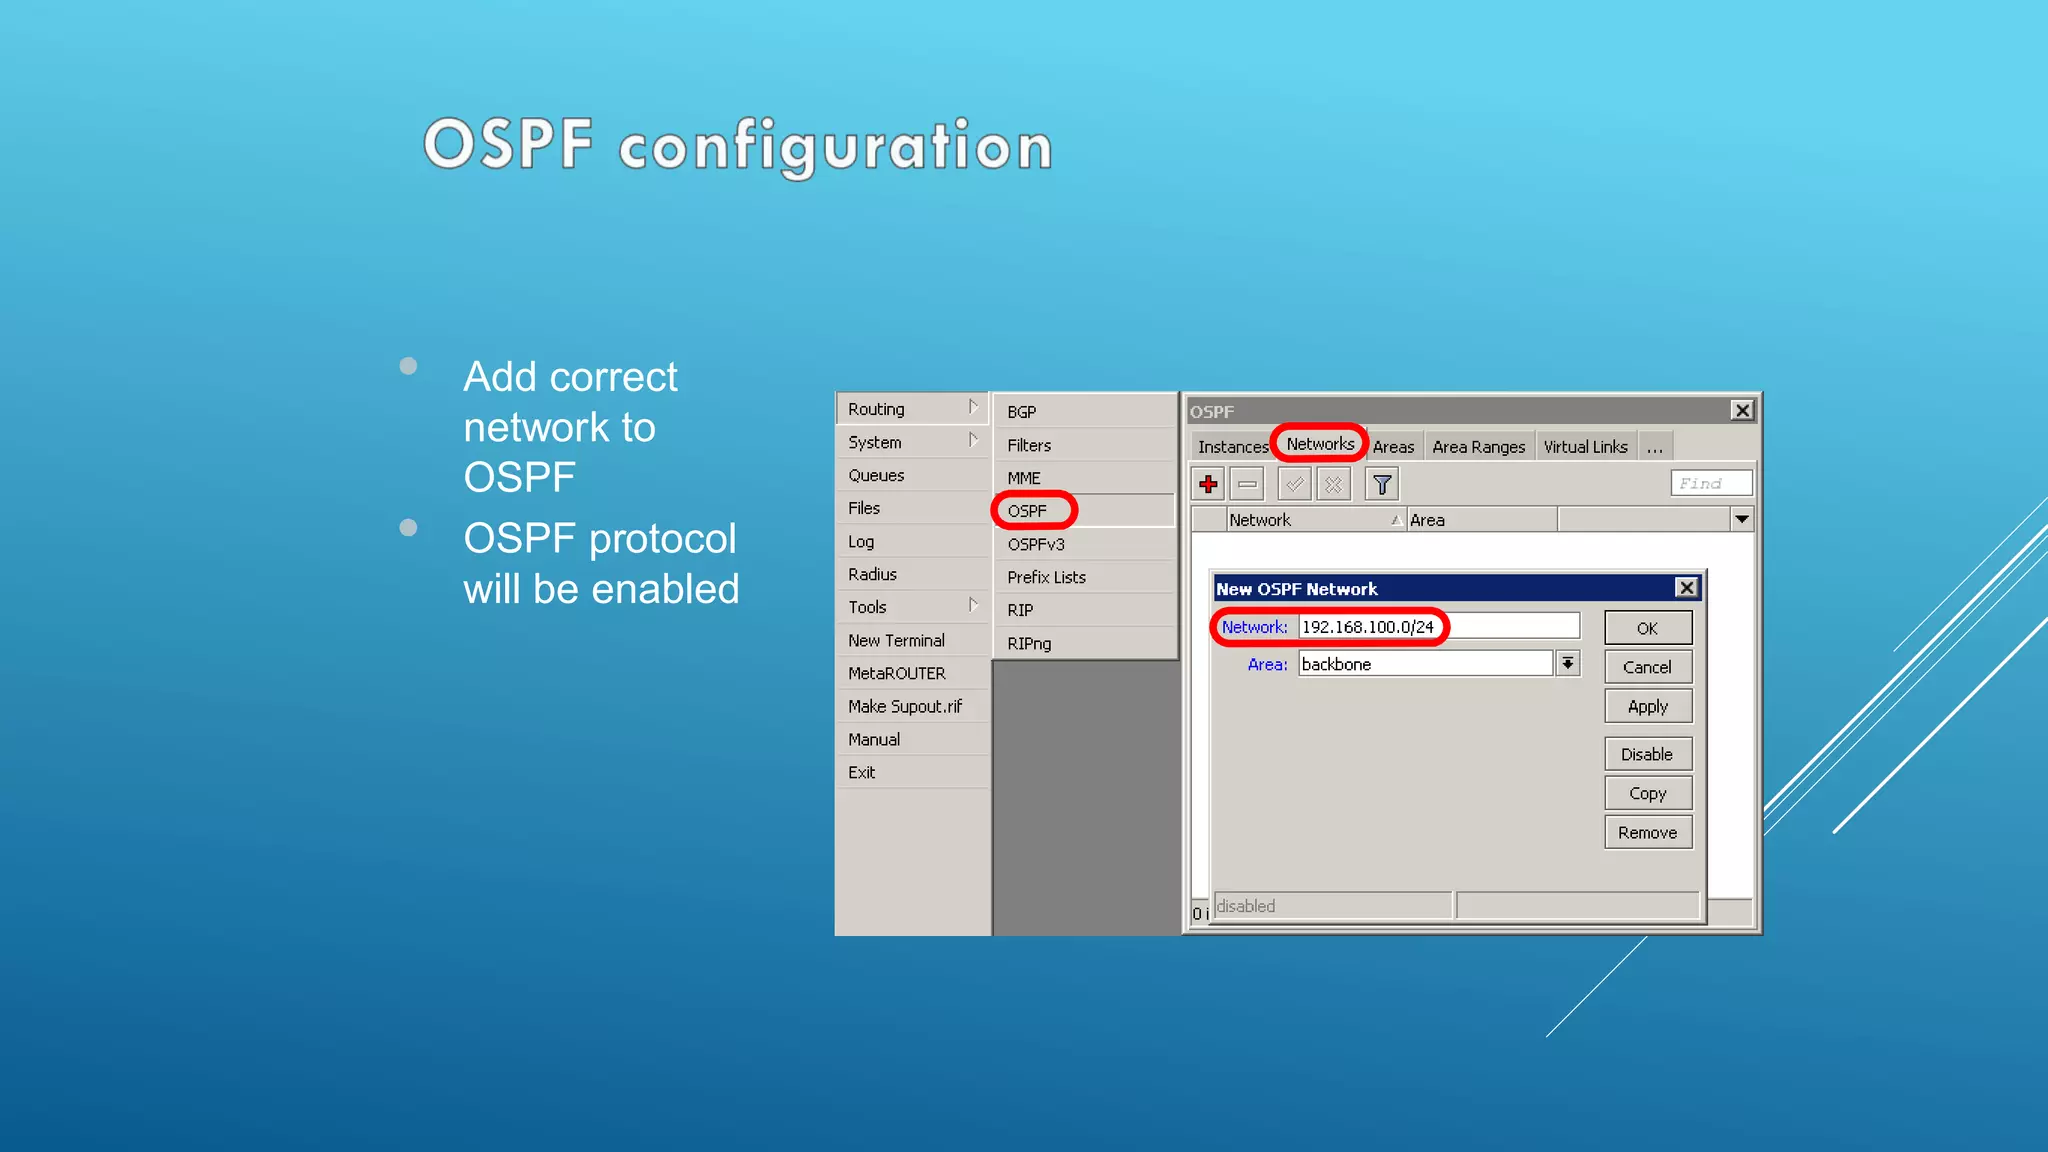
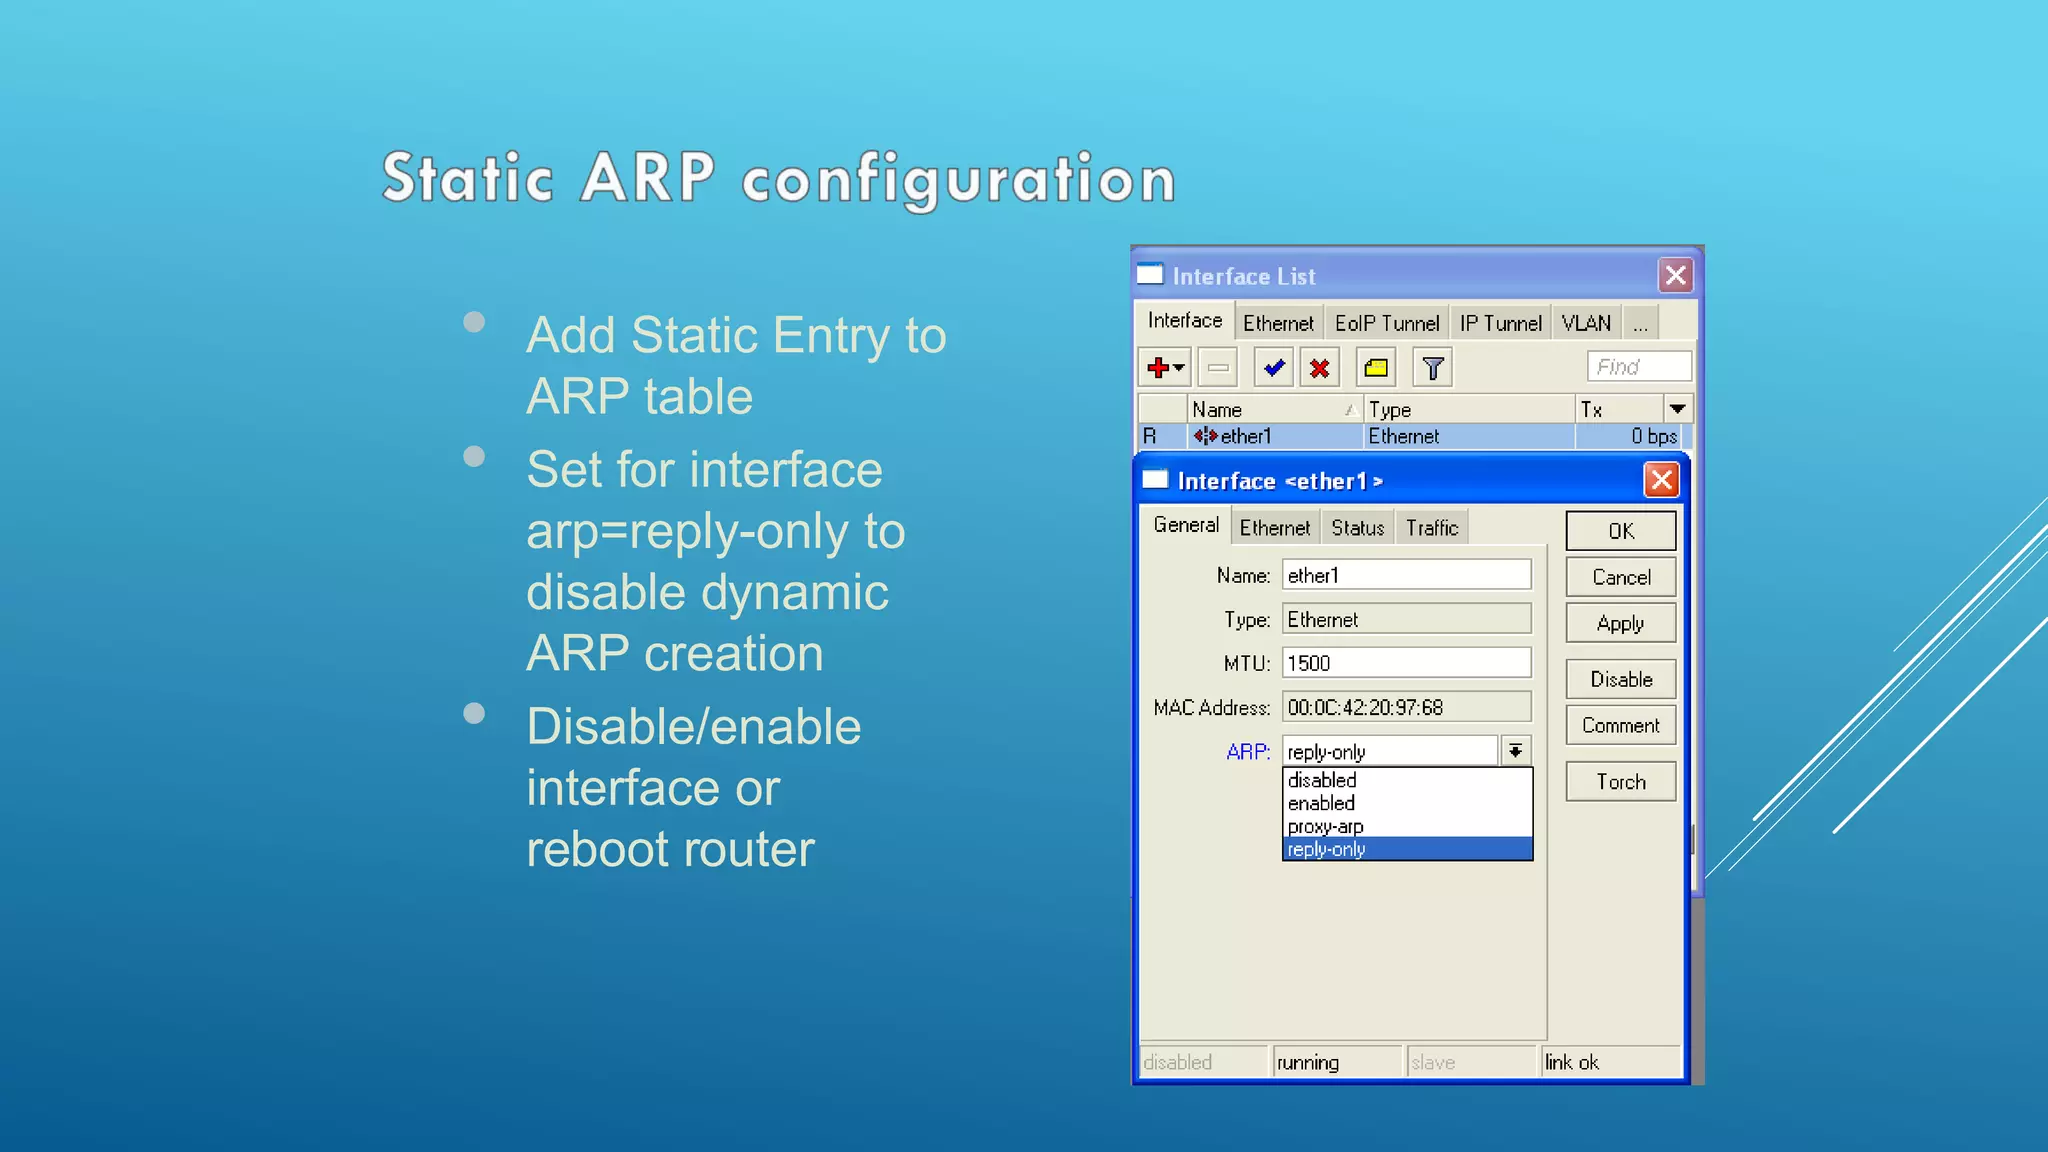
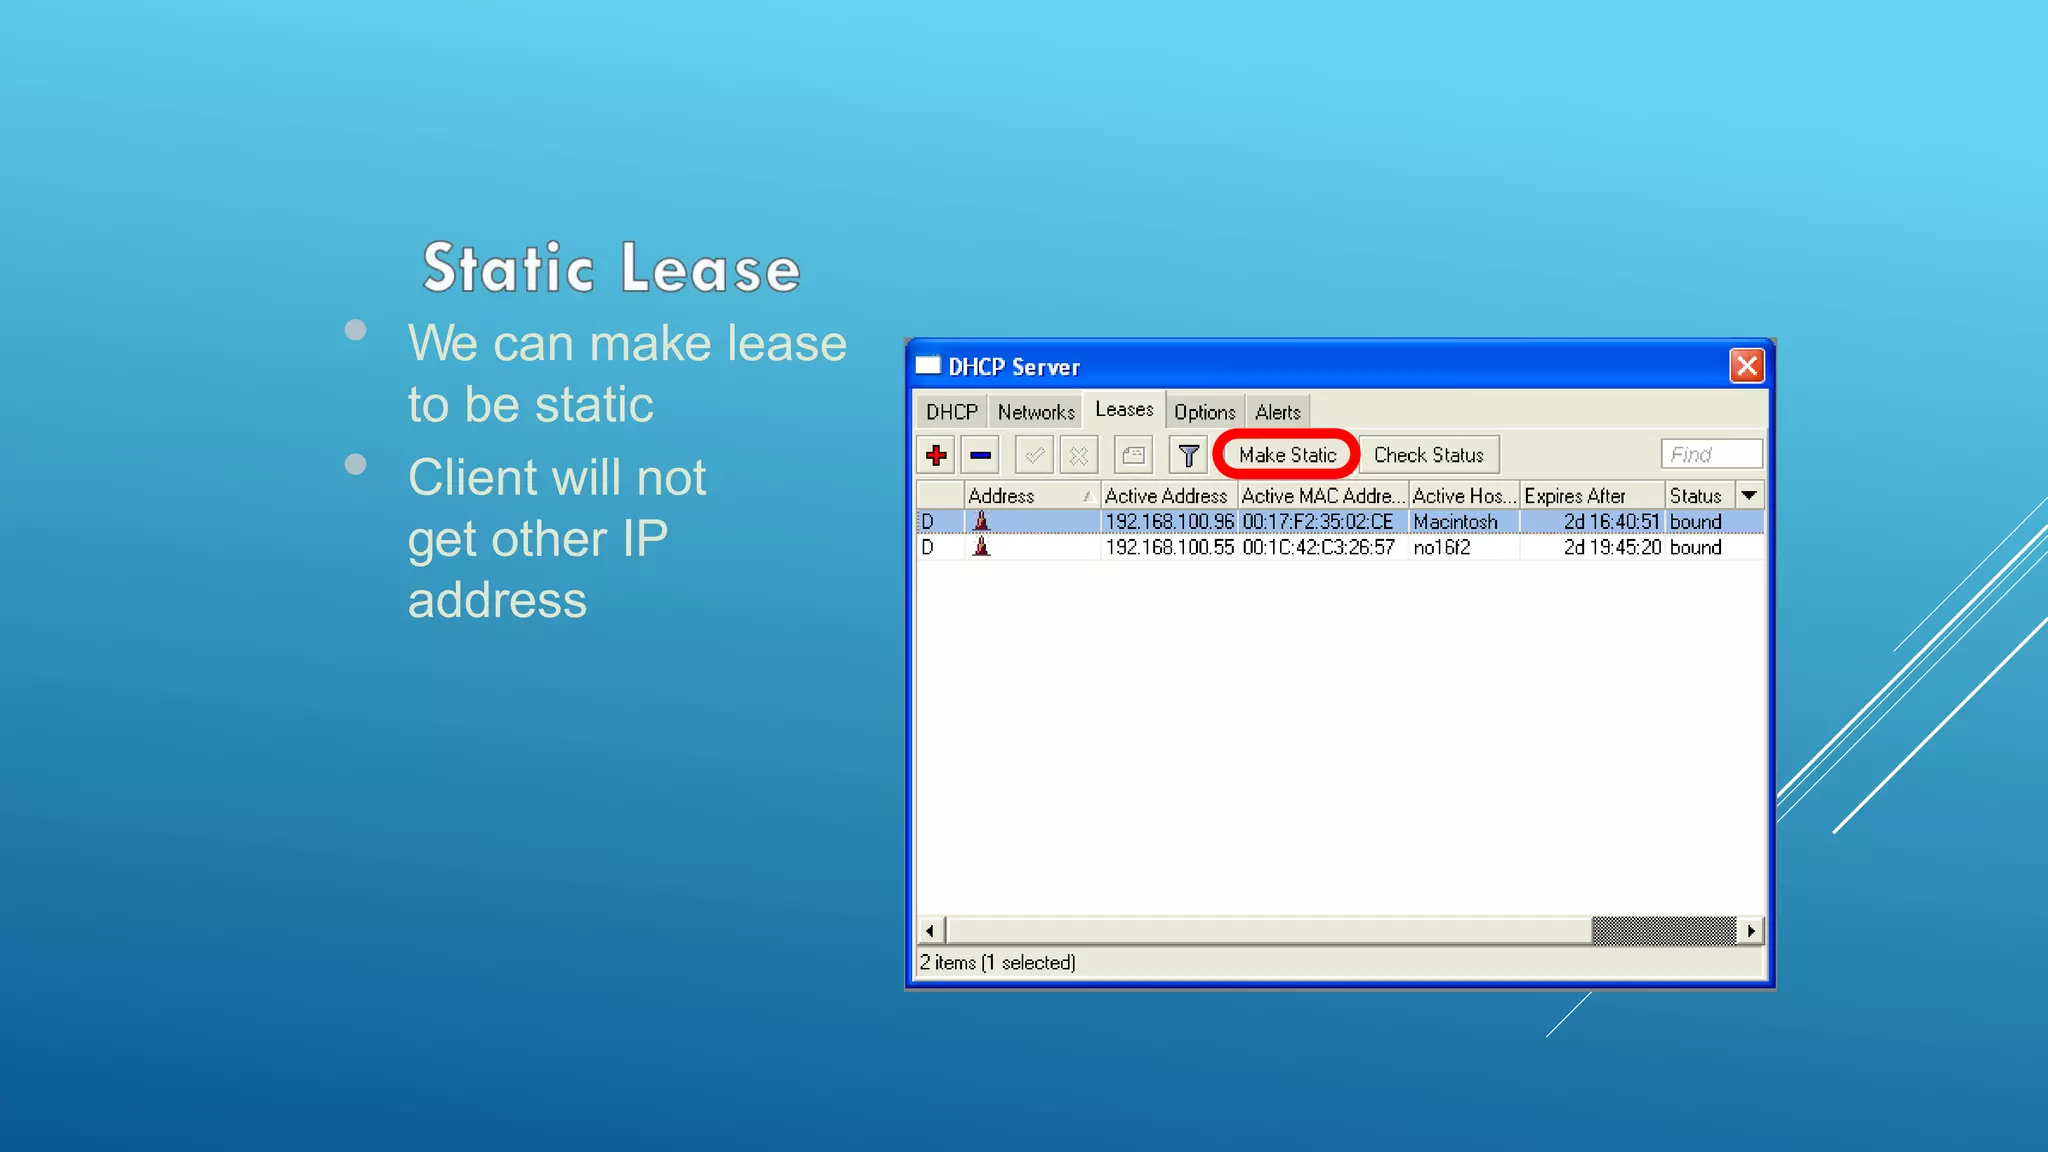
This document provides an overview and agenda for a MikroTik Certified Network Associate (MTCNA) training course. The training will cover RouterOS software and RouterBoard hardware capabilities, configuration, maintenance, and troubleshooting over two 3.5 hour sessions with breaks. Attendees will learn about MikroTik as a router and wireless hardware manufacturer, the history and features of RouterOS and RouterBOARD devices, and hands-on configuration including firewalls, bandwidth management, and more.


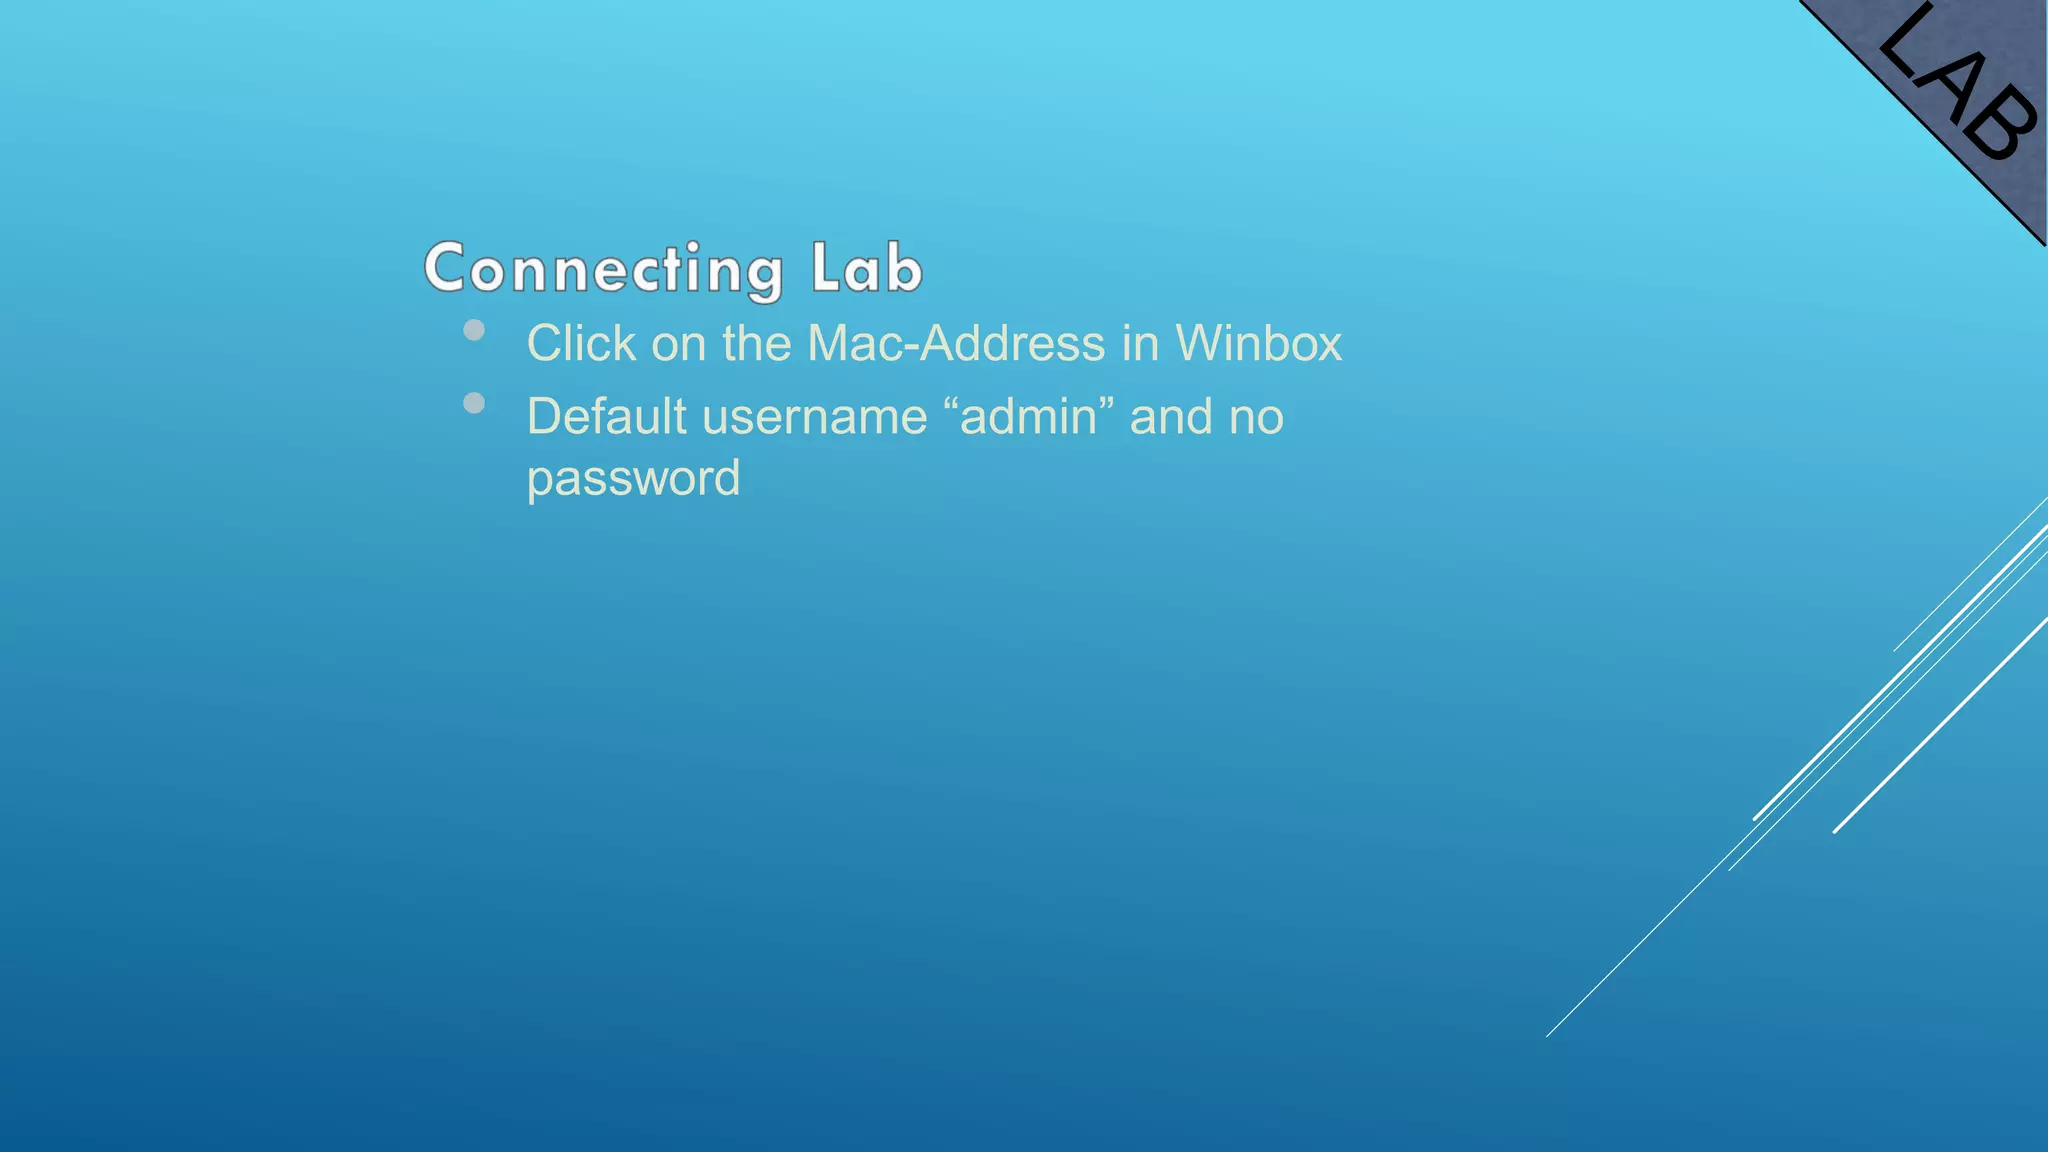
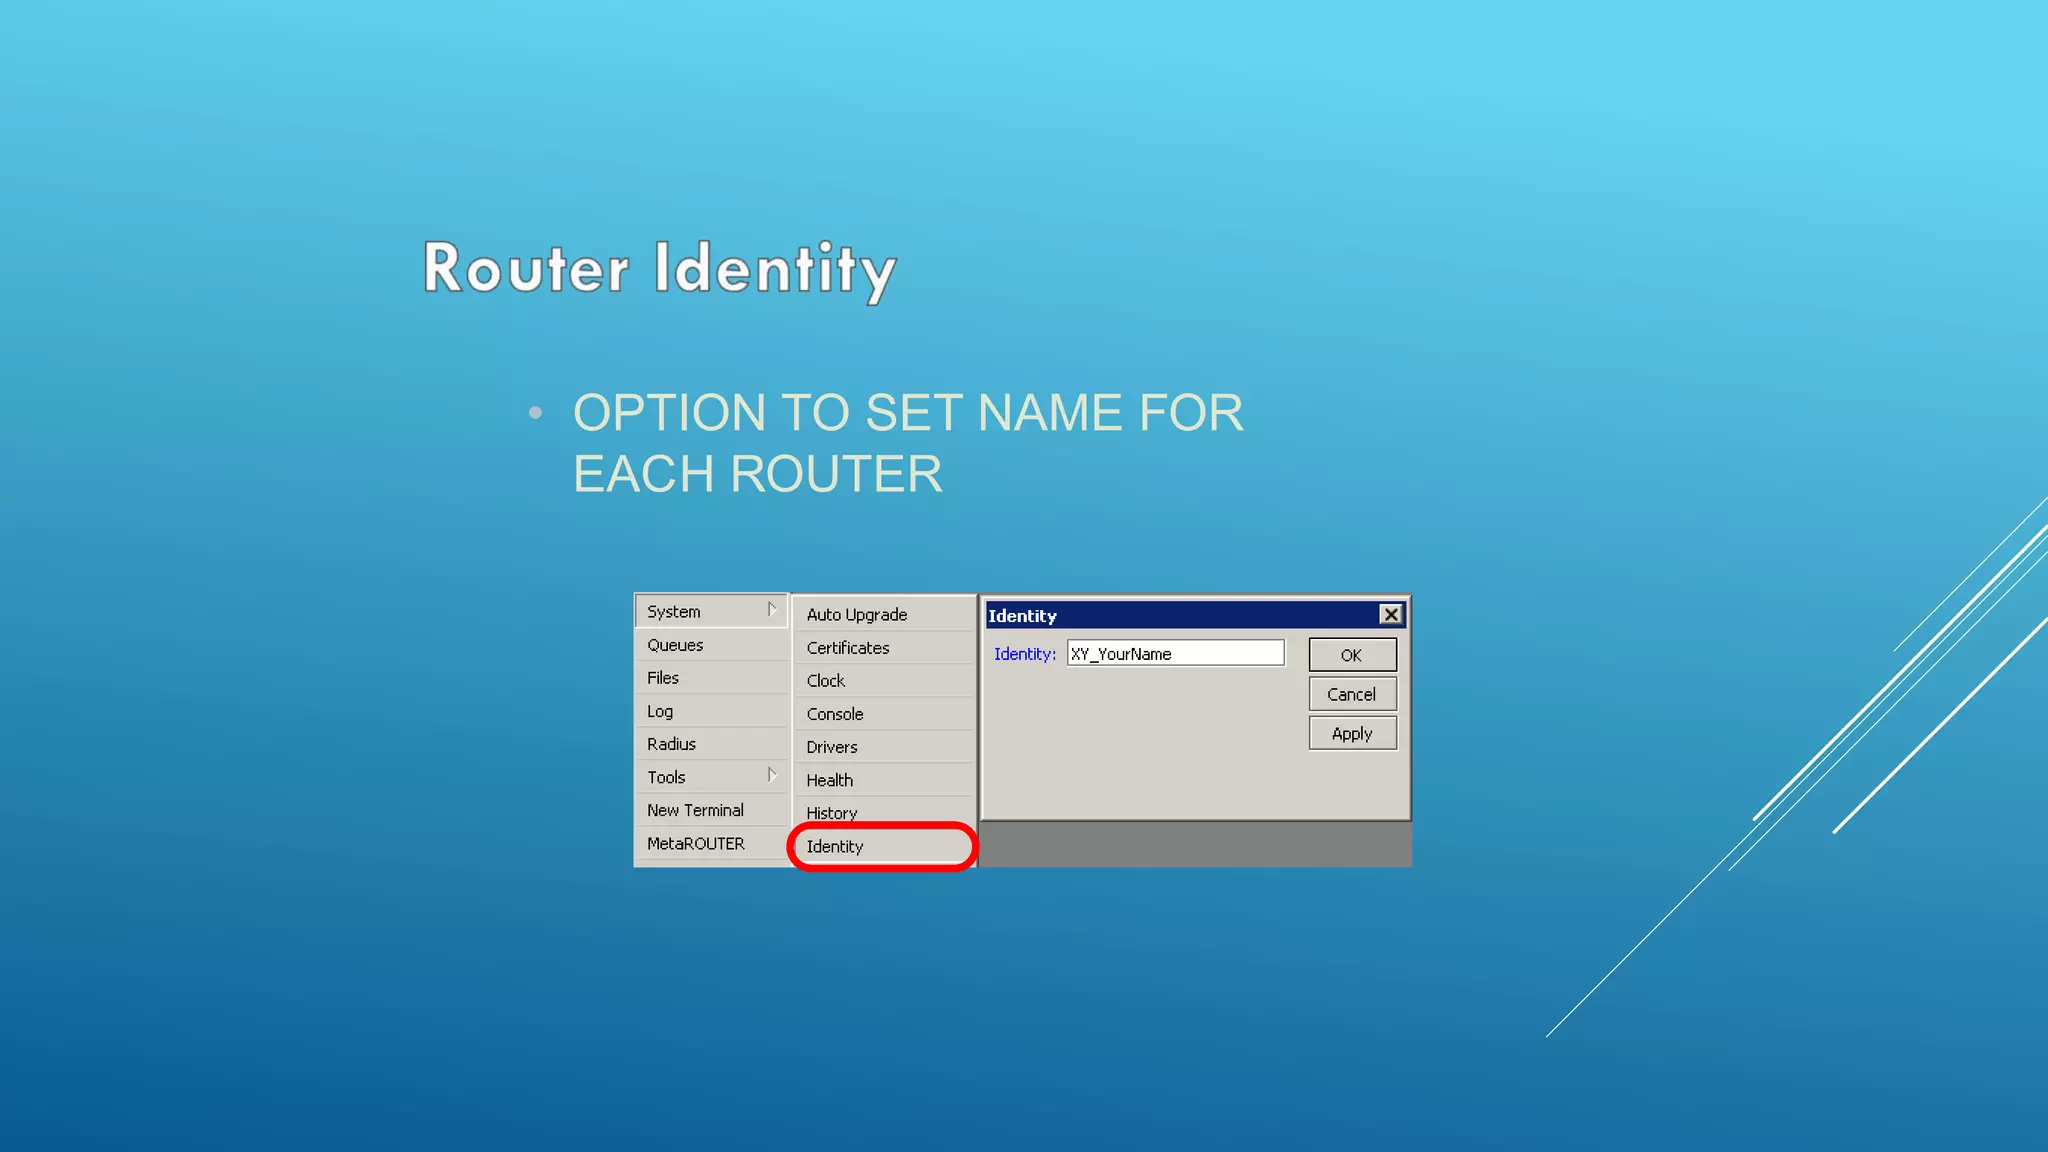
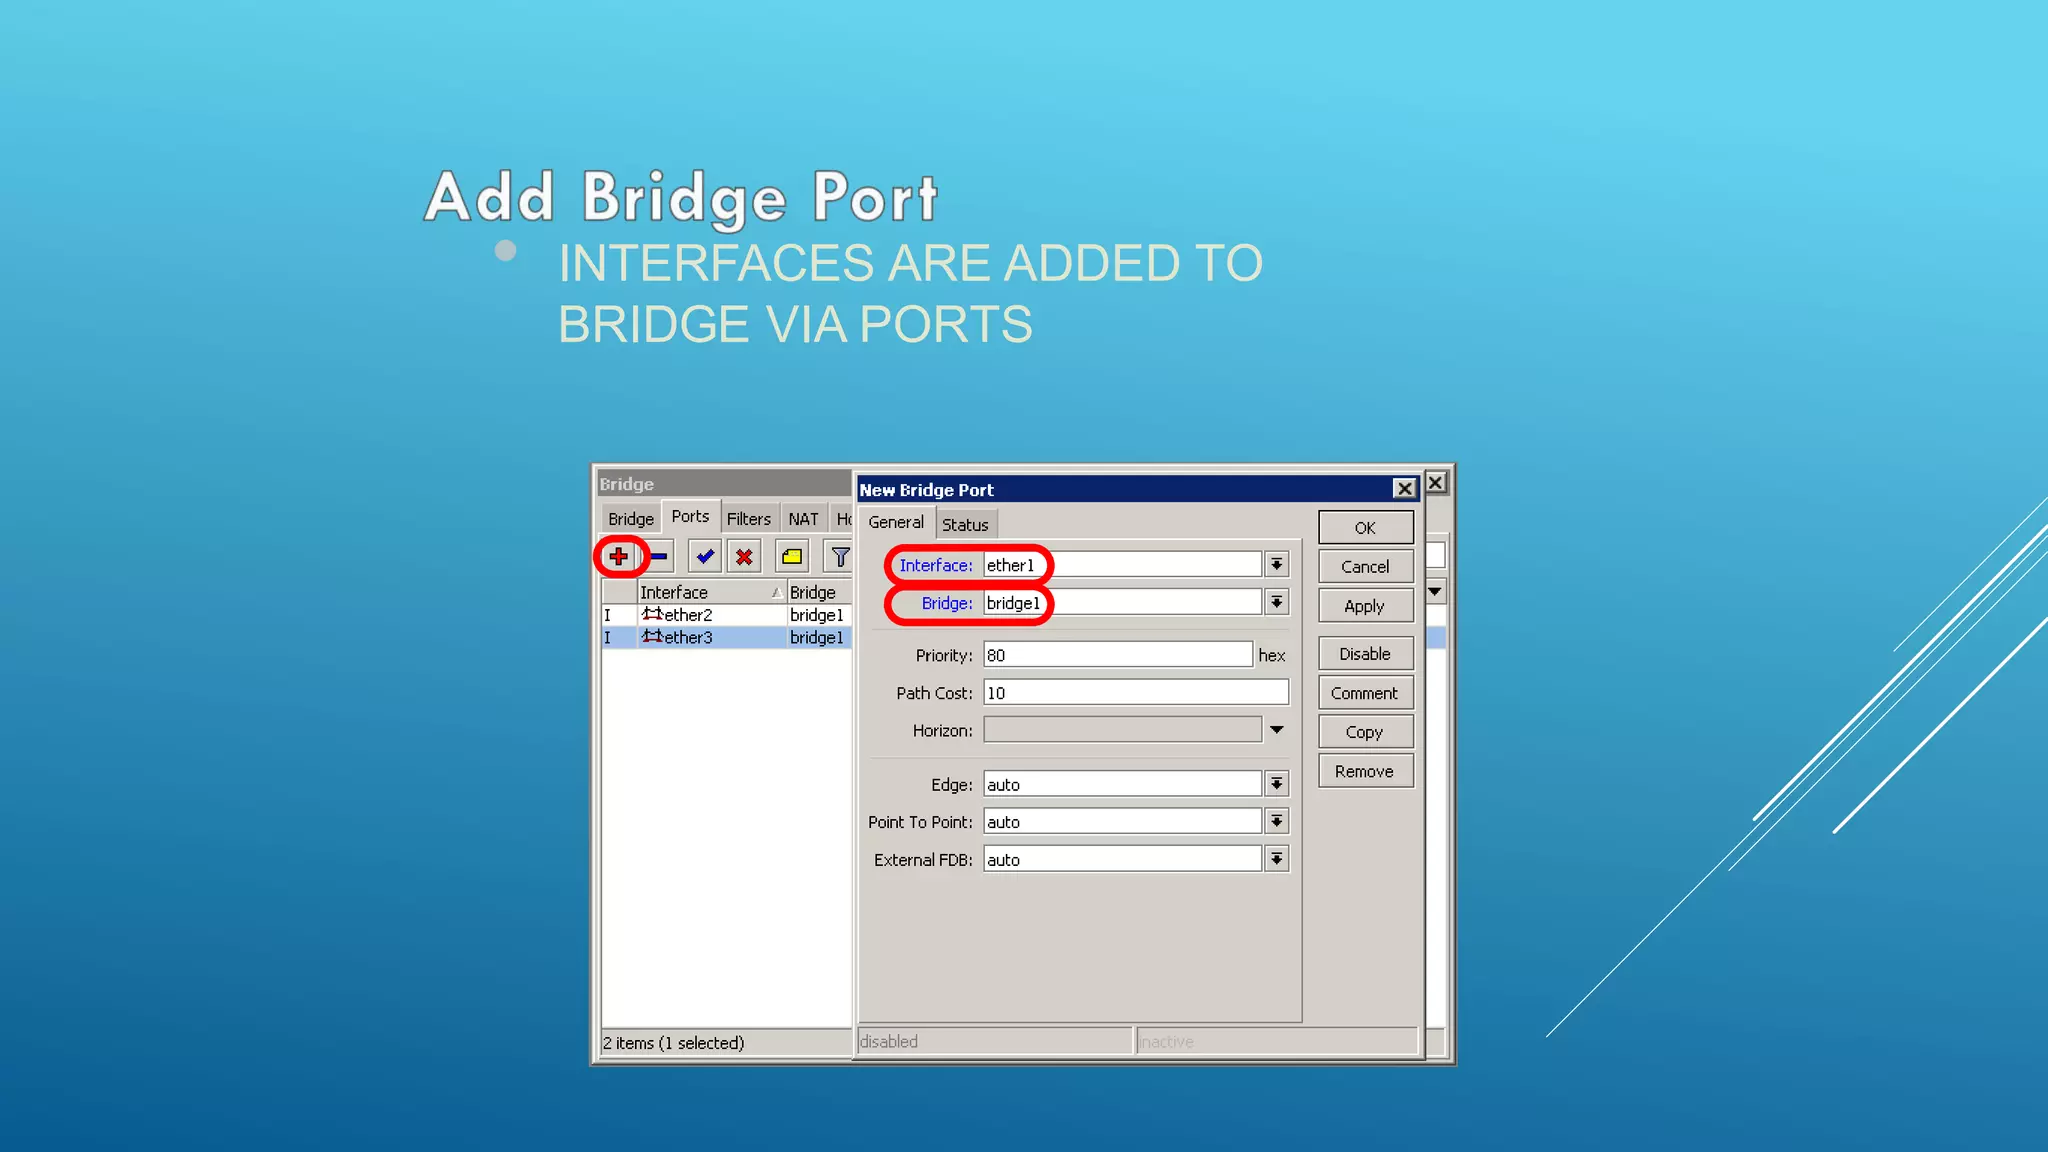
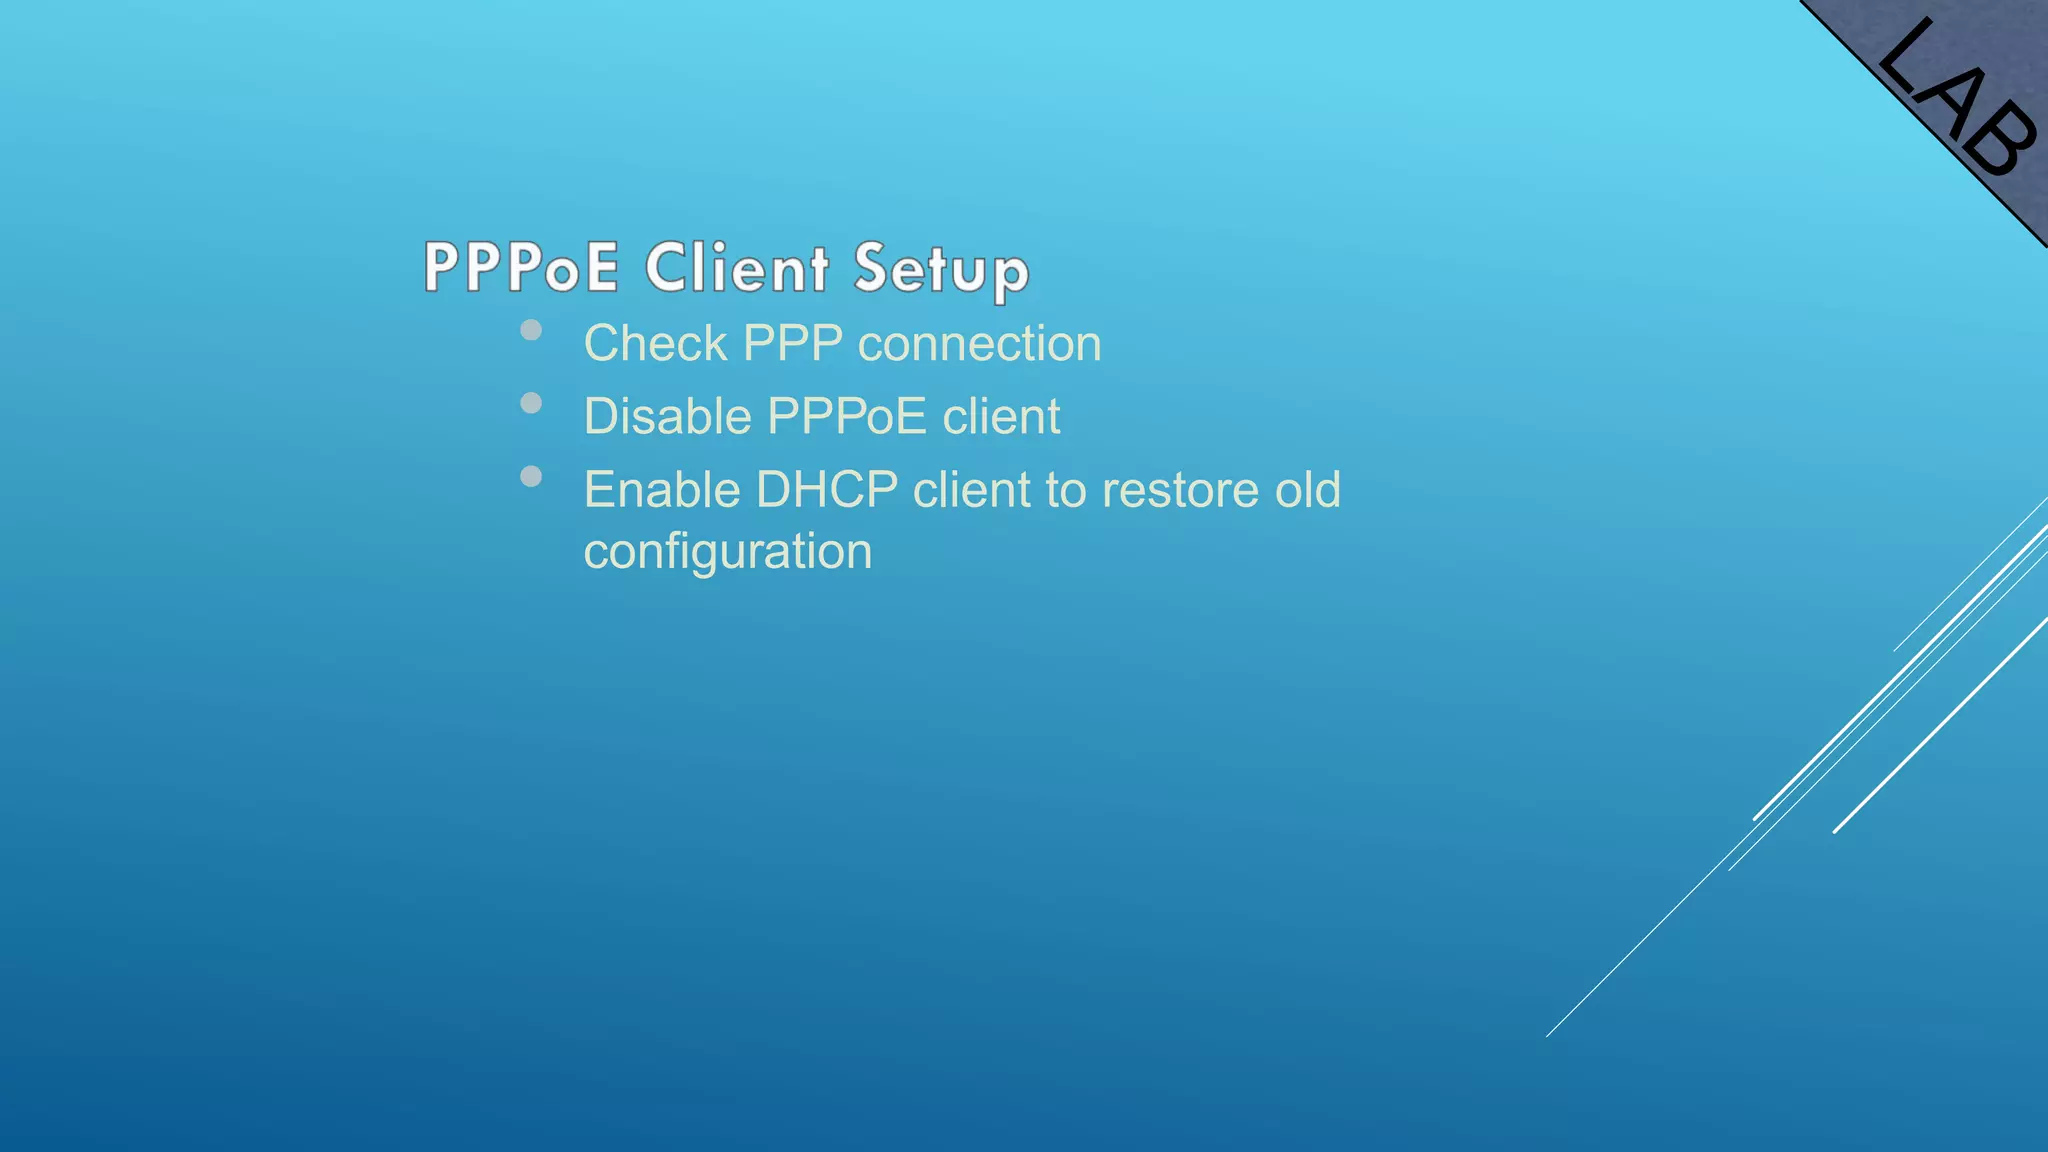
![• CLICK ON THE [...] BUTTON TO
SEE YOUR ROUTER](https://image.slidesharecdn.com/mtcnalebanonppt-161028175136/75/MikroTik-MTCNA-16-2048.jpg)


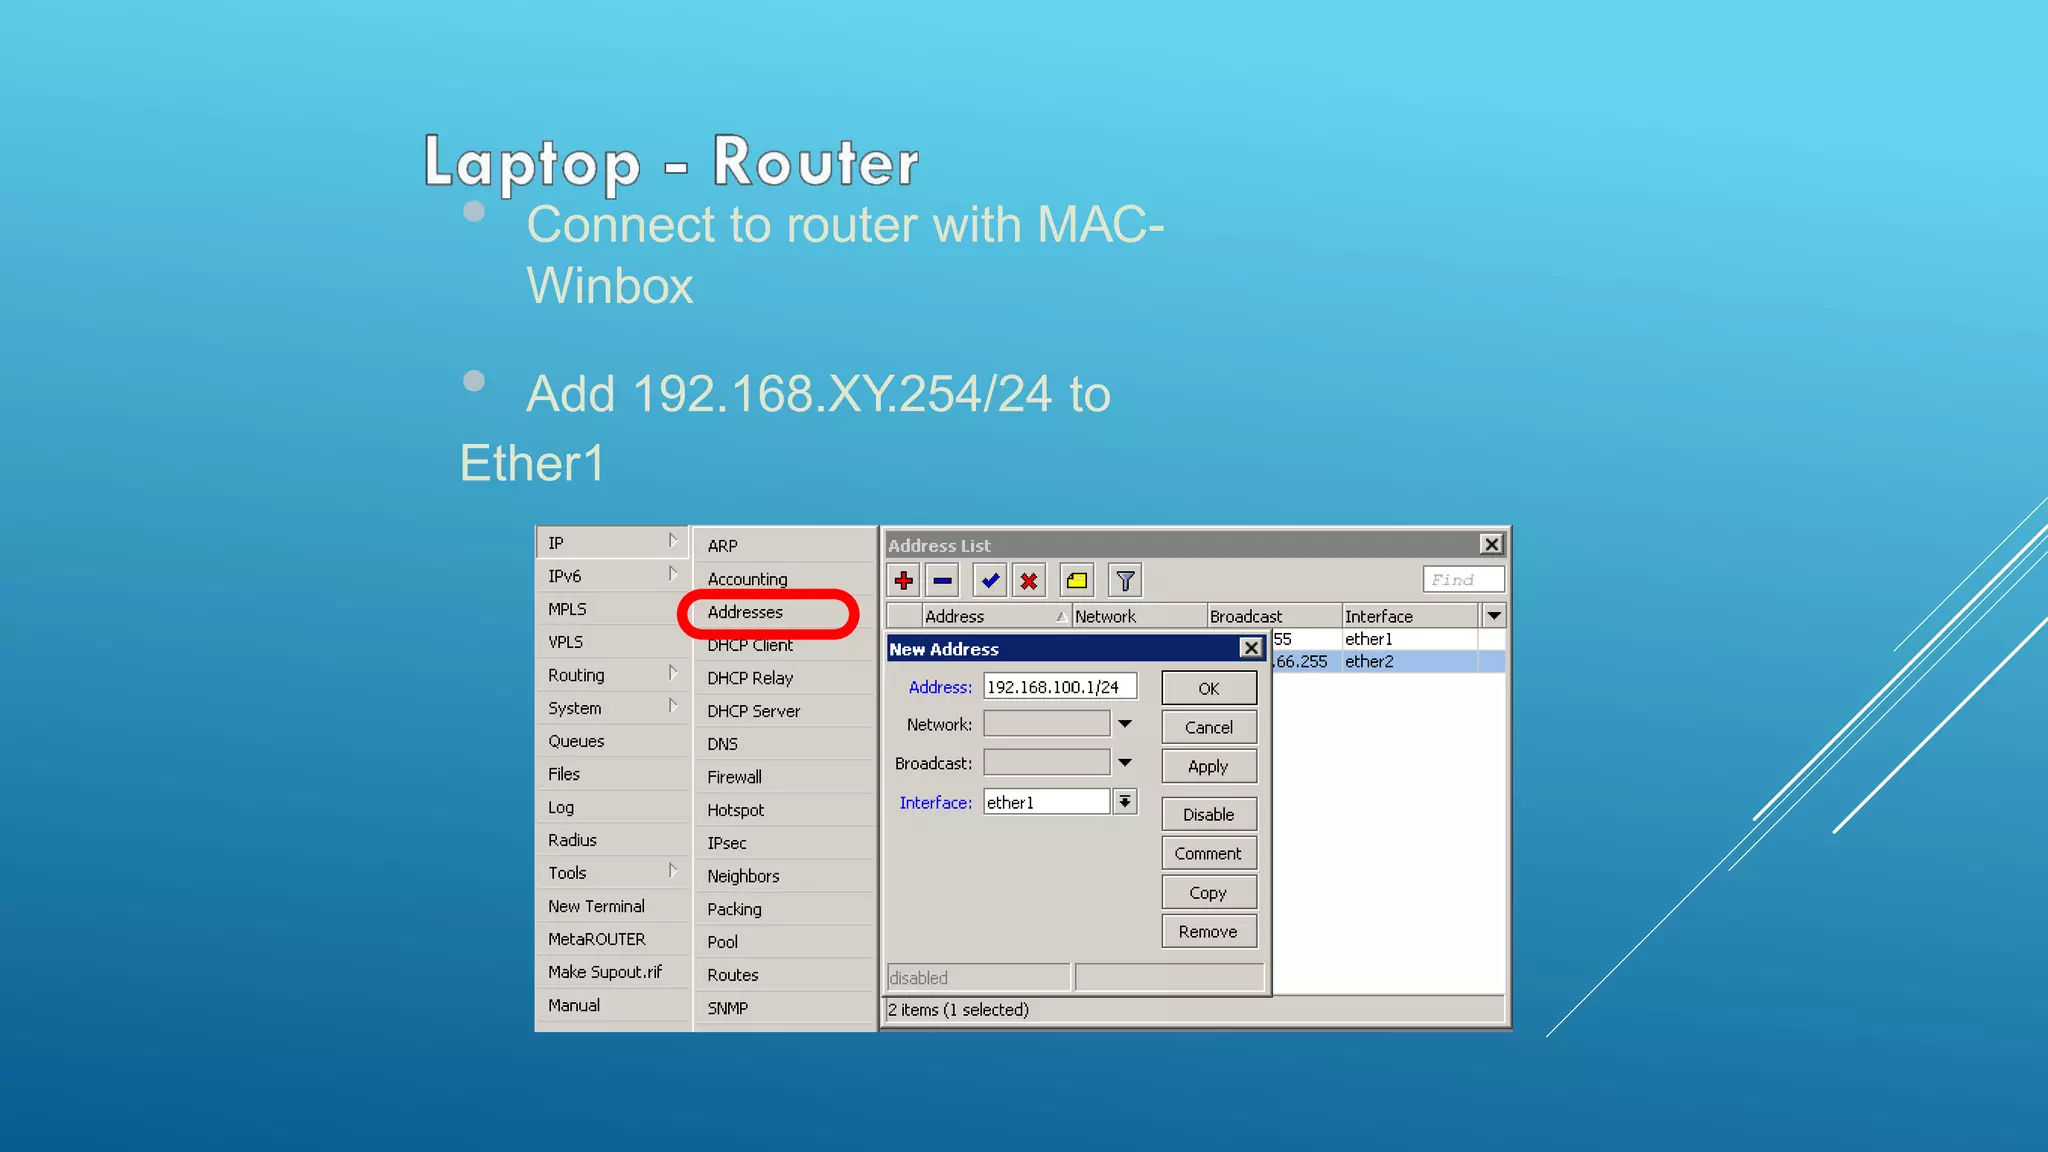


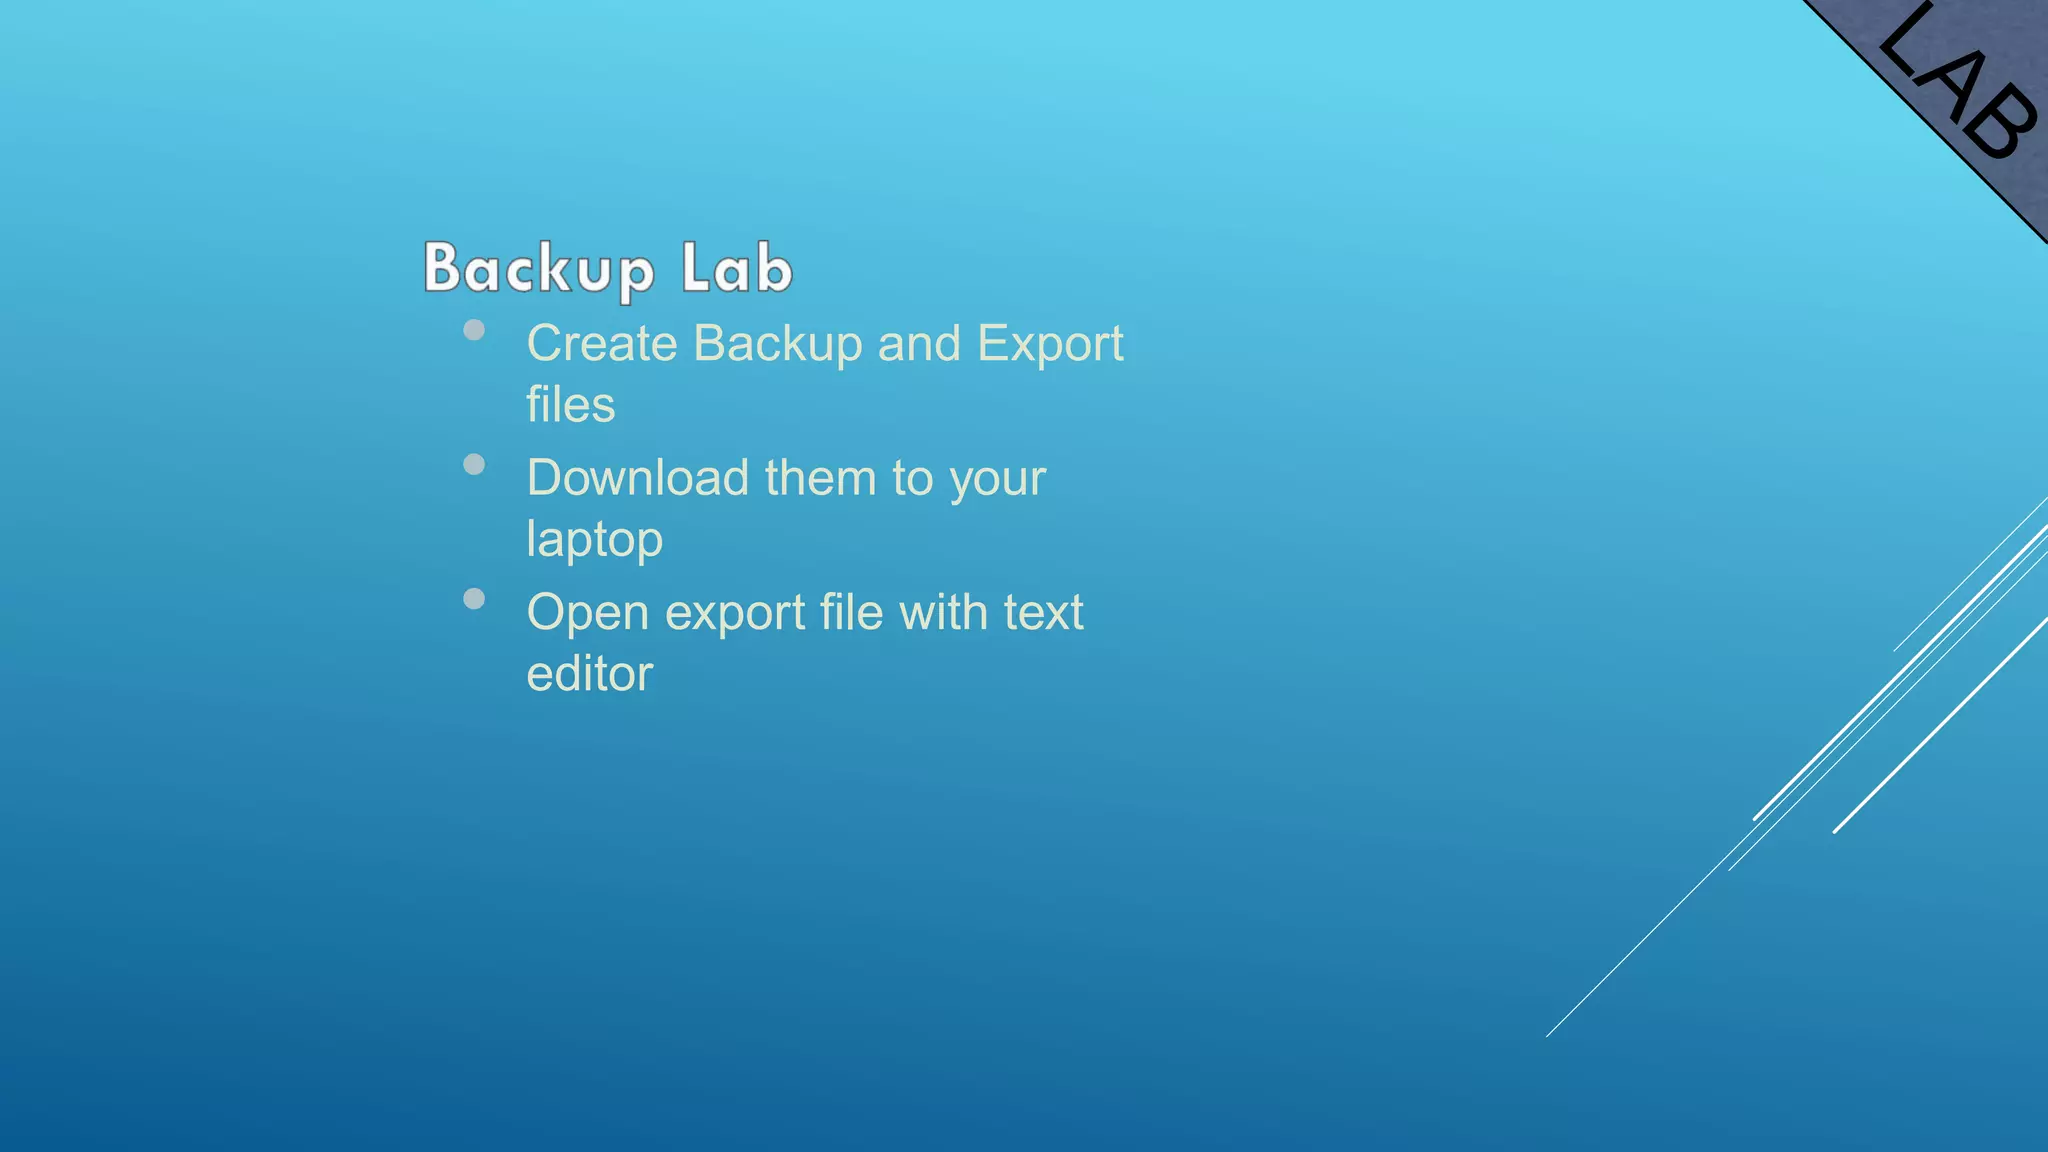
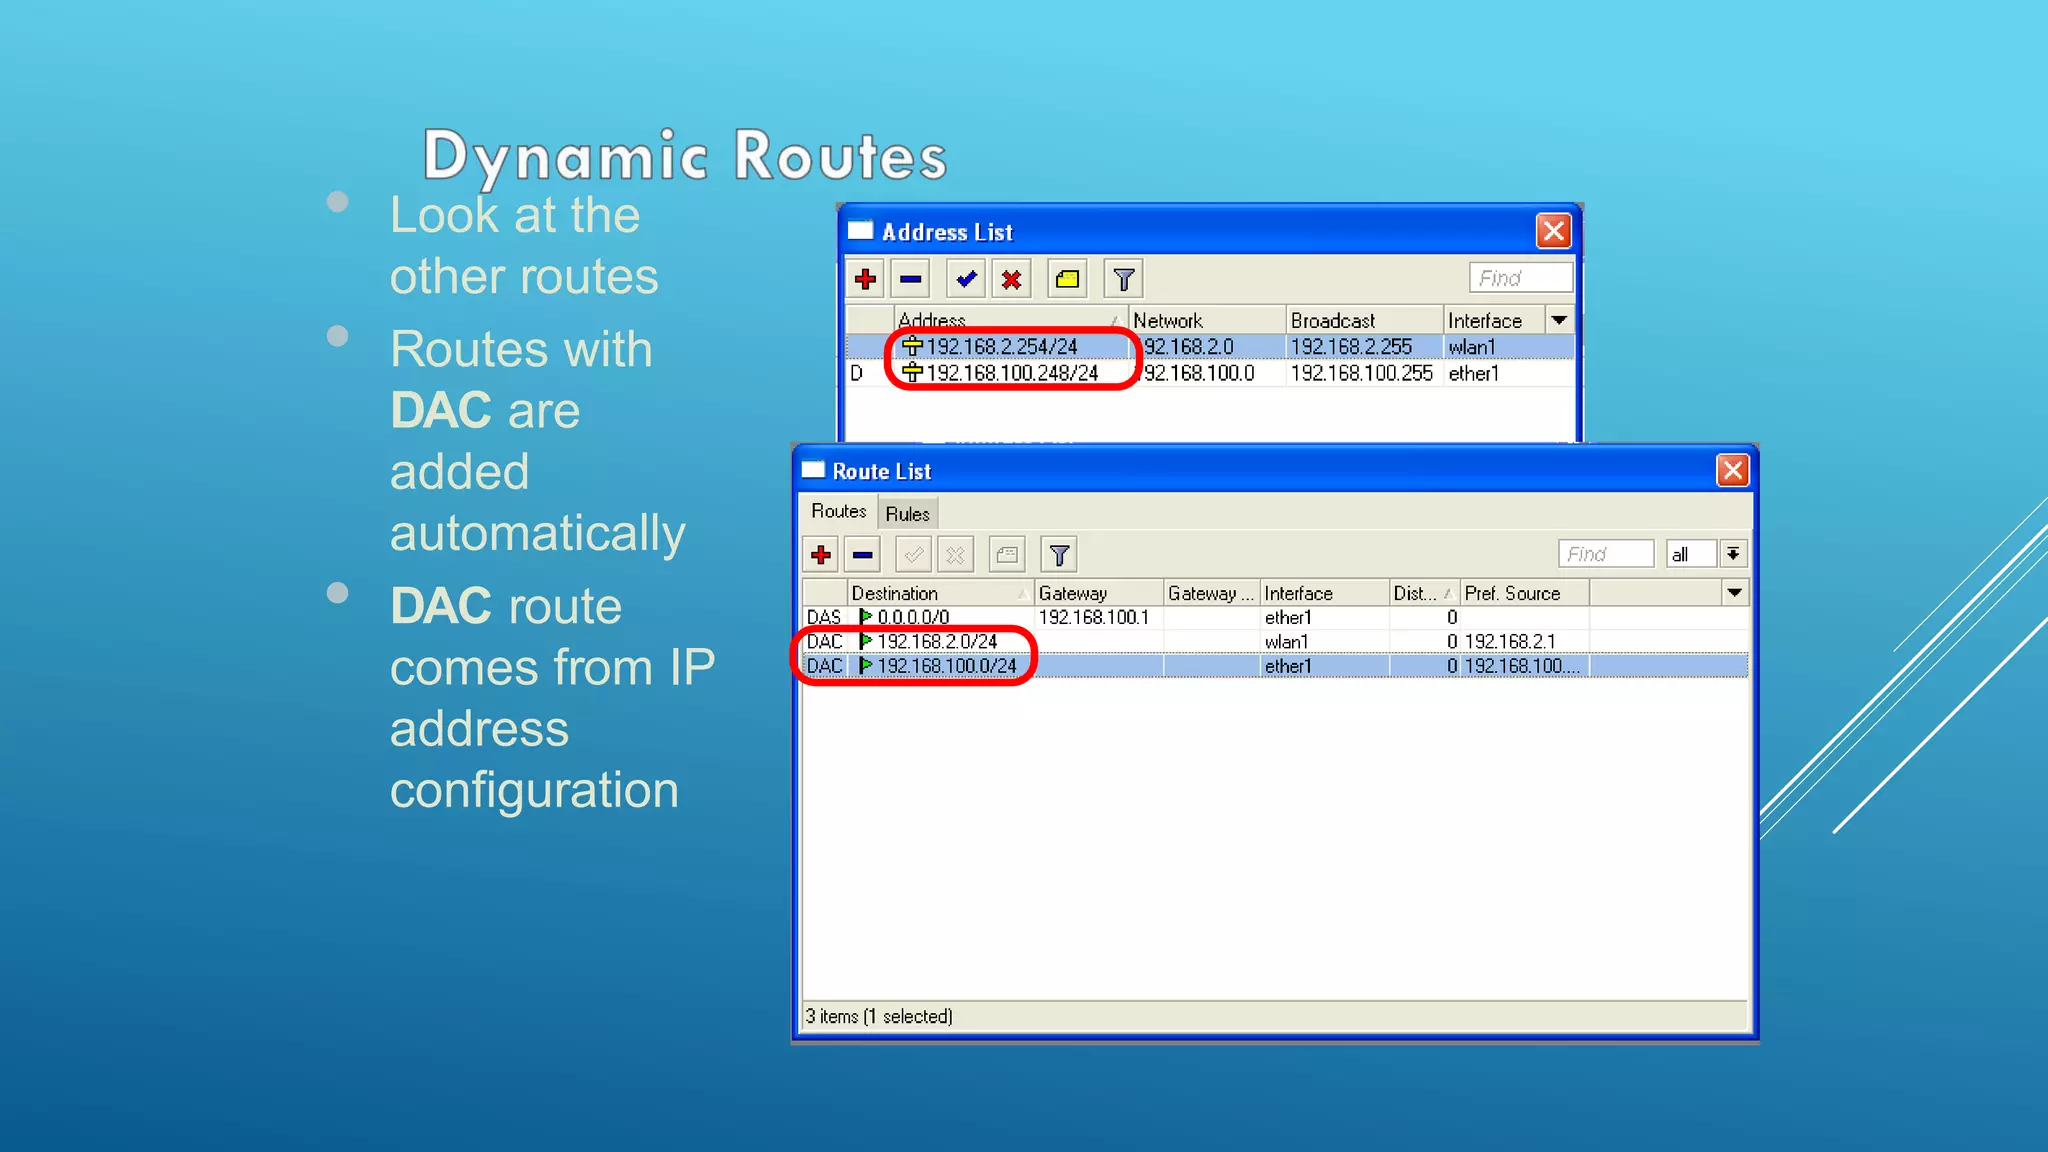
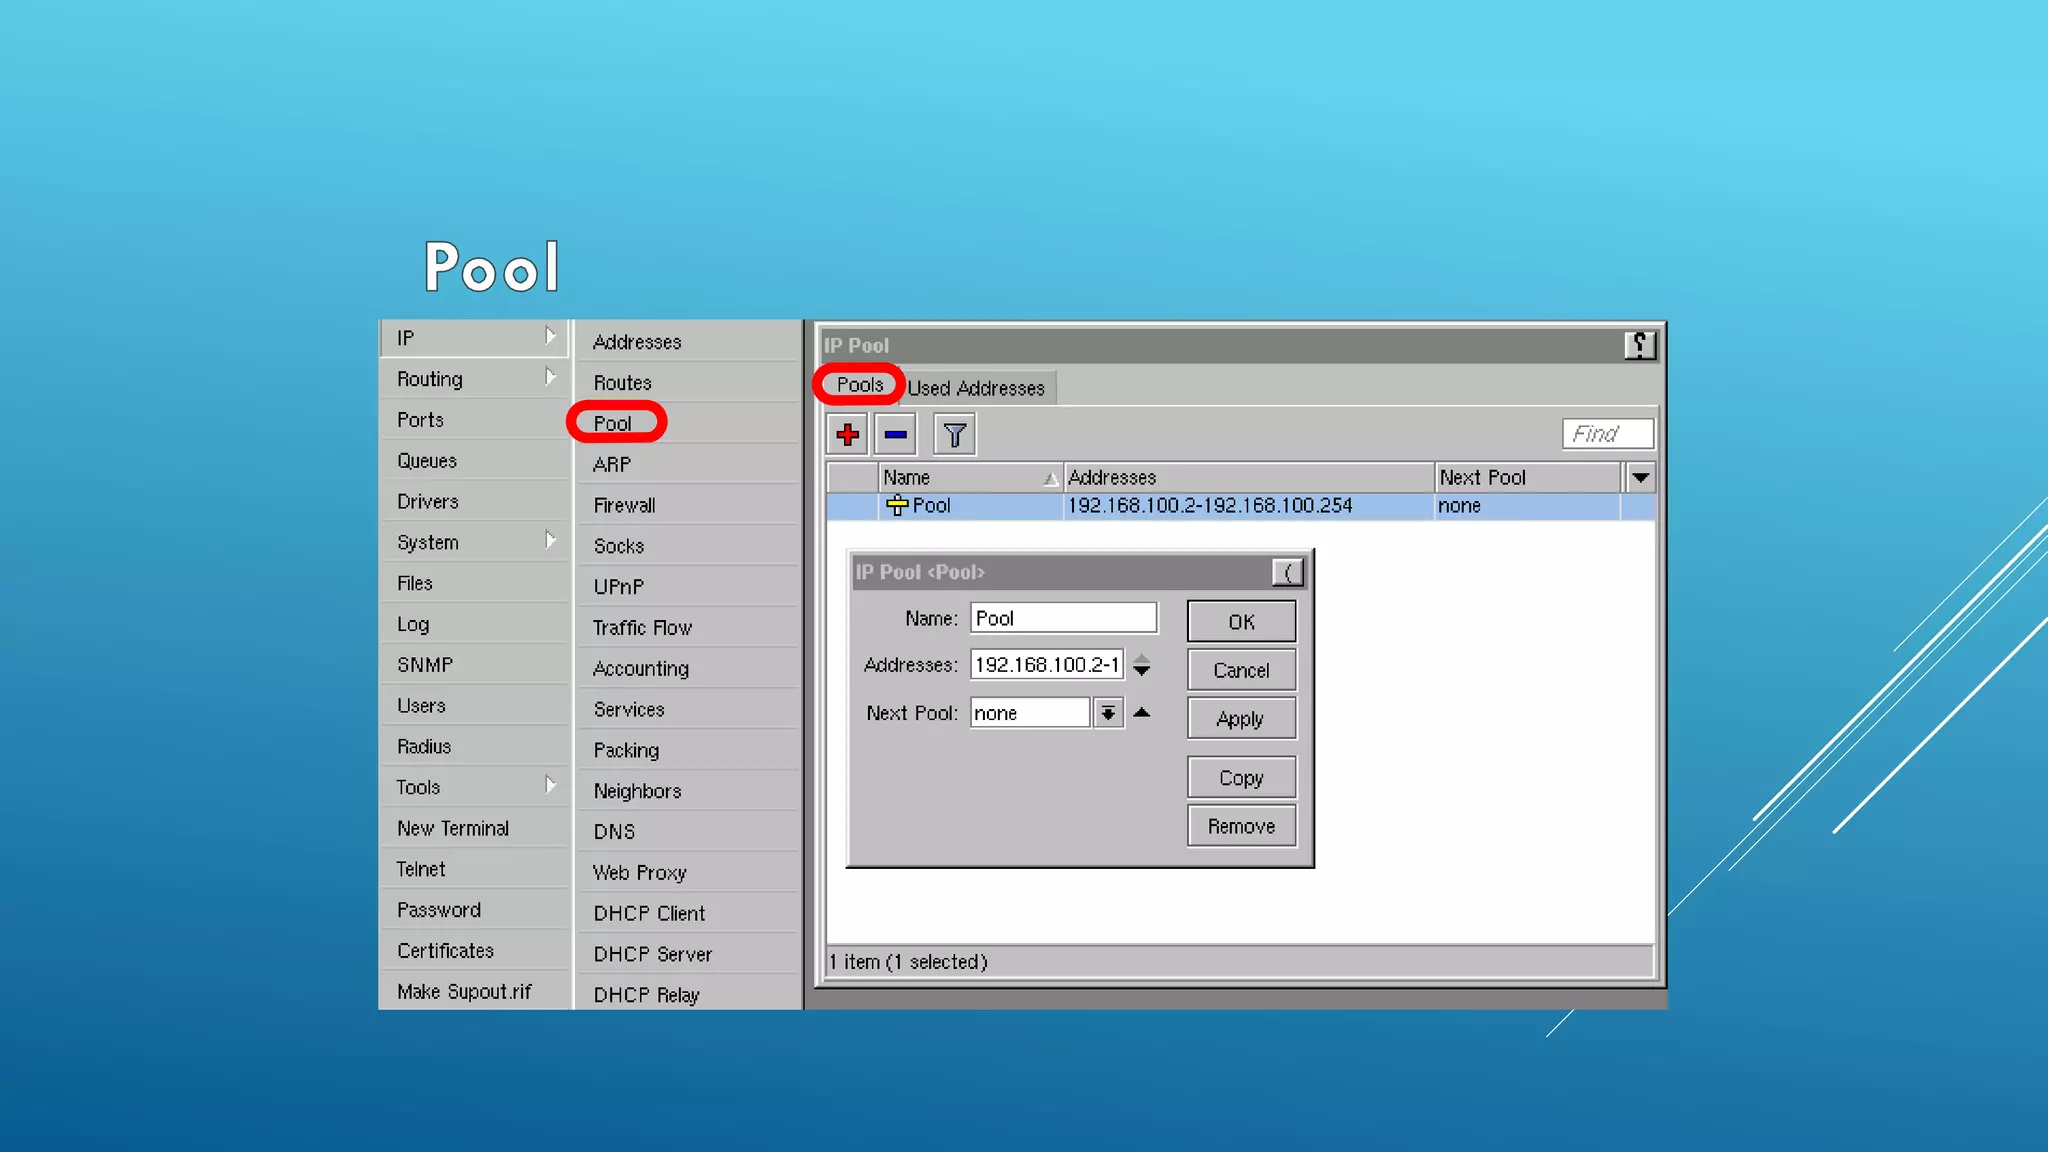
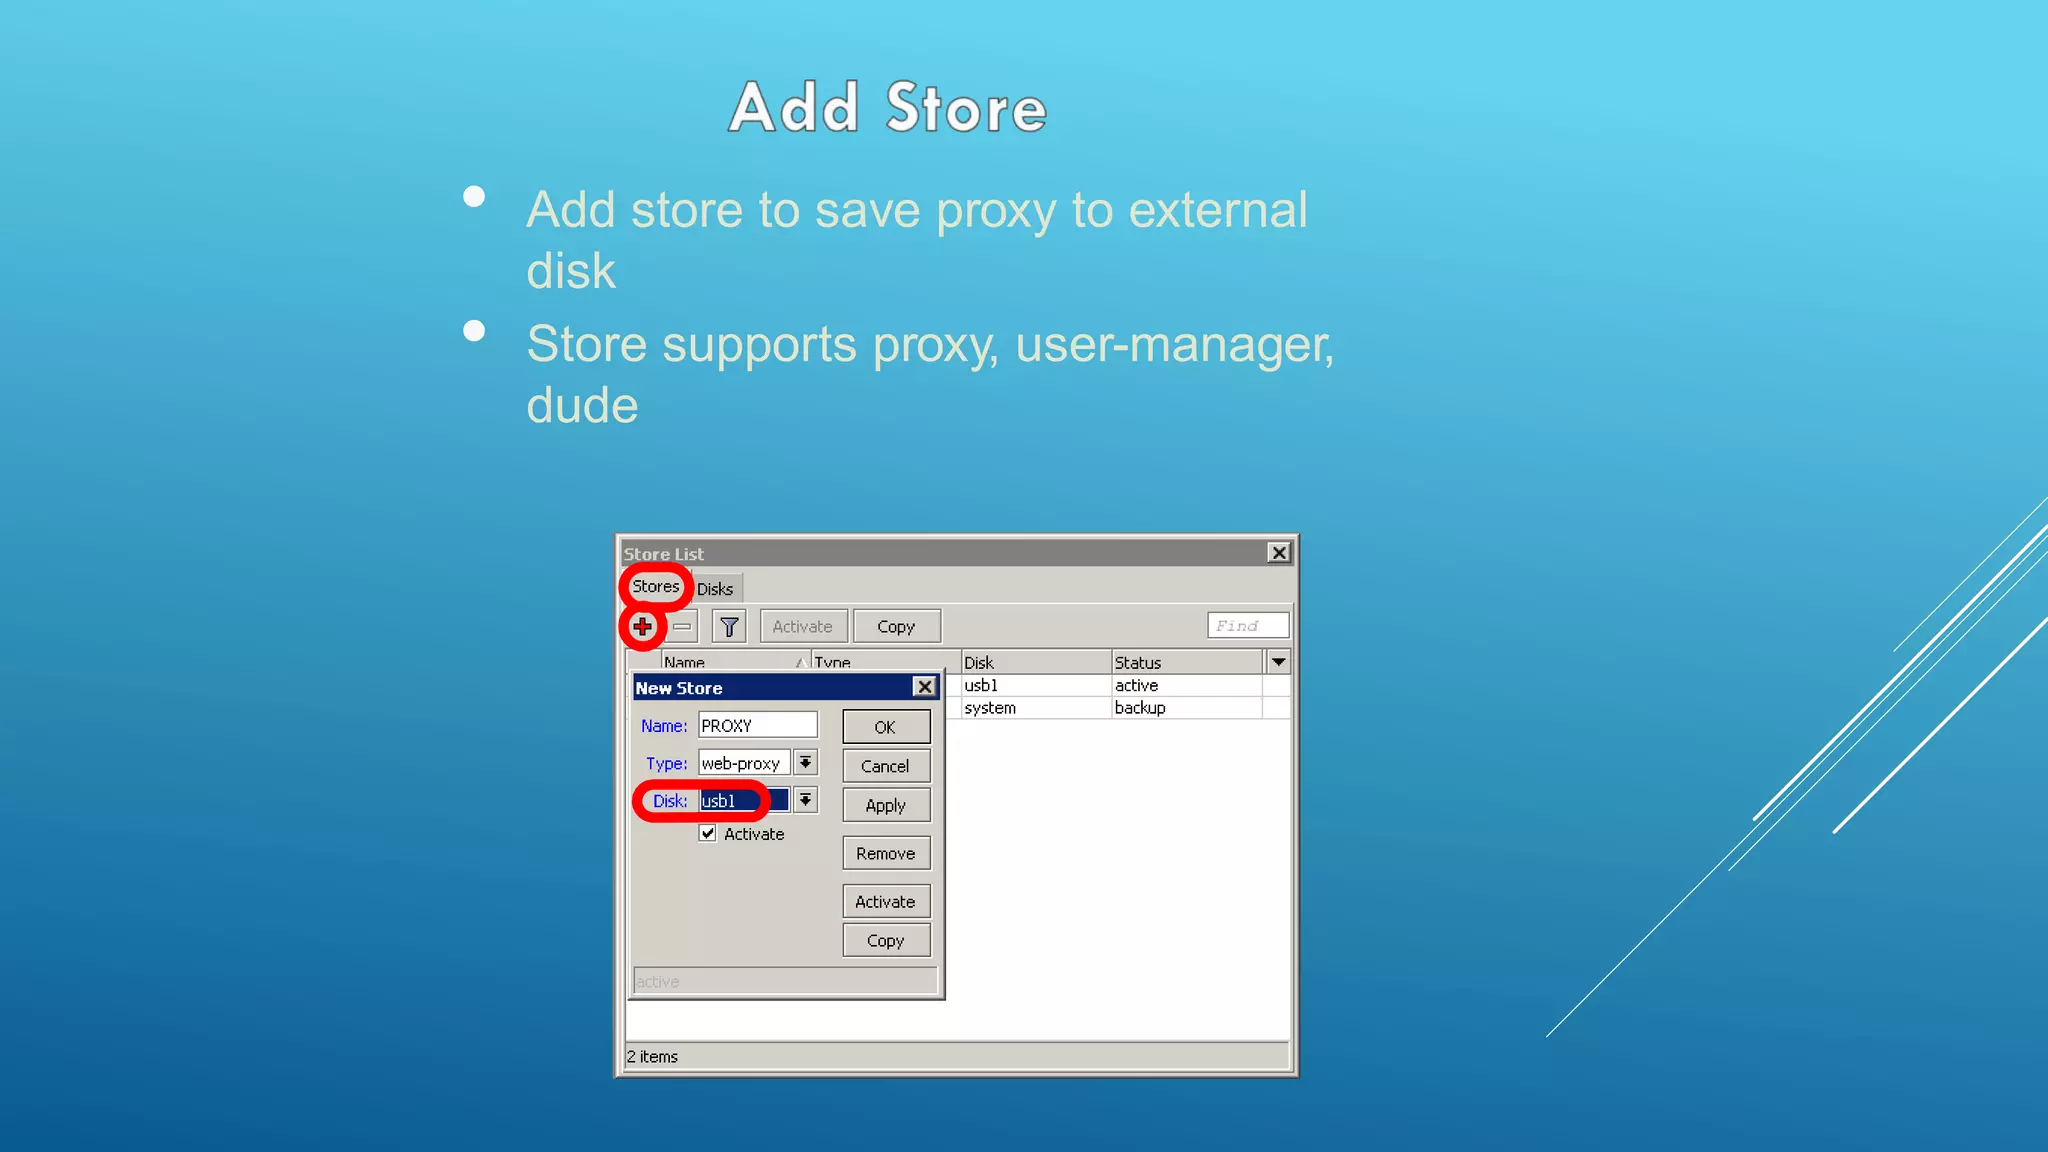
![• Additionally use export and import
commands in CLI
• Export files are editable
• Passwords are not saved with
export
/export file=conf-august-2009
/ ip firewall filter export file=firewall-aug-
2009
/ file print
/ import [Tab]](https://image.slidesharecdn.com/mtcnalebanonppt-161028175136/75/MikroTik-MTCNA-63-2048.jpg)


![Ccnp presentation [Day 1-3] Class](https://cdn.slidesharecdn.com/ss_thumbnails/ccnppresentation-day1-3demo-200416075108-thumbnail.jpg?width=640&height=640&fit=bounds)