Download to read offline


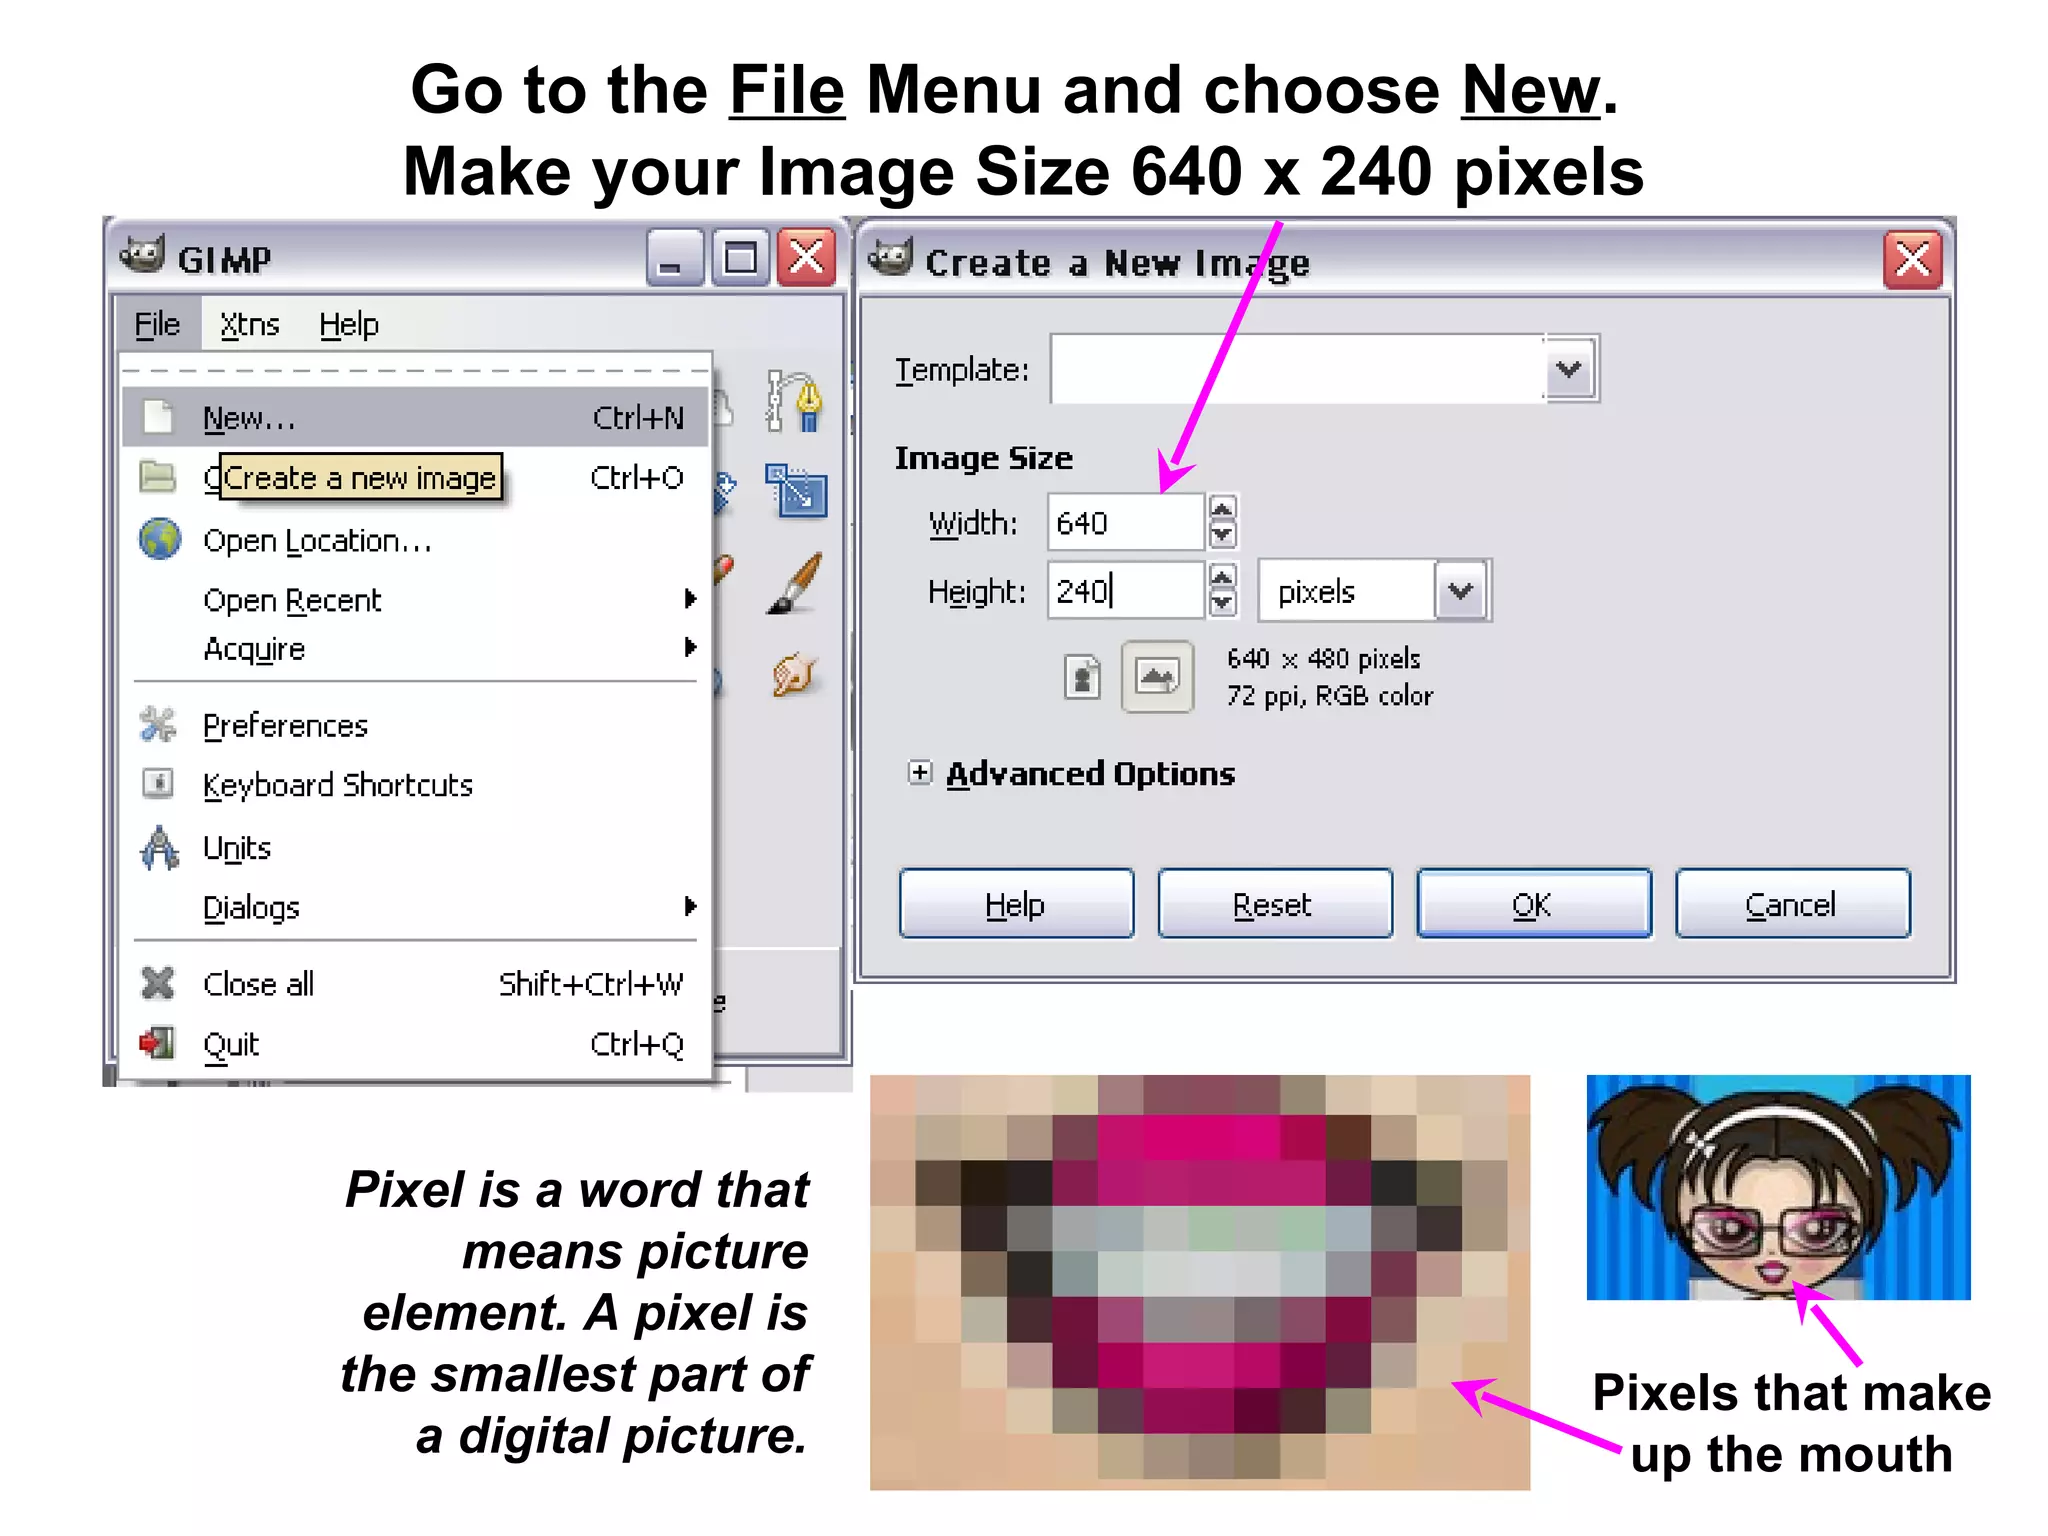
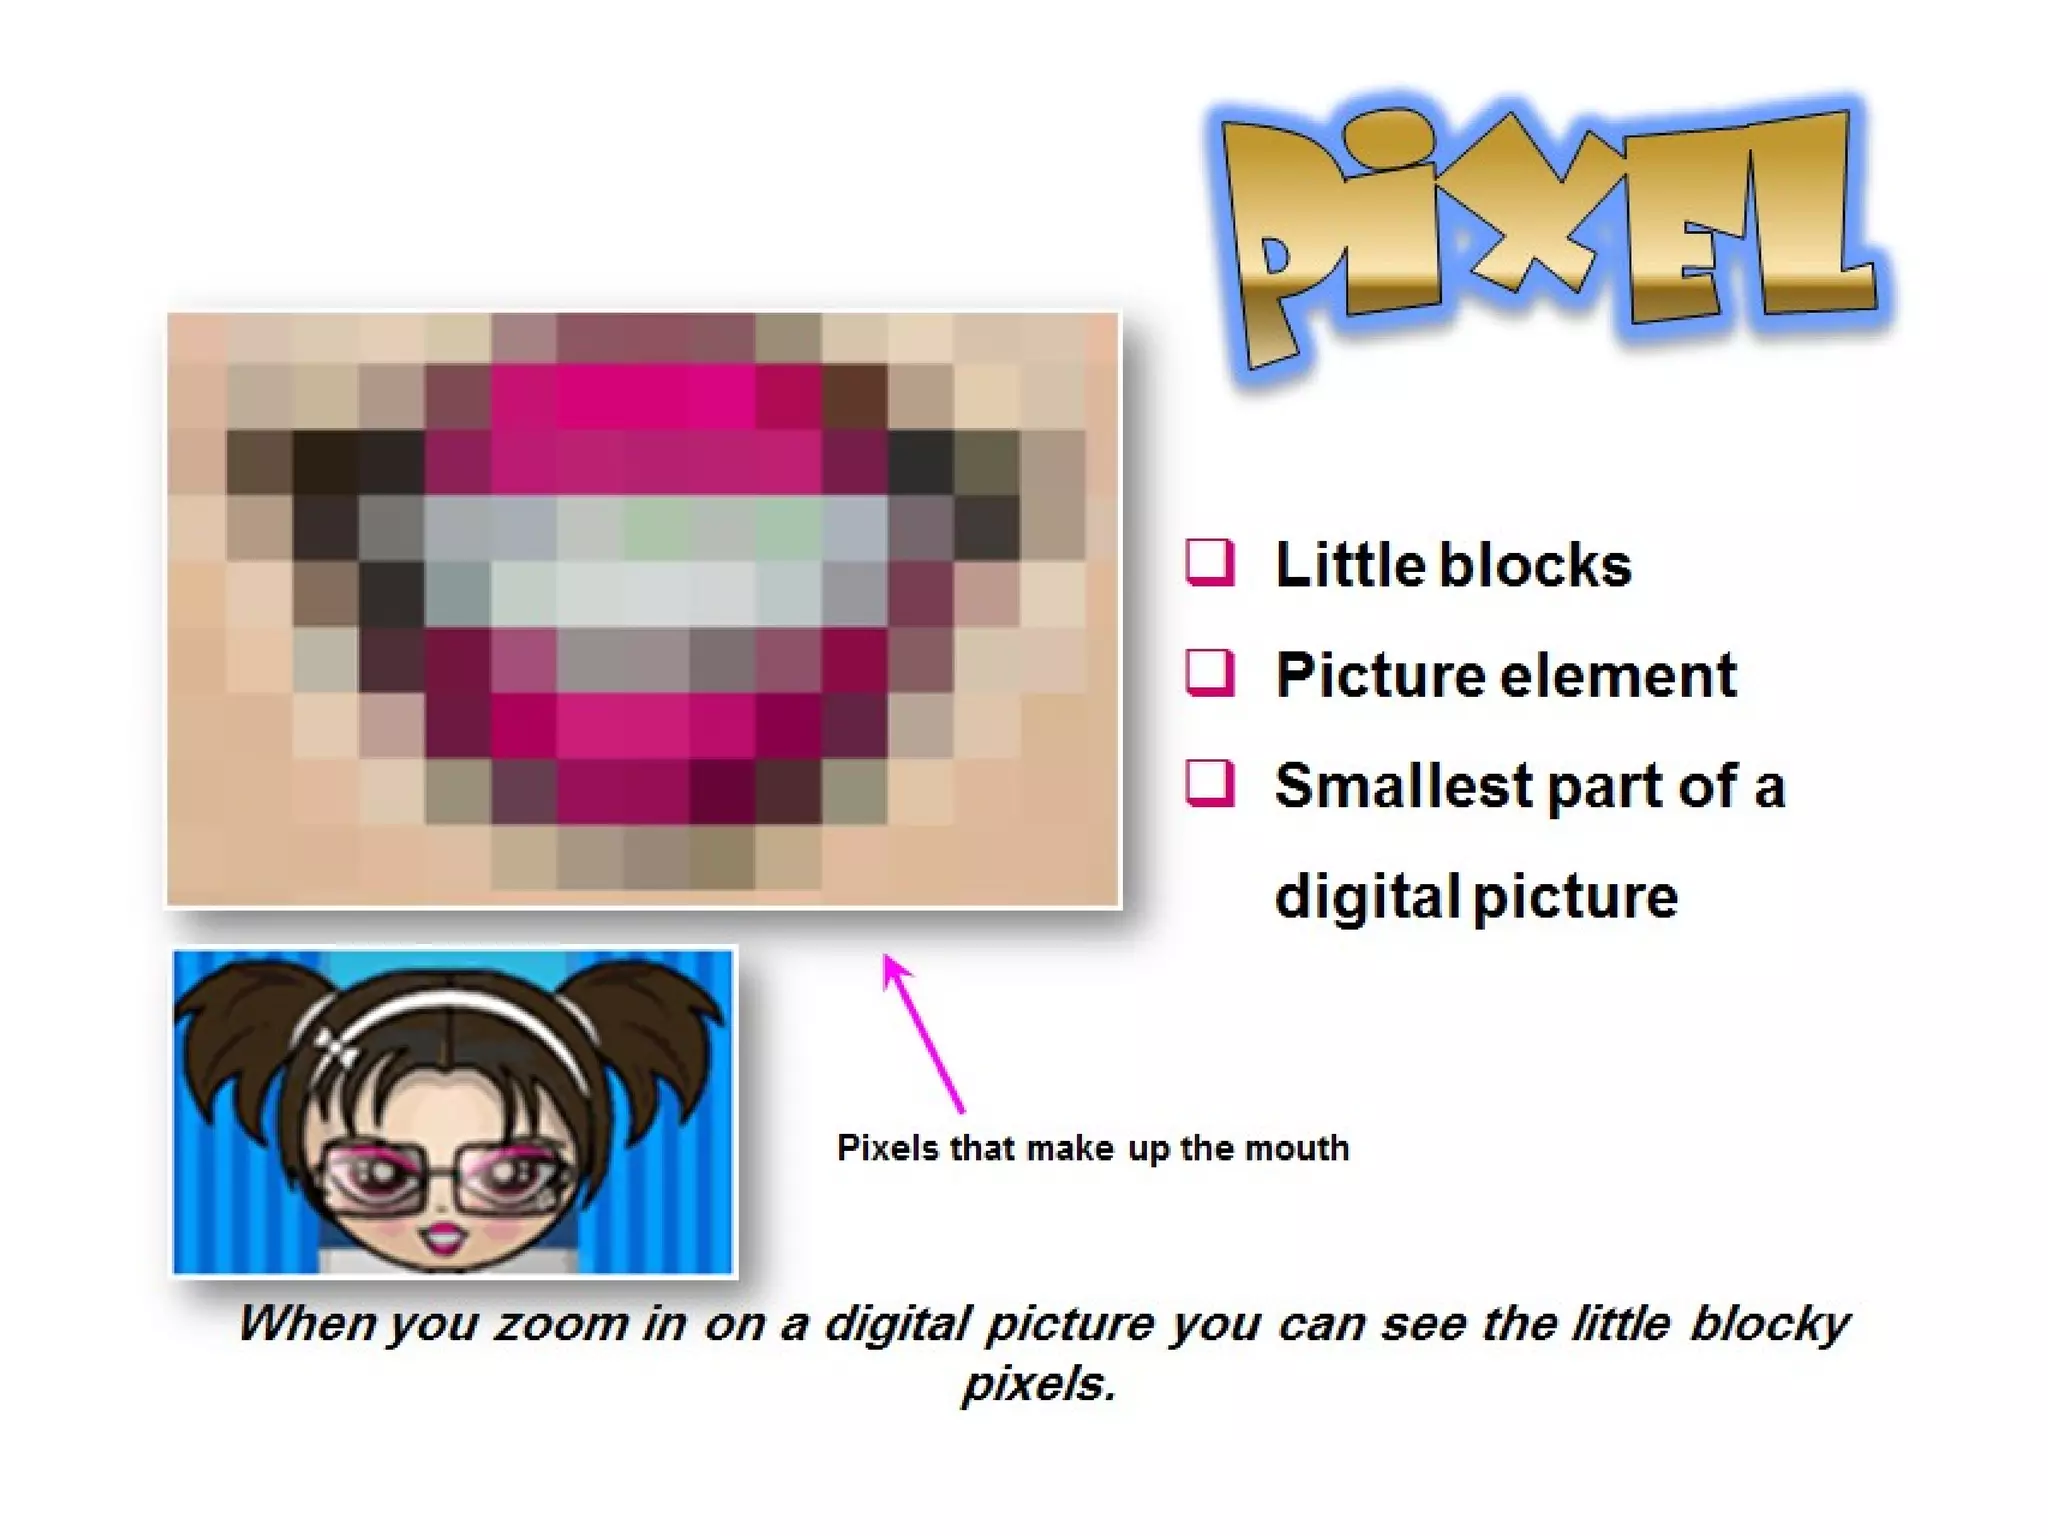
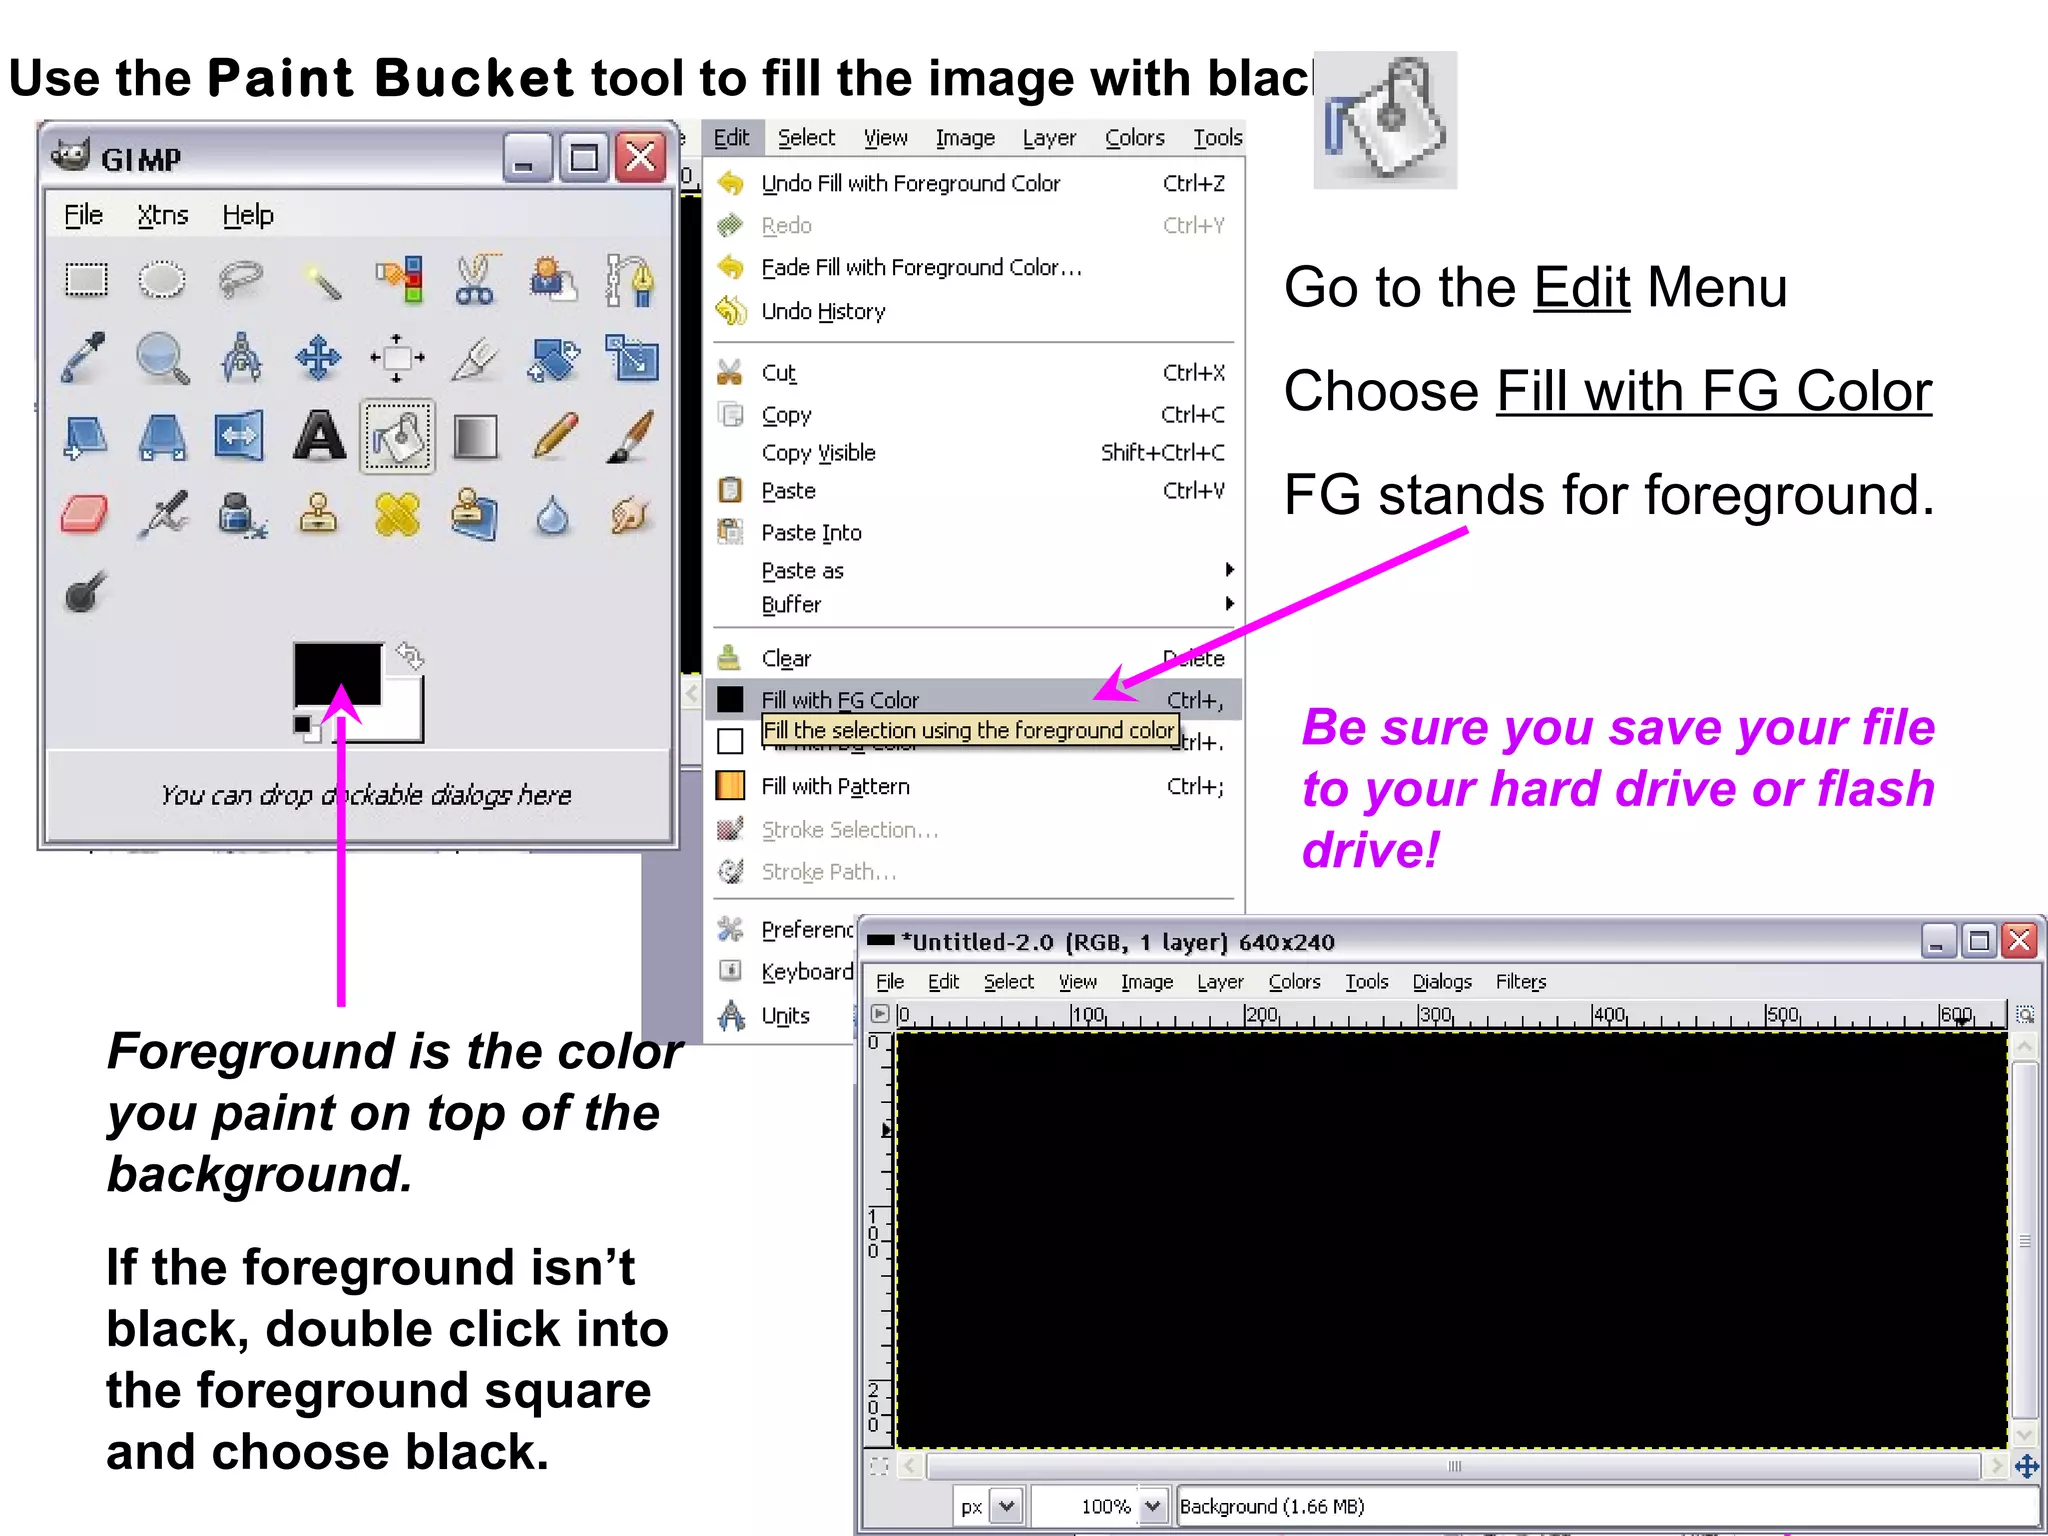
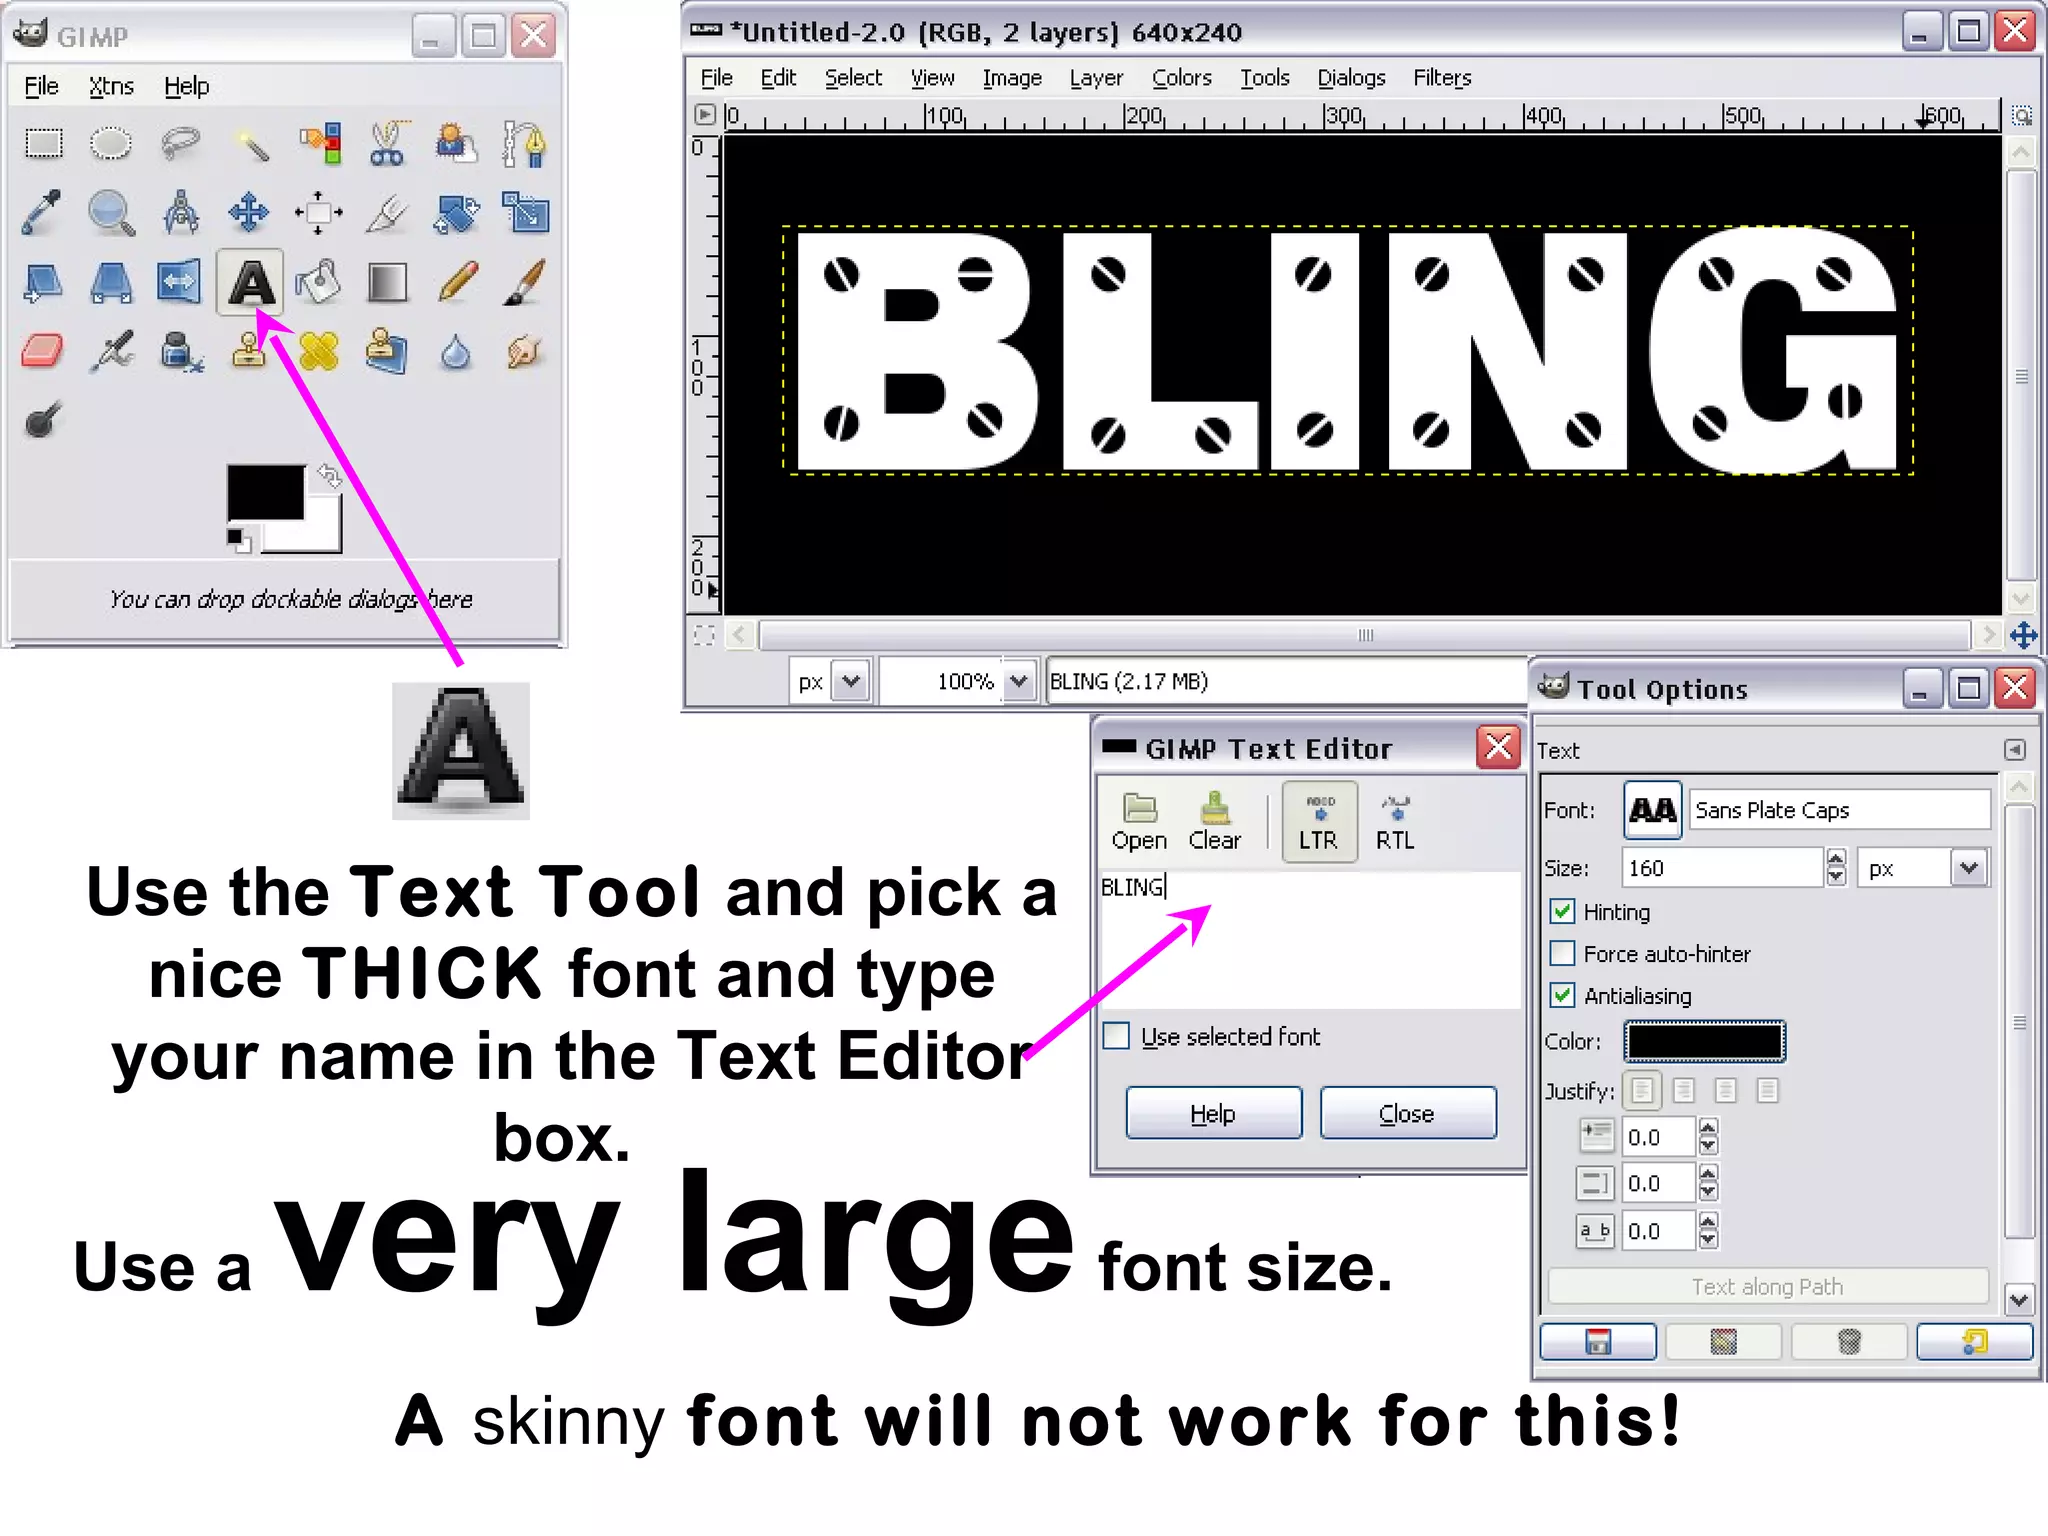
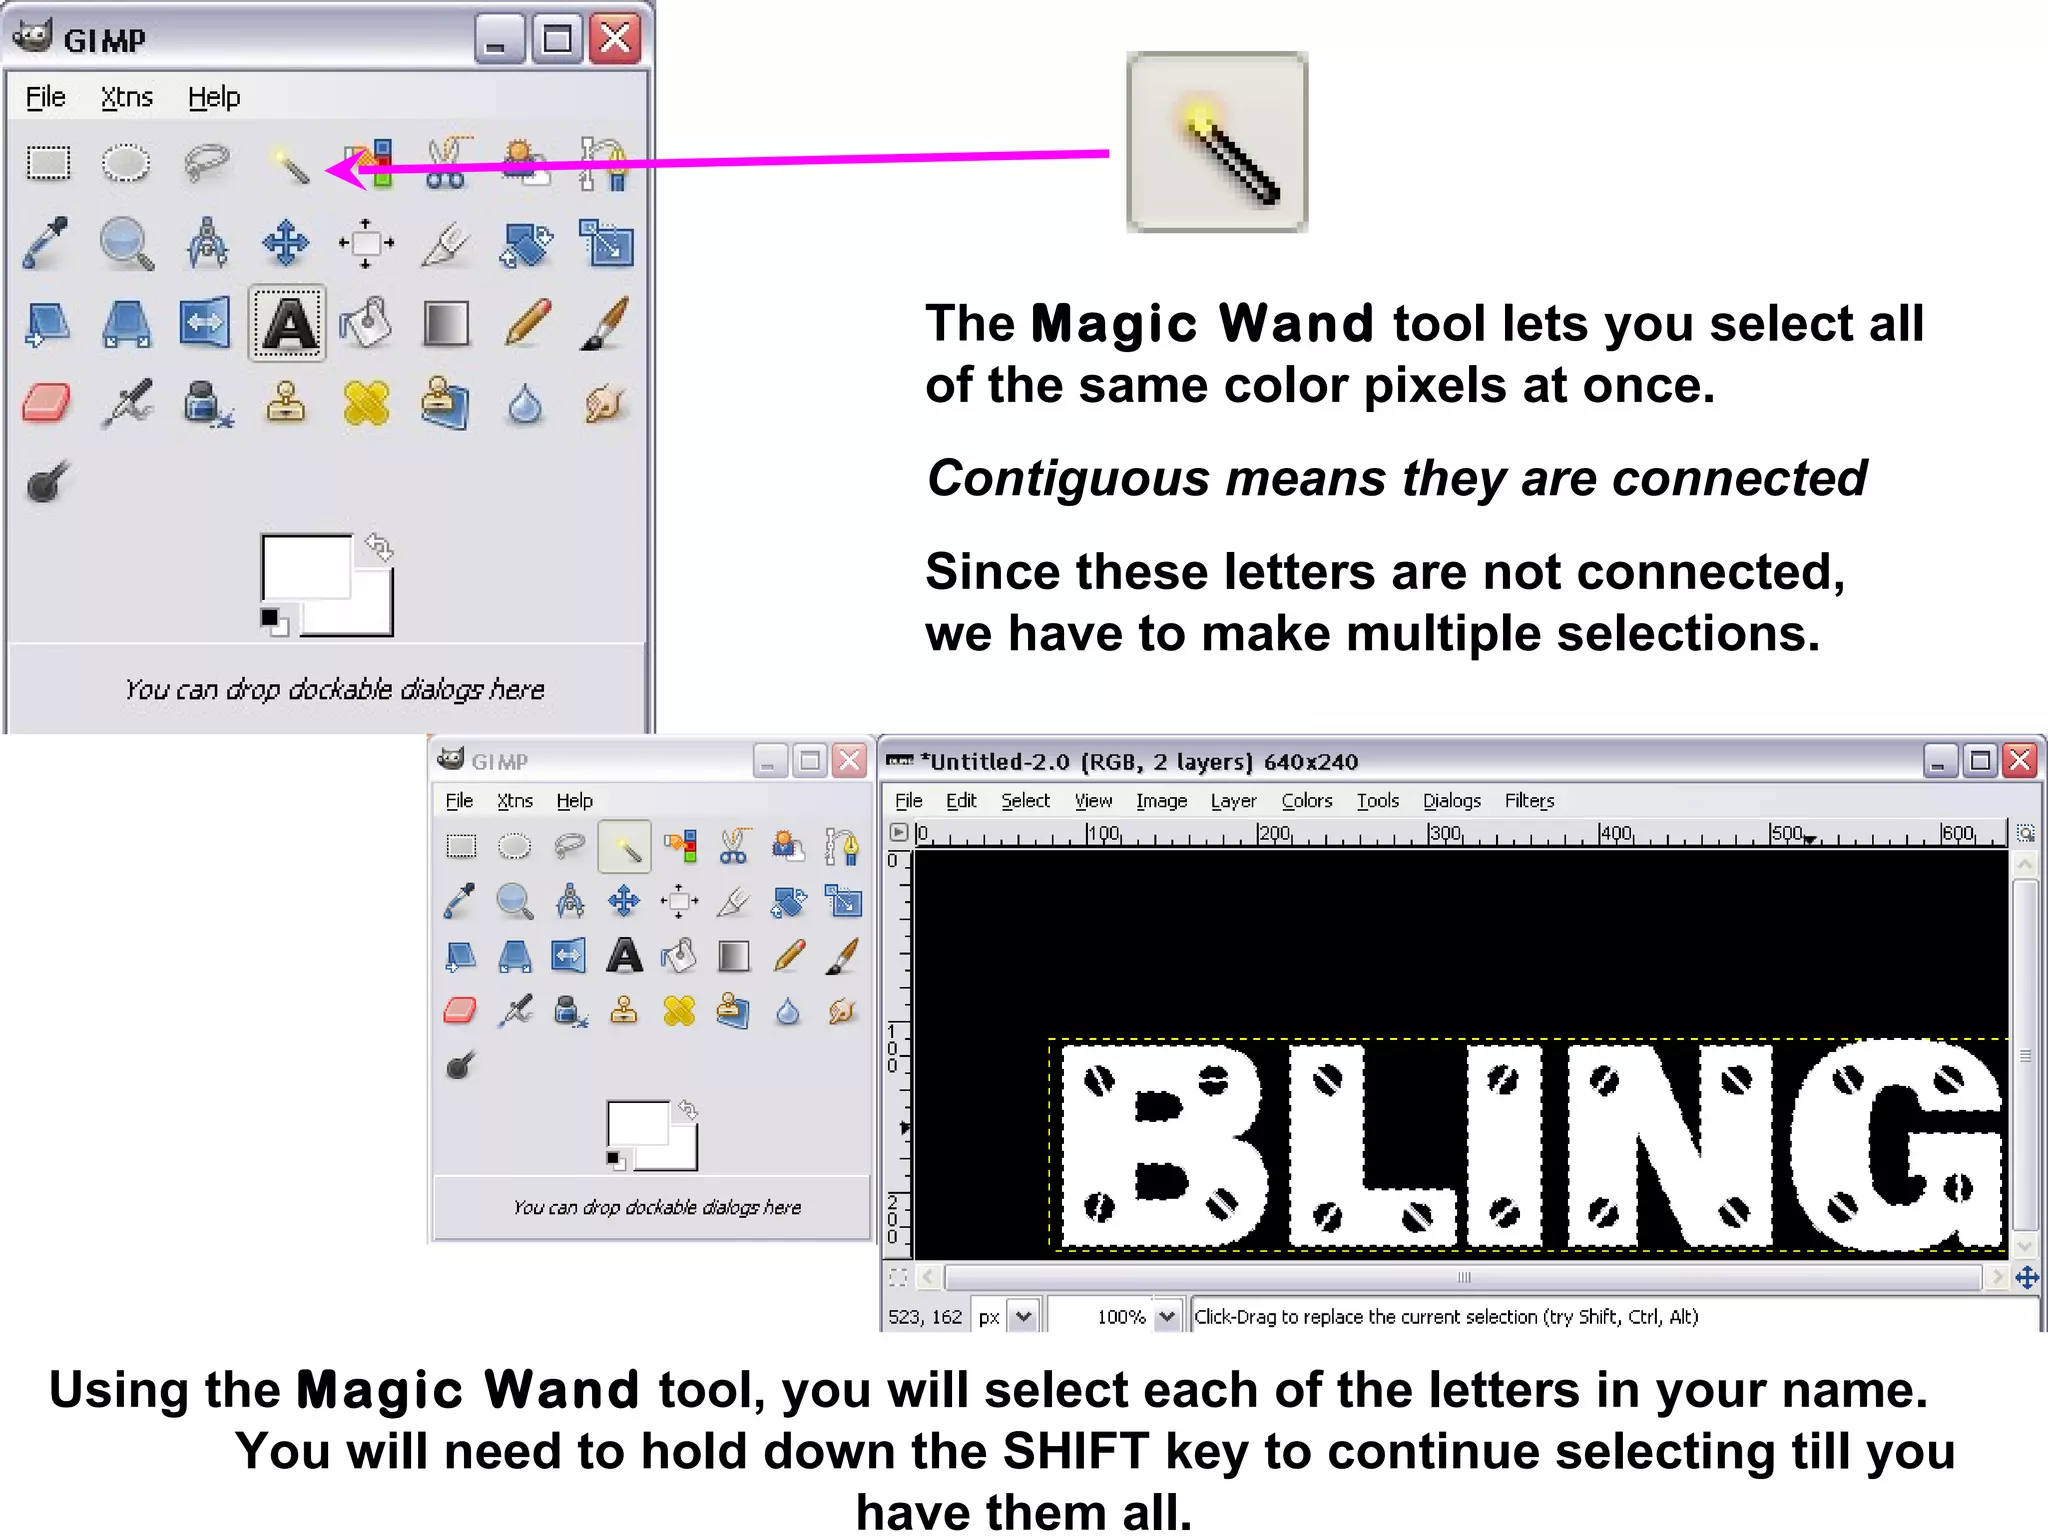
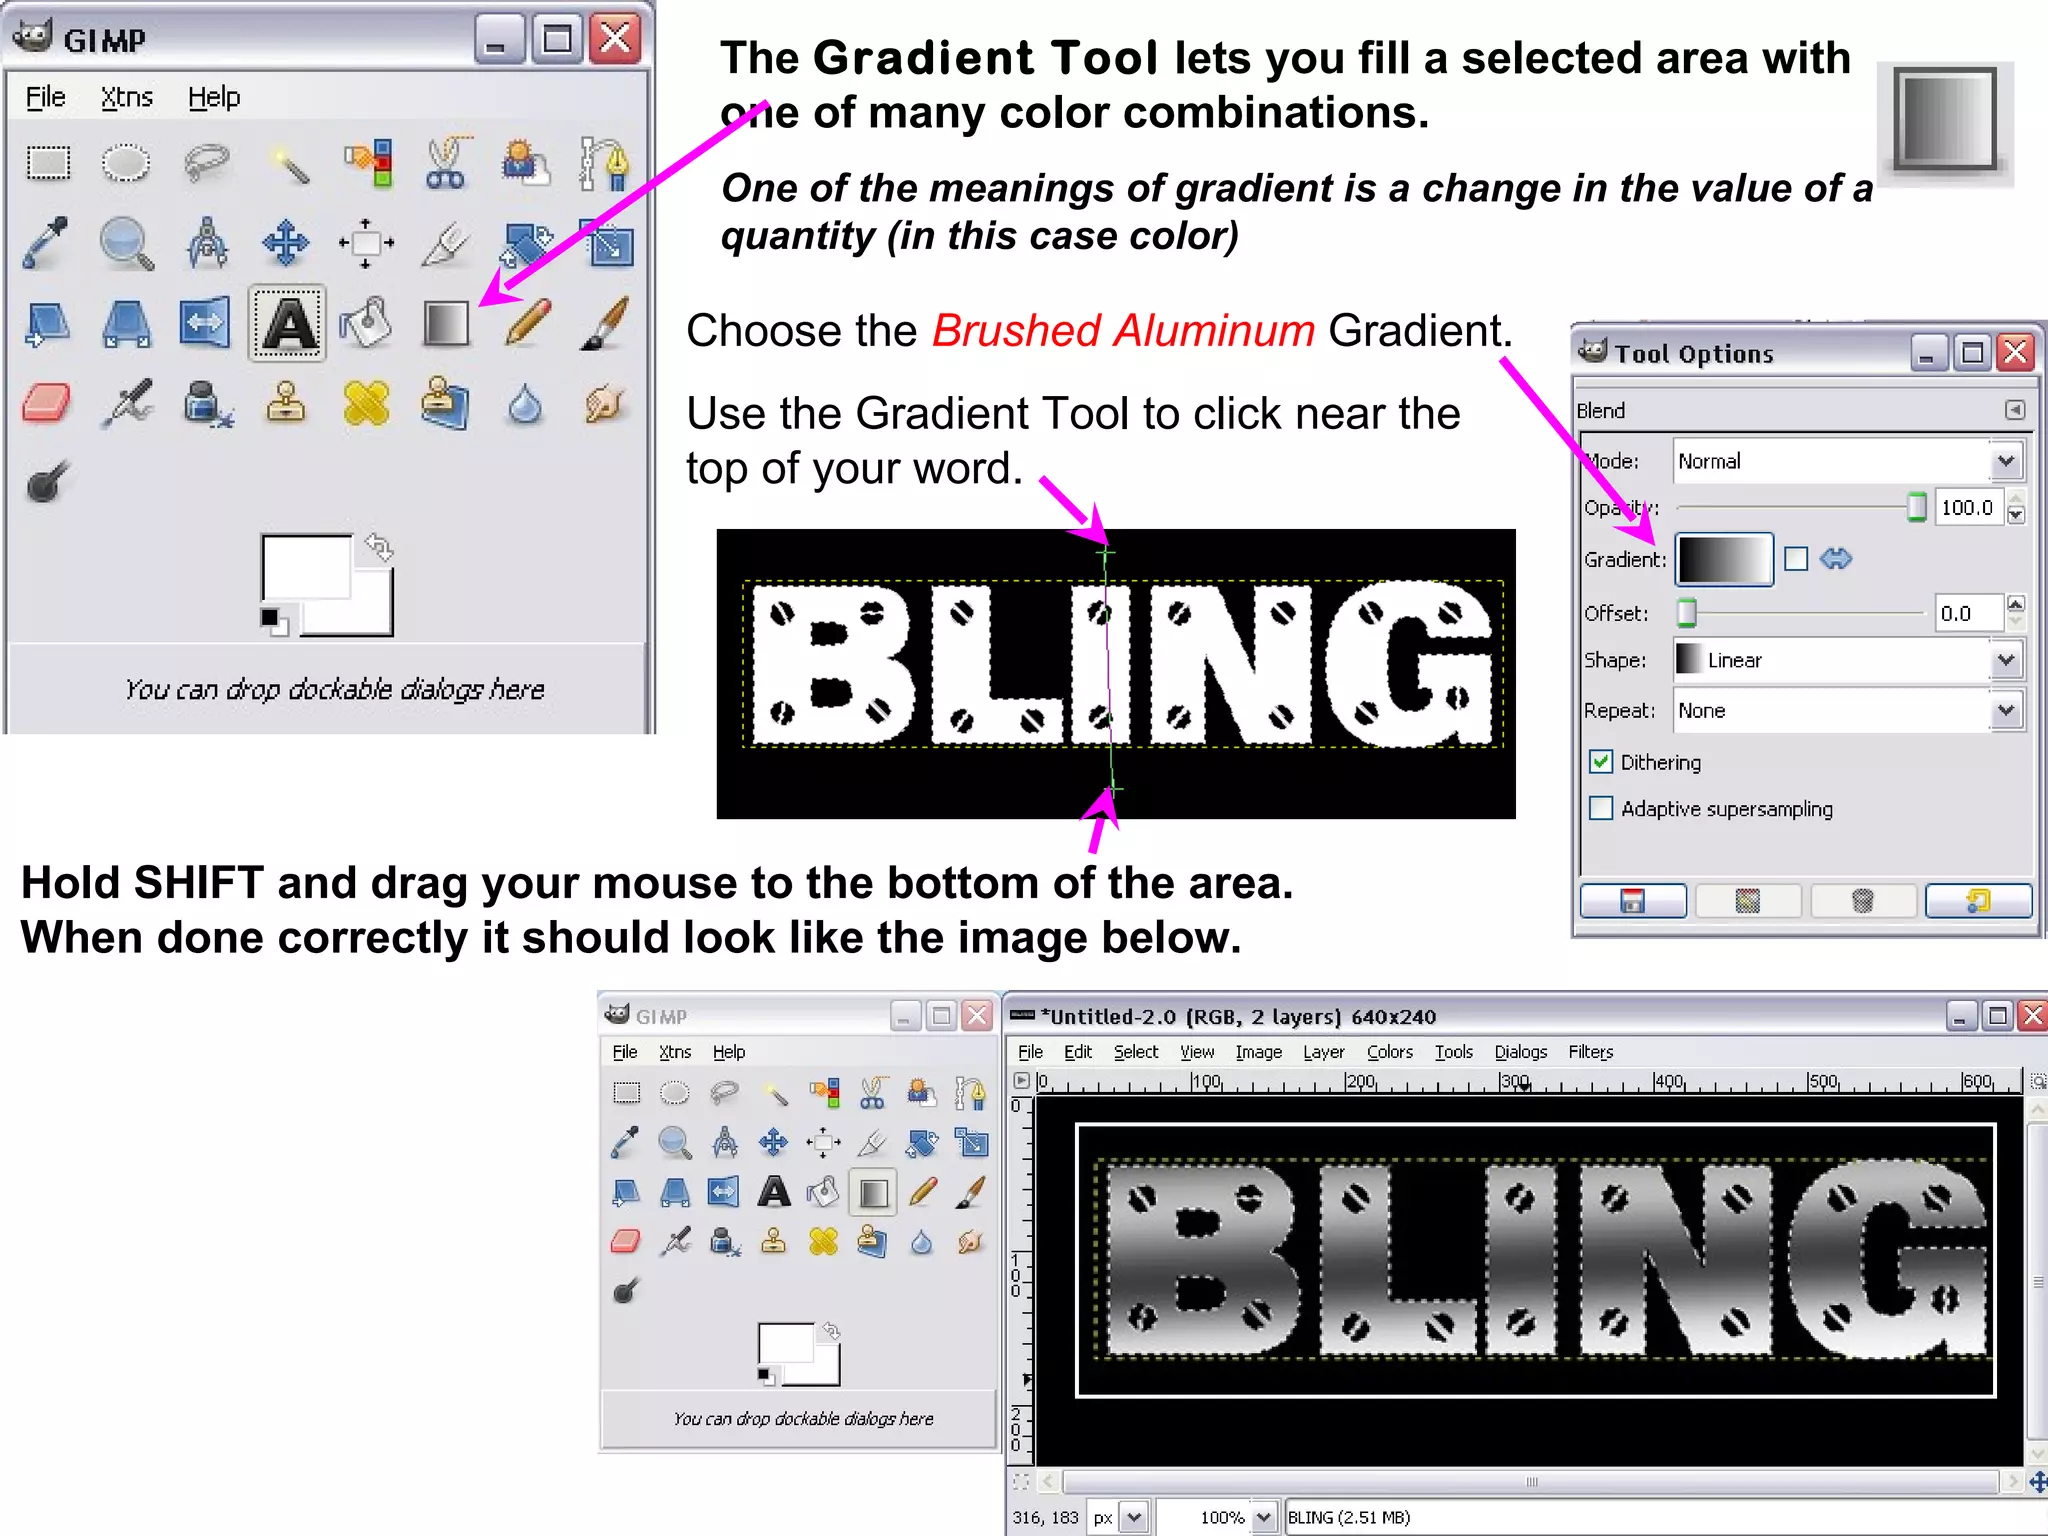
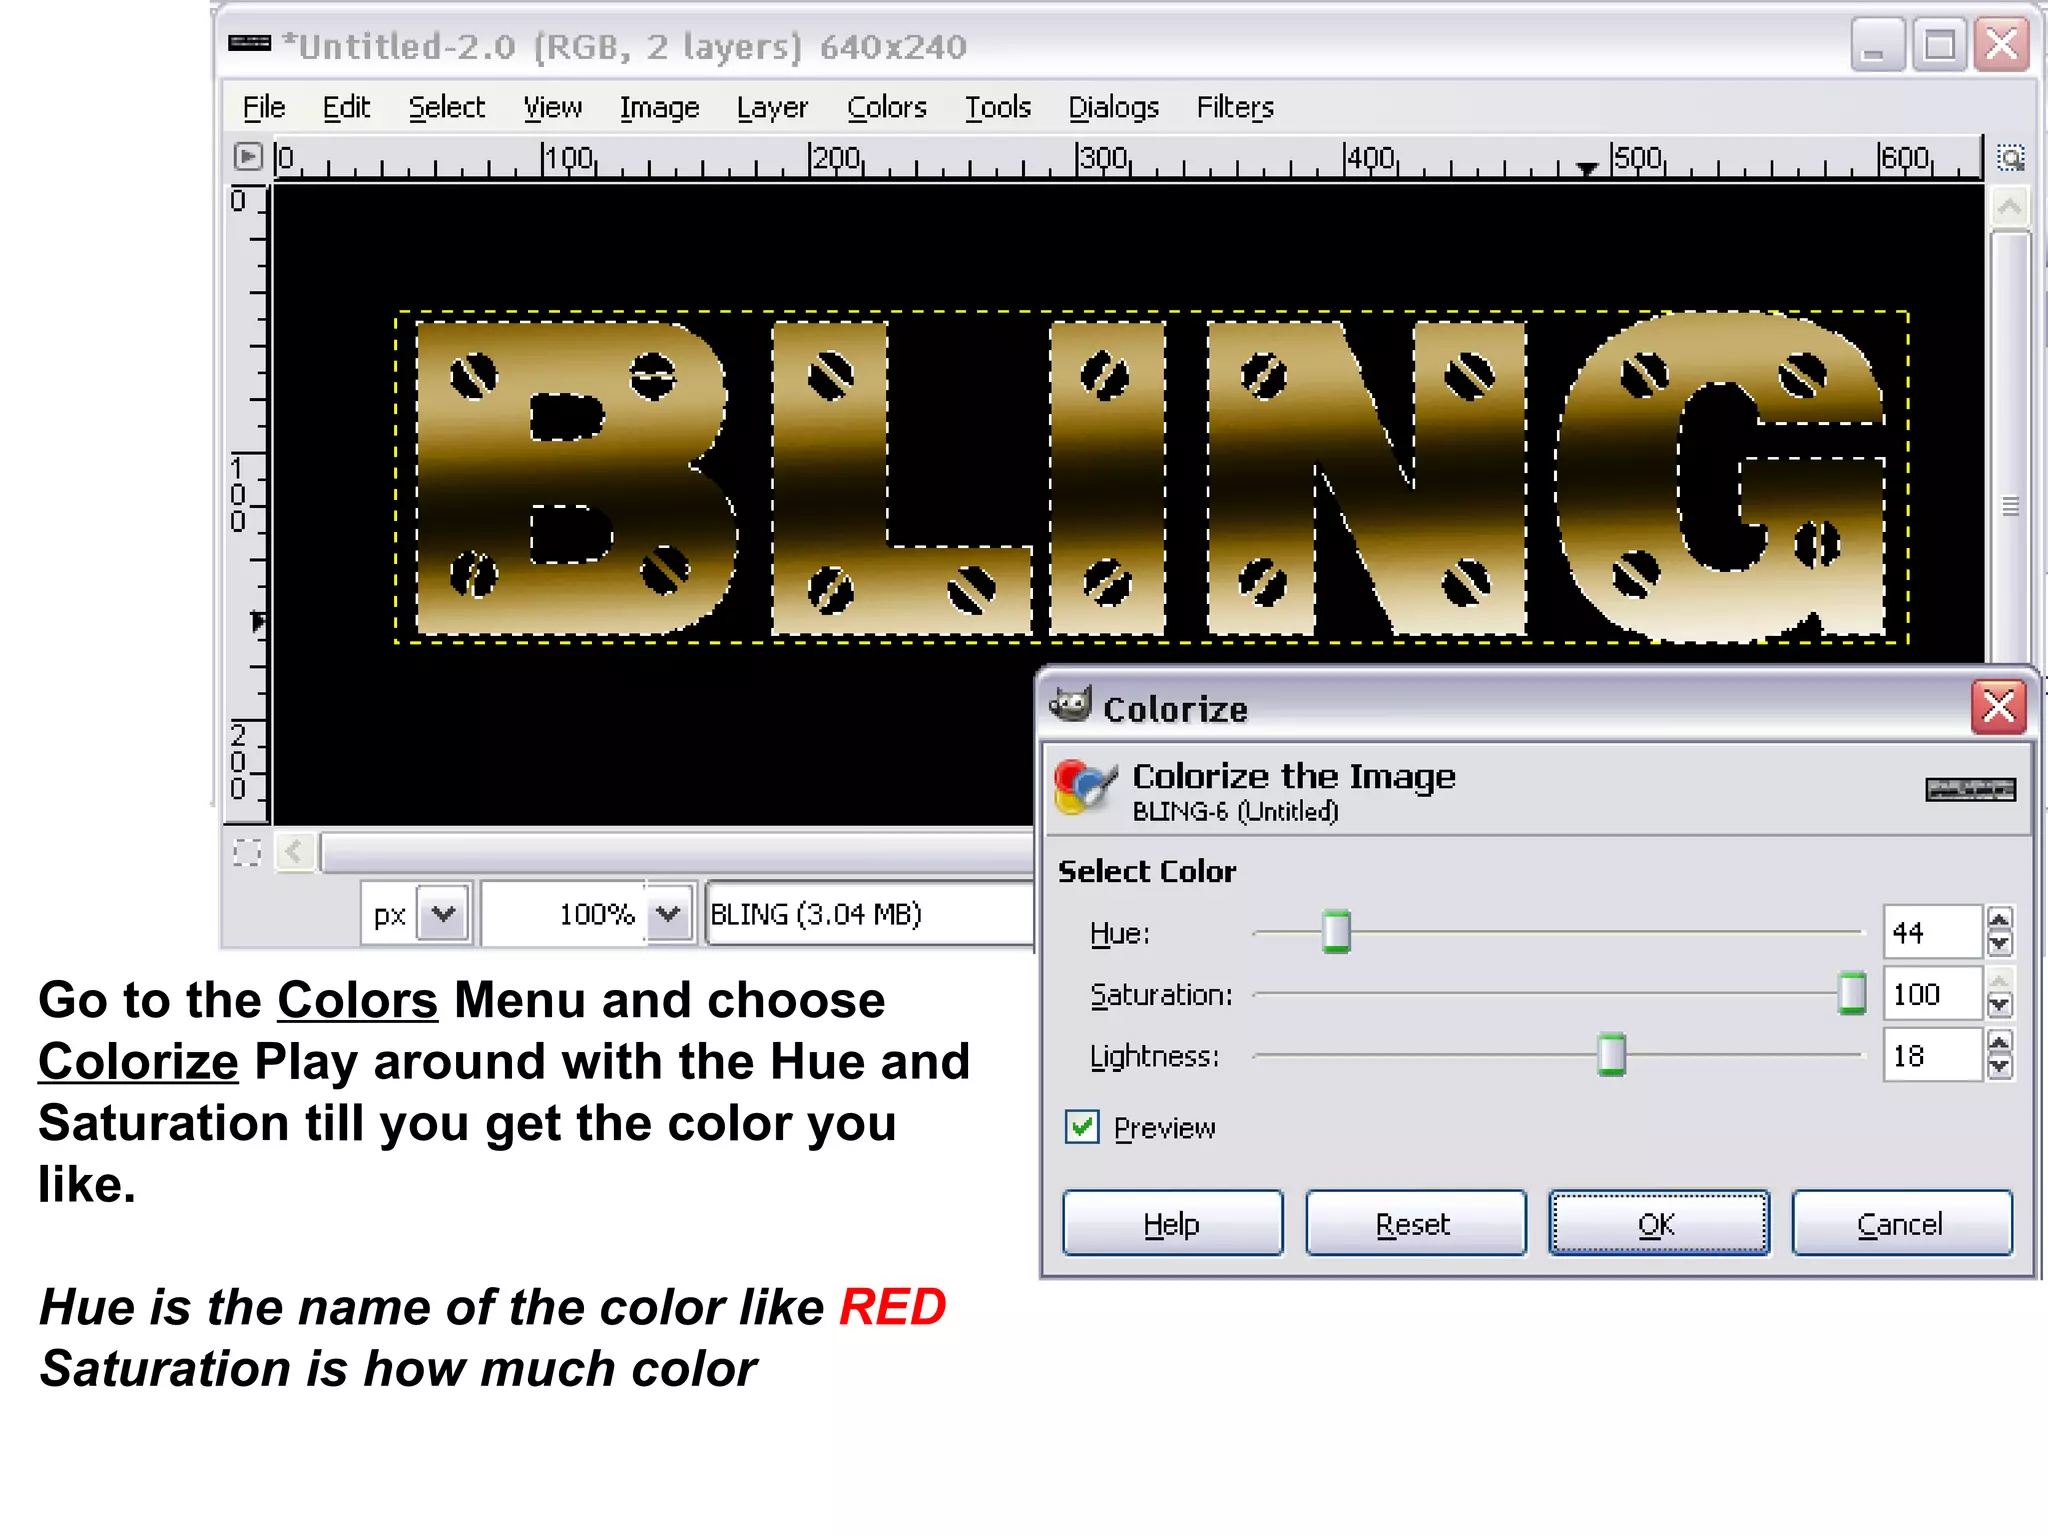
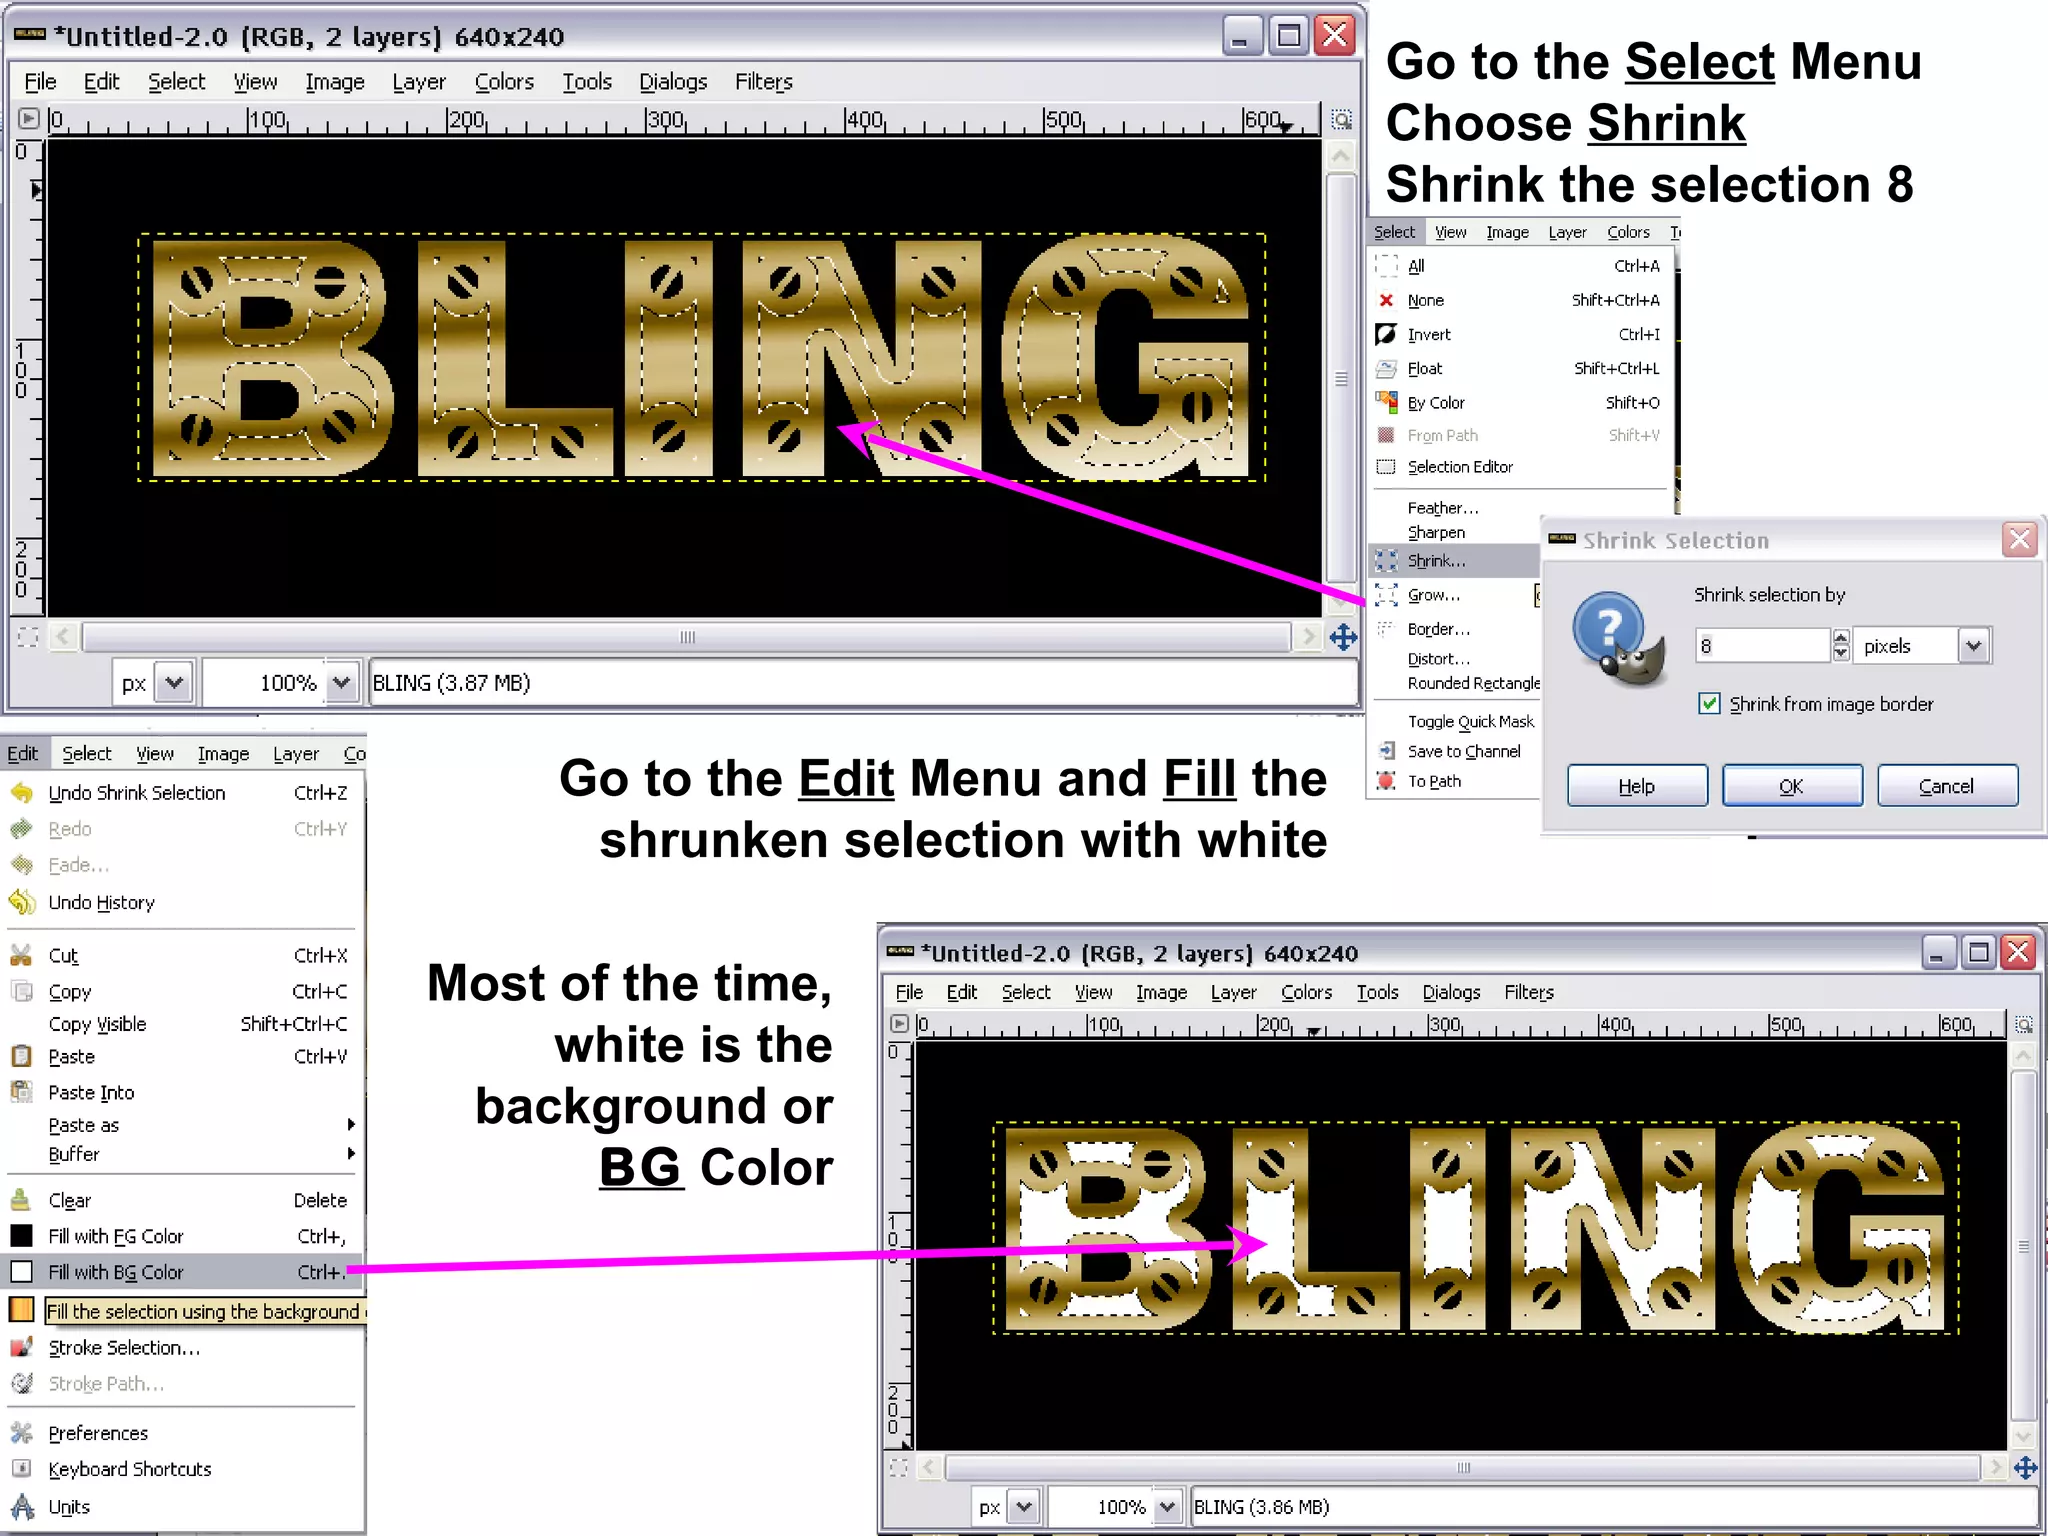
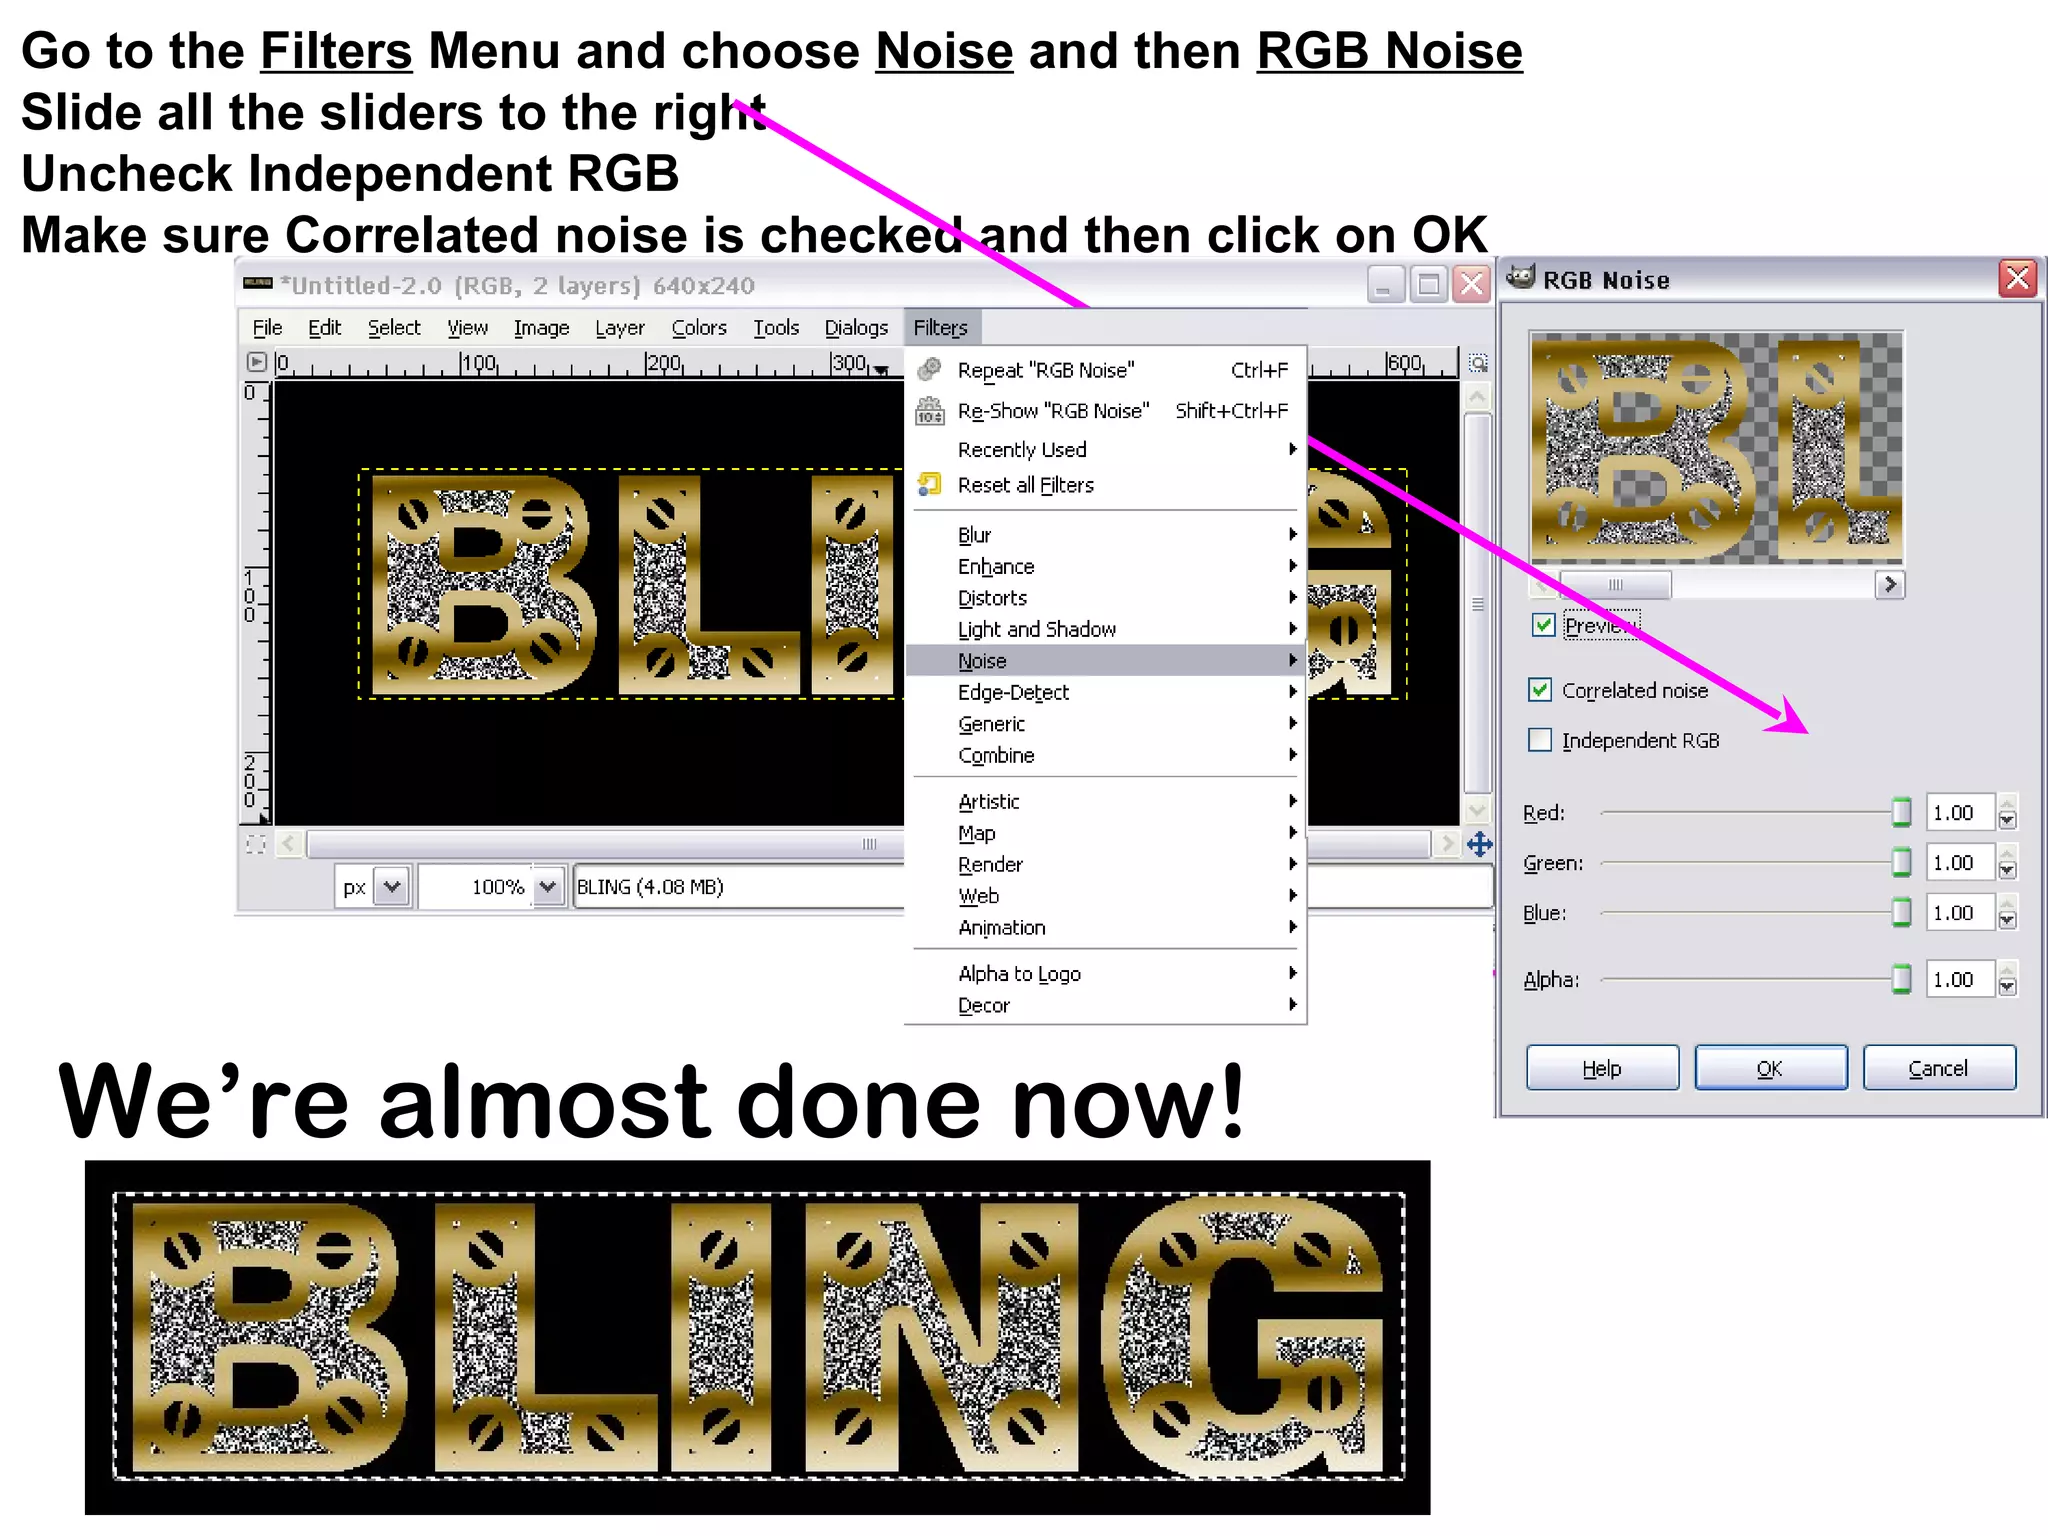
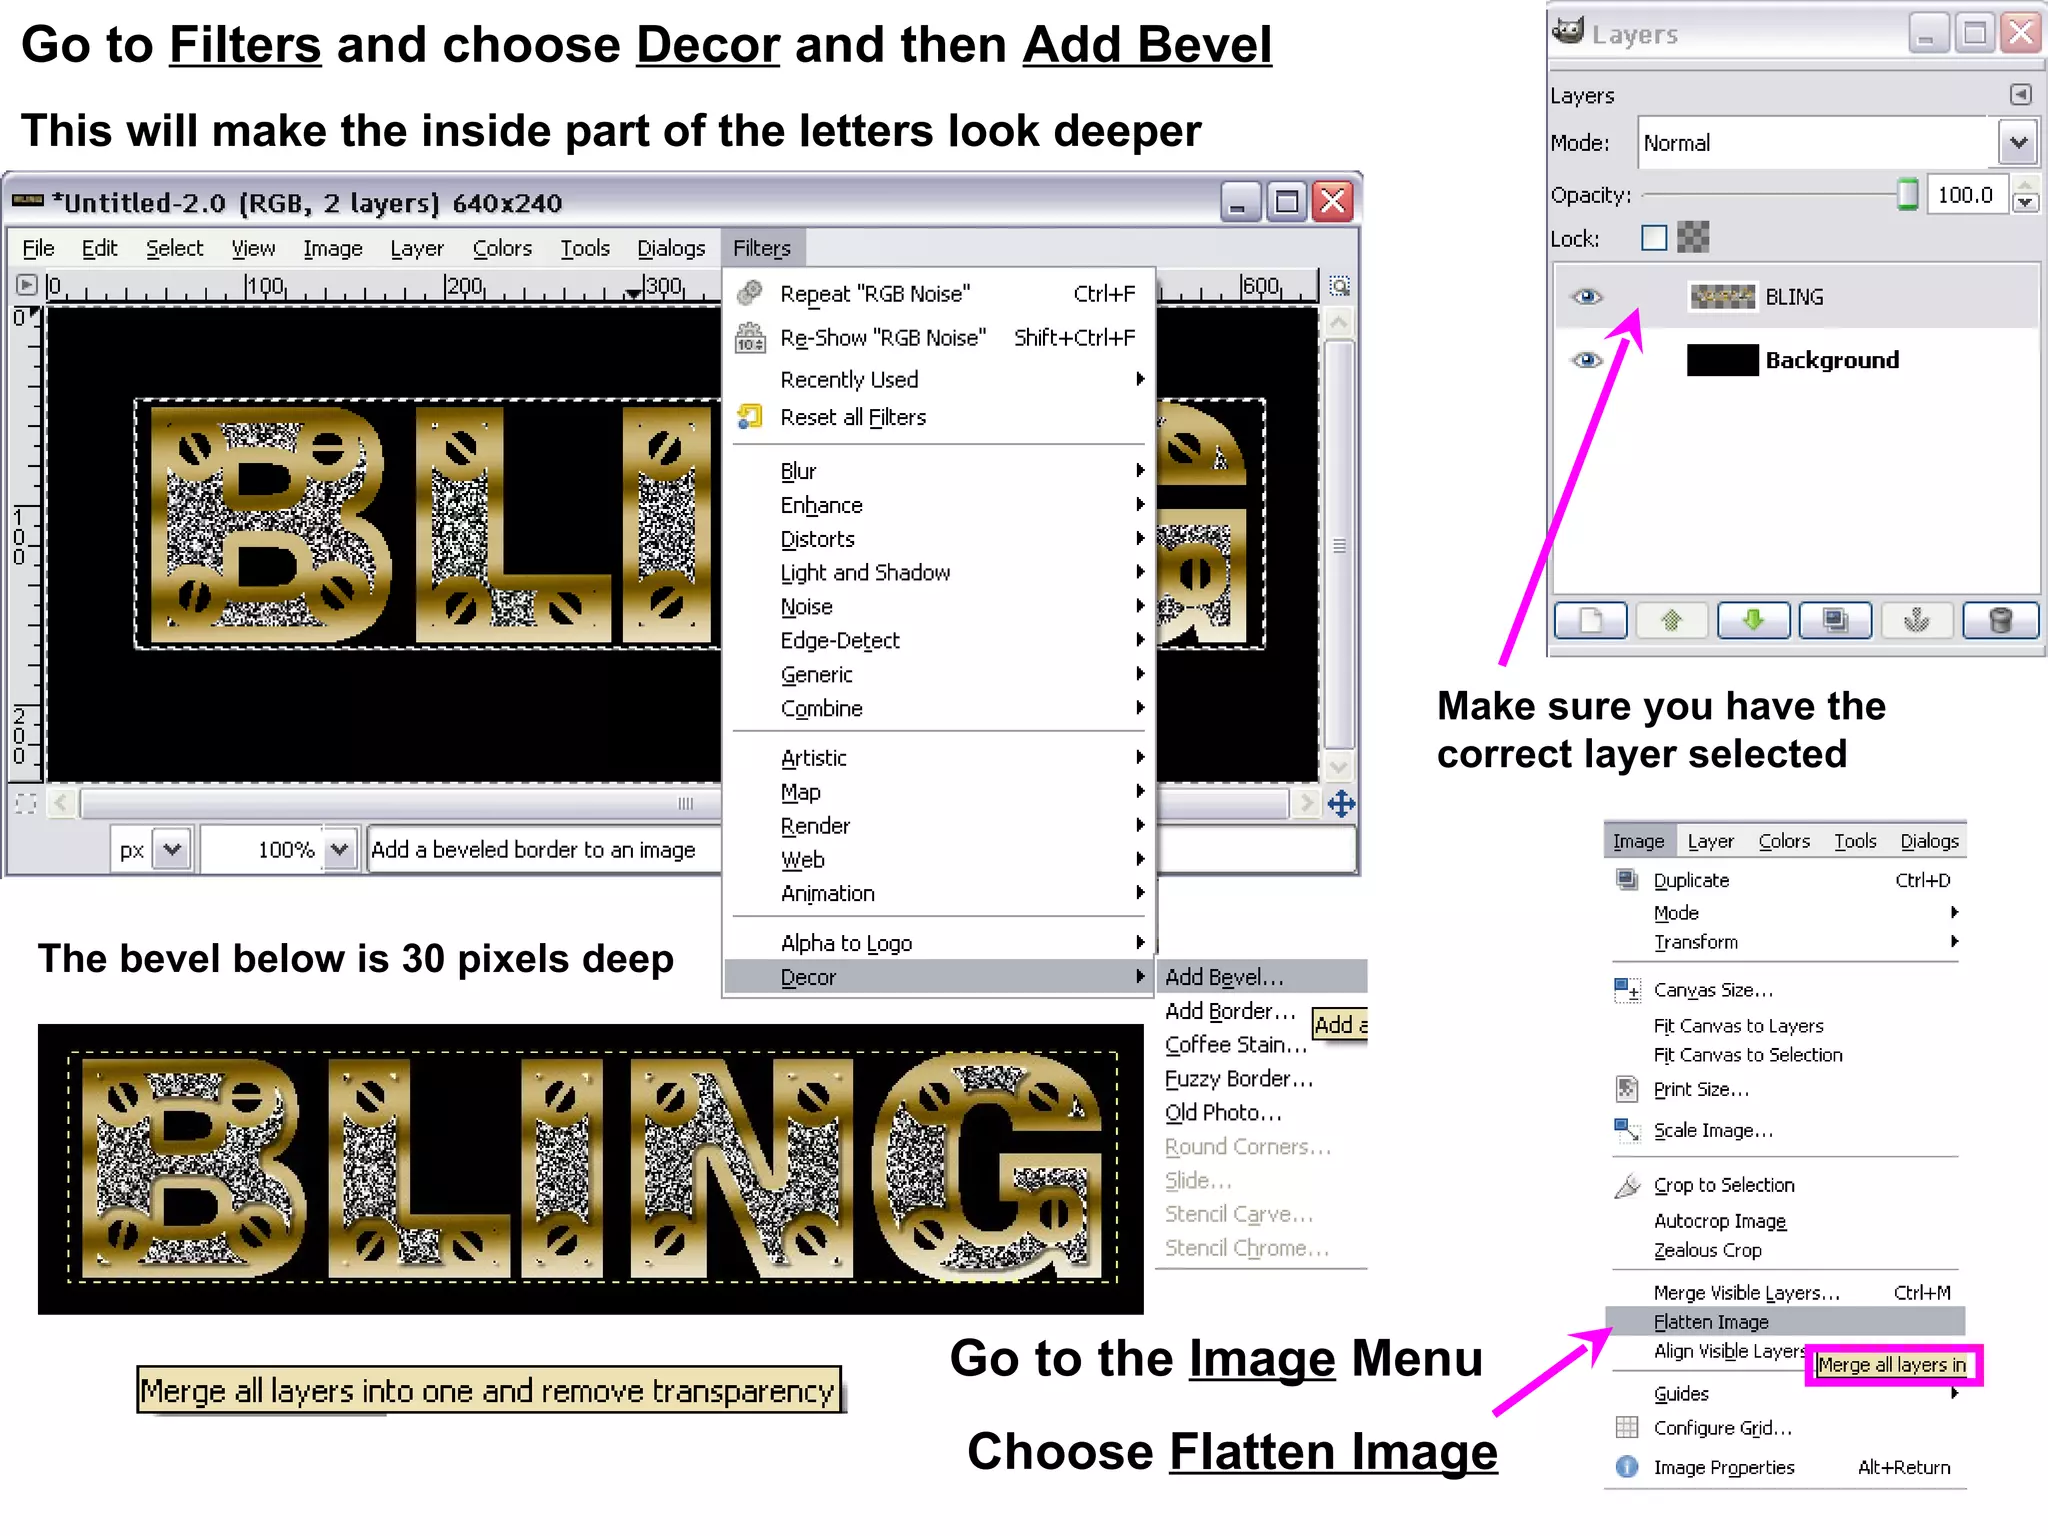
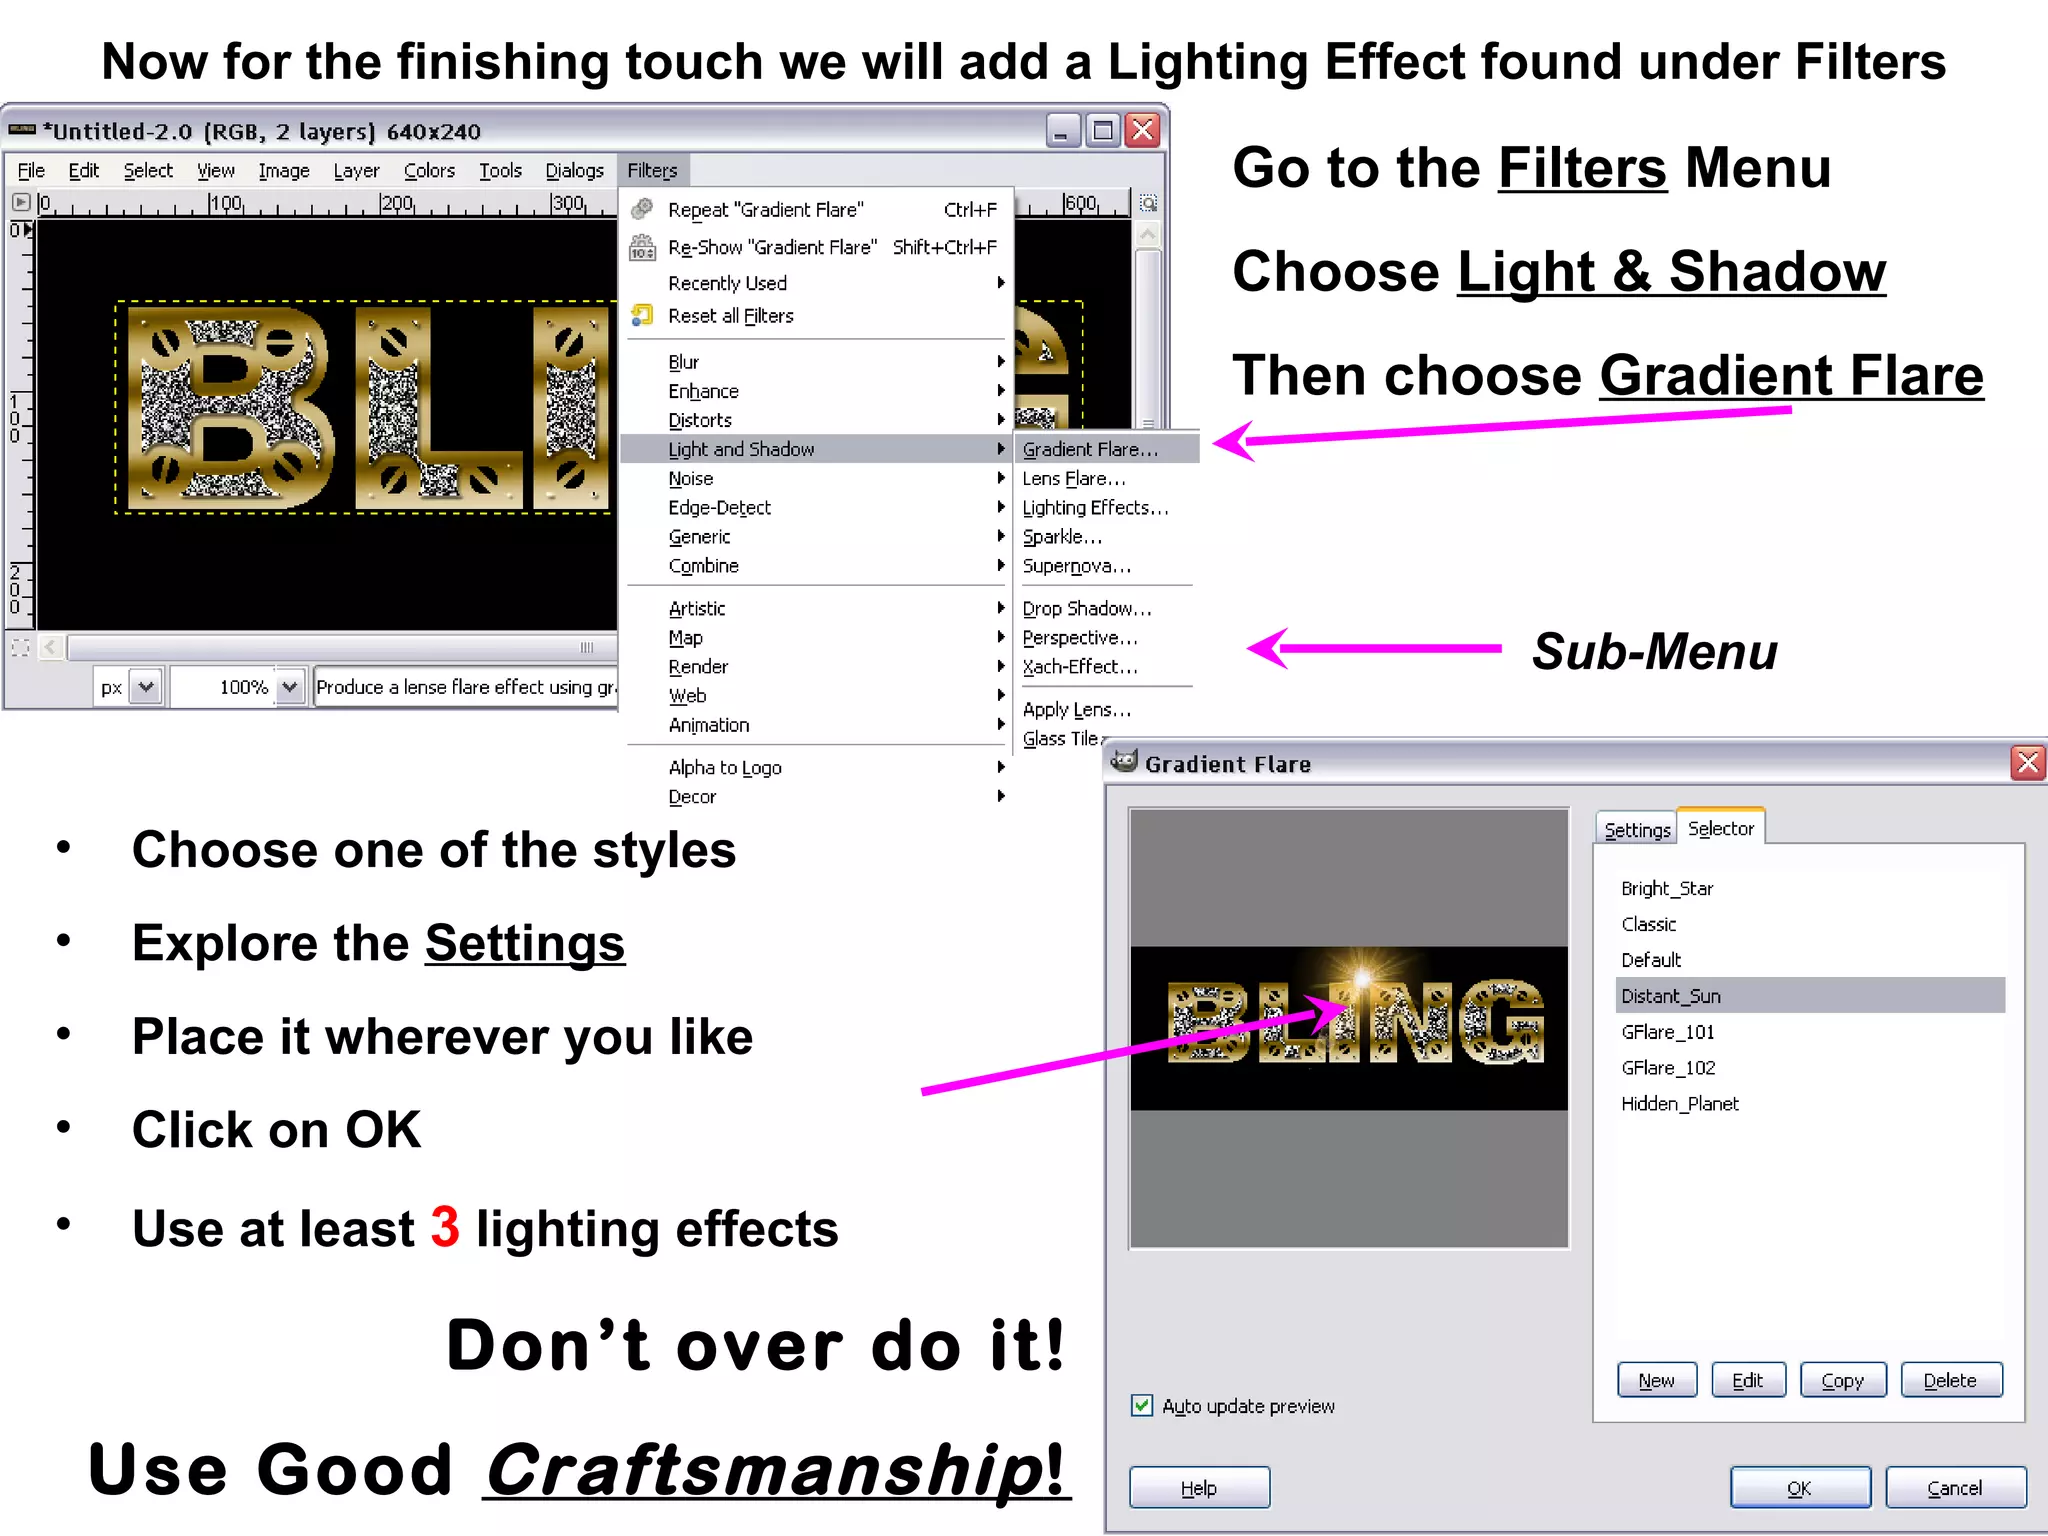
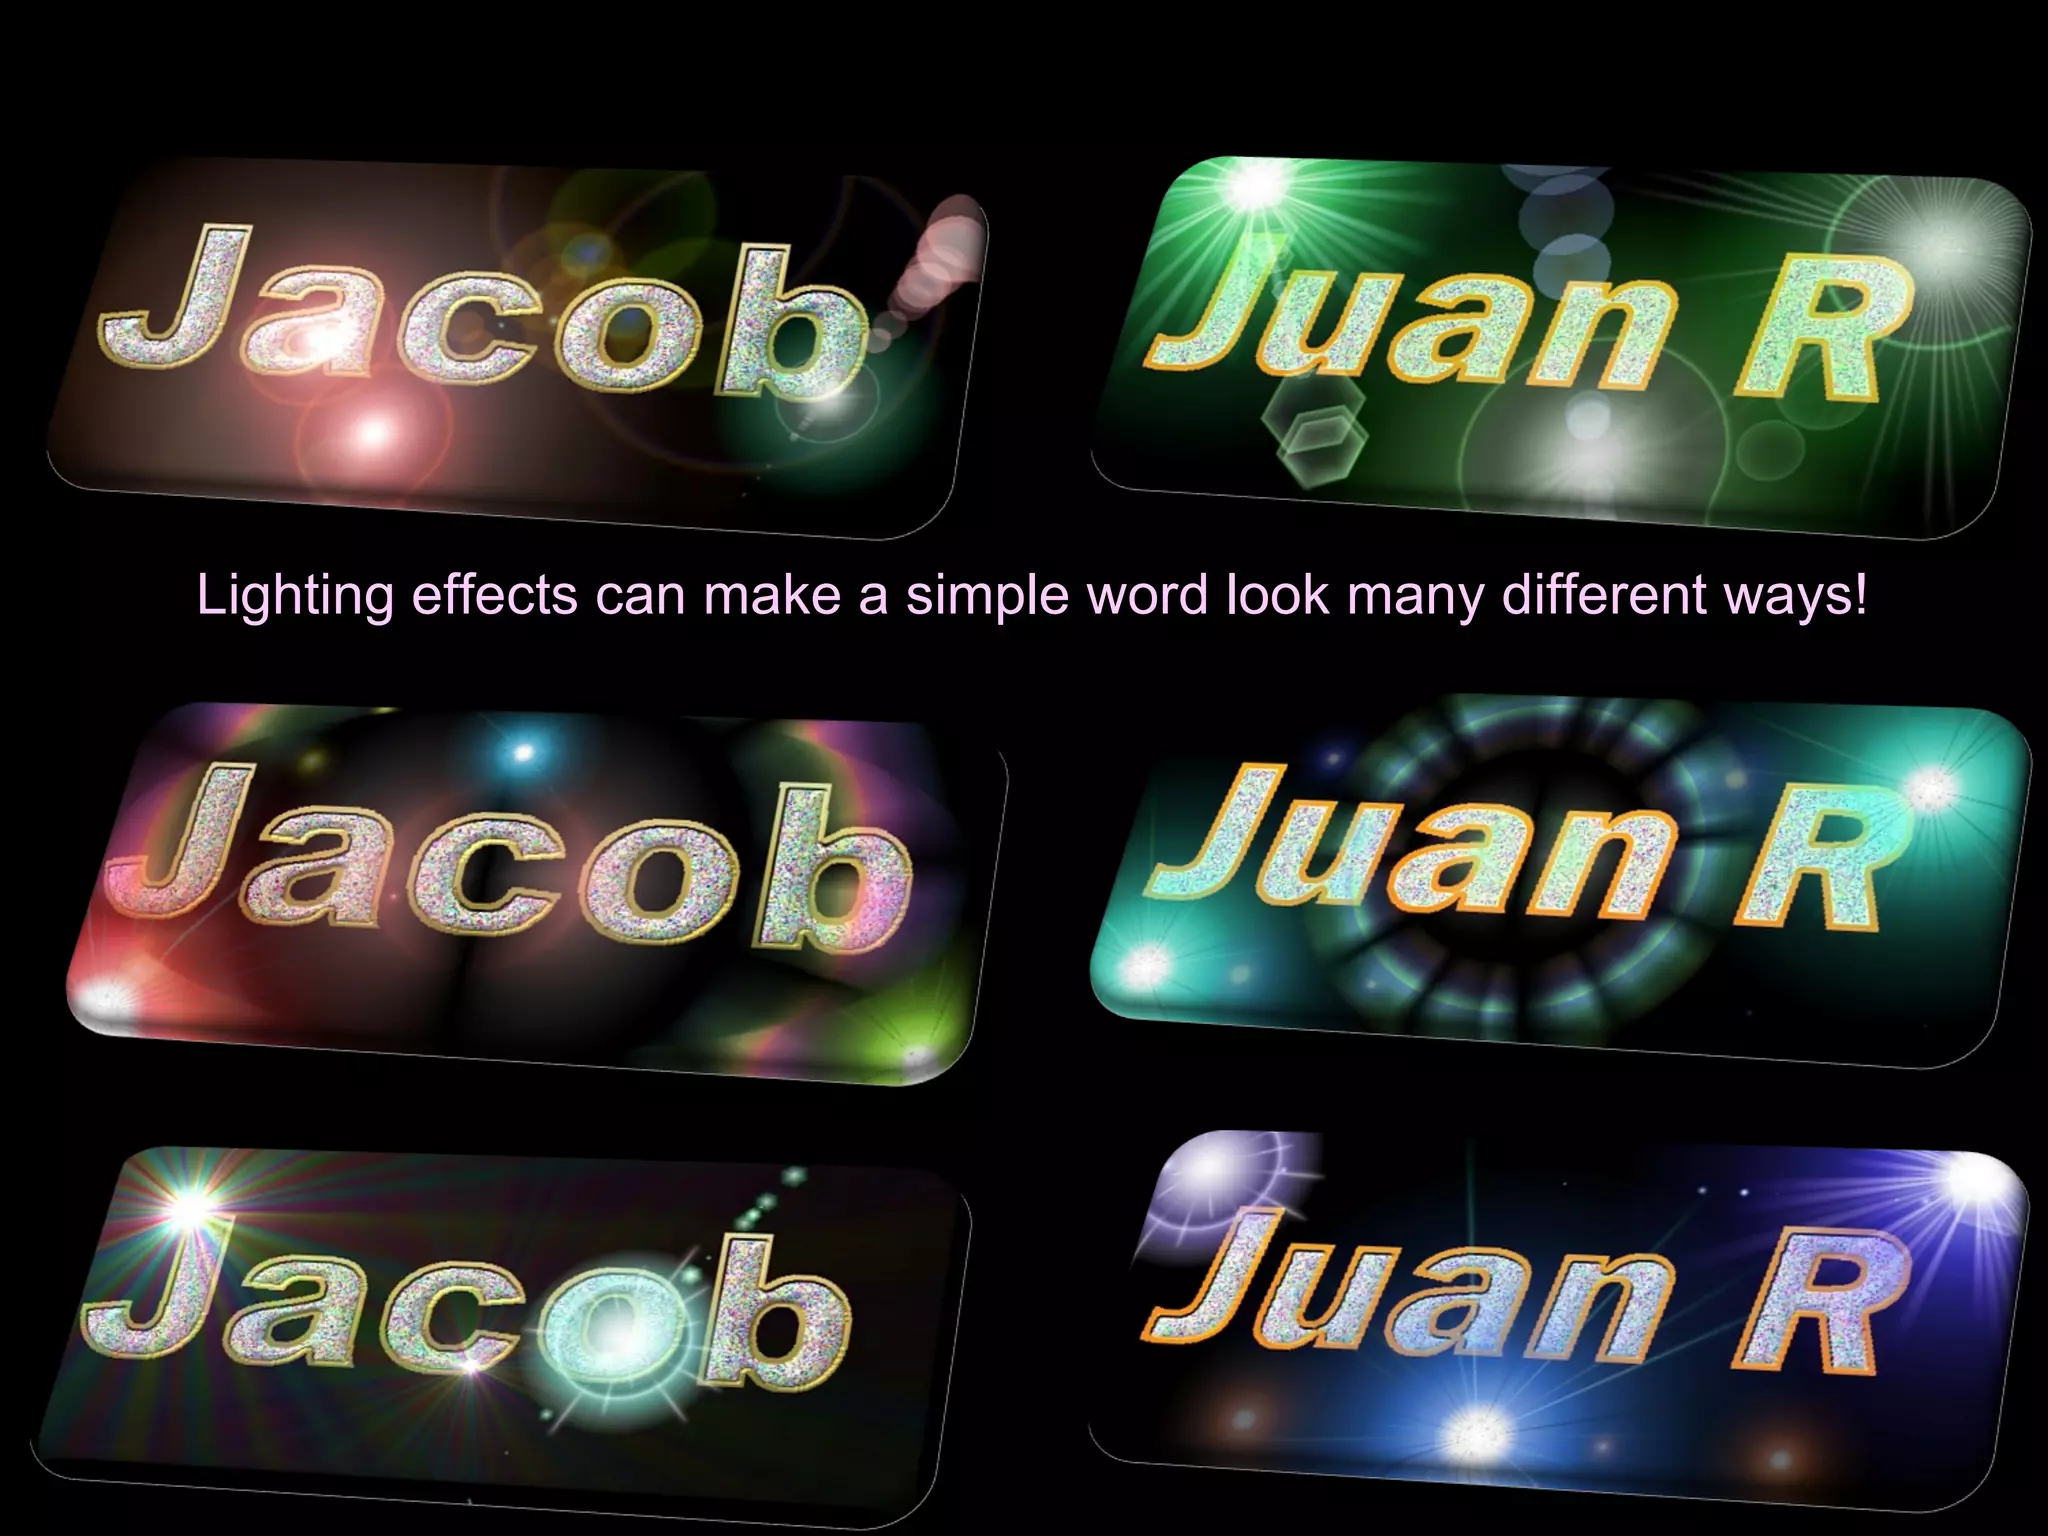
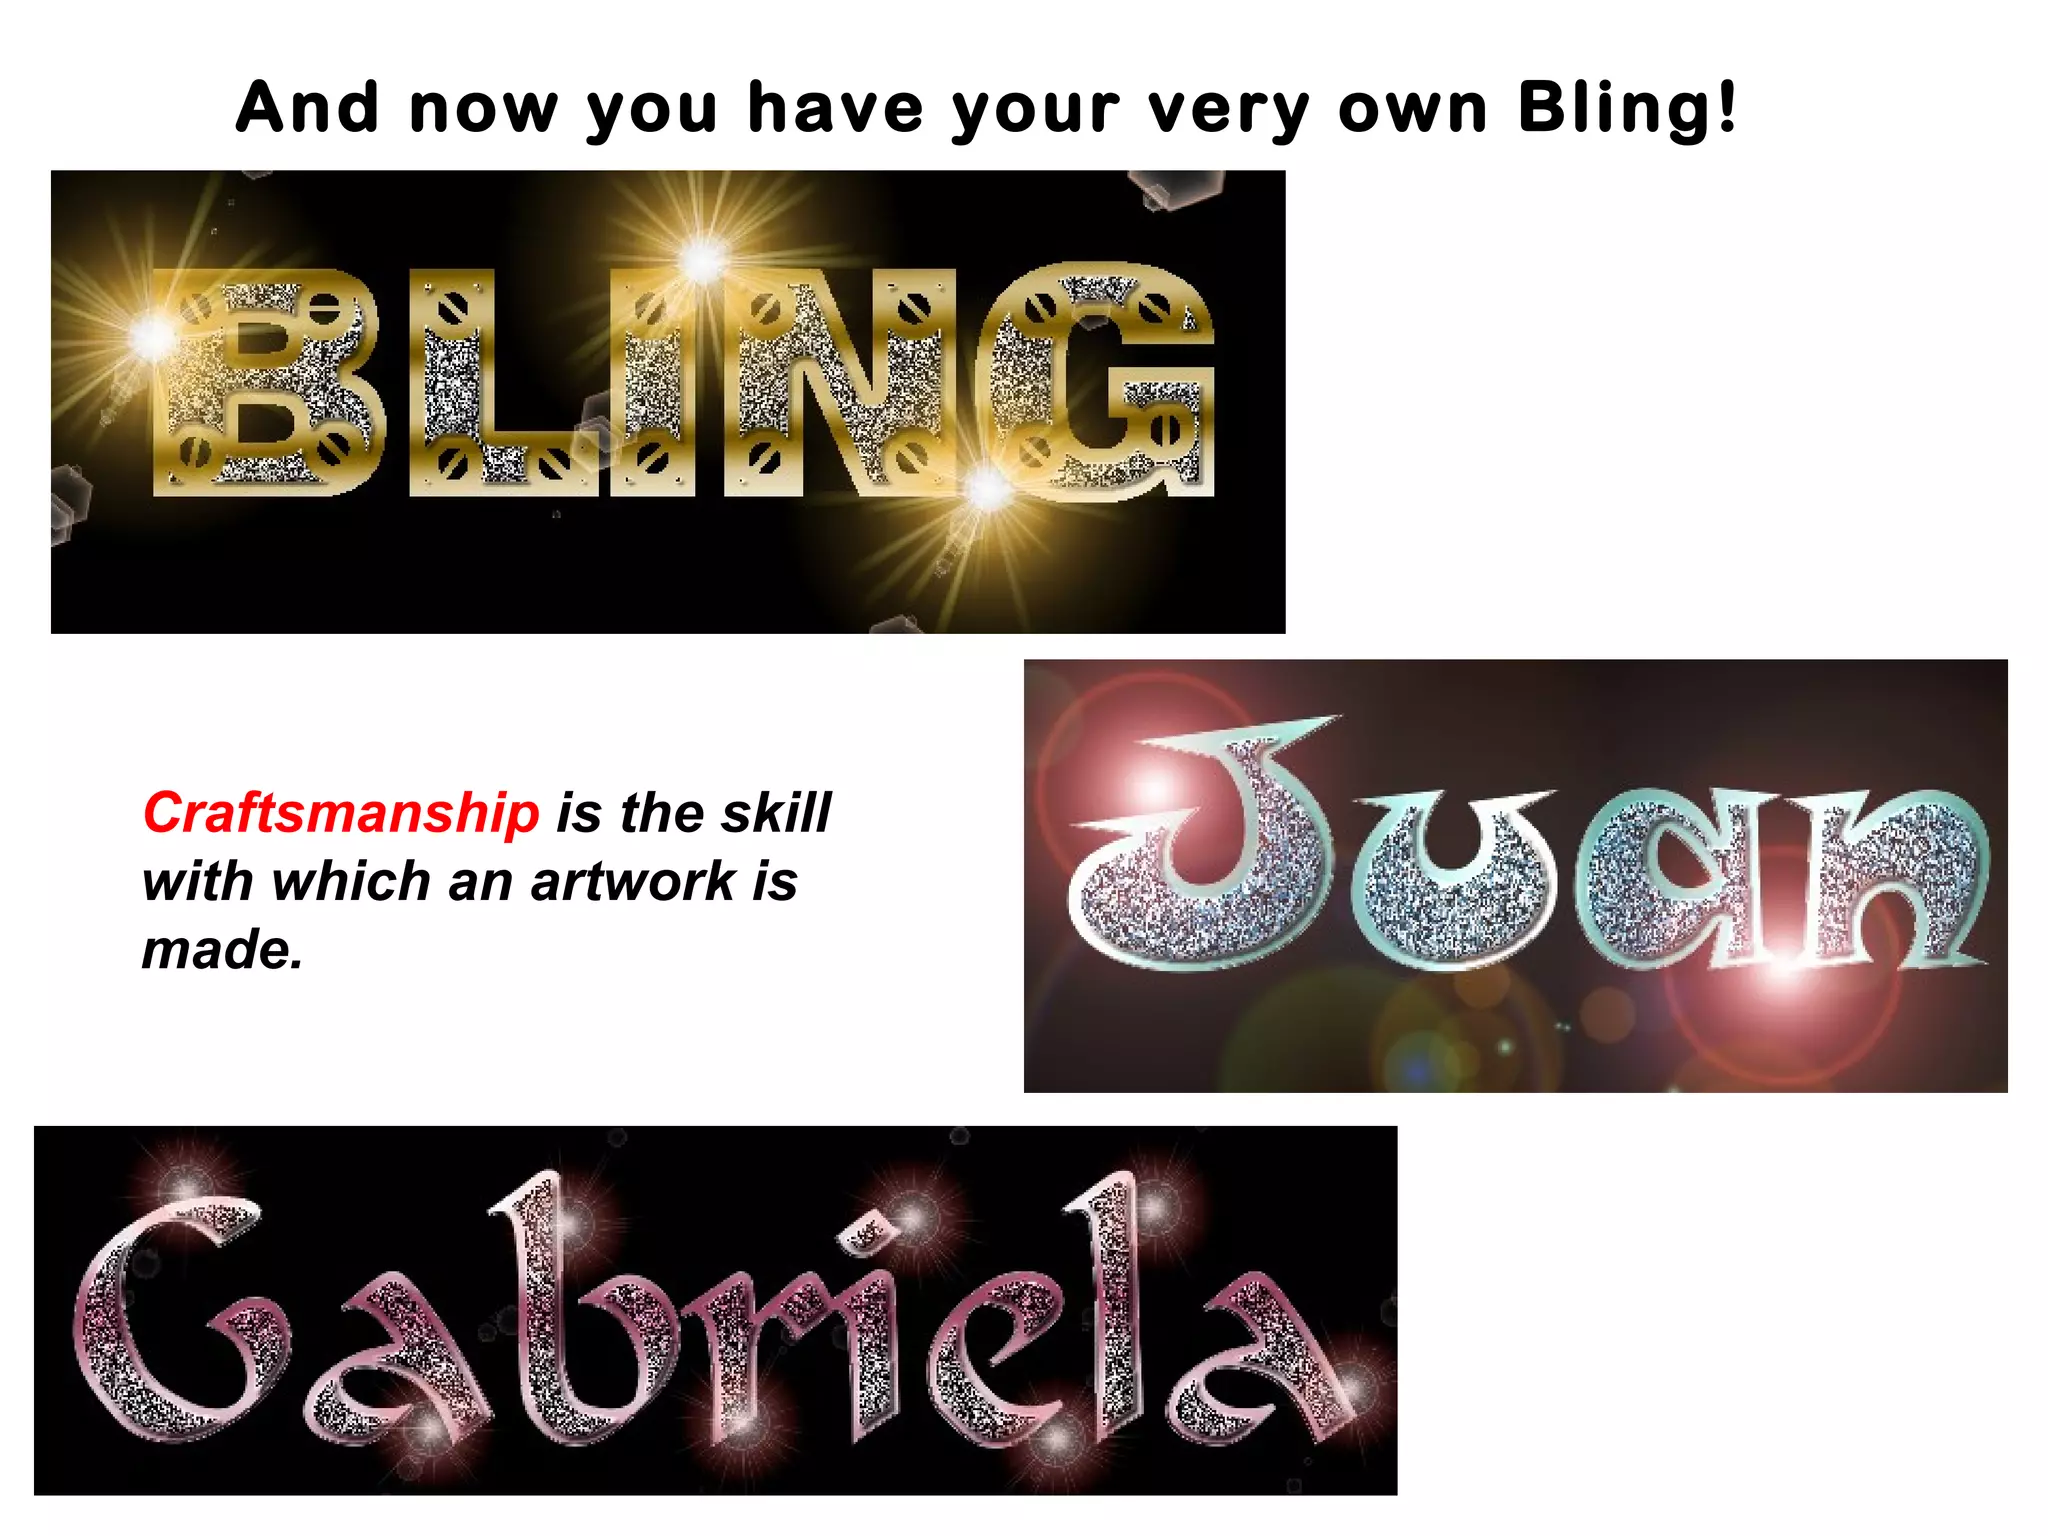

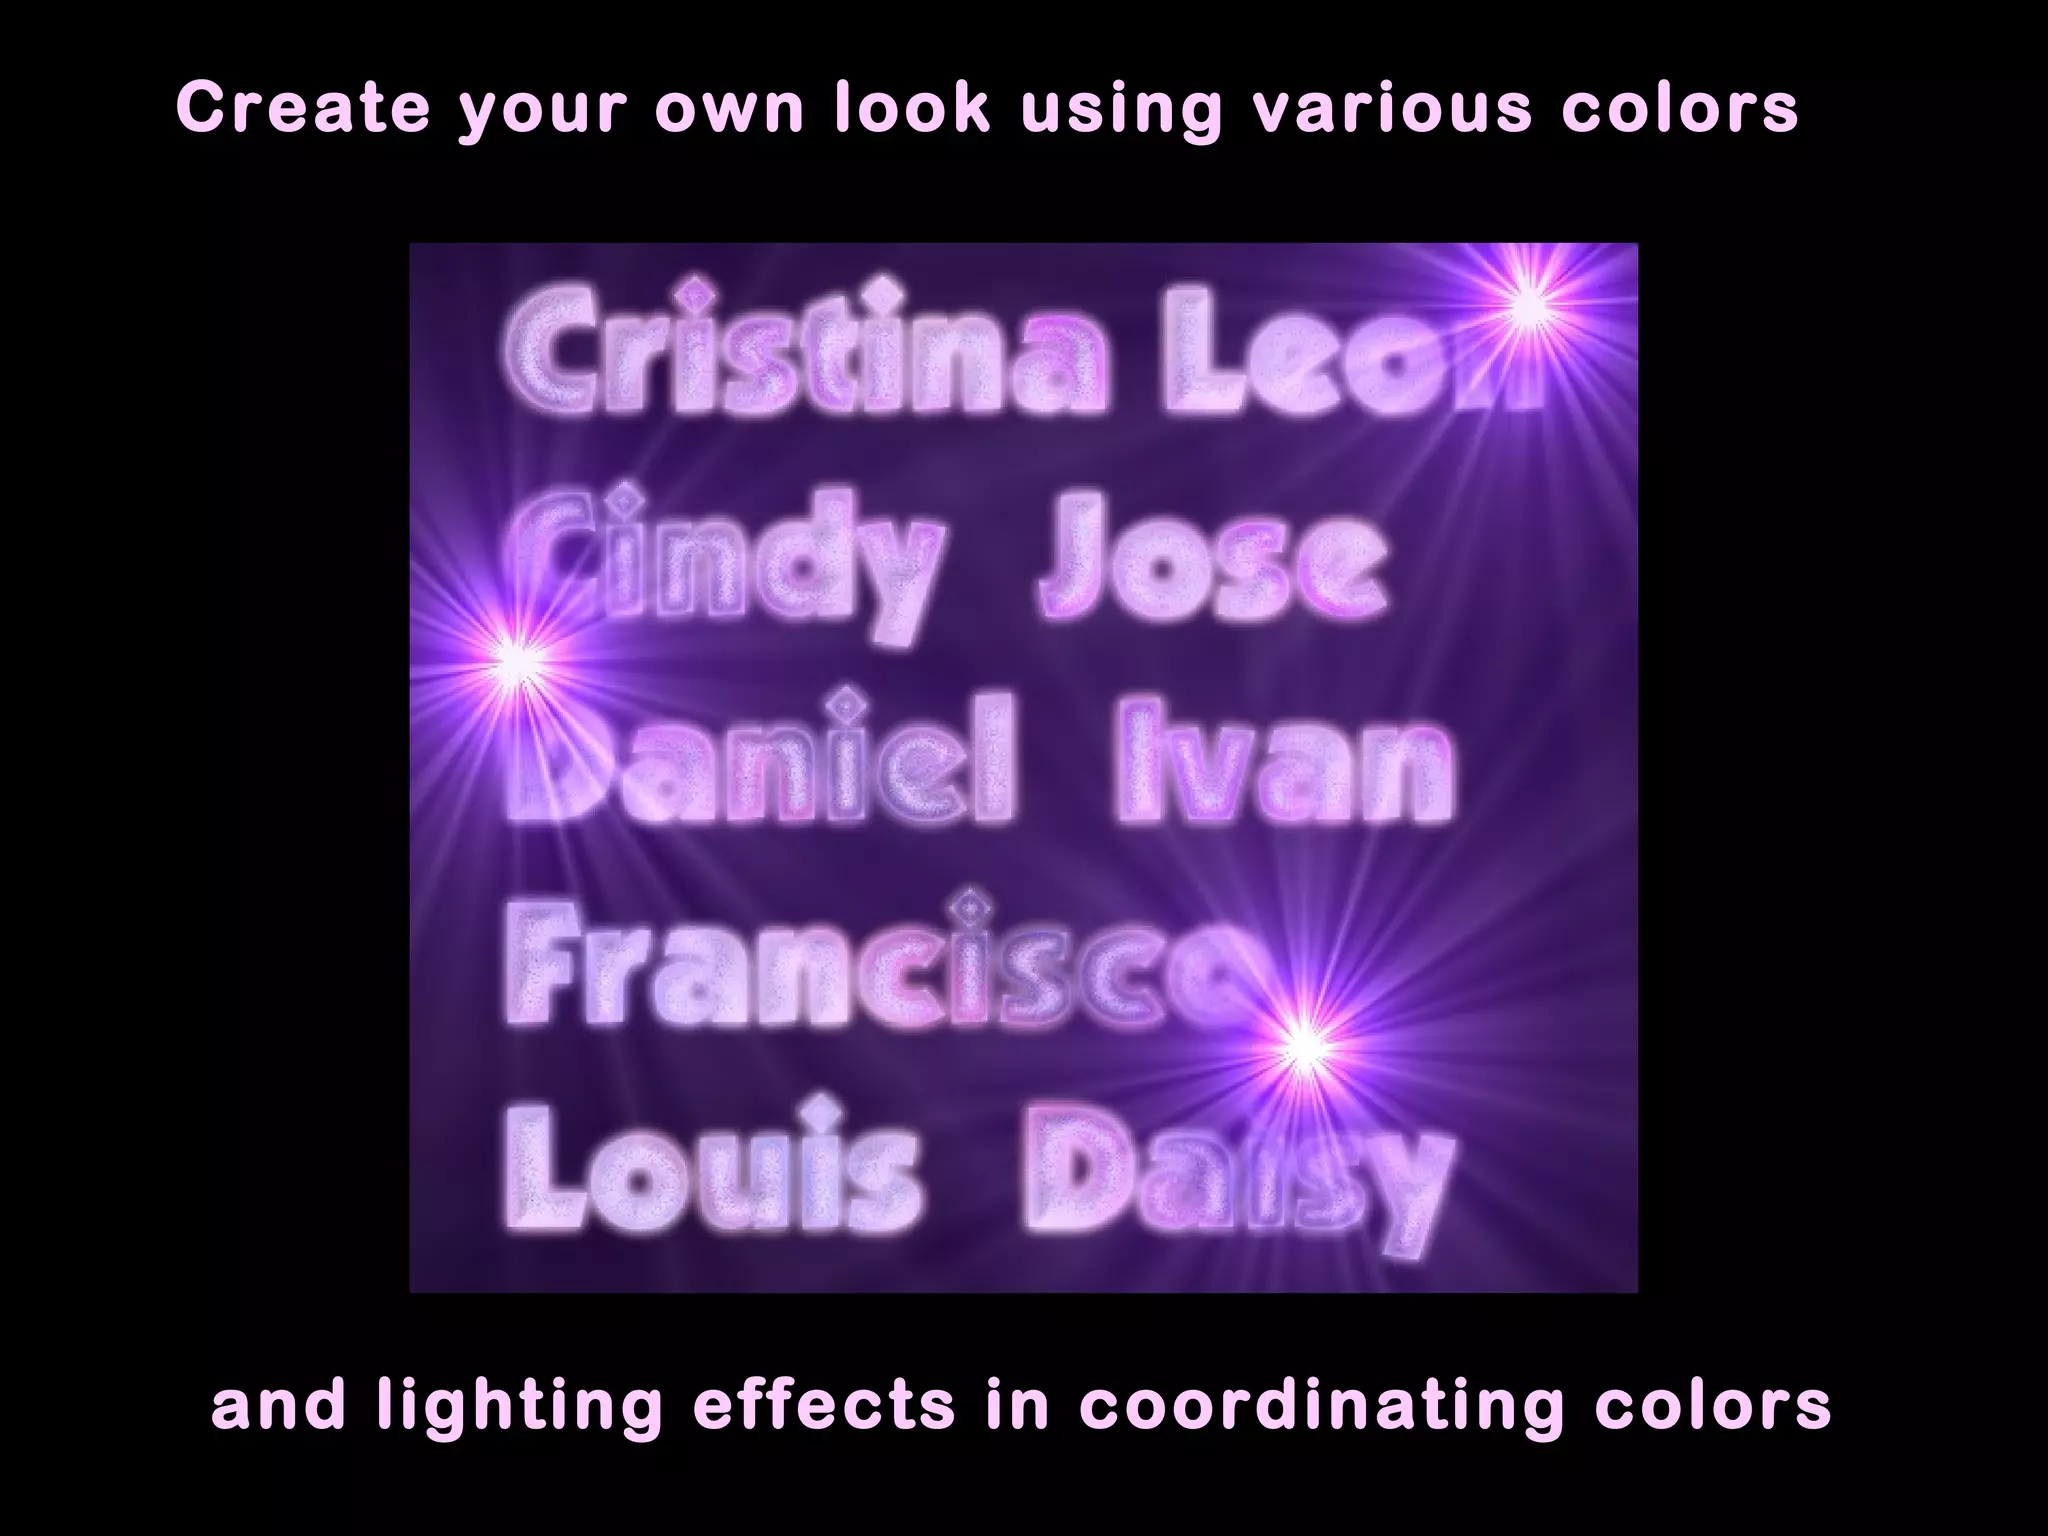
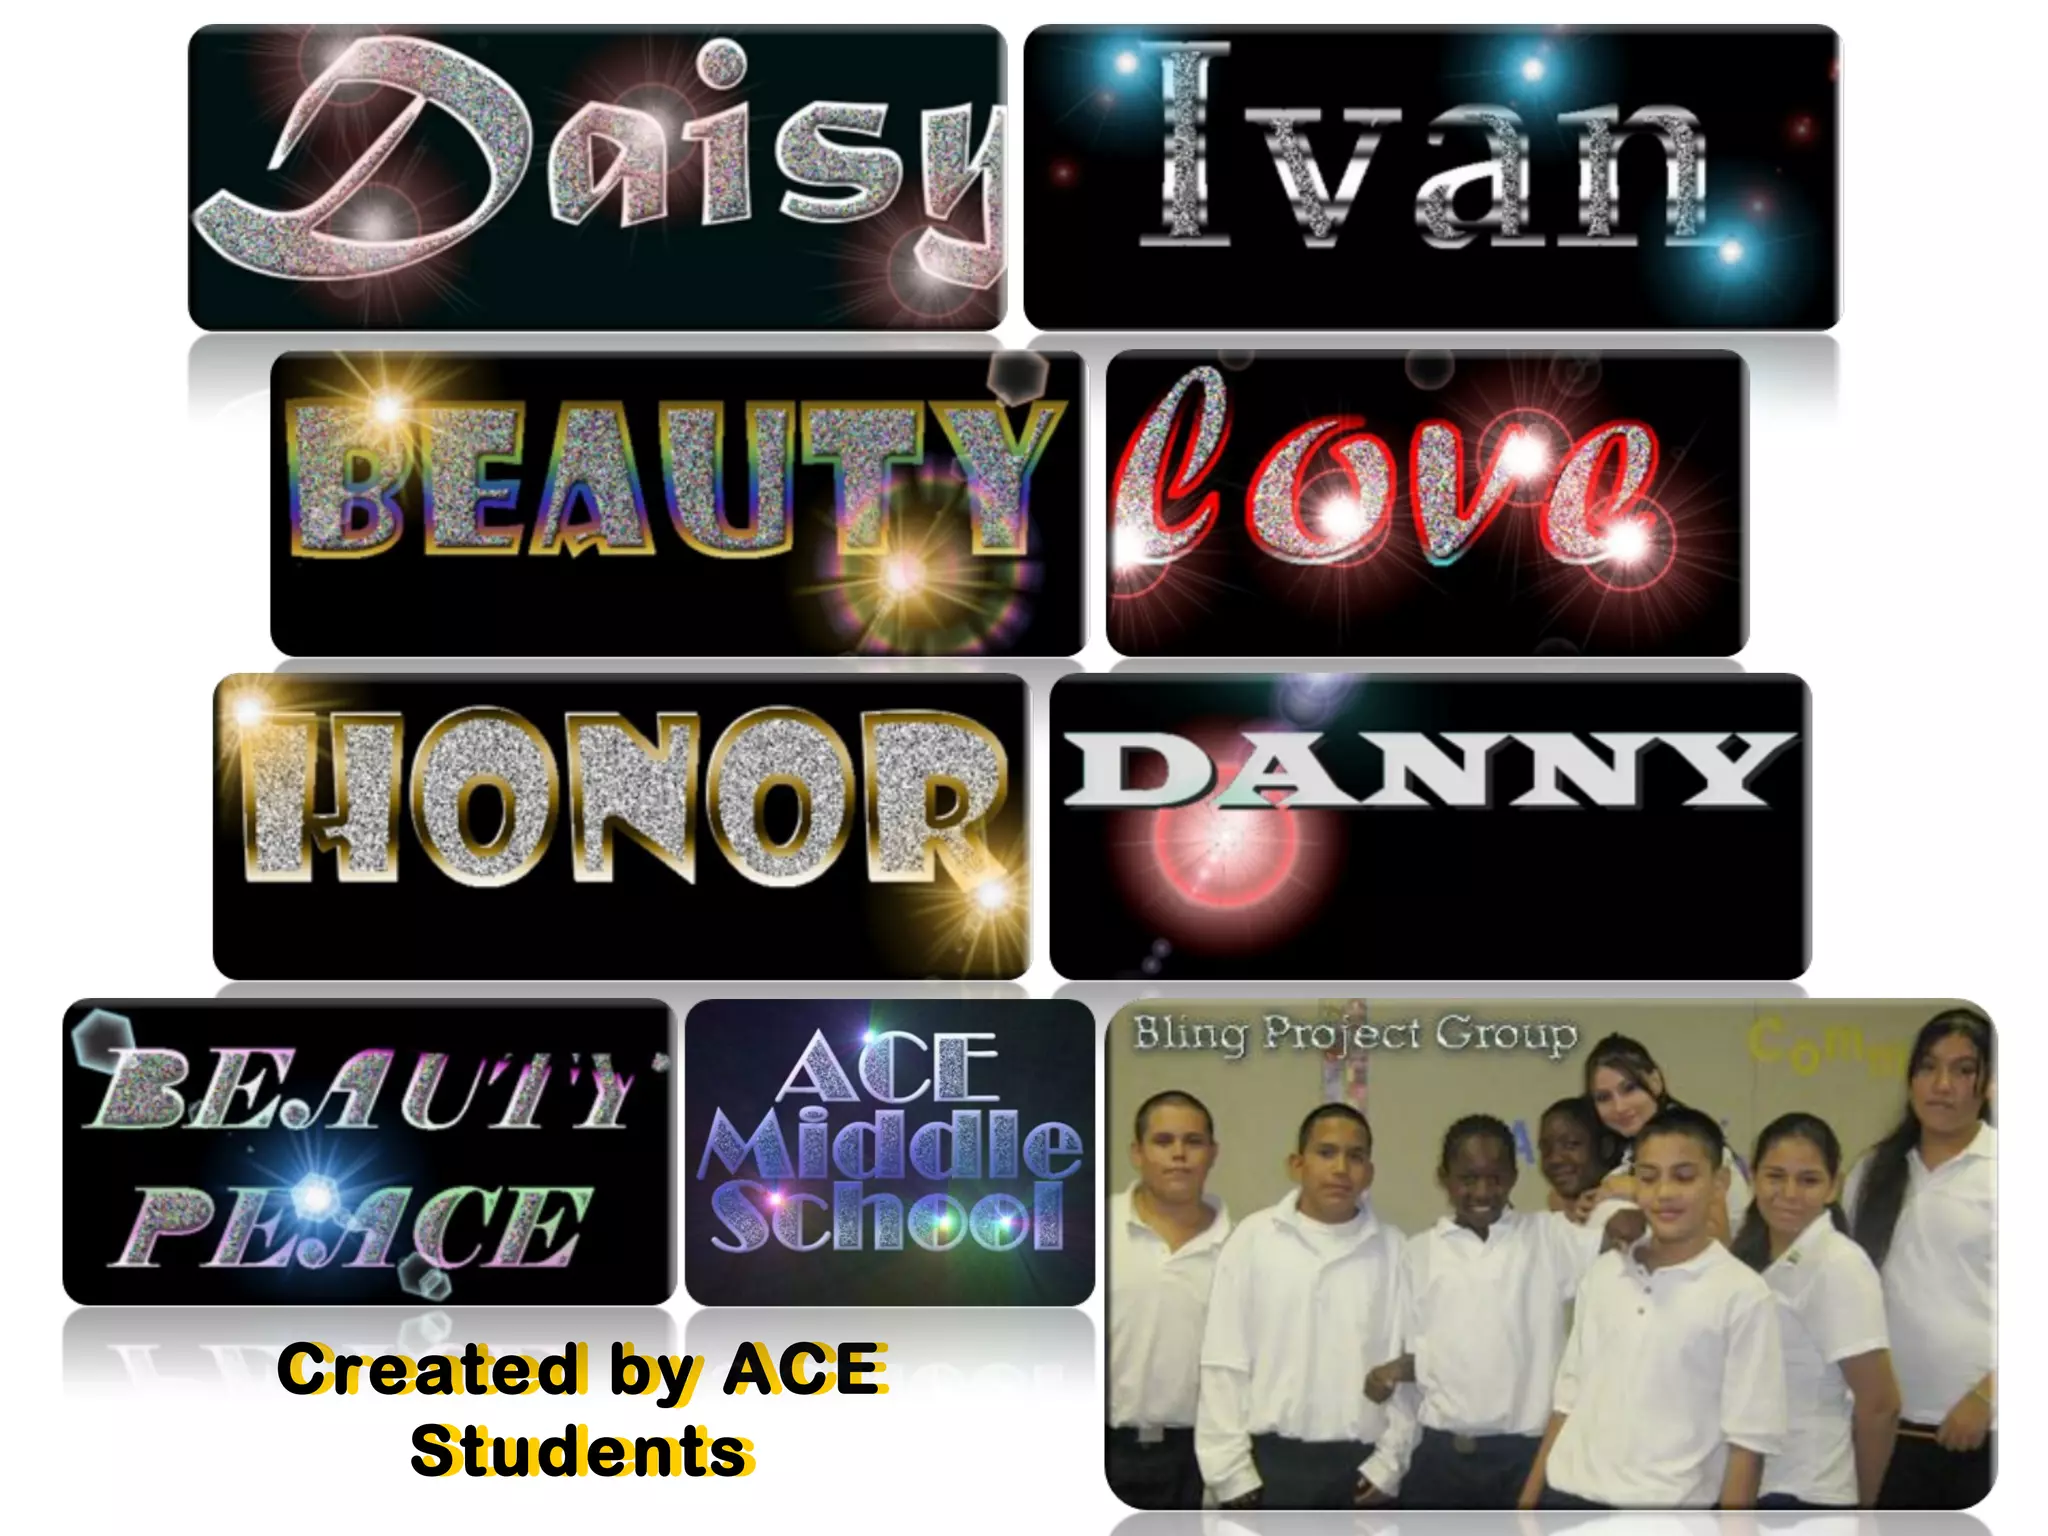

This document outlines a step-by-step guide for creating a digital image using various design tools. It includes instructions on manipulating pixels, filling colors, using the text tool for names, and adding effects such as gradients and lighting. The guide emphasizes the importance of craftsmanship in the final design.