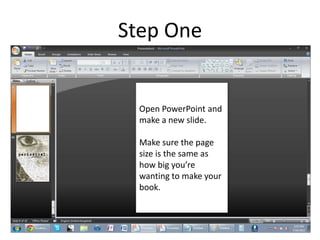
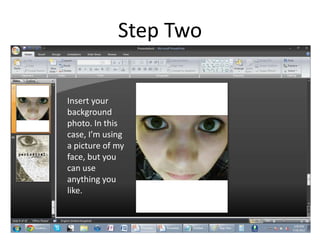
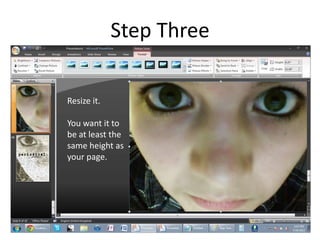
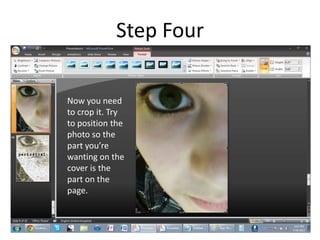
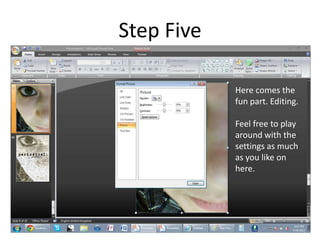
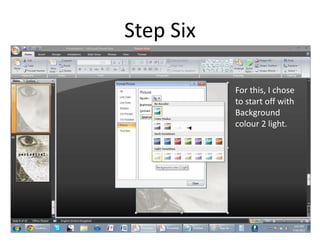
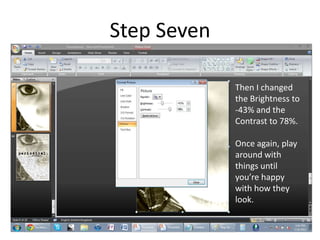
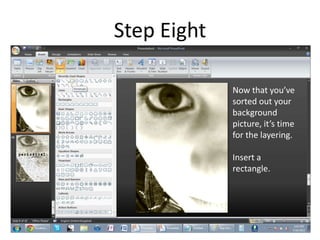
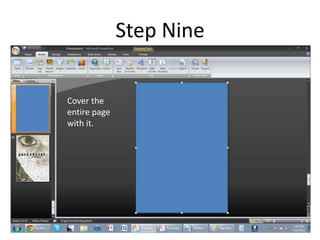
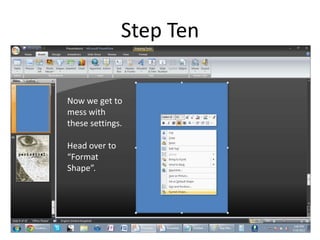
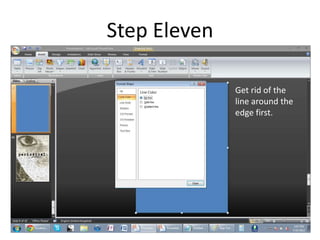
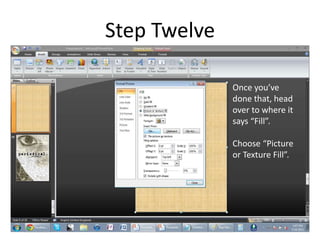
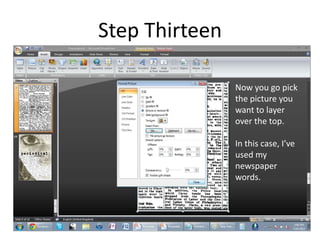
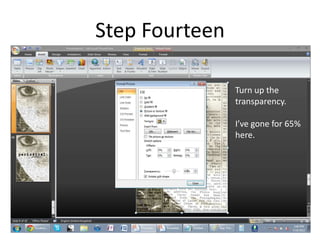
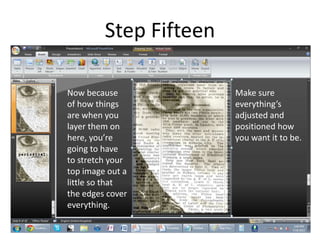
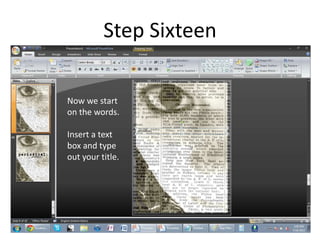
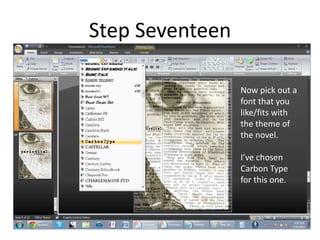
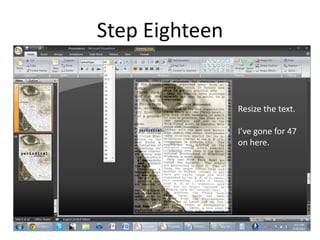
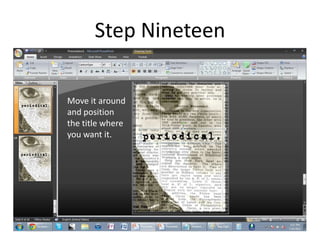
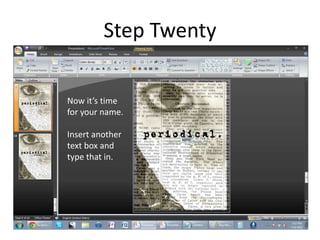
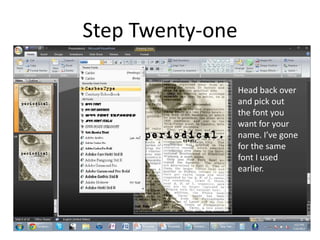
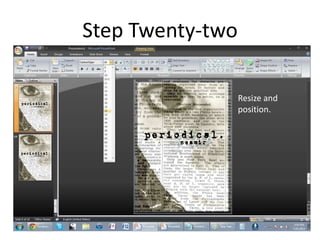
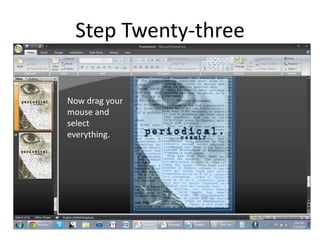
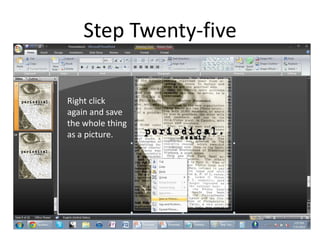
Hello and welcome to this session of Seamir
Shows You How She Makes Covers. Please take
                  a seat.

 Today I’m going to be showing you how to
          make a cover like this:


               Ready? Okay.
Step One


  Open PowerPoint and
  make a new slide.

  Make sure the page
  size is the same as
  how big you’re
  wanting to make your
  book.
Step Two

Insert your
background
photo. In this
case, I’m using
a picture of my
face, but you
can use
anything you
like.
Step Three

Resize it.

You want it to
be at least the
same height as
your page.
Step Four

Now you need
to crop it. Try
to position the
photo so the
part you’re
wanting on the
cover is the
part on the
page.
Step Five

            Here comes the
            fun part. Editing.

            Feel free to play
            around with the
            settings as much
            as you like on
            here.
Step Six

           For this, I chose
           to start off with
           Background
           colour 2 light.
Step Seven

             Then I changed
             the Brightness to
             -43% and the
             Contrast to 78%.

             Once again, play
             around with
             things until
             you’re happy
             with how they
             look.
Step Eight

             Now that you’ve
             sorted out your
             background
             picture, it’s time
             for the layering.

             Insert a
             rectangle.
Step Nine

Cover the
entire page
with it.
Step Ten

Now we get to
mess with
these settings.

Head over to
“Format
Shape”.
Step Eleven

              Get rid of the
              line around the
              edge first.
Step Twelve

              Once you’ve
              done that, head
              over to where it
              says “Fill”.

              Choose “Picture
              or Texture Fill”.
Step Thirteen

                Now you go pick
                the picture you
                want to layer
                over the top.

                In this case, I’ve
                used my
                newspaper
                words.
Step Fourteen

                Turn up the
                transparency.

                I’ve gone for 65%
                here.
Step Fifteen

Now because             Make sure
of how things           everything’s
are when you            adjusted and
layer them on           positioned how
here, you’re            you want it to be.
going to have
to stretch your
top image out a
little so that
the edges cover
everything.
Step Sixteen

Now we start
on the words.

Insert a text
box and type
out your title.
Step Seventeen

                 Now pick out a
                 font that you
                 like/fits with
                 the theme of
                 the novel.

                 I’ve chosen
                 Carbon Type
                 for this one.
Step Eighteen


                Resize the text.

                I’ve gone for 47
                on here.
Step Nineteen

Move it around
and position
the title where
you want it.
Step Twenty

Now it’s time
for your name.

Insert another
text box and
type that in.
Step Twenty-one

                  Head back over
                  and pick out
                  the font you
                  want for your
                  name. I’ve gone
                  for the same
                  font I used
                  earlier.
Step Twenty-two

                  Resize and
                  position.
Step Twenty-three

Now drag your
mouse and
select
everything.
Step Twenty-four

Right click and
group them
together.
Step Twenty-five

Right click
again and save
the whole thing
as a picture.
And that’s pretty much it. You might need to do a little cropping
 or adjusting around the edges, but essentially you’re finished.

So there you have it. A brand new, shiny cover. This tutorial was
for making one like mine, but you can totally use the same skills
 to make one for whatever story you’re writing (as long as you
               want to use layering or whatever).

Let me know if you guys have any questions or anything and I’d
    be more than happy to give you the answer if I know it.
 Remember, all of this is just stuff I’ve picked up from messing
                    around on PowerPoint.

        Most of the time I have no idea what I’m doing.

Cover Tutorial

  • 1.
    Hello and welcometo this session of Seamir Shows You How She Makes Covers. Please take a seat. Today I’m going to be showing you how to make a cover like this: Ready? Okay.
  • 2.
    Step One Open PowerPoint and make a new slide. Make sure the page size is the same as how big you’re wanting to make your book.
  • 3.
    Step Two Insert your background photo.In this case, I’m using a picture of my face, but you can use anything you like.
  • 4.
    Step Three Resize it. Youwant it to be at least the same height as your page.
  • 5.
    Step Four Now youneed to crop it. Try to position the photo so the part you’re wanting on the cover is the part on the page.
  • 6.
    Step Five Here comes the fun part. Editing. Feel free to play around with the settings as much as you like on here.
  • 7.
    Step Six For this, I chose to start off with Background colour 2 light.
  • 8.
    Step Seven Then I changed the Brightness to -43% and the Contrast to 78%. Once again, play around with things until you’re happy with how they look.
  • 9.
    Step Eight Now that you’ve sorted out your background picture, it’s time for the layering. Insert a rectangle.
  • 10.
  • 11.
    Step Ten Now weget to mess with these settings. Head over to “Format Shape”.
  • 12.
    Step Eleven Get rid of the line around the edge first.
  • 13.
    Step Twelve Once you’ve done that, head over to where it says “Fill”. Choose “Picture or Texture Fill”.
  • 14.
    Step Thirteen Now you go pick the picture you want to layer over the top. In this case, I’ve used my newspaper words.
  • 15.
    Step Fourteen Turn up the transparency. I’ve gone for 65% here.
  • 16.
    Step Fifteen Now because Make sure of how things everything’s are when you adjusted and layer them on positioned how here, you’re you want it to be. going to have to stretch your top image out a little so that the edges cover everything.
  • 17.
    Step Sixteen Now westart on the words. Insert a text box and type out your title.
  • 18.
    Step Seventeen Now pick out a font that you like/fits with the theme of the novel. I’ve chosen Carbon Type for this one.
  • 19.
    Step Eighteen Resize the text. I’ve gone for 47 on here.
  • 20.
    Step Nineteen Move itaround and position the title where you want it.
  • 21.
    Step Twenty Now it’stime for your name. Insert another text box and type that in.
  • 22.
    Step Twenty-one Head back over and pick out the font you want for your name. I’ve gone for the same font I used earlier.
  • 23.
    Step Twenty-two Resize and position.
  • 24.
    Step Twenty-three Now dragyour mouse and select everything.
  • 25.
    Step Twenty-four Right clickand group them together.
  • 26.
    Step Twenty-five Right click againand save the whole thing as a picture.
  • 27.
    And that’s prettymuch it. You might need to do a little cropping or adjusting around the edges, but essentially you’re finished. So there you have it. A brand new, shiny cover. This tutorial was for making one like mine, but you can totally use the same skills to make one for whatever story you’re writing (as long as you want to use layering or whatever). Let me know if you guys have any questions or anything and I’d be more than happy to give you the answer if I know it. Remember, all of this is just stuff I’ve picked up from messing around on PowerPoint. Most of the time I have no idea what I’m doing.