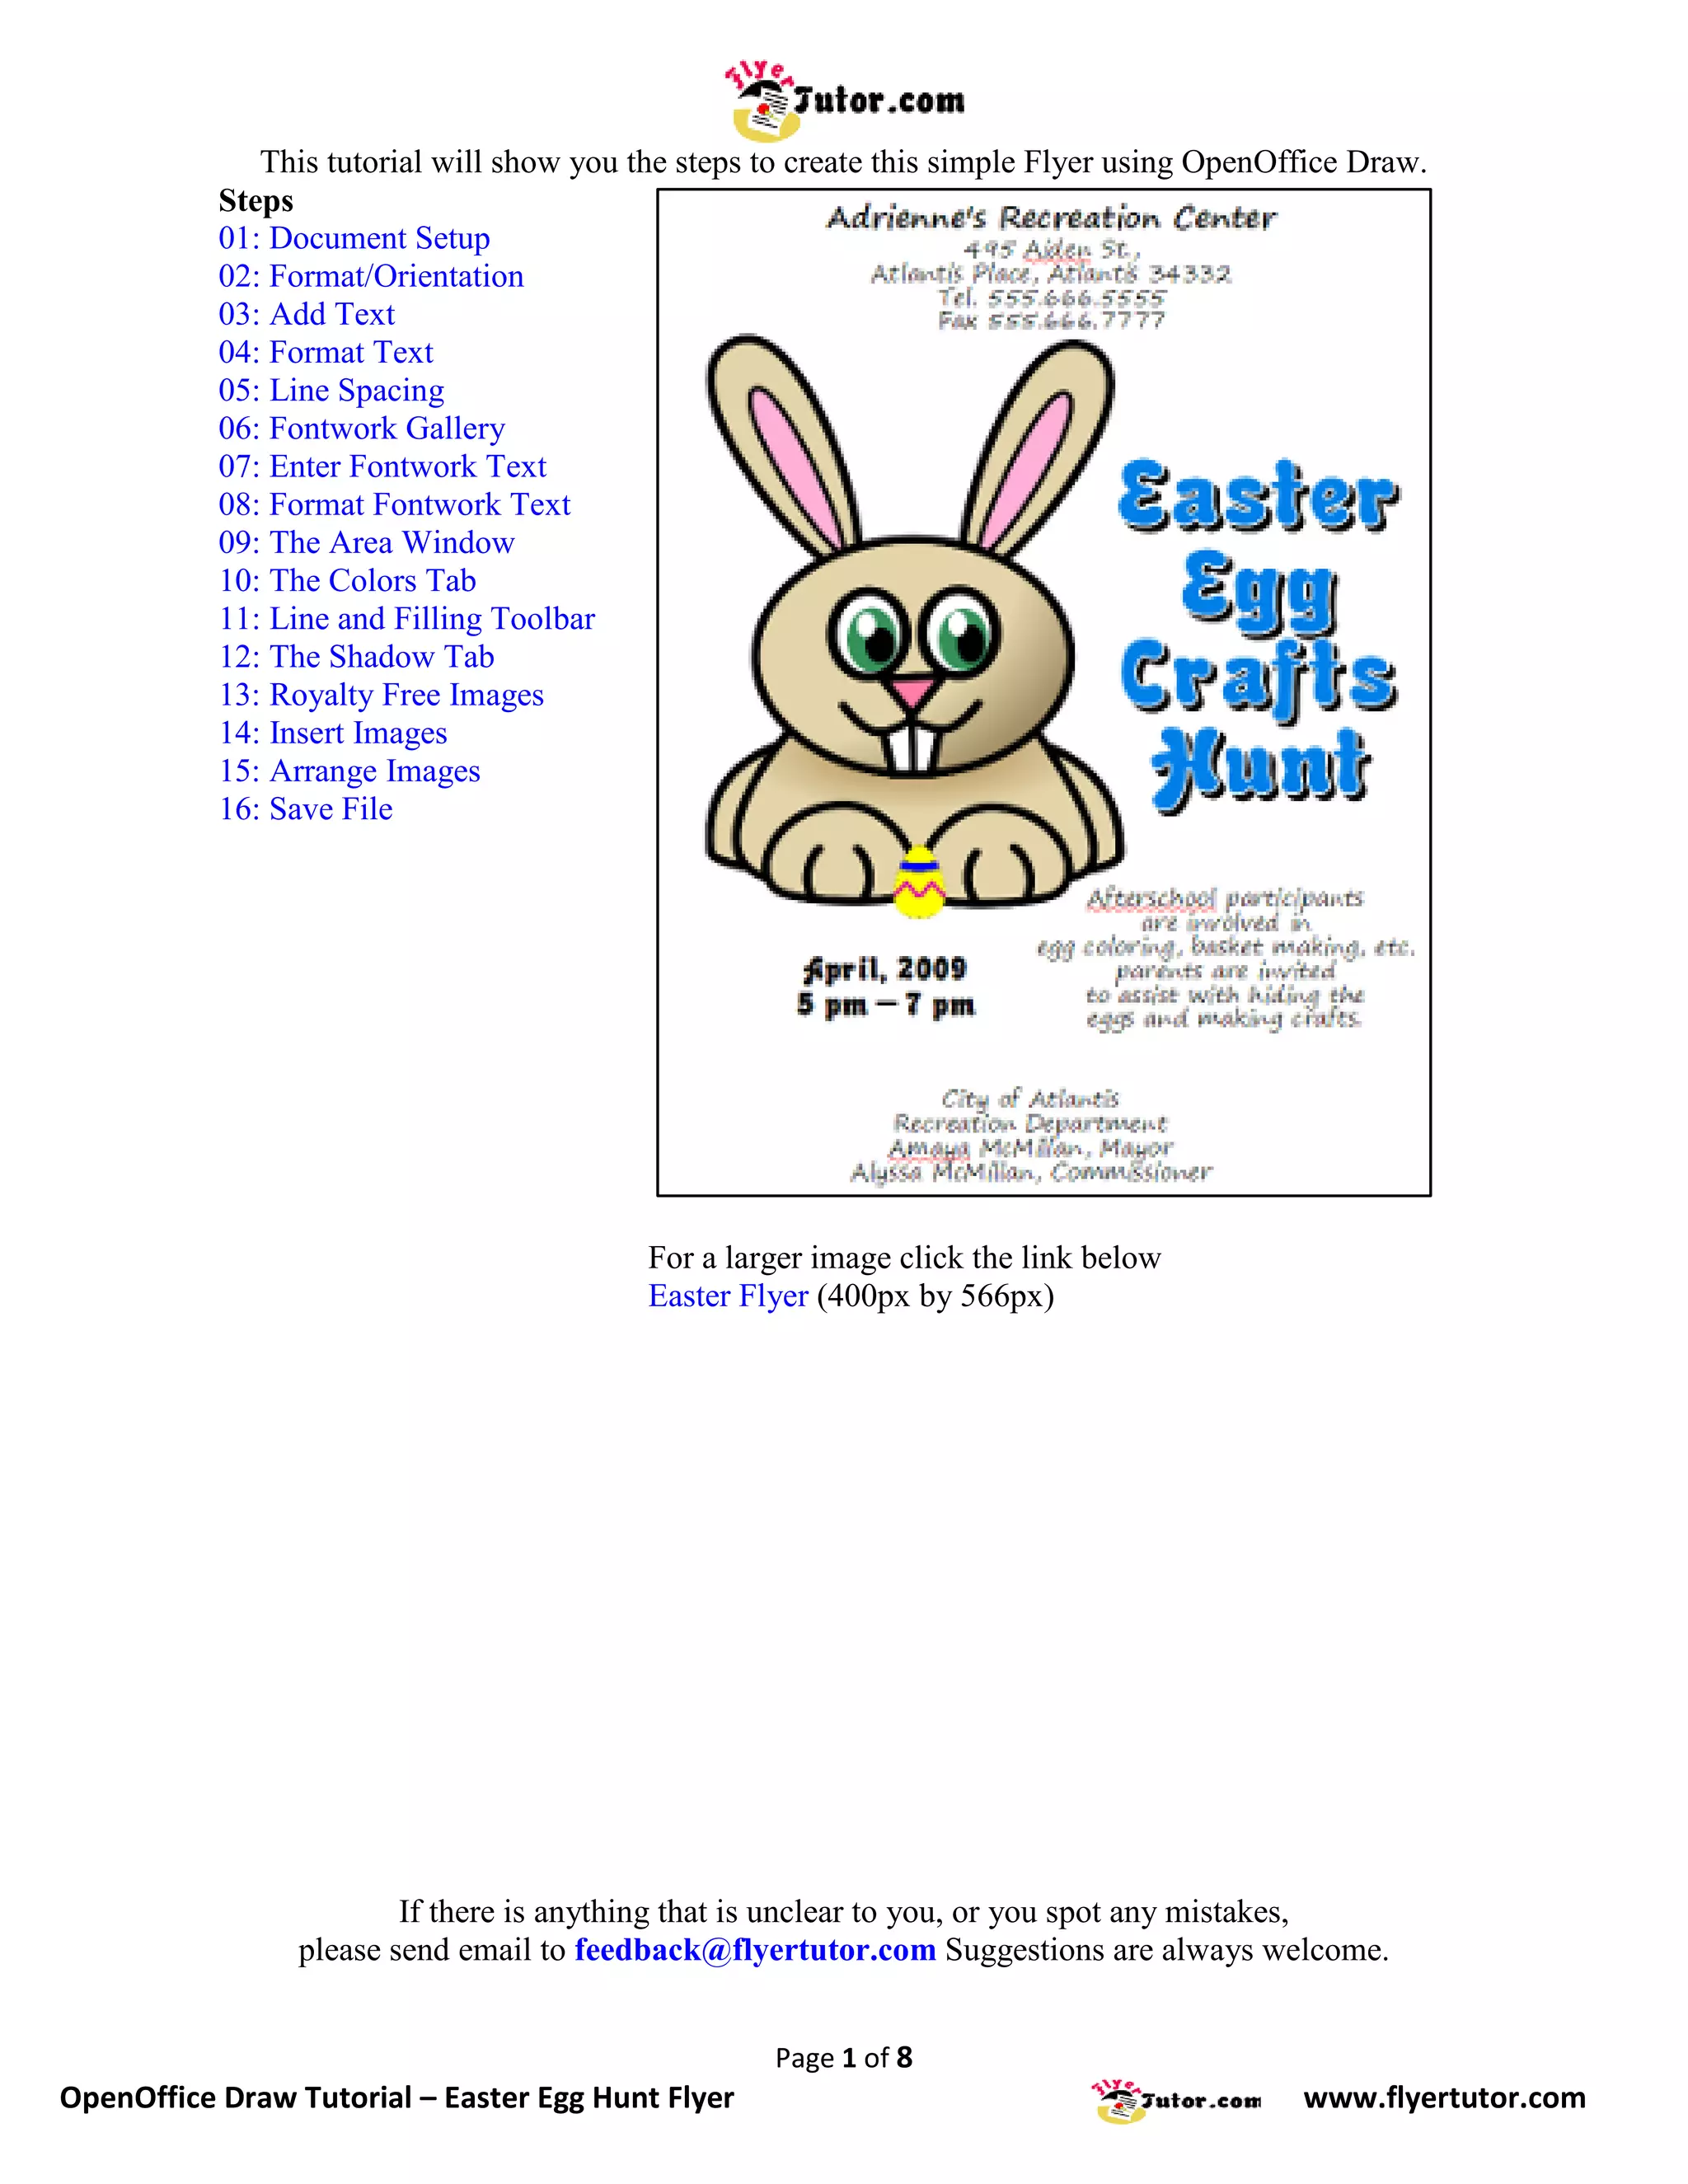
Inkscape Beginner Tutorial: How to Make a Yoga Class FlyerFlyer Tutor
Learn how to use the Free Open Source Program - Inkscape, to make a Yoga Class Flyer from beginning to end. With this Inkscape Tutorial you will learn how to do Document Setup, Create Rectangle, Set Object Size, Edit Fill and Stroke Color, Convert to Curves, Add Nodes, Adjust Line Segment, Curve Line Segment, Create Duplicates, Arrange Order, Insert Circles, Find Royalty Free Clipart, Import Image, Ungroup Images, Flip Images Horizontally, Find Free Fonts, Insert and Format Text, Add Drop Shadow, and Save your File.
Corel Draw Beginner Tutorial: How to Make a New Product FlyerFlyer Tutor
Recreate this New Product Flyer while learning how to use the Corel Draw Interface with this step by step illustrated tutorial. Perform document setup, delete nodes, mirror image, convert to bitmap, gaussian blur, gradient, text on a path, crop images, fountain fill, line spacing and more.
1. This tutorial will show you the steps to create this simple Flyer using OpenOffice Draw.
Steps
01: Document Setup
02: Format/Orientation
03: Add Text
04: Format Text
05: Line Spacing
06: Fontwork Gallery
07: Enter Fontwork Text
08: Format Fontwork Text
09: The Area Window
10: The Colors Tab
11: Line and Filling Toolbar
12: The Shadow Tab
13: Royalty Free Images
14: Insert Images
15: Arrange Images
16: Save File
For a larger image click the link below
Easter Flyer (400px by 566px)
If there is anything that is unclear to you, or you spot any mistakes,
please send email to feedback@flyertutor.com Suggestions are always welcome.
Page 1 of 8
OpenOffice Draw Tutorial – Easter Egg Hunt Flyer www.flyertutor.com
2. Step 01: Document Setup
To start, move the mouse over the blank
canvas, then right click and select Page >
Page Setup.
The Page Setup Window will appear.
Step 02: Format/Orientation
On the Page Tab, change the Paper Format to Letter, and Orientation to Portrait.
Then set Margins to "0.50" each. Then click OK.
Step 03: Add Text
Select the Text Icon from the Drawing Toolbar.
Click anywhere on the canvas and start entering Text, in this case it will be the Company's Title
and Contact Information:
"Adrienne's Recreation Center
495 Aiden St.,
Atlantis Place, Atlantis 34332
Tel. 555.666.5555
Fax 555.666.7777".
Page 2 of 8
OpenOffice Draw Tutorial – Easter Egg Hunt Flyer www.flyertutor.com
3. Step 04: Format Text
Select all the Text, then choose the Center Icon from the Text
Formatting Toolbar.
Select the Down Arrow on the right side of "Arial" and change the Font
to "Segoe Print" which is a free Font that was downloaded from
www.FontFreak.com. Set the Font Size to "18".
Then specifically select the Company Title, select the Bold Icon and
change the Font Size to "24".
Next reselect all the Text and right click over it, then select Paragraph
from the menu that appears.
This will open the Paragraph Window.
Step 05: Line Spacing
In the Indents and Spacing Tab,
in the Line Spacing Section,
select the Down Arrow, choose
"Proportional" and change to
"60%".
Then click OK.
The changes to the Text should
look like this:
Continue adding the remainder of
Text, making the necessary
changes.
The "April" Text uses the Font "Advert" also downloaded from www.FontFreak.com. Font
Size is "30" and Layout is "Center".
Page 3 of 8
OpenOffice Draw Tutorial – Easter Egg Hunt Flyer www.flyertutor.com
4. Step 06: Fontwork Gallery
Next we can add some Fill Colored Text with a
Drop Shadow.
In this case, the Text is "Easter Crafts Egg
Hunt".
Click on the Fontwork Gallery Icon on the
Drawing Toolbar.
This will open up the Fontwork Gallery. Select the
first option and click OK.
Step 07: Enter Fontwork Text
The Fontwork Text will appear. Double click on this Text to get a flashing
cursor.
Then select the "Black Fontwork" that appears inside it and type in "Easter
Egg Crafts Hunt".
Then click anywhere on the canvas to see the
changes.
The Fontwork Menu Bar will appear. Select the 4th Icon and select
"Center" from the drop down menu.
With the "Easter" Text selected, right click and select Character from the
menu that appears.
This brings up the Character Window.
Page 4 of 8
OpenOffice Draw Tutorial – Easter Egg Hunt Flyer www.flyertutor.com
5. Step 08: Format Fontwork Text
In the Font Tab, change Font to "Advert",
Size "60", then click OK.
Next we will add Color to the Text.
Right click over it and select "Area" from the
menu that appears.
Step 09: The Area Window
This will bring up the Area Window.
Go to the Colors Tab.
Step 10: The Colors Tab
In the Names Box, type in what you want
to call your Custom Color, in this case it is
"Text Blue".
Then go over to "RGB" and set Red to
"0", Green to "128" and Blue to "232".
Then click Add.
You can scroll down the Table of Colors
to verify that your new color has been
added.
Then click OK.
Page 5 of 8
OpenOffice Draw Tutorial – Easter Egg Hunt Flyer www.flyertutor.com
6. Step 11: Line and Filling Toolbar
Reselect the "Easter Text" and go to the Line and Filling
Toolbar. (Toolbar normally is longer)
Where the Line Width is set to "0.01", change this to
"0.02". Select the Down Arrow next to the color "Black"
and select "White".
Now instead of selecting the Drop Shadow Icon that is clearly visible on the Line and Filling
Toolbar, we must first change the Drop Shadow Settings.
To do this, right click over the "Easter Text" and select Area again. Then select the Shadow Tab.
Step 12: The Shadow Tab
Check the "Use Shadow Box", change
Distance to "0.06" and Color to
"Black", then click OK.
The Blue Drop Shadow Text should
look like this:
Step 13: Royalty Free Images
Next add Images to the document.
Here I downloaded the Images of an Egg and a Rabbit from
www.Clker.com, which is a site where you can download Royalty Free
Clipart.
You can also check out www.Public-Domain-Image.com, and OpenClipArt.org.
Page 6 of 8
OpenOffice Draw Tutorial – Easter Egg Hunt Flyer www.flyertutor.com
7. Step 14: Insert Images
To insert an Image click on the From File Icon . You can also do this by going to Insert >
Picture > From File.
This will bring up the Insert Picture Window. Locate
your file, then click Open.
Once the Images are put on canvas, Resize and move into desired
location.
Step 15: Arrange Images
Select the Arrange Icon on the Drawing Toolbar.
This will bring up the Arrange Menu. Select the 1st Icon which is "Bring to
Front" while you have the Egg selected.
This will place the Egg in front of the Rabbit.
Once you've finished arranging your Images your document will be complete.
Step 16: Save File
It should look like this:
All that's left to do is Save the document.
Go to File > Save.
Page 7 of 8
OpenOffice Draw Tutorial – Easter Egg Hunt Flyer www.flyertutor.com