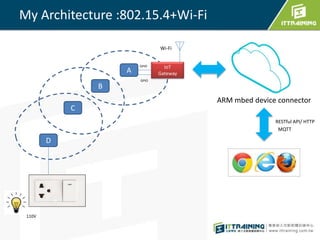

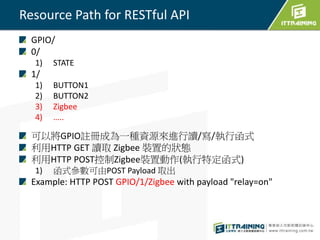
![send_DATA()
Type Dest ID Dest MAC Src ID Src MAC Len Data[10]
0x10 'B' 0x0002 'A' 0x0001 7
for Routing
'D' 0 state
Dest ID
'A' 0x0001
Seq No.
Relay on/off
Src MAC
Src ID
Example: 'A'-->'D'](https://image.slidesharecdn.com/iotfinalprojectforit-180117025127/85/IoT-Gateway-8-320.jpg)
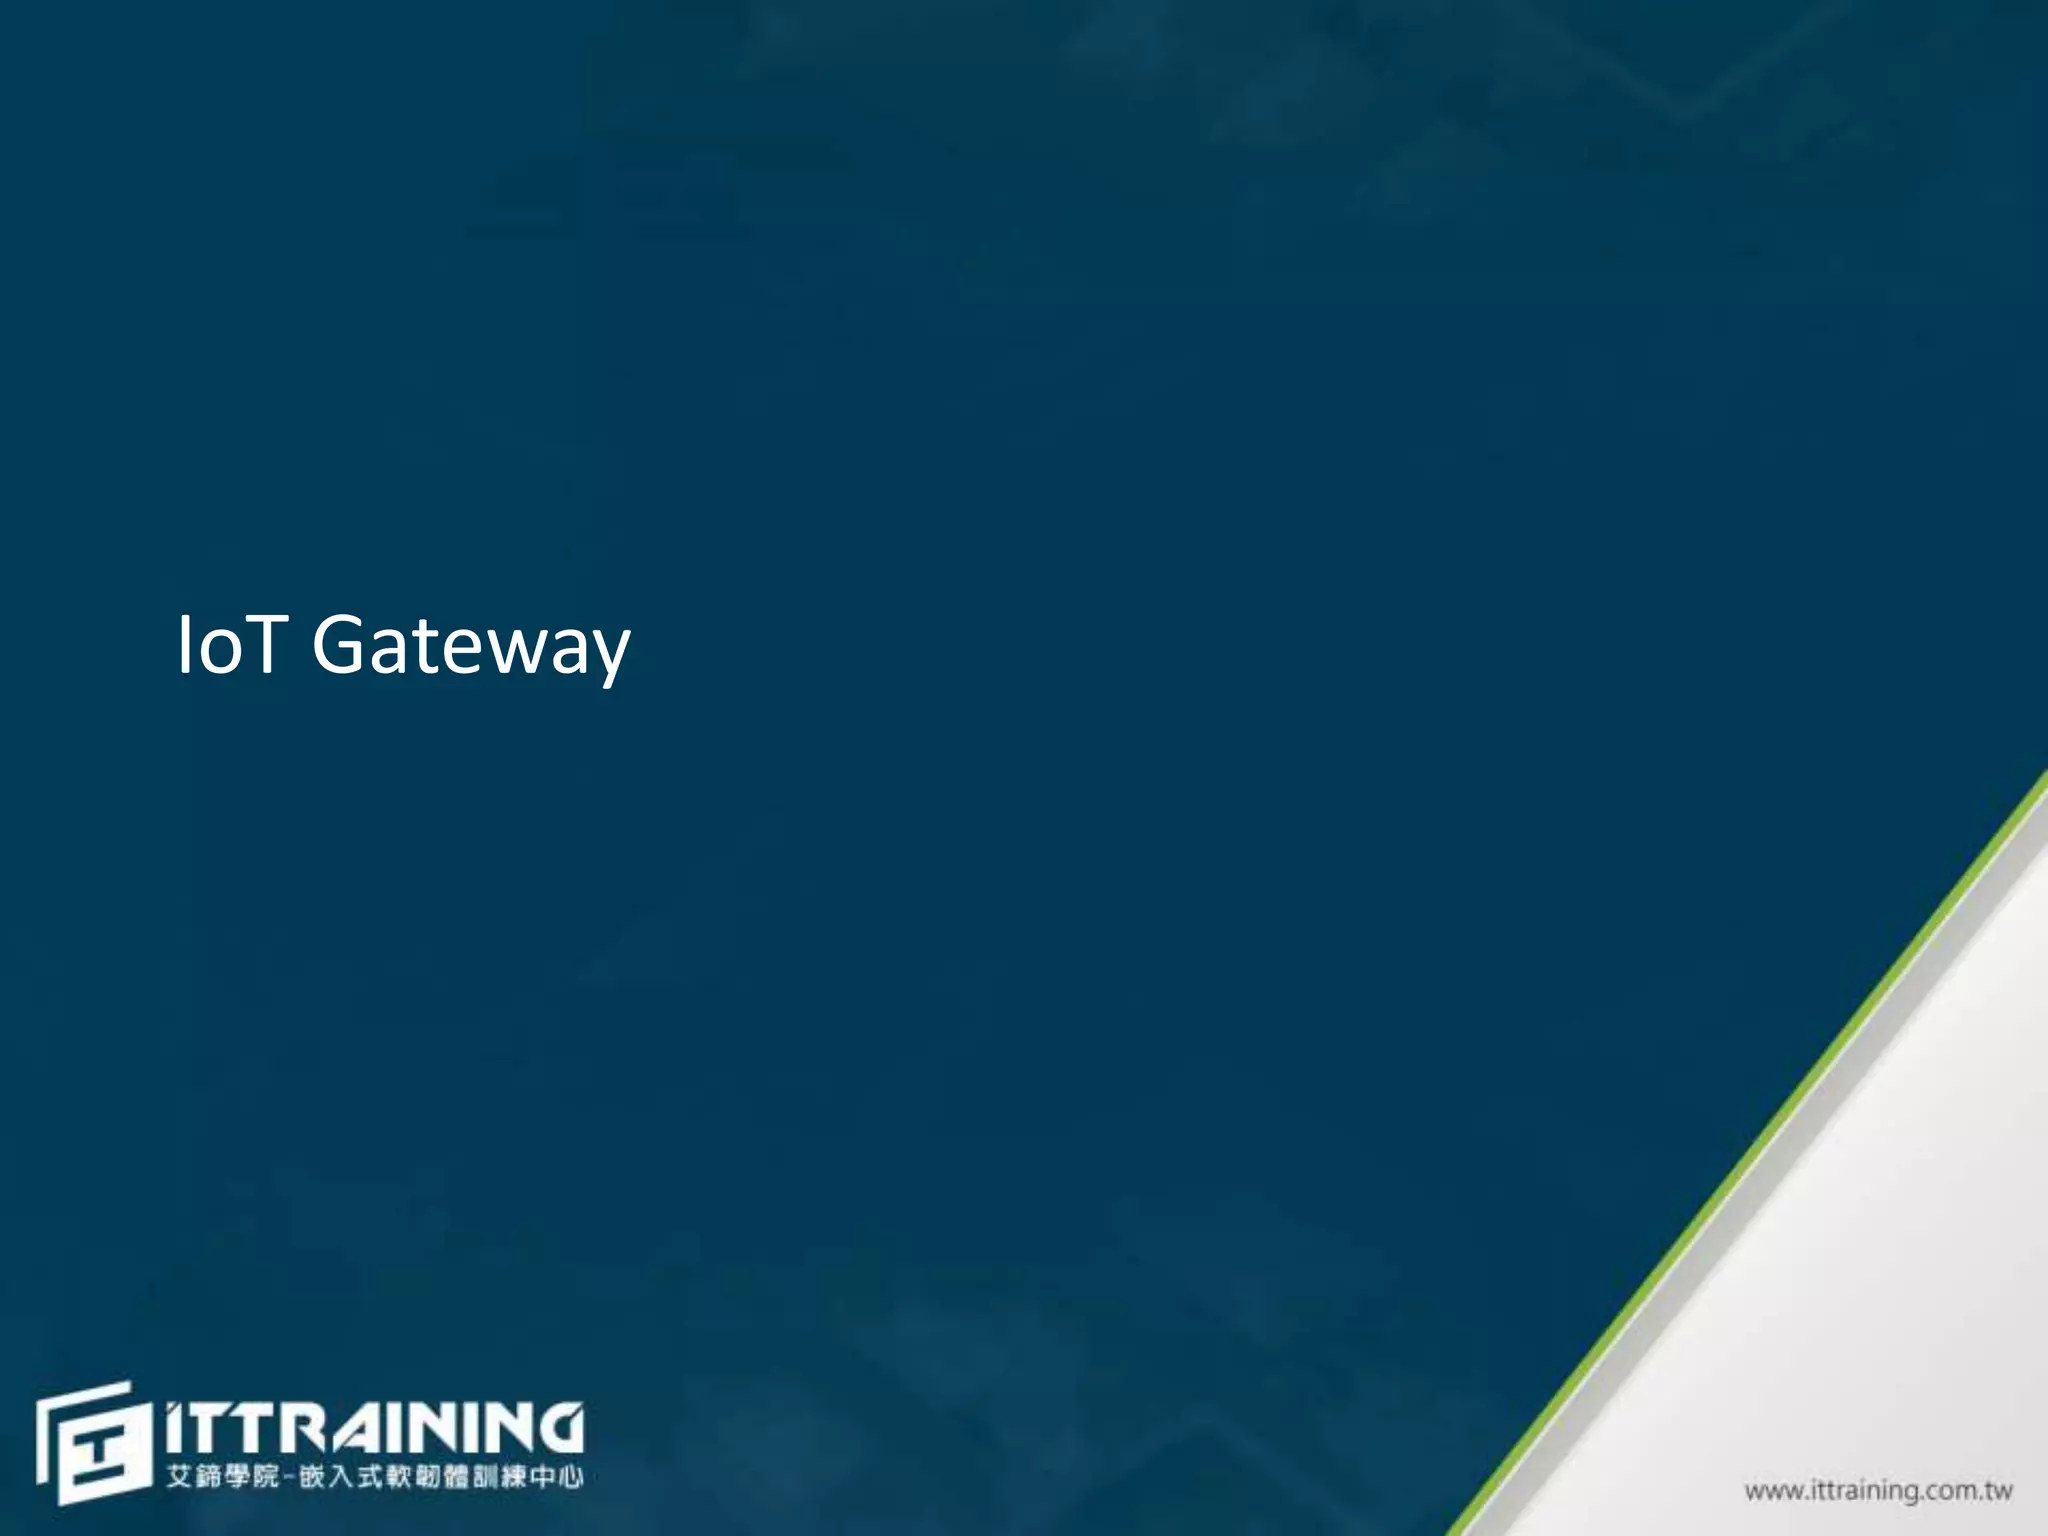
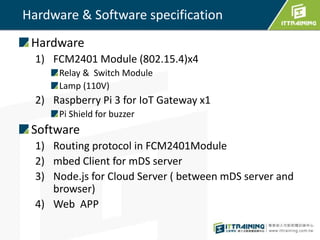
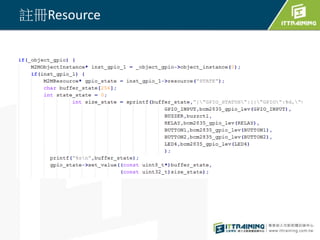
![send_DATA_ACK()
Type Dest ID Dest MAC Src ID Src MAC Len Data[10]
0x11 'C' 0x0003 'D' 0x0004 3
for Routing
'A' 0 state
Seq No.
Switch on/off
Example: 'D'-->'A'
Dest ID](https://image.slidesharecdn.com/iotfinalprojectforit-180117025127/85/IoT-Gateway-9-320.jpg)
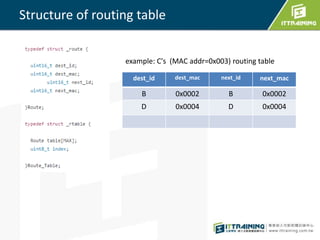
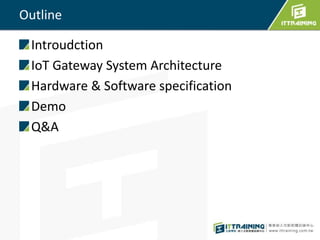
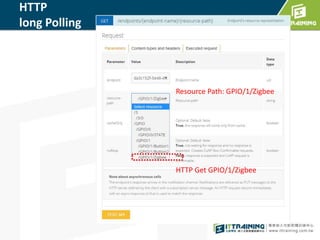
![dest_id dest_mac next_id next_mac
B 0x0002 B 0x0002
D 0x0004 D 0x0004
find_next_hop()
r=find_next_hop('B',tbl);
r
Type Dest ID Dest MAC Src ID Src MAC Len Data[10]
0x11 'B' 0x0002 'C' 0x0003
'C'-->'B'](https://image.slidesharecdn.com/iotfinalprojectforit-180117025127/85/IoT-Gateway-11-320.jpg)


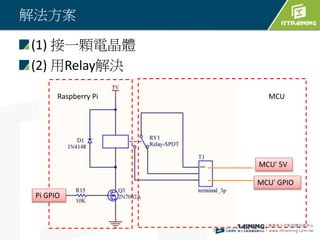


The document outlines an IoT gateway system architecture, detailing hardware and software specifications, including the use of various communication technologies such as Wi-Fi and Zigbee. It describes the setup involving a Raspberry Pi and FCM2401 modules for remote appliance control and energy monitoring, along with RESTful API interactions for device management. It also highlights potential issues related to GPIO power requirements and provides solutions for ensuring proper operation.