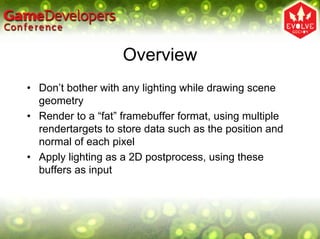
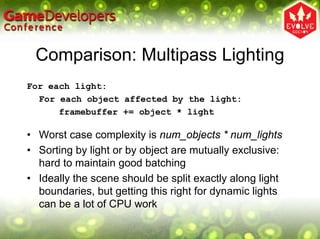
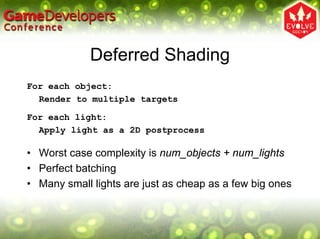
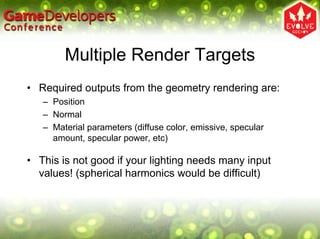
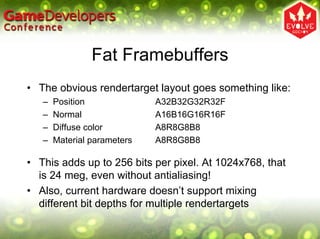
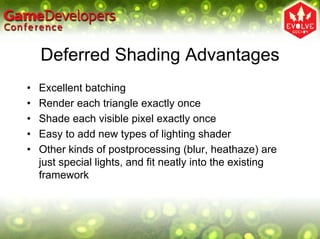
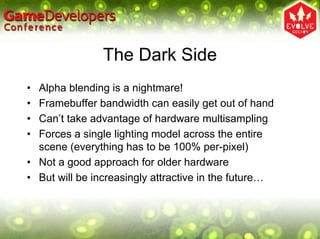
Deferred Shading

  Shawn Hargreaves
Overview
• Don’t bother with any lighting while drawing scene
  geometry
• Render to a “fat” framebuffer format, using multiple
  rendertargets to store data such as the position and
  normal of each pixel
• Apply lighting as a 2D postprocess, using these
  buffers as input
Comparison: Single Pass Lighting
For each object:
  Render mesh, applying all lights in one shader

• Good for scenes with small numbers of lights (eg.
  outdoor sunlight)
• Difficult to organize if there are many lights
• Easy to overflow shader length limitations
Comparison: Multipass Lighting
For each light:
  For each object affected by the light:
      framebuffer += object * light

• Worst case complexity is num_objects * num_lights
• Sorting by light or by object are mutually exclusive:
  hard to maintain good batching
• Ideally the scene should be split exactly along light
  boundaries, but getting this right for dynamic lights
  can be a lot of CPU work
Deferred Shading
For each object:
  Render to multiple targets

For each light:
  Apply light as a 2D postprocess

• Worst case complexity is num_objects + num_lights
• Perfect batching
• Many small lights are just as cheap as a few big ones
Multiple Render Targets
• Required outputs from the geometry rendering are:
   – Position
   – Normal
   – Material parameters (diffuse color, emissive, specular
     amount, specular power, etc)

• This is not good if your lighting needs many input
  values! (spherical harmonics would be difficult)
Fat Framebuffers
• The obvious rendertarget layout goes something like:
   –   Position              A32B32G32R32F
   –   Normal                A16B16G16R16F
   –   Diffuse color         A8R8G8B8
   –   Material parameters   A8R8G8B8

• This adds up to 256 bits per pixel. At 1024x768, that
  is 24 meg, even without antialiasing!
• Also, current hardware doesn’t support mixing
  different bit depths for multiple rendertargets
Framebuffer Size Optimizations
• Store normals in A2R10G10B10 format
• Material attributes could be palettized, then looked up
  in shader constants or a texture
• No need to store position as a vector3:
   – Each 2D screen pixel corresponds to a ray from the eyepoint
     into the 3D world (think raytracing)
   – You inherently know the 2D position of each screen pixel,
     and you know the camera settings
   – So if you write out the distance along this ray, you can
     reconstruct the original worldspace position
My Framebuffer Choices
• 128 bits per pixel = 12 meg @ 1024x768:
   –   Depth                       R32F
   –   Normal + scattering         A2R10G10B10
   –   Diffuse color + emissive    A8R8G8B8
   –   Other material parameters   A8R8G8B8

• My material parameters are specular intensity,
  specular power, occlusion factor, and shadow
  amount. I store a 2-bit subsurface scattering control
  in the alpha channel of the normal buffer
Depth
Buffer

Specular
Intensity /
Power
Normal
Buffer
Diffuse
Color
Buffer
Deferred
Lighting
Results
How Wasteful…
• One of my 32 bit buffers holds depth values
• But the hardware is already doing this for me!
• It would be nice if there was an efficient way to get
  access to the existing contents of the Z buffer
• Pretty please? ☺
Global Lights
• Things like sunlight and fog affect the entire scene
• Draw them as a fullscreen quad
• Position, normal, color, and material settings are read
  from texture inputs
• Lighting calculation is evaluated in the pixel shader
• Output goes to an intermediate lighting buffer
Local Lights
• These only affect part of the scene
• We only want to render to the affected pixels
• This requires projecting the light volume into
  screenspace. The GPU is very good at that sort of
  thing…
• At author time, build a simple mesh that bounds the
  area affected by the light. At runtime, draw this in 3D
  space, running your lighting shader over each pixel
  that it covers
Convex Light Hulls
• The light bounding
  mesh will have two
  sides, but it is important
  that each pixel only gets
  lit once
• As long as the mesh is
  convex, backface
  culling can take care of
  this
Convex Light Hulls
• The light bounding
  mesh will have two
  sides, but it is important
  that each pixel only gets
  lit once
• As long as the mesh is
  convex, backface
  culling can take care of
  this
Convex Light Hulls #2
• If the camera is inside
  the light volume, draw
  backfaces
Convex Light Hulls #3
• If the light volume
  intersects the far clip
  plane, draw frontfaces
• If the light volume
  intersects both near and
  far clip planes, your
  light is too big!
Volume Optimization
• We only want to shade
  the area where the light
  volume intersects scene
  geometry
• There is no need to
  shade where the
  volume is suspended in
  midair
• Or where it is buried
  beneath the ground
Stencil Light Volumes
• This is exactly the same problem as finding the
  intersection between scene geometry and an
  extruded shadow volume
• The standard stencil buffer solution applies
• But using stencil requires changing renderstate for
  each light, which prevents batching up multiple lights
  into a single draw call
• Using stencil may or may not be a performance win,
  depending on context
Light Volume Z Tests
• A simple Z test can get
  things half-right, without
  the overhead of using
  stencil
• When drawing light
  volume backfaces, use
  D3DCMP_GREATER to
  reject “floating in the air”
  portions of the light
Light Volume Z Tests #2
• If drawing frontfaces, use
  D3DCMP_LESS to reject
  “buried underground”
  light regions
• Which is faster depends
  on the ratio of
  aboveground vs.
  underground pixels: use
  a heuristic to make a
  guess
Alpha Blending
• This is a big problem!
• You could simply not do any lighting on alpha
  blended things, and draw them after the deferred
  shading is complete. The emissive and occlusion
  material controls are useful for crossfading between
  lit and non-lit geometry
• The return of stippling?
• Depth peeling is the ultimate solution, but is
  prohibitively expensive at least for the time being
High Dynamic Range
• You can do deferred shading without HDR, but that
  wouldn’t be so much fun
• Render your scene to multiple 32 bit buffers, then use
  a 64 bit accumulation buffer during the lighting phase
• Unfortunately, current hardware doesn’t support
  additive blending into 64 bit rendertargets
• Workaround: use a pair of HDR buffers, and simulate
  alpha blending in the pixel shader
DIY Alpha Blending
• Initialize buffers A and B to the same contents
• Set buffer A as a shader input, while rendering to B,
  and roll your own blend at the end of the shader
• This only works as long as your geometry doesn’t
  overlap in screenspace
• When things do overlap, you have to copy all
  modified pixels from B back into A, to make sure the
  input and output buffers stay in sync
• This is slow, but not totally impractical as long as you
  sort your lights to minimize screenspace overlaps
HDR
Results
Volumetric Depth Tests
• Neat side effect of having scene depth available as a
  shader input
• Gradually fade out alpha as a polygon approaches
  the Z fail threshold
• No more hard edges where alpha blended particles
  intersect world geometry!
Deferred Shading Advantages
•   Excellent batching
•   Render each triangle exactly once
•   Shade each visible pixel exactly once
•   Easy to add new types of lighting shader
•   Other kinds of postprocessing (blur, heathaze) are
    just special lights, and fit neatly into the existing
    framework
The Dark Side
• Alpha blending is a nightmare!
• Framebuffer bandwidth can easily get out of hand
• Can’t take advantage of hardware multisampling
• Forces a single lighting model across the entire
  scene (everything has to be 100% per-pixel)
• Not a good approach for older hardware
• But will be increasingly attractive in the future…
The End
• Any questions?

Deferred shading

  • 1.
    Deferred Shading Shawn Hargreaves
  • 2.
    Overview • Don’t botherwith any lighting while drawing scene geometry • Render to a “fat” framebuffer format, using multiple rendertargets to store data such as the position and normal of each pixel • Apply lighting as a 2D postprocess, using these buffers as input
  • 3.
    Comparison: Single PassLighting For each object: Render mesh, applying all lights in one shader • Good for scenes with small numbers of lights (eg. outdoor sunlight) • Difficult to organize if there are many lights • Easy to overflow shader length limitations
  • 4.
    Comparison: Multipass Lighting Foreach light: For each object affected by the light: framebuffer += object * light • Worst case complexity is num_objects * num_lights • Sorting by light or by object are mutually exclusive: hard to maintain good batching • Ideally the scene should be split exactly along light boundaries, but getting this right for dynamic lights can be a lot of CPU work
  • 5.
    Deferred Shading For eachobject: Render to multiple targets For each light: Apply light as a 2D postprocess • Worst case complexity is num_objects + num_lights • Perfect batching • Many small lights are just as cheap as a few big ones
  • 6.
    Multiple Render Targets •Required outputs from the geometry rendering are: – Position – Normal – Material parameters (diffuse color, emissive, specular amount, specular power, etc) • This is not good if your lighting needs many input values! (spherical harmonics would be difficult)
  • 7.
    Fat Framebuffers • Theobvious rendertarget layout goes something like: – Position A32B32G32R32F – Normal A16B16G16R16F – Diffuse color A8R8G8B8 – Material parameters A8R8G8B8 • This adds up to 256 bits per pixel. At 1024x768, that is 24 meg, even without antialiasing! • Also, current hardware doesn’t support mixing different bit depths for multiple rendertargets
  • 8.
    Framebuffer Size Optimizations •Store normals in A2R10G10B10 format • Material attributes could be palettized, then looked up in shader constants or a texture • No need to store position as a vector3: – Each 2D screen pixel corresponds to a ray from the eyepoint into the 3D world (think raytracing) – You inherently know the 2D position of each screen pixel, and you know the camera settings – So if you write out the distance along this ray, you can reconstruct the original worldspace position
  • 9.
    My Framebuffer Choices •128 bits per pixel = 12 meg @ 1024x768: – Depth R32F – Normal + scattering A2R10G10B10 – Diffuse color + emissive A8R8G8B8 – Other material parameters A8R8G8B8 • My material parameters are specular intensity, specular power, occlusion factor, and shadow amount. I store a 2-bit subsurface scattering control in the alpha channel of the normal buffer
  • 10.
  • 11.
  • 12.
  • 13.
  • 14.
    How Wasteful… • Oneof my 32 bit buffers holds depth values • But the hardware is already doing this for me! • It would be nice if there was an efficient way to get access to the existing contents of the Z buffer • Pretty please? ☺
  • 15.
    Global Lights • Thingslike sunlight and fog affect the entire scene • Draw them as a fullscreen quad • Position, normal, color, and material settings are read from texture inputs • Lighting calculation is evaluated in the pixel shader • Output goes to an intermediate lighting buffer
  • 16.
    Local Lights • Theseonly affect part of the scene • We only want to render to the affected pixels • This requires projecting the light volume into screenspace. The GPU is very good at that sort of thing… • At author time, build a simple mesh that bounds the area affected by the light. At runtime, draw this in 3D space, running your lighting shader over each pixel that it covers
  • 17.
    Convex Light Hulls •The light bounding mesh will have two sides, but it is important that each pixel only gets lit once • As long as the mesh is convex, backface culling can take care of this
  • 18.
    Convex Light Hulls •The light bounding mesh will have two sides, but it is important that each pixel only gets lit once • As long as the mesh is convex, backface culling can take care of this
  • 19.
    Convex Light Hulls#2 • If the camera is inside the light volume, draw backfaces
  • 20.
    Convex Light Hulls#3 • If the light volume intersects the far clip plane, draw frontfaces • If the light volume intersects both near and far clip planes, your light is too big!
  • 21.
    Volume Optimization • Weonly want to shade the area where the light volume intersects scene geometry • There is no need to shade where the volume is suspended in midair • Or where it is buried beneath the ground
  • 22.
    Stencil Light Volumes •This is exactly the same problem as finding the intersection between scene geometry and an extruded shadow volume • The standard stencil buffer solution applies • But using stencil requires changing renderstate for each light, which prevents batching up multiple lights into a single draw call • Using stencil may or may not be a performance win, depending on context
  • 23.
    Light Volume ZTests • A simple Z test can get things half-right, without the overhead of using stencil • When drawing light volume backfaces, use D3DCMP_GREATER to reject “floating in the air” portions of the light
  • 24.
    Light Volume ZTests #2 • If drawing frontfaces, use D3DCMP_LESS to reject “buried underground” light regions • Which is faster depends on the ratio of aboveground vs. underground pixels: use a heuristic to make a guess
  • 25.
    Alpha Blending • Thisis a big problem! • You could simply not do any lighting on alpha blended things, and draw them after the deferred shading is complete. The emissive and occlusion material controls are useful for crossfading between lit and non-lit geometry • The return of stippling? • Depth peeling is the ultimate solution, but is prohibitively expensive at least for the time being
  • 26.
    High Dynamic Range •You can do deferred shading without HDR, but that wouldn’t be so much fun • Render your scene to multiple 32 bit buffers, then use a 64 bit accumulation buffer during the lighting phase • Unfortunately, current hardware doesn’t support additive blending into 64 bit rendertargets • Workaround: use a pair of HDR buffers, and simulate alpha blending in the pixel shader
  • 27.
    DIY Alpha Blending •Initialize buffers A and B to the same contents • Set buffer A as a shader input, while rendering to B, and roll your own blend at the end of the shader • This only works as long as your geometry doesn’t overlap in screenspace • When things do overlap, you have to copy all modified pixels from B back into A, to make sure the input and output buffers stay in sync • This is slow, but not totally impractical as long as you sort your lights to minimize screenspace overlaps
  • 28.
  • 29.
    Volumetric Depth Tests •Neat side effect of having scene depth available as a shader input • Gradually fade out alpha as a polygon approaches the Z fail threshold • No more hard edges where alpha blended particles intersect world geometry!
  • 30.
    Deferred Shading Advantages • Excellent batching • Render each triangle exactly once • Shade each visible pixel exactly once • Easy to add new types of lighting shader • Other kinds of postprocessing (blur, heathaze) are just special lights, and fit neatly into the existing framework
  • 31.
    The Dark Side •Alpha blending is a nightmare! • Framebuffer bandwidth can easily get out of hand • Can’t take advantage of hardware multisampling • Forces a single lighting model across the entire scene (everything has to be 100% per-pixel) • Not a good approach for older hardware • But will be increasingly attractive in the future…
  • 32.
    The End • Anyquestions?