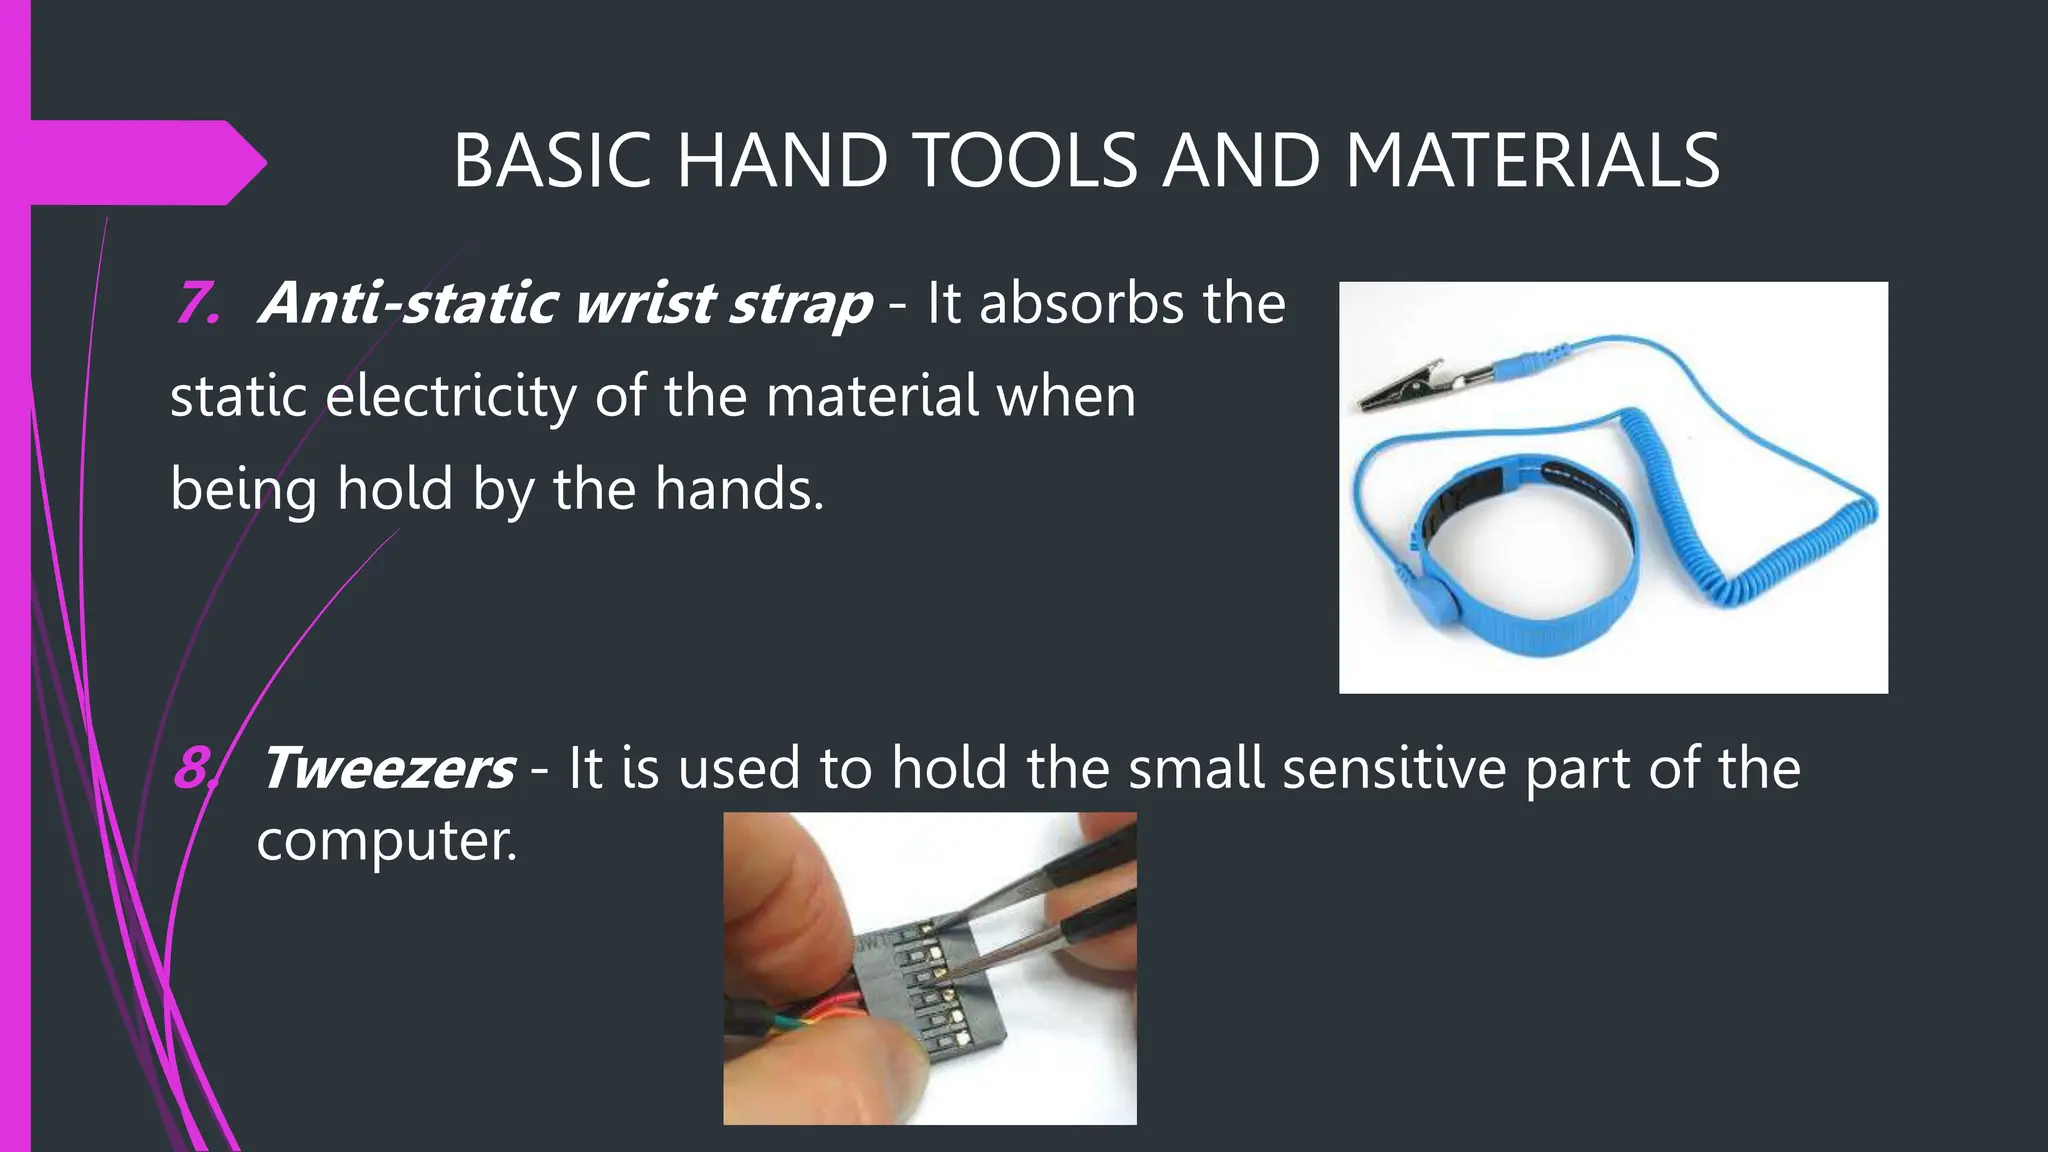
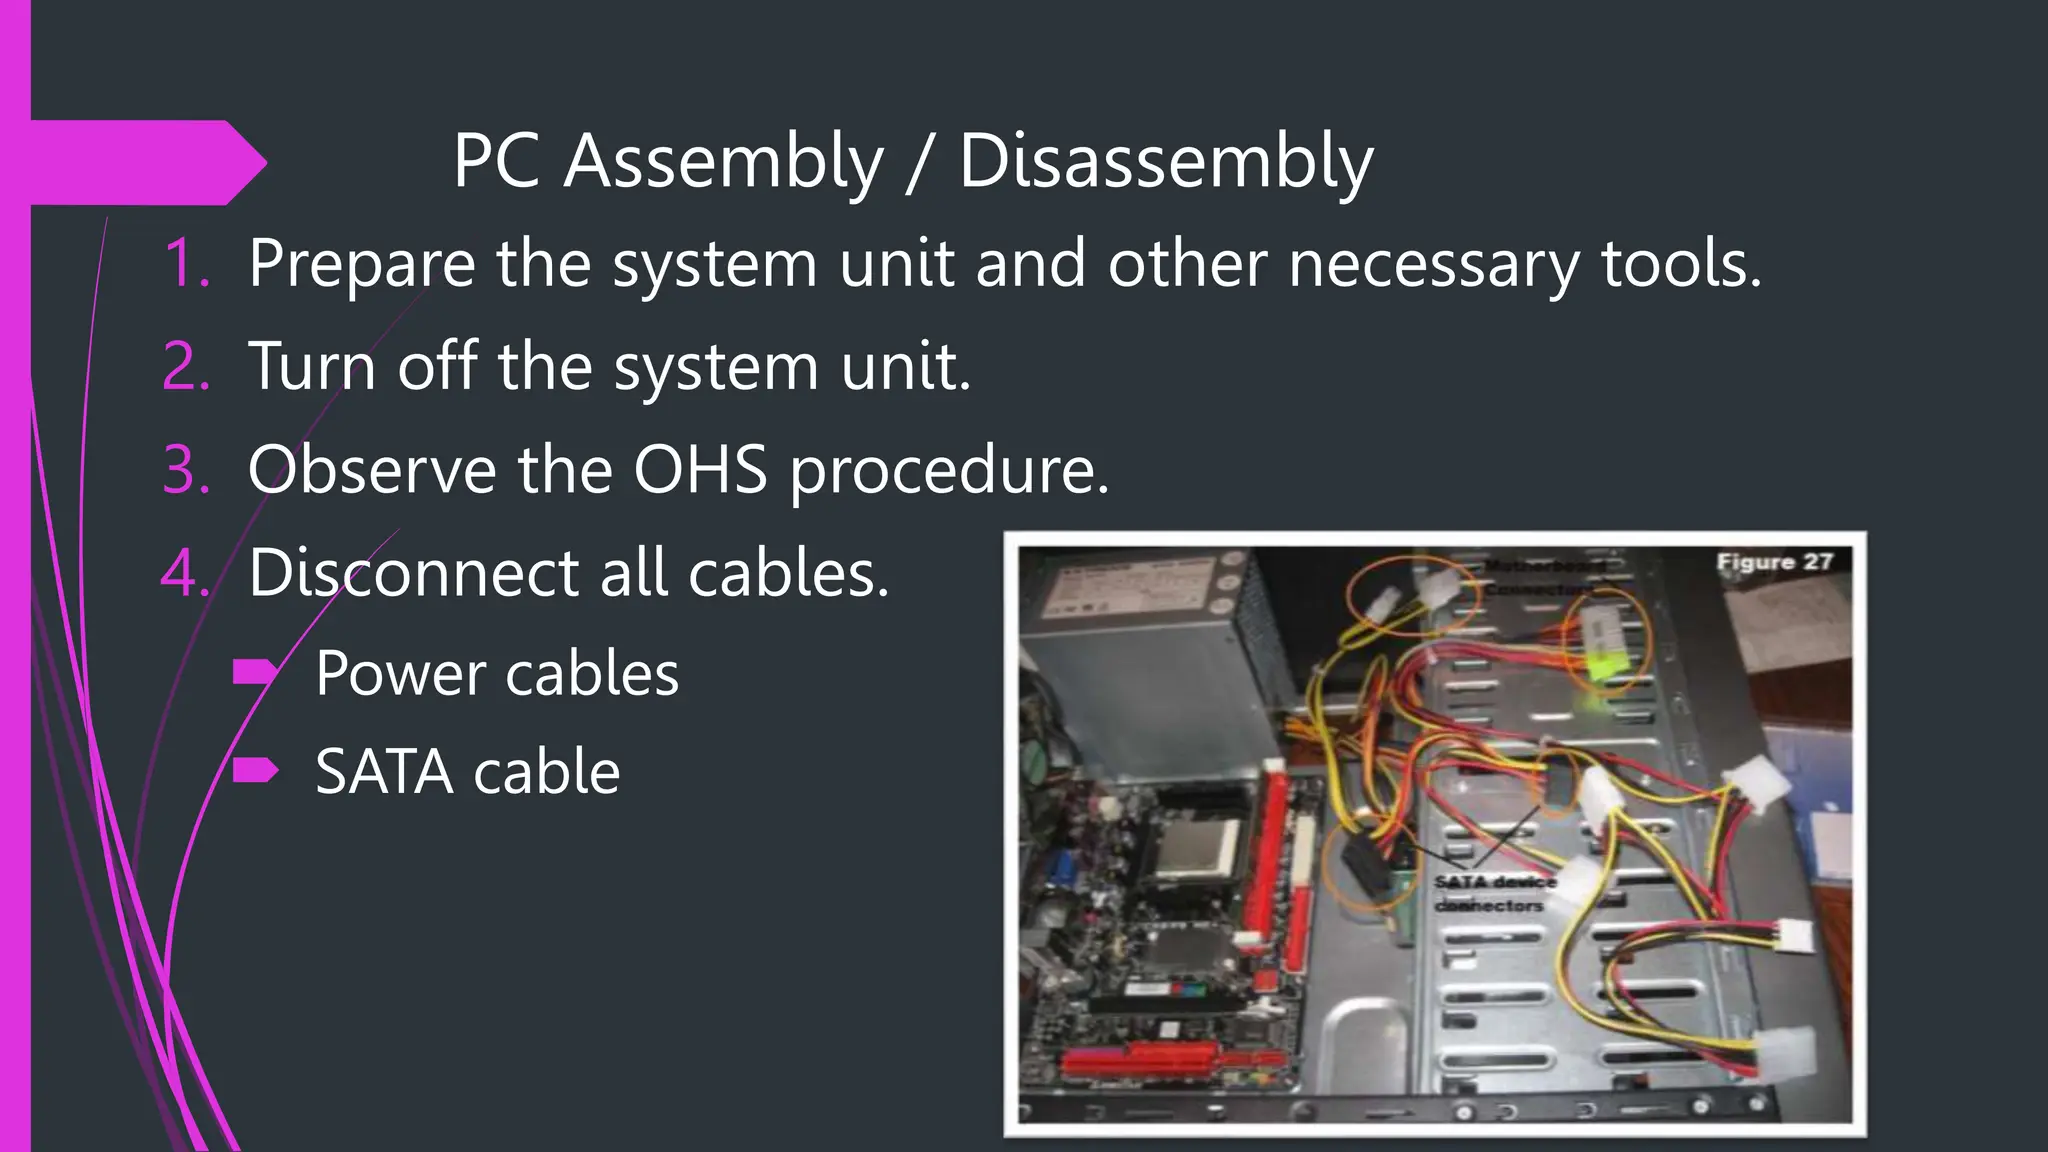
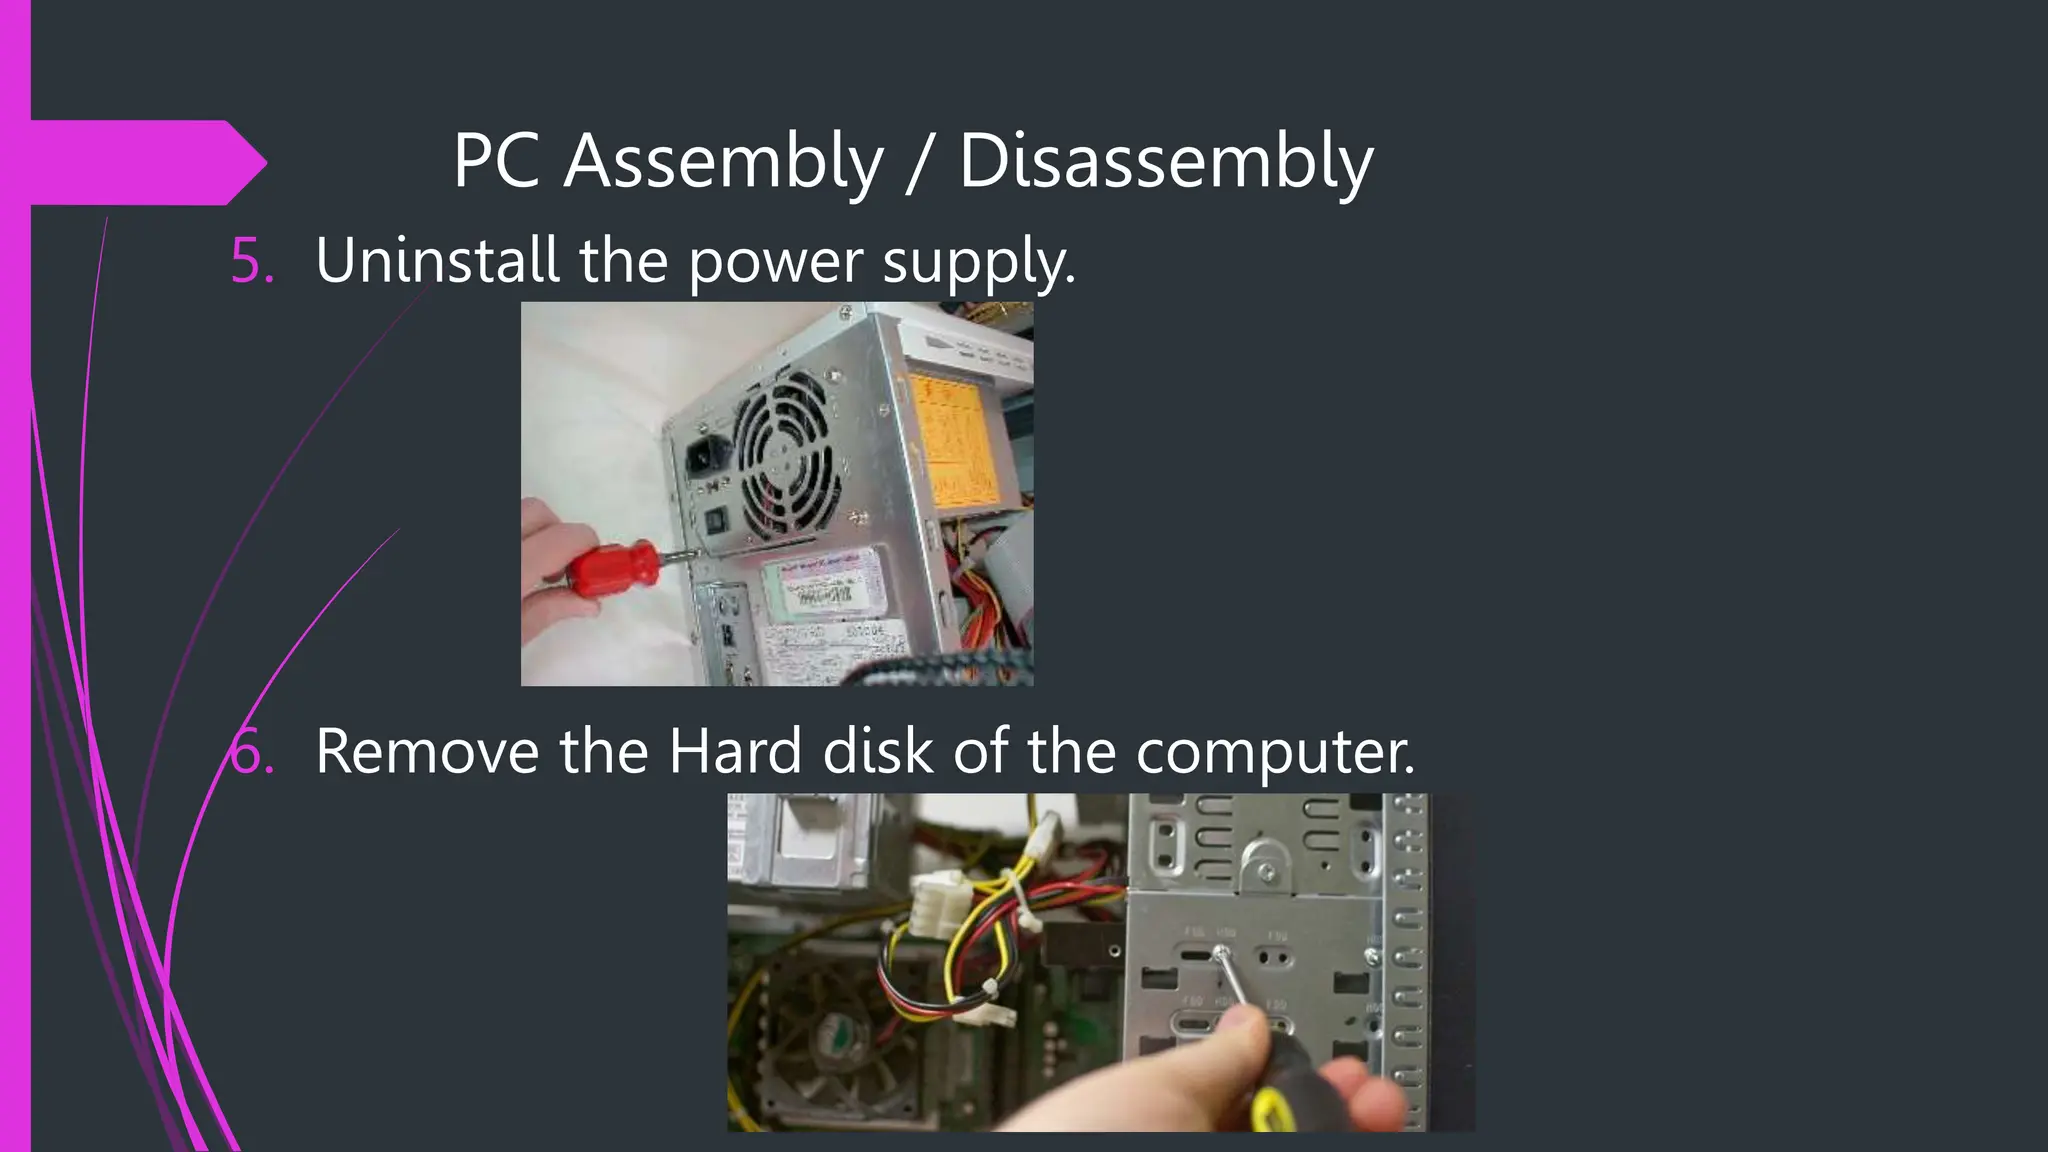
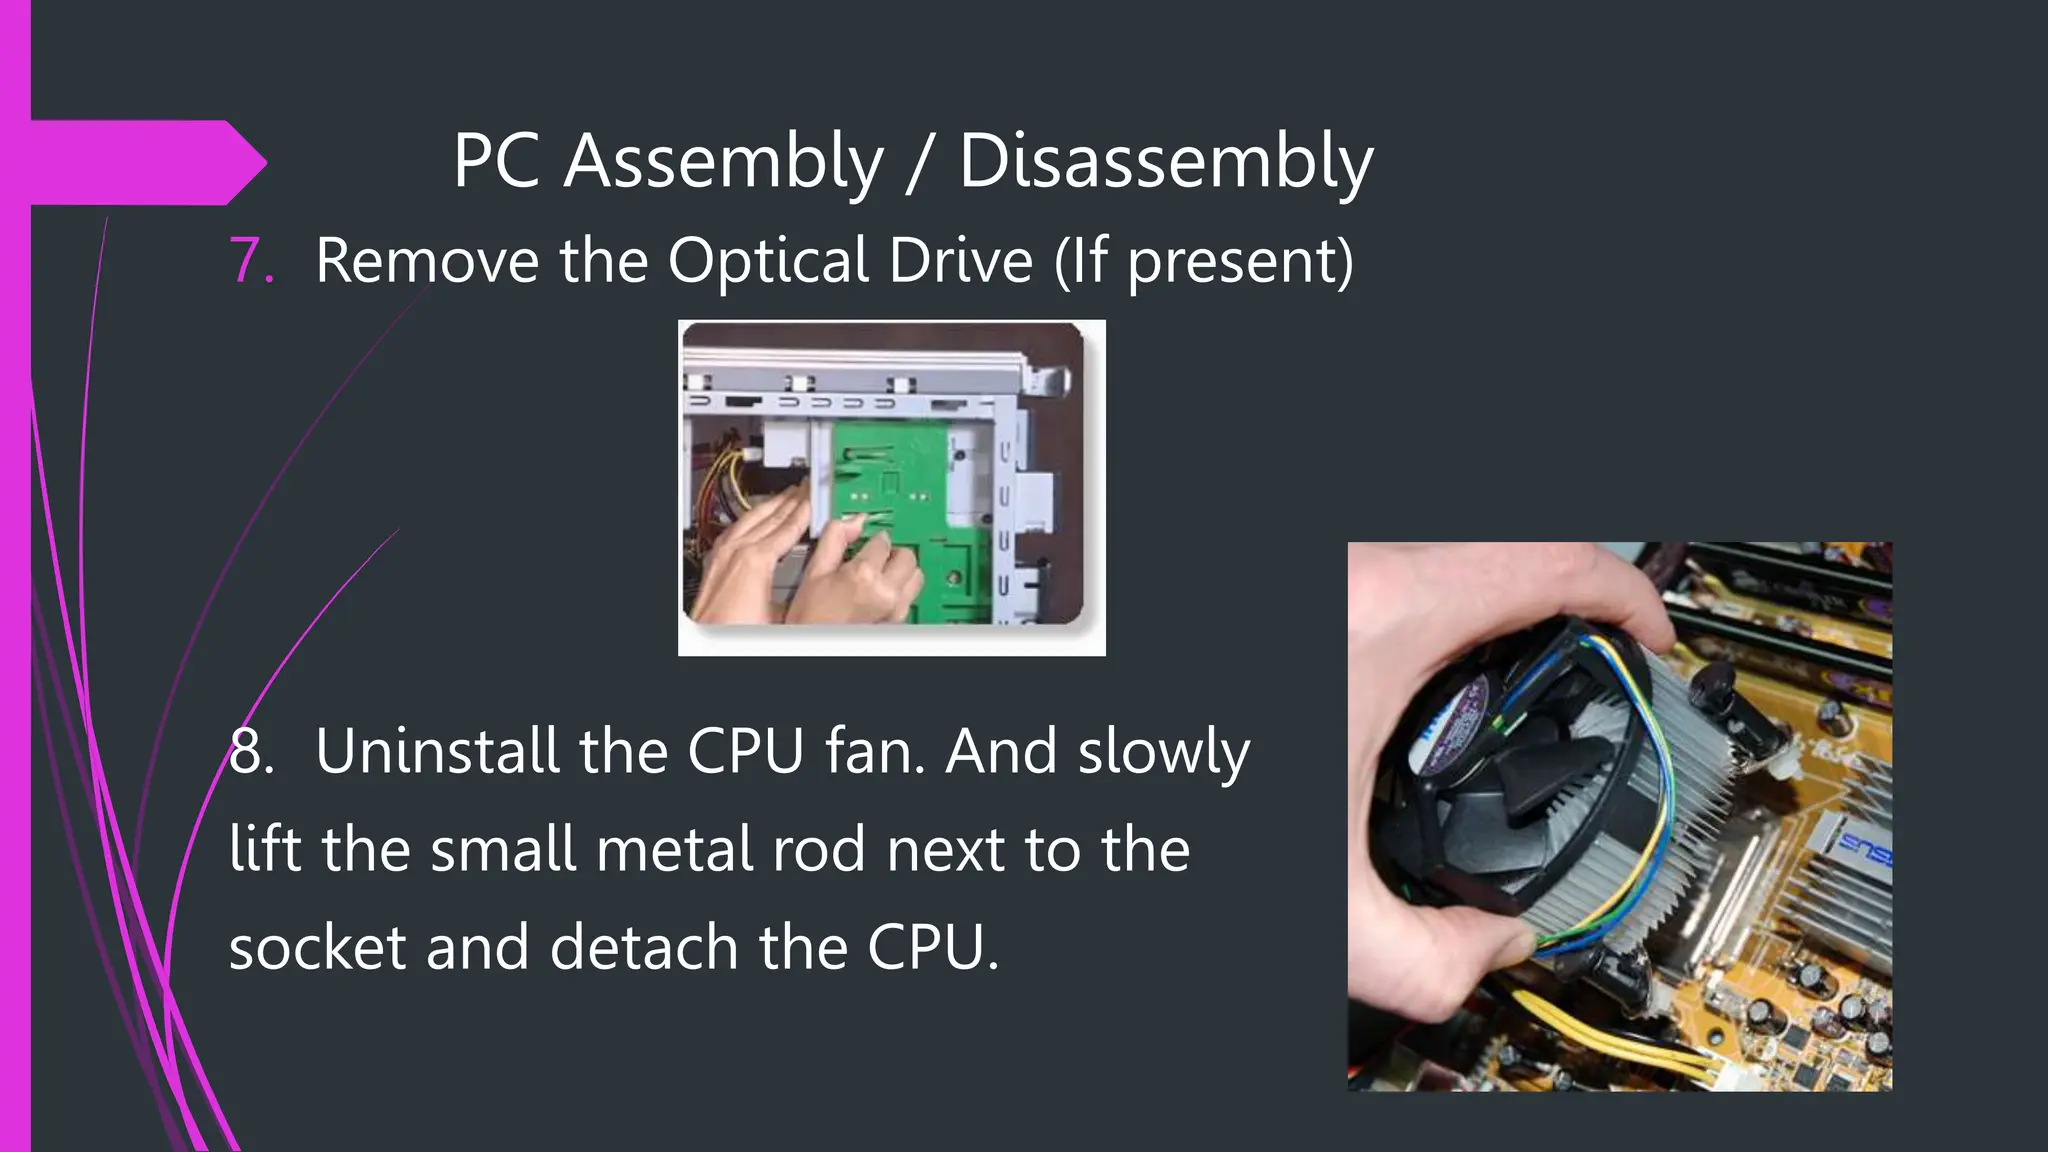
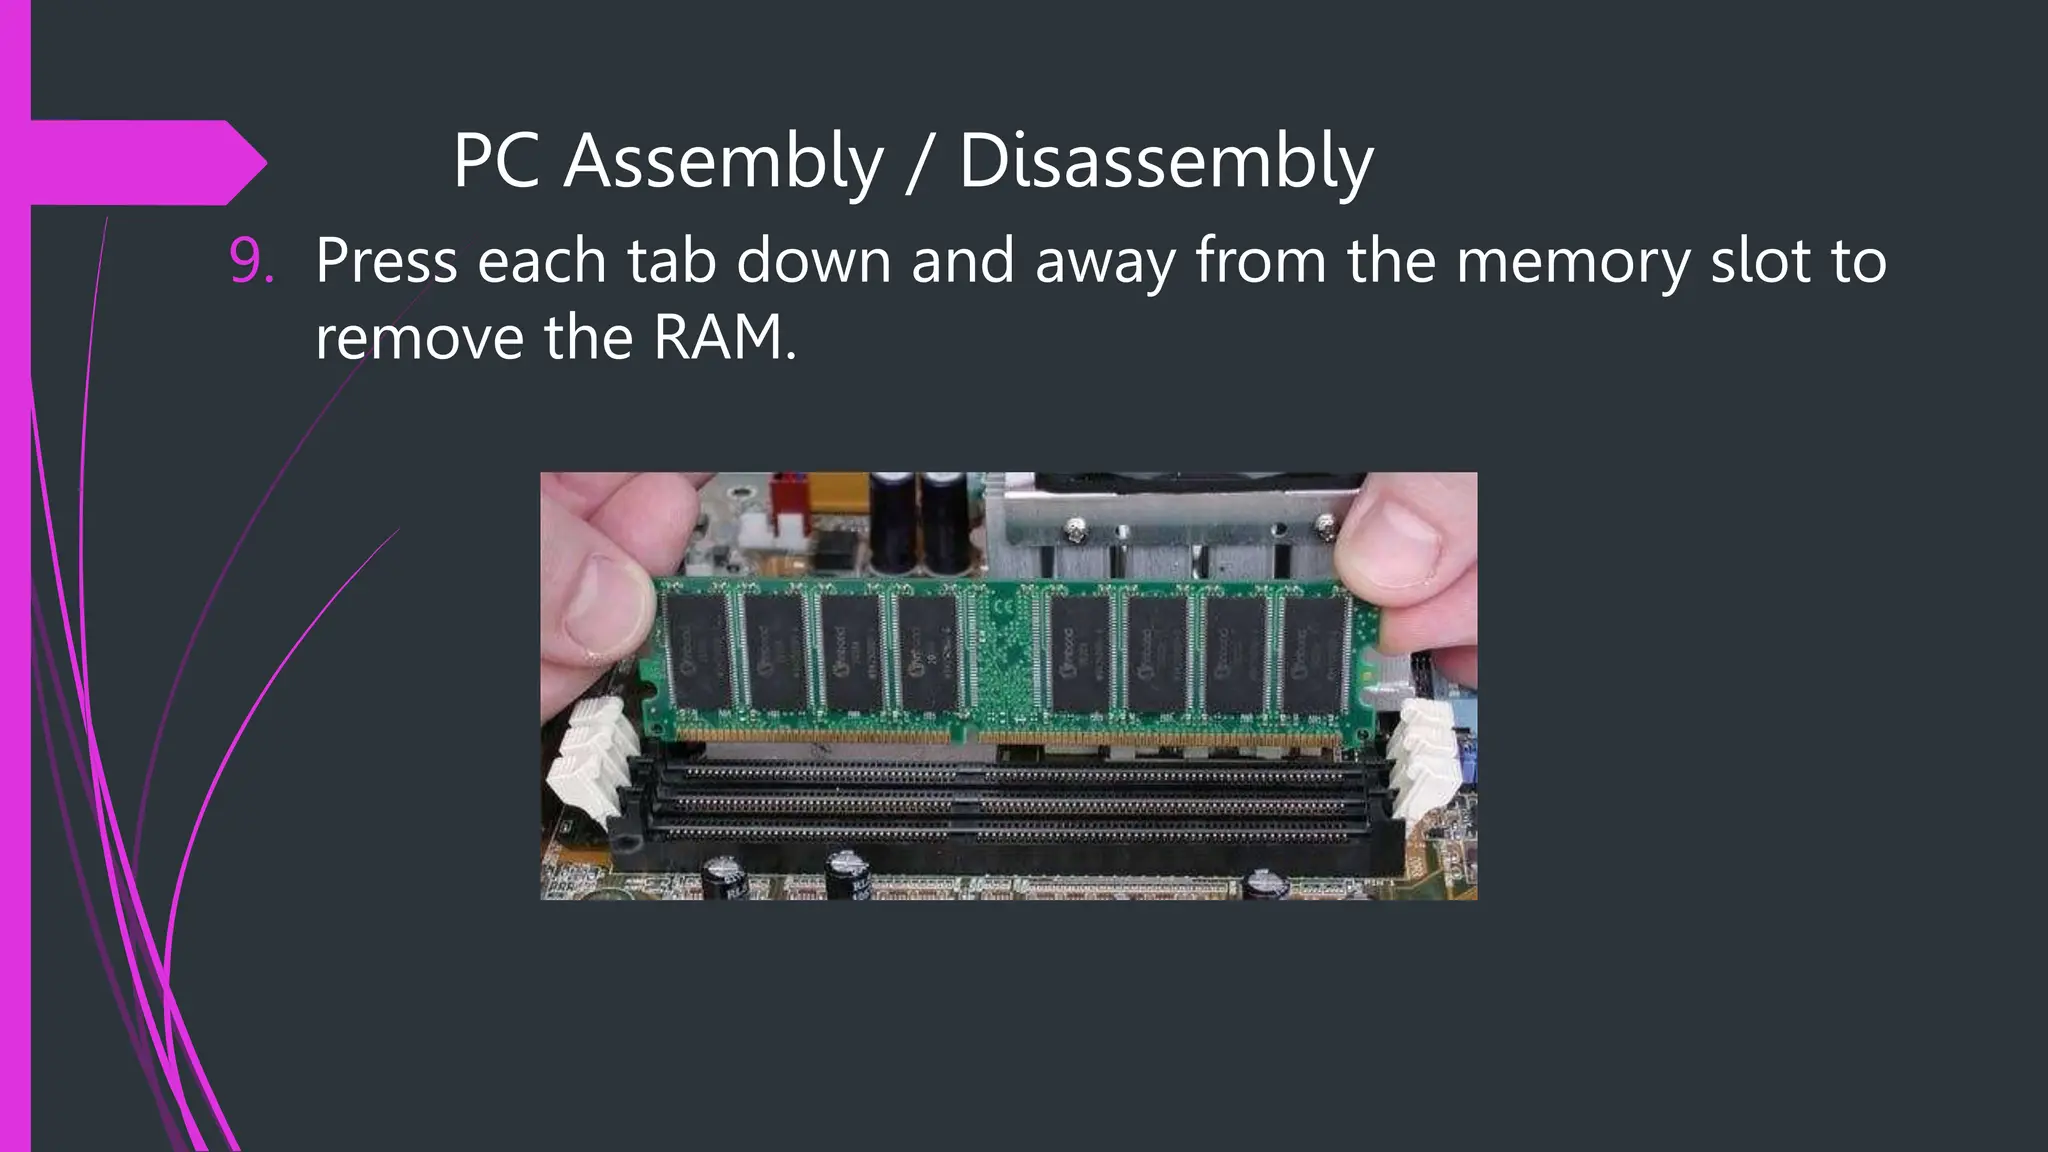
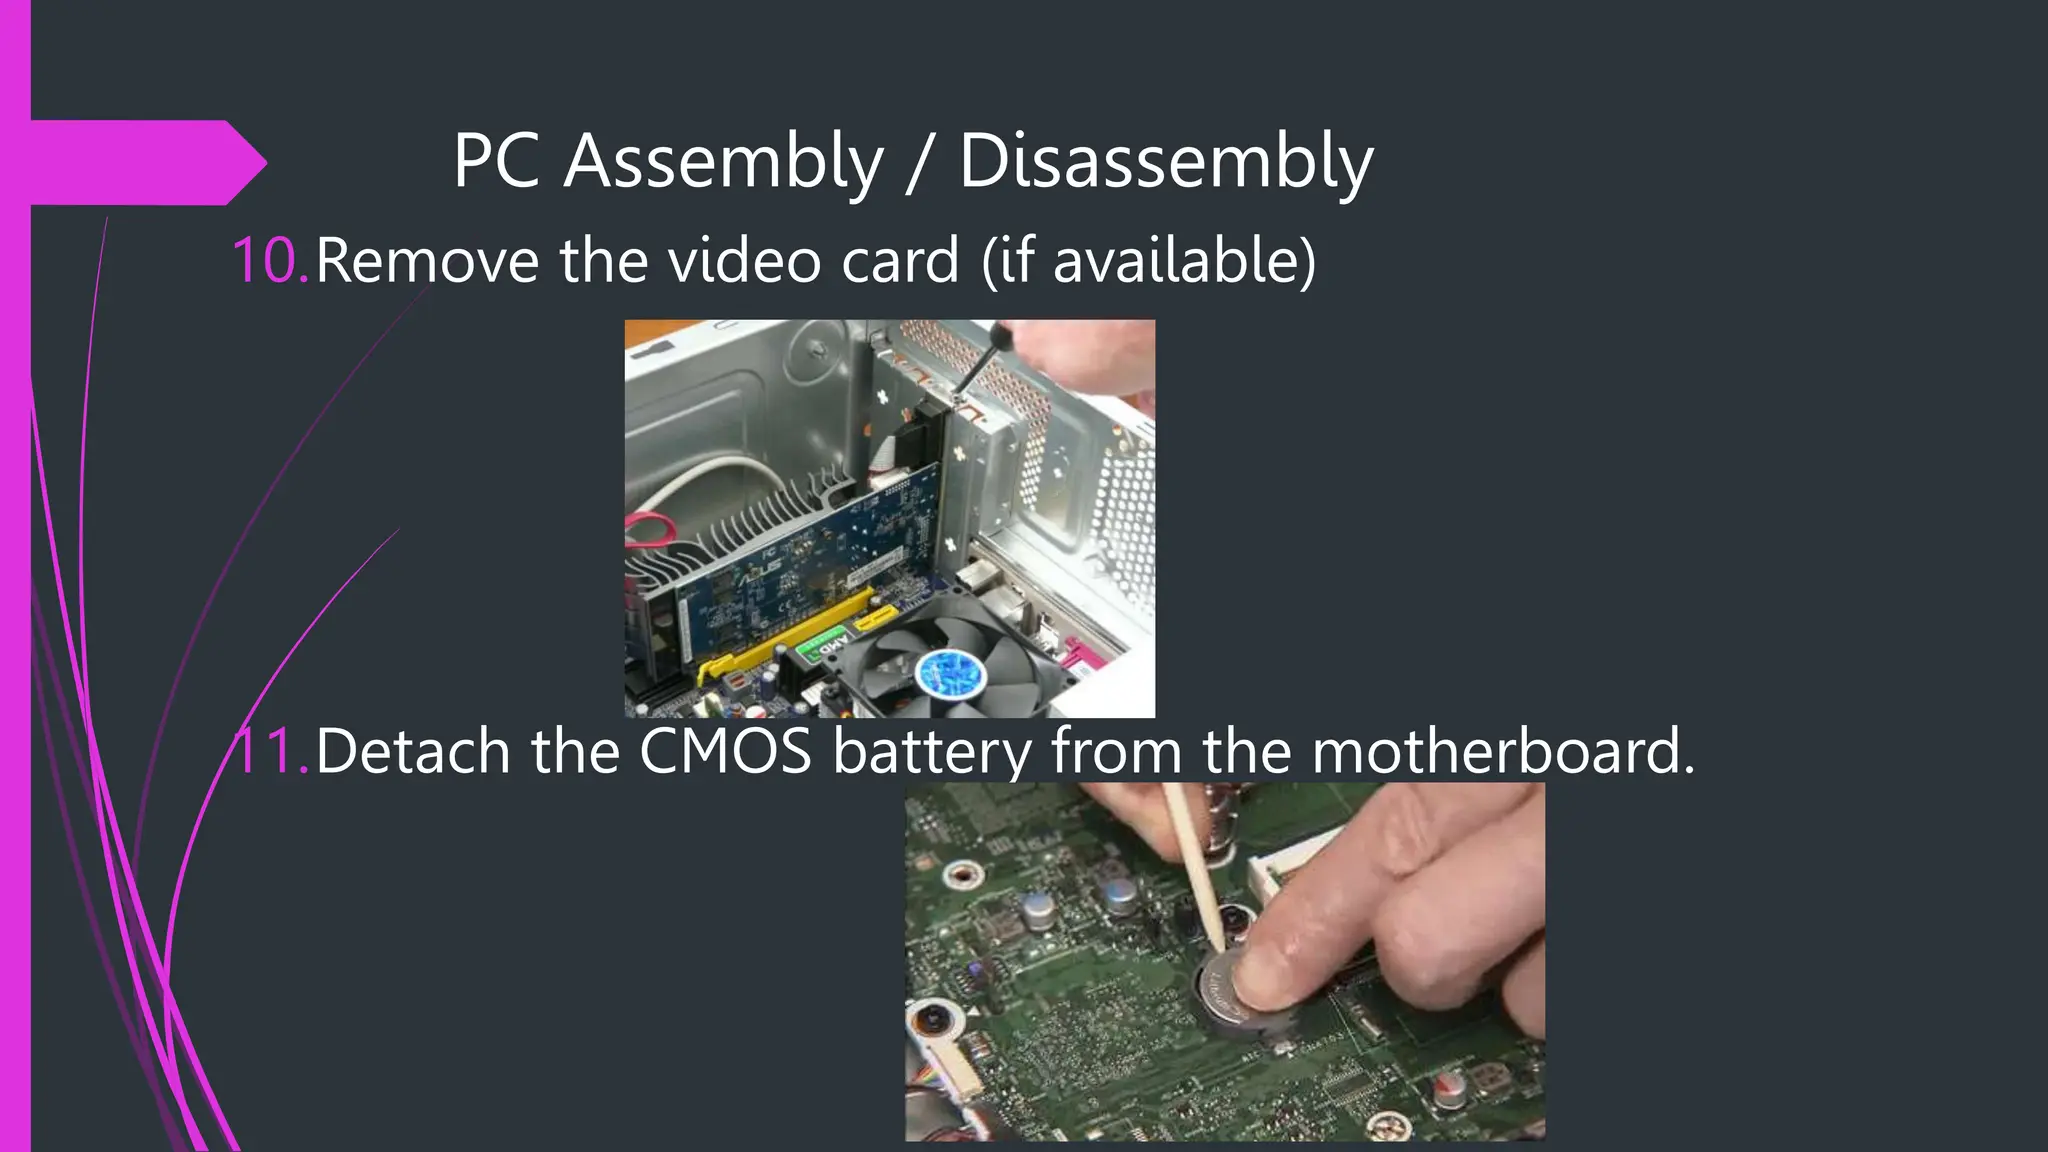
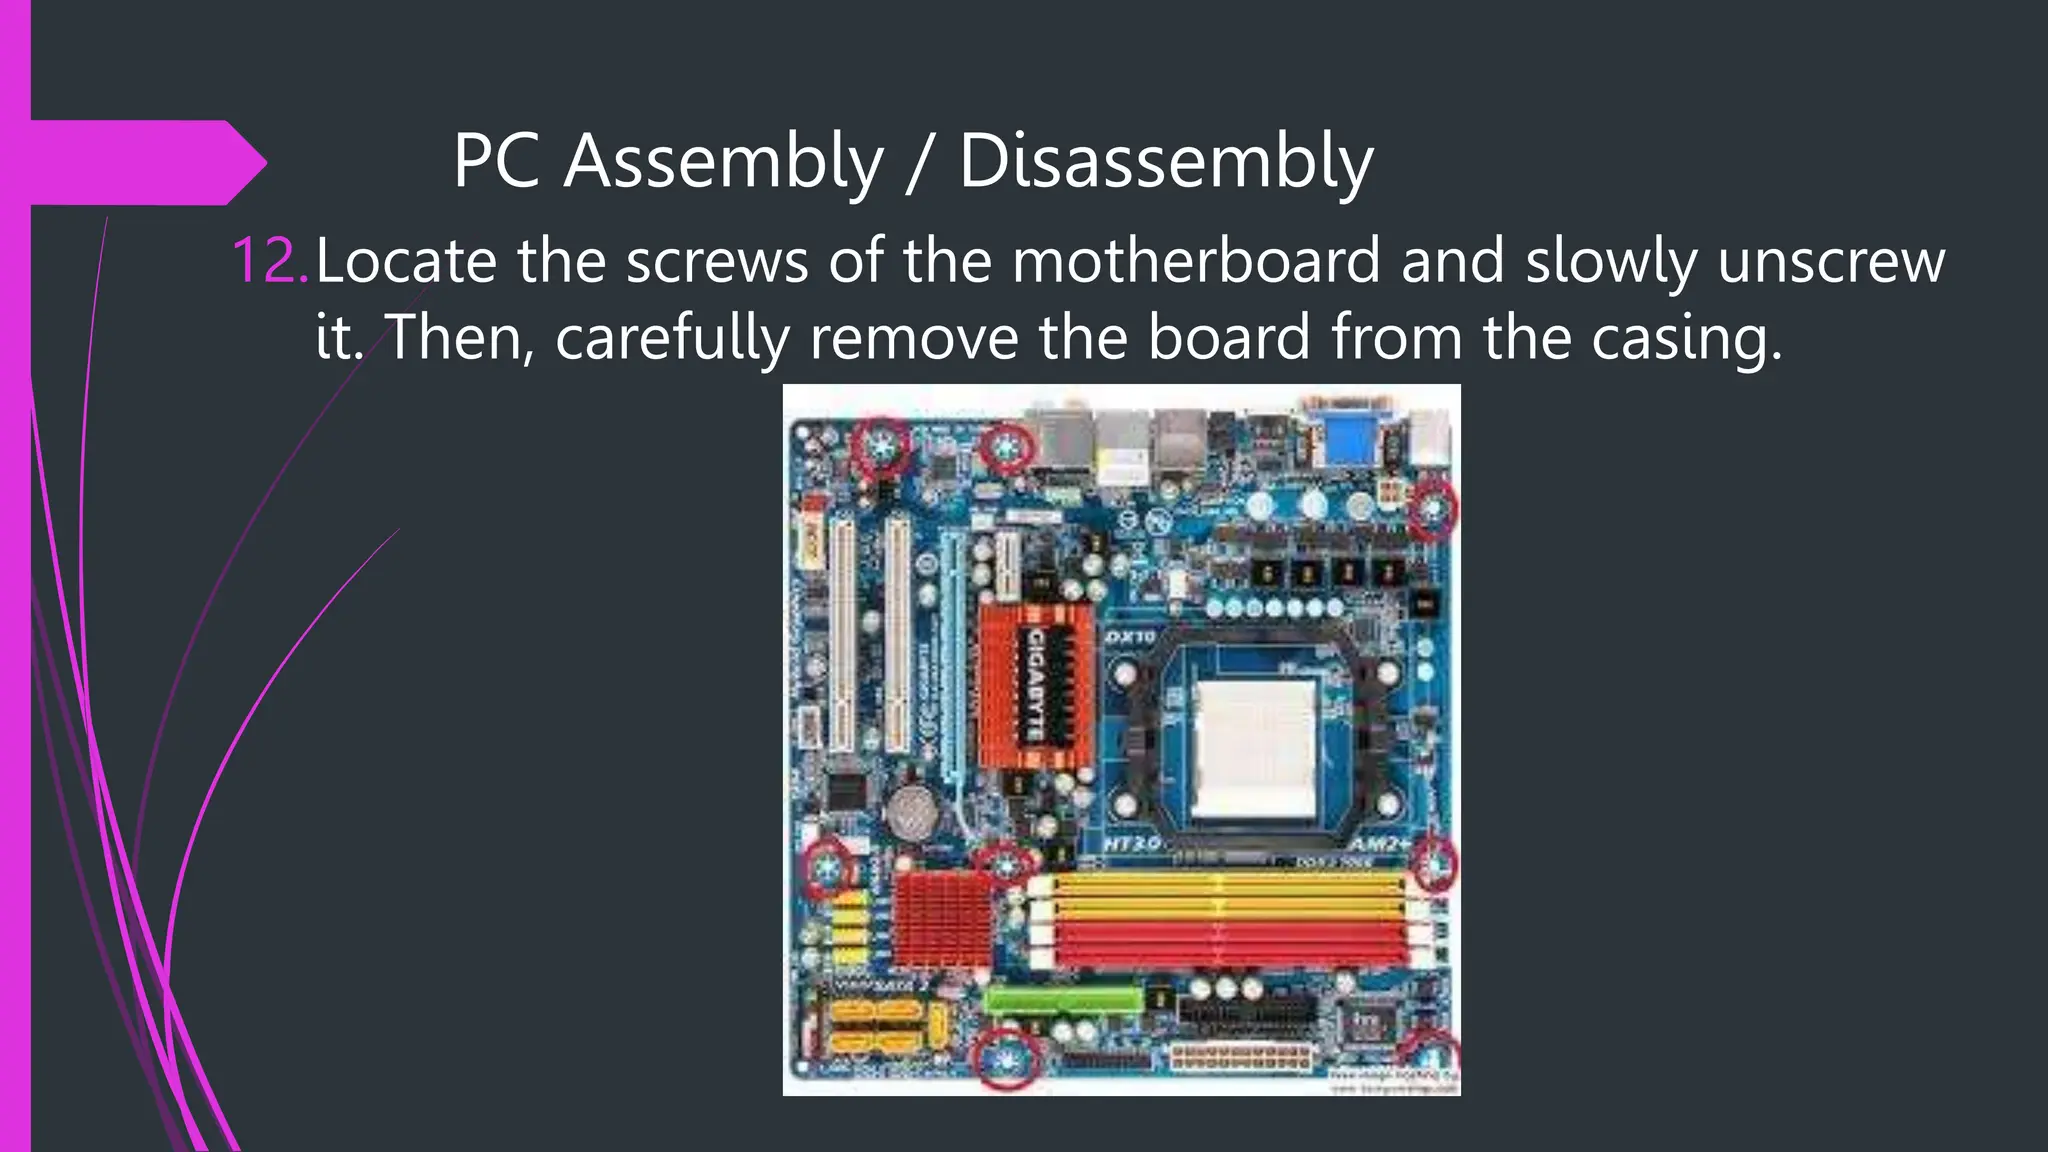
COMPUTER ASSEMBLY
PROCEDURES
SAFETY PROCEDURES
Learning Objectives:
After the discussion, YOU MUST able to:
1. Identify hazard risks
2. Evaluate hazard risks
3. Control hazard risk
4. Maintain occupational health and safety
awareness.
SAFETY PROCEDURES
Here are some safety precautions to take before
working with any computer devices:
Before doing anything, listen to your teacher’s instruction to
prevent accidents or any unwanted events that may occur
on your workplace.
Ensure a clean, well-lit, and organized workspace.
Do not work on computer when you are wet because you
might get electrocuted.
Do not remove internal devices of the computer when it is
turned on.
SAFETY PROCEDURES
Here are some safety precautions to take before
working with any computer devices:
Wear appropriate PPE like anti-static gloves, safety goggles,
and closed-toe shoes to protect against potential hazards
Handle computer parts with care, especially fragile
components like CPUs, RAM modules, and GPUs.
Avoid touching sensitive parts (such as gold connectors)
directly and hold components by their edges.
SAFETY PROCEDURES
Here are some safety precautions to take before working
with any computer devices:
Organize cables neatly to prevent tripping hazards and to
ensure proper airflow within the computer case.
Avoid playing or running while inside the room.
Ask for assistance from your teacher when it comes on
dealing with computer devices.
BASIC HAND TOOLS AND MATERIALS
Learning Objectives:
After the discussion, YOU MUST able to:
1. Identify basic hand tools and materials used in computer
configuration.
2. Identify usage of each tool and device for the
configuration process.
3. Distinguish which is a material, a tool and a testing
device.
BASIC HAND TOOLS AND MATERIALS
These are the following materials needed in the Configuration
task:
1. Connectors - It is used to connect external devices to the
computer system.
BASIC HAND TOOLS AND MATERIALS
2. Adapter - A piece of hardware device used for connecting two
nonmatching parts.
BASIC HAND TOOLS AND MATERIALS
3. Wires and Cables - It is used to connect computers for
network.
BASIC HAND TOOLS AND MATERIALS
4. Application Software - - This software packages are used to
install new drivers needed in setting up your computer.
BASIC HAND TOOLS AND MATERIALS
5. Computer storage media - These help you in saving data and
providing backup for your files such as external hard disk,
compact disc, flash drives and memory cards.
BASIC HAND TOOLS AND MATERIALS
6. Reference book - These are books that will provide topics
about networking or related books on computer.
BASIC HAND TOOLS AND MATERIALS
These are the following tools/ testing devices needed in the
configuration tasks:
1. Screw drivers
Flat screw driver is used to fasten negative slotted Screws.
 Philips Screw driver is used to fasten positive slotted screws.
BASIC HAND TOOLS AND MATERIALS
2. Pliers
 Side Cutter pliers - are used for cutting and trimming of
connecting wires or terminal leads in the circuit board.
 Long nose pliers - are used for holding, bending and
stretching the lead of electronics component and connecting
wire.
BASIC HAND TOOLS AND MATERIALS
5. Magnifying glass − It is a device made of glass with handle. It
exaggerates or increases the apparent size of an object.
6. Safety apparel suit (coverall) - It is used by the person for
body protection.
BASIC HAND TOOLS AND MATERIALS
7. Anti-static wrist strap - It absorbs the
static electricity of the material when
being hold by the hands.
8. Tweezers - It is used to hold the small sensitive part of the
computer.
BASIC HAND TOOLS AND MATERIALS
9. Mini-vacuum cleaner - It is used for
cleaning sensitive parts of the computer.
10.Crimping Tool & Wire Stripper – it is used for crimping
network cables.
PC Assembly / Disassembly
Learning Objectives:
After the discussion, YOU MUST able to:
1. Identify basic parts of personal computer.
2. Assemble the computer unit based on proper
procedure.
3. Disassemble the computer unit based on proper
procedure.
PC Assembly / Disassembly
1. Prepare the system unit and other necessary tools.
2. Turn off the system unit.
3. Observe the OHS procedure.
4. Disconnect all cables.
 Power cables
 SATA cable
PC Assembly / Disassembly
5. Uninstall the power supply.
6. Remove the Hard disk of the computer.
PC Assembly / Disassembly
7. Remove the Optical Drive (If present)
8. Uninstall the CPU fan. And slowly
lift the small metal rod next to the
socket and detach the CPU.
PC Assembly / Disassembly
9. Press each tab down and away from the memory slot to
remove the RAM.
PC Assembly / Disassembly
10.Remove the video card (if available)
11.Detach the CMOS battery from the motherboard.
PC Assembly / Disassembly
12.Locate the screws of the motherboard and slowly unscrew
it. Then, carefully remove the board from the casing.
Troubleshooting a Computer
1. CPU won’t turn on.
What to do?
 Check the power source
 Check the AVR/UPS if it is turned on
 Check the power cable
 Check the power supply
 Check the power/reset wires in the motherboard
 Check the power supply connections in the motherboard.
Troubleshooting a Computer
2. No display.
What to do?
 Check the power source
 Check the AVR/UPS if it is turned on
 Check the VGA cable
 Check the monitor
 Check RAM
 Check the CPU fan or the Processor
 Check the power supply connections in the motherboard.
Troubleshooting a Computer
3. Sudden Computer Shutdown.
What to do?
 Check the power source
 Check the AVR/UPS if it is turned on
 Clean the CPU fan or reinstall the processor
 Check the CPU temperature through the BIOS settings
Troubleshooting a Computer
4. Continually Rebooting Computer.
What to do?
 Check the power source
 Check the AVR/UPS if it is turned on
 Check the BIOS setting
 Check the power supply voltage.
 Boot the computer into safe mode.
 If problem persist reinstall operating system.
Troubleshooting a Computer
5. Hard disk not Detected.
What to do?
 Check the power supply.
 Check SATA data/power connection
 Check BIOS setting.
Troubleshooting a Computer
6. Cannot save BIOS setting.
What to do?
 Check/Replace the CMOS battery.
ACTIVITY # 3
Assemble and Disassemble
Computer

Computer Assembly and Disassembly Procedures_student.pptx

  • 1.
  • 2.
    SAFETY PROCEDURES Learning Objectives: Afterthe discussion, YOU MUST able to: 1. Identify hazard risks 2. Evaluate hazard risks 3. Control hazard risk 4. Maintain occupational health and safety awareness.
  • 3.
    SAFETY PROCEDURES Here aresome safety precautions to take before working with any computer devices: Before doing anything, listen to your teacher’s instruction to prevent accidents or any unwanted events that may occur on your workplace. Ensure a clean, well-lit, and organized workspace. Do not work on computer when you are wet because you might get electrocuted. Do not remove internal devices of the computer when it is turned on.
  • 4.
    SAFETY PROCEDURES Here aresome safety precautions to take before working with any computer devices: Wear appropriate PPE like anti-static gloves, safety goggles, and closed-toe shoes to protect against potential hazards Handle computer parts with care, especially fragile components like CPUs, RAM modules, and GPUs. Avoid touching sensitive parts (such as gold connectors) directly and hold components by their edges.
  • 5.
    SAFETY PROCEDURES Here aresome safety precautions to take before working with any computer devices: Organize cables neatly to prevent tripping hazards and to ensure proper airflow within the computer case. Avoid playing or running while inside the room. Ask for assistance from your teacher when it comes on dealing with computer devices.
  • 6.
    BASIC HAND TOOLSAND MATERIALS Learning Objectives: After the discussion, YOU MUST able to: 1. Identify basic hand tools and materials used in computer configuration. 2. Identify usage of each tool and device for the configuration process. 3. Distinguish which is a material, a tool and a testing device.
  • 7.
    BASIC HAND TOOLSAND MATERIALS These are the following materials needed in the Configuration task: 1. Connectors - It is used to connect external devices to the computer system.
  • 8.
    BASIC HAND TOOLSAND MATERIALS 2. Adapter - A piece of hardware device used for connecting two nonmatching parts.
  • 9.
    BASIC HAND TOOLSAND MATERIALS 3. Wires and Cables - It is used to connect computers for network.
  • 10.
    BASIC HAND TOOLSAND MATERIALS 4. Application Software - - This software packages are used to install new drivers needed in setting up your computer.
  • 11.
    BASIC HAND TOOLSAND MATERIALS 5. Computer storage media - These help you in saving data and providing backup for your files such as external hard disk, compact disc, flash drives and memory cards.
  • 12.
    BASIC HAND TOOLSAND MATERIALS 6. Reference book - These are books that will provide topics about networking or related books on computer.
  • 13.
    BASIC HAND TOOLSAND MATERIALS These are the following tools/ testing devices needed in the configuration tasks: 1. Screw drivers Flat screw driver is used to fasten negative slotted Screws.  Philips Screw driver is used to fasten positive slotted screws.
  • 14.
    BASIC HAND TOOLSAND MATERIALS 2. Pliers  Side Cutter pliers - are used for cutting and trimming of connecting wires or terminal leads in the circuit board.  Long nose pliers - are used for holding, bending and stretching the lead of electronics component and connecting wire.
  • 15.
    BASIC HAND TOOLSAND MATERIALS 5. Magnifying glass − It is a device made of glass with handle. It exaggerates or increases the apparent size of an object. 6. Safety apparel suit (coverall) - It is used by the person for body protection.
  • 16.
    BASIC HAND TOOLSAND MATERIALS 7. Anti-static wrist strap - It absorbs the static electricity of the material when being hold by the hands. 8. Tweezers - It is used to hold the small sensitive part of the computer.
  • 17.
    BASIC HAND TOOLSAND MATERIALS 9. Mini-vacuum cleaner - It is used for cleaning sensitive parts of the computer. 10.Crimping Tool & Wire Stripper – it is used for crimping network cables.
  • 18.
    PC Assembly /Disassembly Learning Objectives: After the discussion, YOU MUST able to: 1. Identify basic parts of personal computer. 2. Assemble the computer unit based on proper procedure. 3. Disassemble the computer unit based on proper procedure.
  • 19.
    PC Assembly /Disassembly 1. Prepare the system unit and other necessary tools. 2. Turn off the system unit. 3. Observe the OHS procedure. 4. Disconnect all cables.  Power cables  SATA cable
  • 20.
    PC Assembly /Disassembly 5. Uninstall the power supply. 6. Remove the Hard disk of the computer.
  • 21.
    PC Assembly /Disassembly 7. Remove the Optical Drive (If present) 8. Uninstall the CPU fan. And slowly lift the small metal rod next to the socket and detach the CPU.
  • 22.
    PC Assembly /Disassembly 9. Press each tab down and away from the memory slot to remove the RAM.
  • 23.
    PC Assembly /Disassembly 10.Remove the video card (if available) 11.Detach the CMOS battery from the motherboard.
  • 24.
    PC Assembly /Disassembly 12.Locate the screws of the motherboard and slowly unscrew it. Then, carefully remove the board from the casing.
  • 25.
    Troubleshooting a Computer 1.CPU won’t turn on. What to do?  Check the power source  Check the AVR/UPS if it is turned on  Check the power cable  Check the power supply  Check the power/reset wires in the motherboard  Check the power supply connections in the motherboard.
  • 26.
    Troubleshooting a Computer 2.No display. What to do?  Check the power source  Check the AVR/UPS if it is turned on  Check the VGA cable  Check the monitor  Check RAM  Check the CPU fan or the Processor  Check the power supply connections in the motherboard.
  • 27.
    Troubleshooting a Computer 3.Sudden Computer Shutdown. What to do?  Check the power source  Check the AVR/UPS if it is turned on  Clean the CPU fan or reinstall the processor  Check the CPU temperature through the BIOS settings
  • 28.
    Troubleshooting a Computer 4.Continually Rebooting Computer. What to do?  Check the power source  Check the AVR/UPS if it is turned on  Check the BIOS setting  Check the power supply voltage.  Boot the computer into safe mode.  If problem persist reinstall operating system.
  • 29.
    Troubleshooting a Computer 5.Hard disk not Detected. What to do?  Check the power supply.  Check SATA data/power connection  Check BIOS setting.
  • 30.
    Troubleshooting a Computer 6.Cannot save BIOS setting. What to do?  Check/Replace the CMOS battery.
  • 31.
    ACTIVITY # 3 Assembleand Disassemble Computer