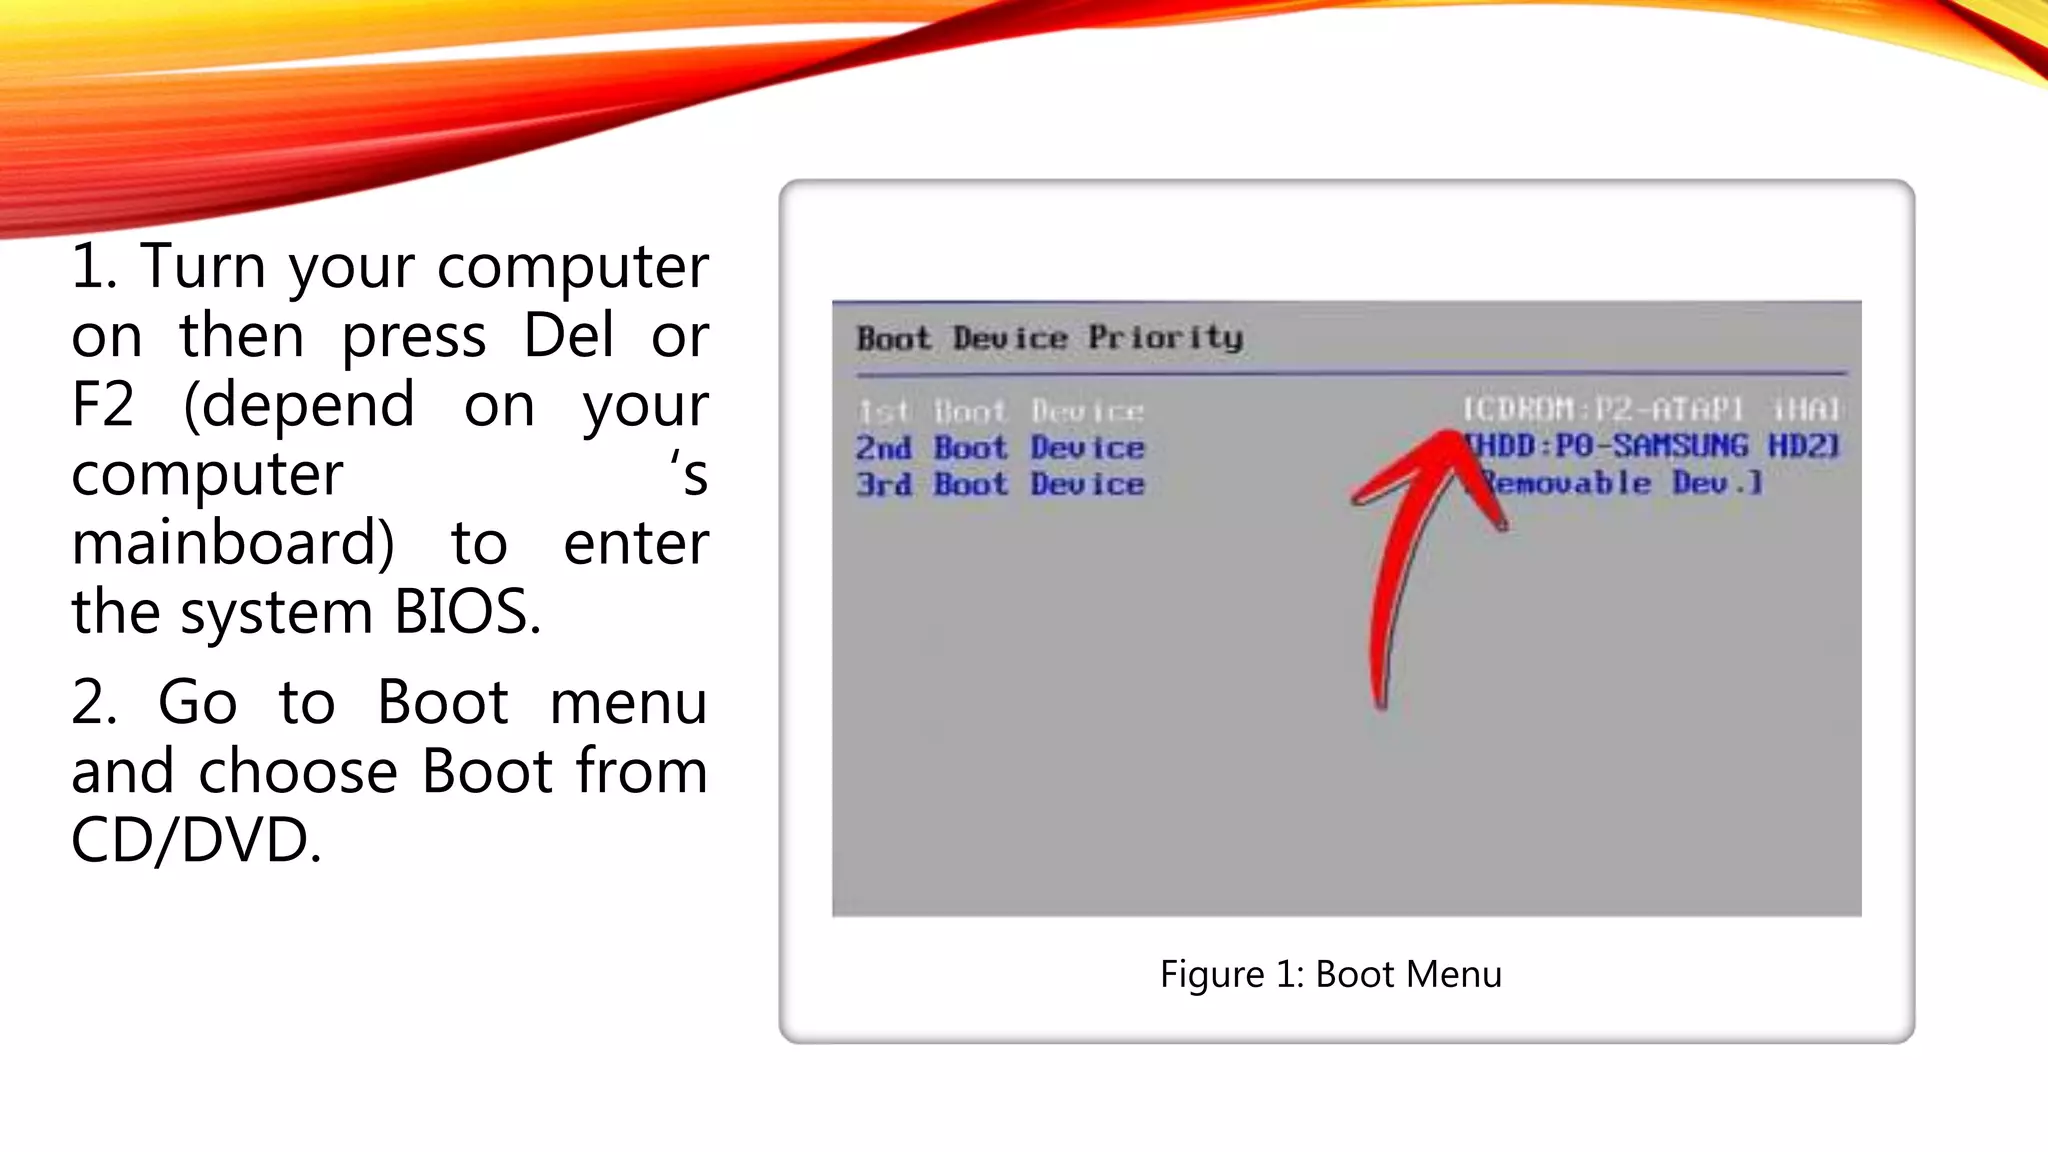
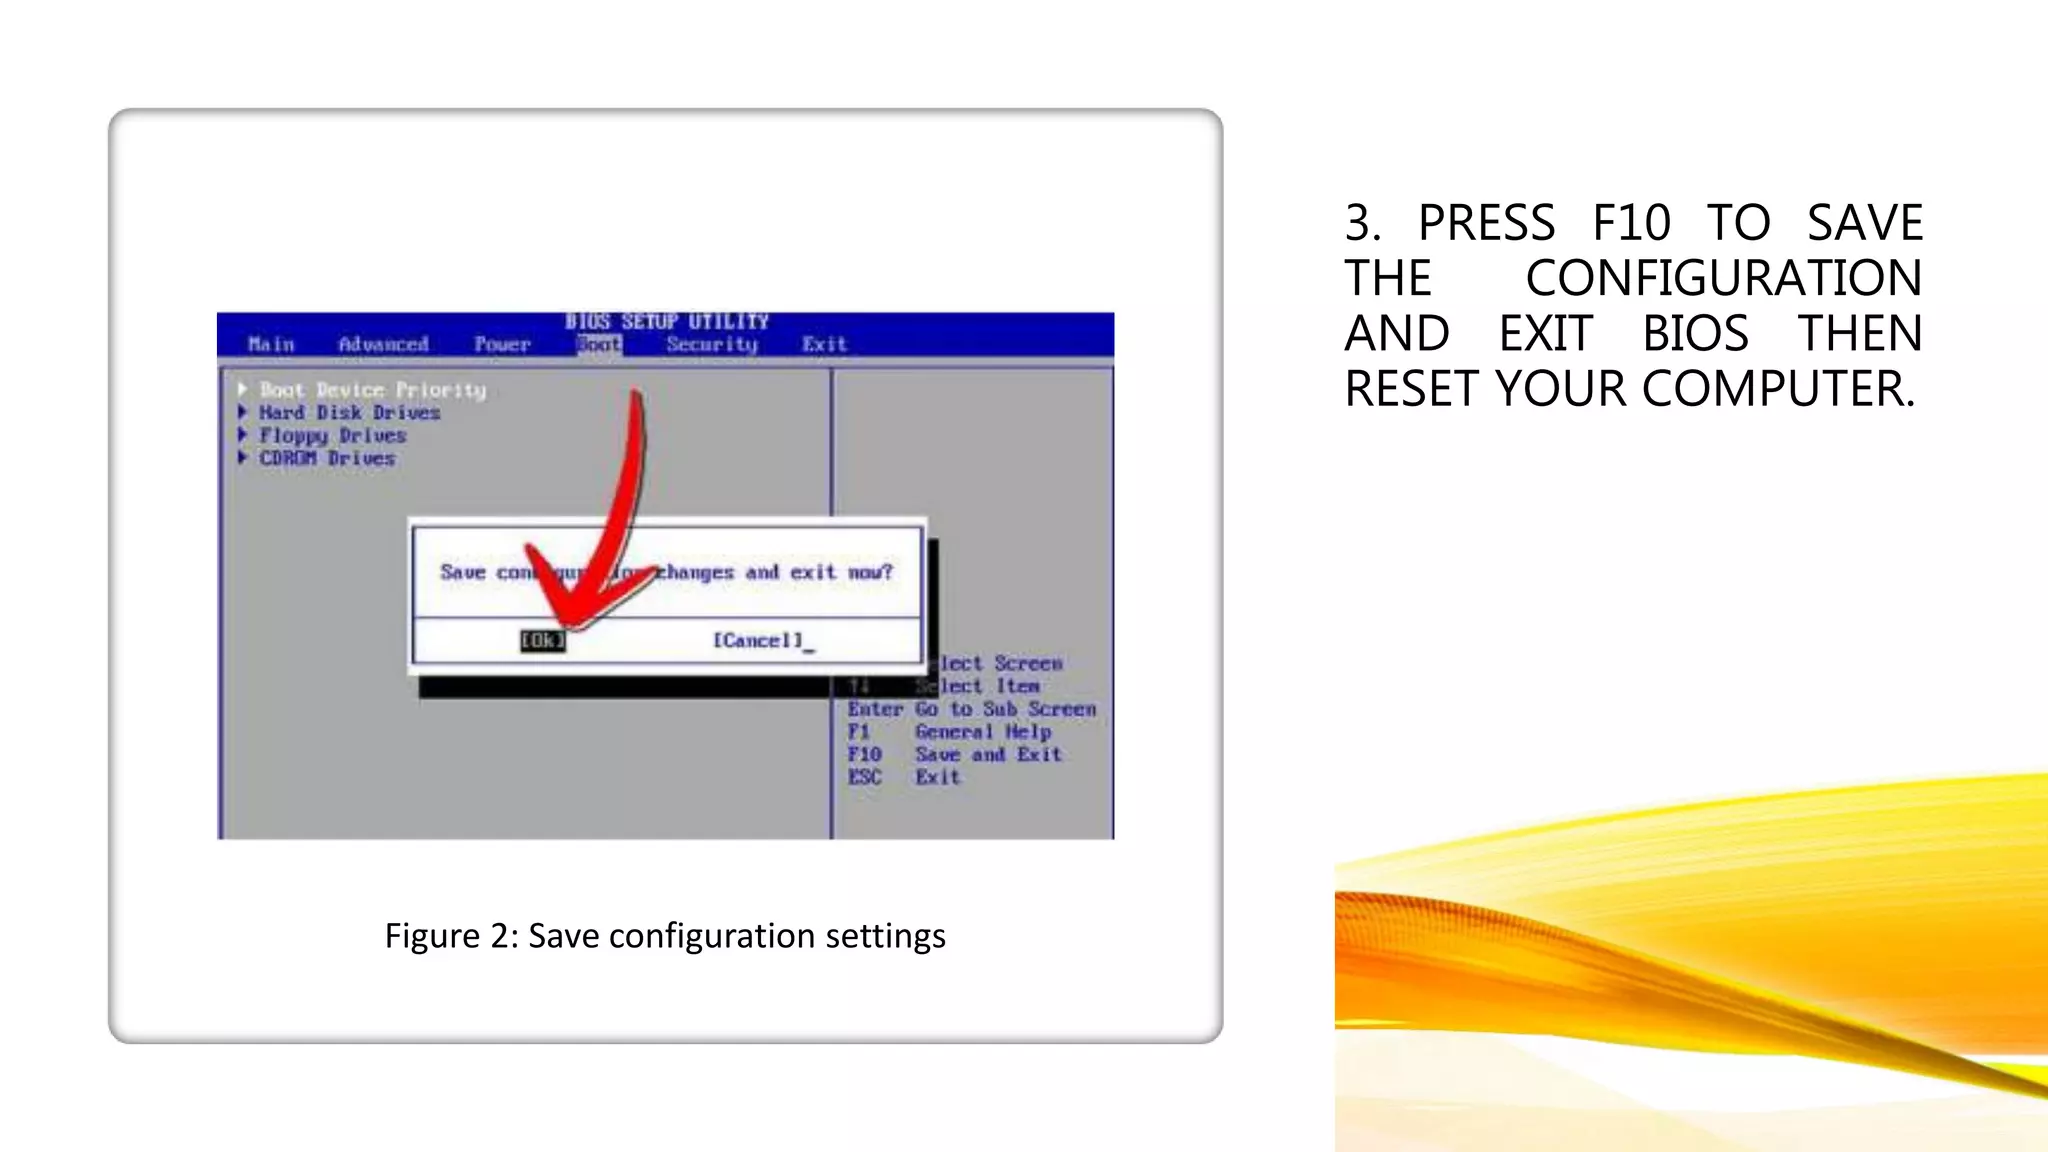
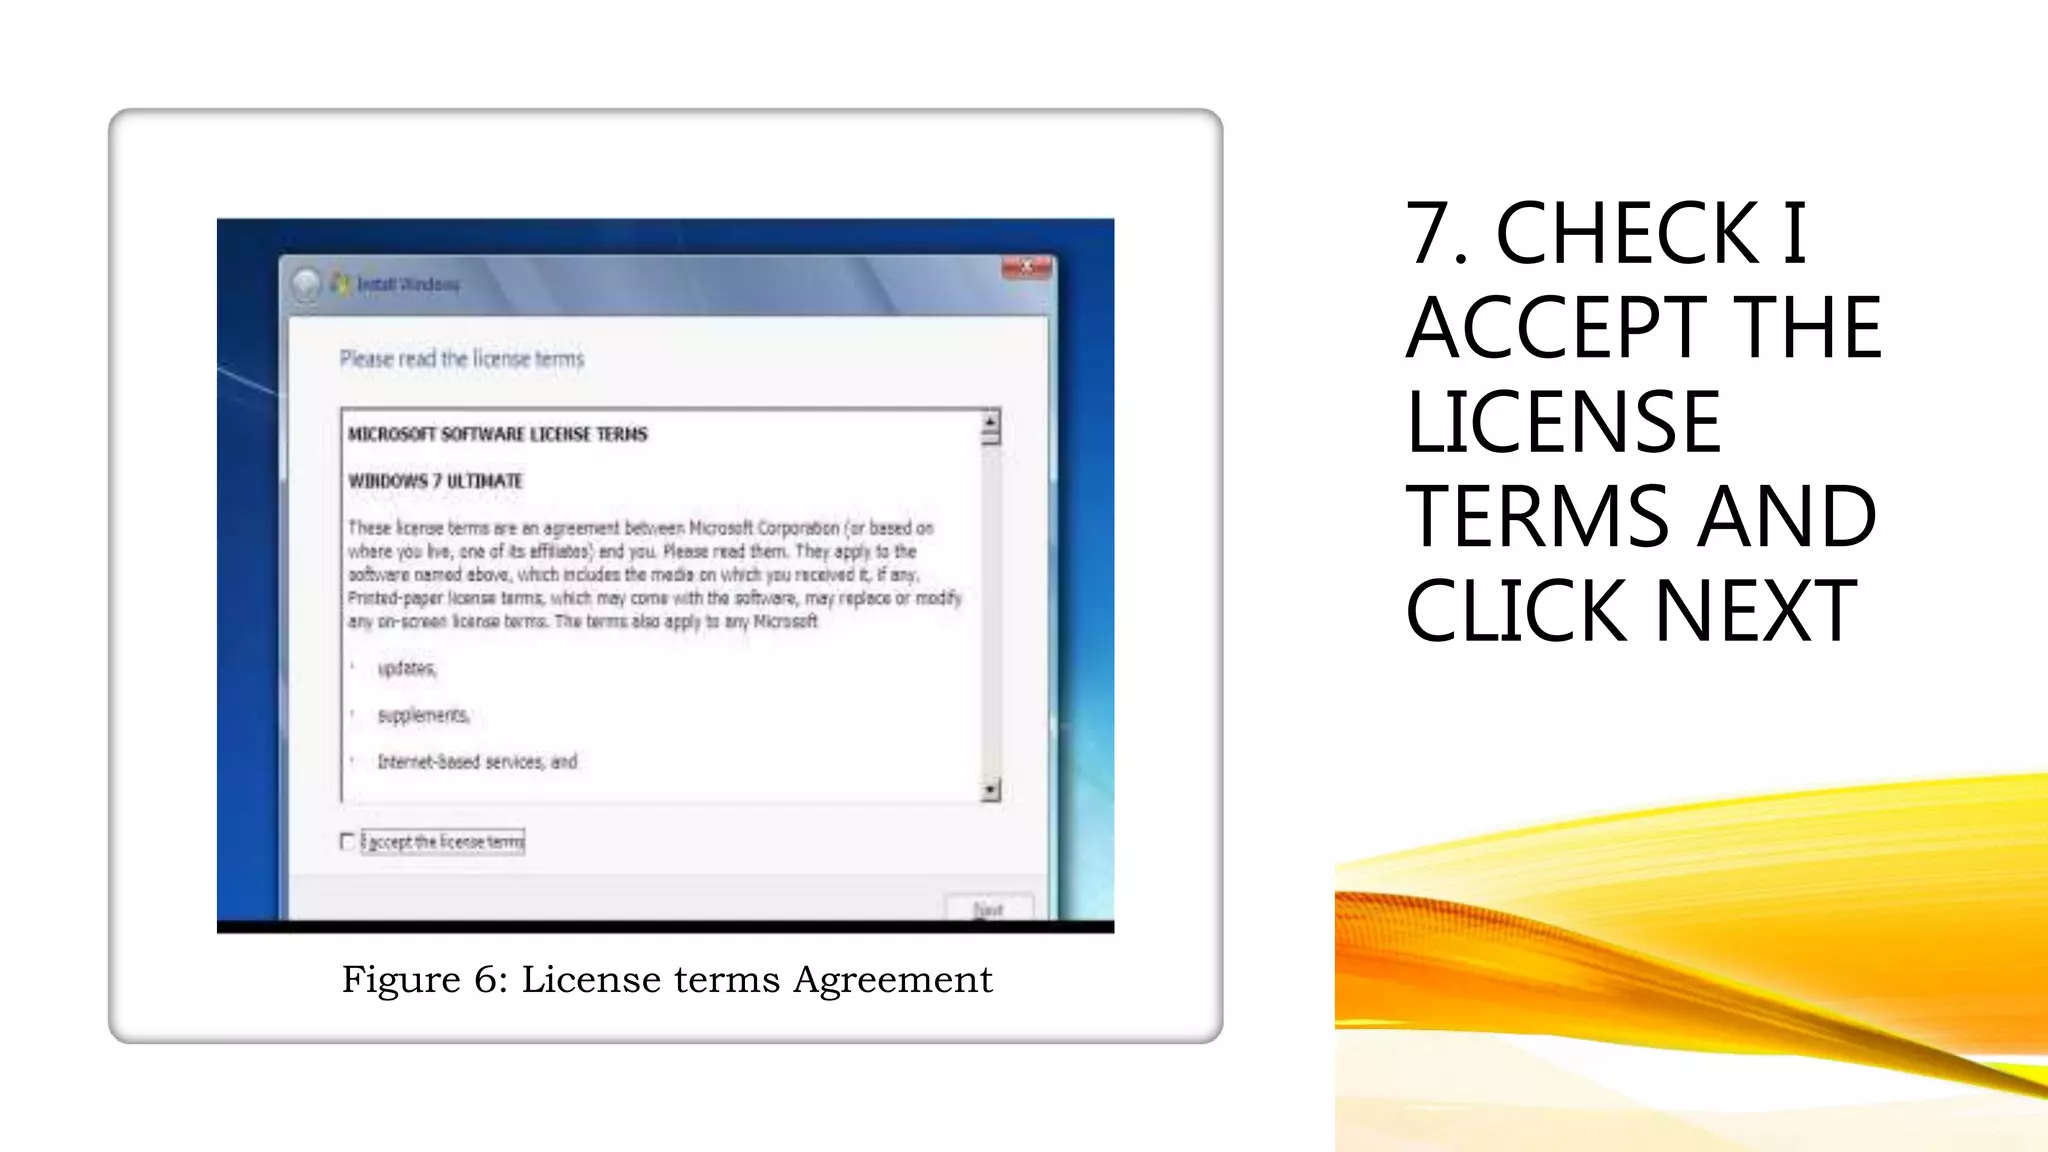
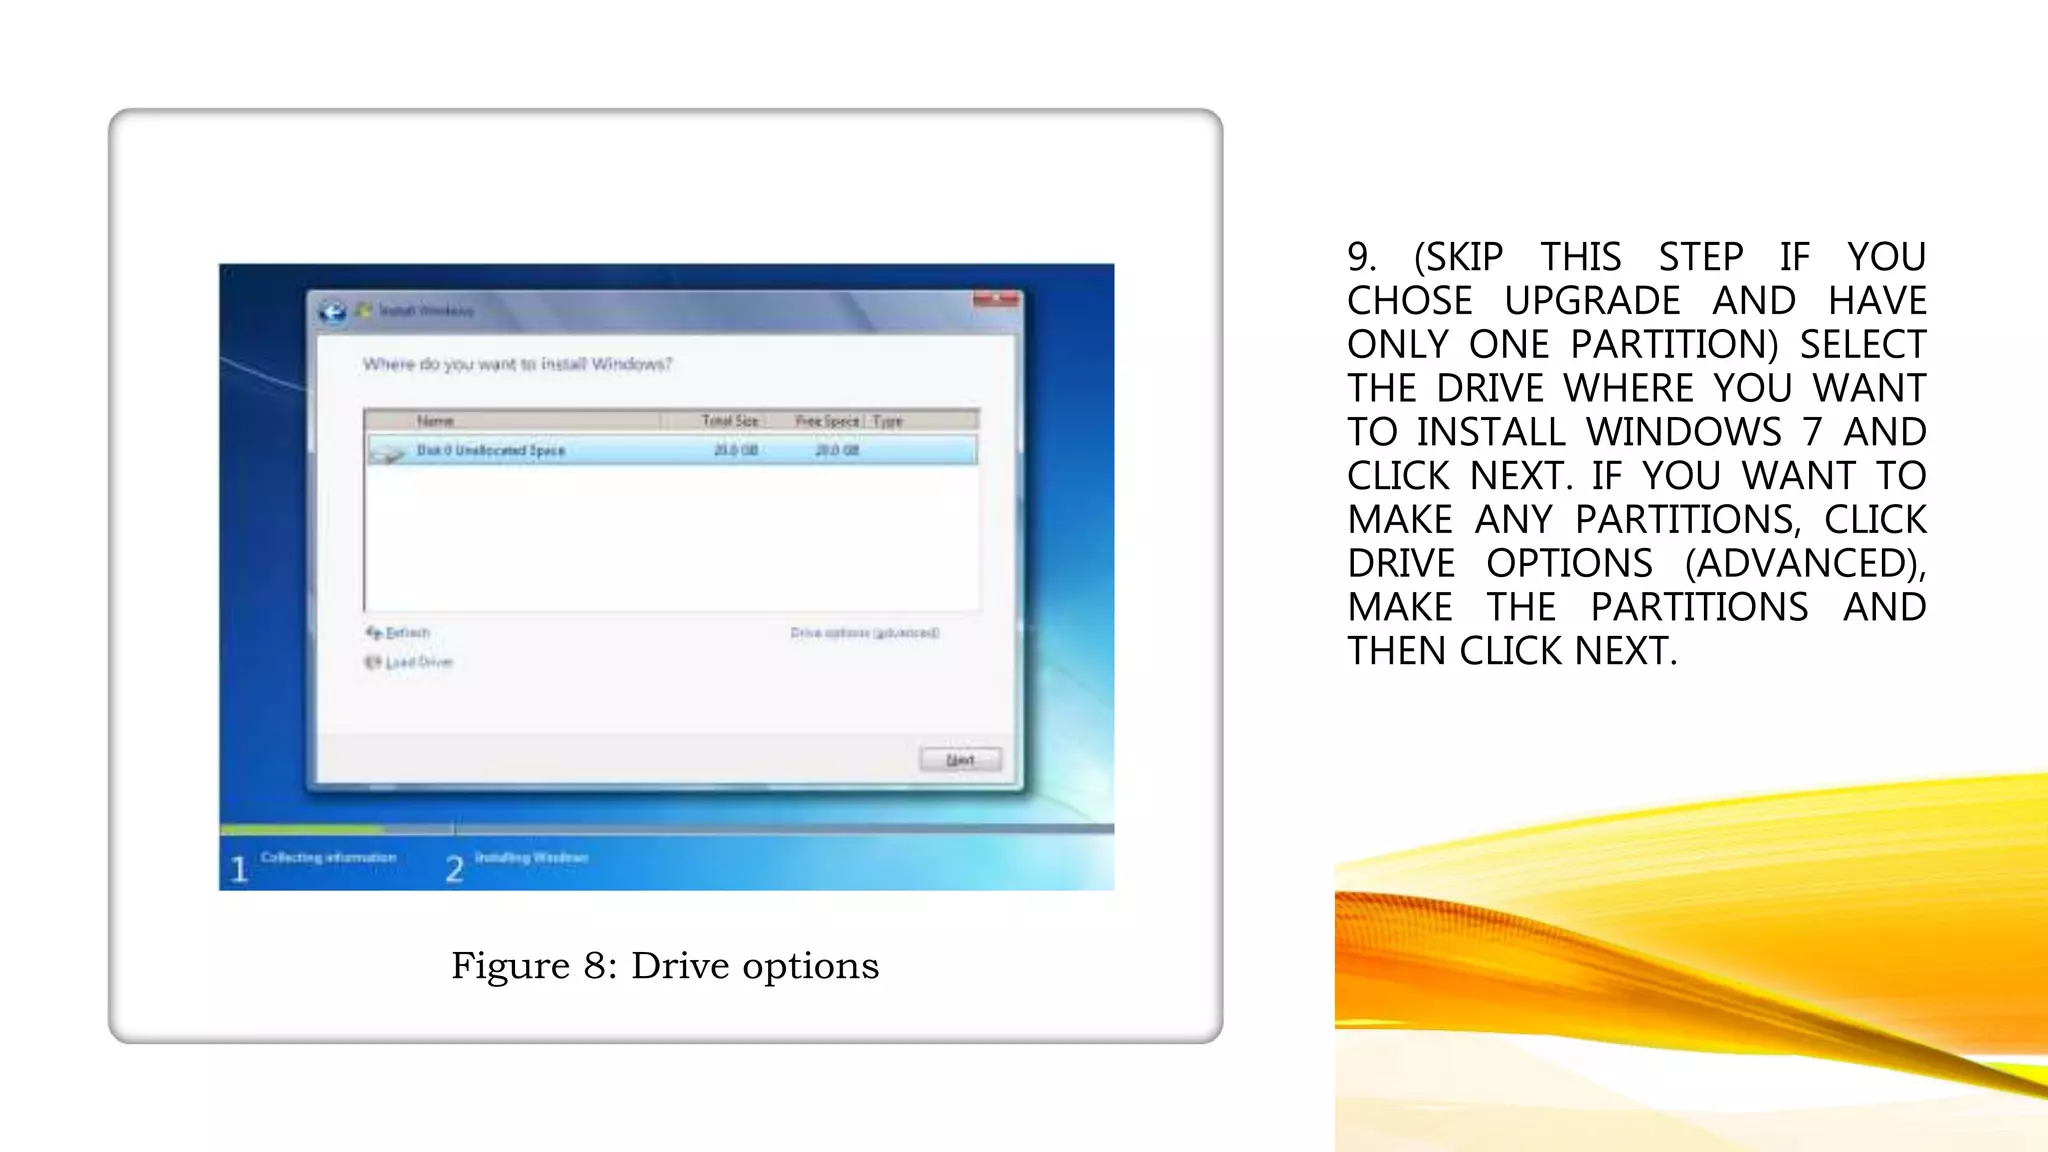
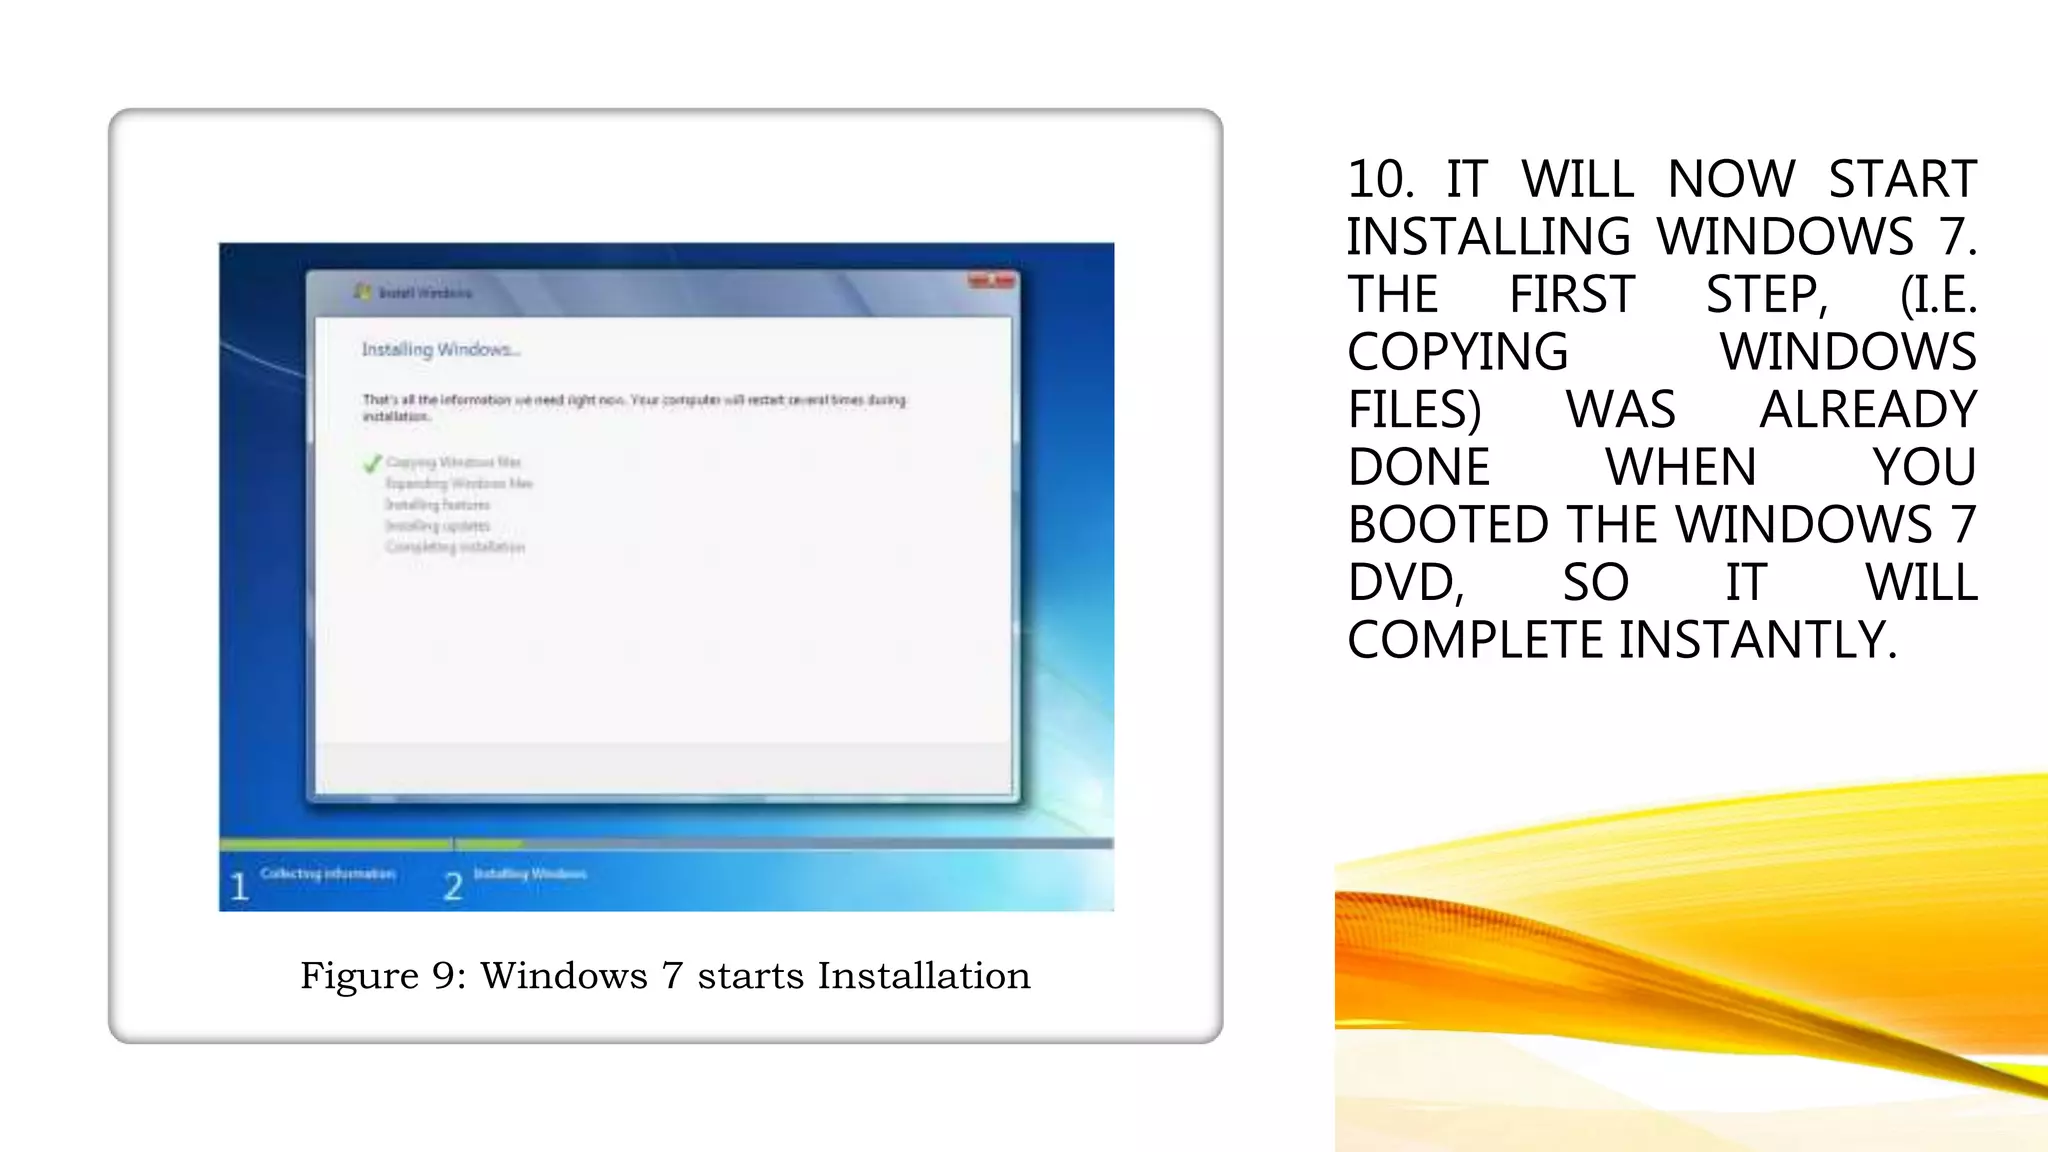
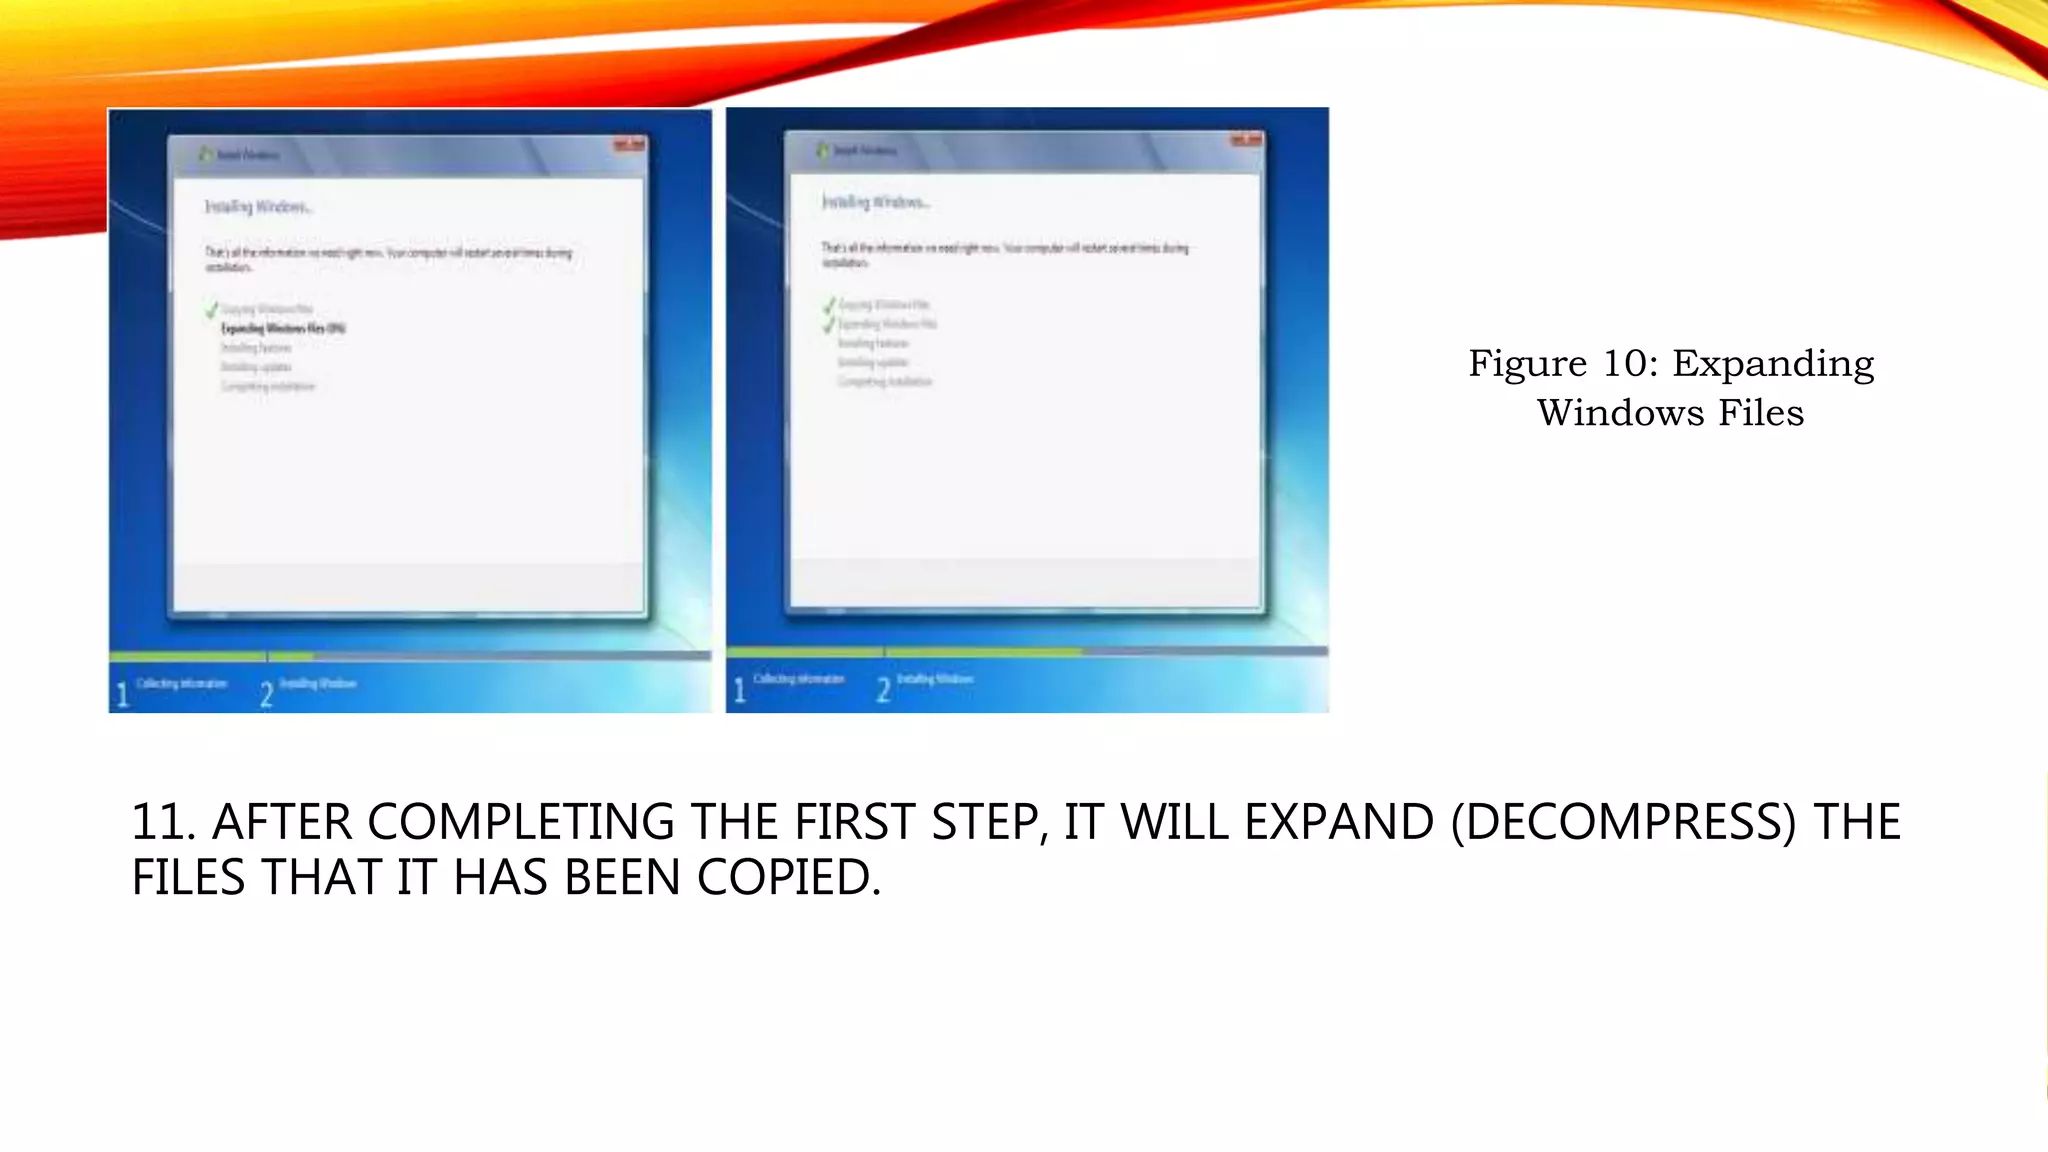
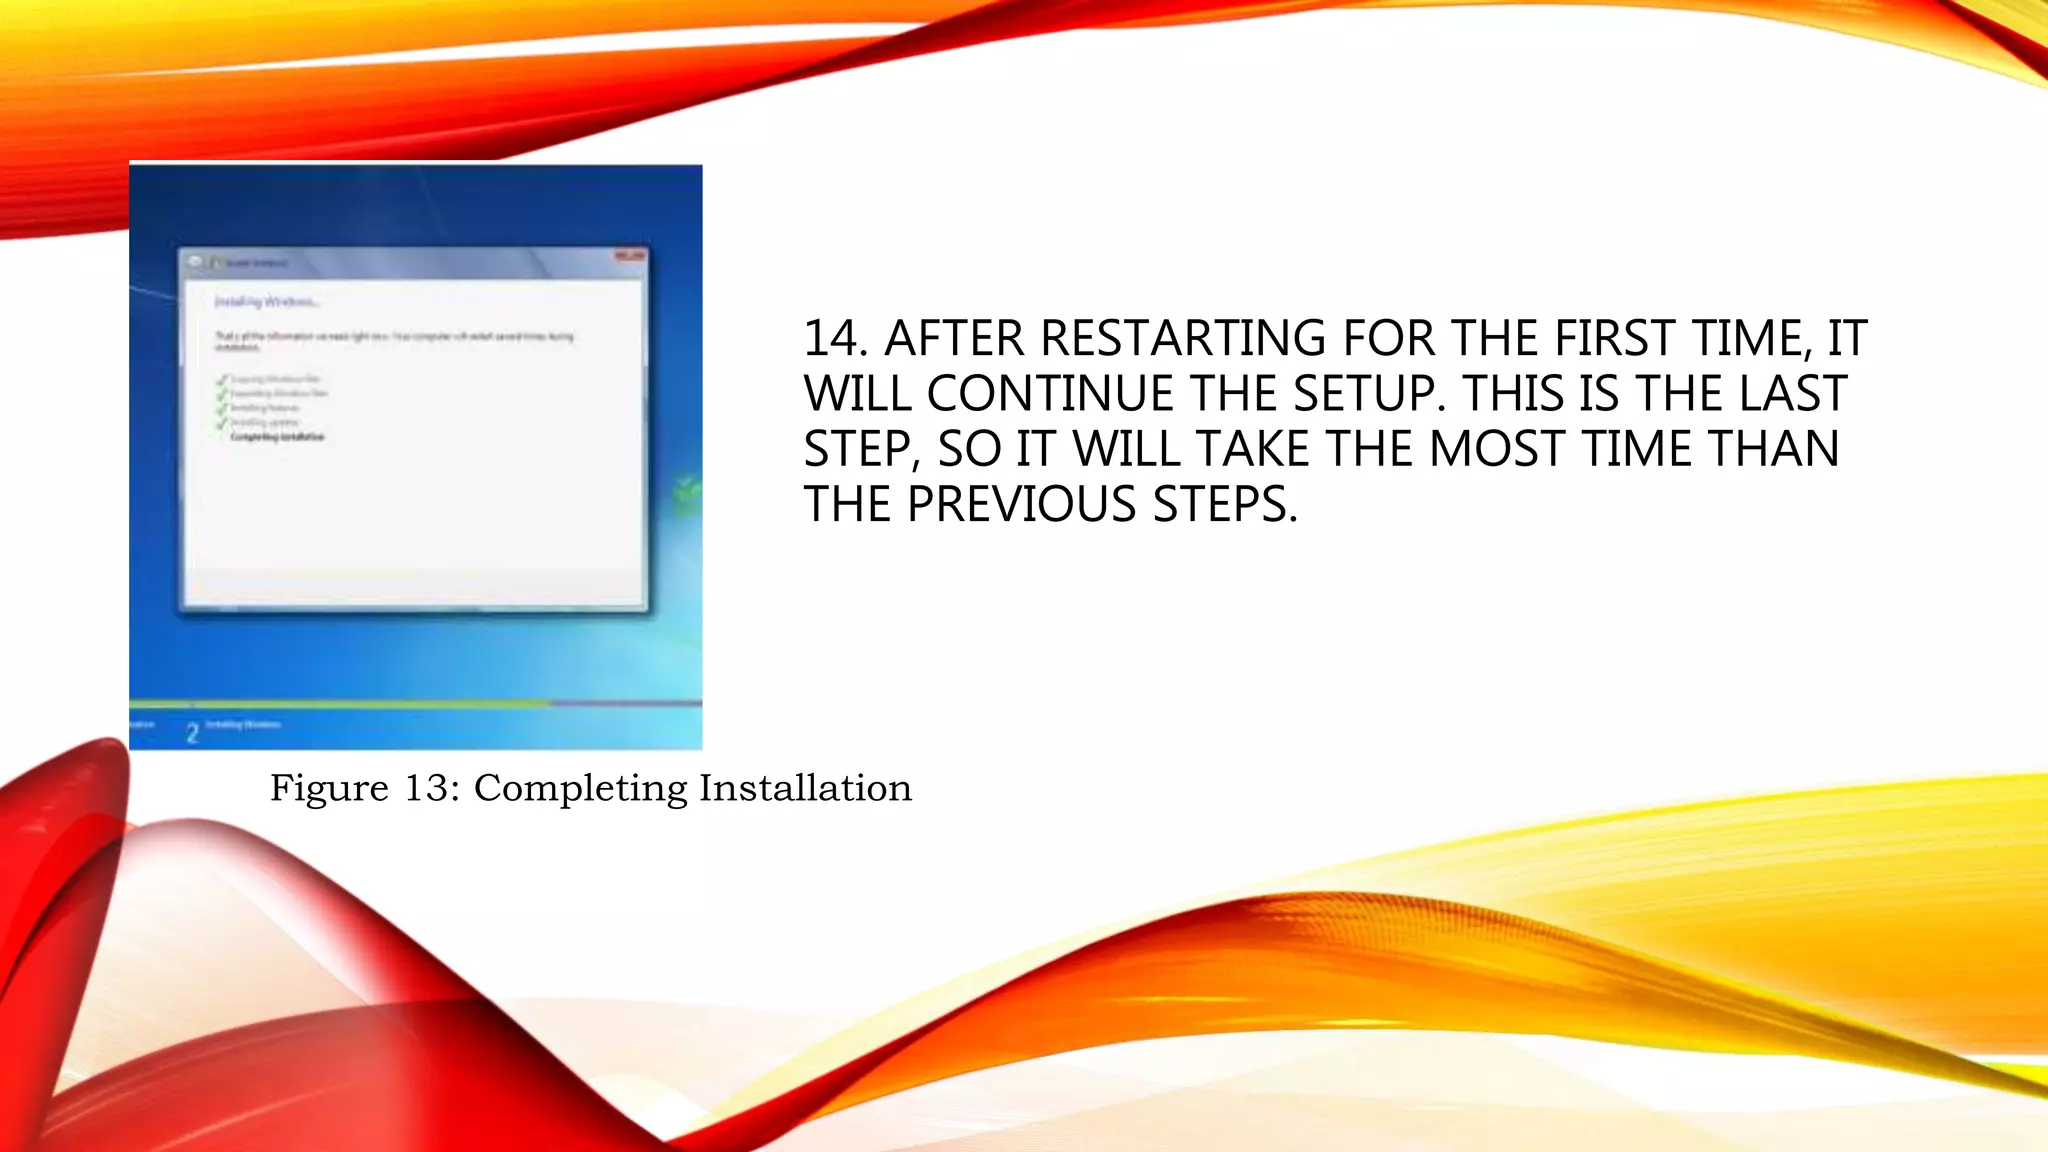
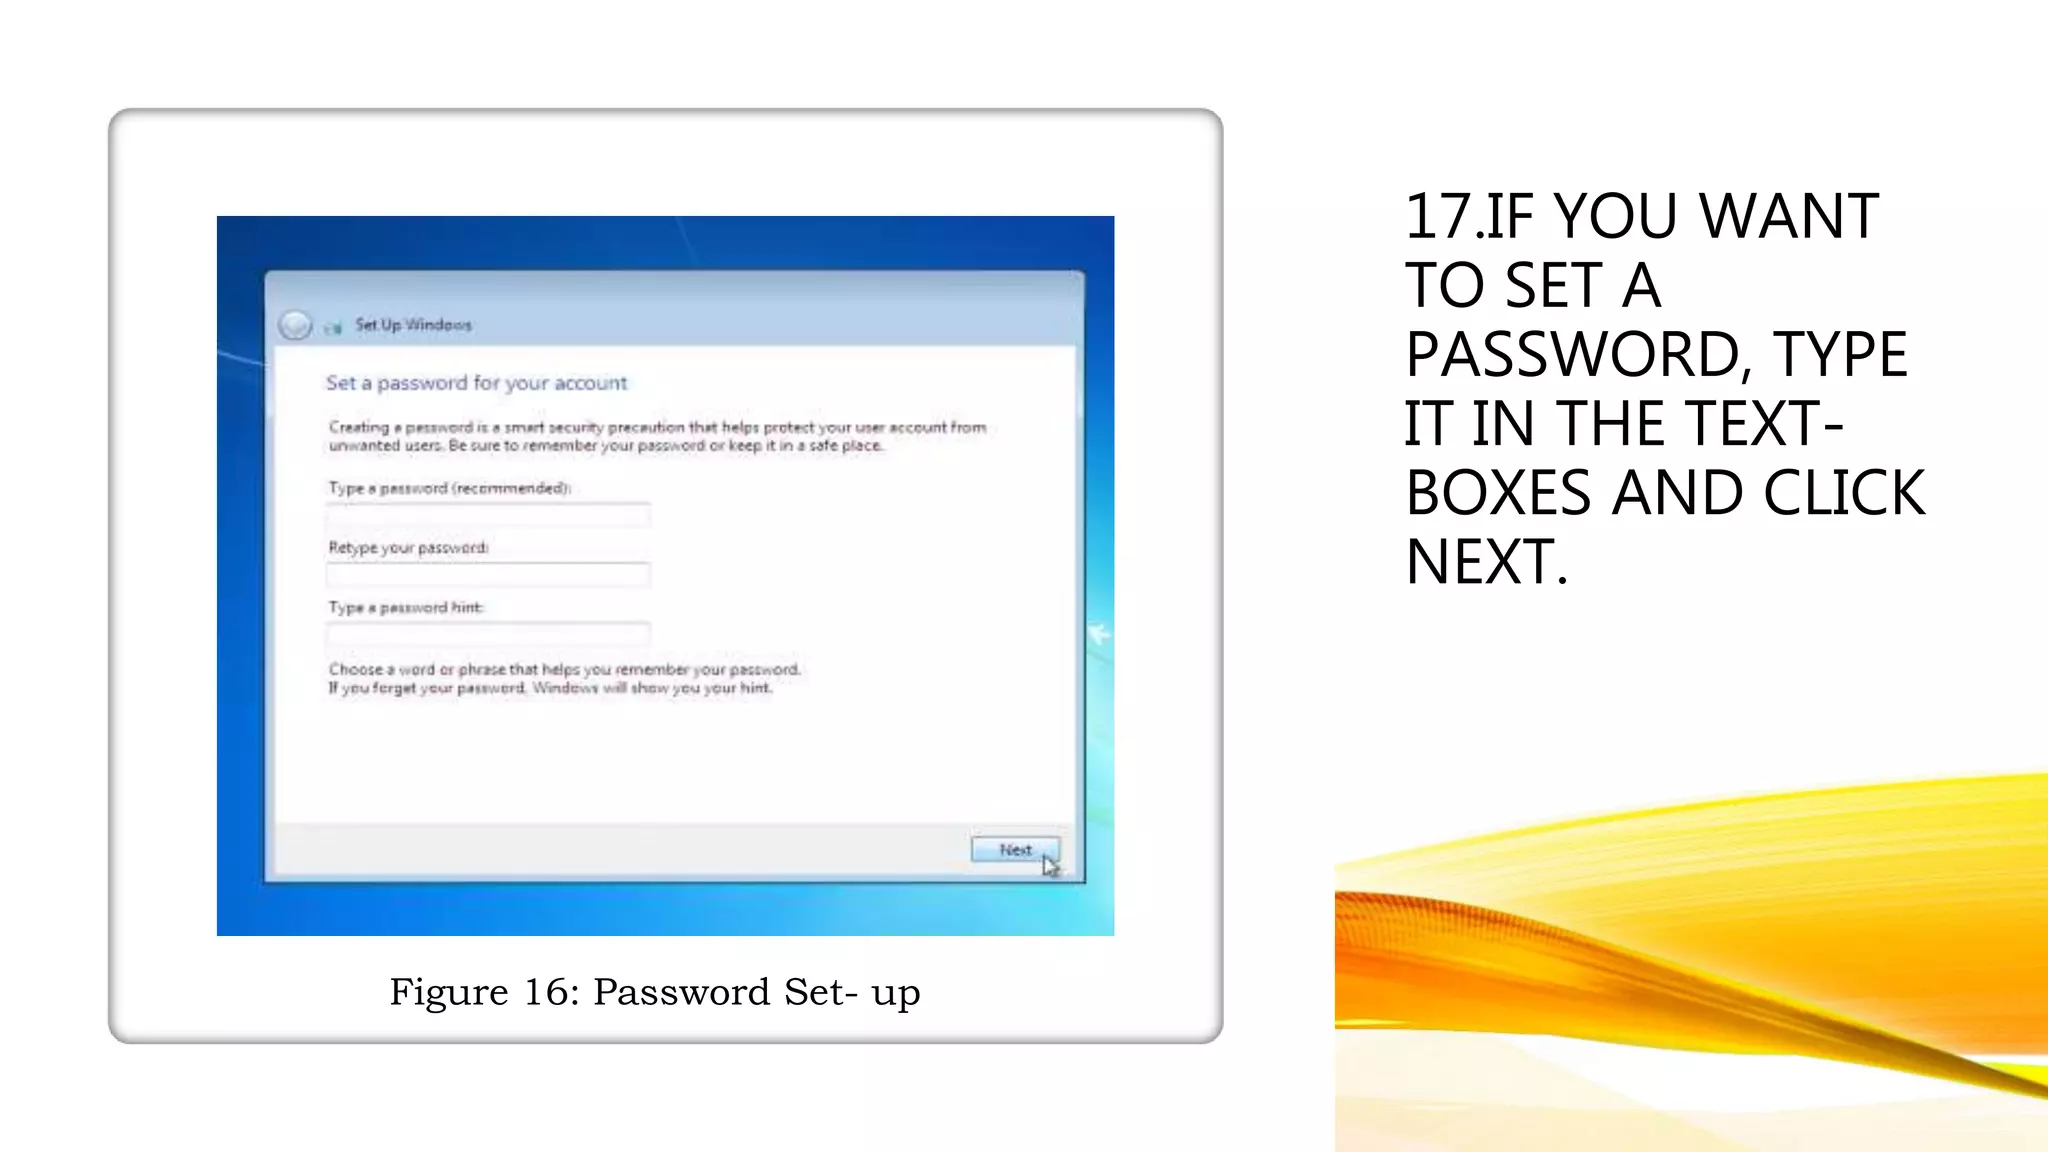
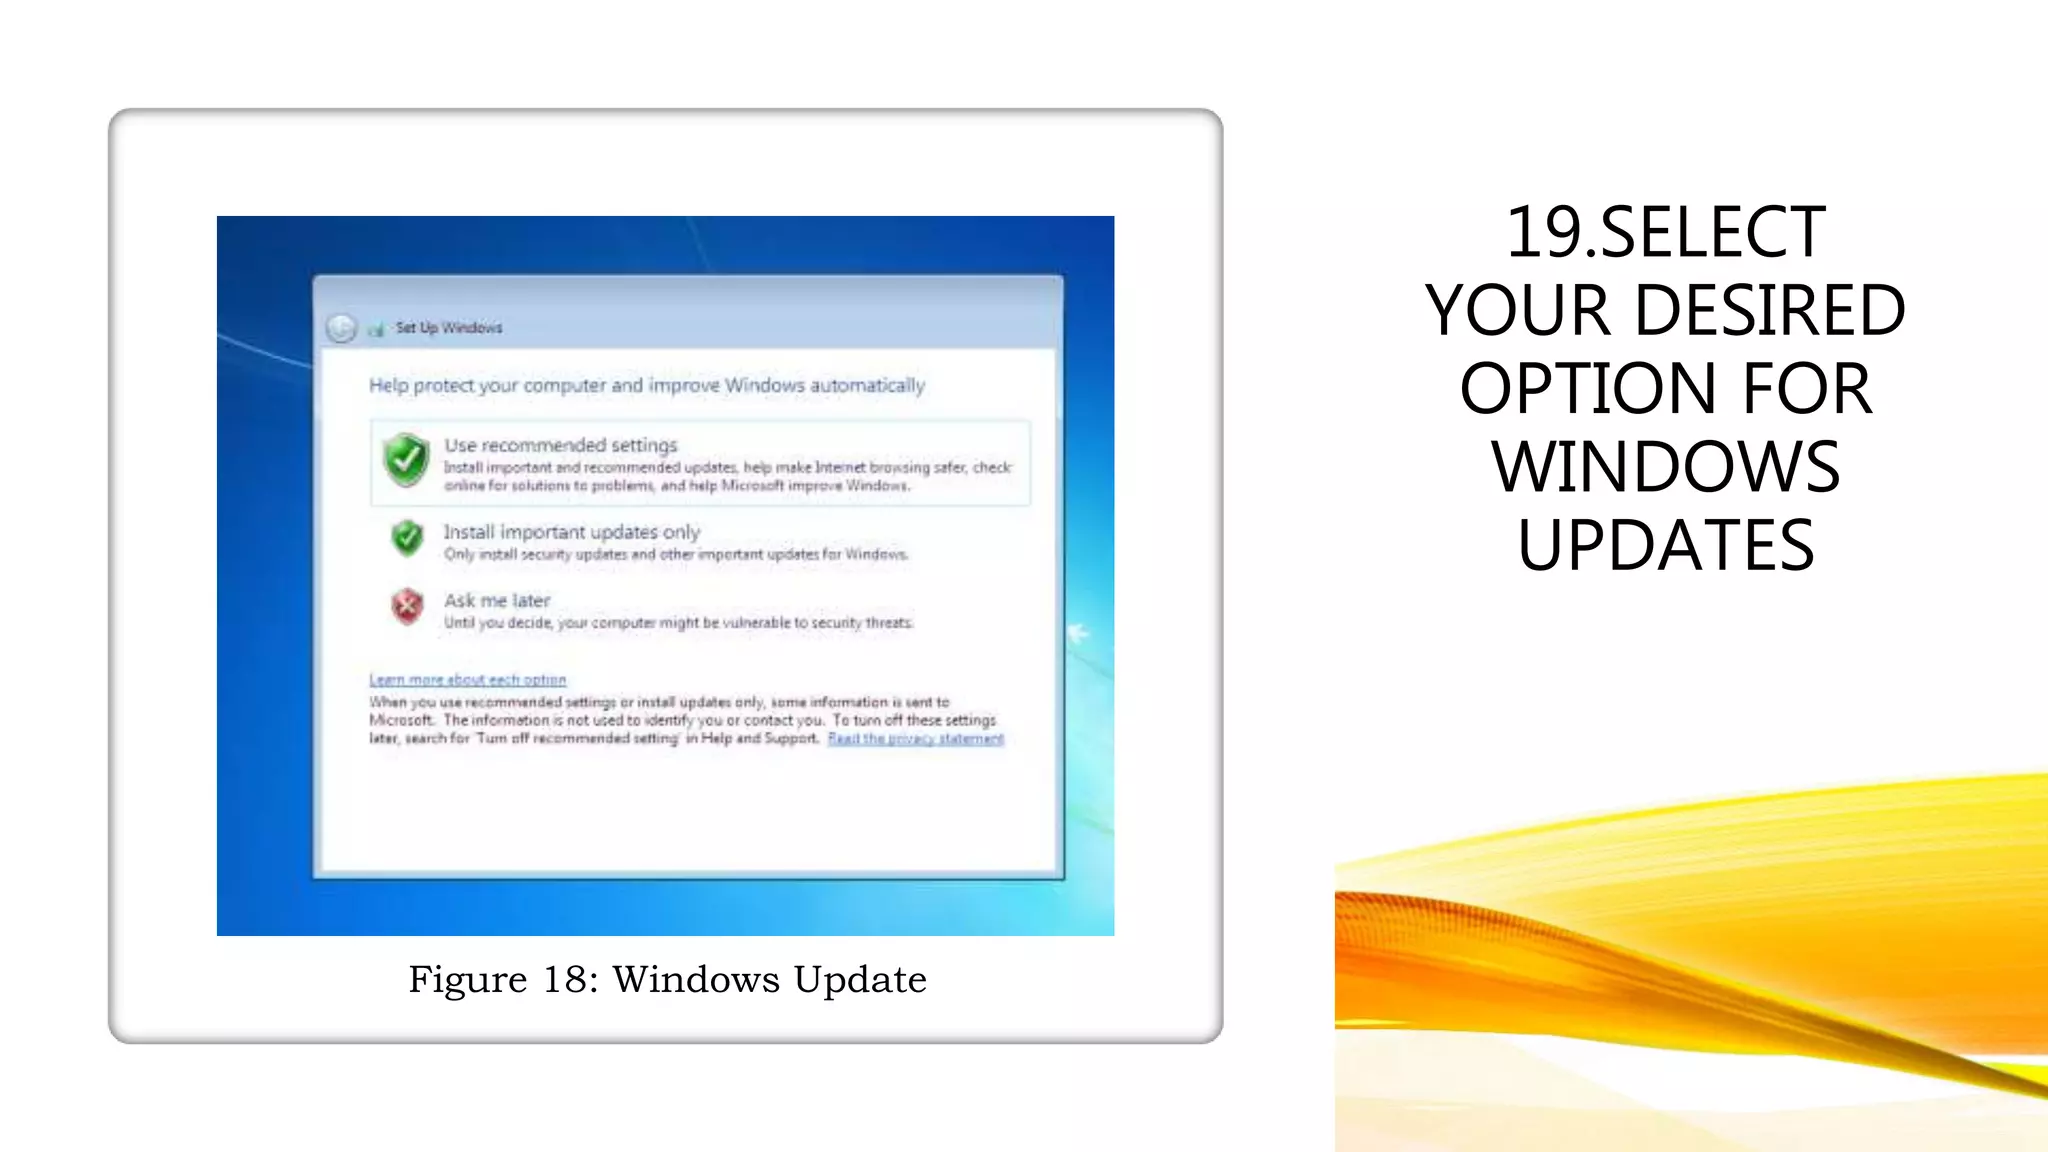
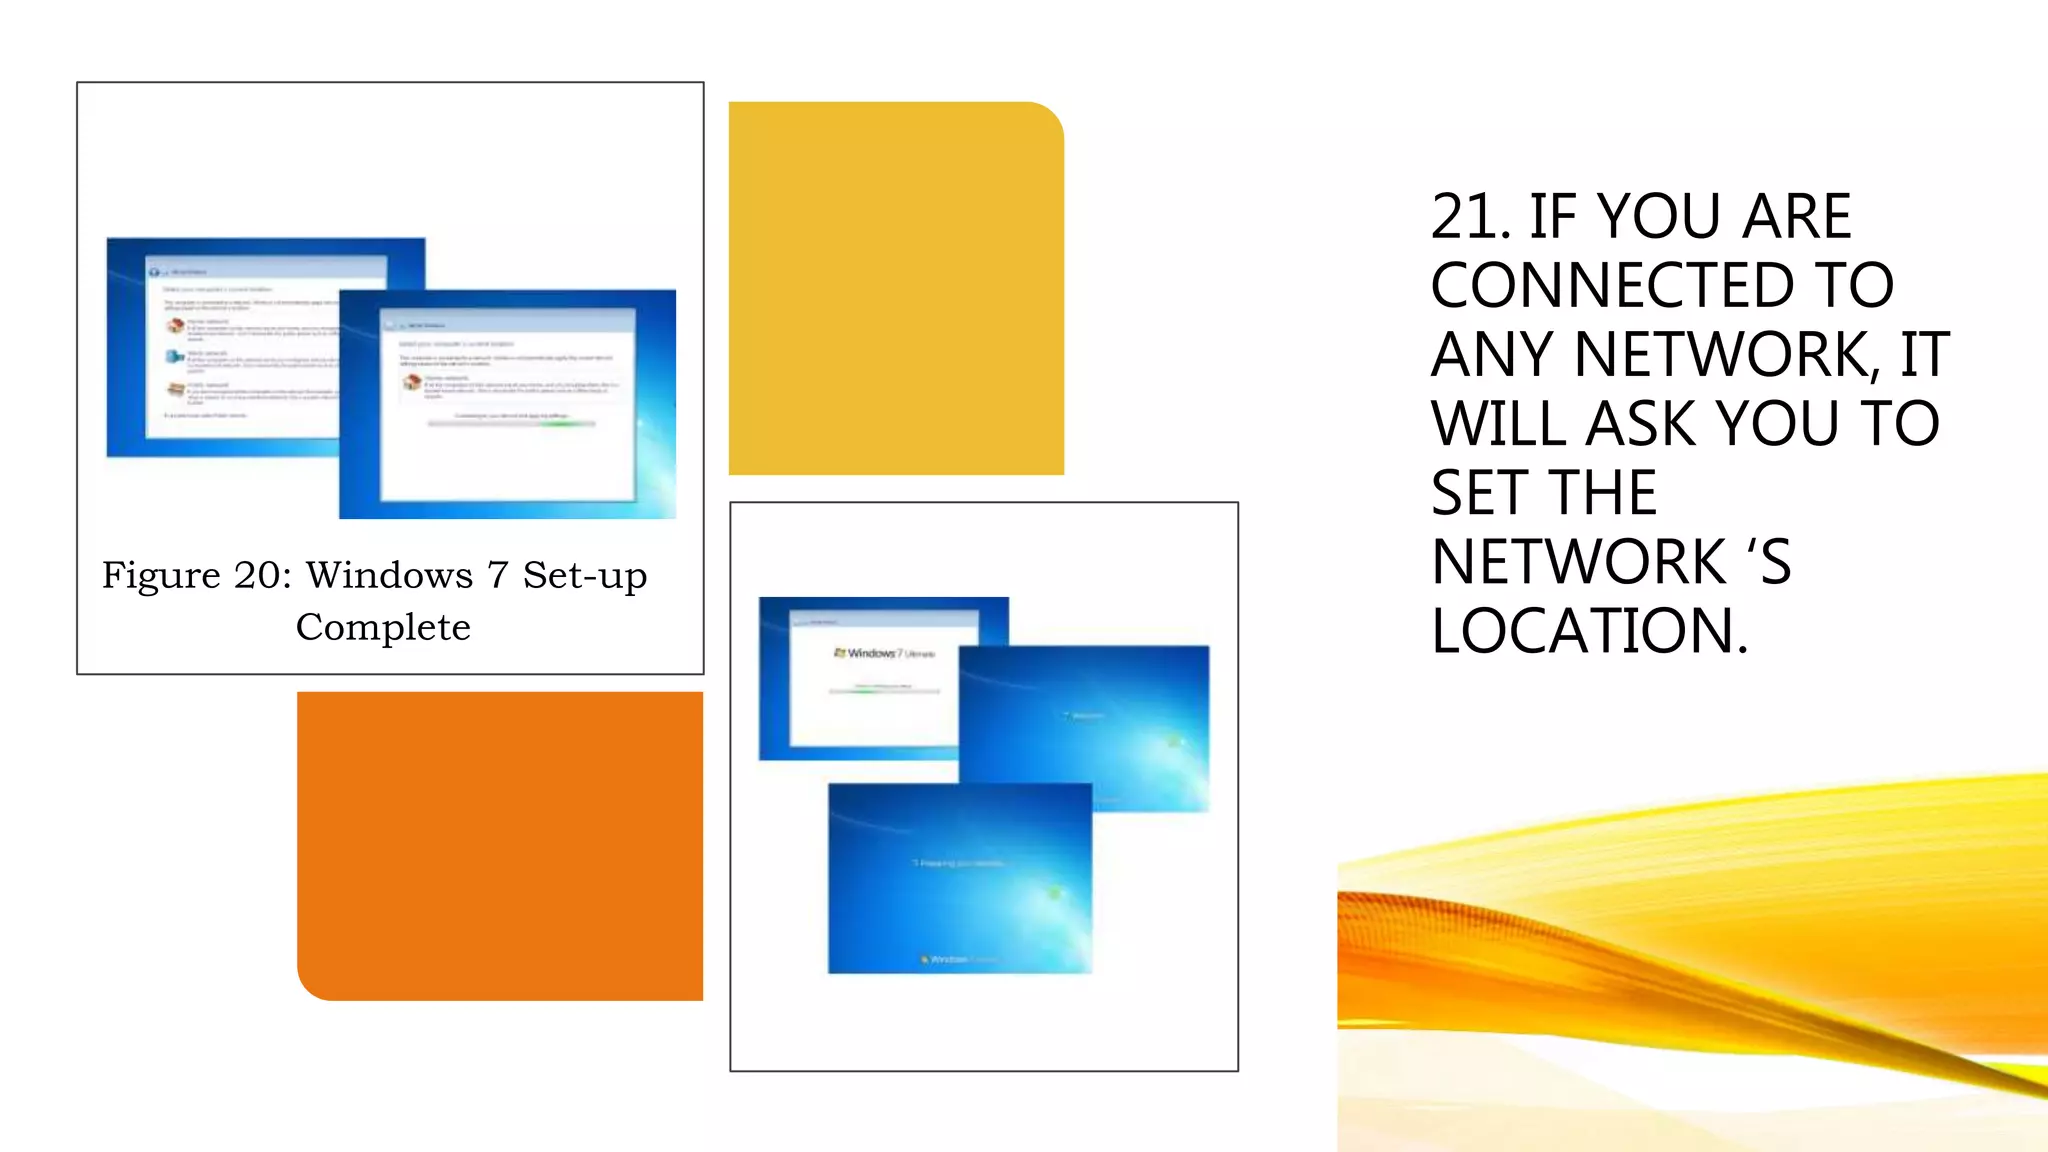
The document provides step-by-step instructions for installing the Windows 7 operating system on a computer. It begins by having the user enter the BIOS setup to select booting from a CD/DVD. Then it outlines 20 steps for installing Windows 7, which include inserting the Windows 7 DVD, selecting language and time settings, selecting the drive to install to, restarting the computer during installation, setting up user accounts and passwords, and completing Windows updates and time/date settings. It also briefly discusses some common issues with Windows 7 like hardware problems and issues that may require professional troubleshooting. Finally, it provides instructions for students to complete an online activity on installing operating systems.
1. Republic of the Philippines
Department of Education
Region XII
SCHOOLS DIVISION OFFICE OF KORONADAL CITY
Koronadal National Comprehensive High School
City of Koronadal
WELCOME
ONLINE CLASS
(COMPUTER SYSTEM SERVICING)
JOHN LESTER B. ESCALERA
SUBJECT TEACHER
7. INSTALL OPERATING SYSTEM (OS)
•Is an interface between a computer user and
computer hardware.
•Is a software which performs all the basic task like
file management, process management, handling
input and output , and controlling peripheral
devices such as disk drives.
8. 5 COMMON OPERATING SYSTEM
1. Microsoft windows
2.Apple macOS
3.Linux
4.Android
5.Apple’s ios
9. MICROSOFT WINDOWS
EVOLUTION
1. MS-DOS – MICROSOFT DISK OPERATING SYSTEM (1981)
2. WINDOWS 1.0 – 2.0 (1985-1992)
3. WINDOWS 3.0 – 3.1 (1990-1994)
4. WINDOWS 95 (AUGUST 1995)
5. WINDOWS NT 3.1 – 4.0 (1993 – 1996)
6. WINDOWS 98 (JUNE 1998)
7. WINDOWS ME – MILLENNIUM EDITION
(SEPTEMBER 2000)
8. WINDOWS 2000 (FEBRUARY 2000)
9. WINDOWS XP (OCTOBER 2001)
10. WINDOWS VISTA (NOVEMBER 2006)
11. WINDOWS 7 (OCTOBER, 2009)
12. WINDOWS 8 - August 1, 2012
13. WINDOWS 10 - July 29, 2015
14. WINDOWS 11 - Sept. 2020
10. LESSON 1: INSTALLING WINDOWS 7
OPERATING SYSTEM
• As a technician you must be able to know the
variations or options in installing an operating system
that is compatible with the hardware requirement of
a personal computer. Another operating system
available in the market now is the Windows 7 version.
Now, take a tour through the procedures in installing
a Windows 7 operating system. I believe, the
procedures will be very easy for you.
11. 1. Turn your computer
on then press Del or
F2 (depend on your
computer ‘s
mainboard) to enter
the system BIOS.
2. Go to Boot menu
and choose Boot from
CD/DVD.
Figure 1: Boot Menu
12. 3. PRESS F10 TO SAVE
THE CONFIGURATION
AND EXIT BIOS THEN
RESET YOUR COMPUTER.
Figure 2: Save configuration settings
13. 4. INSERT WINDOWS 7 DVD INTO YOUR DVD DRIVE THEN START
UP YOUR COMPUTER, WINDOWS 7 WILL BE LOADING FILES.
Figure 3: Windows 7 loading files and start up
14. 5. SELECT YOUR
LANGUAGE, TIME &
CURRENCY FORMAT,
KEYBOARD OR INPUT
METHOD AND CLICK
NEXT.
Figure 4: Language, Time and Currency Set-up
16. 7. CHECK I
ACCEPT THE
LICENSE
TERMS AND
CLICK NEXT
Figure 6: License terms Agreement
17. 8. CLICK UPGRADE IF
YOU ALREADY HAVE A
PREVIOUS WINDOWS
VERSION OR CUSTOM
(ADVANCED) IF YOU
DON ‘T HAS A PREVIOUS
WINDOWS VERSION OR
WANT TO INSTALL A
FRESH COPY OF
WINDOWS 7.
Figure 7: Windows 7 options for installation
18. 9. (SKIP THIS STEP IF YOU
CHOSE UPGRADE AND HAVE
ONLY ONE PARTITION) SELECT
THE DRIVE WHERE YOU WANT
TO INSTALL WINDOWS 7 AND
CLICK NEXT. IF YOU WANT TO
MAKE ANY PARTITIONS, CLICK
DRIVE OPTIONS (ADVANCED),
MAKE THE PARTITIONS AND
THEN CLICK NEXT.
Figure 8: Drive options
19. 10. IT WILL NOW START
INSTALLING WINDOWS 7.
THE FIRST STEP, (I.E.
COPYING WINDOWS
FILES) WAS ALREADY
DONE WHEN YOU
BOOTED THE WINDOWS 7
DVD, SO IT WILL
COMPLETE INSTANTLY.
Figure 9: Windows 7 starts Installation
20. 11. AFTER COMPLETING THE FIRST STEP, IT WILL EXPAND (DECOMPRESS) THE
FILES THAT IT HAS BEEN COPIED.
Figure 10: Expanding
Windows Files
21. 12. THE THIRD AND FOURTH STEP WILL ALSO COMPLETE INSTANTLY LIKE THE
FIRST STEP.
Figure 11: Installing Features and Updates
22. 13. AFTER THAT IT WILL
AUTOMATICALLY RESTART
AFTER 15 SECONDS AND
CONTINUE THE SETUP. YOU
CAN ALSO CLICK RESTART
NOW TO RESTART WITHOUT
ANY DELAYS.
Figure 12: Restart to Continue Installation
23. 14. AFTER RESTARTING FOR THE FIRST TIME, IT
WILL CONTINUE THE SETUP. THIS IS THE LAST
STEP, SO IT WILL TAKE THE MOST TIME THAN
THE PREVIOUS STEPS.
Figure 13: Completing Installation
24. 15. IT WILL NOW
AUTOMATICALLY
RESTART AGAIN AND
CONTINUE THE SETUP.
YOU CAN CLICK RESTART
NOW TO RESTART
WITHOUT ANY DELAYS.
Figure 14: First Start Up
25. 16.TYPE YOUR DESIRED
USER NAME IN THE
TEXT-BOX AND CLICK
NEXT. IT WILL
AUTOMATICALLY FILL UP
THE COMPUTER NAME.
Figure 15: Software Personalization
26. 17.IF YOU WANT
TO SET A
PASSWORD, TYPE
IT IN THE TEXT-
BOXES AND CLICK
NEXT.
Figure 16: Password Set- up
27. 18. TYPE YOUR
PRODUCT KEY IN THE
TEXT-BOX AND CLICK
NEXT. YOU CAN ALSO
SKIP THIS STEP AND
SIMPLY CLICK NEXT IF
YOU WANT TO TYPE THE
PRODUCT KEY LATER.
WINDOWS WILL RUN
ONLY FOR 30-DAY S IF
YOU DO THAT
Figure 17: Type Windows Product Key
32. Another problem that may plague your computer is
hardware problems. Perhaps the internet doesn't work
because the actual wireless card is physically damaged.
In this case, troubleshooting will not fix anything, and
you'll have to repair the broken part.
If you are not able to solve your problem with a
troubleshooting wizard, you may need to take your PC in
for clinical repairs. You could have a deep-rooted software
problem, that most PC users don't have the experience to
figure out.