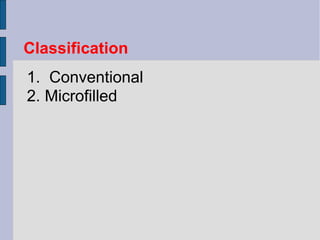
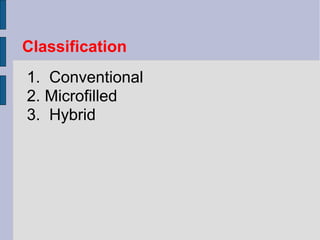
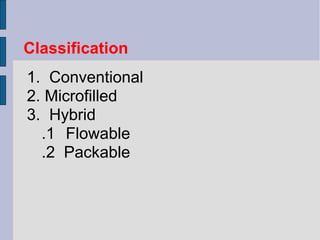
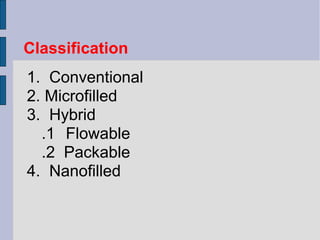
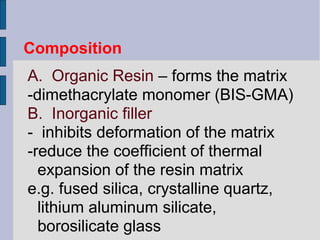
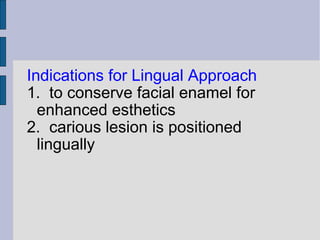
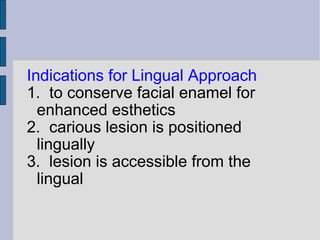
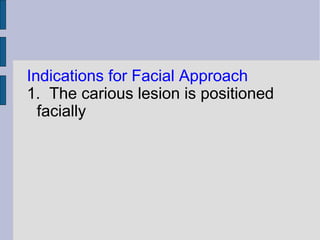
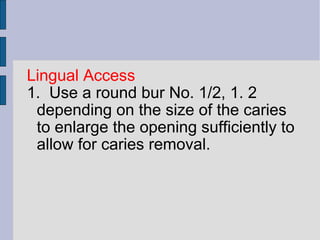
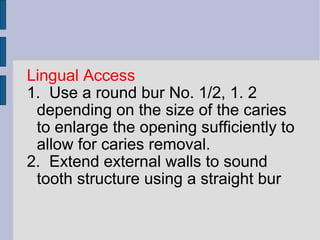
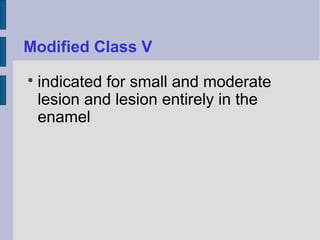
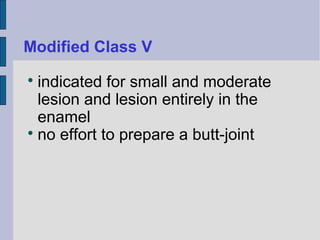
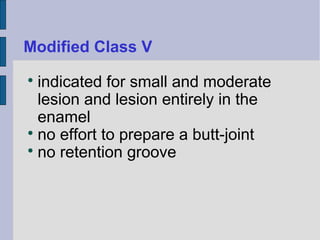
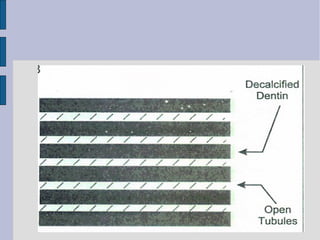
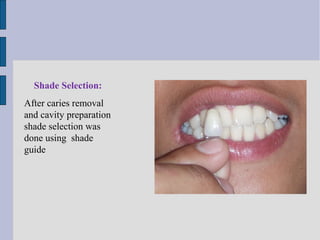
CLASS III, IV and V 
DIRECT COMPOSITE 
RESTORATIONS 
Upload By : Ahmed Ali Abbas 
Babylon University College of Dentistry 
download this file from Website on google 
theoptimalsmile.wix.com/dentistry
Indications:
Indications: 
 restorations in esthetic prominent 
areas
Indications: 
 restorations in esthetic prominent 
areas 
 areas can be adequately isolated
Indications: 
 restorations in esthetic prominent 
areas 
 areas can be adequately isolated 
 tooth preparations that have an all 
enamel margins
Contraindications:
Contraindications: 
 an operating area that cannot be 
adequately isolated
Contraindications: 
 an operating area that cannot be 
adequately isolated 
 class v restorations that are not 
esthetically critical
Contraindications: 
 an operating area that cannot be 
adequately isolated 
 class v restorations that are not 
esthetically critical 
 restorations that extends into the 
root surface (contraction gap)
Advantages
Advantages 
 esthetics
Advantages 
 esthetics 
 conservative of tooth structure 
removal
Advantages 
 esthetics 
 conservative of tooth structure 
removal 
 less complex when preparing the 
tooth
Advantages 
 esthetics 
 conservative of tooth structure 
removal 
 less complex when preparing the 
tooth 
 low thermal conductivity (insulative)
Advantages 
 esthetics 
 conservative of tooth structure 
removal 
 less complex when preparing the 
tooth 
 low thermal conductivity (insulative) 
Used almost universally
Advantages (continued) 
 bonded to tooth structure
Advantages (continued) 
 bonded to tooth structure 
Repairable
Disadvantages
Disadvantages 
may result to gap formation
Disadvantages 
may result to gap formation 
 restoration is more difficult, time-consuming, 
costly
Disadvantages 
may result to gap formation 
 restoration is more difficult, time-consuming, 
costly 
more technique sensitive
Disadvantages 
may result to gap formation 
 restoration is more difficult, time-consuming, 
costly 
more technique sensitive 
may exhibit more wear in areas of 
high occlusion
Disadvantages 
may result to gap formation 
 restoration is more difficult, time-consuming, 
costly 
more technique sensitive 
may exhibit more wear in areas of 
high occlusion 
 have a higher linear coefficient of 
thermal expansion
COMPOSITE
COMPOSITE 
 introduced commercially in 1962 by 
Bowen of the National Bureau of 
Standards
COMPOSITE 
 introduced commercially in 1962 by 
Bowen of the National Bureau of 
Standards 
most popular tooth colored material
COMPOSITE 
 introduced commercially in 1962 by 
Bowen of the National Bureau of 
Standards 
most popular tooth colored material 
 consist of a continuous polymeric or 
resin matrix in which an inorganic 
filler is dispersed
Classification
Classification 
1. Conventional
Classification 
1. Conventional 
2. Microfilled
Classification 
1. Conventional 
2. Microfilled 
3. Hybrid
Classification 
1. Conventional 
2. Microfilled 
3. Hybrid 
.1 Flowable
Classification 
1. Conventional 
2. Microfilled 
3. Hybrid 
.1 Flowable 
.2 Packable
Classification 
1. Conventional 
2. Microfilled 
3. Hybrid 
.1 Flowable 
.2 Packable 
4. Nanofilled
Composition
Composition 
1. Organic Resin
Composition 
1. Organic Resin – forms the matrix
Composition 
1. Organic Resin – forms the matrix 
-dimethacrylate monomer (BIS-GMA)
Composition 
1. Organic Resin – forms the matrix 
-dimethacrylate monomer (BIS-GMA) 
2. Inorganic filler
Composition 
1. Organic Resin – forms the matrix 
-dimethacrylate monomer (BIS-GMA) 
2. Inorganic filler 
- inhibits deformation of the matrix
Composition 
1. Organic Resin – forms the matrix 
-dimethacrylate monomer (BIS-GMA) 
2. Inorganic filler 
- inhibits deformation of the matrix 
-reduce the coefficient of thermal 
expansion of the resin matrix
Composition 
A. Organic Resin – forms the matrix 
-dimethacrylate monomer (BIS-GMA) 
B. Inorganic filler 
- inhibits deformation of the matrix 
-reduce the coefficient of thermal 
expansion of the resin matrix 
e.g. fused silica, crystalline quartz, 
lithium aluminum silicate, 
borosilicate glass
C. Coupling Agent
C. Coupling Agent 
– unite the resin with the filler
C. Coupling Agent 
– unite the resin with the filler 
-stress absorber of the filler and 
resin
3. Coupling Agent 
– unite the resin with the filler 
-stress absorber of the filler and 
resin 
4. Initiator System
3. Coupling Agent 
– unite the resin with the filler 
-stress absorber of the filler and 
resin 
4. Initiator System – activate the 
setting mechanism
3. Coupling Agent 
– unite the resin with the filler 
-stress absorber of the filler and 
resin 
4. Initiator System – activate the 
setting mechanism 
5. Stabilizers
C. Coupling Agent 
– unite the resin with the filler 
-stress absorber of the filler and 
resin 
D. Initiator System – activate the 
setting mechanism 
E. Stabilizers 
F. Pigments
Conventional Composites
Conventional Composites 
 contains 75-80% inorganic filler by 
weight
Conventional Composites 
 contains 75-80% inorganic filler by 
weight 
 average particle size 8μm 
l
Conventional Composites 
 contains 75-80% inorganic filler by 
weight 
 average particle size 8μm 
 large size particle and 
extremely hard filler
Conventional Composites 
 contains 75-80% inorganic filler by 
weight 
 average particle size 8μm 
 large size particle and 
extremely hard filler 
 rough surface structure 
strontium and barium glass 
(radiopaque)
Microfilled Composites
Microfilled Composites 
 introduced in the late 1970
Microfilled Composites 
 introduced in the late 1970 
 polishable
Microfilled Composites 
 introduced in the late 1970 
 polishable 
 smooth lustrous surface similar to 
tooth enamel
Microfilled Composites 
 introduced in the late 1970 
 polishable 
 smooth lustrous surface similar to 
tooth enamel 
 particle size is 0.01 – 0.04μm
Microfilled Composites 
 introduced in the late 1970 
 polishable 
 smooth lustrous surface similar to 
tooth enamel 
 particle size is 0.01 – 0.04μm 
 contains 35-60% inorganic filler 
by weight
 some of physical and mechanical 
properties are inferior
 some of physical and mechanical 
properties are inferior 
 wear resistant
 some of physical and mechanical 
properties are inferior 
 wear resistant 
 low modulus of elasticity (allow 
restoration to flex)
 some of physical and mechanical 
properties are inferior 
 wear resistant 
 low modulus of elasticity (allow 
restoration to flex) 
 high resin content results in an 
increased coefficient of thermal 
expansion and lower strength
Use of Microfilled Composites
Use of Microfilled Composites 
 used for low stress restorations
Use of Microfilled Composites 
 used for low stress restorations 
 buccal and lingual surfaces of class 
III and class V
Hybrid Composites
Hybrid Composites 
 combines the properties of 
conventional and microfilled
Hybrid Composites 
 combines the properties of 
conventional and microfilled 
 contains 75-85% inorganic filler by 
weight
Hybrid Composites 
 combines the properties of 
conventional and microfilled 
 contains 75-85% inorganic filler by 
weight 
 particle size is 0.4 – 1μm
Hybrid Composites 
 combines the properties of 
conventional and microfilled 
 contains 75-85% inorganic filler by 
weight 
 particle size is 0.4 – 1μm 
 physical properties is superior 
to conventional
 predominant direct esthetic resin
 predominant direct esthetic resin 
 have universal clinical applicability
Use of Hybrid Composites
Use of Hybrid Composites 
 used in moderate stress 
restorations where strength and 
wear resistance are more important 
than surface luster
Use of Hybrid Composites 
 used in moderate stress 
restorations where strength and 
wear resistance are more important 
than surface luster 
Class I, class II, class IV
Flowable
Flowable 
 flows into cavity due to lower 
viscosity
Flowable 
 flows into cavity due to lower 
viscosity 
 have lower filler content
Flowable 
 flows into cavity due to lower 
viscosity 
 have lower filler content 
 inferior physical properties (lower 
wear resistance, lower strength)
Flowable 
 flows into cavity due to lower 
viscosity 
 have lower filler content 
 inferior physical properties (lower 
wear resistance, lower strength) 
 used in small class I, pit and fissure 
sealant,marginal repair, liner
 easy to use
 easy to use 
 good wettability
 easy to use 
 good wettability 
 favorable handling properties
Packable (Condensable)
Packable (Condensable) 
more viscous, “thicker, stiffer feel”
Packable (Condensable) 
more viscous, “thicker, stiffer feel” 
 have filler particle feature that 
prevents sliding of the filler particle 
by one another
Packable (Condensable) 
more viscous, “thicker, stiffer feel” 
 have filler particle feature that 
prevents sliding of the filler particle 
by one another 
 easier restoration of proximal 
contact
Packable (Condensable) 
more viscous, “thicker, stiffer feel” 
 have filler particle feature that 
prevents sliding of the filler particle 
by one another 
 easier restoration of proximal 
contact 
 similar to the handling of amalgam
Nanocomposites 
Nanotechnology or, for short, 
nanotech, refers to a field of 
applied science whose theme is the 
control of matter on an atomic or 
molecular scale.
 Generally nanotechnology deals 
with structures 100 nanometers or 
smaller, and involves developing 
materials or devices within that 
size.
Nanocomposites are materials 
that are created by introducing 
nanoparticulates (often referred to 
as filler) into a macroscopic sample 
material (often referred to as the 
matrix).
 After adding nanoparticulates to 
the matrix material, the resulting 
nanocomposite may exhibit 
drastically enhanced properties. 
For example, adding carbon 
nanotubes tends to drastically add 
to the electrical and thermal 
conductivity.
Other kinds of nanoparticulates 
may result in enhanced optical 
properties, dielectric or mechanical 
properties such as stiffness and 
strenght.
CLINICAL TECHNIQUE 
FOR DIRECT CLASS III, 
CLASS IV AND 
CLASS V 
RESTORATIONS
Class III Tooth Preparation
Class III Tooth Preparation 
 there is a choice between facial or 
lingual entry into the tooth
Indications for Lingual Approach
Indications for Lingual Approach 
1. to conserve facial enamel for 
enhanced esthetics
Indications for Lingual Approach 
1. to conserve facial enamel for 
enhanced esthetics 
2. carious lesion is positioned 
lingually
Indications for Lingual Approach 
1. to conserve facial enamel for 
enhanced esthetics 
2. carious lesion is positioned 
lingually 
3. lesion is accessible from the 
lingual
Indications for Facial Approach
Indications for Facial Approach 
1. The carious lesion is positioned 
facially
Indications for Facial Approach 
1. The carious lesion is positioned 
facially 
2. Teeth is irregularly aligned, 
making lingual access undesirable.
Indications for Facial Approach 
1. The carious lesion is positioned 
facially 
2. Teeth is irregularly aligned, 
making lingual access undesirable. 
3. Extensive caries extent into the 
facial surface.
Indications for Facial Approach 
1. The carious lesion is positioned 
facially 
2. Teeth is irregularly aligned, 
making lingual access undesirable. 
3. Extensive caries extent into the 
facial surface. 
4. Faulty restoration that was 
originally placed at the facial.
Conventional Class III
Conventional Class III 
 indicated for restorations involving 
the root surface
Conventional Class III 
 indicated for restorations involving 
the root surface 
1. using a No. ½, 1, 2 round bur 
prepare the outline form on the root 
surface
Conventional Class III 
 indicated for restorations involving 
the root surface 
1. using a No. ½, 1, 2 round bur 
prepare the outline form on the root 
surface 
2. extend the preparation into sound 
walls
Conventional Class III 
 indicated for restorations involving 
the root surface 
1. using a No. ½, 1, 2 round bur 
prepare the outline form on the root 
surface 
2. extend the preparation into sound 
walls 
3. extend pulpally 0.75mm in depth
4. The gingival/cervical and incisal 
wall is perpendicular to the root 
surface (box like design)
4. The gingival/cervical and incisal 
wall is perpendicular to the root 
surface (box like design) 
5. A continuous groove retention can 
be prepared 0.25 mm (½ of 
diameter of bur) into dentin of the 
gingival and incisal walls with a ¼ 
round bur.
6. The groove is placed at the 
junction of the axial and the external 
walls.
6. The groove is placed at the 
junction of the axial and the external 
walls. 
7. Clean preparation and inspect the 
final preparation.
Beveled Conventional Class III
Beveled Conventional Class III 
 Indicated for replacing an existing 
defective restoration in the crown 
portion of the tooth
Beveled Conventional Class III 
 Indicated for replacing an existing 
defective restoration in the crown 
portion of the tooth 
 when restoring a large carious 
lesion for which the need for 
increased retention and/or 
resistance form is anticipated.
Lingual Access
Lingual Access 
1. Use a round bur No. 1/2, 1. 2 
depending on the size of the caries 
to enlarge the opening sufficiently to 
allow for caries removal.
Lingual Access 
1. Use a round bur No. 1/2, 1. 2 
depending on the size of the caries 
to enlarge the opening sufficiently to 
allow for caries removal. 
2. Extend external walls to sound 
tooth structure using a straight bur
3. Extend the gingival and incisal 
walls up to extent of caries or 
location of old restoration.
3. Extend the gingival and incisal 
walls up to extent of caries or 
location of old restoration. 
Unless necessary, DO NOT:
3. Extend the gingival and incisal 
walls up to extent of caries or 
location of old restoration. 
Unless necessary, DO NOT: 
 include the proximal contact.
3. Extend the gingival and incisal 
walls up to extent of caries or 
location of old restoration. 
Unless necessary, DO NOT: 
 include the proximal contact. 
 extend into the facial surface.
3. Extend the gingival and incisal 
walls up to extent of caries or 
location of old restoration. 
Unless necessary, DO NOT: 
 include the proximal contact. 
 extend into the facial surface. 
 extend subgingivally
4. Create an axial wall depth of 
0.2mm into the dentin/DEJ 
(approximately 0.75 – 1.25mm in 
depth)
4. Create an axial wall depth of 
0.2mm into the dentin/DEJ 
(approximately 0.75 – 1.25mm in 
depth) 
5. Axial wall is convex, following the 
external contour of the tooth.
4. Create an axial wall depth of 
0.2mm into the dentin/DEJ 
(approximately 0.75 – 1.25mm in 
depth) 
5. Axial wall is convex, following the 
external contour of the tooth. 
6. Remove all remaining infected 
dentin, using a round bur or small 
spoon excavator.
7. Remove friable enamel at the 
margins.
7. Remove friable enamel at the 
margins. 
8. If necessary, prepare retention 
(grooves or coves)
7. Remove friable enamel at the 
margins. 
8. If necessary, prepare retention 
(grooves or coves) 
 prepare it along the gingivoxial line 
angle, and sometimes at the 
incisoaxial line angle .25 mm with a 
¼ round bur.
9. Place cavosurface bevel or flare at 
the enamel except at the gingival 
margin area.
9. Place cavosurface bevel or flare at 
the enamel except at the gingival 
margin area. 
10. Use a flame shape or round bur 
resulting in a 45 degrees angle to 
the external tooth surface.
9. Place cavosurface bevel or flare at 
the enamel except at the gingival 
margin area. 
10. Use a flame shape or round bur 
resulting in a 45 degrees angle to 
the external tooth surface. 
11. Bevel width should be 0.25 to 
0.5mm.
12. Clean the preparation of any 
debris and inspect final preparation.
Facial Access
Facial Access 
 same stages and steps are followed
Facial Access 
 same stages and steps are followed 
 procedure is simplified because of 
easy access
Modified Class III
Modified Class III 
most used type of cavity 
preparation.
Modified Class III 
most used type of cavity 
preparation. 
 indicated for small and moderate 
lesions or faults.
Modified Class III 
most used type of cavity 
preparation. 
 indicated for small and moderate 
lesions or faults. 
 designed to be as conservative as 
possible.
Modified Class III 
most used type of cavity 
preparation. 
 indicated for small and moderate 
lesions or faults. 
 designed to be as conservative as 
possible. 
 preparation walls have no specific 
shapes or forms other than an 
external angle of 90 or more 
degrees
 preparation design appears to be 
scooped or concave
 preparation design appears to be 
scooped or concave 
1. Use a 1/2, 1, 2 round bur, point of 
entry is within the incisogingival 
dimension of the lesion, 
perpendicular to the enamel 
surface.
 preparation design appears to be 
scooped or concave 
1. Use a 1/2, 1, 2 round bur, point of 
entry is within the incisogingival 
dimension of the lesion, 
perpendicular to the enamel 
surface. 
2. Remove all remaining caries or 
defect.
3. No attempt is made to create a 
uniform axial wall.
3. No attempt is made to create a 
uniform axial wall. 
4. Place cavosurface bevel or flare at 
the enamel except at the gingival 
margin area.
3. No attempt is made to create a 
uniform axial wall. 
4. Place cavosurface bevel or flare at 
the enamel except at the gingival 
margin area. 
5. Use a flame shape or round bur 
resulting in a 45 degrees angle to 
the external tooth surface.
3. No attempt is made to create a 
uniform axial wall. 
4. Place cavosurface bevel or flare at 
the enamel except at the gingival 
margin area. 
5. Use a flame shape or round bur 
resulting in a 45 degrees angle to 
the external tooth surface. 
6. Bevel width should be 0.25 to 
0.5mm.
7. Clean the preparation of any 
debris and inspect final preparation.
Class IV Tooth Preparation
Class IV Tooth Preparation 
 preoperative assessment of 
occlusion is very important 
(placement of margin in noncontact 
areas)
Class IV Tooth Preparation 
 preoperative assessment of 
occlusion is very important 
(placement of margin in noncontact 
areas) 
 shade selection is more difficult
Class IV Tooth Preparation 
 preoperative assessment of 
occlusion is very important 
(placement of margin in noncontact 
areas) 
 shade selection is more difficult 
 preparation is similar to Class III 
except that the preparation for class 
IV is extended to the incisal angles
Class V Tooth Preparation 
Conventional
Class V Tooth Preparation 
Conventional 
 the feature of the preparation 
include a 90 degree cavosurface 
angle, uniform depth of the axial line 
angle, and sometimes, groove 
retention from.
Class V Tooth Preparation 
Conventional 
 the feature of the preparation 
include a 90 degree cavosurface 
angle, uniform depth of the axial line 
angle, and sometimes, groove 
retention from. 
 conventional design is indicated 
only for portion of the lesion 
extended onto the root surface
1. Use a tapered fissure (No. 700, 
701,or 271) or No.1 or 2 round bur.
1. Use a tapered fissure (No. 700, 
701,or 271) or No.1 or 2 round bur. 
2. Make entry at 45 degrees angle to 
tooth surface, this should result to a 
90 degree cavosurface.
1. Use a tapered fissure (No. 700, 
701,or 271) or No.1 or 2 round bur. 
2. Make entry at 45 degrees angle to 
tooth surface, this should result to a 
90 degree cavosurface. 
3. Axial depth is 0.75 mm
1. Use a tapered fissure (No. 700, 
701,or 271) or No.1 or 2 round bur. 
2. Make entry at 45 degrees angle to 
tooth surface, this should result to a 
90 degree cavosurface. 
3. Axial depth is 0.75 mm 
-strength of preparation wall
1. Use a tapered fissure (No. 700, 
701,or 271) or No.1 or 2 round bur. 
2. Make entry at 45 degrees angle to 
tooth surface, this should result to a 
90 degree cavosurface. 
3. Axial depth is 0.75 mm 
-strength of preparation wall 
-strength of composite
1. Use a tapered fissure (No. 700, 
701,or 271) or No.1 or 2 round bur. 
2. Make entry at 45 degrees angle to 
tooth surface, this should result to a 
90 degree cavosurface. 
3. Axial depth is 0.75 mm 
-strength of preparation wall 
-strength of composite 
-placement of retention groove
4. Axial should follow contour of the 
tooth.
4. Axial should follow contour of the 
tooth. 
5. Extent of outline form is dictated 
by the carious lesion extent.
4. Axial should follow contour of the 
tooth. 
5. Extent of outline form is dictated 
by the carious lesion extent. 
6. Remove remaining carious lesion
4. Axial should follow contour of the 
tooth. 
5. Extent of outline form is dictated 
by the carious lesion extent. 
6. Remove remaining carious lesion 
7. Prepare retention groove (similar 
to Class III preparation)
4. Axial should follow contour of the 
tooth. 
5. Extent of outline form is dictated 
by the carious lesion extent. 
6. Remove remaining carious lesion 
7. Prepare retention groove (similar 
to Class III preparation) 
8. Clean preparation
Beveled Conventional Class V
Beveled Conventional Class V 
 Indications
Beveled Conventional Class V 
 Indications 
1. replacement of defective class V 
restorations
Beveled Conventional Class V 
 Indications 
1. replacement of defective class V 
restorations 
2. large carious lesion
Beveled Conventional Class V 
 Indications 
1. replacement of defective class V 
restorations 
2. large carious lesion 
 exhibits 90 degrees of cavosurface
Beveled Conventional Class V 
 Indications 
1. replacement of defective class V 
restorations 
2. large carious lesion 
 exhibits 90 degrees of cavosurface 
 axial wall depth is uniform (0.2mm 
or 0.5 when retention groove is to 
placed)
 groove is not indicated when 
periphery of tooth preparation is 
located in enamel.
 groove is not indicated when 
periphery of tooth preparation is 
located in enamel. 
 remove all infected dentin
 groove is not indicated when 
periphery of tooth preparation is 
located in enamel. 
 remove all infected dentin 
 clean preparation
Modified Class V
Modified Class V 
 indicated for small and moderate 
lesion and lesion entirely in the 
enamel
Modified Class V 
 indicated for small and moderate 
lesion and lesion entirely in the 
enamel 
 no effort to prepare a butt-joint
Modified Class V 
 indicated for small and moderate 
lesion and lesion entirely in the 
enamel 
 no effort to prepare a butt-joint 
 no retention groove
Modified Class V 
 indicated for small and moderate 
lesion and lesion entirely in the 
enamel 
 no effort to prepare a butt-joint 
 no retention groove 
 lesion is scooped out
Modified Class V 
 indicated for small and moderate 
lesion and lesion entirely in the 
enamel 
 no effort to prepare a butt-joint 
 no retention groove 
 lesion is scooped out 
 preparation has divergent wall
Modified Class V 
 indicated for small and moderate 
lesion and lesion entirely in the 
enamel 
 no effort to prepare a butt-joint 
 no retention groove 
 lesion is scooped out 
 preparation has divergent wall 
 axial wall does not have uniform 
depth
 prepare tooth with round or elliptical 
instrument
 prepare tooth with round or elliptical 
instrument 
 preparation is extended no deeper 
than 0.2 mm
 prepare tooth with round or elliptical 
instrument 
 preparation is extended no deeper 
than 0.2 mm 
 no effort is made to prepare a 90 
degree cavosurface margins.
 prepare tooth with round or elliptical 
instrument 
 preparation is extended no deeper 
than 0.2 mm 
 no effort is made to prepare a 90 
degree cavosurface margins. 
 infected enamel is removed with a 
round bur or excavator.
Class V Tooth Preparation for 
Abrasion/Erosion
Class V Tooth Preparation for 
Abrasion/Erosion 
Abrasion – often V-shaped is a loss 
or wearing away due to mechanical 
forces.
Class V Tooth Preparation for 
Abrasion/Erosion 
Abrasion – often V-shaped is a loss 
or wearing away due to mechanical 
forces. 
Erosion- often a saucer shaped 
notch as a result of chemical 
dissolutions
Abfraction/Idiopathic Erosion- may 
occur as a result of flexure of 
cervical area under heavy occlusal 
stress. This occurs as a notched 
defect.
Abfraction/Idiopathic Erosion- may 
occur as a result of flexure of 
cervical area under heavy occlusal 
stress. This occurs as a notched 
defect. 
Modified tooth preparation is used 
for this types of defects.
Acid Etching
Acid Etching 
A physical process that creates a 
microscopically rough enamel 
surface (enamel tags)
Acid Etching 
A physical process that creates a 
microscopically rough enamel 
surface (enamel tags) 
 first successful technique developed 
to bond dental materials to tooth 
structure
Acid Etching 
A physical process that creates a 
microscopically rough enamel 
surface (enamel tags) 
 first successful technique developed 
to bond dental materials to tooth 
structure 
 acid used id 37% ortho-phosphoric 
acid
 sometimes referred to as 
conditioner
Enamel Etching
Enamel Etching 
Acid
Enamel Etching 
Acid 
 37% ortho-phosphoric acid
Enamel Etching 
Acid 
 37% ortho-phosphoric acid 
 dissolves the periphery of enamel 
rod, or the core of the rods or both
 over-etching results to formation of 
crystals (precipitates) that inhibits 
bonding
 over-etching results to formation of 
crystals (precipitates) that inhibits 
bonding 
 built-in quality control check – if 
properly etched it appears frosty or 
chalky white.
 over-etching results to formation of 
crystals (precipitates) that inhibits 
bonding 
 built-in quality control check – if 
properly etched it appears frosty or 
chalky white. 
Time
 over-etching results to formation of 
crystals (precipitates) that inhibits 
bonding 
 built-in quality control check – if 
properly etched it appears frosty or 
chalky white. 
Time 
 15-30 seconds permanent tooth
 over-etching results to formation of 
crystals (precipitates) that inhibits 
bonding 
 built-in quality control check – if 
properly etched it appears frosty or 
chalky white. 
Time 
 15-30 seconds permanent tooth 
 twice as long for deciduous
Dentin Etching
Dentin Etching 
Acid
Dentin Etching 
Acid 
 37% ortho-phosphoric acid
Dentin Etching 
Acid 
 37% ortho-phosphoric acid 
 removes the smear layer from the 
surface of the of the dentin as well 
as the plugs of material forces into 
dentinal tubules during cavity 
preparation.
 decalcifies a layer of dentin several 
microns thick
 decalcifies a layer of dentin several 
microns thick 
Time
 decalcifies a layer of dentin several 
microns thick 
Time 
10-15 seconds
Primer
Primer 
 similar to the low viscosity resin 
used in enamel bonding.
Primer 
 similar to the low viscosity resin 
used in enamel bonding. 
 primers are hydrophilic (tolerant of 
moisture)
Primer 
 similar to the low viscosity resin 
used in enamel bonding. 
 primers are hydrophilic (tolerant of 
moisture) 
 contains a volatile solutions 
(acetone) to thin the organic 
chemicals and improves the wetting 
of the etched surface
 primer flows into:
 primer flows into: 
-surface irregularities of etched 
enamel
 primer flows into: 
-surface irregularities of etched 
enamel 
-open tubules and around collagen 
fibers of etched dentin
 primer flows into: 
-surface irregularities of etched 
enamel 
-open tubules and around collagen 
fibers of etched dentin 
 primers do not set on their own, et 
when adhesive is applied
Adhesives
Adhesives 
 a low viscosity resin
Adhesives 
 a low viscosity resin 
 dentin adhesives contain hydrophilic 
chemicals, but less than in primers
Adhesives 
 a low viscosity resin 
 dentin adhesives contain hydrophilic 
chemicals, but less than in primers 
 adhesive sets
Adhesives 
 a low viscosity resin 
 dentin adhesives contain hydrophilic 
chemicals, but less than in primers 
 adhesive sets 
 renders the tooth surface glossy
Two-step Bonding System
Two-step Bonding System 
 the primer and the adhesive have 
been combined
Two-step Bonding System 
 the primer and the adhesive have 
been combined 
One-step/Self Etching System
Two-step Bonding System 
 the primer and the adhesive have 
been combined 
One-step/Self Etching System 
 etches, primes and bonds (has 
adhesives) the tooth structure all at 
once
Two-step Bonding System 
 the primer and the adhesive have 
been combined 
One-step/Self Etching System 
 etches, primes and bonds (has 
adhesives) the tooth structure all at 
once 
 sometimes does not effectively etch 
the enamel.
Restorative Technique
Restorative Technique 
1. Determine shade of tooth
Shade Selection: 
After caries removal 
and cavity preparation 
shade selection was 
done using shade 
guide
Restorative Technique 
1. Determine shade of tooth 
2. Clean the tooth preparation using 
a slurry of pumice, polishing cup.
Restorative Technique 
1. Determine shade of tooth 
2. Clean the tooth preparation using 
a slurry of pumice, polishing cup. 
3. Isolate the tooth, preferably with a 
rubber dam or cotton rolls.
Isolation of the Teeth: 
Rubber dam isolation 
technique was used to 
keep the prepared teeth 
from saliva, blood, 
debris and other fluids.
Restorative Technique 
1. Determine shade of tooth 
2. Clean the tooth preparation using 
a slurry of pumice, polishing cup. 
3. Isolate the tooth, preferably with a 
rubber dam or cotton rolls. 
4. Protect adjacent unprepared tooth 
from the acid etchant with a 
polyester strip apply the wedge.
5. Apply the gel etchant 0.5 beyond 
the prepared margins onto the 
adjacent unprepared tooth.
5. Apply the gel etchant 0.5 beyond 
the prepared margins onto the 
adjacent unprepared tooth. 
6. Etchant is left undisturbed for 15- 
30 seconds.
Etching Procedure
5. Apply the gel etchant 0.5 beyond 
the prepared margins onto the 
adjacent unprepared tooth. 
6. Etchant is left undisturbed for 15- 
30 seconds. 
7. The area is washed to remove the 
etchant. Same amount of time as 
etching time.
8. Dry the tooth structure, if dentin is 
exposed, do not air dry. Use cotton 
pellet, disposable brush or tissue 
paper to remove excess water.
8. Dry the tooth structure, if dentin is 
exposed, do not air dry. Use cotton 
pellet, disposable brush or tissue 
paper to remove excess water. 
9. Bonding system is applied on all 
tooth structure that has been etched 
with a microbrush or other suitable 
applicators
10. Air bonding system to thin out 
coating.
10. Air bonding system to thin out 
coating. 
11. Cure, follow manufacturer's 
direction.
Application of 
Bonding Agent: 
Application of 
the bonding 
agent and then 
cured for 10 
seconds.
10. Air bonding system to thin out 
coating. 
11. Cure, follow manufacturer's 
direction. 
12. Incrementally place composite 
material and cure.
Filling
Filling & Packing
Curing Of the 
Composite: 
The material is cured 
using the light curing 
machine for 20 
seconds for every 
increment of 
composite that was 
placed.
10. Air bonding system to thin out 
coating. 
11. Cure, follow manufacturer's 
direction. 
12. Incrementally place composite 
material and cure. 
13. Finish and Polish
Finishing and 
Polishing: 
The use of polishers 
with enhancers and 
polishing paste were 
done after the 
trimming of the 
excess composites.
Finishing & Polishing
BEFORE AAFFTTEERR 
Before the restoration 
procedure. 
After restoring with Composite 
Resin Material

class iv direct composite

  • 1.
    CLASS III, IVand V DIRECT COMPOSITE RESTORATIONS Upload By : Ahmed Ali Abbas Babylon University College of Dentistry download this file from Website on google theoptimalsmile.wix.com/dentistry
  • 3.
  • 4.
    Indications:  restorationsin esthetic prominent areas
  • 5.
    Indications:  restorationsin esthetic prominent areas  areas can be adequately isolated
  • 6.
    Indications:  restorationsin esthetic prominent areas  areas can be adequately isolated  tooth preparations that have an all enamel margins
  • 7.
  • 8.
    Contraindications:  anoperating area that cannot be adequately isolated
  • 9.
    Contraindications:  anoperating area that cannot be adequately isolated  class v restorations that are not esthetically critical
  • 10.
    Contraindications:  anoperating area that cannot be adequately isolated  class v restorations that are not esthetically critical  restorations that extends into the root surface (contraction gap)
  • 11.
  • 12.
  • 13.
    Advantages  esthetics  conservative of tooth structure removal
  • 14.
    Advantages  esthetics  conservative of tooth structure removal  less complex when preparing the tooth
  • 15.
    Advantages  esthetics  conservative of tooth structure removal  less complex when preparing the tooth  low thermal conductivity (insulative)
  • 16.
    Advantages  esthetics  conservative of tooth structure removal  less complex when preparing the tooth  low thermal conductivity (insulative) Used almost universally
  • 17.
    Advantages (continued) bonded to tooth structure
  • 18.
    Advantages (continued) bonded to tooth structure Repairable
  • 19.
  • 20.
  • 21.
    Disadvantages may resultto gap formation  restoration is more difficult, time-consuming, costly
  • 22.
    Disadvantages may resultto gap formation  restoration is more difficult, time-consuming, costly more technique sensitive
  • 23.
    Disadvantages may resultto gap formation  restoration is more difficult, time-consuming, costly more technique sensitive may exhibit more wear in areas of high occlusion
  • 24.
    Disadvantages may resultto gap formation  restoration is more difficult, time-consuming, costly more technique sensitive may exhibit more wear in areas of high occlusion  have a higher linear coefficient of thermal expansion
  • 25.
  • 26.
    COMPOSITE  introducedcommercially in 1962 by Bowen of the National Bureau of Standards
  • 27.
    COMPOSITE  introducedcommercially in 1962 by Bowen of the National Bureau of Standards most popular tooth colored material
  • 28.
    COMPOSITE  introducedcommercially in 1962 by Bowen of the National Bureau of Standards most popular tooth colored material  consist of a continuous polymeric or resin matrix in which an inorganic filler is dispersed
  • 29.
  • 30.
  • 31.
  • 32.
    Classification 1. Conventional 2. Microfilled 3. Hybrid
  • 33.
    Classification 1. Conventional 2. Microfilled 3. Hybrid .1 Flowable
  • 34.
    Classification 1. Conventional 2. Microfilled 3. Hybrid .1 Flowable .2 Packable
  • 35.
    Classification 1. Conventional 2. Microfilled 3. Hybrid .1 Flowable .2 Packable 4. Nanofilled
  • 36.
  • 37.
  • 38.
    Composition 1. OrganicResin – forms the matrix
  • 39.
    Composition 1. OrganicResin – forms the matrix -dimethacrylate monomer (BIS-GMA)
  • 40.
    Composition 1. OrganicResin – forms the matrix -dimethacrylate monomer (BIS-GMA) 2. Inorganic filler
  • 41.
    Composition 1. OrganicResin – forms the matrix -dimethacrylate monomer (BIS-GMA) 2. Inorganic filler - inhibits deformation of the matrix
  • 42.
    Composition 1. OrganicResin – forms the matrix -dimethacrylate monomer (BIS-GMA) 2. Inorganic filler - inhibits deformation of the matrix -reduce the coefficient of thermal expansion of the resin matrix
  • 43.
    Composition A. OrganicResin – forms the matrix -dimethacrylate monomer (BIS-GMA) B. Inorganic filler - inhibits deformation of the matrix -reduce the coefficient of thermal expansion of the resin matrix e.g. fused silica, crystalline quartz, lithium aluminum silicate, borosilicate glass
  • 44.
  • 45.
    C. Coupling Agent – unite the resin with the filler
  • 46.
    C. Coupling Agent – unite the resin with the filler -stress absorber of the filler and resin
  • 47.
    3. Coupling Agent – unite the resin with the filler -stress absorber of the filler and resin 4. Initiator System
  • 48.
    3. Coupling Agent – unite the resin with the filler -stress absorber of the filler and resin 4. Initiator System – activate the setting mechanism
  • 49.
    3. Coupling Agent – unite the resin with the filler -stress absorber of the filler and resin 4. Initiator System – activate the setting mechanism 5. Stabilizers
  • 50.
    C. Coupling Agent – unite the resin with the filler -stress absorber of the filler and resin D. Initiator System – activate the setting mechanism E. Stabilizers F. Pigments
  • 51.
  • 52.
    Conventional Composites contains 75-80% inorganic filler by weight
  • 53.
    Conventional Composites contains 75-80% inorganic filler by weight  average particle size 8μm l
  • 54.
    Conventional Composites contains 75-80% inorganic filler by weight  average particle size 8μm  large size particle and extremely hard filler
  • 55.
    Conventional Composites contains 75-80% inorganic filler by weight  average particle size 8μm  large size particle and extremely hard filler  rough surface structure strontium and barium glass (radiopaque)
  • 57.
  • 58.
    Microfilled Composites introduced in the late 1970
  • 59.
    Microfilled Composites introduced in the late 1970  polishable
  • 60.
    Microfilled Composites introduced in the late 1970  polishable  smooth lustrous surface similar to tooth enamel
  • 61.
    Microfilled Composites introduced in the late 1970  polishable  smooth lustrous surface similar to tooth enamel  particle size is 0.01 – 0.04μm
  • 62.
    Microfilled Composites introduced in the late 1970  polishable  smooth lustrous surface similar to tooth enamel  particle size is 0.01 – 0.04μm  contains 35-60% inorganic filler by weight
  • 63.
     some ofphysical and mechanical properties are inferior
  • 64.
     some ofphysical and mechanical properties are inferior  wear resistant
  • 65.
     some ofphysical and mechanical properties are inferior  wear resistant  low modulus of elasticity (allow restoration to flex)
  • 66.
     some ofphysical and mechanical properties are inferior  wear resistant  low modulus of elasticity (allow restoration to flex)  high resin content results in an increased coefficient of thermal expansion and lower strength
  • 68.
  • 69.
    Use of MicrofilledComposites  used for low stress restorations
  • 70.
    Use of MicrofilledComposites  used for low stress restorations  buccal and lingual surfaces of class III and class V
  • 71.
  • 72.
    Hybrid Composites combines the properties of conventional and microfilled
  • 73.
    Hybrid Composites combines the properties of conventional and microfilled  contains 75-85% inorganic filler by weight
  • 74.
    Hybrid Composites combines the properties of conventional and microfilled  contains 75-85% inorganic filler by weight  particle size is 0.4 – 1μm
  • 75.
    Hybrid Composites combines the properties of conventional and microfilled  contains 75-85% inorganic filler by weight  particle size is 0.4 – 1μm  physical properties is superior to conventional
  • 76.
     predominant directesthetic resin
  • 77.
     predominant directesthetic resin  have universal clinical applicability
  • 79.
    Use of HybridComposites
  • 80.
    Use of HybridComposites  used in moderate stress restorations where strength and wear resistance are more important than surface luster
  • 81.
    Use of HybridComposites  used in moderate stress restorations where strength and wear resistance are more important than surface luster Class I, class II, class IV
  • 82.
  • 83.
    Flowable  flowsinto cavity due to lower viscosity
  • 84.
    Flowable  flowsinto cavity due to lower viscosity  have lower filler content
  • 85.
    Flowable  flowsinto cavity due to lower viscosity  have lower filler content  inferior physical properties (lower wear resistance, lower strength)
  • 86.
    Flowable  flowsinto cavity due to lower viscosity  have lower filler content  inferior physical properties (lower wear resistance, lower strength)  used in small class I, pit and fissure sealant,marginal repair, liner
  • 87.
  • 88.
     easy touse  good wettability
  • 89.
     easy touse  good wettability  favorable handling properties
  • 90.
  • 91.
    Packable (Condensable) moreviscous, “thicker, stiffer feel”
  • 92.
    Packable (Condensable) moreviscous, “thicker, stiffer feel”  have filler particle feature that prevents sliding of the filler particle by one another
  • 93.
    Packable (Condensable) moreviscous, “thicker, stiffer feel”  have filler particle feature that prevents sliding of the filler particle by one another  easier restoration of proximal contact
  • 94.
    Packable (Condensable) moreviscous, “thicker, stiffer feel”  have filler particle feature that prevents sliding of the filler particle by one another  easier restoration of proximal contact  similar to the handling of amalgam
  • 95.
    Nanocomposites Nanotechnology or,for short, nanotech, refers to a field of applied science whose theme is the control of matter on an atomic or molecular scale.
  • 96.
     Generally nanotechnologydeals with structures 100 nanometers or smaller, and involves developing materials or devices within that size.
  • 97.
    Nanocomposites are materials that are created by introducing nanoparticulates (often referred to as filler) into a macroscopic sample material (often referred to as the matrix).
  • 98.
     After addingnanoparticulates to the matrix material, the resulting nanocomposite may exhibit drastically enhanced properties. For example, adding carbon nanotubes tends to drastically add to the electrical and thermal conductivity.
  • 99.
    Other kinds ofnanoparticulates may result in enhanced optical properties, dielectric or mechanical properties such as stiffness and strenght.
  • 100.
    CLINICAL TECHNIQUE FORDIRECT CLASS III, CLASS IV AND CLASS V RESTORATIONS
  • 101.
    Class III ToothPreparation
  • 102.
    Class III ToothPreparation
  • 103.
    Class III ToothPreparation  there is a choice between facial or lingual entry into the tooth
  • 104.
  • 105.
    Indications for LingualApproach 1. to conserve facial enamel for enhanced esthetics
  • 106.
    Indications for LingualApproach 1. to conserve facial enamel for enhanced esthetics 2. carious lesion is positioned lingually
  • 107.
    Indications for LingualApproach 1. to conserve facial enamel for enhanced esthetics 2. carious lesion is positioned lingually 3. lesion is accessible from the lingual
  • 108.
  • 109.
    Indications for FacialApproach 1. The carious lesion is positioned facially
  • 110.
    Indications for FacialApproach 1. The carious lesion is positioned facially 2. Teeth is irregularly aligned, making lingual access undesirable.
  • 111.
    Indications for FacialApproach 1. The carious lesion is positioned facially 2. Teeth is irregularly aligned, making lingual access undesirable. 3. Extensive caries extent into the facial surface.
  • 112.
    Indications for FacialApproach 1. The carious lesion is positioned facially 2. Teeth is irregularly aligned, making lingual access undesirable. 3. Extensive caries extent into the facial surface. 4. Faulty restoration that was originally placed at the facial.
  • 113.
  • 114.
    Conventional Class III  indicated for restorations involving the root surface
  • 115.
    Conventional Class III  indicated for restorations involving the root surface 1. using a No. ½, 1, 2 round bur prepare the outline form on the root surface
  • 116.
    Conventional Class III  indicated for restorations involving the root surface 1. using a No. ½, 1, 2 round bur prepare the outline form on the root surface 2. extend the preparation into sound walls
  • 117.
    Conventional Class III  indicated for restorations involving the root surface 1. using a No. ½, 1, 2 round bur prepare the outline form on the root surface 2. extend the preparation into sound walls 3. extend pulpally 0.75mm in depth
  • 118.
    4. The gingival/cervicaland incisal wall is perpendicular to the root surface (box like design)
  • 119.
    4. The gingival/cervicaland incisal wall is perpendicular to the root surface (box like design) 5. A continuous groove retention can be prepared 0.25 mm (½ of diameter of bur) into dentin of the gingival and incisal walls with a ¼ round bur.
  • 120.
    6. The grooveis placed at the junction of the axial and the external walls.
  • 121.
    6. The grooveis placed at the junction of the axial and the external walls. 7. Clean preparation and inspect the final preparation.
  • 124.
  • 125.
    Beveled Conventional ClassIII  Indicated for replacing an existing defective restoration in the crown portion of the tooth
  • 126.
    Beveled Conventional ClassIII  Indicated for replacing an existing defective restoration in the crown portion of the tooth  when restoring a large carious lesion for which the need for increased retention and/or resistance form is anticipated.
  • 127.
  • 128.
    Lingual Access 1.Use a round bur No. 1/2, 1. 2 depending on the size of the caries to enlarge the opening sufficiently to allow for caries removal.
  • 129.
    Lingual Access 1.Use a round bur No. 1/2, 1. 2 depending on the size of the caries to enlarge the opening sufficiently to allow for caries removal. 2. Extend external walls to sound tooth structure using a straight bur
  • 130.
    3. Extend thegingival and incisal walls up to extent of caries or location of old restoration.
  • 131.
    3. Extend thegingival and incisal walls up to extent of caries or location of old restoration. Unless necessary, DO NOT:
  • 132.
    3. Extend thegingival and incisal walls up to extent of caries or location of old restoration. Unless necessary, DO NOT:  include the proximal contact.
  • 133.
    3. Extend thegingival and incisal walls up to extent of caries or location of old restoration. Unless necessary, DO NOT:  include the proximal contact.  extend into the facial surface.
  • 134.
    3. Extend thegingival and incisal walls up to extent of caries or location of old restoration. Unless necessary, DO NOT:  include the proximal contact.  extend into the facial surface.  extend subgingivally
  • 135.
    4. Create anaxial wall depth of 0.2mm into the dentin/DEJ (approximately 0.75 – 1.25mm in depth)
  • 137.
    4. Create anaxial wall depth of 0.2mm into the dentin/DEJ (approximately 0.75 – 1.25mm in depth) 5. Axial wall is convex, following the external contour of the tooth.
  • 138.
    4. Create anaxial wall depth of 0.2mm into the dentin/DEJ (approximately 0.75 – 1.25mm in depth) 5. Axial wall is convex, following the external contour of the tooth. 6. Remove all remaining infected dentin, using a round bur or small spoon excavator.
  • 139.
    7. Remove friableenamel at the margins.
  • 140.
    7. Remove friableenamel at the margins. 8. If necessary, prepare retention (grooves or coves)
  • 141.
    7. Remove friableenamel at the margins. 8. If necessary, prepare retention (grooves or coves)  prepare it along the gingivoxial line angle, and sometimes at the incisoaxial line angle .25 mm with a ¼ round bur.
  • 143.
    9. Place cavosurfacebevel or flare at the enamel except at the gingival margin area.
  • 144.
    9. Place cavosurfacebevel or flare at the enamel except at the gingival margin area. 10. Use a flame shape or round bur resulting in a 45 degrees angle to the external tooth surface.
  • 146.
    9. Place cavosurfacebevel or flare at the enamel except at the gingival margin area. 10. Use a flame shape or round bur resulting in a 45 degrees angle to the external tooth surface. 11. Bevel width should be 0.25 to 0.5mm.
  • 147.
    12. Clean thepreparation of any debris and inspect final preparation.
  • 148.
  • 149.
    Facial Access same stages and steps are followed
  • 150.
    Facial Access same stages and steps are followed  procedure is simplified because of easy access
  • 151.
  • 153.
    Modified Class III most used type of cavity preparation.
  • 154.
    Modified Class III most used type of cavity preparation.  indicated for small and moderate lesions or faults.
  • 155.
    Modified Class III most used type of cavity preparation.  indicated for small and moderate lesions or faults.  designed to be as conservative as possible.
  • 156.
    Modified Class III most used type of cavity preparation.  indicated for small and moderate lesions or faults.  designed to be as conservative as possible.  preparation walls have no specific shapes or forms other than an external angle of 90 or more degrees
  • 157.
     preparation designappears to be scooped or concave
  • 159.
     preparation designappears to be scooped or concave 1. Use a 1/2, 1, 2 round bur, point of entry is within the incisogingival dimension of the lesion, perpendicular to the enamel surface.
  • 160.
     preparation designappears to be scooped or concave 1. Use a 1/2, 1, 2 round bur, point of entry is within the incisogingival dimension of the lesion, perpendicular to the enamel surface. 2. Remove all remaining caries or defect.
  • 161.
    3. No attemptis made to create a uniform axial wall.
  • 162.
    3. No attemptis made to create a uniform axial wall. 4. Place cavosurface bevel or flare at the enamel except at the gingival margin area.
  • 163.
    3. No attemptis made to create a uniform axial wall. 4. Place cavosurface bevel or flare at the enamel except at the gingival margin area. 5. Use a flame shape or round bur resulting in a 45 degrees angle to the external tooth surface.
  • 164.
    3. No attemptis made to create a uniform axial wall. 4. Place cavosurface bevel or flare at the enamel except at the gingival margin area. 5. Use a flame shape or round bur resulting in a 45 degrees angle to the external tooth surface. 6. Bevel width should be 0.25 to 0.5mm.
  • 165.
    7. Clean thepreparation of any debris and inspect final preparation.
  • 167.
    Class IV ToothPreparation
  • 169.
    Class IV ToothPreparation  preoperative assessment of occlusion is very important (placement of margin in noncontact areas)
  • 170.
    Class IV ToothPreparation  preoperative assessment of occlusion is very important (placement of margin in noncontact areas)  shade selection is more difficult
  • 171.
    Class IV ToothPreparation  preoperative assessment of occlusion is very important (placement of margin in noncontact areas)  shade selection is more difficult  preparation is similar to Class III except that the preparation for class IV is extended to the incisal angles
  • 173.
    Class V ToothPreparation Conventional
  • 174.
    Class V ToothPreparation Conventional  the feature of the preparation include a 90 degree cavosurface angle, uniform depth of the axial line angle, and sometimes, groove retention from.
  • 175.
    Class V ToothPreparation Conventional  the feature of the preparation include a 90 degree cavosurface angle, uniform depth of the axial line angle, and sometimes, groove retention from.  conventional design is indicated only for portion of the lesion extended onto the root surface
  • 176.
    1. Use atapered fissure (No. 700, 701,or 271) or No.1 or 2 round bur.
  • 177.
    1. Use atapered fissure (No. 700, 701,or 271) or No.1 or 2 round bur. 2. Make entry at 45 degrees angle to tooth surface, this should result to a 90 degree cavosurface.
  • 178.
    1. Use atapered fissure (No. 700, 701,or 271) or No.1 or 2 round bur. 2. Make entry at 45 degrees angle to tooth surface, this should result to a 90 degree cavosurface. 3. Axial depth is 0.75 mm
  • 179.
    1. Use atapered fissure (No. 700, 701,or 271) or No.1 or 2 round bur. 2. Make entry at 45 degrees angle to tooth surface, this should result to a 90 degree cavosurface. 3. Axial depth is 0.75 mm -strength of preparation wall
  • 180.
    1. Use atapered fissure (No. 700, 701,or 271) or No.1 or 2 round bur. 2. Make entry at 45 degrees angle to tooth surface, this should result to a 90 degree cavosurface. 3. Axial depth is 0.75 mm -strength of preparation wall -strength of composite
  • 181.
    1. Use atapered fissure (No. 700, 701,or 271) or No.1 or 2 round bur. 2. Make entry at 45 degrees angle to tooth surface, this should result to a 90 degree cavosurface. 3. Axial depth is 0.75 mm -strength of preparation wall -strength of composite -placement of retention groove
  • 182.
    4. Axial shouldfollow contour of the tooth.
  • 183.
    4. Axial shouldfollow contour of the tooth. 5. Extent of outline form is dictated by the carious lesion extent.
  • 184.
    4. Axial shouldfollow contour of the tooth. 5. Extent of outline form is dictated by the carious lesion extent. 6. Remove remaining carious lesion
  • 185.
    4. Axial shouldfollow contour of the tooth. 5. Extent of outline form is dictated by the carious lesion extent. 6. Remove remaining carious lesion 7. Prepare retention groove (similar to Class III preparation)
  • 186.
    4. Axial shouldfollow contour of the tooth. 5. Extent of outline form is dictated by the carious lesion extent. 6. Remove remaining carious lesion 7. Prepare retention groove (similar to Class III preparation) 8. Clean preparation
  • 187.
  • 188.
    Beveled Conventional ClassV  Indications
  • 189.
    Beveled Conventional ClassV  Indications 1. replacement of defective class V restorations
  • 190.
    Beveled Conventional ClassV  Indications 1. replacement of defective class V restorations 2. large carious lesion
  • 191.
    Beveled Conventional ClassV  Indications 1. replacement of defective class V restorations 2. large carious lesion  exhibits 90 degrees of cavosurface
  • 192.
    Beveled Conventional ClassV  Indications 1. replacement of defective class V restorations 2. large carious lesion  exhibits 90 degrees of cavosurface  axial wall depth is uniform (0.2mm or 0.5 when retention groove is to placed)
  • 193.
     groove isnot indicated when periphery of tooth preparation is located in enamel.
  • 194.
     groove isnot indicated when periphery of tooth preparation is located in enamel.  remove all infected dentin
  • 195.
     groove isnot indicated when periphery of tooth preparation is located in enamel.  remove all infected dentin  clean preparation
  • 196.
  • 197.
    Modified Class V  indicated for small and moderate lesion and lesion entirely in the enamel
  • 198.
    Modified Class V  indicated for small and moderate lesion and lesion entirely in the enamel  no effort to prepare a butt-joint
  • 199.
    Modified Class V  indicated for small and moderate lesion and lesion entirely in the enamel  no effort to prepare a butt-joint  no retention groove
  • 200.
    Modified Class V  indicated for small and moderate lesion and lesion entirely in the enamel  no effort to prepare a butt-joint  no retention groove  lesion is scooped out
  • 201.
    Modified Class V  indicated for small and moderate lesion and lesion entirely in the enamel  no effort to prepare a butt-joint  no retention groove  lesion is scooped out  preparation has divergent wall
  • 202.
    Modified Class V  indicated for small and moderate lesion and lesion entirely in the enamel  no effort to prepare a butt-joint  no retention groove  lesion is scooped out  preparation has divergent wall  axial wall does not have uniform depth
  • 203.
     prepare toothwith round or elliptical instrument
  • 204.
     prepare toothwith round or elliptical instrument  preparation is extended no deeper than 0.2 mm
  • 205.
     prepare toothwith round or elliptical instrument  preparation is extended no deeper than 0.2 mm  no effort is made to prepare a 90 degree cavosurface margins.
  • 206.
     prepare toothwith round or elliptical instrument  preparation is extended no deeper than 0.2 mm  no effort is made to prepare a 90 degree cavosurface margins.  infected enamel is removed with a round bur or excavator.
  • 208.
    Class V ToothPreparation for Abrasion/Erosion
  • 209.
    Class V ToothPreparation for Abrasion/Erosion Abrasion – often V-shaped is a loss or wearing away due to mechanical forces.
  • 210.
    Class V ToothPreparation for Abrasion/Erosion Abrasion – often V-shaped is a loss or wearing away due to mechanical forces. Erosion- often a saucer shaped notch as a result of chemical dissolutions
  • 211.
    Abfraction/Idiopathic Erosion- may occur as a result of flexure of cervical area under heavy occlusal stress. This occurs as a notched defect.
  • 212.
    Abfraction/Idiopathic Erosion- may occur as a result of flexure of cervical area under heavy occlusal stress. This occurs as a notched defect. Modified tooth preparation is used for this types of defects.
  • 213.
  • 214.
    Acid Etching Aphysical process that creates a microscopically rough enamel surface (enamel tags)
  • 215.
    Acid Etching Aphysical process that creates a microscopically rough enamel surface (enamel tags)  first successful technique developed to bond dental materials to tooth structure
  • 216.
    Acid Etching Aphysical process that creates a microscopically rough enamel surface (enamel tags)  first successful technique developed to bond dental materials to tooth structure  acid used id 37% ortho-phosphoric acid
  • 217.
     sometimes referredto as conditioner
  • 218.
  • 219.
  • 220.
    Enamel Etching Acid  37% ortho-phosphoric acid
  • 221.
    Enamel Etching Acid  37% ortho-phosphoric acid  dissolves the periphery of enamel rod, or the core of the rods or both
  • 223.
     over-etching resultsto formation of crystals (precipitates) that inhibits bonding
  • 224.
     over-etching resultsto formation of crystals (precipitates) that inhibits bonding  built-in quality control check – if properly etched it appears frosty or chalky white.
  • 225.
     over-etching resultsto formation of crystals (precipitates) that inhibits bonding  built-in quality control check – if properly etched it appears frosty or chalky white. Time
  • 226.
     over-etching resultsto formation of crystals (precipitates) that inhibits bonding  built-in quality control check – if properly etched it appears frosty or chalky white. Time  15-30 seconds permanent tooth
  • 227.
     over-etching resultsto formation of crystals (precipitates) that inhibits bonding  built-in quality control check – if properly etched it appears frosty or chalky white. Time  15-30 seconds permanent tooth  twice as long for deciduous
  • 229.
  • 230.
  • 231.
    Dentin Etching Acid  37% ortho-phosphoric acid
  • 232.
    Dentin Etching Acid  37% ortho-phosphoric acid  removes the smear layer from the surface of the of the dentin as well as the plugs of material forces into dentinal tubules during cavity preparation.
  • 234.
     decalcifies alayer of dentin several microns thick
  • 235.
     decalcifies alayer of dentin several microns thick Time
  • 236.
     decalcifies alayer of dentin several microns thick Time 10-15 seconds
  • 238.
  • 239.
    Primer  similarto the low viscosity resin used in enamel bonding.
  • 240.
    Primer  similarto the low viscosity resin used in enamel bonding.  primers are hydrophilic (tolerant of moisture)
  • 241.
    Primer  similarto the low viscosity resin used in enamel bonding.  primers are hydrophilic (tolerant of moisture)  contains a volatile solutions (acetone) to thin the organic chemicals and improves the wetting of the etched surface
  • 242.
  • 243.
     primer flowsinto: -surface irregularities of etched enamel
  • 244.
     primer flowsinto: -surface irregularities of etched enamel -open tubules and around collagen fibers of etched dentin
  • 245.
     primer flowsinto: -surface irregularities of etched enamel -open tubules and around collagen fibers of etched dentin  primers do not set on their own, et when adhesive is applied
  • 246.
  • 247.
    Adhesives  alow viscosity resin
  • 248.
    Adhesives  alow viscosity resin  dentin adhesives contain hydrophilic chemicals, but less than in primers
  • 249.
    Adhesives  alow viscosity resin  dentin adhesives contain hydrophilic chemicals, but less than in primers  adhesive sets
  • 250.
    Adhesives  alow viscosity resin  dentin adhesives contain hydrophilic chemicals, but less than in primers  adhesive sets  renders the tooth surface glossy
  • 251.
  • 252.
    Two-step Bonding System  the primer and the adhesive have been combined
  • 253.
    Two-step Bonding System  the primer and the adhesive have been combined One-step/Self Etching System
  • 254.
    Two-step Bonding System  the primer and the adhesive have been combined One-step/Self Etching System  etches, primes and bonds (has adhesives) the tooth structure all at once
  • 255.
    Two-step Bonding System  the primer and the adhesive have been combined One-step/Self Etching System  etches, primes and bonds (has adhesives) the tooth structure all at once  sometimes does not effectively etch the enamel.
  • 257.
  • 258.
    Restorative Technique 1.Determine shade of tooth
  • 259.
    Shade Selection: Aftercaries removal and cavity preparation shade selection was done using shade guide
  • 260.
    Restorative Technique 1.Determine shade of tooth 2. Clean the tooth preparation using a slurry of pumice, polishing cup.
  • 262.
    Restorative Technique 1.Determine shade of tooth 2. Clean the tooth preparation using a slurry of pumice, polishing cup. 3. Isolate the tooth, preferably with a rubber dam or cotton rolls.
  • 263.
    Isolation of theTeeth: Rubber dam isolation technique was used to keep the prepared teeth from saliva, blood, debris and other fluids.
  • 265.
    Restorative Technique 1.Determine shade of tooth 2. Clean the tooth preparation using a slurry of pumice, polishing cup. 3. Isolate the tooth, preferably with a rubber dam or cotton rolls. 4. Protect adjacent unprepared tooth from the acid etchant with a polyester strip apply the wedge.
  • 267.
    5. Apply thegel etchant 0.5 beyond the prepared margins onto the adjacent unprepared tooth.
  • 268.
    5. Apply thegel etchant 0.5 beyond the prepared margins onto the adjacent unprepared tooth. 6. Etchant is left undisturbed for 15- 30 seconds.
  • 269.
  • 270.
    5. Apply thegel etchant 0.5 beyond the prepared margins onto the adjacent unprepared tooth. 6. Etchant is left undisturbed for 15- 30 seconds. 7. The area is washed to remove the etchant. Same amount of time as etching time.
  • 271.
    8. Dry thetooth structure, if dentin is exposed, do not air dry. Use cotton pellet, disposable brush or tissue paper to remove excess water.
  • 273.
    8. Dry thetooth structure, if dentin is exposed, do not air dry. Use cotton pellet, disposable brush or tissue paper to remove excess water. 9. Bonding system is applied on all tooth structure that has been etched with a microbrush or other suitable applicators
  • 274.
    10. Air bondingsystem to thin out coating.
  • 275.
    10. Air bondingsystem to thin out coating. 11. Cure, follow manufacturer's direction.
  • 276.
    Application of BondingAgent: Application of the bonding agent and then cured for 10 seconds.
  • 277.
    10. Air bondingsystem to thin out coating. 11. Cure, follow manufacturer's direction. 12. Incrementally place composite material and cure.
  • 278.
  • 279.
  • 280.
    Curing Of the Composite: The material is cured using the light curing machine for 20 seconds for every increment of composite that was placed.
  • 281.
    10. Air bondingsystem to thin out coating. 11. Cure, follow manufacturer's direction. 12. Incrementally place composite material and cure. 13. Finish and Polish
  • 282.
    Finishing and Polishing: The use of polishers with enhancers and polishing paste were done after the trimming of the excess composites.
  • 283.
  • 284.
    BEFORE AAFFTTEERR Beforethe restoration procedure. After restoring with Composite Resin Material

Editor's Notes

  • #169 The beveled conventional Class IV tooth preparation was used.
  • #270 Tooth conditioner 36% is used to etch the enamel surface of the prepared teeth. It was left undisturbed for 15-30 secs then washed w/ water. The etched surface were then dried w/ cotton pellet.
  • #273 XP Bond is applied & spread evenly using an applicator tip. It was light-cured for 10-20 secs.
  • #279 The dentin is filled w/ ceram X dentin duo. Light cured for 20-30 secs.
  • #280 The unfilled region are filled & packed w/ ceram X enamel duo. The flat end of a hand instrument is used to flatten & contour the anatomy of the involved teeth. Light cured again for 20-30 secs. Celluloid strip should be placed interproximally tp avoid overhanging restoration before curing
  • #284 The teeth are now polished using POGO micro polisher.