Downloaded 226 times
![Android User Interface
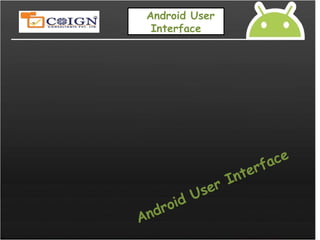
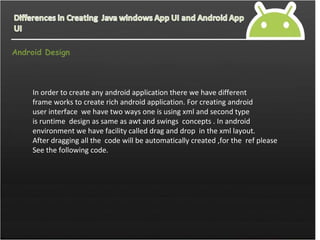
What is Android User Interface ?
User interface in Android Platform just like other Java based user interface.
You can create user interface in to ways,
Static [Drag and Drop]
Dynamic [ Run time]
Difference between java UI and Android UI
Type of Application Java [UI
Design]
Android [UI
Design]
Windows Awt,Swings
Web based Html,css,java
script
Mobile Midlets](https://image.slidesharecdn.com/2-2androidlayouts-140705125937-phpapp02/85/android-layouts-3-320.jpg)

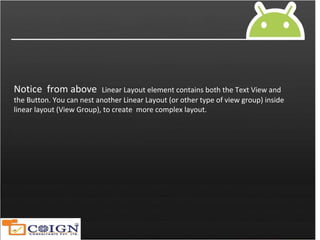
![Java Design Code import java.awt.*;
import java.awt.event.*;
public class ButtonDemo {
public static void main(String[] args){
Button b;
Action Listener a = new MyActionListener();
Frame f = new Frame("Java Applet");
f.add(b = new Button("Bonjour"), BorderLayout.
NORTH);
b.setActionCommand("Good Morning");
b.addActionListener(a);
f.add(b = new Button("Good Day"), BorderLayo
ut.CENTER);
b.addActionListener(a);
f.add(b = new Button("Aurevoir"), BorderLayout
.SOUTH);
b.setActionCommand("Exit");
b.addActionListener(a);
f.pack();
f.show();
}
}](https://image.slidesharecdn.com/2-2androidlayouts-140705125937-phpapp02/85/android-layouts-5-320.jpg)


![--
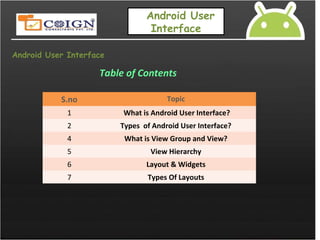
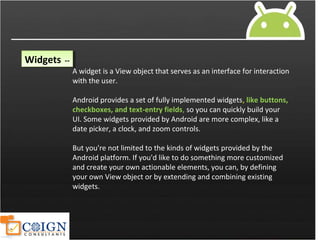
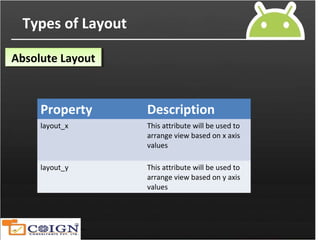
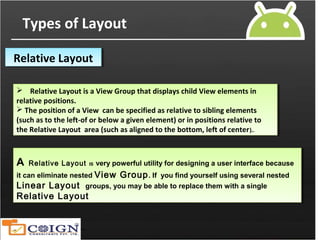
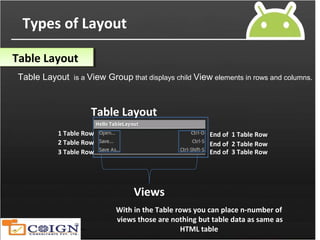
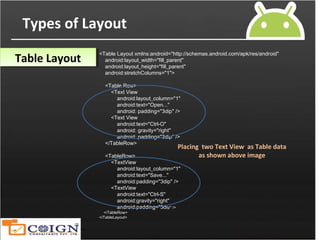
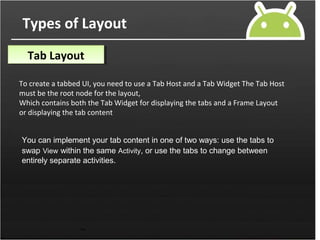
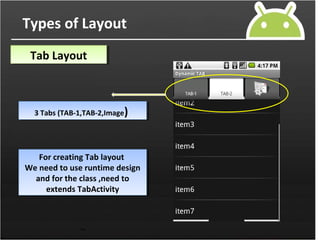
Types of Layout
List LayoutList Layout
public class HelloListView extends ListActivity {
setListAdapter(new Array Adapter<String>(this, R.layout.list_item, Languages));
ListView lv = getListView();
lv.setTextFilterEnabled(true);}
public class HelloListView extends ListActivity {
setListAdapter(new Array Adapter<String>(this, R.layout.list_item, Languages));
ListView lv = getListView();
lv.setTextFilterEnabled(true);}
static final String[] Languages=
new String[]
{java ,c++,lisp,c#}
static final String[] Languages=
new String[]
{java ,c++,lisp,c#}
Adding list of items in runtime through arraysAdding list of items in runtime through arrays](https://image.slidesharecdn.com/2-2androidlayouts-140705125937-phpapp02/85/android-layouts-33-320.jpg)


The document discusses various types of user interfaces in Android. It describes the view hierarchy in Android using ViewGroups and Views as the basic building blocks. It explains common layouts like LinearLayout, RelativeLayout, TableLayout, GridLayout and ListView that can be used to arrange views. Key classes involved include View, ViewGroup, and different view subclasses that serve as widgets. The document also compares Java and Android approaches to designing user interfaces.