Download as PDF, PPTX

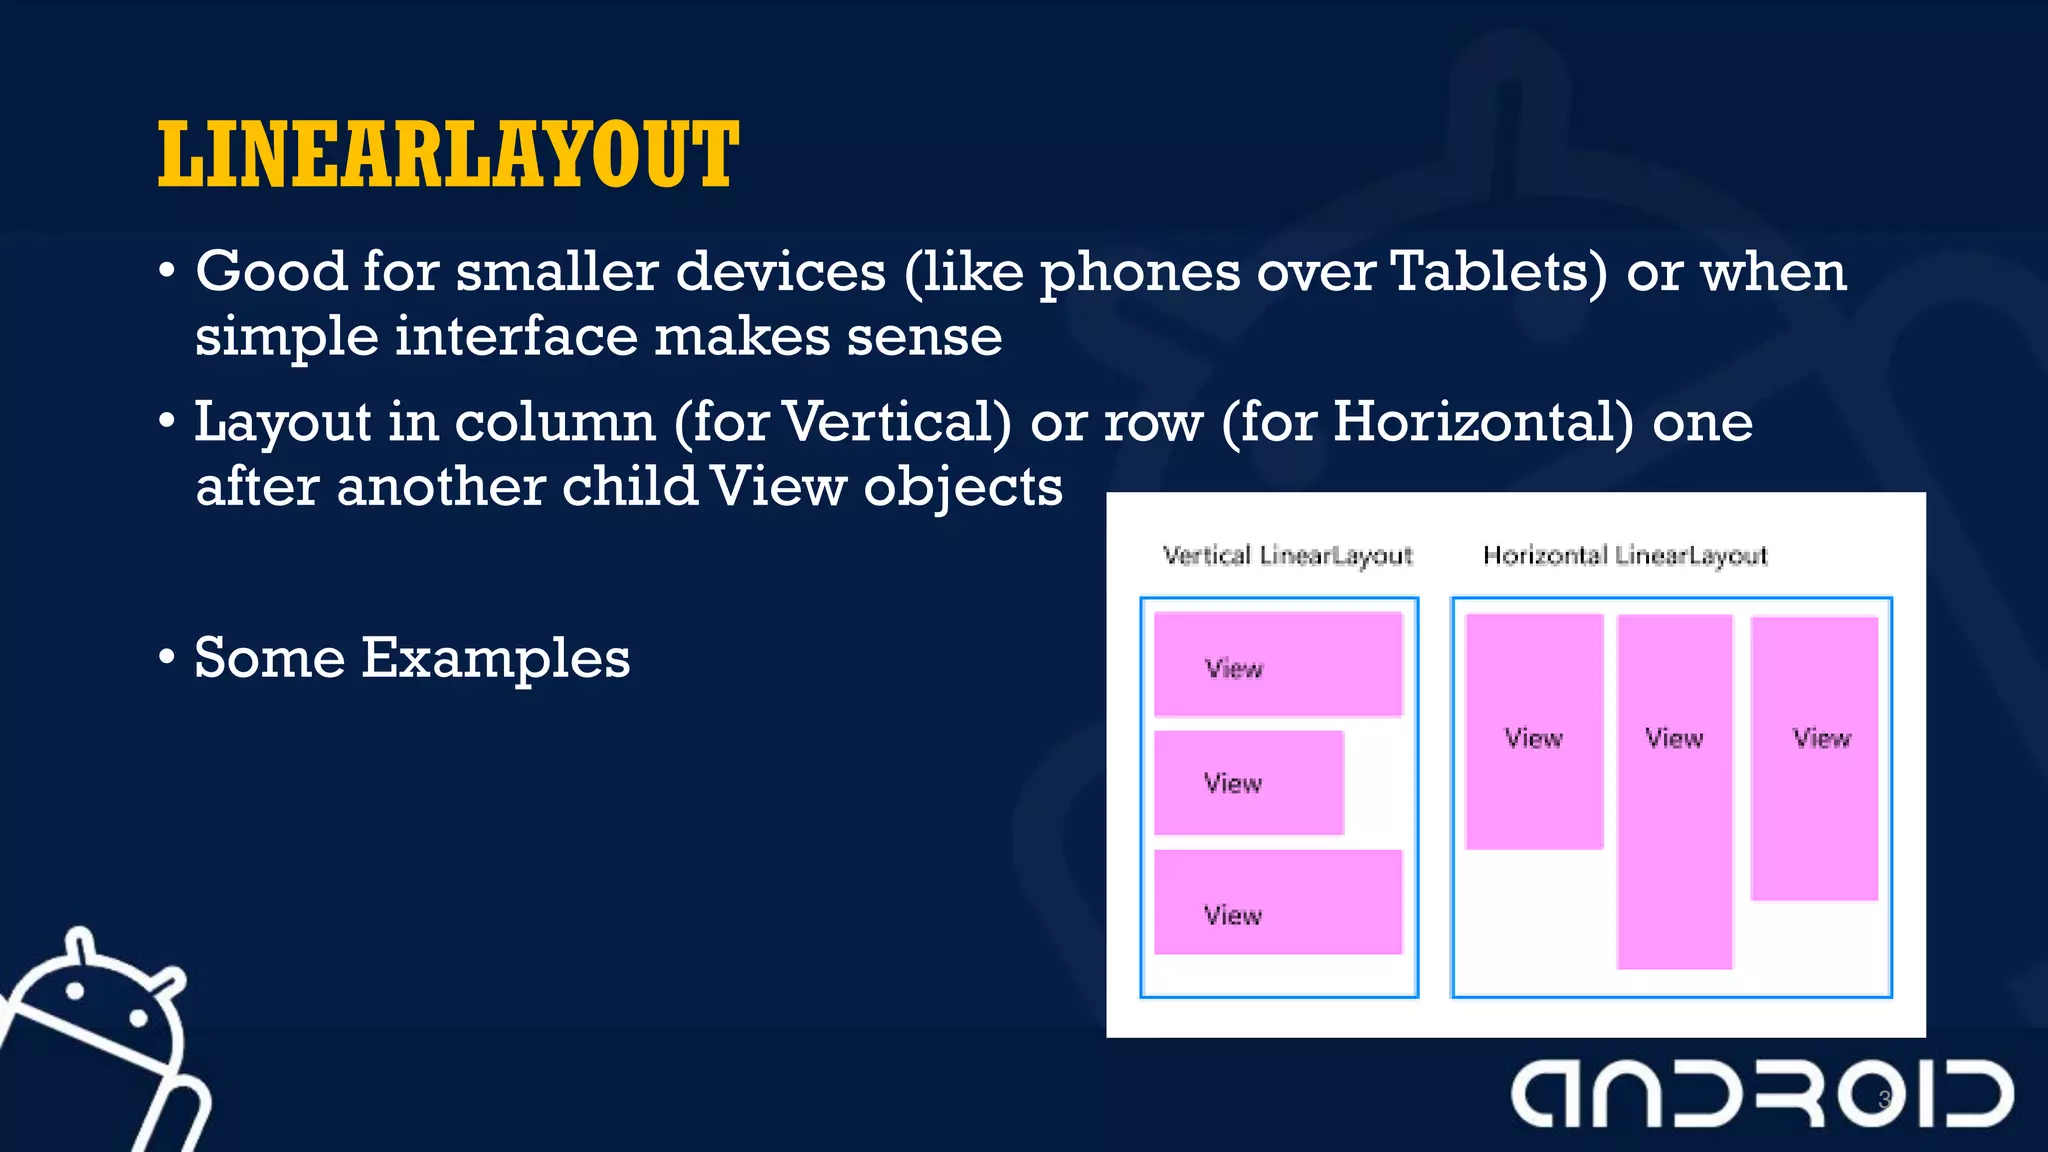
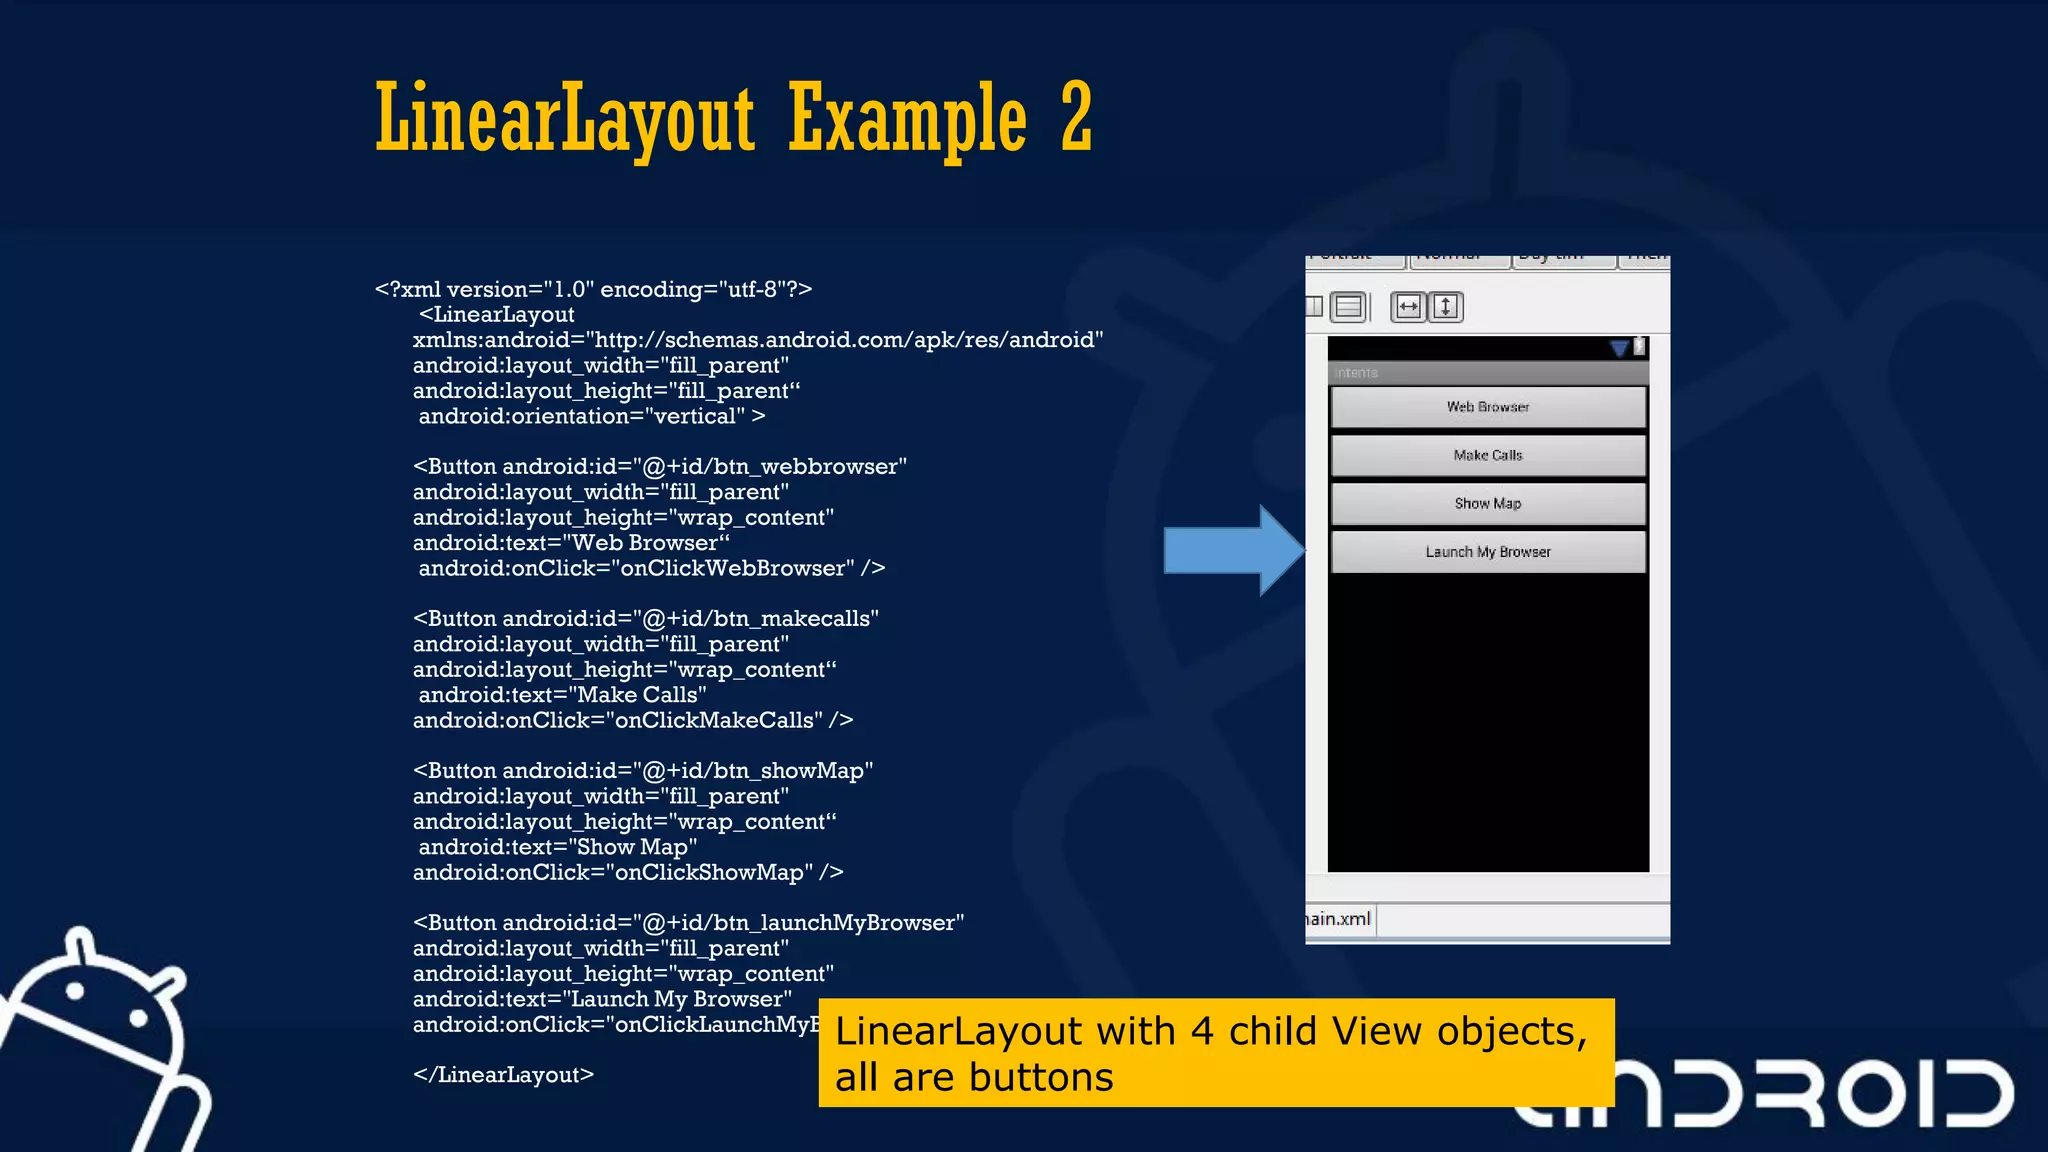
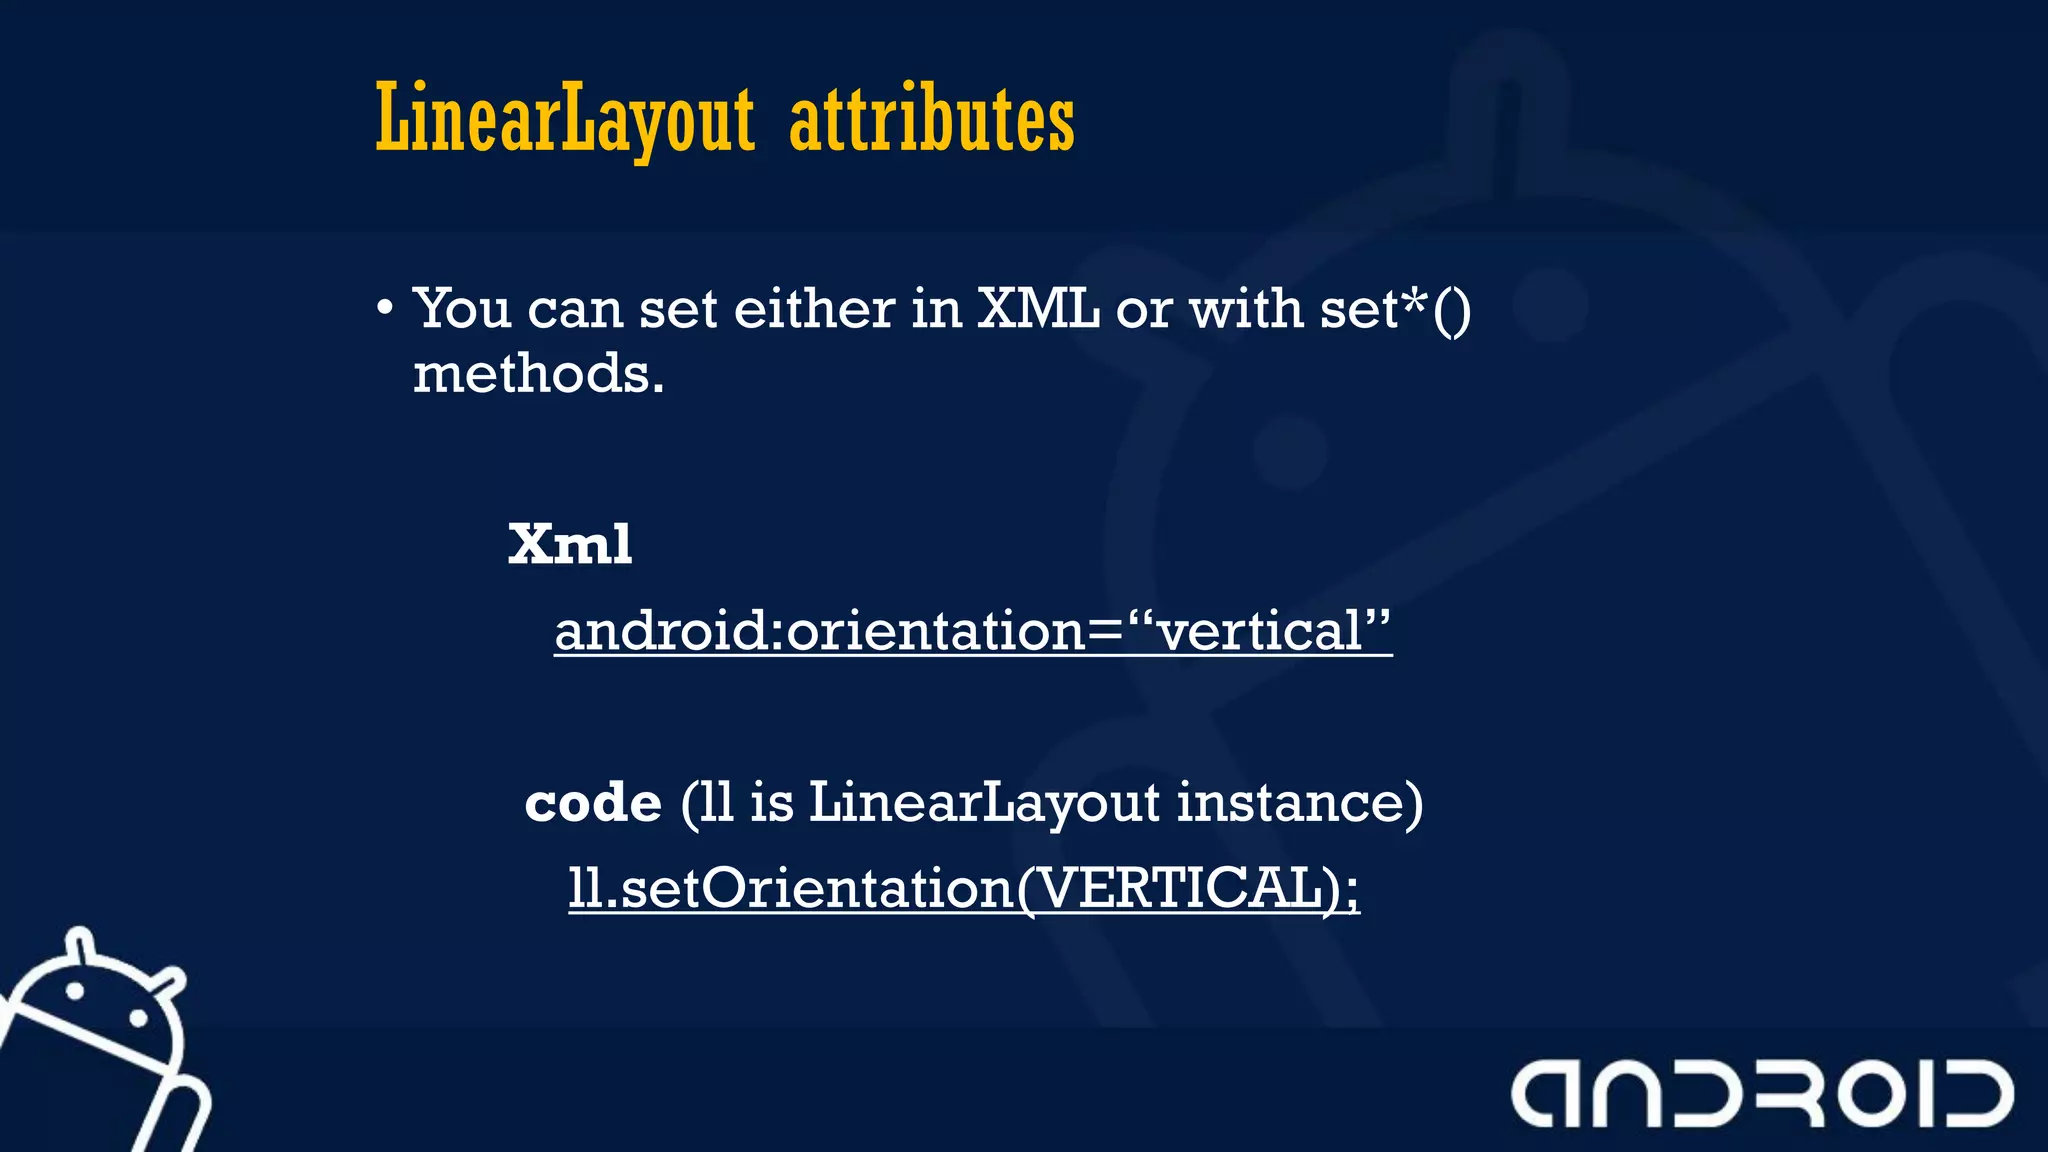
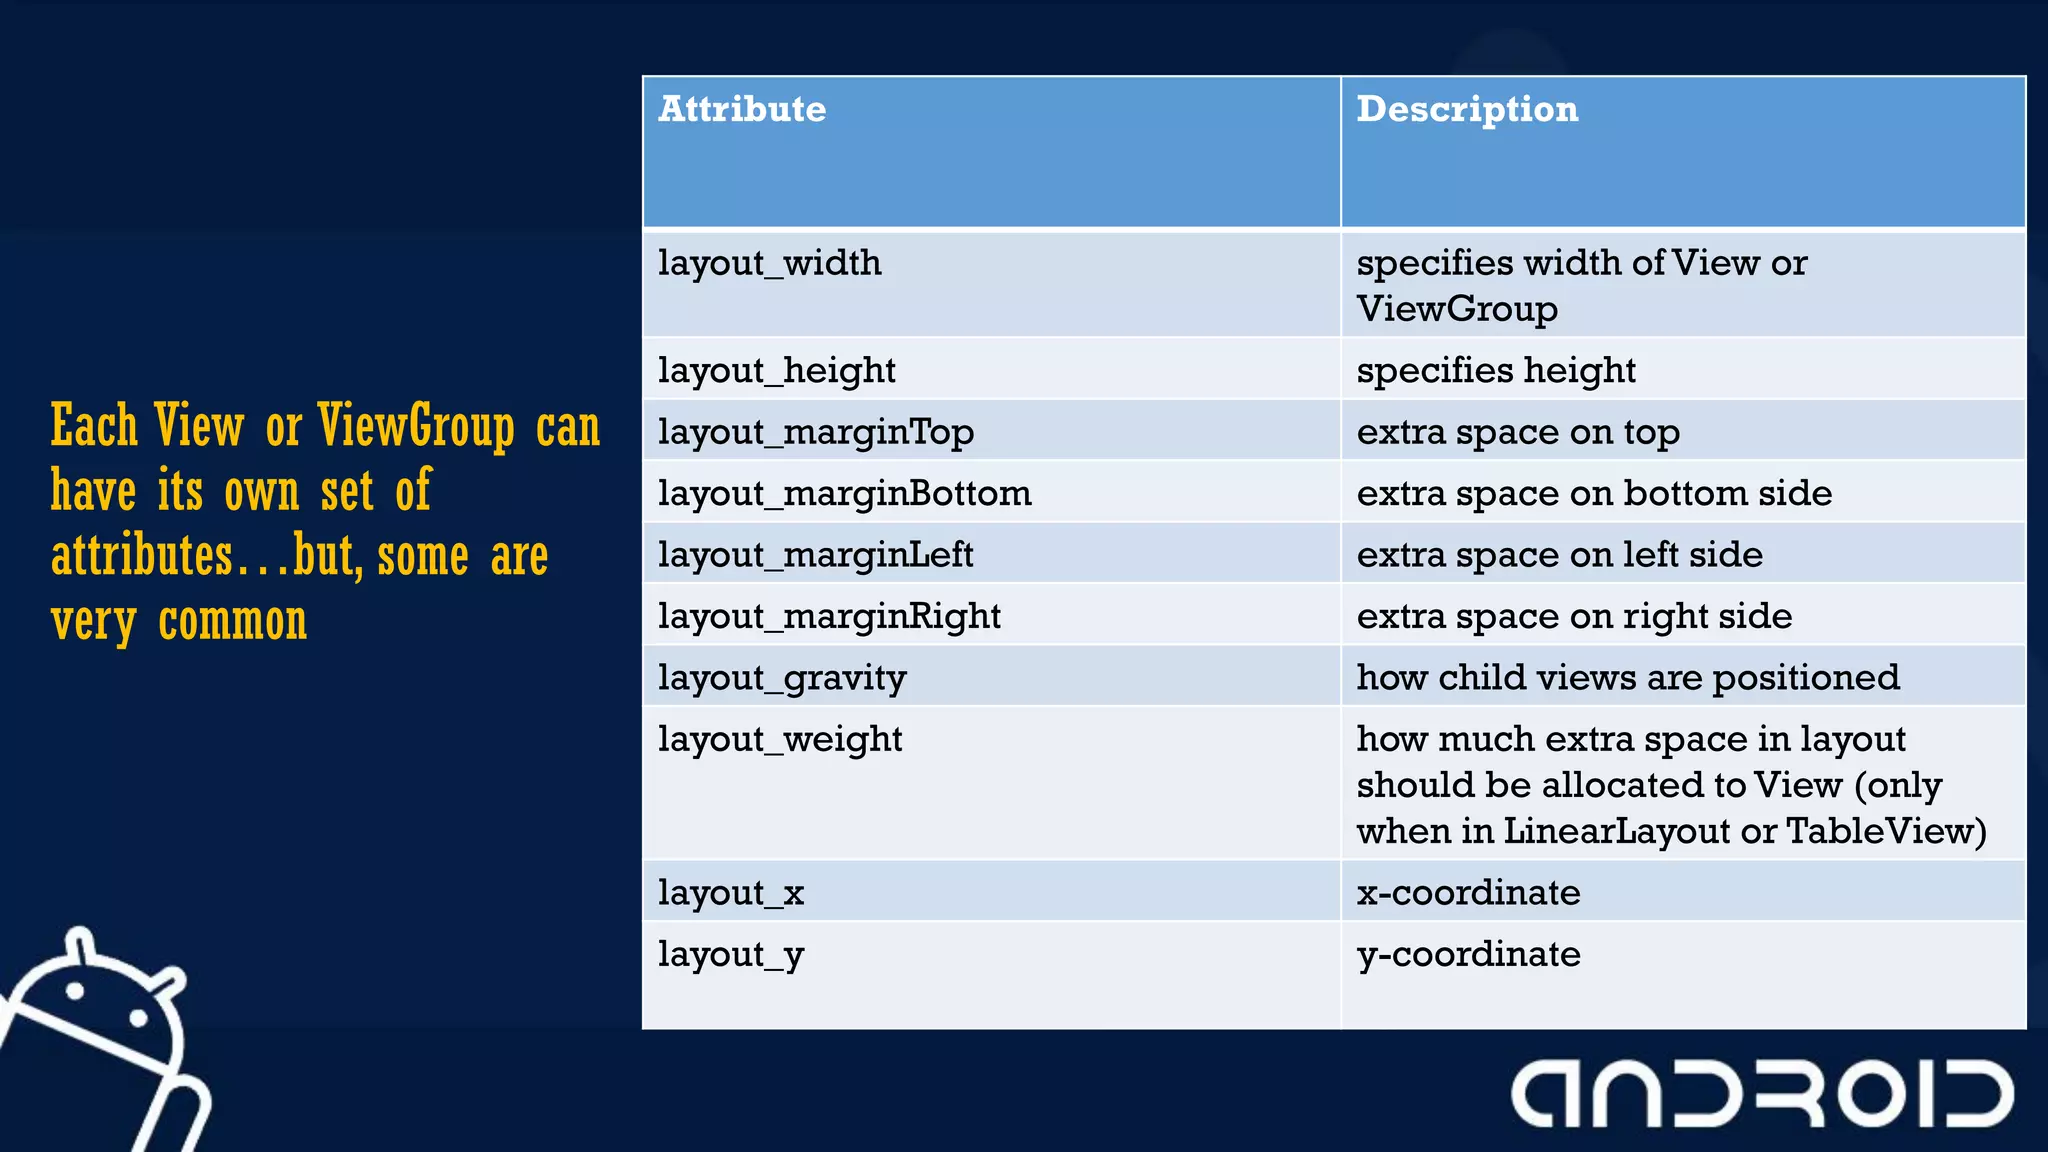
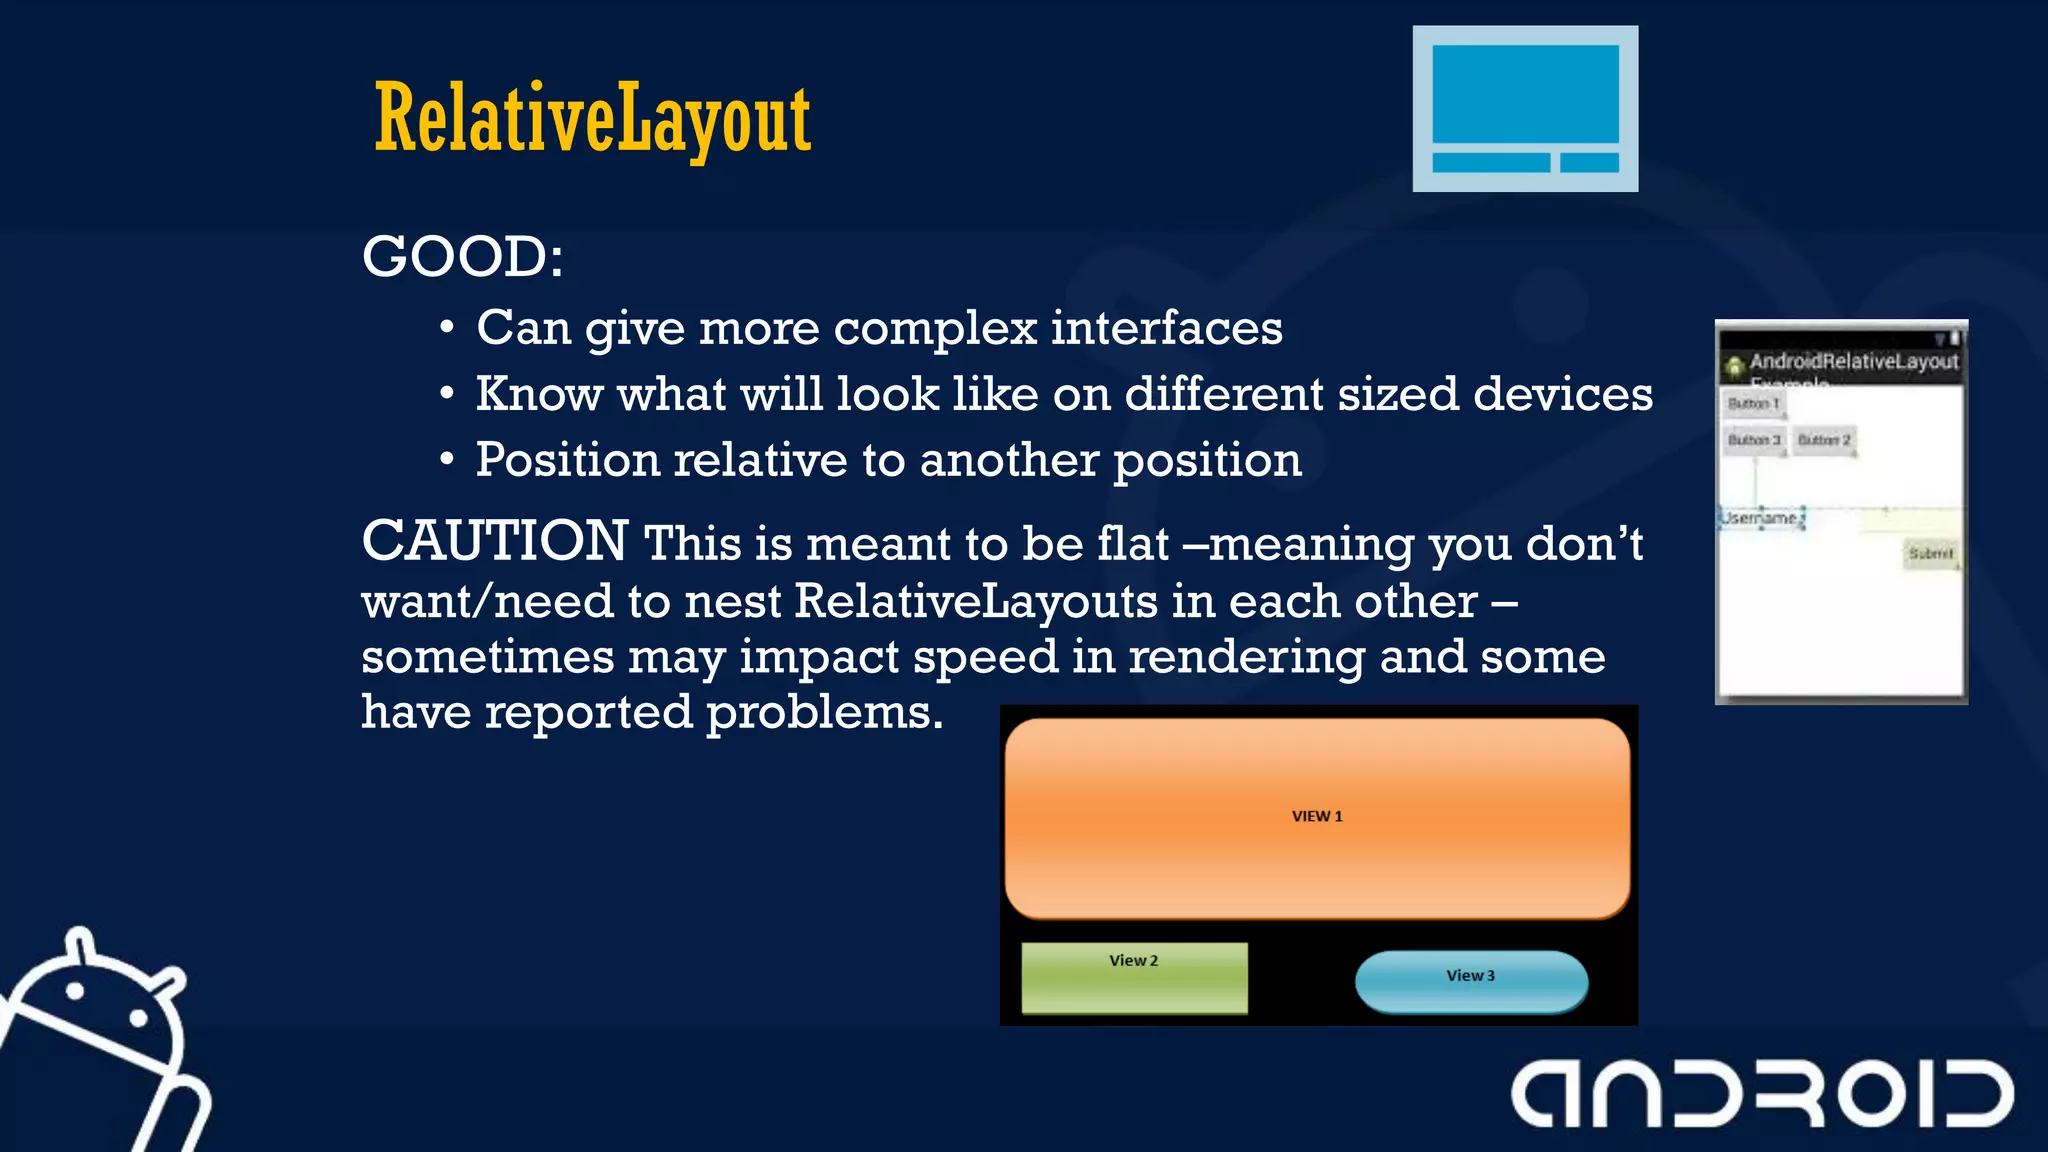

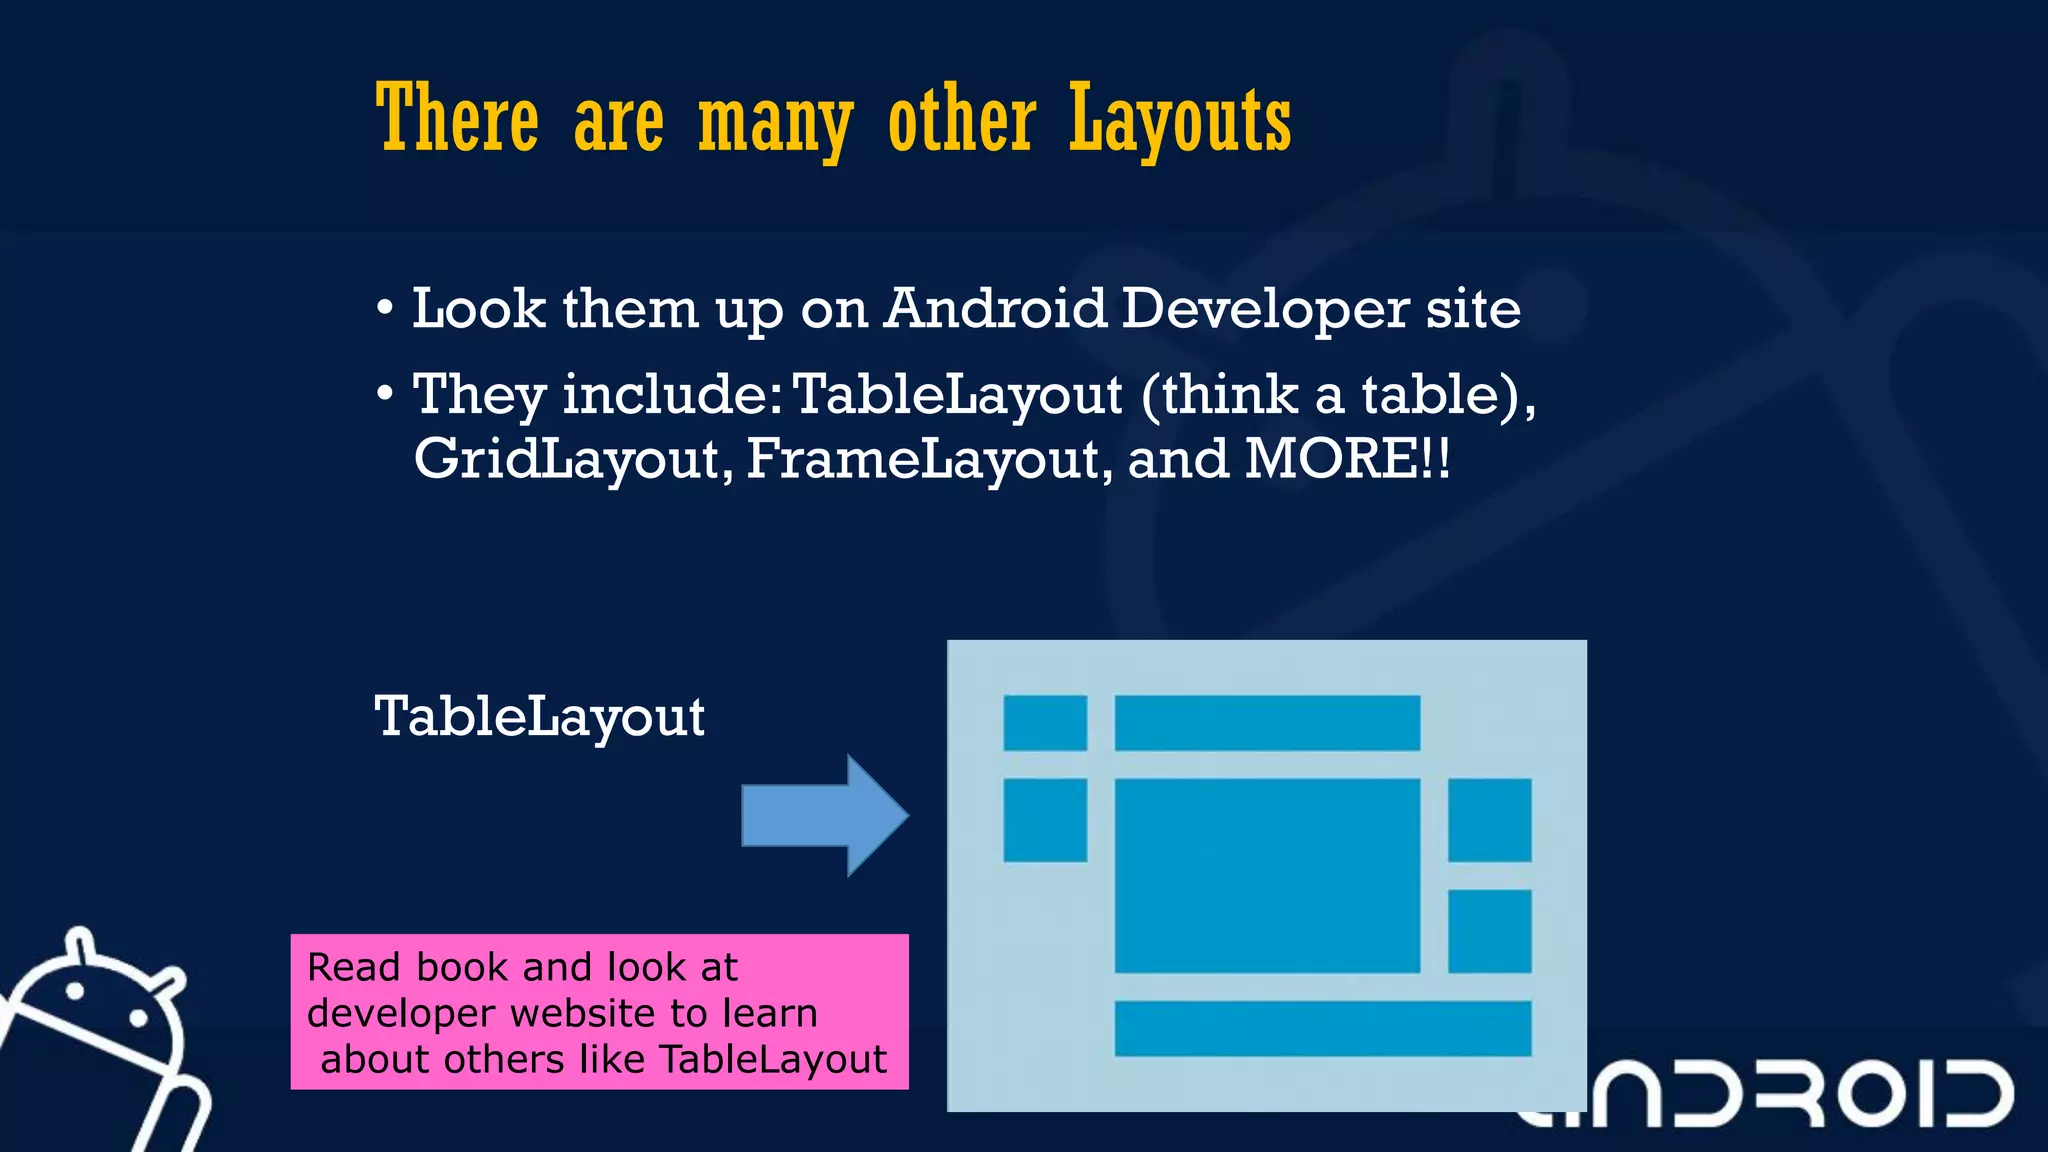
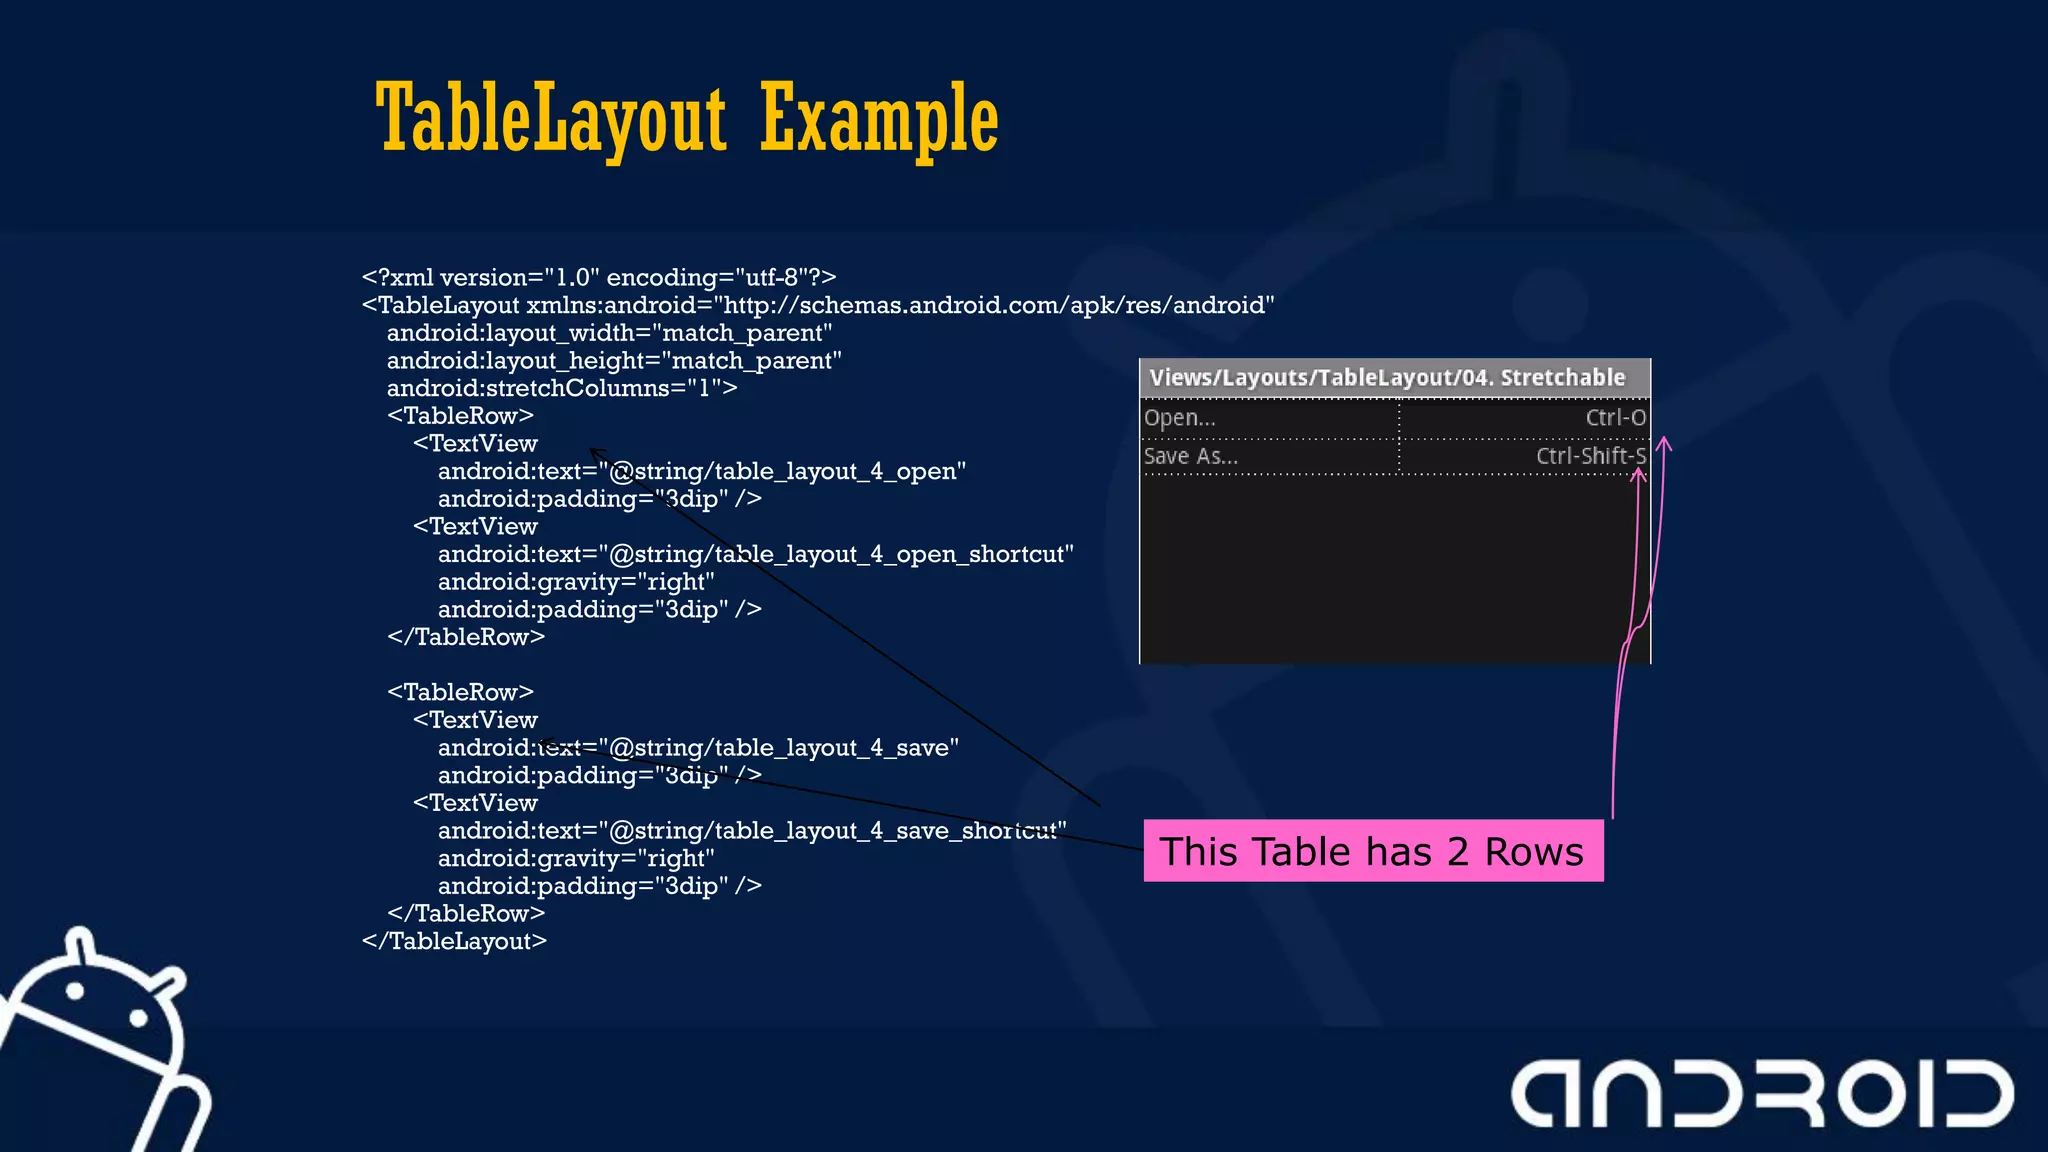
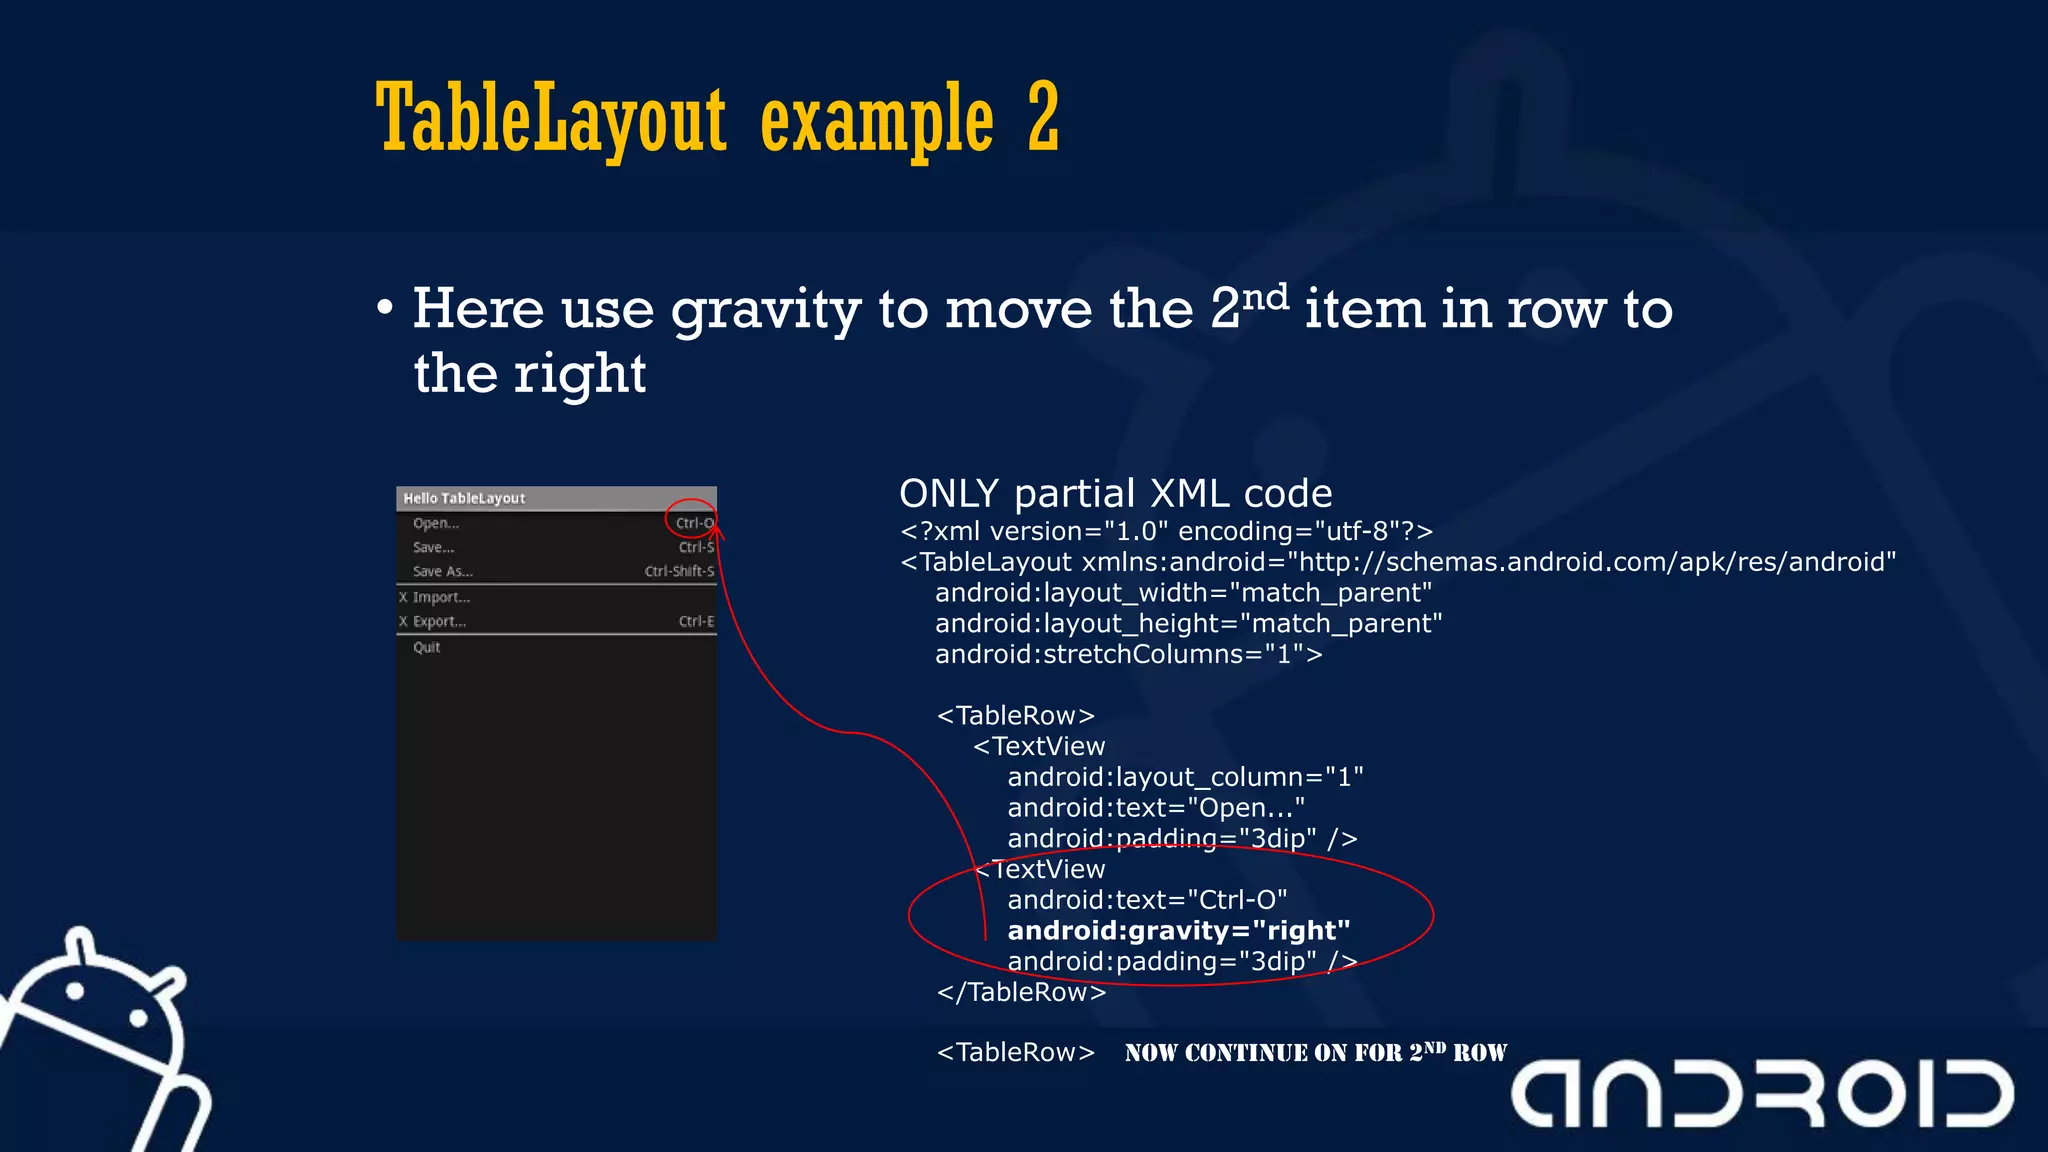

This document discusses mobile application development, focusing on layout options such as LinearLayout and RelativeLayout. It highlights the advantages and disadvantages of using LinearLayout for simple interfaces and introduces attributes for customizing layouts. Additionally, it covers the use of RelativeLayout for more complex designs and briefly mentions other layout types like TableLayout and GridLayout.