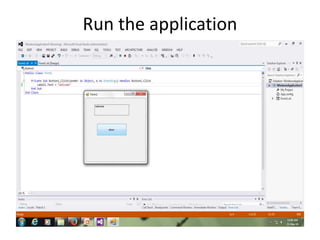
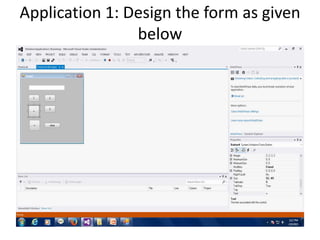
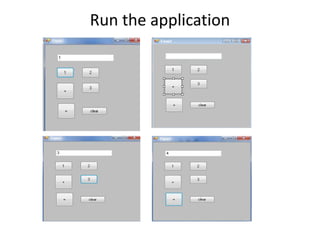
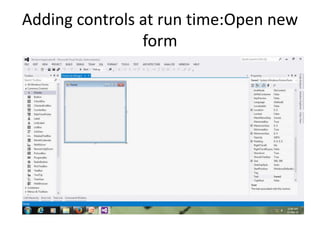
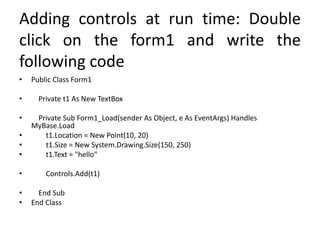
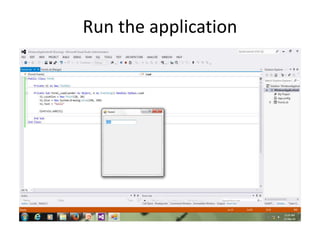
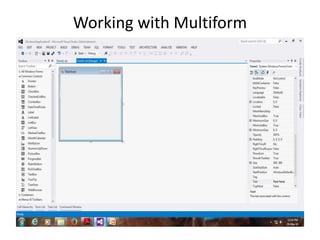
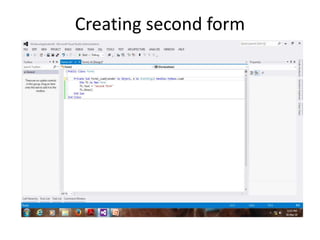
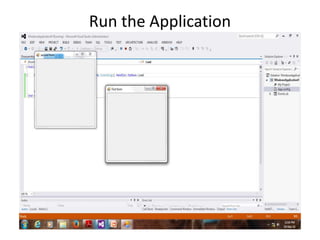
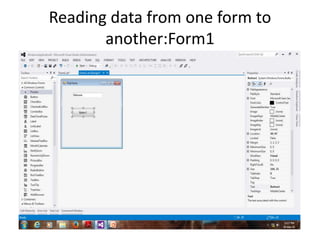
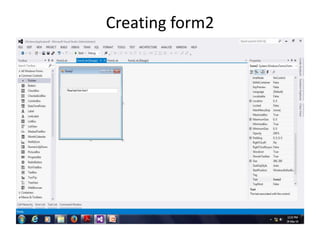
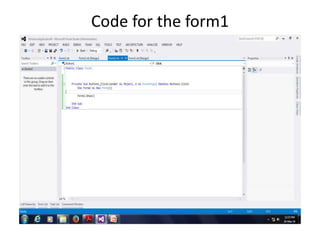
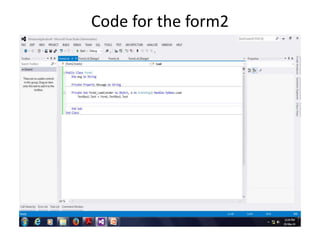
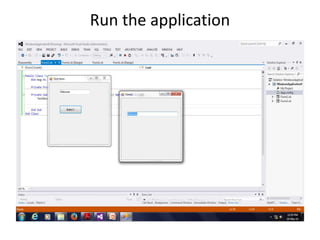
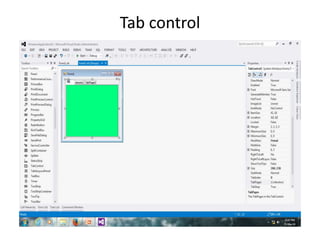
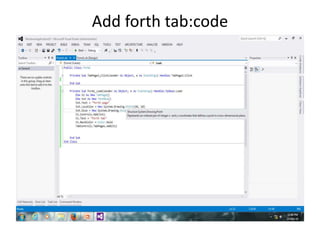
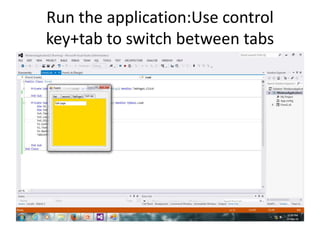
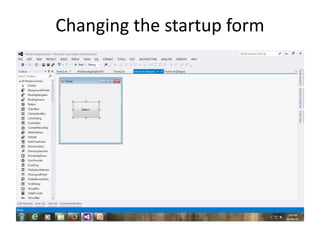
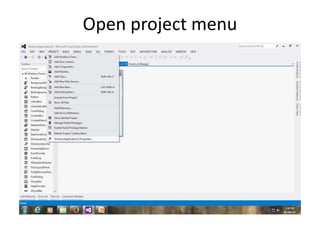
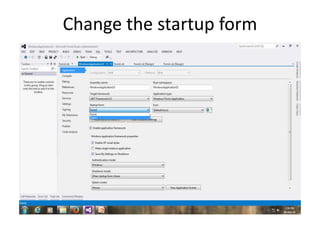
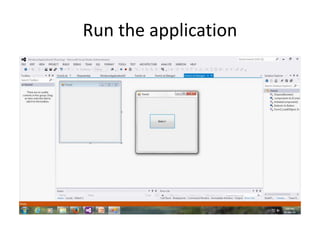
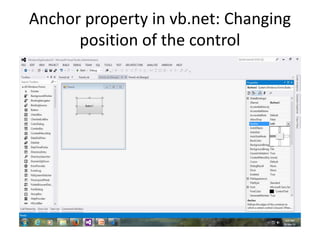
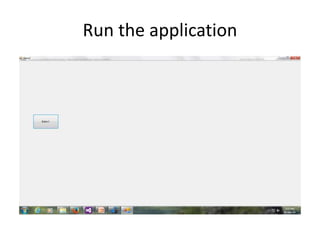
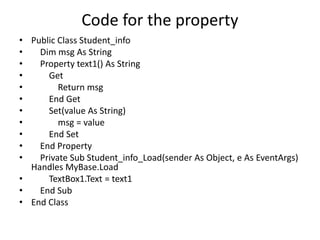
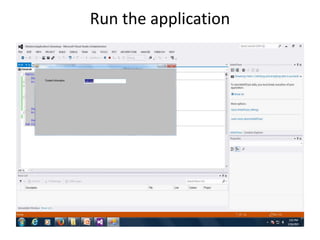
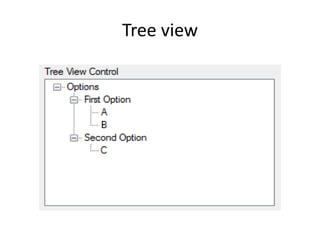
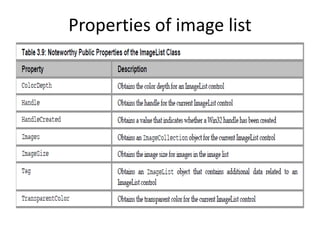
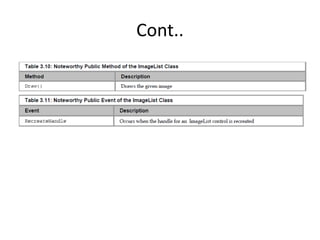
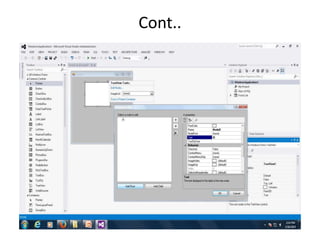
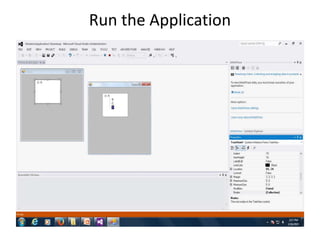
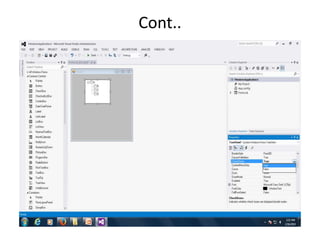
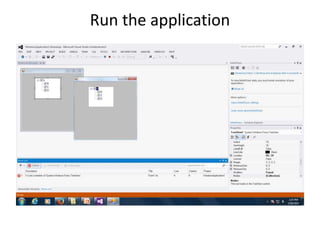
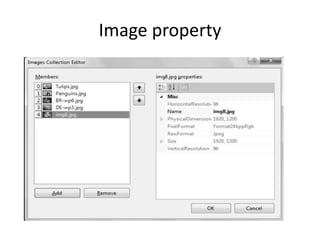
Windows form application in
VB.NET
Open new project
Form1
Adding controls
Adding event handler
Run the application
Application 1: Design the form as given
below
Enter following code
• Public Class Form1
• Dim Add As Boolean
• Dim value1, value2 As Double
• Private Sub Form1_Load(sender As Object, e As EventArgs) Handles
MyBase.Load
• End Sub
• Private Sub Button4_Click(sender As Object, e As EventArgs) Handles sum.Click
• value1 = Double.Parse(TextBox1.Text)
• Add = True
• TextBox1.Clear()
• End Sub
• Private Sub Button1_Click(sender As Object, e As EventArgs) Handles one.Click
• TextBox1.Text = TextBox1.Text & 1
• End Sub
Cont..
• Private Sub Button2_Click(sender As Object, e As EventArgs) Handles two.Click
• TextBox1.Text = TextBox1.Text & 2
• End Sub
• Private Sub Button3_Click(sender As Object, e As EventArgs) Handles three.Click
• TextBox1.Text = TextBox1.Text & 3
• End Sub
• Private Sub Button6_Click(sender As Object, e As EventArgs) Handles cleart.Click
• TextBox1.Clear()
• End Sub
• Private Sub Button5_Click(sender As Object, e As EventArgs) Handles eq.Click
• value2 = Double.Parse(TextBox1.Text)
• If Add = True Then
• TextBox1.Text = value1 + value2 & "" 'Val1 & val2 are doubles, as textbox supports string we
need to convert val1+val2 to string so we have just added "" to convert it into a string
• Add = False
• End If
• End Sub
• End Class
Run the application
Adding controls at run time:Open new
form
Adding controls at run time: Double
click on the form1 and write the
following code
• Public Class Form1
• Private t1 As New TextBox
• Private Sub Form1_Load(sender As Object, e As EventArgs) Handles
MyBase.Load
• t1.Location = New Point(10, 20)
• t1.Size = New System.Drawing.Size(150, 250)
• t1.Text = "hello"
• Controls.Add(t1)
• End Sub
• End Class
Run the application
Form1
Adding a button at runtime
• Public Class Form1
• Dim btn1 As New Button()
• Dim t1 As New TextBox
• Private Sub Form1_Load(ByVal sender As System.Object, ByVal e As System.EventArgs) Handles MyBase.Load
• ' creating control
• t1.Location = New Point(30, 40)
• t1.Size = New System.Drawing.Size(100, 100)
• t1.Text = ""
• btn1.Name = "btn1"
• btn1.Top = 10
• btn1.Text = "Btn1"
• Controls.Add(t1)
• Controls.Add(btn1)
• 'adding handler for click event
• AddHandler btn1.Click, AddressOf show1
• End Sub
• Private Sub show1(ByVal sender As Object, ByVal e As EventArgs)
• t1.Text = "hello"
• End Sub
•
• End Class
Cont..
Problem 1: The form should appear as
shown below
Menu
Creating a menu
Cont..
Run the Application
Cont..
Working with Multiform
Creating second form
Run the Application
Reading data from one form to
another:Form1
Creating form2
Code for the form1
Code for the form2
Run the application
Form Inheritance: Derived form
Base form
Double click on the form1:Derived
form
Run the application
Tab control
Add forth tab:code
Run the application:Use control
key+tab to switch between tabs
Changing the startup form
Open project menu
Change the startup form
Run the application
Anchor property in vb.net: Changing
position of the control
Run the application
List view
Cont..
Cont..
cont..
To remove item
Cont..
Creating User control
Open project
Cont..
Cont..
Drag and drop a text box from the
toolbox to the mycontrol1
Build solution and open the form in design view: Your
control will appear on the top of the toolbox
Now drag and drop the control from
the toolbox to the form
Example 1
Code for the property
• Public Class Student_info
• Dim msg As String
• Property text1() As String
• Get
• Return msg
• End Get
• Set(value As String)
• msg = value
• End Set
• End Property
• Private Sub Student_info_Load(sender As Object, e As EventArgs)
Handles MyBase.Load
• TextBox1.Text = text1
• End Sub
• End Class
Run the application
The TreeView Control
• A TreeView control displays a hierarchy of
nodes, which may include child nodes.
Windows Explorer, which uses a tree view in
its left pane to display the hierarchy of folders
stored on the hard disk of a computer, is an
example of the implementation of the
TreeView control. Figure shows a TreeView
control
Tree view
Cont..
• A TreeView control can also display the hierarchy of nodes with
checkboxes placed next to the nodes of the tree structure if the
TreeView’s CheckBoxes property is set to True.
• You can then check or uncheck the nodes to select or deselect them
by setting the node’s Checked property to True or False.
• The main properties of tree views are Nodes and SelectedNode.
The Nodes property contains a list of nodes in the tree view, and
the SelectedNode property specifies the currently selected node.
• Nodes themselves are supported by the TreeNode class. A node
can be a parent of other child nodes, called TreeNode objects. You
can add, remove, or clone a TreeNode object, which in turn can also
contain a collection of other TreeNode objects. The FullPath
property specifies the nodes in terms of their absolute locations.
You can add nodes to a TreeView control through the Nodes property. The
Nodes property in the Properties window enables you to open the TreeNode
Editor dialog box, as shown in Figure
Tree view control form
Cont..
• An alternative to display the checkboxes beside the nodes in a TreeView
control is shown in the following code
• snippet:
• private void button1_Click(object sender, EventArgs e)
• {
• treeView1.CheckBoxes = true;
• }
The ImageList Control
• An ImageList control is used to store images; i.e., it acts as a kind of image
repository. Various controls are used to work with an ImageList control,
such as list views, tree views, toolbars, tab controls, checkboxes, buttons,
radio buttons, and labels.
• You can associate an ImageList control with its ImageList property and
specify the images you want to display in the control by using the
ImageIndex property. The images in an ImageList control are indexed—
starting at zero—and you can switch the image displayed in a control at
runtime by changing the value of the ImageIndex property.
• The main property in the ImageList control is Images, which contains the
images to be used by the control. The ColorDepth property of the
ImageList control determines the number of colors with which an image is
rendered. Note that images are displayed in the size set by the ImageSize
property. This property is set to 16×16 pixels by default (the size of a small
icon) and needs to be changed when the images are loaded into an
• image list.
Properties of image list
Cont..
Cont..
• To add an image list to the ImageList control,
you should use the Images property in the
Properties window.
• The Images property enables you to open the
Images Collection Editor dialog box, as shown
in Figure
Example 1
Cont..
Run the Application
Example 2
Cont..
Run the application
Image property
Cont..
• you can see the Add and Remove buttons
used to add or delete an image to an
ImageList control.
• You can resize the images in the ImageList (the
default is 16×16 pixels, the size of a small icon)
control by using the ImageSize property in the
Properties window.

Windows form application_in_vb(vb.net --3 year)

  • 1.
  • 2.
  • 3.
  • 4.
  • 5.
  • 6.
  • 7.
    Application 1: Designthe form as given below
  • 8.
    Enter following code •Public Class Form1 • Dim Add As Boolean • Dim value1, value2 As Double • Private Sub Form1_Load(sender As Object, e As EventArgs) Handles MyBase.Load • End Sub • Private Sub Button4_Click(sender As Object, e As EventArgs) Handles sum.Click • value1 = Double.Parse(TextBox1.Text) • Add = True • TextBox1.Clear() • End Sub • Private Sub Button1_Click(sender As Object, e As EventArgs) Handles one.Click • TextBox1.Text = TextBox1.Text & 1 • End Sub
  • 9.
    Cont.. • Private SubButton2_Click(sender As Object, e As EventArgs) Handles two.Click • TextBox1.Text = TextBox1.Text & 2 • End Sub • Private Sub Button3_Click(sender As Object, e As EventArgs) Handles three.Click • TextBox1.Text = TextBox1.Text & 3 • End Sub • Private Sub Button6_Click(sender As Object, e As EventArgs) Handles cleart.Click • TextBox1.Clear() • End Sub • Private Sub Button5_Click(sender As Object, e As EventArgs) Handles eq.Click • value2 = Double.Parse(TextBox1.Text) • If Add = True Then • TextBox1.Text = value1 + value2 & "" 'Val1 & val2 are doubles, as textbox supports string we need to convert val1+val2 to string so we have just added "" to convert it into a string • Add = False • End If • End Sub • End Class
  • 10.
  • 11.
    Adding controls atrun time:Open new form
  • 12.
    Adding controls atrun time: Double click on the form1 and write the following code • Public Class Form1 • Private t1 As New TextBox • Private Sub Form1_Load(sender As Object, e As EventArgs) Handles MyBase.Load • t1.Location = New Point(10, 20) • t1.Size = New System.Drawing.Size(150, 250) • t1.Text = "hello" • Controls.Add(t1) • End Sub • End Class
  • 13.
  • 14.
  • 15.
    Adding a buttonat runtime • Public Class Form1 • Dim btn1 As New Button() • Dim t1 As New TextBox • Private Sub Form1_Load(ByVal sender As System.Object, ByVal e As System.EventArgs) Handles MyBase.Load • ' creating control • t1.Location = New Point(30, 40) • t1.Size = New System.Drawing.Size(100, 100) • t1.Text = "" • btn1.Name = "btn1" • btn1.Top = 10 • btn1.Text = "Btn1" • Controls.Add(t1) • Controls.Add(btn1) • 'adding handler for click event • AddHandler btn1.Click, AddressOf show1 • End Sub • Private Sub show1(ByVal sender As Object, ByVal e As EventArgs) • t1.Text = "hello" • End Sub • • End Class
  • 16.
  • 17.
    Problem 1: Theform should appear as shown below
  • 18.
  • 19.
  • 20.
  • 21.
  • 22.
  • 23.
  • 24.
  • 25.
  • 26.
    Reading data fromone form to another:Form1
  • 27.
  • 28.
  • 29.
  • 30.
  • 31.
  • 32.
  • 33.
    Double click onthe form1:Derived form
  • 34.
  • 35.
  • 36.
  • 37.
    Run the application:Usecontrol key+tab to switch between tabs
  • 38.
  • 39.
  • 40.
  • 41.
  • 42.
    Anchor property invb.net: Changing position of the control
  • 43.
  • 44.
  • 45.
  • 46.
  • 47.
  • 48.
  • 49.
  • 50.
  • 51.
  • 52.
  • 53.
  • 54.
    Drag and dropa text box from the toolbox to the mycontrol1
  • 55.
    Build solution andopen the form in design view: Your control will appear on the top of the toolbox
  • 56.
    Now drag anddrop the control from the toolbox to the form
  • 57.
  • 58.
    Code for theproperty • Public Class Student_info • Dim msg As String • Property text1() As String • Get • Return msg • End Get • Set(value As String) • msg = value • End Set • End Property • Private Sub Student_info_Load(sender As Object, e As EventArgs) Handles MyBase.Load • TextBox1.Text = text1 • End Sub • End Class
  • 59.
  • 60.
    The TreeView Control •A TreeView control displays a hierarchy of nodes, which may include child nodes. Windows Explorer, which uses a tree view in its left pane to display the hierarchy of folders stored on the hard disk of a computer, is an example of the implementation of the TreeView control. Figure shows a TreeView control
  • 61.
  • 62.
    Cont.. • A TreeViewcontrol can also display the hierarchy of nodes with checkboxes placed next to the nodes of the tree structure if the TreeView’s CheckBoxes property is set to True. • You can then check or uncheck the nodes to select or deselect them by setting the node’s Checked property to True or False. • The main properties of tree views are Nodes and SelectedNode. The Nodes property contains a list of nodes in the tree view, and the SelectedNode property specifies the currently selected node. • Nodes themselves are supported by the TreeNode class. A node can be a parent of other child nodes, called TreeNode objects. You can add, remove, or clone a TreeNode object, which in turn can also contain a collection of other TreeNode objects. The FullPath property specifies the nodes in terms of their absolute locations.
  • 63.
    You can addnodes to a TreeView control through the Nodes property. The Nodes property in the Properties window enables you to open the TreeNode Editor dialog box, as shown in Figure
  • 64.
  • 65.
    Cont.. • An alternativeto display the checkboxes beside the nodes in a TreeView control is shown in the following code • snippet: • private void button1_Click(object sender, EventArgs e) • { • treeView1.CheckBoxes = true; • }
  • 66.
    The ImageList Control •An ImageList control is used to store images; i.e., it acts as a kind of image repository. Various controls are used to work with an ImageList control, such as list views, tree views, toolbars, tab controls, checkboxes, buttons, radio buttons, and labels. • You can associate an ImageList control with its ImageList property and specify the images you want to display in the control by using the ImageIndex property. The images in an ImageList control are indexed— starting at zero—and you can switch the image displayed in a control at runtime by changing the value of the ImageIndex property. • The main property in the ImageList control is Images, which contains the images to be used by the control. The ColorDepth property of the ImageList control determines the number of colors with which an image is rendered. Note that images are displayed in the size set by the ImageSize property. This property is set to 16×16 pixels by default (the size of a small icon) and needs to be changed when the images are loaded into an • image list.
  • 67.
  • 68.
  • 69.
    Cont.. • To addan image list to the ImageList control, you should use the Images property in the Properties window. • The Images property enables you to open the Images Collection Editor dialog box, as shown in Figure
  • 70.
  • 71.
  • 72.
  • 73.
  • 74.
  • 75.
  • 76.
  • 77.
    Cont.. • you cansee the Add and Remove buttons used to add or delete an image to an ImageList control. • You can resize the images in the ImageList (the default is 16×16 pixels, the size of a small icon) control by using the ImageSize property in the Properties window.