SlideShare a Scribd company logo
ORTHOGRAPHIC PROJECTIONS
                 OF POINTS, LINES, PLANES, AND SOLIDS.

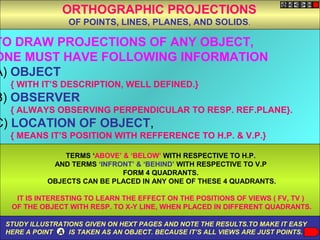
TO DRAW PROJECTIONS OF ANY OBJECT,
ONE MUST HAVE FOLLOWING INFORMATION
A) OBJECT
  { WITH IT’S DESCRIPTION, WELL DEFINED.}
B) OBSERVER
  { ALWAYS OBSERVING PERPENDICULAR TO RESP. REF.PLANE}.
C) LOCATION OF OBJECT,
  { MEANS IT’S POSITION WITH REFFERENCE TO H.P. & V.P.}

               TERMS ‘ABOVE’ & ‘BELOW’ WITH RESPECTIVE TO H.P.
            AND TERMS ‘INFRONT’ & ‘BEHIND’ WITH RESPECTIVE TO V.P
                             FORM 4 QUADRANTS.
           OBJECTS CAN BE PLACED IN ANY ONE OF THESE 4 QUADRANTS.

   IT IS INTERESTING TO LEARN THE EFFECT ON THE POSITIONS OF VIEWS ( FV, TV )
  OF THE OBJECT WITH RESP. TO X-Y LINE, WHEN PLACED IN DIFFERENT QUADRANTS.

 STUDY ILLUSTRATIONS GIVEN ON HEXT PAGES AND NOTE THE RESULTS.TO MAKE IT EASY
 HERE A POINT A IS TAKEN AS AN OBJECT. BECAUSE IT’S ALL VIEWS ARE JUST POINTS.
NOTATIONS


 FOLLOWING NOTATIONS SHOULD BE FOLLOWED WHILE NAMEING
      DIFFERENT VIEWS IN ORTHOGRAPHIC PROJECTIONS.


          OBJECT           POINT A        LINE AB

         IT’S TOP VIEW        a             ab

         IT’S FRONT VIEW      a’            a’ b’

         IT’S SIDE VIEW       a”            a” b”


SAME SYSTEM OF NOTATIONS SHOULD BE FOLLOWED
                        INCASE NUMBERS, LIKE 1, 2, 3 – ARE USED.
VP
                                  2   nd
                                           Quad.         1ST Quad.


                     Y
                                                                Observer


                                                   X Y                HP
       X


                                   3rd Quad.              4th Quad.


THIS QUADRANT PATTERN,
IF OBSERVED ALONG X-Y LINE ( IN RED ARROW DIRECTION)
WILL EXACTLY APPEAR AS SHOWN ON RIGHT SIDE AND HENCE,
IT IS FURTHER USED TO UNDERSTAND ILLUSTRATION PROPERLLY.
Point A is      POINT A IN                            VP              POINT A IN
     Placed In    2ND QUADRANT                                          1ST QUADRANT
                                        VP                 a’
     different                 A                                    A
    quadrants                             a’
and it’s Fv & Tv                          a
 are brought in
same plane for                                                          HP     OBSERVER

Observer to see
      clearly.           HP                    OBSERVER
 Fv is visible as
 it is a view on
VP. But as Tv is                                           a
is a view on Hp,
   it is rotated
downward 900,
  In clockwise
  direction.The
 In front part of                   a
Hp comes below
 xy line and the
part behind Vp                                                      HP
  comes above.          HP                     OBSERVER
                                                                             OBSERVER


 Observe and
  note the                                                a
  process.                          a’
                           A                              a’
                   POINT A IN                                   A        POINT A IN
                 3 QUADRANT
                  RD
                                                           VP            4TH QUADRANT
                                   VP
Basic concepts for drawing projection of point

FV & TV of a point always lie in the same vertical line

FV of a point ‘P’ is represented by p’. It shows position of the point
with respect to HP.

If the point lies above HP, p’ lies above the XY line.

If the point lies in the HP, p’ lies on the XY line.

If the point lies below the HP, p’ lies below the XY line.

TV of a point ‘P’ is represented by p. It shows position of the point with
respect to VP.
If the point lies in front of VP, p lies below the XY line.

If the point lies in the VP, p lies on the XY line.

If the point lies behind the VP, p lies above the XY line.
PROJECTIONS OF A POINT IN FIRST QUADRANT.
    POINT A ABOVE HP                       POINT A ABOVE HP                              POINT A IN HP
     & INFRONT OF VP                            & IN VP                                & INFRONT OF VP
                                                       For Tv
                   For Tv

                                  PICTORIAL                                   PICTORIAL                           For Tv
                                PRESENTATION                A               PRESENTATION
         a’                                            a’


                                                                     Fo
                      A


                                                                        r
                                                                 Y                                                Y


                                                                       Fv
               Y
                            Fo


                                                        a                                               a’
                               rFv


                                                                        S
                                                                  S . ON
                                                                                                                      a
X                                              X                                           X                      A


                                                                SE ATI
                      a


                                                                                                                              Fo
                                                             CA T


                                                                                                                                 r
                                                            E EN


                                                                                                                                Fv
                                                          OV E S
                                                        AB PR
                                                      L IC
                                                    AL PH
                                                  OF RA
        Fv above xy,                                   Fv above xy,                                 Fv on xy,
                                                   OG


        Tv below xy.                                    Tv on xy.                                  Tv below xy.
                                                 TH
                                               OR


        VP                                             VP                                          VP

              a’                                            a’

    X                       Y                      X                    Y                      X
                                                                                                             a’           Y
                                                            a

              a                                                                                              a

        HP                                             HP                                          HP
PROJECTIONS OF STRAIGHT LINES.
          INFORMATION REGARDING A LINE means
                       IT’S LENGTH,
             POSITION OF IT’S ENDS WITH HP & VP
      IT’S INCLINATIONS WITH HP & VP WILL BE GIVEN.
     AIM:- TO DRAW IT’S PROJECTIONS - MEANS FV & TV.

SIMPLE CASES OF THE LINE
1.   A VERTICAL LINE ( LINE PERPENDICULAR TO HP & // TO VP)

2.   LINE PARALLEL TO BOTH HP & VP.

3.   LINE INCLINED TO HP & PARALLEL TO VP.

4.   LINE INCLINED TO VP & PARALLEL TO HP.

5.   LINE INCLINED TO BOTH HP & VP.

STUDY ILLUSTRATIONS GIVEN ON NEXT PAGE
SHOWING CLEARLY THE NATURE OF FV & TV
OF LINES LISTED ABOVE AND NOTE RESULTS .
For Tv                                             Orthographic Pattern
  (Pictorial Presentation)                                                                            V.P.
                                    a’
                                                                                  Note:                            a’
                                                                           Fv is a vertical line
                                                   A                      Showing True Length                Fv
  1.
                                    FV                                              &


                         .
                    V .P
                                                                              Tv is a point.                       b’
   A Line                           b’
perpendicular                                  Y
                                                                                               X                             Y
                                                              Fo
    to Hp                                          B             r   Fv

       &                                      TV a b
                                                                                                             Tv a b
   // to Vp          X


                                                                                                     H.P.
                                                                                                   Orthographic Pattern
  (Pictorial Presentation)                     For Tv                            Note:                V.P.
                                                                            Fv & Tv both are
  2.                                                                            // to xy               a’     Fv        b’
                                         b’                                         &
                                   .
        A Line                  F.V                       B                 both show T. L.
       // to Hp            a’
                       .
                   V.P


                                               Y
            &                            A                                                     X                             Y
        // to Vp                                              Fo
                                                                rF
                                                                  v
                                                          b                                            a                b
                                                                                                              Tv
                                                     V.
                                                   T.
                                         a

                                X
                                                                                                     H.P.
Fv inclined to xy        V.P.
                                                                              Tv parallel to xy.                            b’
      3.                                          b’
                                                                                                                        .
                                                                                                                     F.V
 A Line inclined to Hp                                                B


                                       F.V.
                                                                                                        a’       θ
          and                                              Y


                           V.P.
                                        θ
     parallel to Vp           a’                                                                   X                              Y
                                                           θ
(Pictorial presentation)                          A                   b
                                                                                                        a
                                                                                                                 T.V.        b


                                                                  .
                                                               T.V
                                                  a
                                       X                                                               H.P.
                                                                                                   Orthographic Projections

                                                                              Tv inclined to xy        V.P.
      4.                                                                      Fv parallel to xy.
                                                                                                            a’       Fv      b’
 A Line inclined to Vp                  F .V
                                            . b’
                             .
                         V.P


          and                     a’
     parallel to Hp                           A
                                                       Ø
                                                                          B                        X                              Y
(Pictorial presentation)                                                                                     a   Ø

                                                       Ø                                                         Tv
                                              a                           b
                                                               T.V.
                                                                                                                             b
                                                                                                       H.P.
For Tv
                           For Tv
                                        5.     A Line inclined to both
                 b’                                  Hp and Vp                                b’
                                                                                    .
       .                                      (Pictorial presentation)           V.P
    V.P                                                                                                           B
                                    B


                                                                                      .
                                                                                       F.V
                                                                                          α
         .
          F.V


             α                                                                                          Y
                           Y
                                                      On removal of object       a’                                   For
    a’                                       For          i.e. Line AB                                                    Fv
                                                 Fv
                                                      Fv as a image on Vp.
                                                                                          A
             A                                        Tv as a image on Hp,
                                                                                                   β
                      β                                                      X
X                                                                                             a        T.V.       b
                 a        T.V.      b
                                                      V.P.
                                                                  b’
                                                             FV
                                                       a’    α

                                                 X                           Y
     Orthographic Projections                                                               Note These Facts:-
      Fv is seen on Vp clearly.                                                       Both Fv & Tv are inclined to xy.
    To see Tv clearly, HP is                           a     β                           (No view is parallel to xy)
    rotated 900 downwards,                                                              Both Fv & Tv are reduced
         Hence it comes below xy.                            TV                                  lengths.
                                                                                       (No view shows True Length)
                                                      H.P.        b
Orthographic Projections                   Note the procedure                      Note the procedure
       Means Fv & Tv of Line AB                  When Fv & Tv known,                   When True Length is known,
           are shown below,                     How to find True Length.                 How to locate FV & TV.
    with their apparent Inclinations        (Views are rotated to determine          (Component a’b2’ of TL is drawn
                                             True Length & it’s inclinations             which is further rotated
                    α &β
                                                    with Hp & Vp).                          to determine FV)
       V.P.                                    V.P.                                        V.P.
                       b’                                           b’    b 1’                                        b’
                                                                                                        Fv


                                                                                               θ
               FV                                         FV                                                     TL


                                                                                                                             b1
                                                               TL                                       α


                                                                                                                              ’
        a’     α                                a’                                         a’                         b2 ’
                                                          θ

X                               Y       X                                        Y   X                                            Y

                                                                                                             Ø               b1
         a     β                                                          b1               a
                                                 a    β              TV                                  β

               TV                                     TV


                                                                                                   Tv


                                                                                                                 TL
        H.P.          b                        H.P.             b                          H.P.                      b
                                                                                                             b
                                                                                                                 2


    Here TV (ab) is not // to XY line       In this sketch, TV is rotated               Here a’b1’ is component
     Hence it’s corresponding FV               and made // to XY line.                of TL ab1 gives length of FV.
         a’ b’ is not showing                Hence it’s corresponding                  Hence it is brought Up to
            True Length &                       FV a’ b1’ Is showing                 Locus of a’ and further rotated
      True Inclination with Hp.                     True Length                      to get point b’. a’ b’ will be Fv.
                                                         &                              Similarly drawing component
                                              True Inclination with Hp.              of other TL(a’b1‘) TV can be drawn.
Projection of straight line
               Line inclined to both HP & VP
Type-I
Given projections (FV & TV) of the line. To find True length & true
inclination of the line with HP (θ) and with VP(Φ).
  PROBLEM
 End A of a line AB is 20mm above HP & 20mm in front of VP while
 its end B is 55mm above HP and 75mm in front of VP. The distance
 between end projectors of the line is 50mm. Draw projections of the
 line and find its true length and true inclination with the principal
 planes. Also mark its traces.
b’              b1 ’

                                                                      θ: True inclination of
                                                                      the line with HP = 24º
                                     TL
                                                    55
                   a’                                    b2’          α : Inclination of FV of
                        θ   α                                         the line with HP/XY
    HT VT’        20
X                                                                                 Y
         v
    h’
                                50
                                                                      Ø: True inclination of
             20
                        Φ   β                                   b1    the line with VP = 41º
                   a
                                                                      β : Inclination of TV of
                                                    75                the line with VP/XY
                                      TL


                                           b             b2
Line inclined to both HP & VP
Type –II
Given (i) T.L., θ and Ø,
       (ii) T.L., F.V., T.V.
to draw projections, find α, β,H.T. and V.T.
   PROBLEM
  A line AB, 70mm long, has its end A 20 mm above HP and 20mm in
  front of VP. It is inclined at 30° to HP and 45°to VP. Draw its projections
  and mark its traces.
b’            b1’


                               70
                    a’   30°

     HT                                       b2’
15            VT’                                          Y
X
     h’   v

20
                                                      b1
                    a          45°

                                     70


                                                      b2
                                          b
Q10.11 The top view of a 75mm long line AB measures 65mm,while its front
    view measures 50mm. Its one end A is in HP and12mm in front of VP. Draw the
    projections of AB and determine its inclination with HP and VP
                                       To draw FV &TV of the line
Given,                                                                  Hint: Draw ab1=65mm // to XY.
                                       AB
TL=75mm,TV=65mm,FV=50mm                                                 Because when TV is // to XY, FV
                                       To find θ & Ø
                                                                        gives TL.
A is in HP & 12mm VP
                   →
                                  b’                   b1 ’


                                                                    Ans. θ=31º
                       50


                             75
                                                                    Ans. Ø=49º
              a’
X                                                                                                    Y
                       31º
         12


                                       65         b1
              a
                       49º
                             75
                        65


                              b              b2
Q10.12 A line AB, 65mm long has its end A 20mm above H.P. and 25mm in
    front of VP. The end B is 40mm above H.P. and 65mm in front of V.P. Draw the
    projections of AB and show its inclination with H.P. and V.P.

    Given,                         To draw FV &TV of the line        Hint1:Mark a’ 20mm above
                                   AB                                H.P & a 25mm below XY
    TL=65mm
                                   To find θ & Ø
    A is 20mm ↑ HP & 25mm →V.P. b’         b1 ’                      Hint2:Draw locus of b’ 40mm
         B is 40mm ↑ & 65mm → V.P.                                   above XY & locus of b 65 mm
                                                                     below XY
                  a’          65        b2 ’


                                                    40
                       18º
             20


X                                                                Y
             25


                        38º                                     Ans. θ=18º
                                               b1
                  a
                                                                Ans. Ø=38º
                                                    65

                              65


                                   b   b2
Q10.13:The projectors of the ends of a line AB are 5cm apart. The end A is
2cm above the H.P and 3cm in front of V.P. The end B is1cm below H.P. and
4cm behind the V.P. Determine the true length and traces of AB, and its
inclination with the two planes
    Given,
                                                  To find,
    A0B0=50mm                                     True Length, θ,Ø, H.T. and V.T.
         A is 20mm ↑ HP & 30mm →V.P.
              B is 10mm ↓ & 40mm ←
    V.P.


                                             b     b2


                  a’


                                                                  40
                                  HT
                                                    b2 ’
             20


                         VT’            91

X                       v
                                   h’                                        Y
                             50


                                                                       10
                                             b’            20º
             30


                                                                            Ans. θ=20º

                  a    50º                                       b1
                                                                            Ans. Ø=50º
Q10.14:A line AB, 90mm long, is inclined at 45 to the H.P. and its top view
   makes an angle of 60 with the V.P. The end A is in the H.P. and 12mm in front
   of V.P. Draw its front view and find its true inclination with the V.P.

                                                     b’
   Given,                                                          b1’
   T.L.=90mm, θ=45º, β=60º
   A is in the H.P. & 12mm→V.P.
   To find/draw,
   F.V.,T.V. & Ø
                                                    90

Ans. Ø = 38º

                                        a’
                            X                                                      Y
                                               45º
                                                                    b1
                                  12


                                               60º 38º
                                        a


                                                              90


                                                          b         b2
Q10.16:The end A of a line AB is 25 mm behind the V.P. and is below
the H.P. The end B is 12 mm in front of the VP and is above the HP The
distance between the projectors is 65mm. The line is inclined at 40 to
the HP and its HT is 20 mm behind the VP. Draw the projections of the
line and determine its true length and the VT
Given,                                                     To find/draw,
A0B0=65mm                                                  F.V., T.V., T.L., VT’
     A is 25mm ←V.P.& is ↓H.P.
    B is 12mm →V.P. & is above HP
    θ = 40º                                 b1 ’
                                      b’            b2 ’


                                                                Ans. TL= a’b2’=123 mm
                                VT’
           a
                                                   b2
                                           b1
                HT
    25

         20


X               h’
                                  v
                                                                 Y


                                                           12
                     40º
           a’
                                           b


                           65
10.17:A line AB, 90mm long, is inclined at 30 to the HP. Its end A is 12mm above the HP and
20mm in front of the VP. Its FV measures 65mm. Draw the TV of AB and determine its
inclination with the VP


                                          b’        b1 ’


                                     90


                     a’     65
                              30°
           12


       X                                                   Y
           20


                              44°                   b1
                      a

                                                               Ans: Ø = 44º
                                    90


                                          b    b2
Q10.23:Two lines AB & AC make an angle of 120 between them in their FV & TV. AB is
parallel to both the HP & VP. Determine the real angle between AB & AC.

                                              C

                                                       c2 ’   c1 ’
                                                  c’


                               112°                                  Ans. 112º
               b’                 120°   a’

      X                                                              Y

               b                         a
                                                         c2     c1
                                  120°


                                              c
Q8:A line AB 65 mm long has its end A in the H.P. & 15 mm in front of the V.P. The end B is
in the third quadrant. The line is inclined at 30 to the H.P. and at 60 to the V.P. Draw its
projections.


                                                                  VP

               b                     b2
                                                                        b
                           65


                                                                        15

          a’                         b2’                           X Y            a”
X                                                Y           a’             30º        HP
                     30º
                                                                  60º
        15


                    60º         65          b1
          a                                                       a

                                                                            b’
                                                     b”
               b’                          b1’
Q10.19 A line AB, inclined at 40º to the V.P. has its end 50mm and 20mm above the
H.P. the length of its front view is 65mm and its V.T. is 10mm above the H.P.
determine .the true length of AB its inclination with the H.P. and its H.T.
 Given,                                       To find,
 Ø = 40º, A is 20mm↑HP,                       TL, θ & HT
 B is 50 mm ↑ HP, FV=65mm, VT is
 10mm     ↑ HP
                 b1 ’        b’


                                  85
                                             a’
          50


                    b2 ’               21º                    HT
                                                       VT’


                                                                        20
                                                                   10
X                                                                         Y
                                             40º       v     h’

            b1                                                          Ans,
                                                   a
                                                                        TL = 85 mm,
                                                                        θ = 21º     &
                                                                          HT is 17 mm
                                                                        behind VP


                        b2
Q10.19 A line AB, inclined at 40º to the V.P. has its end 50mm and 20mm above the H.P. the length of its front view is
65mm and its V.T. is 10mm above the H.P. determine .the true length of AB its inclination with the H.P. and its H.T.

                                     B1’
                                                                              Step1: For solving the problem by
Given,                                                      To find,          trapezoidal method, draw a line at 40º(Ø)
Ø = 40º, A is 20mm↑HP,                                                        from VT’. Then draw perpendiculars from
         B is 50 mm ↑ HP,                                   TL, θ & HT
                                                                              a’ and b’ on this line.
FV=65mm, VT is 10mm ↑ HP
                                                                              Step2: Then draw projectors from a’ and b’
                                                                              and mark the distance of b’B1’ on the
                                                                              projector of b’ below XY. Similarly mark
                    b’                                                        the distance a’A1’ on the projector of a’
                                                                              below XY
                                65                  A1 ’

                                           a’
          50


                                                     40º
                                                       VT’ 21º HT


                                                                             20
X


                                                                       10
                                                       v     h’                                Y

                                                a
                                                                         Ans: A1’B1’=TL=85mm
                                                                         Ans:HT is 17 mm behind VP
                                                                         Ans:θ = 21º


                   b
Q6. The top view of a 75mm long line CD measures 50 mm. C is 50 mm in front of the VP &
15mm below the HP. D is 15 mm in front of the VP & is above the HP. Draw the FV of CD &
find its inclinations with the HP and the VP. Show also its traces.

 Given,                                                     To draw,
 TL = 75 mm, FV =50 mm,                                     FV & to find θ & Ø
 C is 15mm ↓ HP & 50 mm → VP,                    VT’        To mark HT & VT
 D is 15 mm → VP

                                                                            Hint 1: Cut an arc of 50 mm
                                   d’        d1 ’                           from c on locus of D to get
                                                                            the TV of the line
                                                                            Hint 2: Make TV (cd), // to XY
                                  75                                        so that FV will give TL


                        h’
X                                                                                Y
                                             v
               15


                                        d              d2
                    c’ θ=48º                                                           Ans: θ=48º
                                                              Locus of D
          50


                                                                                       Ans: Ø=28º
                             50    75
                        HT
                    c
                                            d1
                        Ø=28º
Q10.10 A line PQ 100 mm long is inclined at 30º to the H.P. and at 45º to the V.P. Its
mid point is in the V.P. and 20 mm above the H.P. Draw its projections, if its end P is in
the third quadrant and Q is in the first quadrant.

  Given,
                                                                To draw,
  TL = 100, θ = 30º, Mid point M is
  20mm↑HP & in the VP                                           FV & TV
  End P in third quadrant &
  End Q in first quadrant
                                                                 q’    q1 ’
                                      p2        p

                                 p2’       50        m’     50        q2 ’
                                                          30º


                                                                                20
                                p1         50             45º
                      X                                                    q1        Y
                                                     m
                                 p1’            p’          50


                                                                 q    q2
Problem 3: The front view of a 125 mm long line PQ measures 75 mm while its top view
measures 100 mm. Its end Q and the mid point M are in the first quadrant. M being 20 mm
from both the planes. Draw the projections of line PQ.
For Tv
                              For Tv
                                           5.     A Line inclined to both
                 b’                                     Hp and Vp                                b’
                                                                                       .
       .                                         (Pictorial presentation)           V.P
    V.P                                                                                                              B
                                       B


                                                                                         .
                                                                                          F.V
                                                                                             α
         .
          F.V


             α                                                                                             Y
                              Y
                                                         On removal of object       a’                                   For
    a’                                          For          i.e. Line AB                                                    Fv
                                                    Fv
                                                         Fv as a image on Vp.
                                                                                             A
             A                                           Tv as a image on Hp,
                                                                                                      β
                         β                                                      X
X                                                                                                a        T.V.       b
                 a           T.V.      b
                                                         V.P.
                                           B                         b’
                                                                FV
                                                          a’    α

                     A                              X                           Y
     Orthographic Projections                                                                  Note These Facts:-
      Fv is seen on Vp clearly.                                                          Both Fv & Tv are inclined to xy.
    To see Tv clearly, HP is                              a     β                           (No view is parallel to xy)
    rotated 900 downwards,                                                                 Both Fv & Tv are reduced
         Hence it comes below xy.                               TV                                  lengths.
                                                                                          (No view shows True Length)
                                                         H.P.        b

More Related Content

What's hot

Projection of solids
Projection of solidsProjection of solids
Projection of solids
Sumit Chandak
 
Unit 1 engineering curves
Unit 1 engineering curvesUnit 1 engineering curves
Unit 1 engineering curves
Vagalla Reddy
 
Projection of planes
Projection of planesProjection of planes
Projection of planes
Deepa Rani
 

What's hot (20)

EG UNIT-IV SECTION OF SOLIDS.ppt
EG UNIT-IV SECTION OF SOLIDS.pptEG UNIT-IV SECTION OF SOLIDS.ppt
EG UNIT-IV SECTION OF SOLIDS.ppt
 
Projection of Solids
Projection of SolidsProjection of Solids
Projection of Solids
 
Section of solids - ENGINEERING DRAWING/GRAPHICS
Section of solids - ENGINEERING DRAWING/GRAPHICSSection of solids - ENGINEERING DRAWING/GRAPHICS
Section of solids - ENGINEERING DRAWING/GRAPHICS
 
Projection of planes
Projection of planesProjection of planes
Projection of planes
 
Unit ii projection of points
Unit  ii projection of pointsUnit  ii projection of points
Unit ii projection of points
 
Eg projection of plane
Eg projection of planeEg projection of plane
Eg projection of plane
 
Projection of solids
Projection of solidsProjection of solids
Projection of solids
 
Projection of planes
Projection of planesProjection of planes
Projection of planes
 
Projection of solids
Projection of solidsProjection of solids
Projection of solids
 
Unit 1 engineering curves
Unit 1 engineering curvesUnit 1 engineering curves
Unit 1 engineering curves
 
projection of planes
projection of planesprojection of planes
projection of planes
 
Projection of Solids
Projection of SolidsProjection of Solids
Projection of Solids
 
Projection of planes
Projection of planesProjection of planes
Projection of planes
 
Projection of Plane-engineering drawing
Projection of Plane-engineering drawingProjection of Plane-engineering drawing
Projection of Plane-engineering drawing
 
Unit ii projection of lines
Unit  ii projection of linesUnit  ii projection of lines
Unit ii projection of lines
 
Engineering Graphics-Lines
Engineering Graphics-LinesEngineering Graphics-Lines
Engineering Graphics-Lines
 
Projection of lines
Projection of linesProjection of lines
Projection of lines
 
Projection of Lines
Projection of LinesProjection of Lines
Projection of Lines
 
Isometric
IsometricIsometric
Isometric
 
Projection of planes
Projection of planesProjection of planes
Projection of planes
 

Similar to straight line

Edp st line(new)
Edp  st line(new)Edp  st line(new)
Edp st line(new)
Akhil Kumar
 
Edp projection of lines
Edp  projection of linesEdp  projection of lines
Edp projection of lines
Akhil Kumar
 
Projection of lines(thedirectdata.com)
Projection of lines(thedirectdata.com)Projection of lines(thedirectdata.com)
Projection of lines(thedirectdata.com)
Agnivesh Ogale
 
Edp projection of planes
Edp  projection of planesEdp  projection of planes
Edp projection of planes
Akhil Kumar
 
Ortographic projection
Ortographic projectionOrtographic projection
Ortographic projection
Deepa Rani
 
Ortographic projection
Ortographic projectionOrtographic projection
Ortographic projection
Vaibhav Bajaj
 
Edp ortographic projection
Edp  ortographic projectionEdp  ortographic projection
Edp ortographic projection
Akhil Kumar
 
Lect 1.point
Lect 1.pointLect 1.point
Lect 1.point
India
 
Section of solids
Section of solidsSection of solids
Section of solids
Deepa Rani
 
Unit 6 orthographic projections
Unit 6 orthographic projectionsUnit 6 orthographic projections
Unit 6 orthographic projections
Vagalla Reddy
 

Similar to straight line (20)

Edp st line(new)
Edp  st line(new)Edp  st line(new)
Edp st line(new)
 
Edp projection of lines
Edp  projection of linesEdp  projection of lines
Edp projection of lines
 
Projection of lines(thedirectdata.com)
Projection of lines(thedirectdata.com)Projection of lines(thedirectdata.com)
Projection of lines(thedirectdata.com)
 
PROJECTION OF POINT AND LINE
PROJECTION OF POINT AND LINEPROJECTION OF POINT AND LINE
PROJECTION OF POINT AND LINE
 
Edp projection of planes
Edp  projection of planesEdp  projection of planes
Edp projection of planes
 
Kiran
KiranKiran
Kiran
 
Ortographic projection
Ortographic projectionOrtographic projection
Ortographic projection
 
Ortographic projection
Ortographic projectionOrtographic projection
Ortographic projection
 
Edp ortographic projection
Edp  ortographic projectionEdp  ortographic projection
Edp ortographic projection
 
St line(new)
St line(new)St line(new)
St line(new)
 
5. projection of lines
5. projection of lines5. projection of lines
5. projection of lines
 
Lect 1.point
Lect 1.pointLect 1.point
Lect 1.point
 
Projectionoflines(thedirectdata[1].com)
Projectionoflines(thedirectdata[1].com)Projectionoflines(thedirectdata[1].com)
Projectionoflines(thedirectdata[1].com)
 
Orthographic projection EG
Orthographic projection EGOrthographic projection EG
Orthographic projection EG
 
Orthographic projection
Orthographic projectionOrthographic projection
Orthographic projection
 
projection of straight line and point in engineering drawind
projection of straight line and point in engineering drawind projection of straight line and point in engineering drawind
projection of straight line and point in engineering drawind
 
Projectionofpointsandlines (1)
Projectionofpointsandlines (1)Projectionofpointsandlines (1)
Projectionofpointsandlines (1)
 
Section of solids
Section of solidsSection of solids
Section of solids
 
Engineering Drawing Full Slide
Engineering Drawing Full SlideEngineering Drawing Full Slide
Engineering Drawing Full Slide
 
Unit 6 orthographic projections
Unit 6 orthographic projectionsUnit 6 orthographic projections
Unit 6 orthographic projections
 

More from Deepa Rani

Speed controller of dc motor
Speed controller of dc motorSpeed controller of dc motor
Speed controller of dc motor
Deepa Rani
 
Foot step power generator
Foot step power generatorFoot step power generator
Foot step power generator
Deepa Rani
 
Crime investigation system
Crime investigation systemCrime investigation system
Crime investigation system
Deepa Rani
 
android content providers
android content providersandroid content providers
android content providers
Deepa Rani
 
android sqlite
android sqliteandroid sqlite
android sqlite
Deepa Rani
 
android dilaogs
android dilaogsandroid dilaogs
android dilaogs
Deepa Rani
 
android layouts
android layoutsandroid layouts
android layouts
Deepa Rani
 
android activity
android activityandroid activity
android activity
Deepa Rani
 
android architecture,life cycle,sdk,execution process
android architecture,life cycle,sdk,execution processandroid architecture,life cycle,sdk,execution process
android architecture,life cycle,sdk,execution process
Deepa Rani
 
Android the first app - hello world - copy
Android   the first app - hello world - copyAndroid   the first app - hello world - copy
Android the first app - hello world - copy
Deepa Rani
 
Android styles and themes
Android   styles and themesAndroid   styles and themes
Android styles and themes
Deepa Rani
 
Review of basic data structures
Review of basic data structuresReview of basic data structures
Review of basic data structures
Deepa Rani
 
Fabric innovation
Fabric innovationFabric innovation
Fabric innovation
Deepa Rani
 
Typical problem
Typical problemTypical problem
Typical problem
Deepa Rani
 
Projection of solids
Projection of solidsProjection of solids
Projection of solids
Deepa Rani
 

More from Deepa Rani (20)

Speed controller of dc motor
Speed controller of dc motorSpeed controller of dc motor
Speed controller of dc motor
 
Foot step power generator
Foot step power generatorFoot step power generator
Foot step power generator
 
Crime investigation system
Crime investigation systemCrime investigation system
Crime investigation system
 
android content providers
android content providersandroid content providers
android content providers
 
android sqlite
android sqliteandroid sqlite
android sqlite
 
android menus
android menusandroid menus
android menus
 
android dilaogs
android dilaogsandroid dilaogs
android dilaogs
 
android layouts
android layoutsandroid layouts
android layouts
 
android activity
android activityandroid activity
android activity
 
android architecture,life cycle,sdk,execution process
android architecture,life cycle,sdk,execution processandroid architecture,life cycle,sdk,execution process
android architecture,life cycle,sdk,execution process
 
Android the first app - hello world - copy
Android   the first app - hello world - copyAndroid   the first app - hello world - copy
Android the first app - hello world - copy
 
Android styles and themes
Android   styles and themesAndroid   styles and themes
Android styles and themes
 
Review of basic data structures
Review of basic data structuresReview of basic data structures
Review of basic data structures
 
Blue Brain
Blue BrainBlue Brain
Blue Brain
 
Tcp
TcpTcp
Tcp
 
Dc machiness
Dc machinessDc machiness
Dc machiness
 
Maddy android
Maddy androidMaddy android
Maddy android
 
Fabric innovation
Fabric innovationFabric innovation
Fabric innovation
 
Typical problem
Typical problemTypical problem
Typical problem
 
Projection of solids
Projection of solidsProjection of solids
Projection of solids
 

Recently uploaded

The Future of Autonomous Vehicles | civilthings.com | Detailed information
The Future of Autonomous Vehicles | civilthings.com |  Detailed informationThe Future of Autonomous Vehicles | civilthings.com |  Detailed information
The Future of Autonomous Vehicles | civilthings.com | Detailed information
gettygaming1
 
一比一原版SDSU毕业证圣地亚哥州立大学毕业证成绩单如何办理
一比一原版SDSU毕业证圣地亚哥州立大学毕业证成绩单如何办理一比一原版SDSU毕业证圣地亚哥州立大学毕业证成绩单如何办理
一比一原版SDSU毕业证圣地亚哥州立大学毕业证成绩单如何办理
psavhef
 
Car Seat Covers and Seat Protection Guide
Car Seat Covers and Seat Protection GuideCar Seat Covers and Seat Protection Guide
Car Seat Covers and Seat Protection Guide
AskXX.com
 

Recently uploaded (8)

gtyccccccccccccccccccccccccccccccccccccccccccccccccccccccc
gtycccccccccccccccccccccccccccccccccccccccccccccccccccccccgtyccccccccccccccccccccccccccccccccccccccccccccccccccccccc
gtyccccccccccccccccccccccccccccccccccccccccccccccccccccccc
 
Core technology of Hyundai Motor Group's EV platform 'E-GMP'
Core technology of Hyundai Motor Group's EV platform 'E-GMP'Core technology of Hyundai Motor Group's EV platform 'E-GMP'
Core technology of Hyundai Motor Group's EV platform 'E-GMP'
 
Essential Maintenance Tips For Commercial Vans.
Essential Maintenance Tips For Commercial Vans.Essential Maintenance Tips For Commercial Vans.
Essential Maintenance Tips For Commercial Vans.
 
Advanced Technology for Auto Part Industry Inventory Solutions
Advanced Technology for Auto Part Industry Inventory SolutionsAdvanced Technology for Auto Part Industry Inventory Solutions
Advanced Technology for Auto Part Industry Inventory Solutions
 
The Future of Autonomous Vehicles | civilthings.com | Detailed information
The Future of Autonomous Vehicles | civilthings.com |  Detailed informationThe Future of Autonomous Vehicles | civilthings.com |  Detailed information
The Future of Autonomous Vehicles | civilthings.com | Detailed information
 
What Should You Do If Your Jaguar XF Bluetooth Isn't Working
What Should You Do If Your Jaguar XF Bluetooth Isn't WorkingWhat Should You Do If Your Jaguar XF Bluetooth Isn't Working
What Should You Do If Your Jaguar XF Bluetooth Isn't Working
 
一比一原版SDSU毕业证圣地亚哥州立大学毕业证成绩单如何办理
一比一原版SDSU毕业证圣地亚哥州立大学毕业证成绩单如何办理一比一原版SDSU毕业证圣地亚哥州立大学毕业证成绩单如何办理
一比一原版SDSU毕业证圣地亚哥州立大学毕业证成绩单如何办理
 
Car Seat Covers and Seat Protection Guide
Car Seat Covers and Seat Protection GuideCar Seat Covers and Seat Protection Guide
Car Seat Covers and Seat Protection Guide
 

straight line

  • 1. ORTHOGRAPHIC PROJECTIONS OF POINTS, LINES, PLANES, AND SOLIDS. TO DRAW PROJECTIONS OF ANY OBJECT, ONE MUST HAVE FOLLOWING INFORMATION A) OBJECT { WITH IT’S DESCRIPTION, WELL DEFINED.} B) OBSERVER { ALWAYS OBSERVING PERPENDICULAR TO RESP. REF.PLANE}. C) LOCATION OF OBJECT, { MEANS IT’S POSITION WITH REFFERENCE TO H.P. & V.P.} TERMS ‘ABOVE’ & ‘BELOW’ WITH RESPECTIVE TO H.P. AND TERMS ‘INFRONT’ & ‘BEHIND’ WITH RESPECTIVE TO V.P FORM 4 QUADRANTS. OBJECTS CAN BE PLACED IN ANY ONE OF THESE 4 QUADRANTS. IT IS INTERESTING TO LEARN THE EFFECT ON THE POSITIONS OF VIEWS ( FV, TV ) OF THE OBJECT WITH RESP. TO X-Y LINE, WHEN PLACED IN DIFFERENT QUADRANTS. STUDY ILLUSTRATIONS GIVEN ON HEXT PAGES AND NOTE THE RESULTS.TO MAKE IT EASY HERE A POINT A IS TAKEN AS AN OBJECT. BECAUSE IT’S ALL VIEWS ARE JUST POINTS.
  • 2. NOTATIONS FOLLOWING NOTATIONS SHOULD BE FOLLOWED WHILE NAMEING DIFFERENT VIEWS IN ORTHOGRAPHIC PROJECTIONS. OBJECT POINT A LINE AB IT’S TOP VIEW a ab IT’S FRONT VIEW a’ a’ b’ IT’S SIDE VIEW a” a” b” SAME SYSTEM OF NOTATIONS SHOULD BE FOLLOWED INCASE NUMBERS, LIKE 1, 2, 3 – ARE USED.
  • 3. VP 2 nd Quad. 1ST Quad. Y Observer X Y HP X 3rd Quad. 4th Quad. THIS QUADRANT PATTERN, IF OBSERVED ALONG X-Y LINE ( IN RED ARROW DIRECTION) WILL EXACTLY APPEAR AS SHOWN ON RIGHT SIDE AND HENCE, IT IS FURTHER USED TO UNDERSTAND ILLUSTRATION PROPERLLY.
  • 4. Point A is POINT A IN VP POINT A IN Placed In 2ND QUADRANT 1ST QUADRANT VP a’ different A A quadrants a’ and it’s Fv & Tv a are brought in same plane for HP OBSERVER Observer to see clearly. HP OBSERVER Fv is visible as it is a view on VP. But as Tv is a is a view on Hp, it is rotated downward 900, In clockwise direction.The In front part of a Hp comes below xy line and the part behind Vp HP comes above. HP OBSERVER OBSERVER Observe and note the a process. a’ A a’ POINT A IN A POINT A IN 3 QUADRANT RD VP 4TH QUADRANT VP
  • 5. Basic concepts for drawing projection of point FV & TV of a point always lie in the same vertical line FV of a point ‘P’ is represented by p’. It shows position of the point with respect to HP. If the point lies above HP, p’ lies above the XY line. If the point lies in the HP, p’ lies on the XY line. If the point lies below the HP, p’ lies below the XY line. TV of a point ‘P’ is represented by p. It shows position of the point with respect to VP. If the point lies in front of VP, p lies below the XY line. If the point lies in the VP, p lies on the XY line. If the point lies behind the VP, p lies above the XY line.
  • 6. PROJECTIONS OF A POINT IN FIRST QUADRANT. POINT A ABOVE HP POINT A ABOVE HP POINT A IN HP & INFRONT OF VP & IN VP & INFRONT OF VP For Tv For Tv PICTORIAL PICTORIAL For Tv PRESENTATION A PRESENTATION a’ a’ Fo A r Y Y Fv Y Fo a a’ rFv S S . ON a X X X A SE ATI a Fo CA T r E EN Fv OV E S AB PR L IC AL PH OF RA Fv above xy, Fv above xy, Fv on xy, OG Tv below xy. Tv on xy. Tv below xy. TH OR VP VP VP a’ a’ X Y X Y X a’ Y a a a HP HP HP
  • 7. PROJECTIONS OF STRAIGHT LINES. INFORMATION REGARDING A LINE means IT’S LENGTH, POSITION OF IT’S ENDS WITH HP & VP IT’S INCLINATIONS WITH HP & VP WILL BE GIVEN. AIM:- TO DRAW IT’S PROJECTIONS - MEANS FV & TV. SIMPLE CASES OF THE LINE 1. A VERTICAL LINE ( LINE PERPENDICULAR TO HP & // TO VP) 2. LINE PARALLEL TO BOTH HP & VP. 3. LINE INCLINED TO HP & PARALLEL TO VP. 4. LINE INCLINED TO VP & PARALLEL TO HP. 5. LINE INCLINED TO BOTH HP & VP. STUDY ILLUSTRATIONS GIVEN ON NEXT PAGE SHOWING CLEARLY THE NATURE OF FV & TV OF LINES LISTED ABOVE AND NOTE RESULTS .
  • 8. For Tv Orthographic Pattern (Pictorial Presentation) V.P. a’ Note: a’ Fv is a vertical line A Showing True Length Fv 1. FV & . V .P Tv is a point. b’ A Line b’ perpendicular Y X Y Fo to Hp B r Fv & TV a b Tv a b // to Vp X H.P. Orthographic Pattern (Pictorial Presentation) For Tv Note: V.P. Fv & Tv both are 2. // to xy a’ Fv b’ b’ & . A Line F.V B both show T. L. // to Hp a’ . V.P Y & A X Y // to Vp Fo rF v b a b Tv V. T. a X H.P.
  • 9. Fv inclined to xy V.P. Tv parallel to xy. b’ 3. b’ . F.V A Line inclined to Hp B F.V. a’ θ and Y V.P. θ parallel to Vp a’ X Y θ (Pictorial presentation) A b a T.V. b . T.V a X H.P. Orthographic Projections Tv inclined to xy V.P. 4. Fv parallel to xy. a’ Fv b’ A Line inclined to Vp F .V . b’ . V.P and a’ parallel to Hp A Ø B X Y (Pictorial presentation) a Ø Ø Tv a b T.V. b H.P.
  • 10. For Tv For Tv 5. A Line inclined to both b’ Hp and Vp b’ . . (Pictorial presentation) V.P V.P B B . F.V α . F.V α Y Y On removal of object a’ For a’ For i.e. Line AB Fv Fv Fv as a image on Vp. A A Tv as a image on Hp, β β X X a T.V. b a T.V. b V.P. b’ FV a’ α X Y Orthographic Projections Note These Facts:- Fv is seen on Vp clearly. Both Fv & Tv are inclined to xy. To see Tv clearly, HP is a β (No view is parallel to xy) rotated 900 downwards, Both Fv & Tv are reduced Hence it comes below xy. TV lengths. (No view shows True Length) H.P. b
  • 11. Orthographic Projections Note the procedure Note the procedure Means Fv & Tv of Line AB When Fv & Tv known, When True Length is known, are shown below, How to find True Length. How to locate FV & TV. with their apparent Inclinations (Views are rotated to determine (Component a’b2’ of TL is drawn True Length & it’s inclinations which is further rotated α &β with Hp & Vp). to determine FV) V.P. V.P. V.P. b’ b’ b 1’ b’ Fv θ FV FV TL b1 TL α ’ a’ α a’ a’ b2 ’ θ X Y X Y X Y Ø b1 a β b1 a a β TV β TV TV Tv TL H.P. b H.P. b H.P. b b 2 Here TV (ab) is not // to XY line In this sketch, TV is rotated Here a’b1’ is component Hence it’s corresponding FV and made // to XY line. of TL ab1 gives length of FV. a’ b’ is not showing Hence it’s corresponding Hence it is brought Up to True Length & FV a’ b1’ Is showing Locus of a’ and further rotated True Inclination with Hp. True Length to get point b’. a’ b’ will be Fv. & Similarly drawing component True Inclination with Hp. of other TL(a’b1‘) TV can be drawn.
  • 12. Projection of straight line Line inclined to both HP & VP Type-I Given projections (FV & TV) of the line. To find True length & true inclination of the line with HP (θ) and with VP(Φ). PROBLEM End A of a line AB is 20mm above HP & 20mm in front of VP while its end B is 55mm above HP and 75mm in front of VP. The distance between end projectors of the line is 50mm. Draw projections of the line and find its true length and true inclination with the principal planes. Also mark its traces.
  • 13. b’ b1 ’ θ: True inclination of the line with HP = 24º TL 55 a’ b2’ α : Inclination of FV of θ α the line with HP/XY HT VT’ 20 X Y v h’ 50 Ø: True inclination of 20 Φ β b1 the line with VP = 41º a β : Inclination of TV of 75 the line with VP/XY TL b b2
  • 14. Line inclined to both HP & VP Type –II Given (i) T.L., θ and Ø, (ii) T.L., F.V., T.V. to draw projections, find α, β,H.T. and V.T. PROBLEM A line AB, 70mm long, has its end A 20 mm above HP and 20mm in front of VP. It is inclined at 30° to HP and 45°to VP. Draw its projections and mark its traces.
  • 15. b’ b1’ 70 a’ 30° HT b2’ 15 VT’ Y X h’ v 20 b1 a 45° 70 b2 b
  • 16. Q10.11 The top view of a 75mm long line AB measures 65mm,while its front view measures 50mm. Its one end A is in HP and12mm in front of VP. Draw the projections of AB and determine its inclination with HP and VP To draw FV &TV of the line Given, Hint: Draw ab1=65mm // to XY. AB TL=75mm,TV=65mm,FV=50mm Because when TV is // to XY, FV To find θ & Ø gives TL. A is in HP & 12mm VP → b’ b1 ’ Ans. θ=31º 50 75 Ans. Ø=49º a’ X Y 31º 12 65 b1 a 49º 75 65 b b2
  • 17. Q10.12 A line AB, 65mm long has its end A 20mm above H.P. and 25mm in front of VP. The end B is 40mm above H.P. and 65mm in front of V.P. Draw the projections of AB and show its inclination with H.P. and V.P. Given, To draw FV &TV of the line Hint1:Mark a’ 20mm above AB H.P & a 25mm below XY TL=65mm To find θ & Ø A is 20mm ↑ HP & 25mm →V.P. b’ b1 ’ Hint2:Draw locus of b’ 40mm B is 40mm ↑ & 65mm → V.P. above XY & locus of b 65 mm below XY a’ 65 b2 ’ 40 18º 20 X Y 25 38º Ans. θ=18º b1 a Ans. Ø=38º 65 65 b b2
  • 18. Q10.13:The projectors of the ends of a line AB are 5cm apart. The end A is 2cm above the H.P and 3cm in front of V.P. The end B is1cm below H.P. and 4cm behind the V.P. Determine the true length and traces of AB, and its inclination with the two planes Given, To find, A0B0=50mm True Length, θ,Ø, H.T. and V.T. A is 20mm ↑ HP & 30mm →V.P. B is 10mm ↓ & 40mm ← V.P. b b2 a’ 40 HT b2 ’ 20 VT’ 91 X v h’ Y 50 10 b’ 20º 30 Ans. θ=20º a 50º b1 Ans. Ø=50º
  • 19. Q10.14:A line AB, 90mm long, is inclined at 45 to the H.P. and its top view makes an angle of 60 with the V.P. The end A is in the H.P. and 12mm in front of V.P. Draw its front view and find its true inclination with the V.P. b’ Given, b1’ T.L.=90mm, θ=45º, β=60º A is in the H.P. & 12mm→V.P. To find/draw, F.V.,T.V. & Ø 90 Ans. Ø = 38º a’ X Y 45º b1 12 60º 38º a 90 b b2
  • 20. Q10.16:The end A of a line AB is 25 mm behind the V.P. and is below the H.P. The end B is 12 mm in front of the VP and is above the HP The distance between the projectors is 65mm. The line is inclined at 40 to the HP and its HT is 20 mm behind the VP. Draw the projections of the line and determine its true length and the VT Given, To find/draw, A0B0=65mm F.V., T.V., T.L., VT’ A is 25mm ←V.P.& is ↓H.P. B is 12mm →V.P. & is above HP θ = 40º b1 ’ b’ b2 ’ Ans. TL= a’b2’=123 mm VT’ a b2 b1 HT 25 20 X h’ v Y 12 40º a’ b 65
  • 21. 10.17:A line AB, 90mm long, is inclined at 30 to the HP. Its end A is 12mm above the HP and 20mm in front of the VP. Its FV measures 65mm. Draw the TV of AB and determine its inclination with the VP b’ b1 ’ 90 a’ 65 30° 12 X Y 20 44° b1 a Ans: Ø = 44º 90 b b2
  • 22. Q10.23:Two lines AB & AC make an angle of 120 between them in their FV & TV. AB is parallel to both the HP & VP. Determine the real angle between AB & AC. C c2 ’ c1 ’ c’ 112° Ans. 112º b’ 120° a’ X Y b a c2 c1 120° c
  • 23. Q8:A line AB 65 mm long has its end A in the H.P. & 15 mm in front of the V.P. The end B is in the third quadrant. The line is inclined at 30 to the H.P. and at 60 to the V.P. Draw its projections. VP b b2 b 65 15 a’ b2’ X Y a” X Y a’ 30º HP 30º 60º 15 60º 65 b1 a a b’ b” b’ b1’
  • 24. Q10.19 A line AB, inclined at 40º to the V.P. has its end 50mm and 20mm above the H.P. the length of its front view is 65mm and its V.T. is 10mm above the H.P. determine .the true length of AB its inclination with the H.P. and its H.T. Given, To find, Ø = 40º, A is 20mm↑HP, TL, θ & HT B is 50 mm ↑ HP, FV=65mm, VT is 10mm ↑ HP b1 ’ b’ 85 a’ 50 b2 ’ 21º HT VT’ 20 10 X Y 40º v h’ b1 Ans, a TL = 85 mm, θ = 21º & HT is 17 mm behind VP b2
  • 25. Q10.19 A line AB, inclined at 40º to the V.P. has its end 50mm and 20mm above the H.P. the length of its front view is 65mm and its V.T. is 10mm above the H.P. determine .the true length of AB its inclination with the H.P. and its H.T. B1’ Step1: For solving the problem by Given, To find, trapezoidal method, draw a line at 40º(Ø) Ø = 40º, A is 20mm↑HP, from VT’. Then draw perpendiculars from B is 50 mm ↑ HP, TL, θ & HT a’ and b’ on this line. FV=65mm, VT is 10mm ↑ HP Step2: Then draw projectors from a’ and b’ and mark the distance of b’B1’ on the projector of b’ below XY. Similarly mark b’ the distance a’A1’ on the projector of a’ below XY 65 A1 ’ a’ 50 40º VT’ 21º HT 20 X 10 v h’ Y a Ans: A1’B1’=TL=85mm Ans:HT is 17 mm behind VP Ans:θ = 21º b
  • 26. Q6. The top view of a 75mm long line CD measures 50 mm. C is 50 mm in front of the VP & 15mm below the HP. D is 15 mm in front of the VP & is above the HP. Draw the FV of CD & find its inclinations with the HP and the VP. Show also its traces. Given, To draw, TL = 75 mm, FV =50 mm, FV & to find θ & Ø C is 15mm ↓ HP & 50 mm → VP, VT’ To mark HT & VT D is 15 mm → VP Hint 1: Cut an arc of 50 mm d’ d1 ’ from c on locus of D to get the TV of the line Hint 2: Make TV (cd), // to XY 75 so that FV will give TL h’ X Y v 15 d d2 c’ θ=48º Ans: θ=48º Locus of D 50 Ans: Ø=28º 50 75 HT c d1 Ø=28º
  • 27. Q10.10 A line PQ 100 mm long is inclined at 30º to the H.P. and at 45º to the V.P. Its mid point is in the V.P. and 20 mm above the H.P. Draw its projections, if its end P is in the third quadrant and Q is in the first quadrant. Given, To draw, TL = 100, θ = 30º, Mid point M is 20mm↑HP & in the VP FV & TV End P in third quadrant & End Q in first quadrant q’ q1 ’ p2 p p2’ 50 m’ 50 q2 ’ 30º 20 p1 50 45º X q1 Y m p1’ p’ 50 q q2
  • 28. Problem 3: The front view of a 125 mm long line PQ measures 75 mm while its top view measures 100 mm. Its end Q and the mid point M are in the first quadrant. M being 20 mm from both the planes. Draw the projections of line PQ.
  • 29.
  • 30. For Tv For Tv 5. A Line inclined to both b’ Hp and Vp b’ . . (Pictorial presentation) V.P V.P B B . F.V α . F.V α Y Y On removal of object a’ For a’ For i.e. Line AB Fv Fv Fv as a image on Vp. A A Tv as a image on Hp, β β X X a T.V. b a T.V. b V.P. B b’ FV a’ α A X Y Orthographic Projections Note These Facts:- Fv is seen on Vp clearly. Both Fv & Tv are inclined to xy. To see Tv clearly, HP is a β (No view is parallel to xy) rotated 900 downwards, Both Fv & Tv are reduced Hence it comes below xy. TV lengths. (No view shows True Length) H.P. b