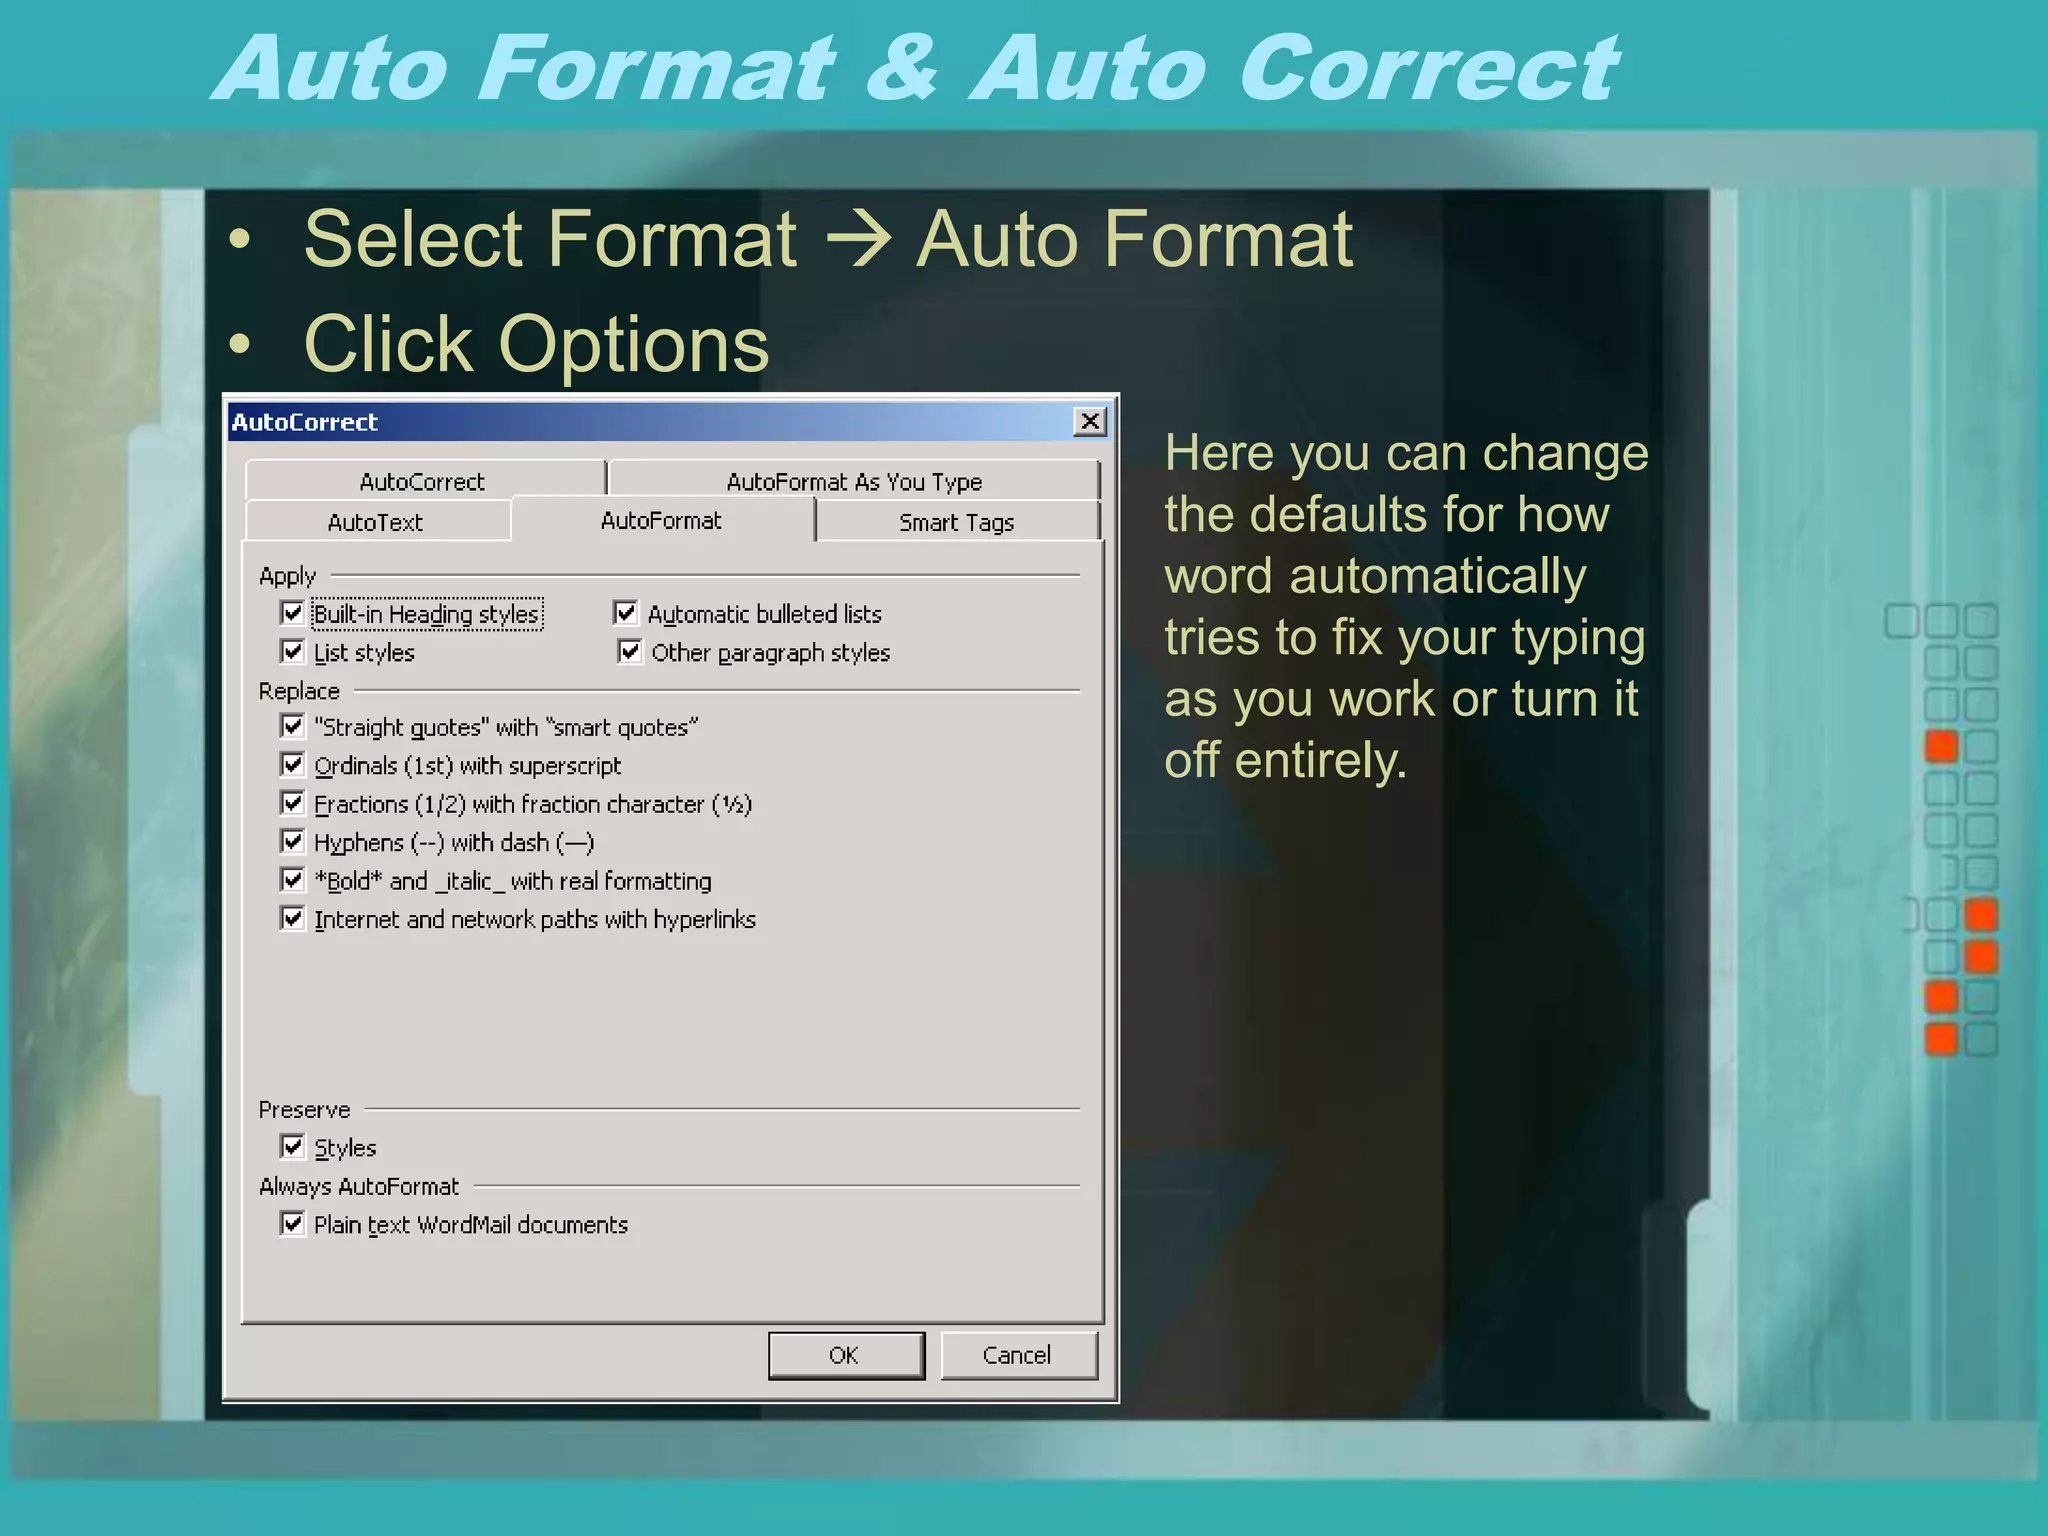
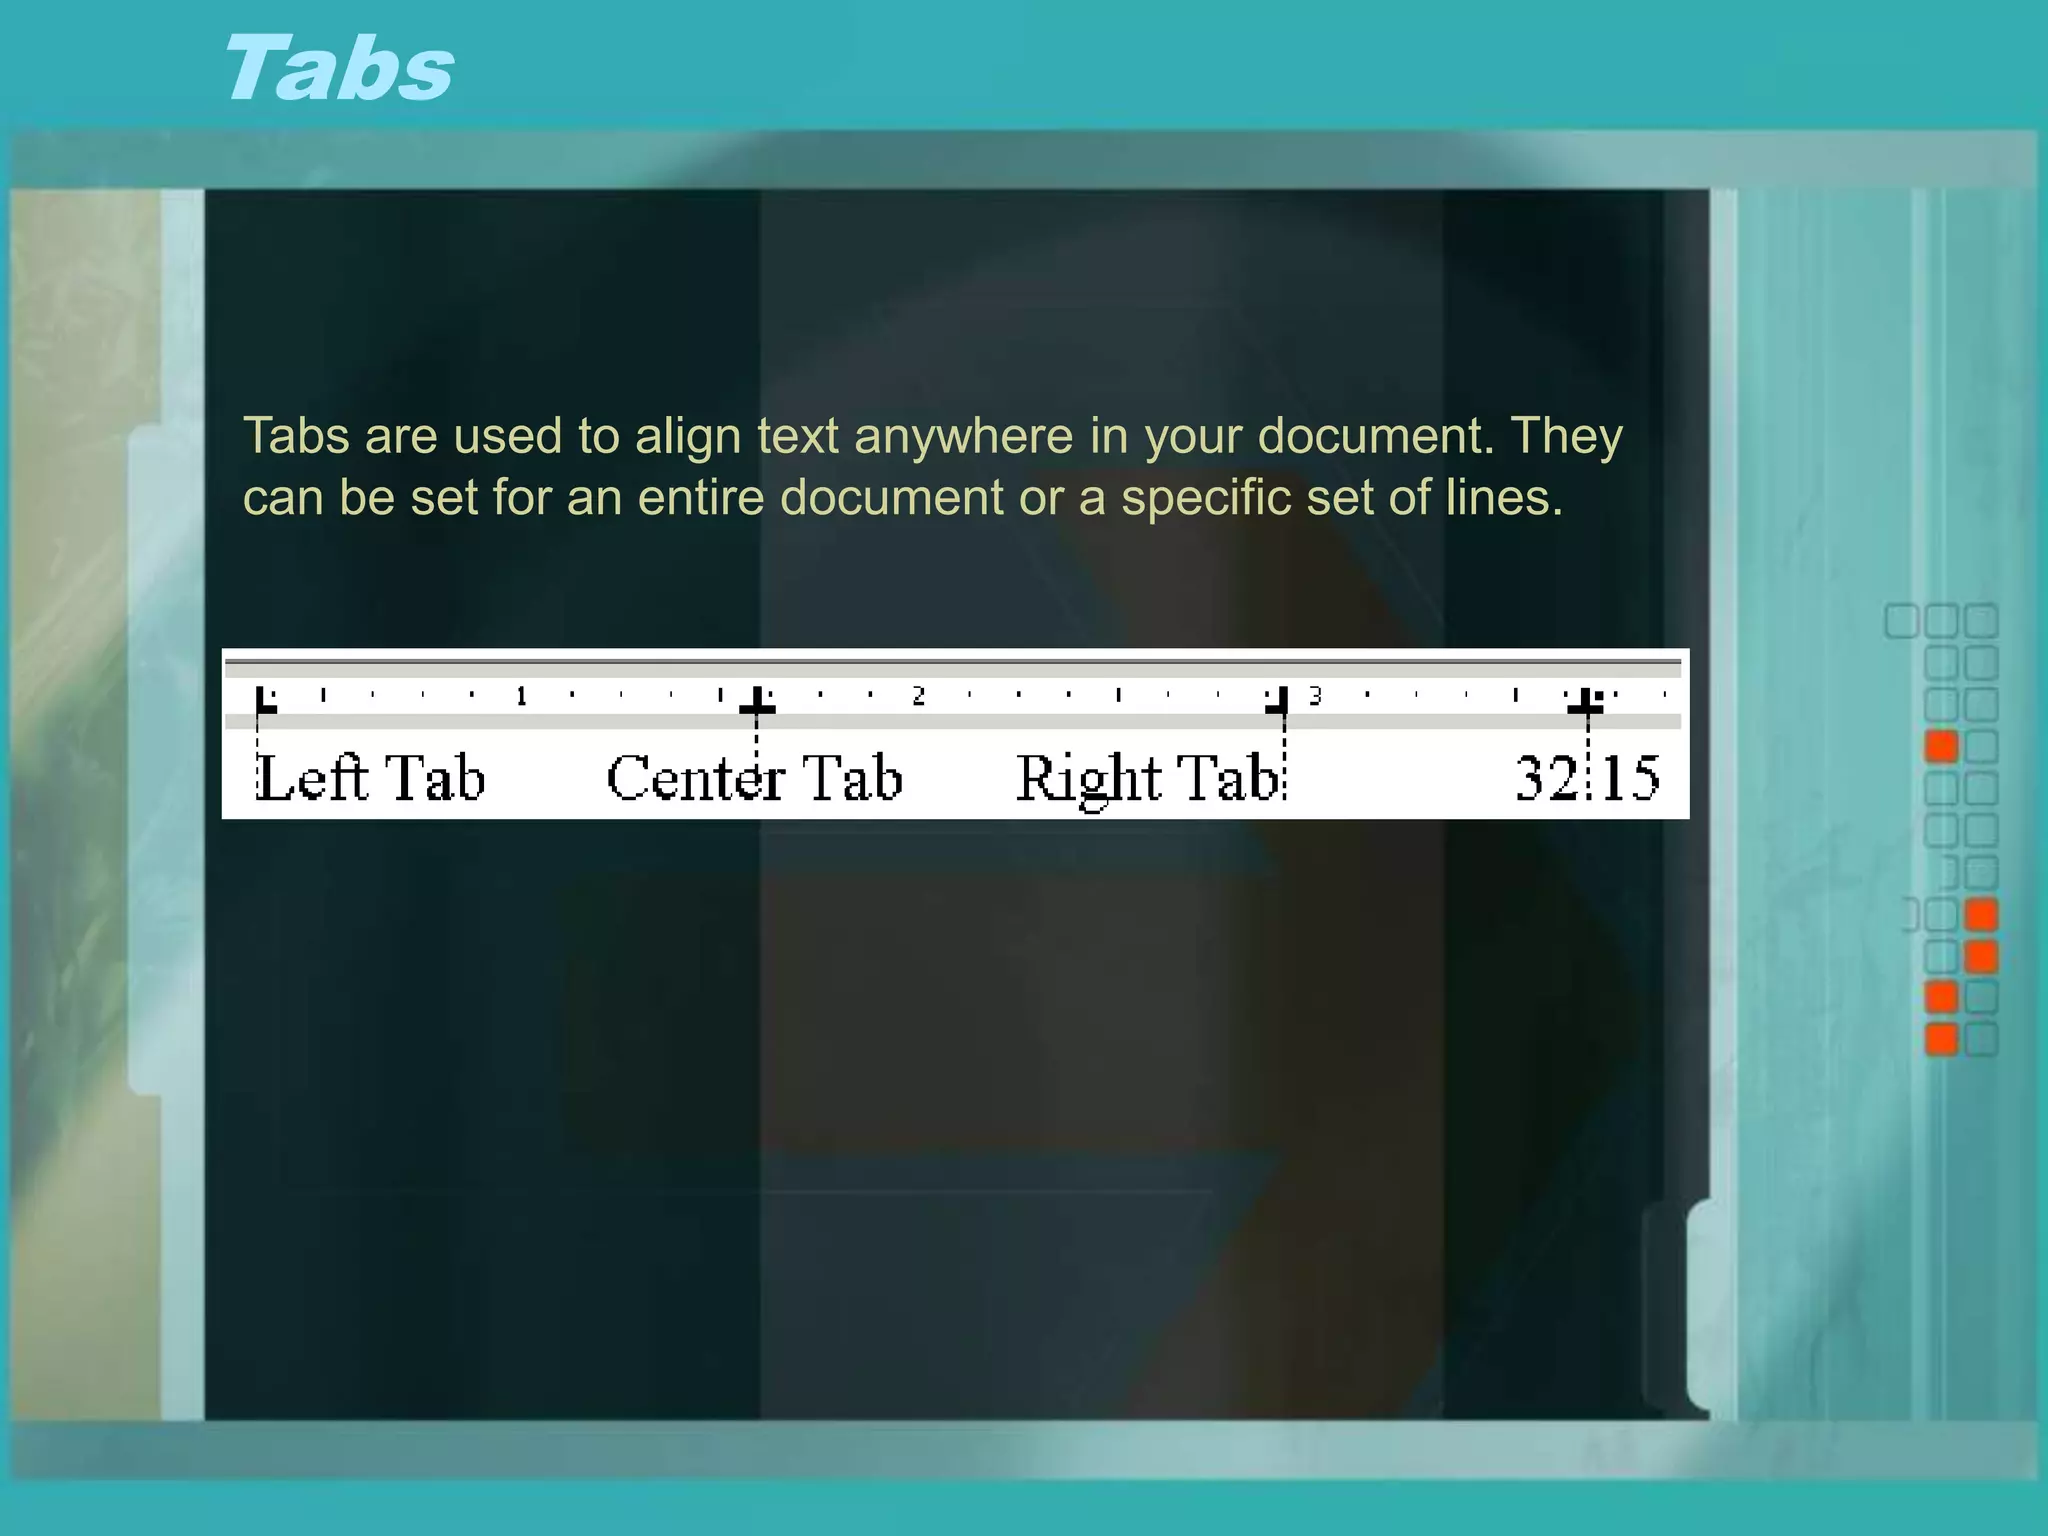
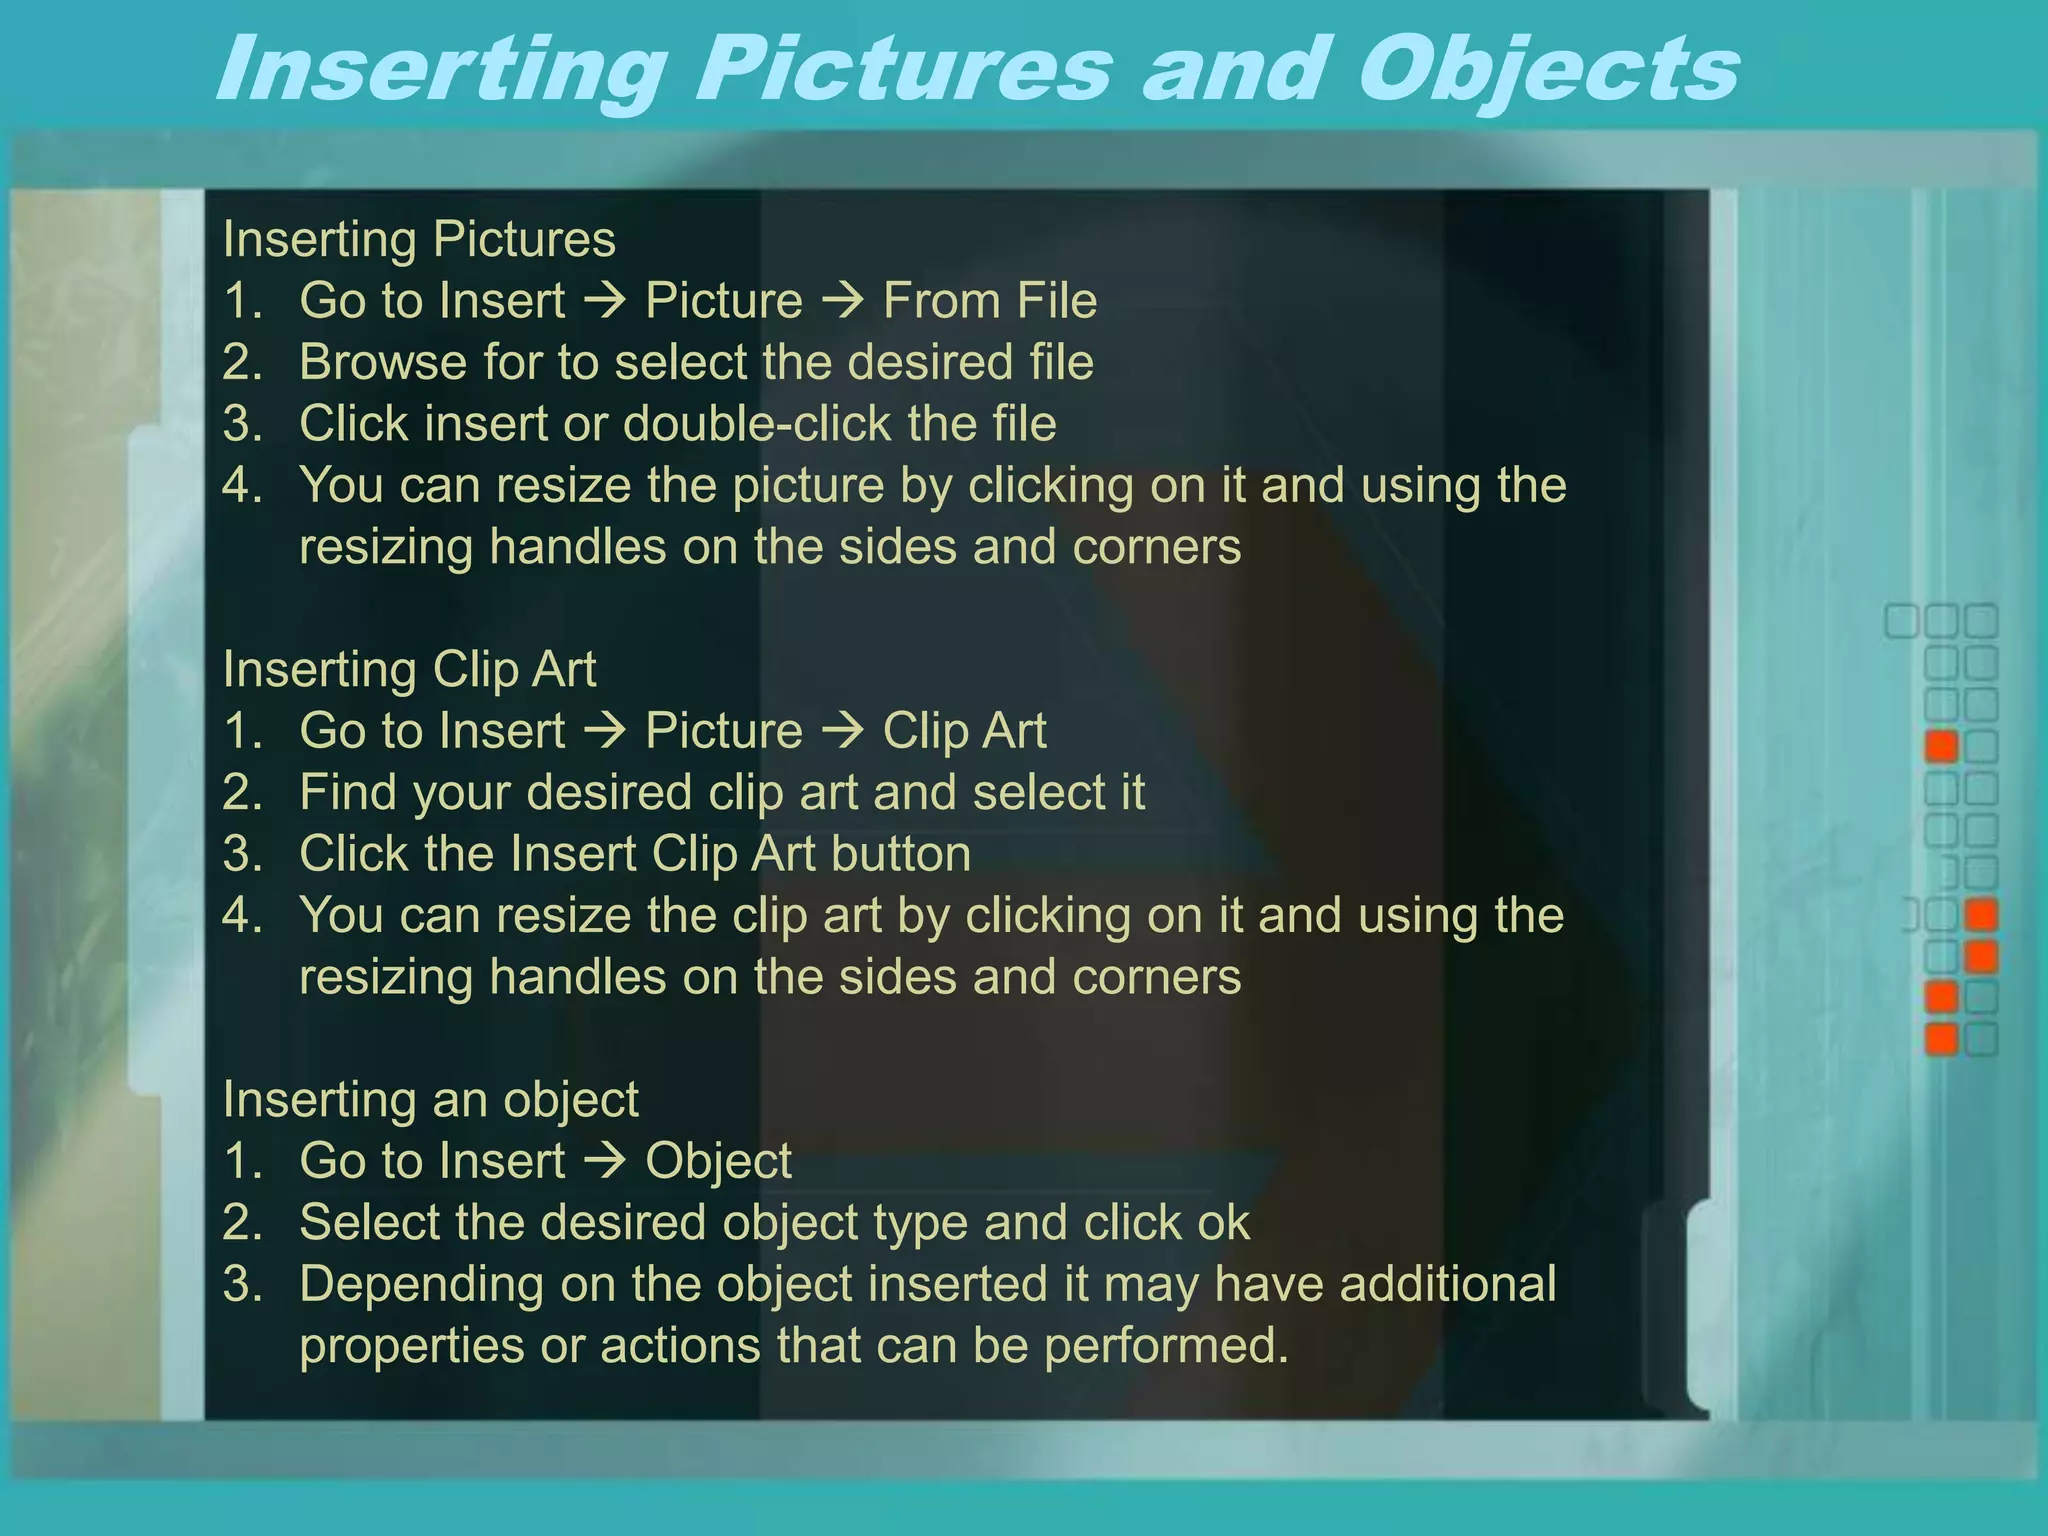
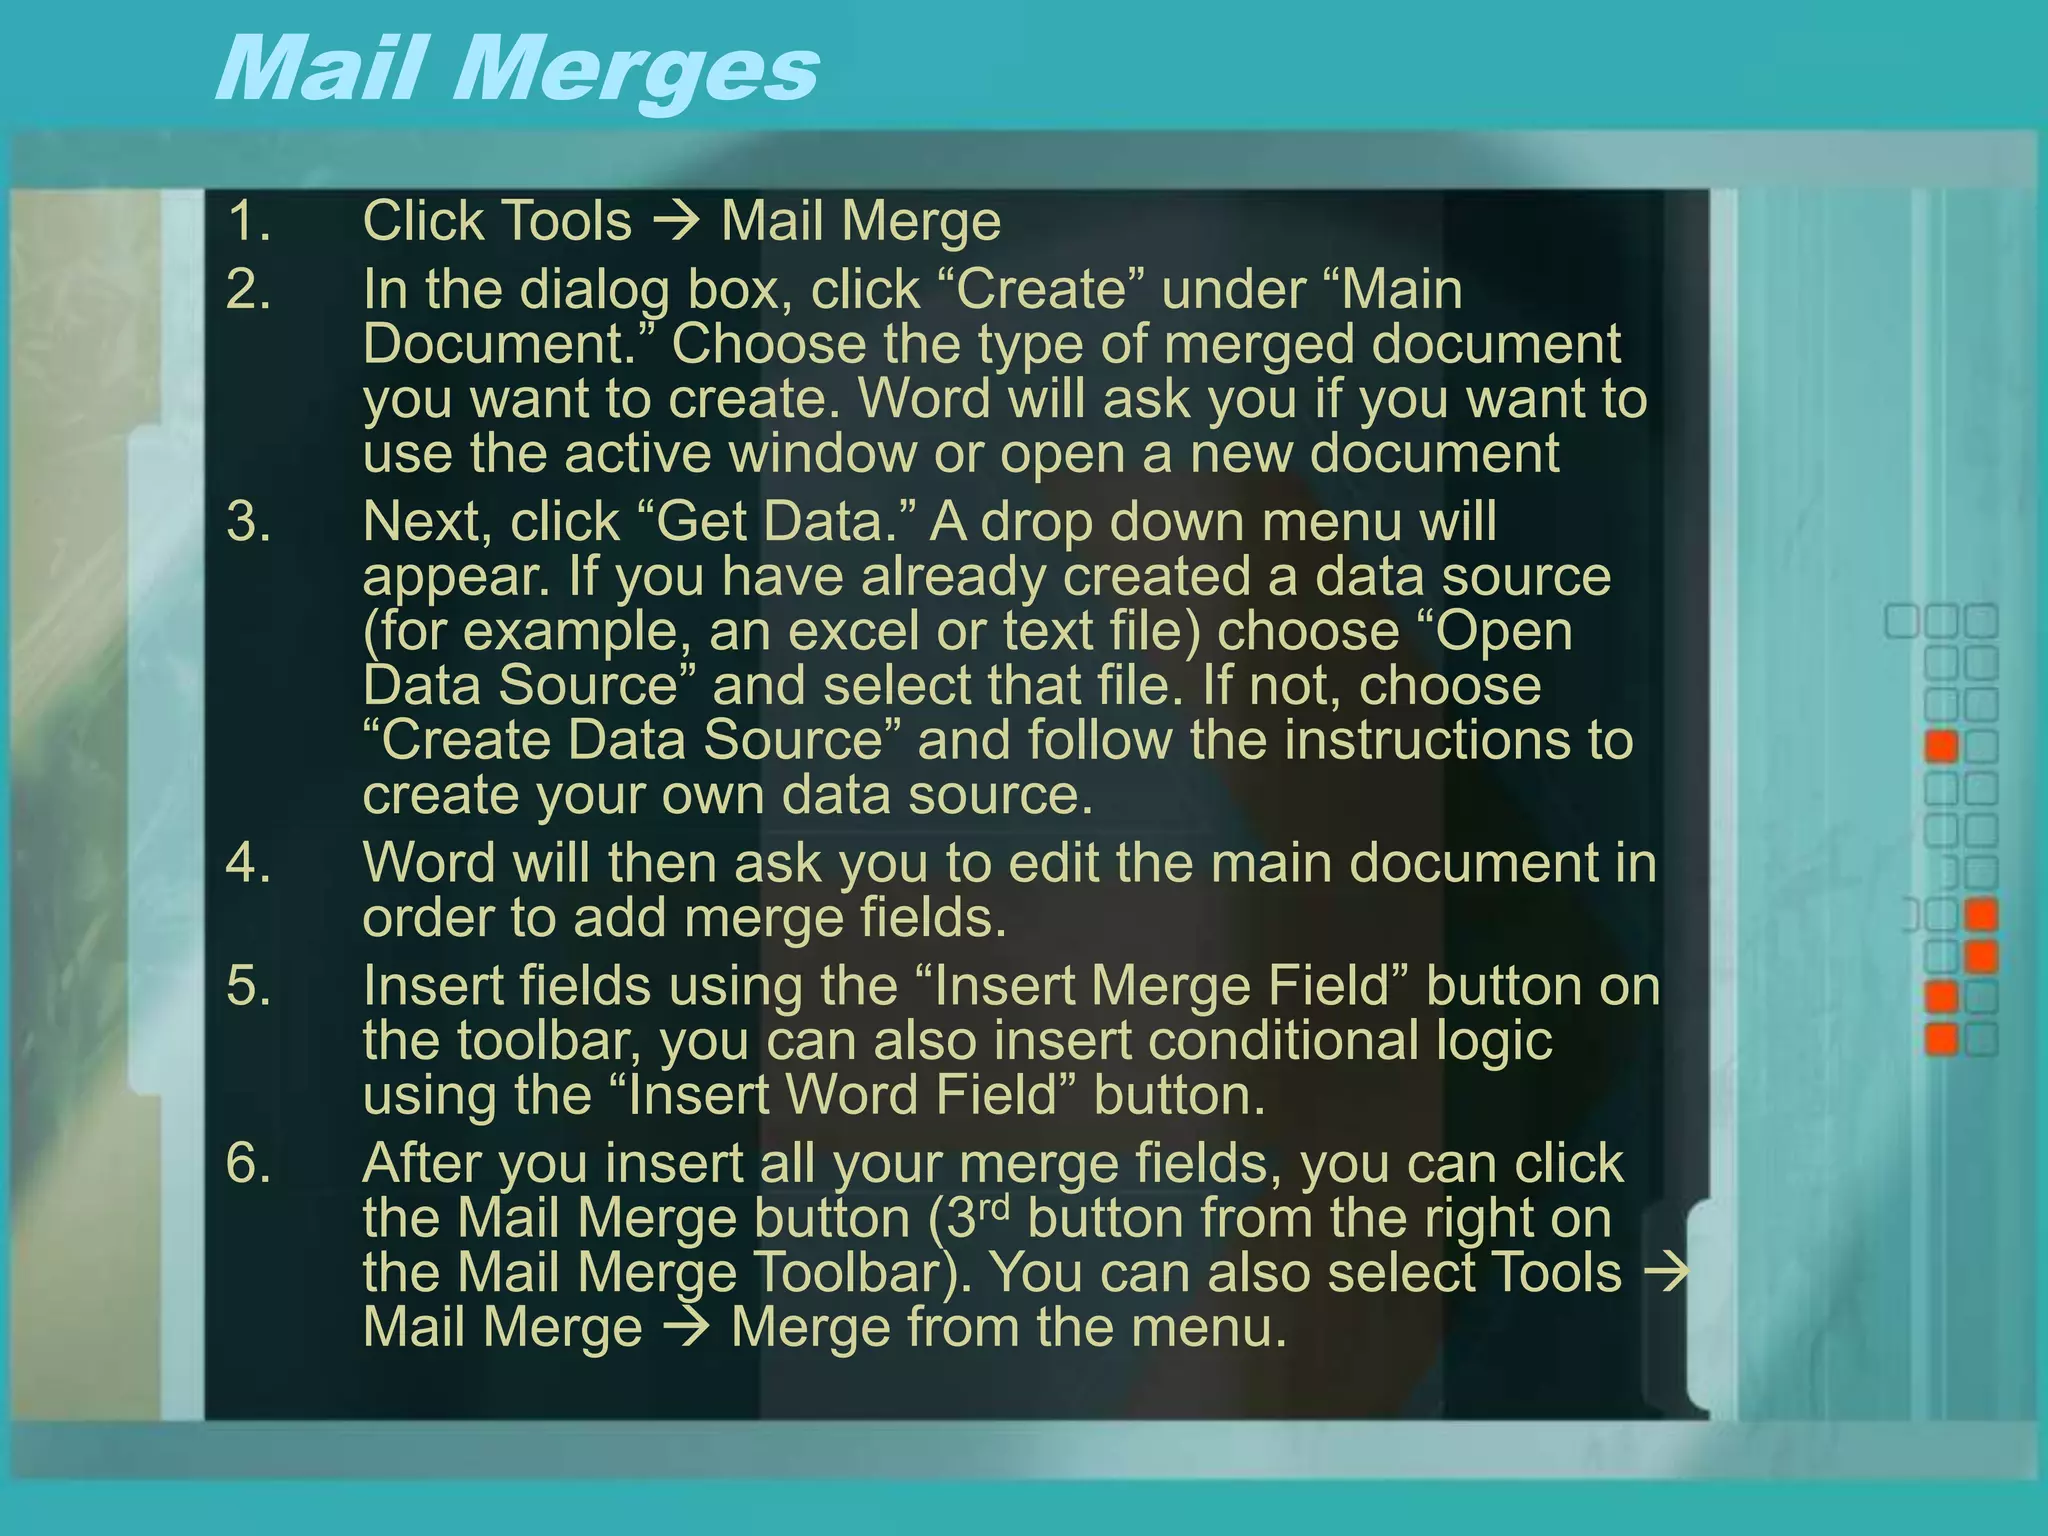
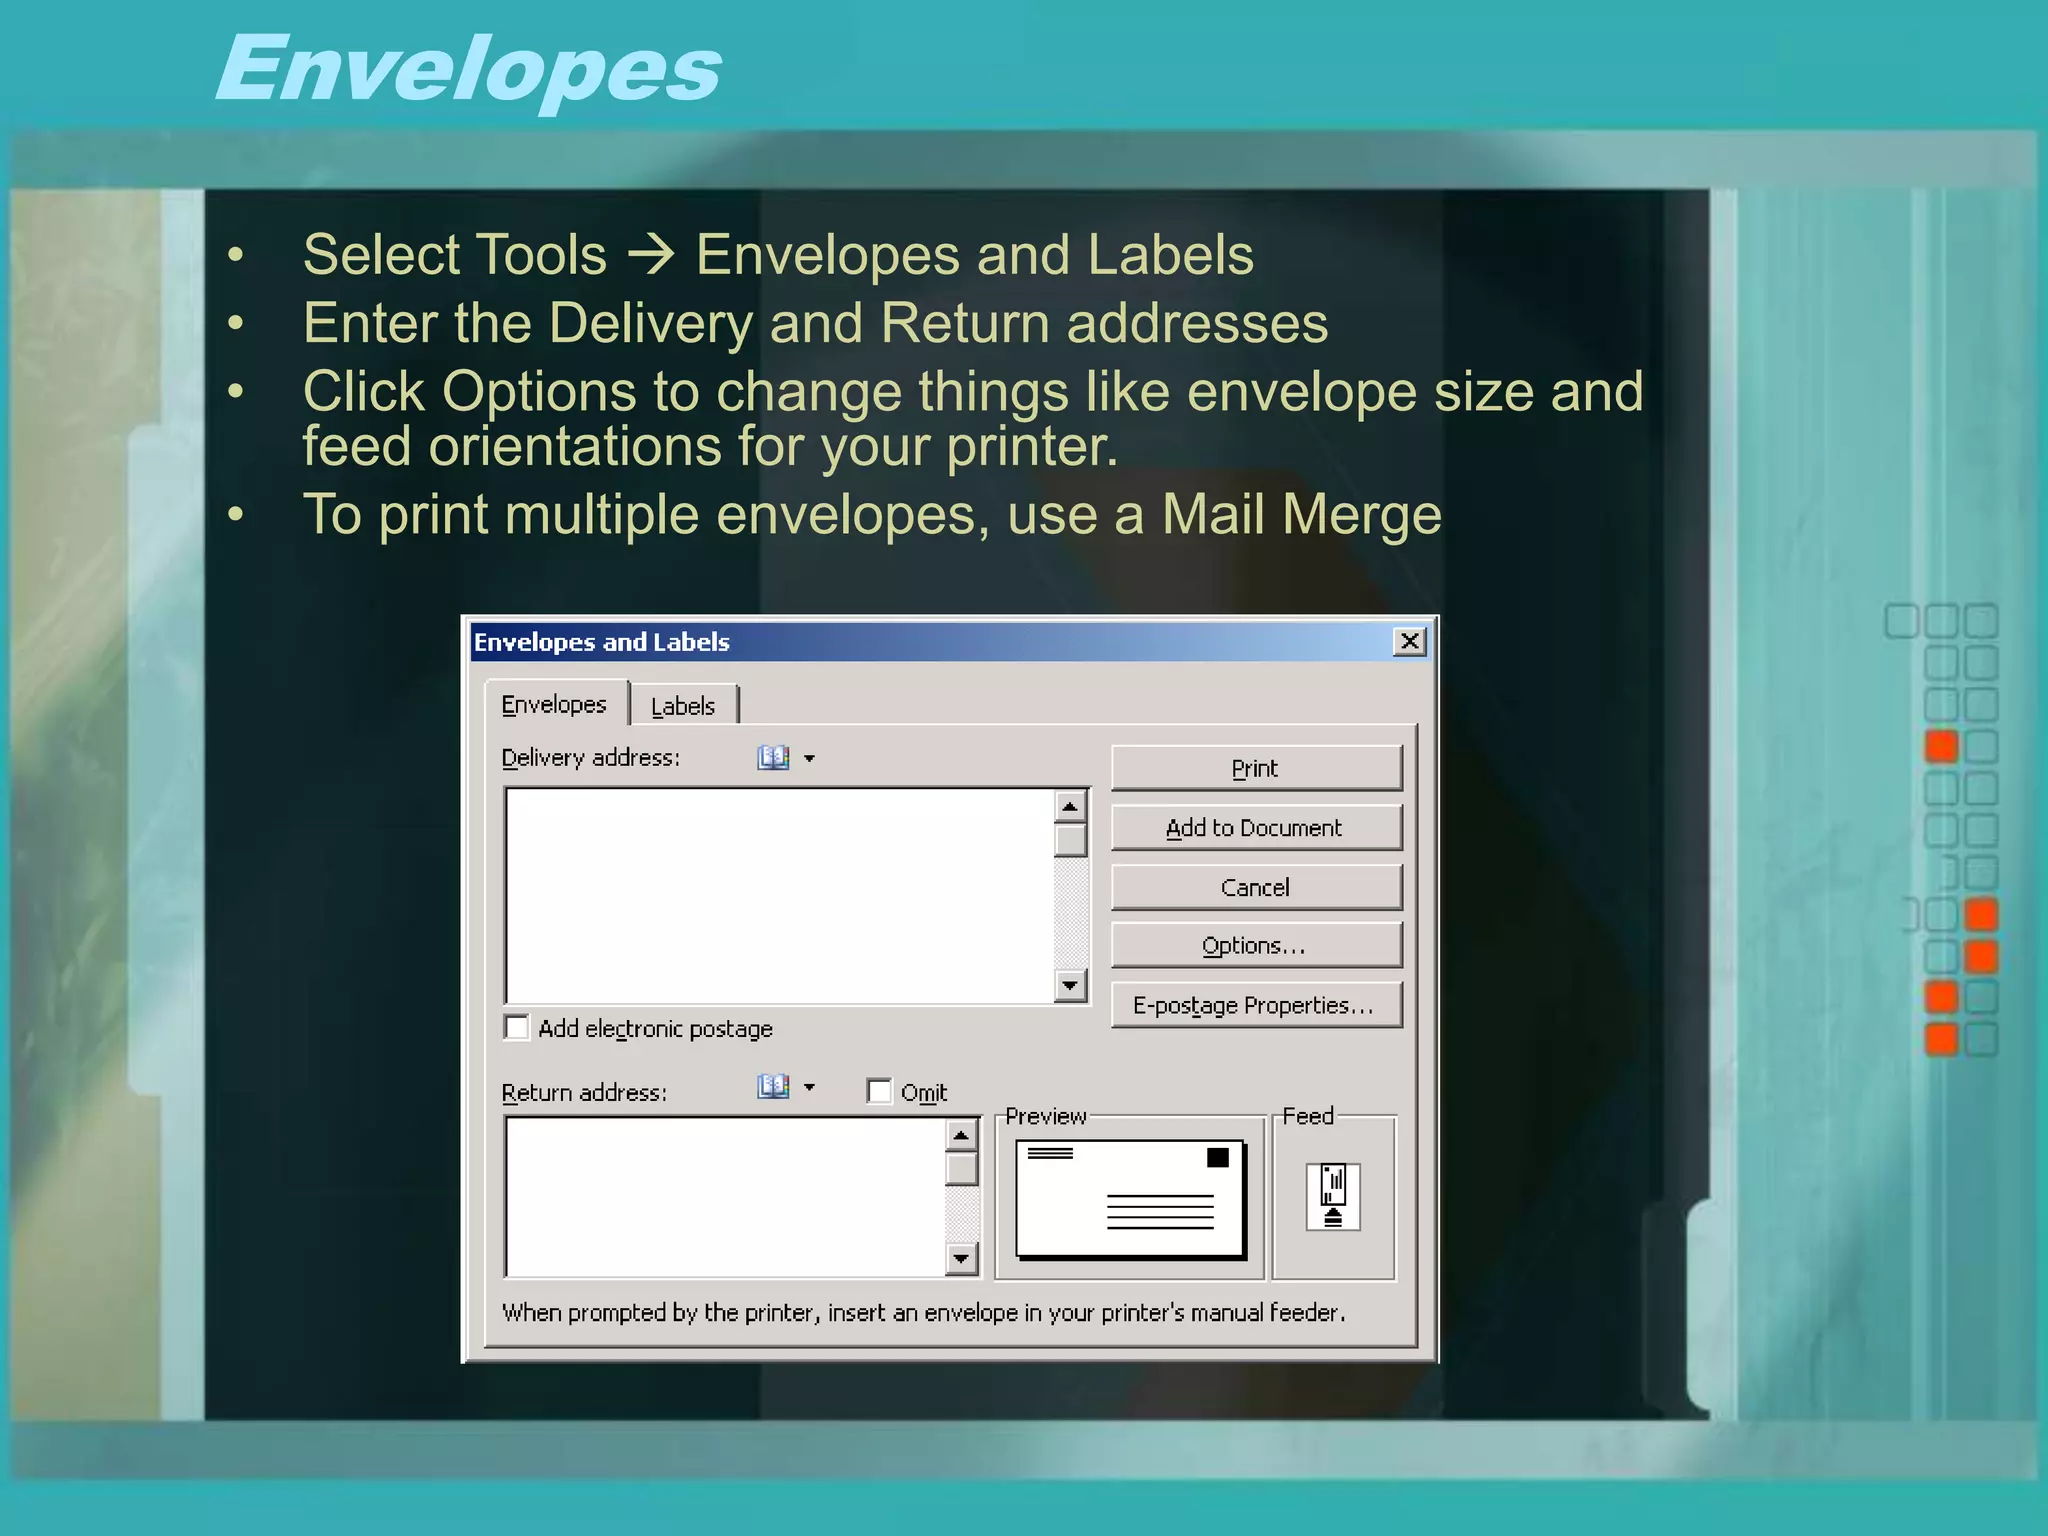
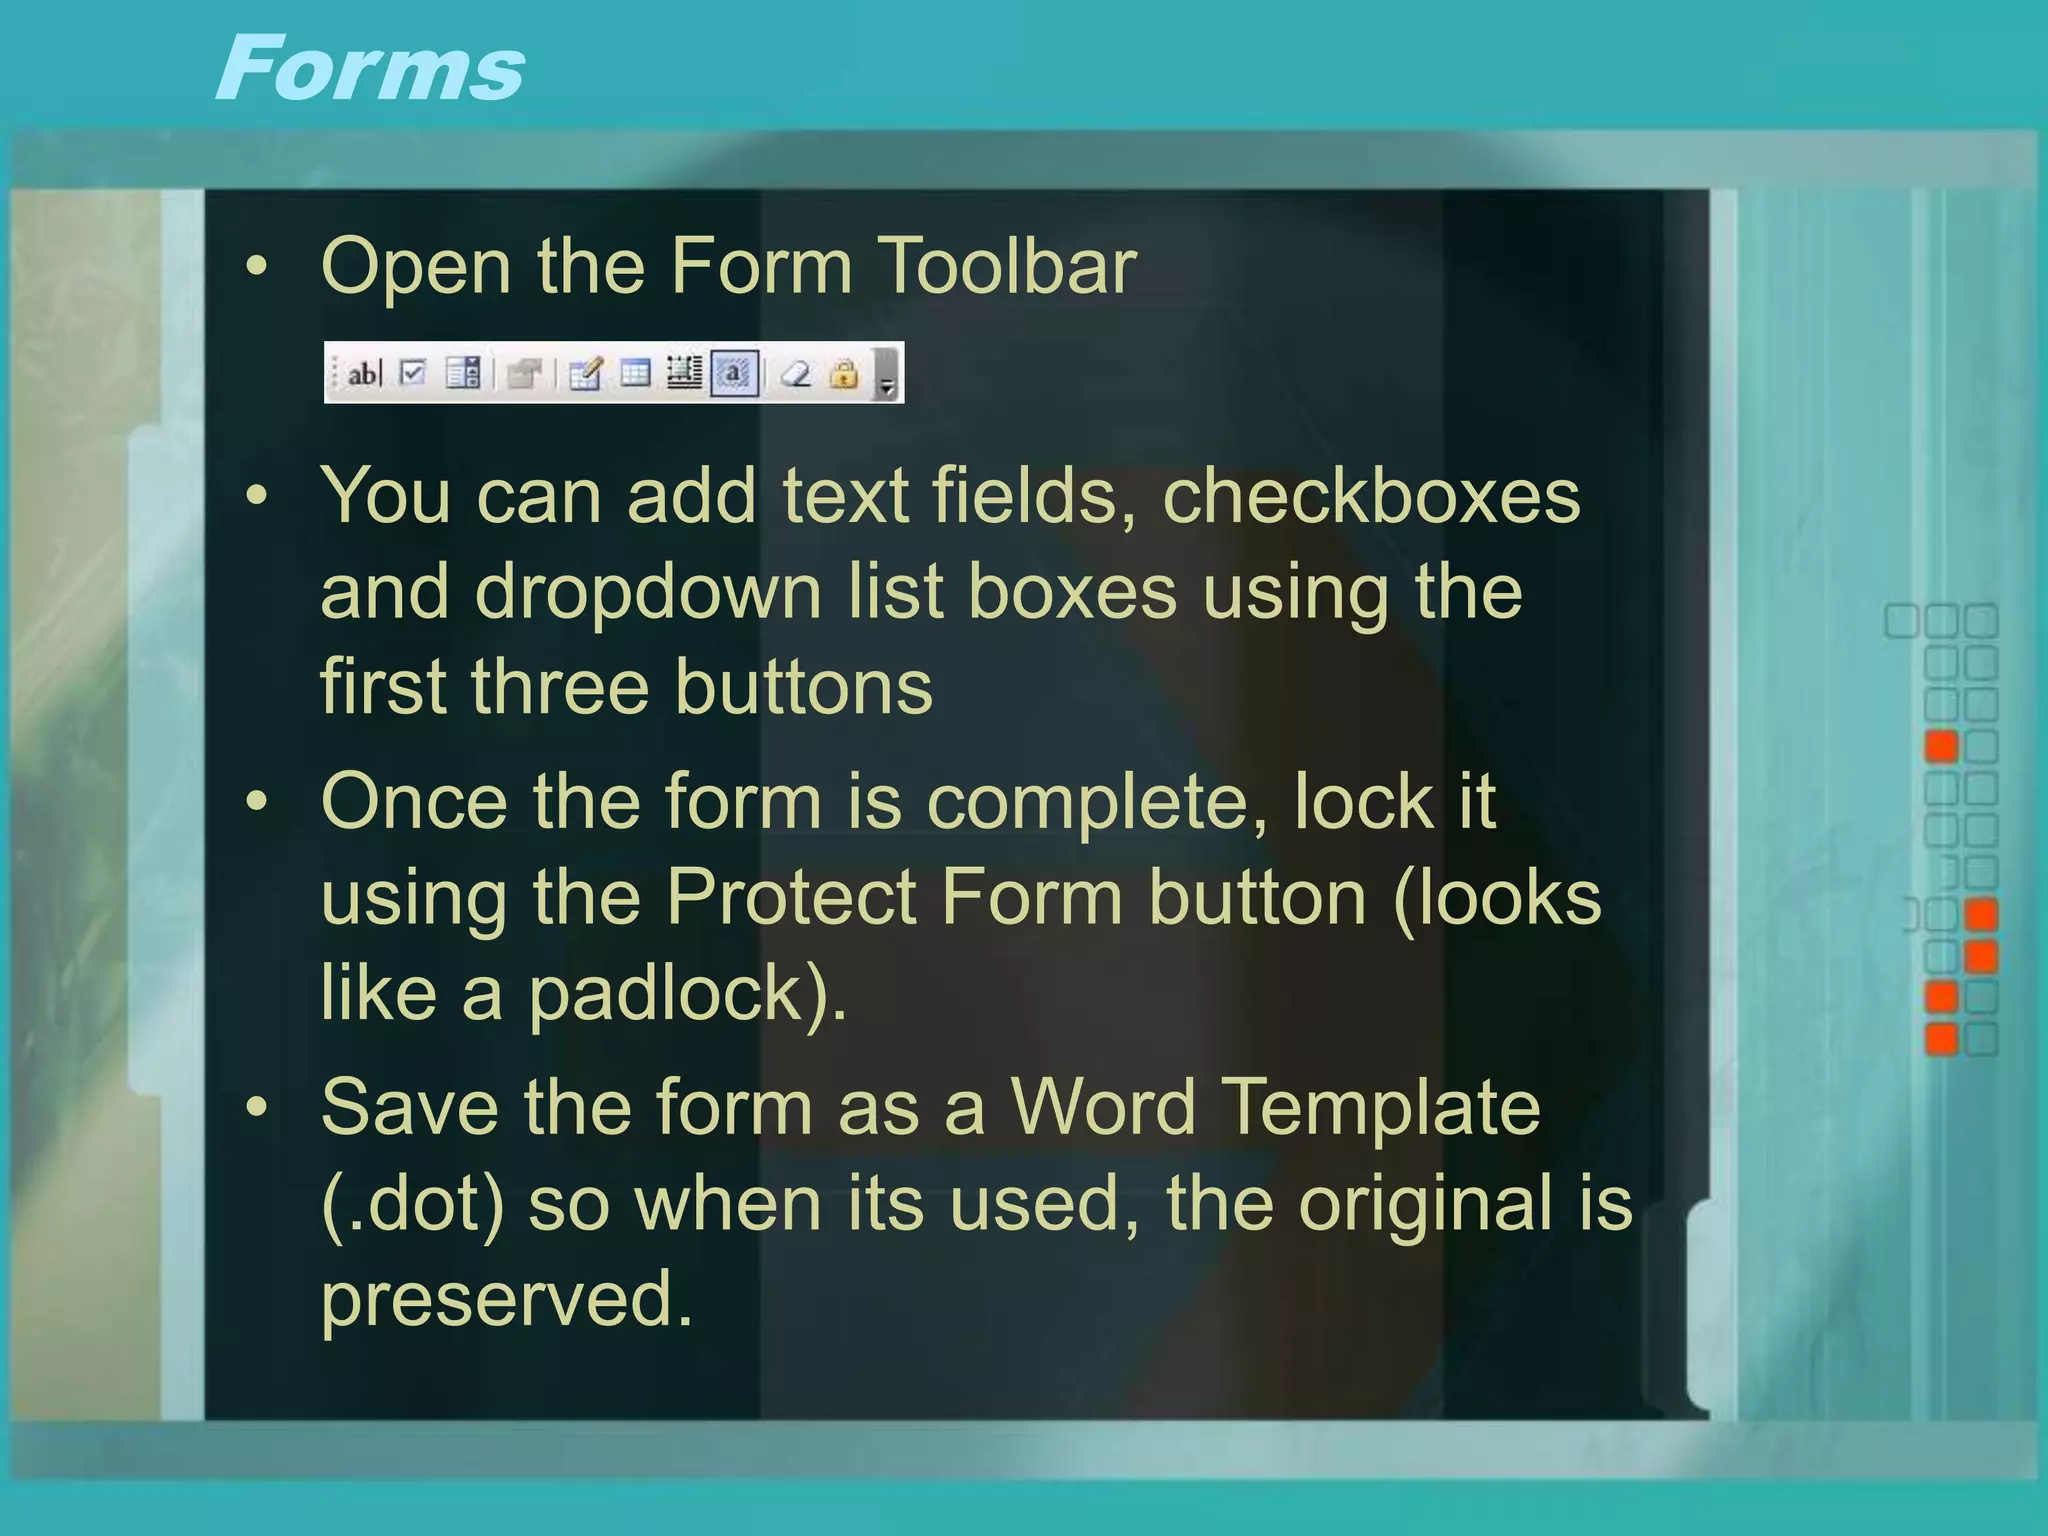
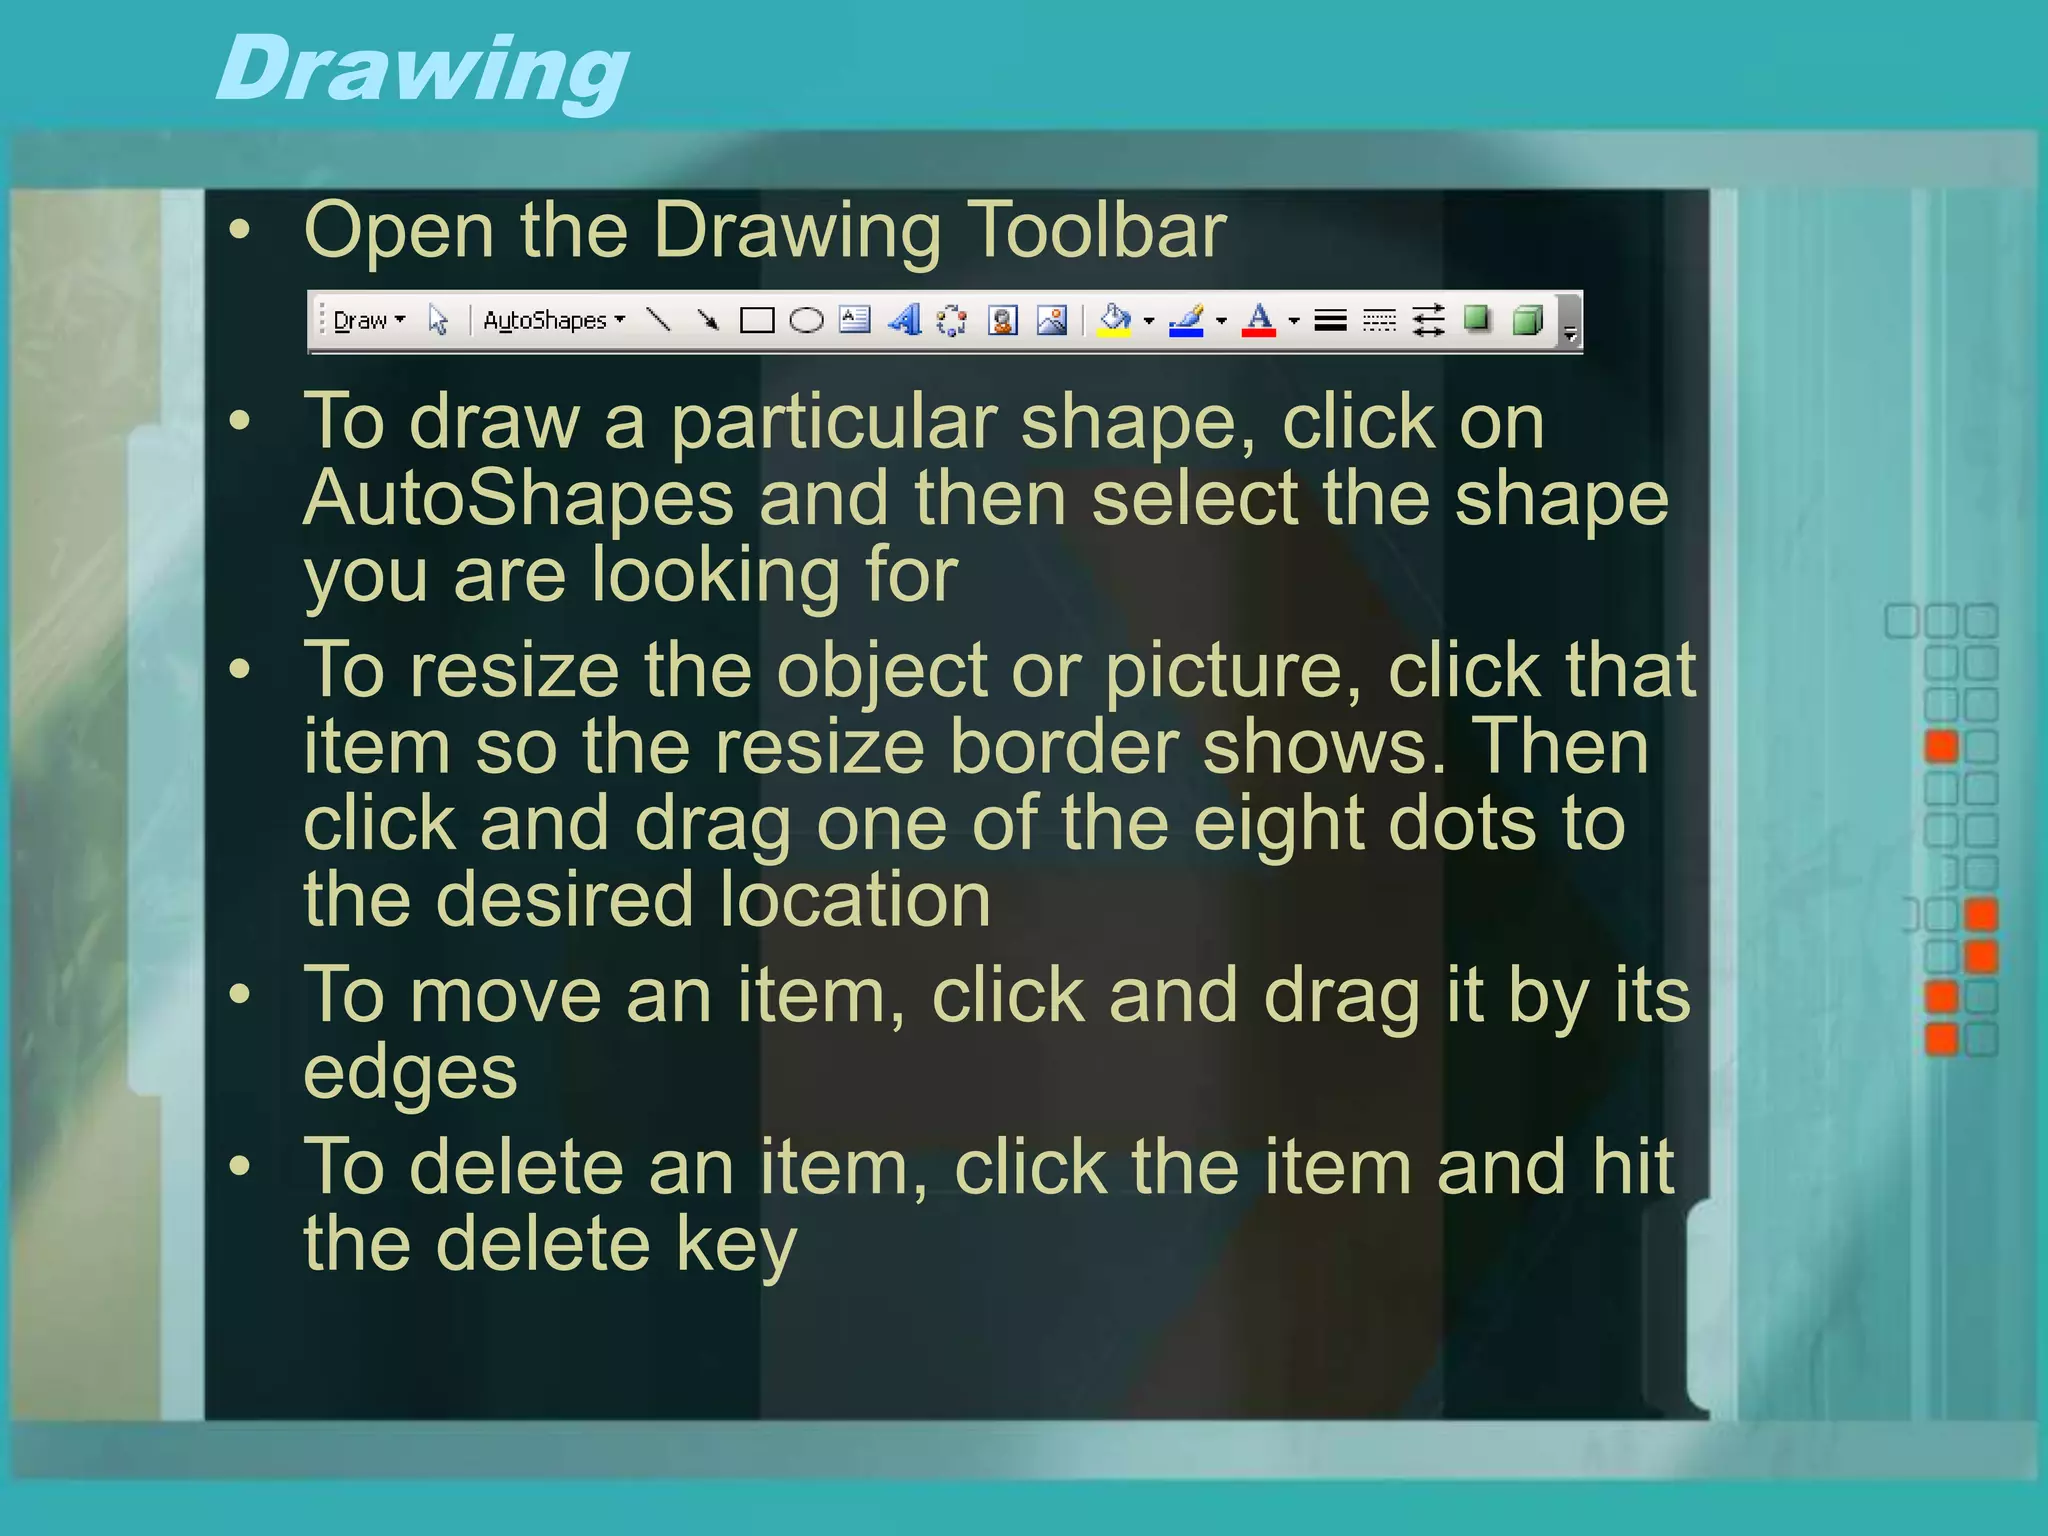
Advanced Microsoft Word
Topics
• Keyboard Shortcuts
• Customizing Toolbars and Menus
• Auto Format & Auto Correct
• Tabs
• Inserting Pictures and Objects
• Mail Merges
• Envelopes
• Templates
• Forms
• Drawing
• Macros
Keyboard Shortcuts
Keyboard Shortcuts
Customizing Toolbars and Menus
• Right-click on the toolbar to bring up list
of toolbars
• Select a toolbar to display/hide it
• Choose Customize to alter Toolbars
and Menus
Customizing Toolbars and Menus
• Here you can add commands to the
toolbars and menus by simply dragging
them to where you want them
• You can delete an item by right-clicking
the item and choosing delete or by
dragging it off the toolbar or menu
Auto Format & Auto Correct
• Select Format  Auto Format
• Click Options
Here you can change
the defaults for how
word automatically
tries to fix your typing
as you work or turn it
off entirely.
Tabs
Tabs are used to align text anywhere in your document. They
can be set for an entire document or a specific set of lines.
Tabs
Inserting a Tab:
1. Make sure the tab button on the left of the ruler displays
the tab you wish to insert. If not click the tab button until
the desired tab type is displayed
2. On the ruler, click where you want the tab to be
3. To move the tab, click and drag it to its new location
Deleting a tab
1. Drag the tab off the ruler
2. Release the mouse button to make it disappear
Inserting Pictures and Objects
Inserting Pictures
1. Go to Insert  Picture  From File
2. Browse for to select the desired file
3. Click insert or double-click the file
4. You can resize the picture by clicking on it and using the
resizing handles on the sides and corners
Inserting Clip Art
1. Go to Insert  Picture  Clip Art
2. Find your desired clip art and select it
3. Click the Insert Clip Art button
4. You can resize the clip art by clicking on it and using the
resizing handles on the sides and corners
Inserting an object
1. Go to Insert  Object
2. Select the desired object type and click ok
3. Depending on the object inserted it may have additional
properties or actions that can be performed.
Inserting Pictures and Objects
Formatting Pictures and Clip Art
1. Click on the picture
2. Right-click and choose format picture OR click Format 
Picture
3. There are tabs for setting color, size, layout, crop and
several other properties
Inserting and Formatting WordArt
1. Go to Insert  Picture  WordArt or click on the WordArt
button on the drawing toolbar.
2. Select the type of WordArt drawing object you want, then
click OK.
3. In the Edit WordArt Text dialog box, type the text you want
to be formatted and select any other options you want,
then click OK.
4. To add or change effects to the text, use the buttons on the
WordArt and Drawing toolbars.
Mail Merges
1. Click Tools  Mail Merge
2. In the dialog box, click “Create” under “Main
Document.” Choose the type of merged document
you want to create. Word will ask you if you want to
use the active window or open a new document
3. Next, click “Get Data.” A drop down menu will
appear. If you have already created a data source
(for example, an excel or text file) choose “Open
Data Source” and select that file. If not, choose
“Create Data Source” and follow the instructions to
create your own data source.
4. Word will then ask you to edit the main document in
order to add merge fields.
5. Insert fields using the “Insert Merge Field” button on
the toolbar, you can also insert conditional logic
using the “Insert Word Field” button.
6. After you insert all your merge fields, you can click
the Mail Merge button (3rd button from the right on
the Mail Merge Toolbar). You can also select Tools 
Mail Merge  Merge from the menu.
Envelopes
• Select Tools  Envelopes and Labels
• Enter the Delivery and Return addresses
• Click Options to change things like envelope size and
feed orientations for your printer.
• To print multiple envelopes, use a Mail Merge
Templates
• To create a template document, simply
click File  Save As and change the
“Save as type” option to “Document
Template (.dot).” Then if you open a
template and make changes, clicking
save will require you to save as a
different name, thus preserving your
template.
– An example of a template is normal.dot,
which is the default blank document that
opens whenever you start word
Forms
• Open the Form Toolbar
• You can add text fields, checkboxes
and dropdown list boxes using the
first three buttons
• Once the form is complete, lock it
using the Protect Form button (looks
like a padlock).
• Save the form as a Word Template
(.dot) so when its used, the original is
preserved.
Drawing
• Open the Drawing Toolbar
• To draw a particular shape, click on
AutoShapes and then select the shape
you are looking for
• To resize the object or picture, click that
item so the resize border shows. Then
click and drag one of the eight dots to
the desired location
• To move an item, click and drag it by its
edges
• To delete an item, click the item and hit
the delete key
Macros
• Microsoft Office uses Visual Basic for
Applications (VBA) programming
language in order to allow users to
write their own code directly into Word
or any other Microsoft Office product
• The code you can create could server
many different purposes.
– Load data from a file
– Format a file based on pre-defined logic
– Whatever you can think of
Macros
• So what is a Macro then?
– A macro is a function which contains VBA code.
• You can record your own macros in order to
save time on repetitive tasks
• To record a macro, open the Visual Basic
toolbar
• Click the red record button to begin recording
the macro. Then once you’ve done everything
you want to be in the macro, click the blue
square to stop recording.
• Then you can create buttons on the toolbar or
menu items that launch your macro

Advanced Microsoft Word.ppt

  • 1.
  • 2.
    Topics • Keyboard Shortcuts •Customizing Toolbars and Menus • Auto Format & Auto Correct • Tabs • Inserting Pictures and Objects • Mail Merges • Envelopes • Templates • Forms • Drawing • Macros
  • 3.
  • 4.
  • 5.
    Customizing Toolbars andMenus • Right-click on the toolbar to bring up list of toolbars • Select a toolbar to display/hide it • Choose Customize to alter Toolbars and Menus
  • 6.
    Customizing Toolbars andMenus • Here you can add commands to the toolbars and menus by simply dragging them to where you want them • You can delete an item by right-clicking the item and choosing delete or by dragging it off the toolbar or menu
  • 7.
    Auto Format &Auto Correct • Select Format  Auto Format • Click Options Here you can change the defaults for how word automatically tries to fix your typing as you work or turn it off entirely.
  • 8.
    Tabs Tabs are usedto align text anywhere in your document. They can be set for an entire document or a specific set of lines.
  • 9.
    Tabs Inserting a Tab: 1.Make sure the tab button on the left of the ruler displays the tab you wish to insert. If not click the tab button until the desired tab type is displayed 2. On the ruler, click where you want the tab to be 3. To move the tab, click and drag it to its new location Deleting a tab 1. Drag the tab off the ruler 2. Release the mouse button to make it disappear
  • 10.
    Inserting Pictures andObjects Inserting Pictures 1. Go to Insert  Picture  From File 2. Browse for to select the desired file 3. Click insert or double-click the file 4. You can resize the picture by clicking on it and using the resizing handles on the sides and corners Inserting Clip Art 1. Go to Insert  Picture  Clip Art 2. Find your desired clip art and select it 3. Click the Insert Clip Art button 4. You can resize the clip art by clicking on it and using the resizing handles on the sides and corners Inserting an object 1. Go to Insert  Object 2. Select the desired object type and click ok 3. Depending on the object inserted it may have additional properties or actions that can be performed.
  • 11.
    Inserting Pictures andObjects Formatting Pictures and Clip Art 1. Click on the picture 2. Right-click and choose format picture OR click Format  Picture 3. There are tabs for setting color, size, layout, crop and several other properties Inserting and Formatting WordArt 1. Go to Insert  Picture  WordArt or click on the WordArt button on the drawing toolbar. 2. Select the type of WordArt drawing object you want, then click OK. 3. In the Edit WordArt Text dialog box, type the text you want to be formatted and select any other options you want, then click OK. 4. To add or change effects to the text, use the buttons on the WordArt and Drawing toolbars.
  • 12.
    Mail Merges 1. ClickTools  Mail Merge 2. In the dialog box, click “Create” under “Main Document.” Choose the type of merged document you want to create. Word will ask you if you want to use the active window or open a new document 3. Next, click “Get Data.” A drop down menu will appear. If you have already created a data source (for example, an excel or text file) choose “Open Data Source” and select that file. If not, choose “Create Data Source” and follow the instructions to create your own data source. 4. Word will then ask you to edit the main document in order to add merge fields. 5. Insert fields using the “Insert Merge Field” button on the toolbar, you can also insert conditional logic using the “Insert Word Field” button. 6. After you insert all your merge fields, you can click the Mail Merge button (3rd button from the right on the Mail Merge Toolbar). You can also select Tools  Mail Merge  Merge from the menu.
  • 13.
    Envelopes • Select Tools Envelopes and Labels • Enter the Delivery and Return addresses • Click Options to change things like envelope size and feed orientations for your printer. • To print multiple envelopes, use a Mail Merge
  • 14.
    Templates • To createa template document, simply click File  Save As and change the “Save as type” option to “Document Template (.dot).” Then if you open a template and make changes, clicking save will require you to save as a different name, thus preserving your template. – An example of a template is normal.dot, which is the default blank document that opens whenever you start word
  • 15.
    Forms • Open theForm Toolbar • You can add text fields, checkboxes and dropdown list boxes using the first three buttons • Once the form is complete, lock it using the Protect Form button (looks like a padlock). • Save the form as a Word Template (.dot) so when its used, the original is preserved.
  • 16.
    Drawing • Open theDrawing Toolbar • To draw a particular shape, click on AutoShapes and then select the shape you are looking for • To resize the object or picture, click that item so the resize border shows. Then click and drag one of the eight dots to the desired location • To move an item, click and drag it by its edges • To delete an item, click the item and hit the delete key
  • 17.
    Macros • Microsoft Officeuses Visual Basic for Applications (VBA) programming language in order to allow users to write their own code directly into Word or any other Microsoft Office product • The code you can create could server many different purposes. – Load data from a file – Format a file based on pre-defined logic – Whatever you can think of
  • 18.
    Macros • So whatis a Macro then? – A macro is a function which contains VBA code. • You can record your own macros in order to save time on repetitive tasks • To record a macro, open the Visual Basic toolbar • Click the red record button to begin recording the macro. Then once you’ve done everything you want to be in the macro, click the blue square to stop recording. • Then you can create buttons on the toolbar or menu items that launch your macro