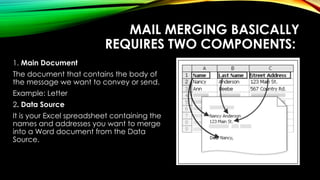
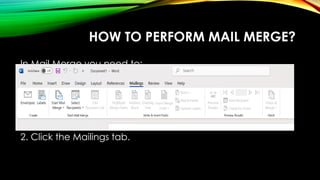
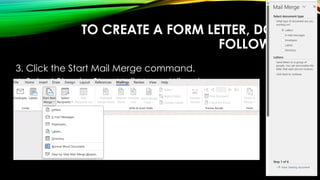
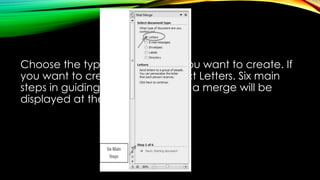
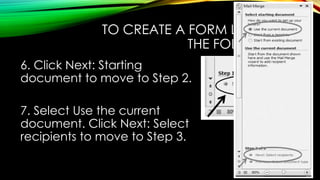
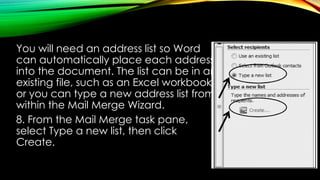
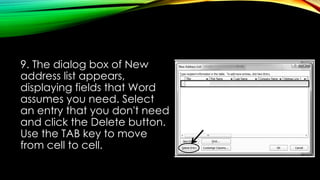
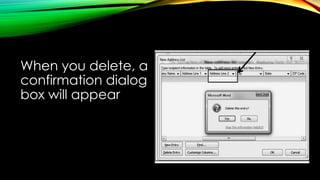
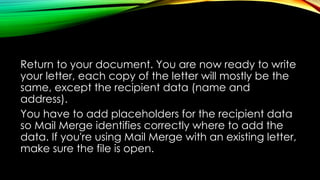
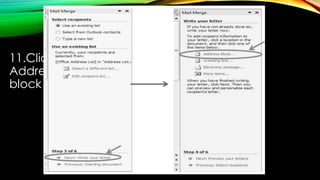
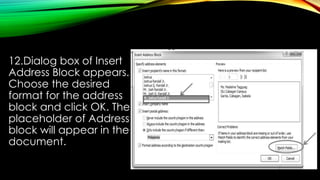
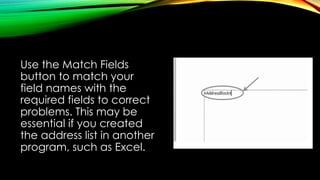
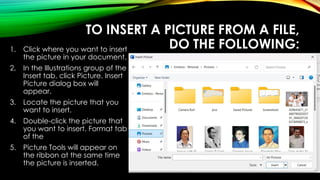
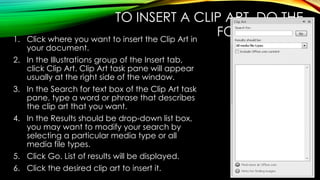
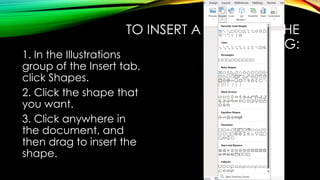
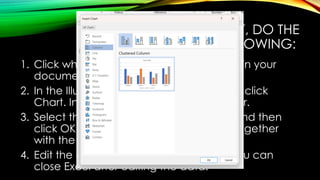
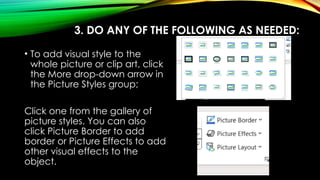
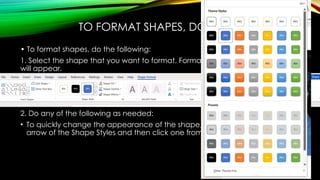
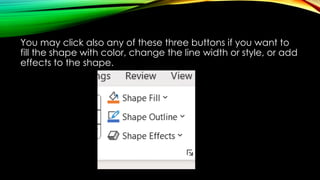
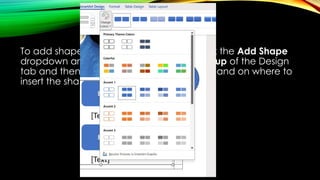
The document outlines advanced techniques for using Microsoft Word, specifically focusing on the mail merge feature, which allows users to create personalized documents for multiple recipients efficiently. It details the steps for performing a mail merge, inserting various types of illustrations such as pictures, charts, and shapes, and formatting those illustrations within Word. Additionally, the document includes activities and assessment questions aimed at reinforcing the concepts presented.

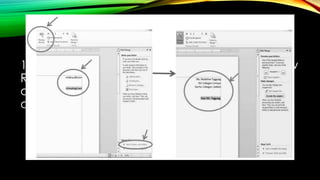
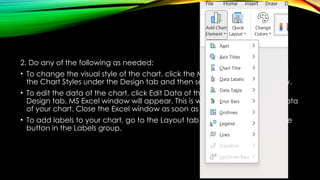
![TO INSERT A SMARTART, DO THE
FOLLOWING:
1. In the Illustrations group of the Insert tab, click
SmartArt. Choose a SmartArt Graphic dialog box
will appear.
2. Select from the list of SmartArt that you want and
then click OK.
3. Enter your text by clicking [Text] in the Text pane,
and then type your text. If the Text pane is not
visible, click the control as shown.](https://image.slidesharecdn.com/ictmodule4-240911122309-acc4202a/85/Empowerment-Technologies-Quarter-1-Module-4-Advanced-Techniques-using-Microsoft-Word-27-320.jpg)


![[EMPOWERMENT TECHNOLOGIES] - ADVANCED WORD PROCESSING SKILLS](https://cdn.slidesharecdn.com/ss_thumbnails/lesson3-advancedwordprocessingskills2-211128024207-thumbnail.jpg?width=640&height=640&fit=bounds)


![[EMPOWERMENT TECHNOLOGIES]-ADVANCED PRESENTATION SKILLS](https://cdn.slidesharecdn.com/ss_thumbnails/et-advancedpresentationskills-211128024220-thumbnail.jpg?width=640&height=640&fit=bounds)