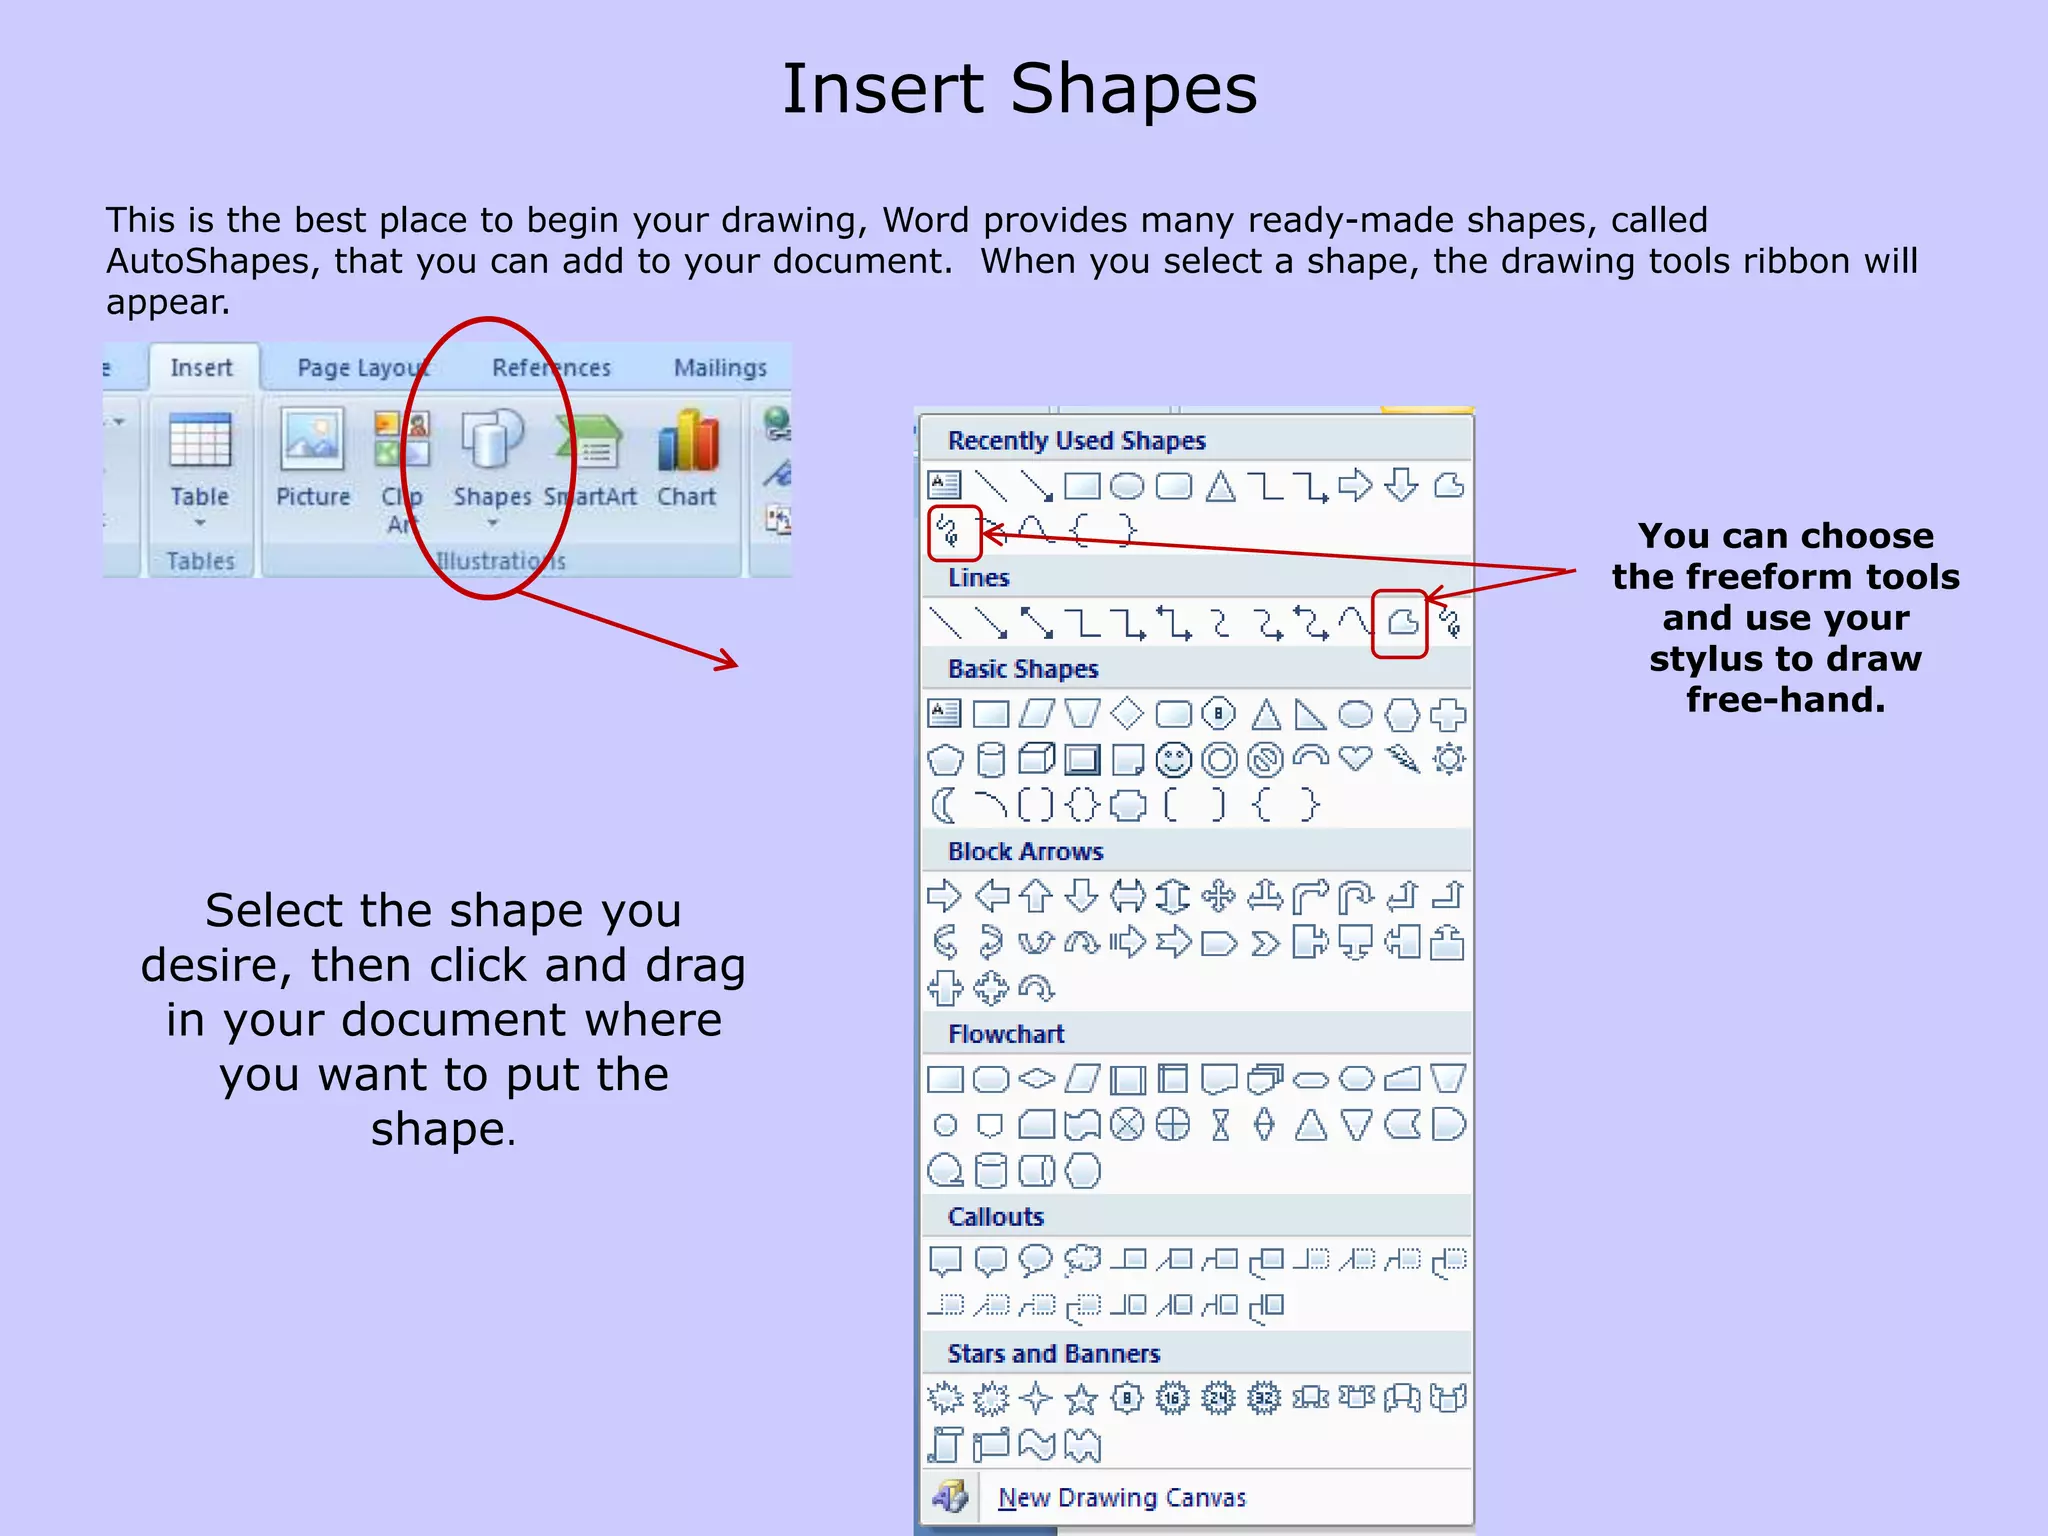
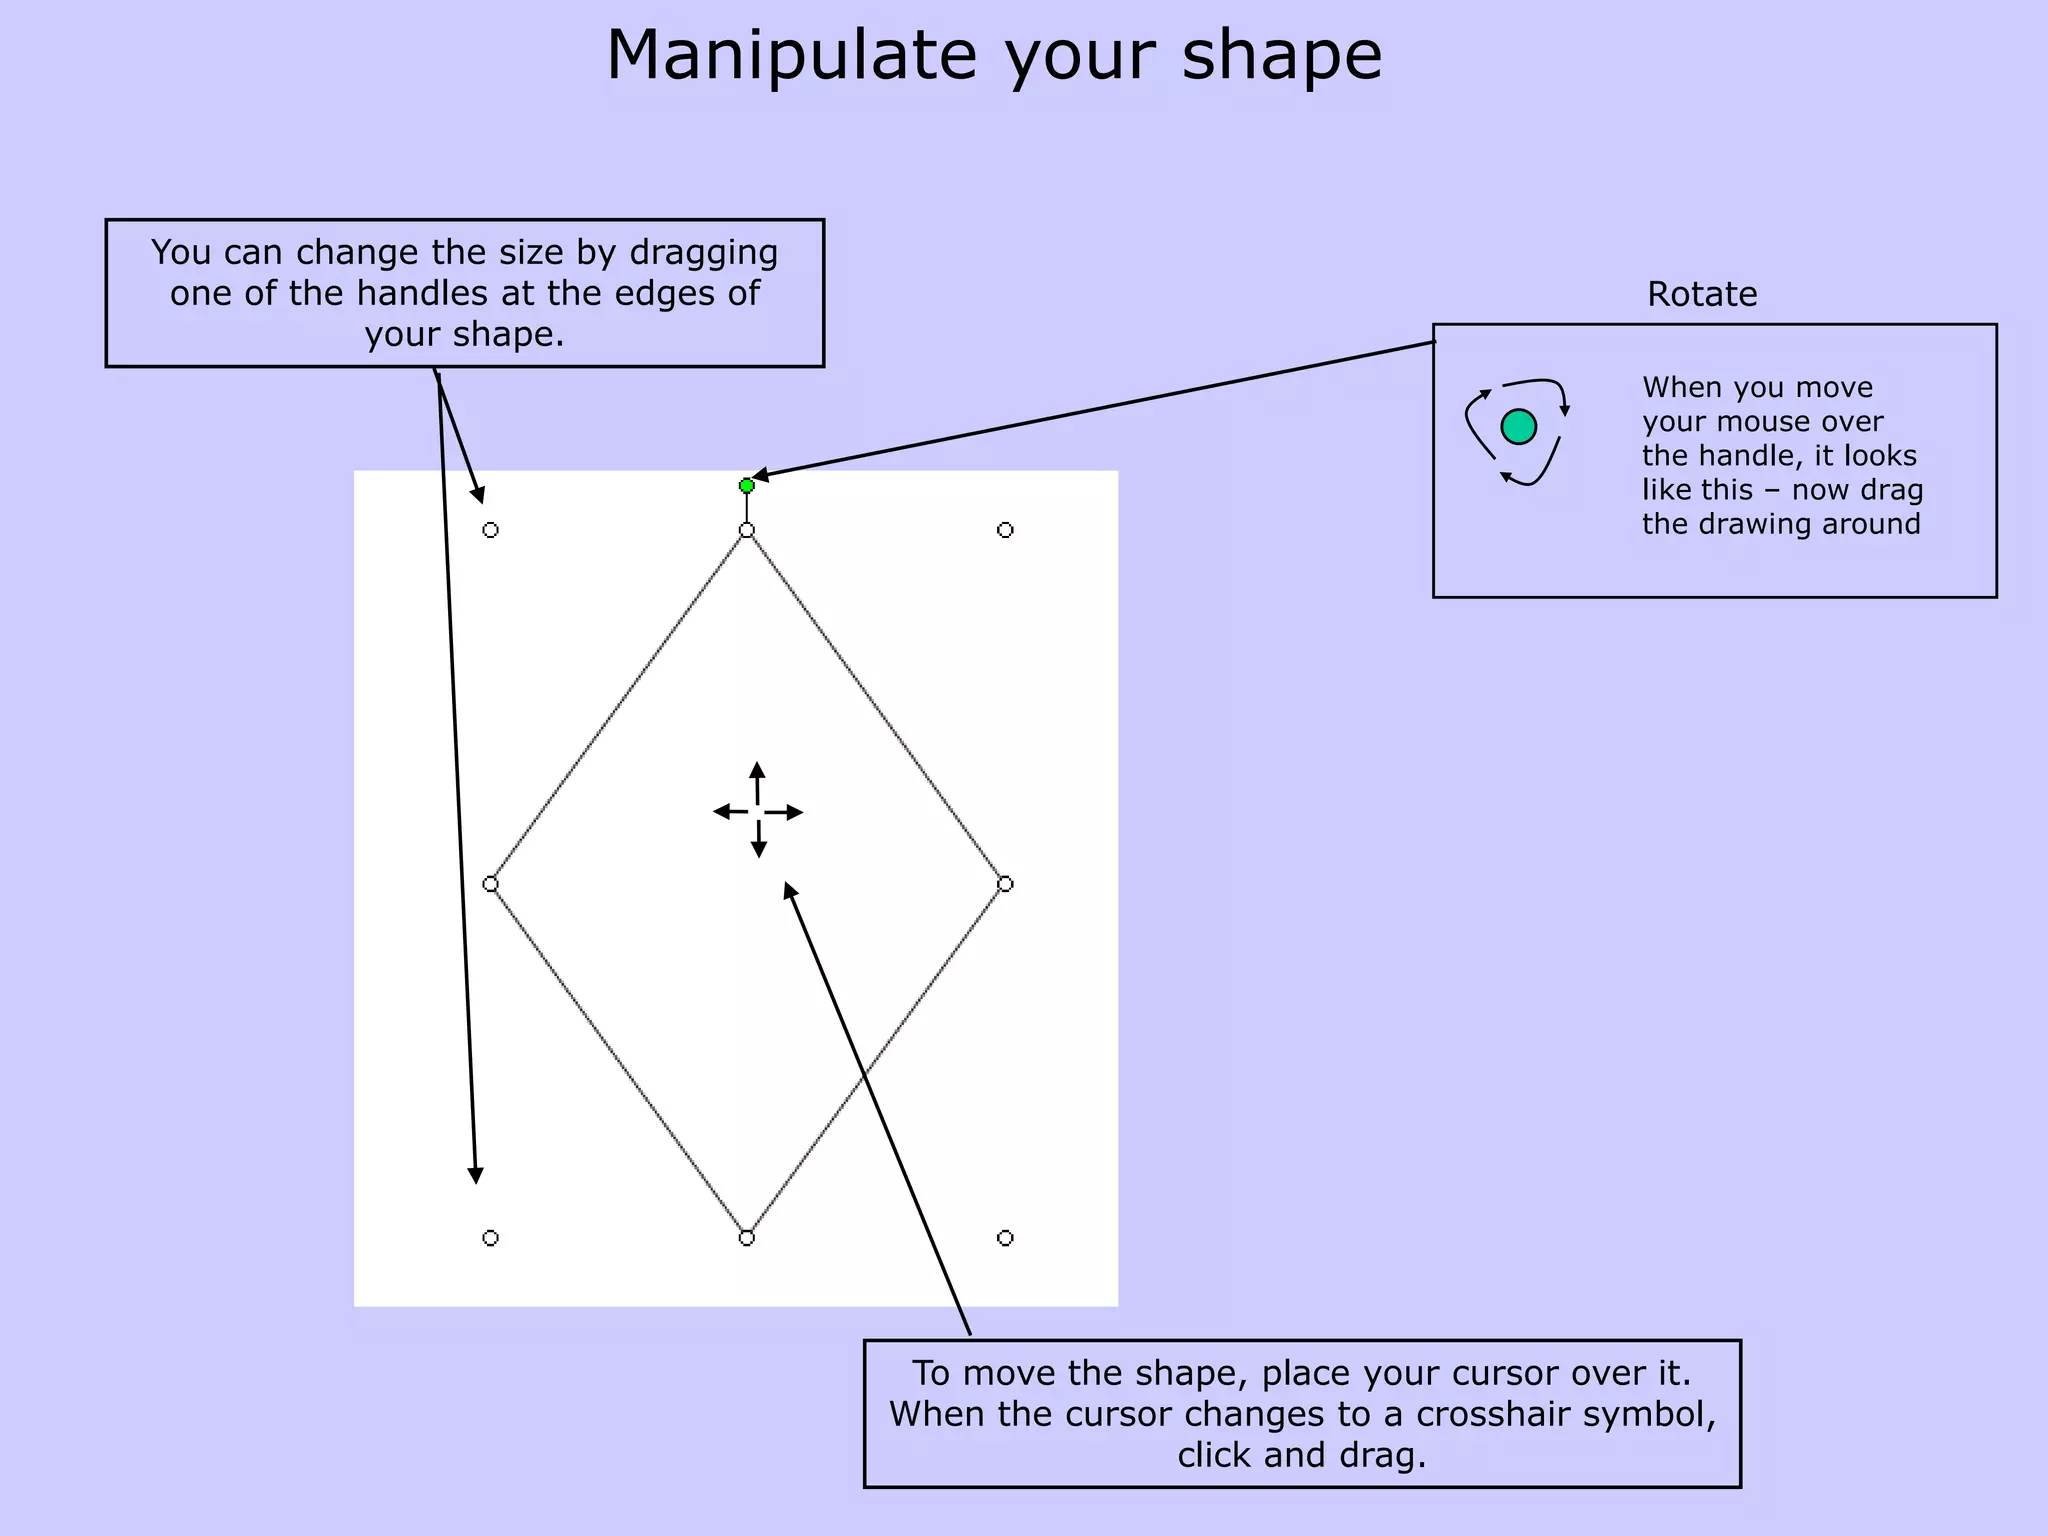
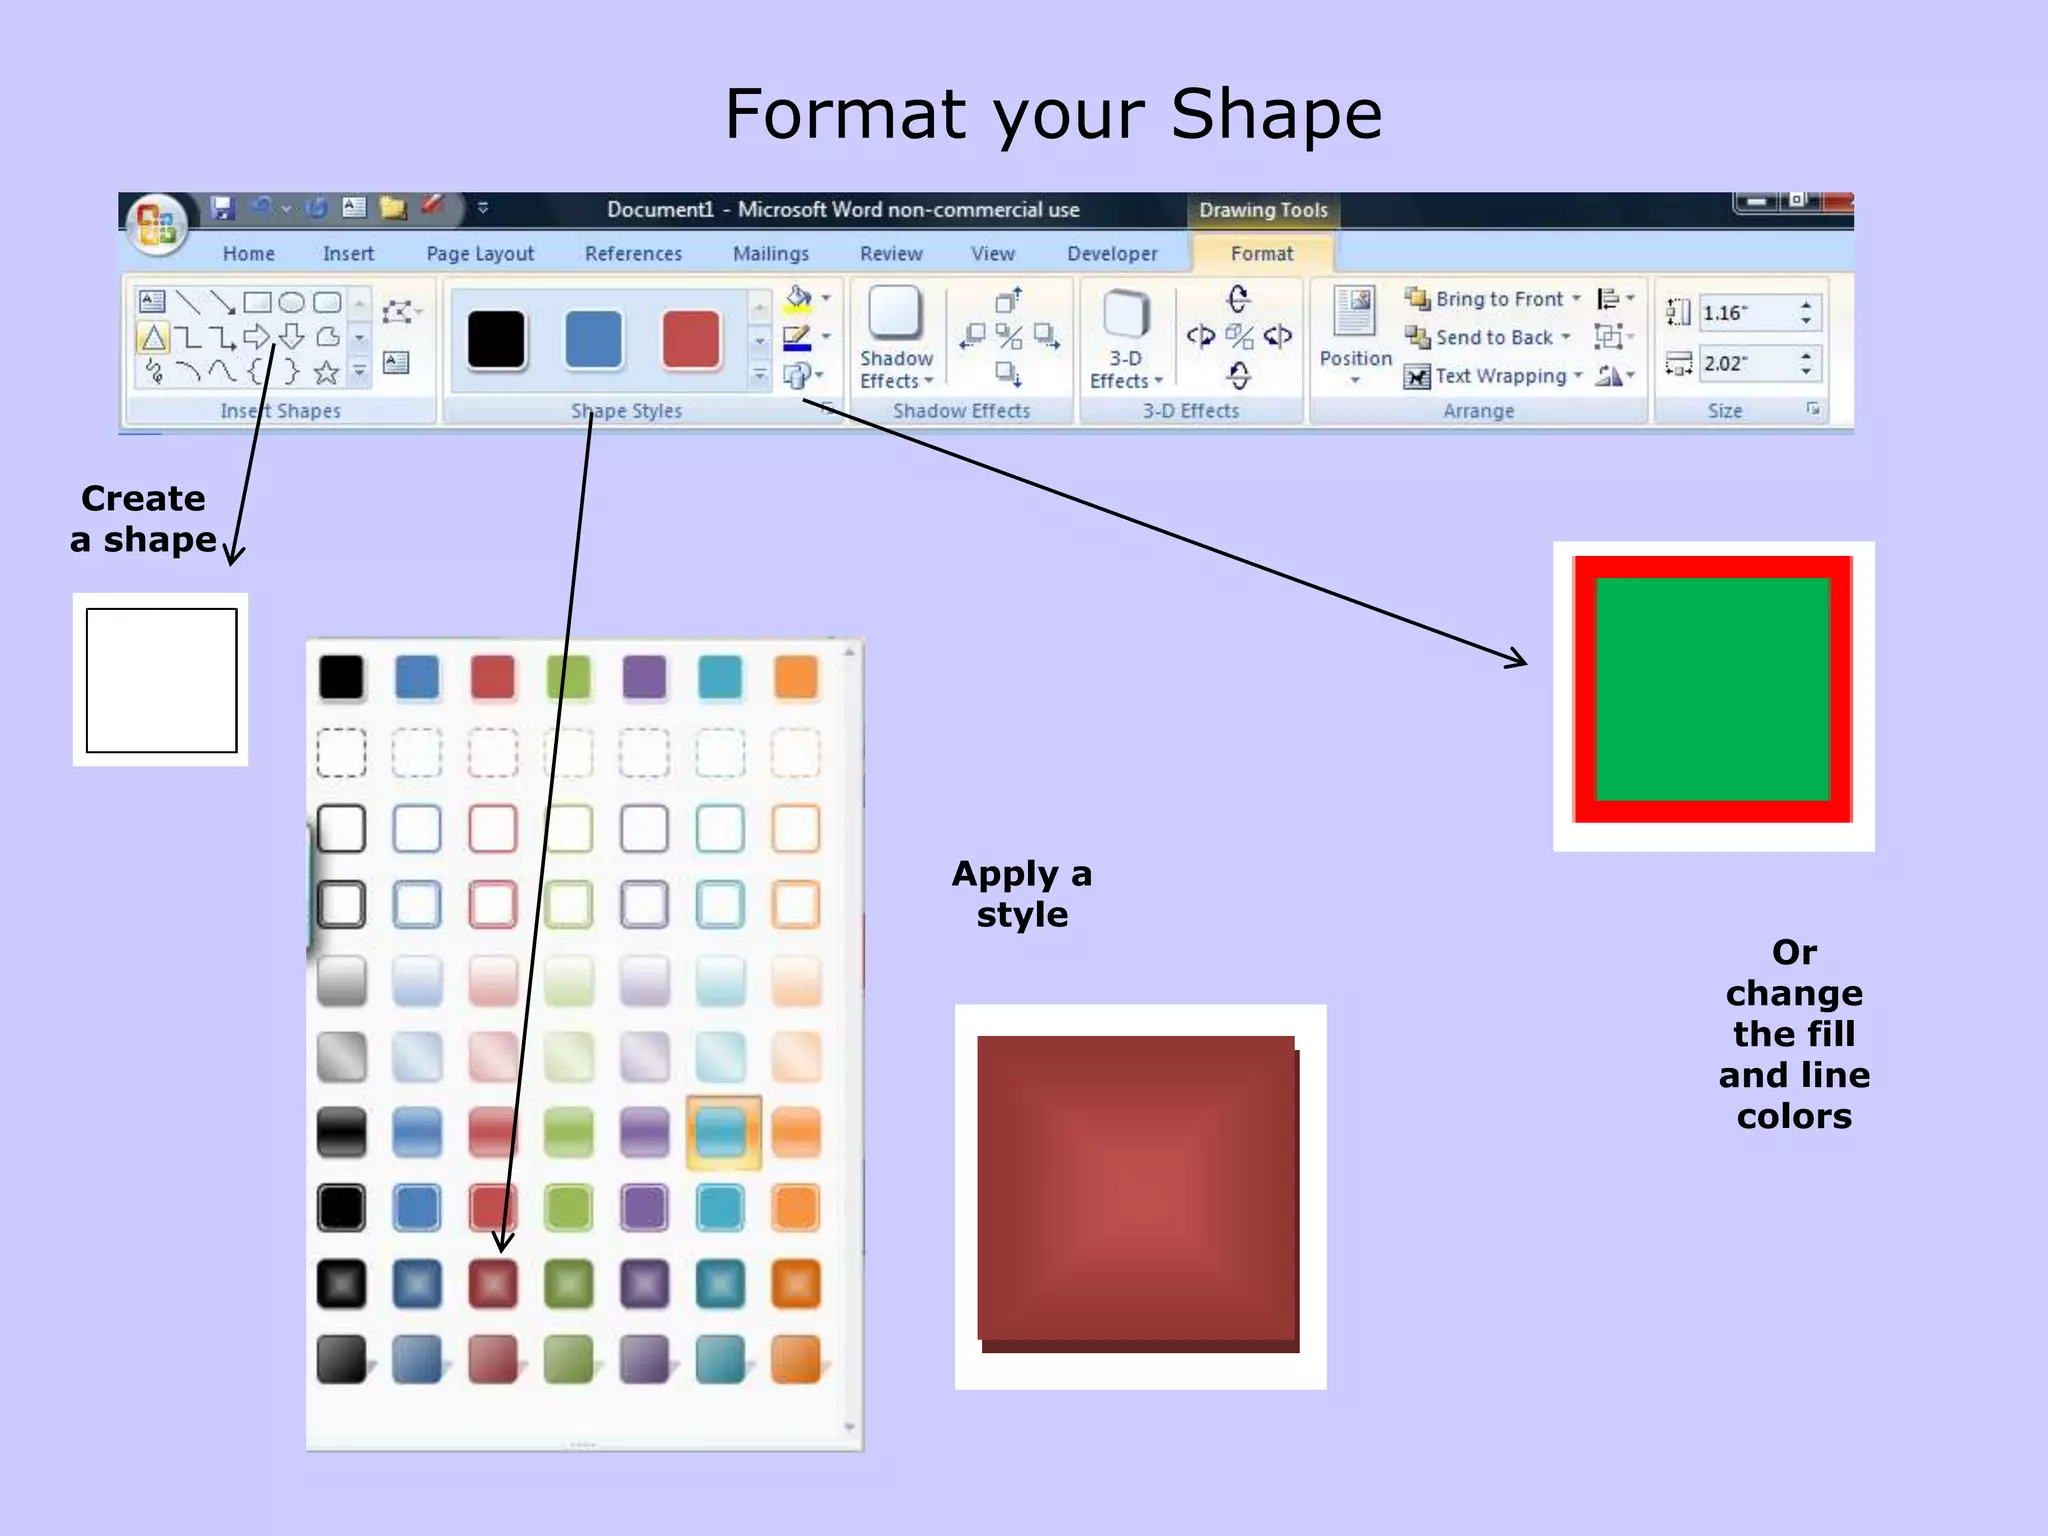
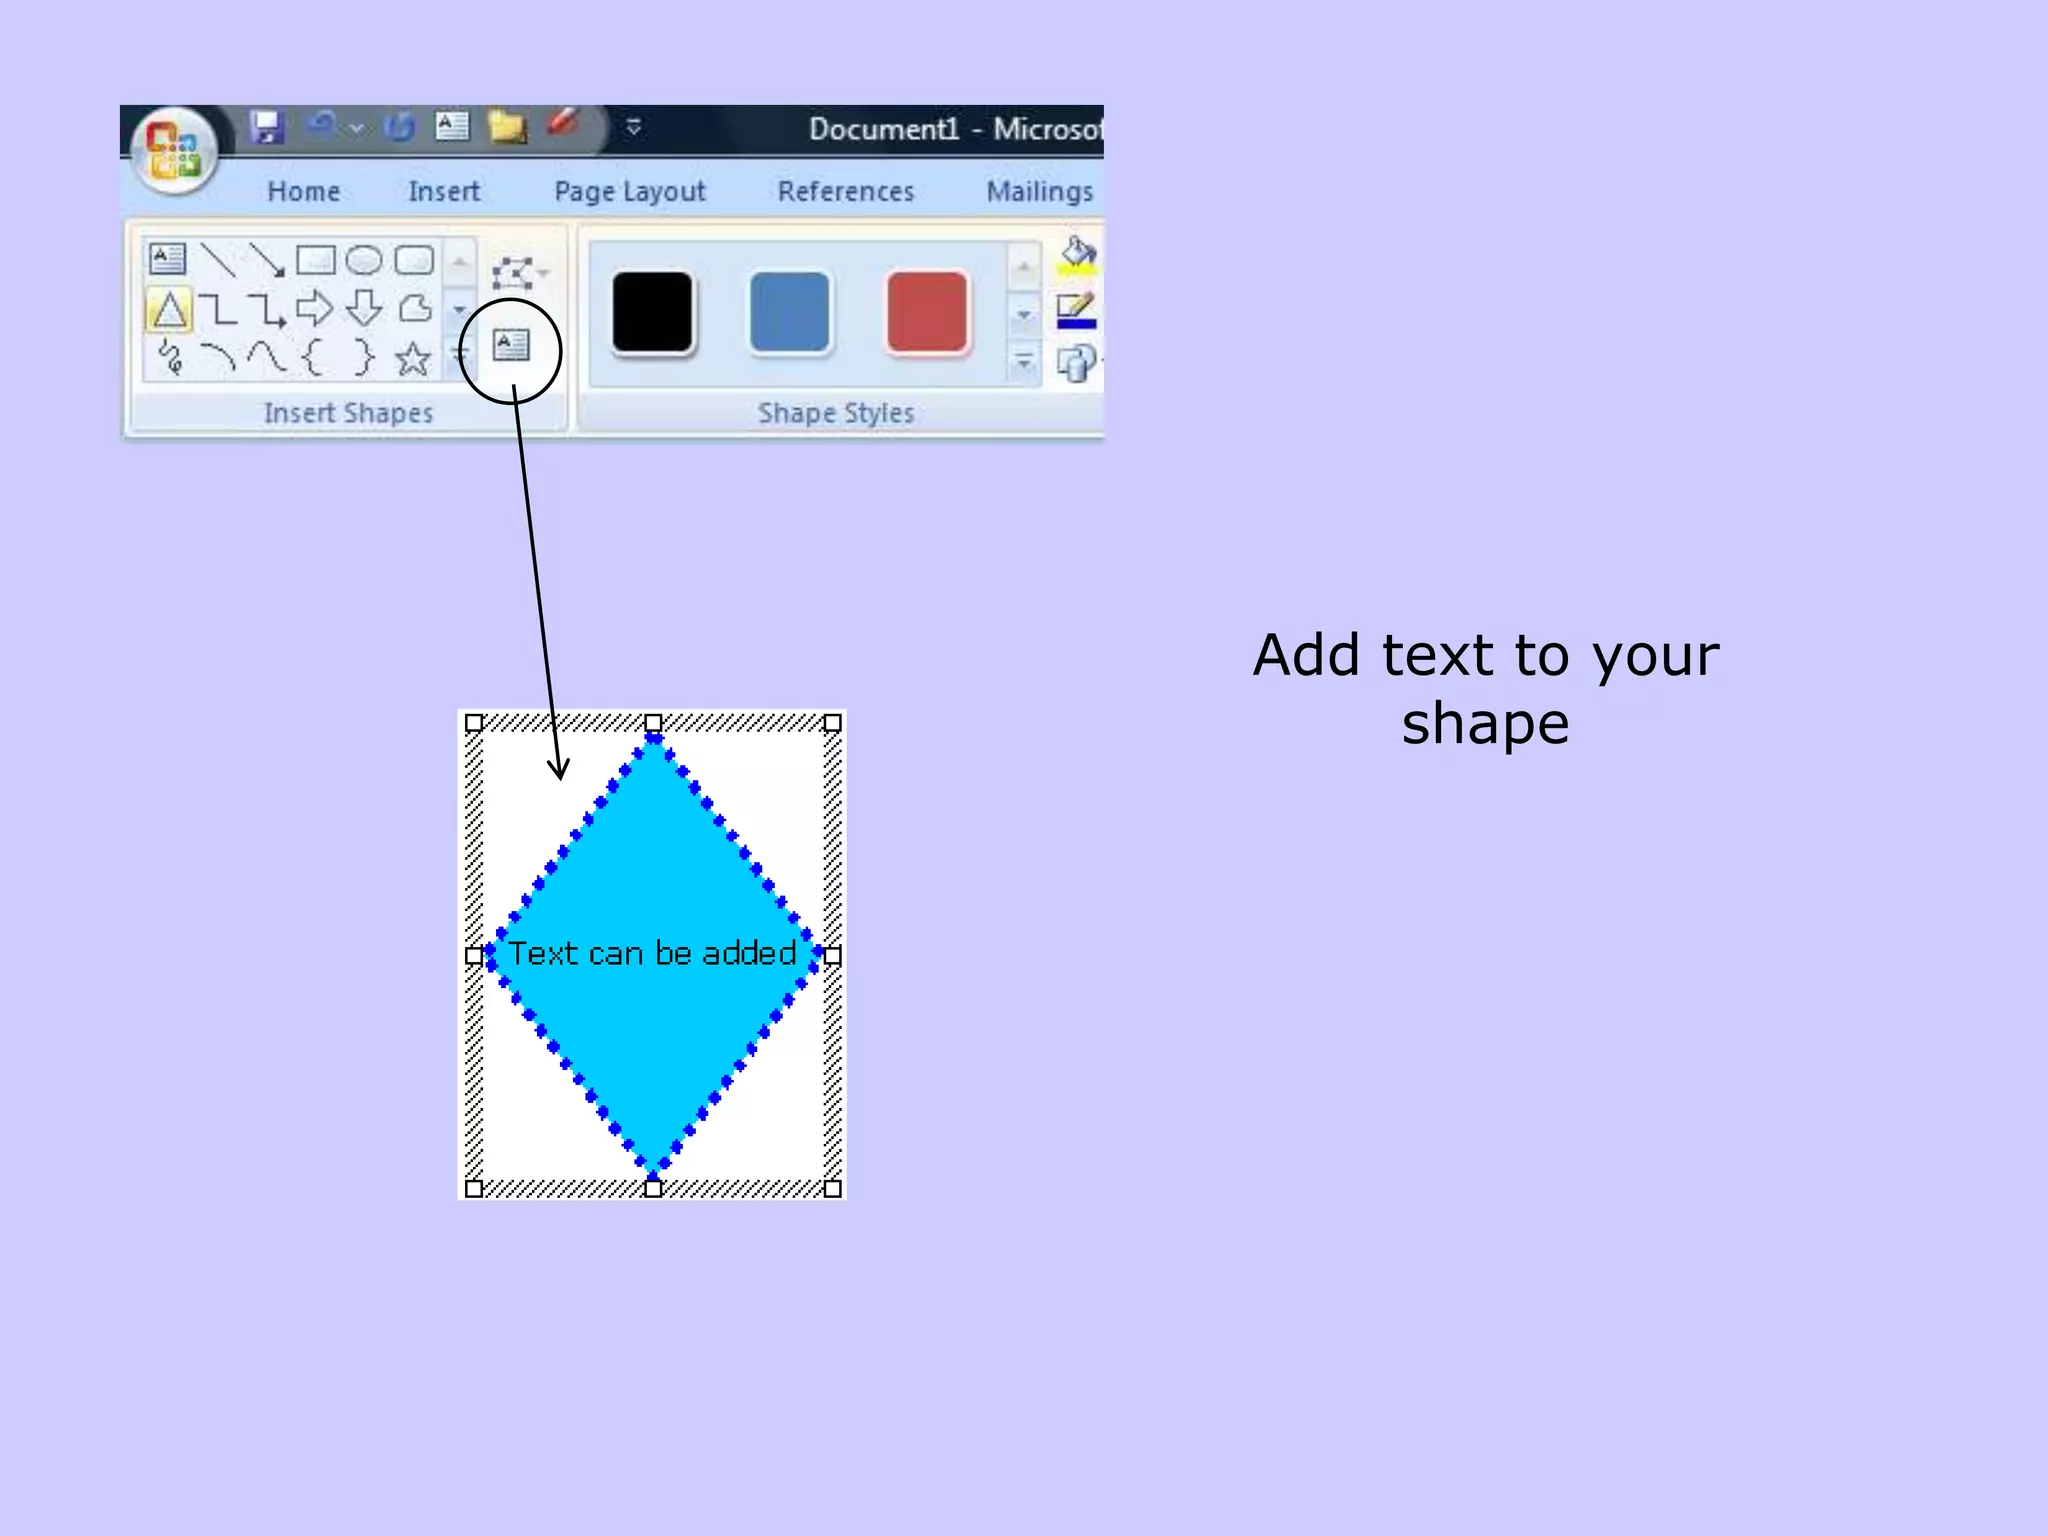
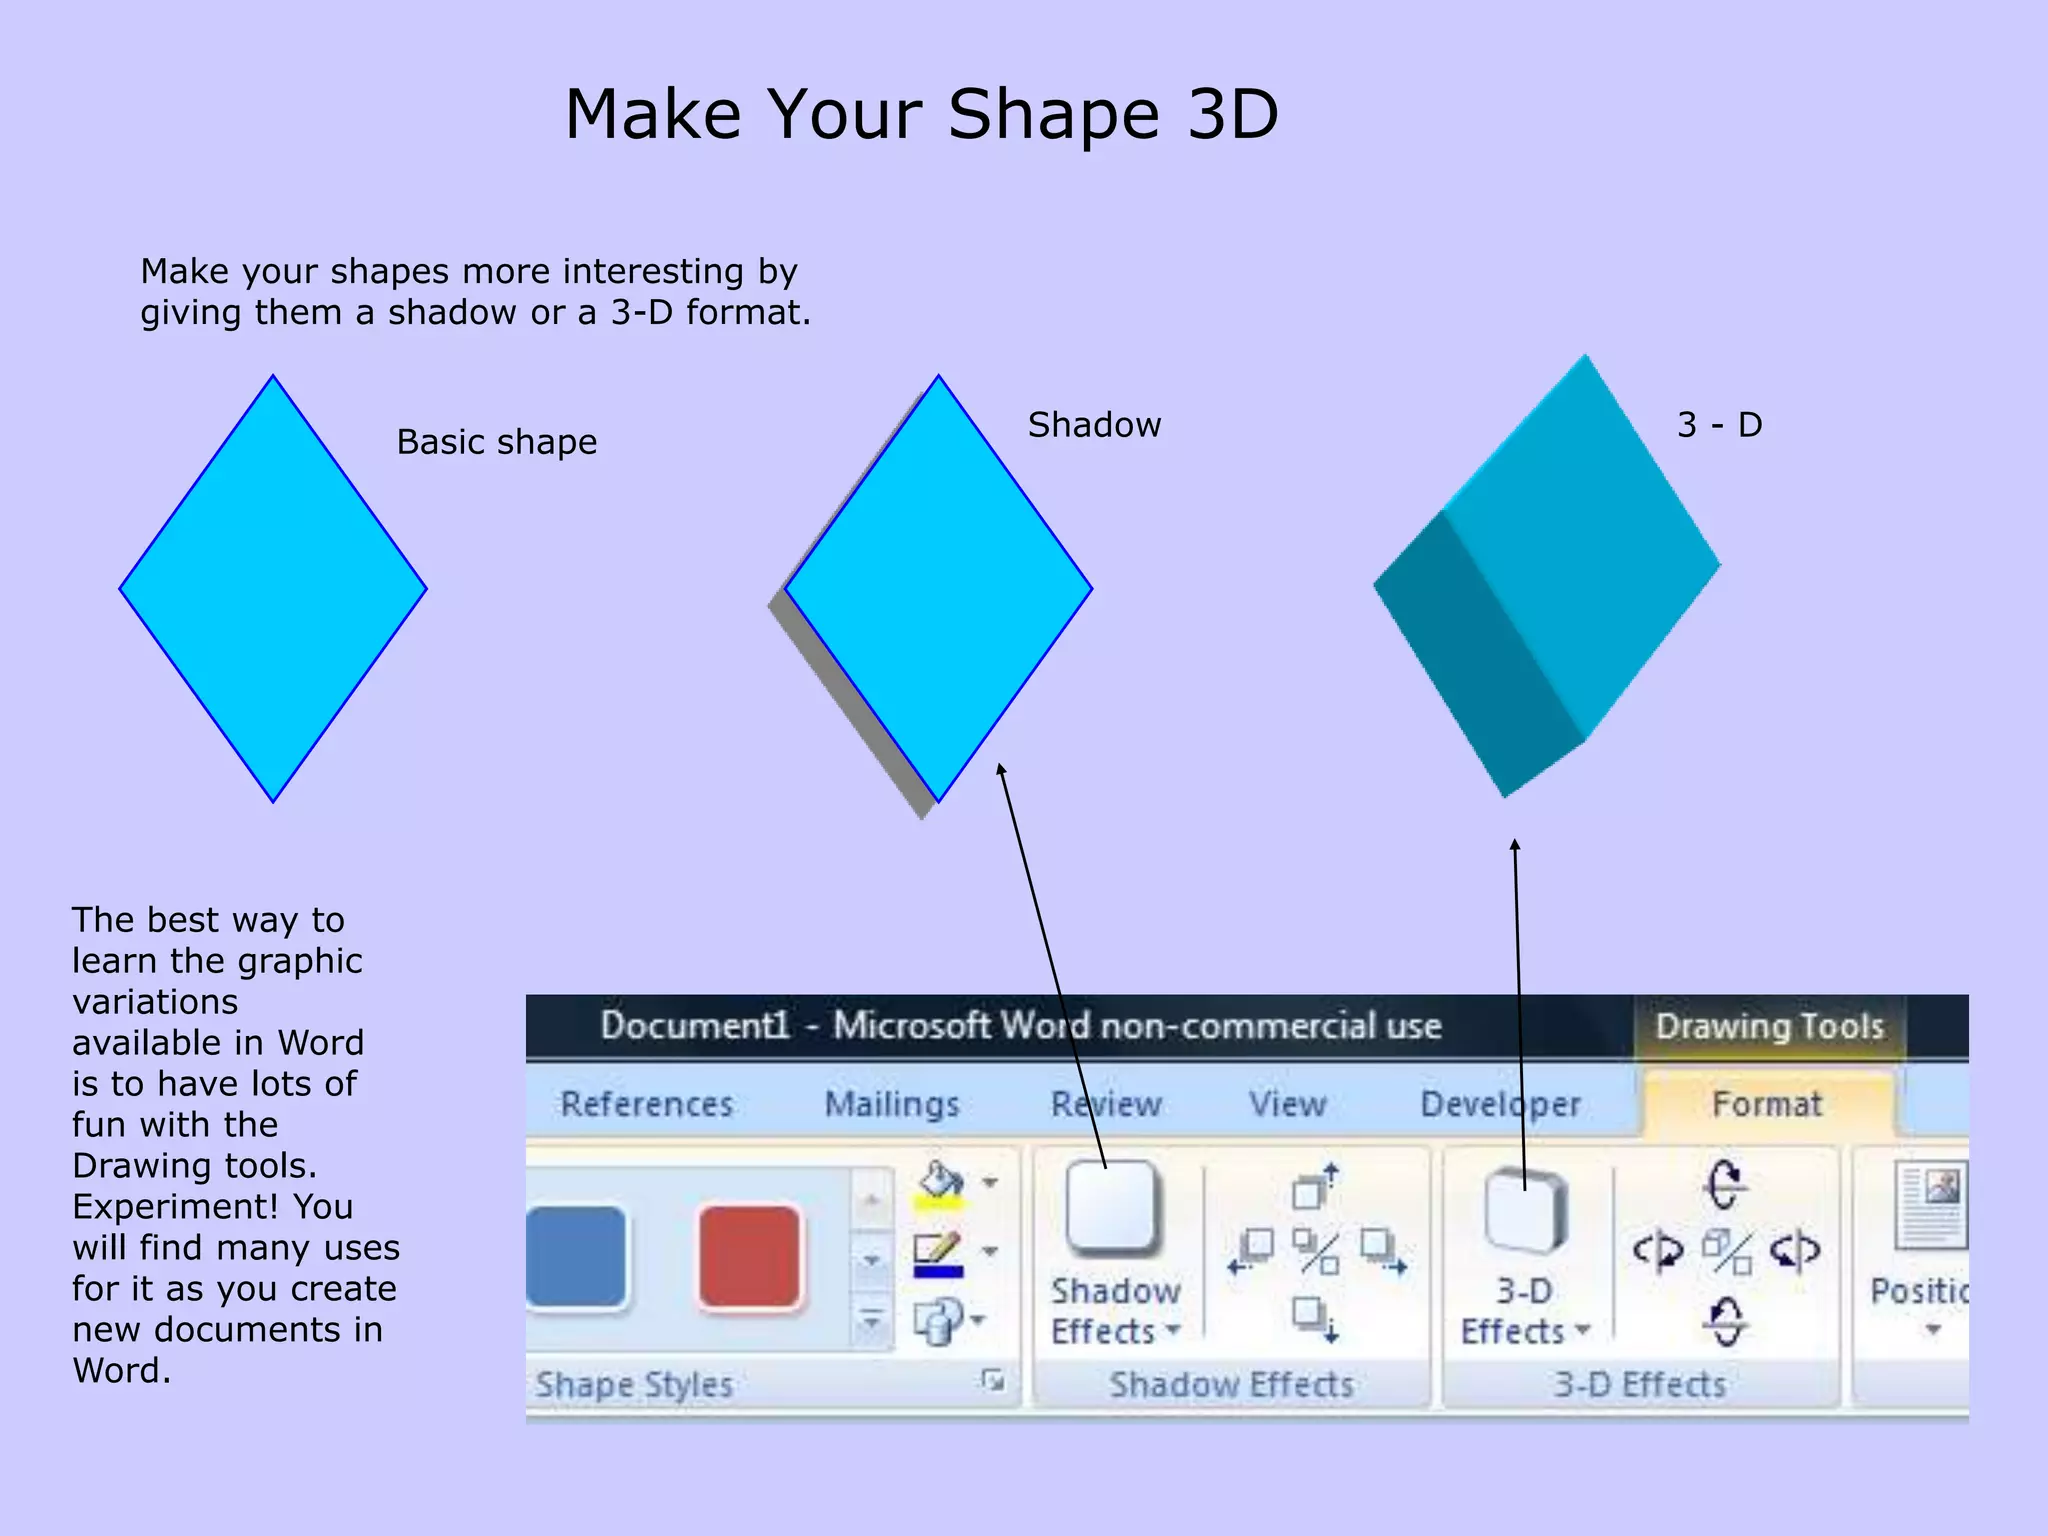
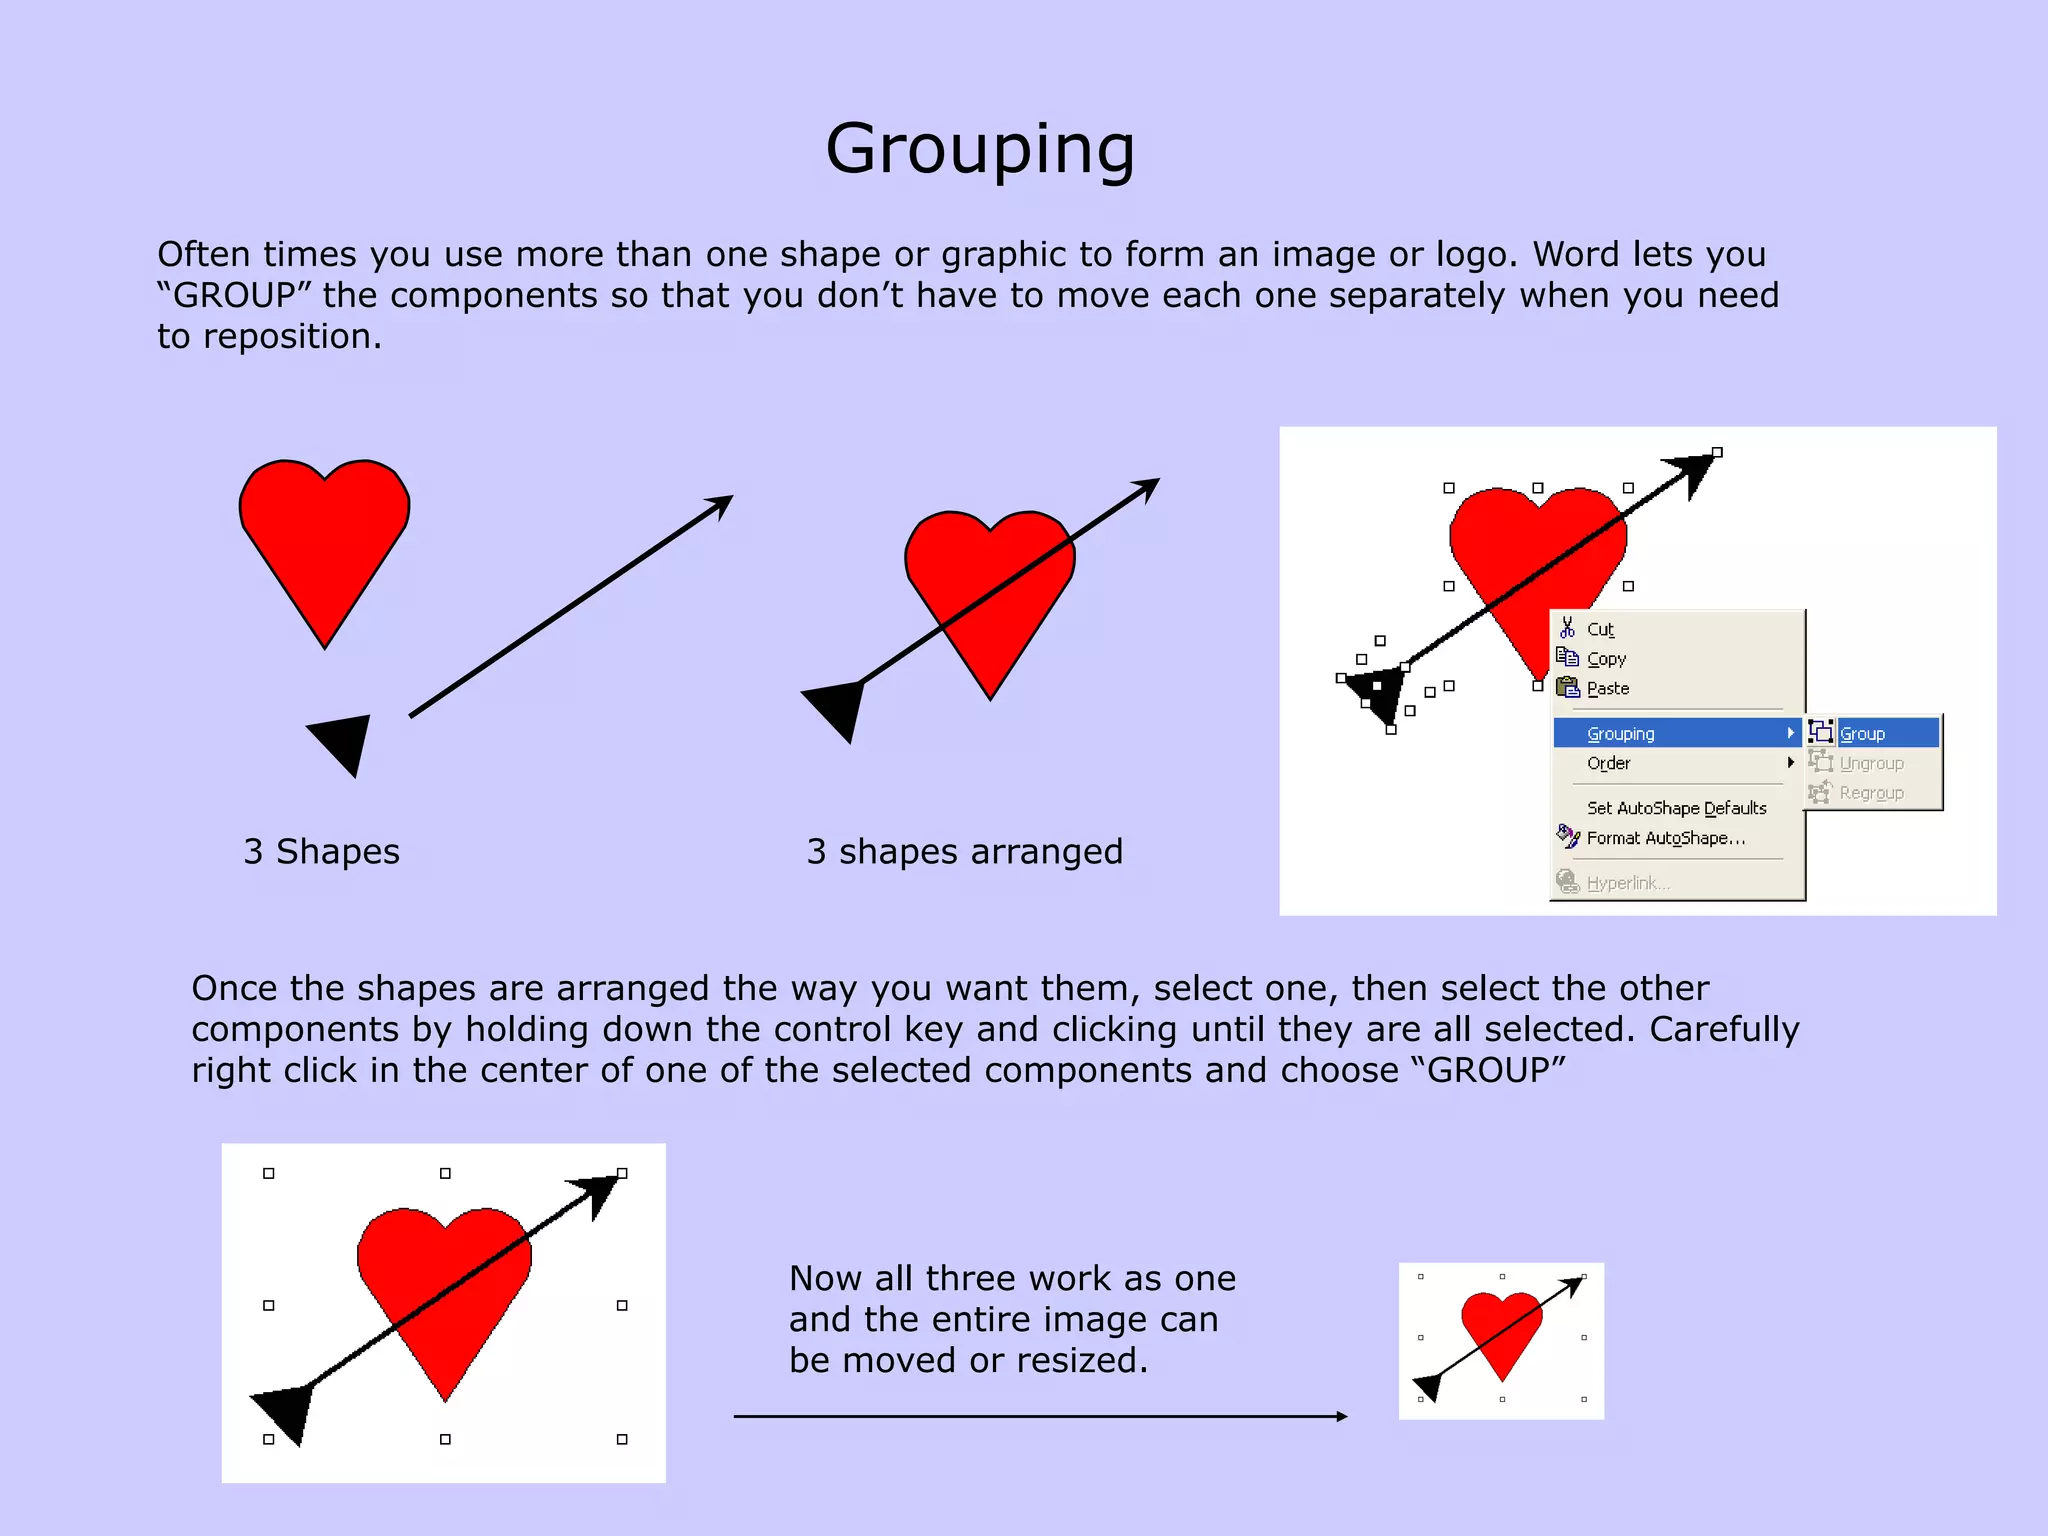
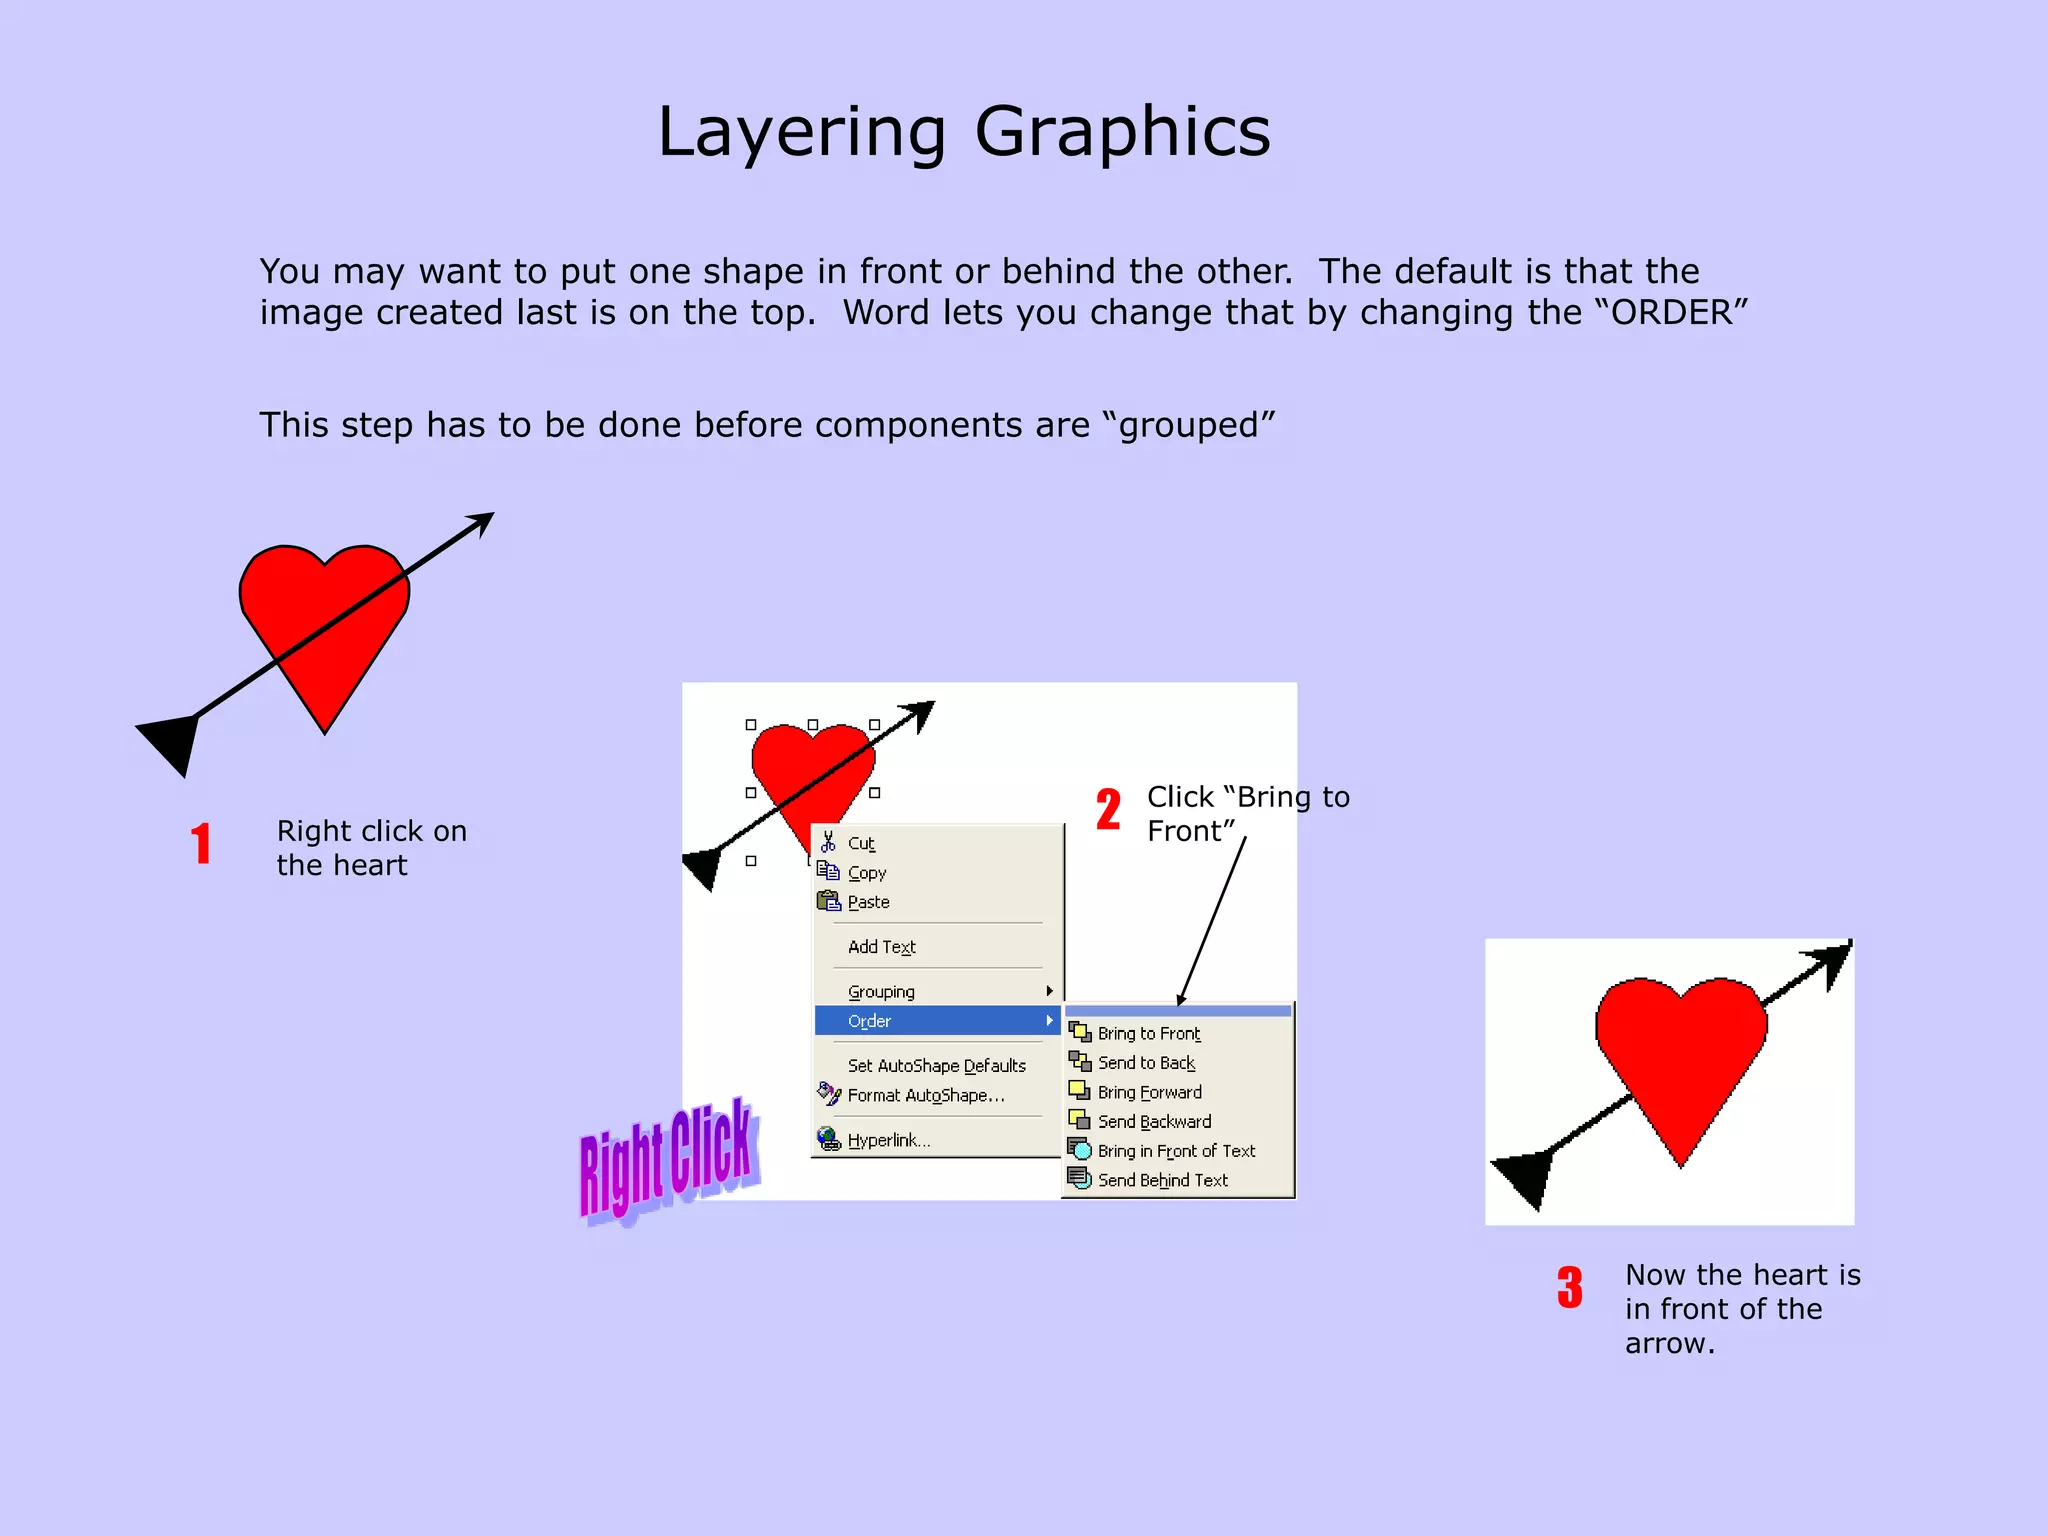
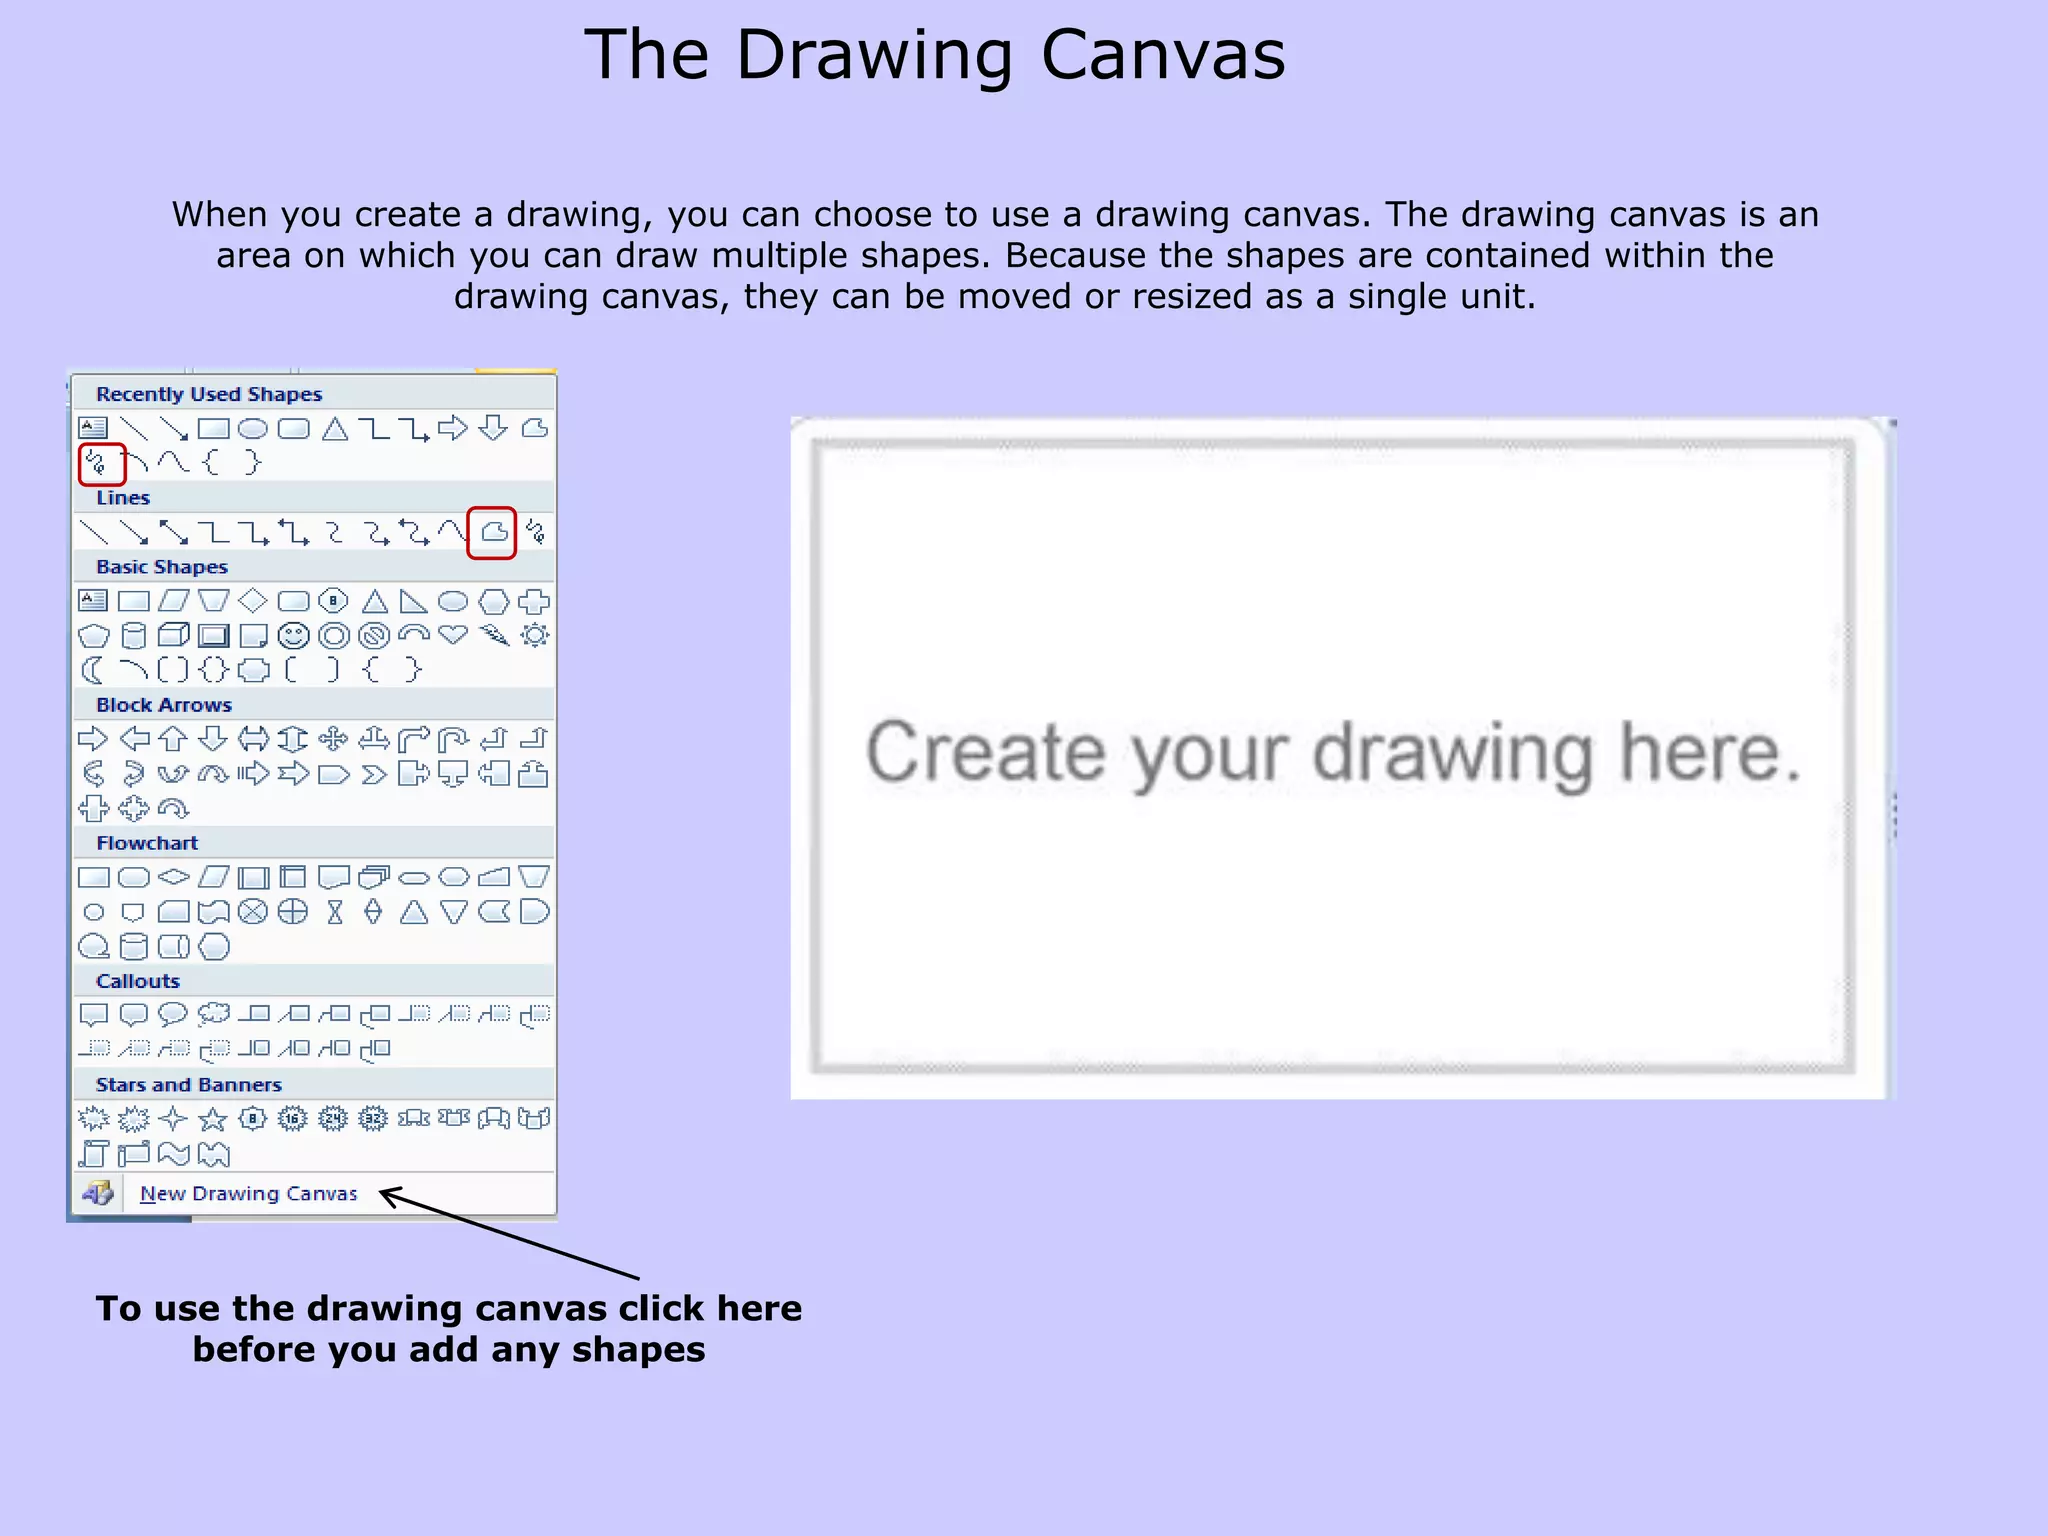
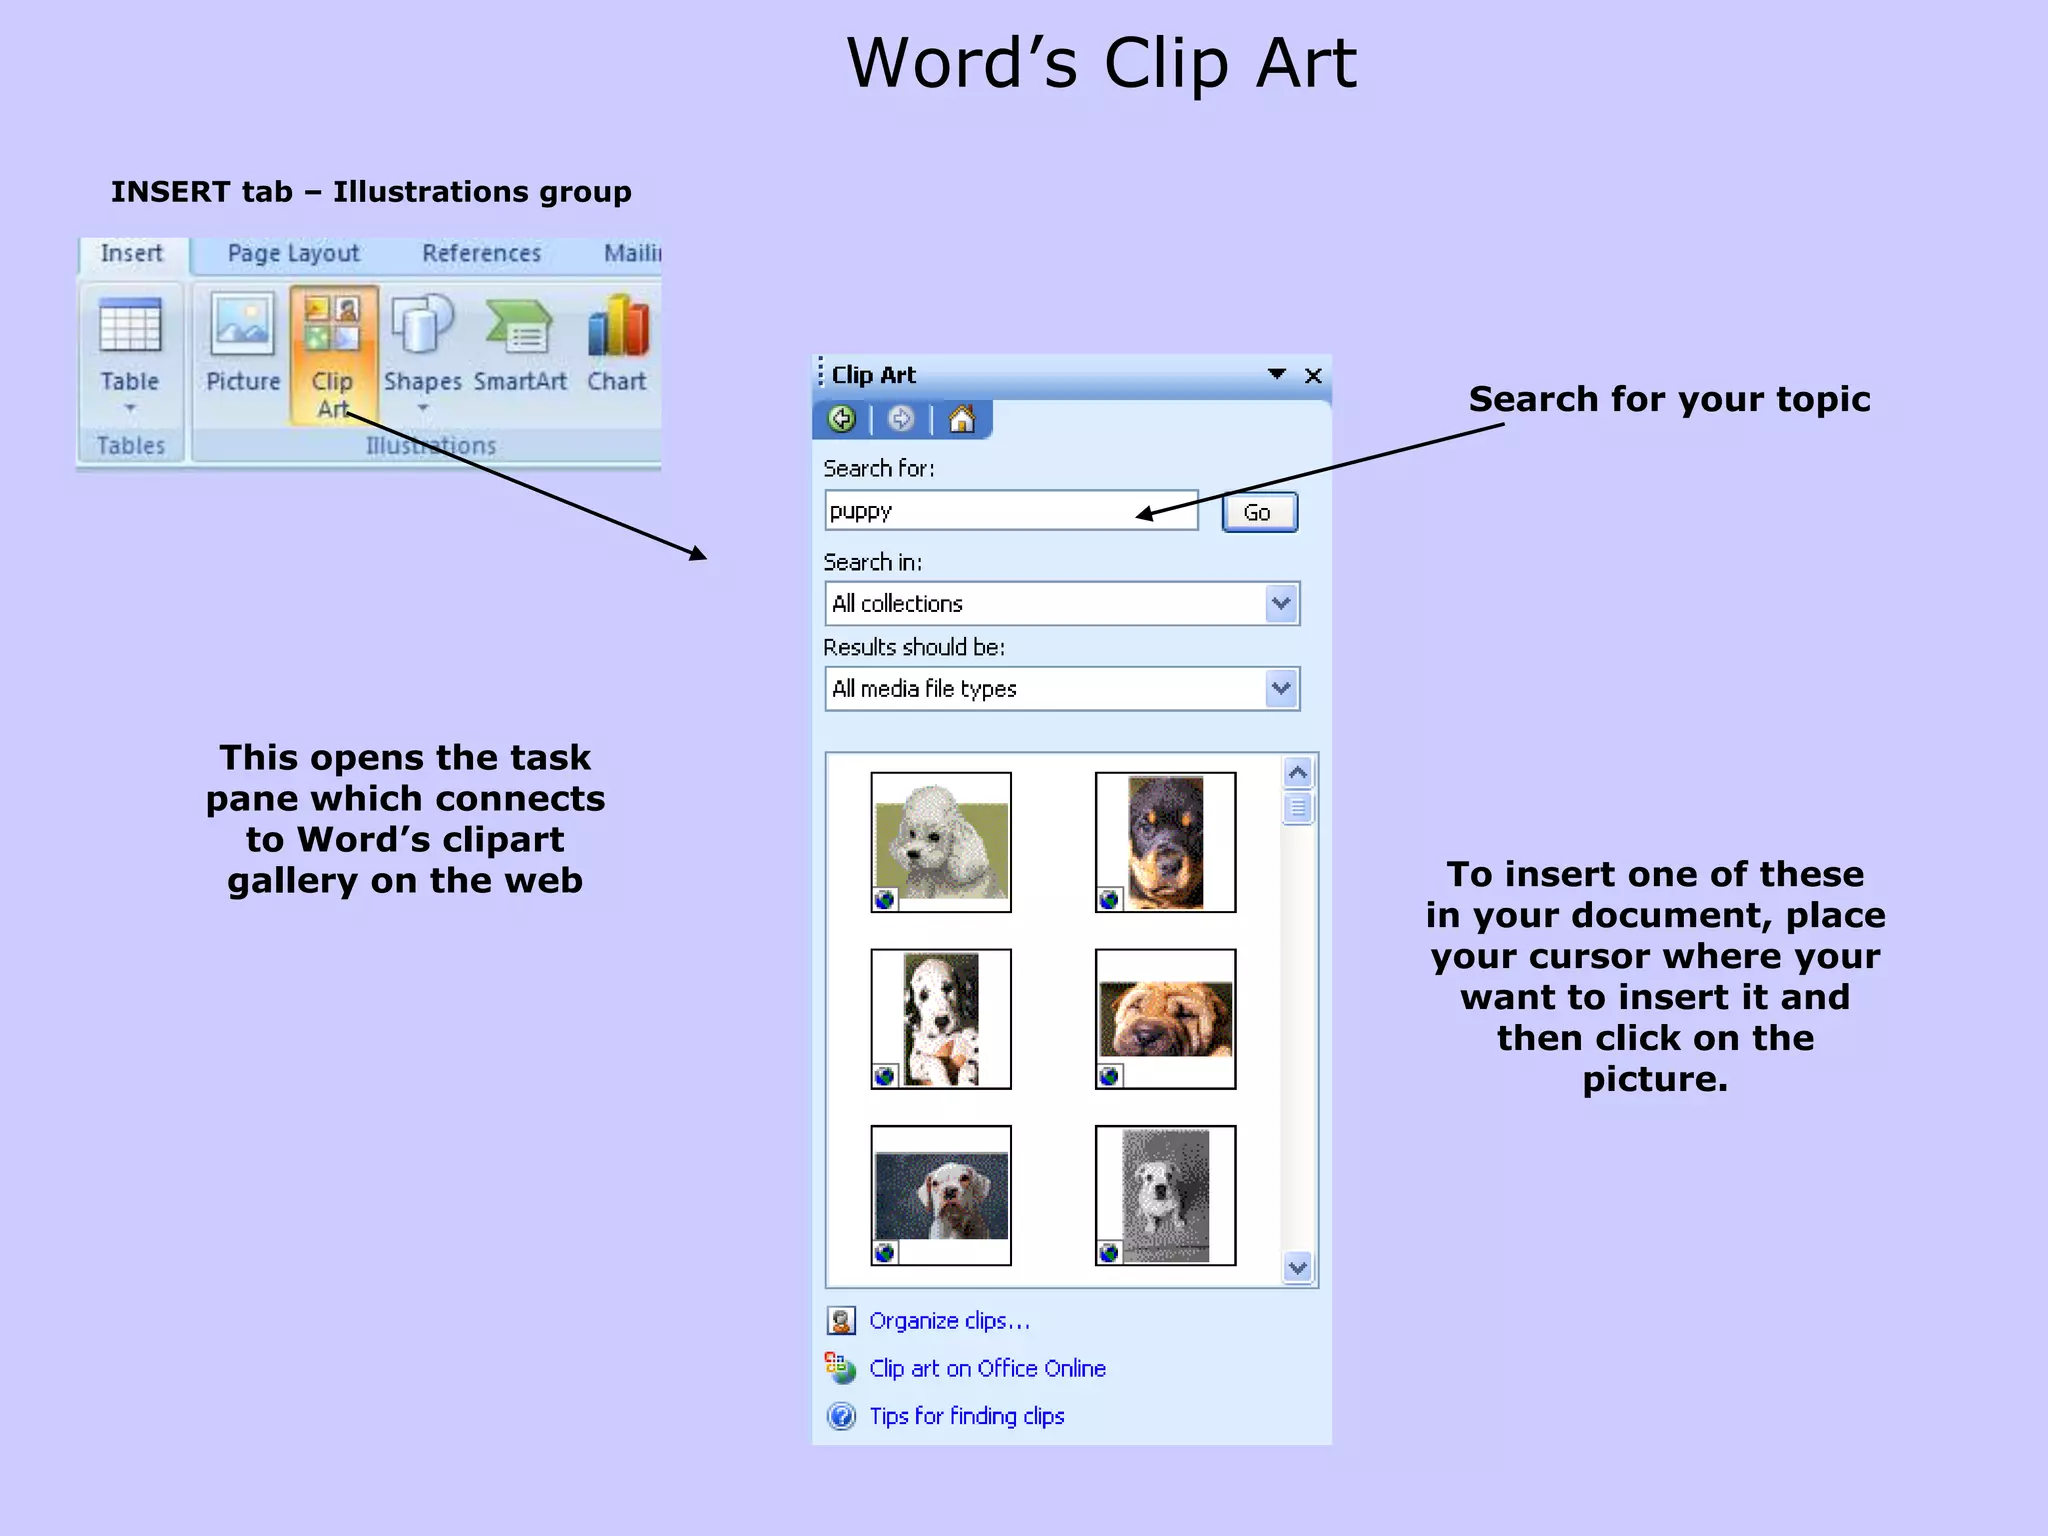
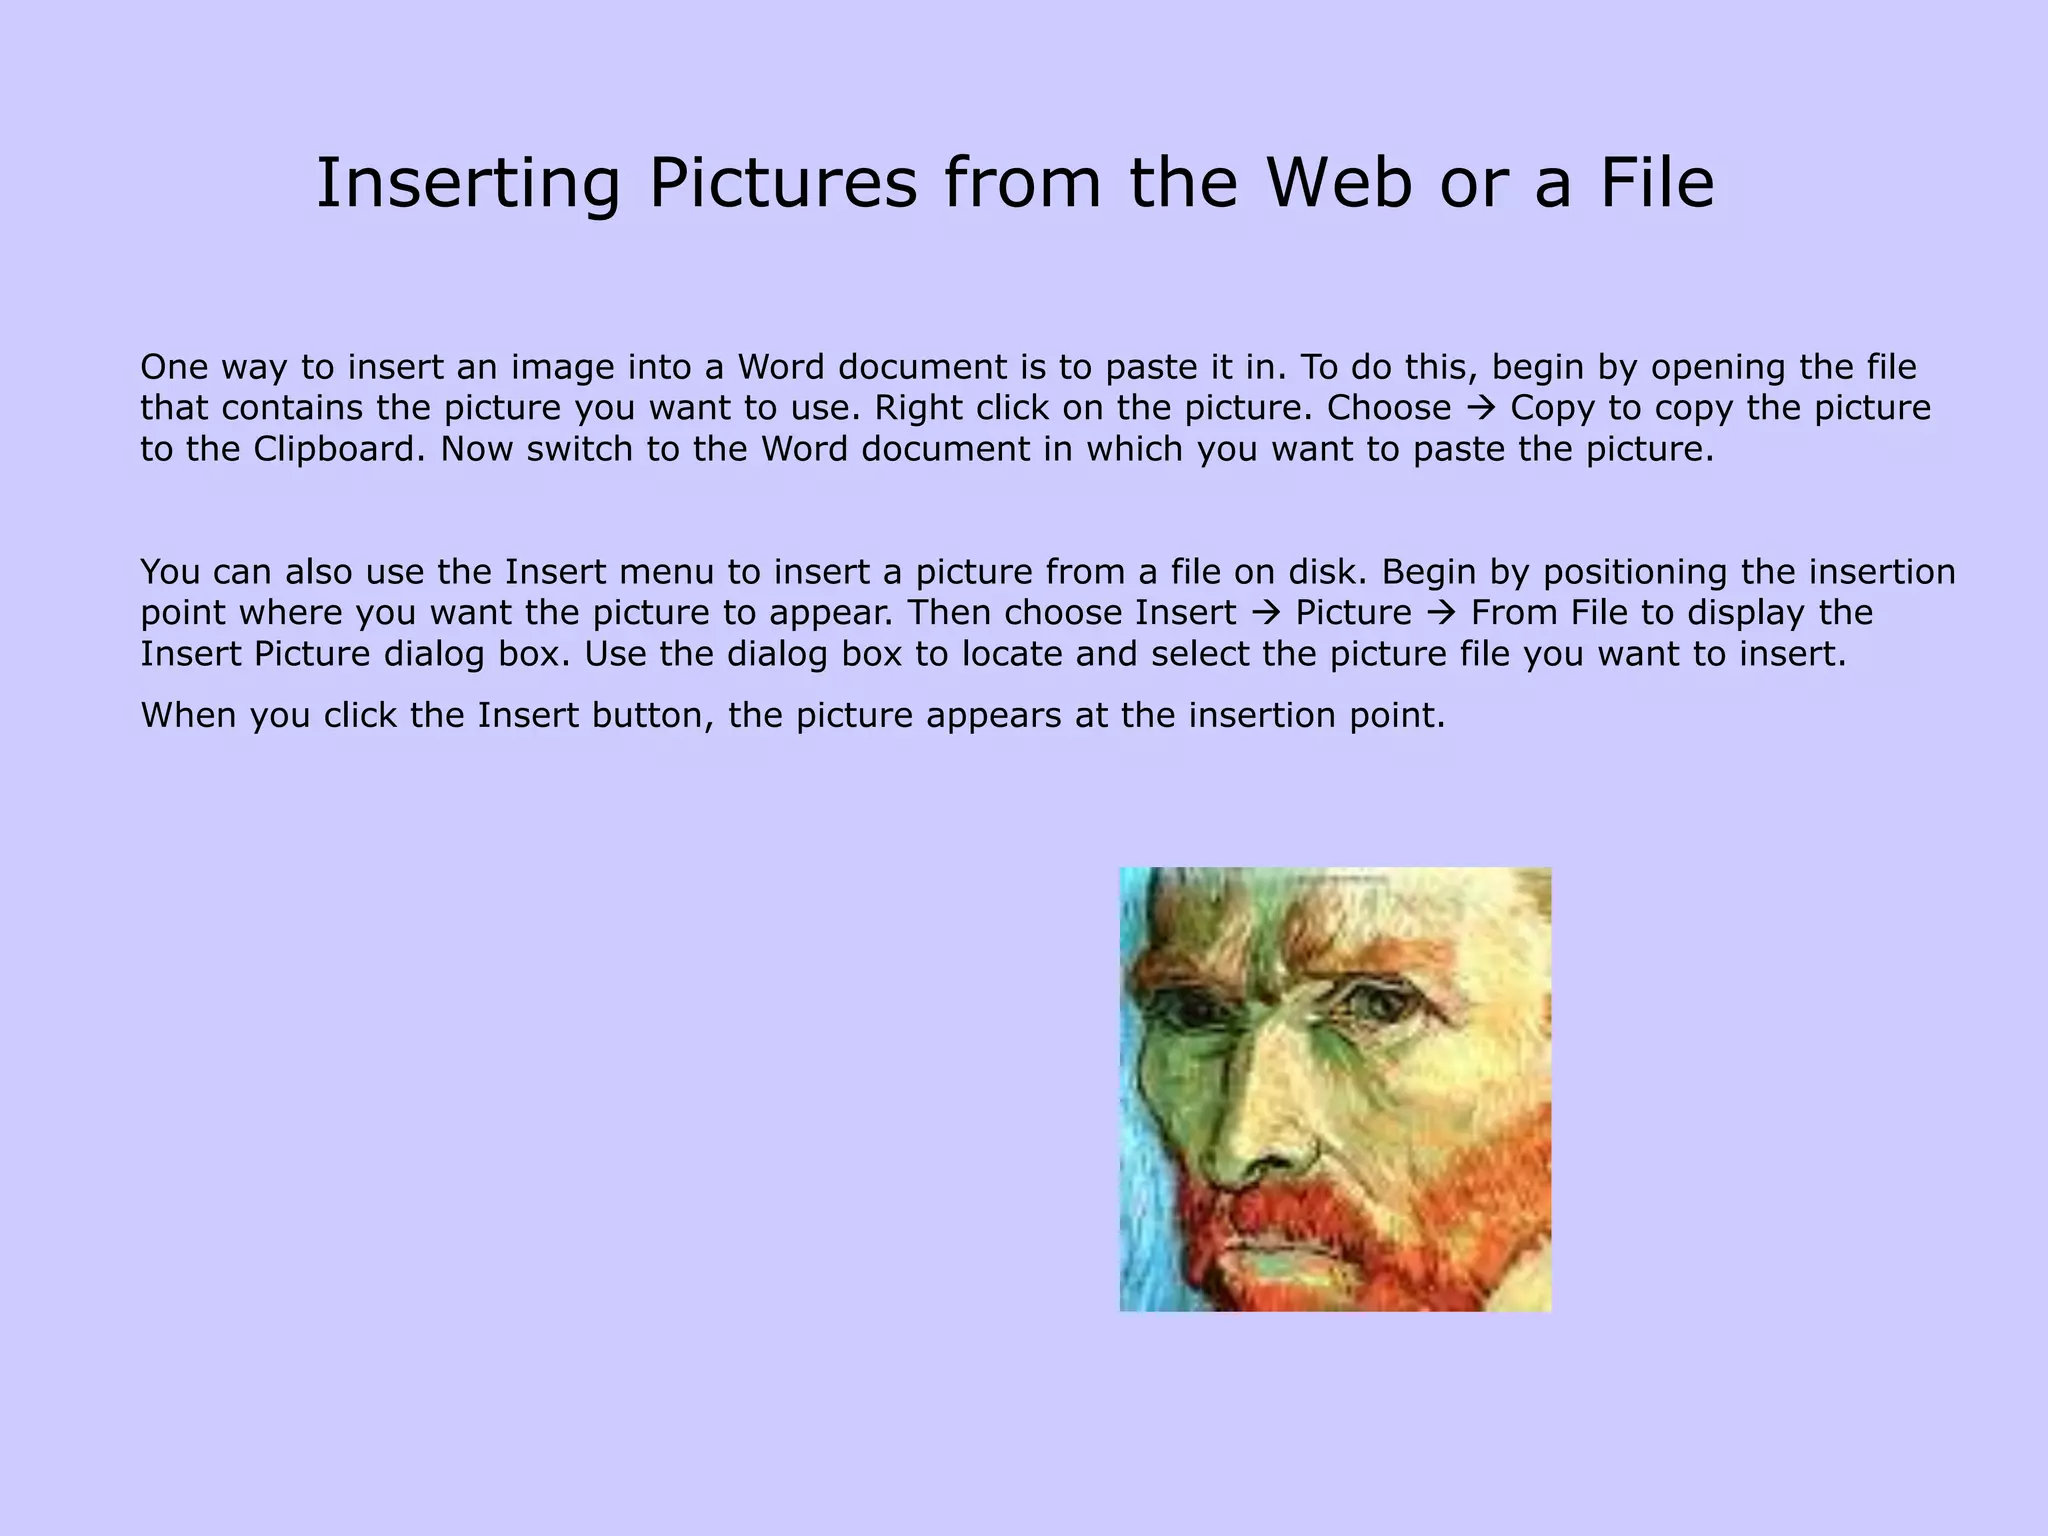
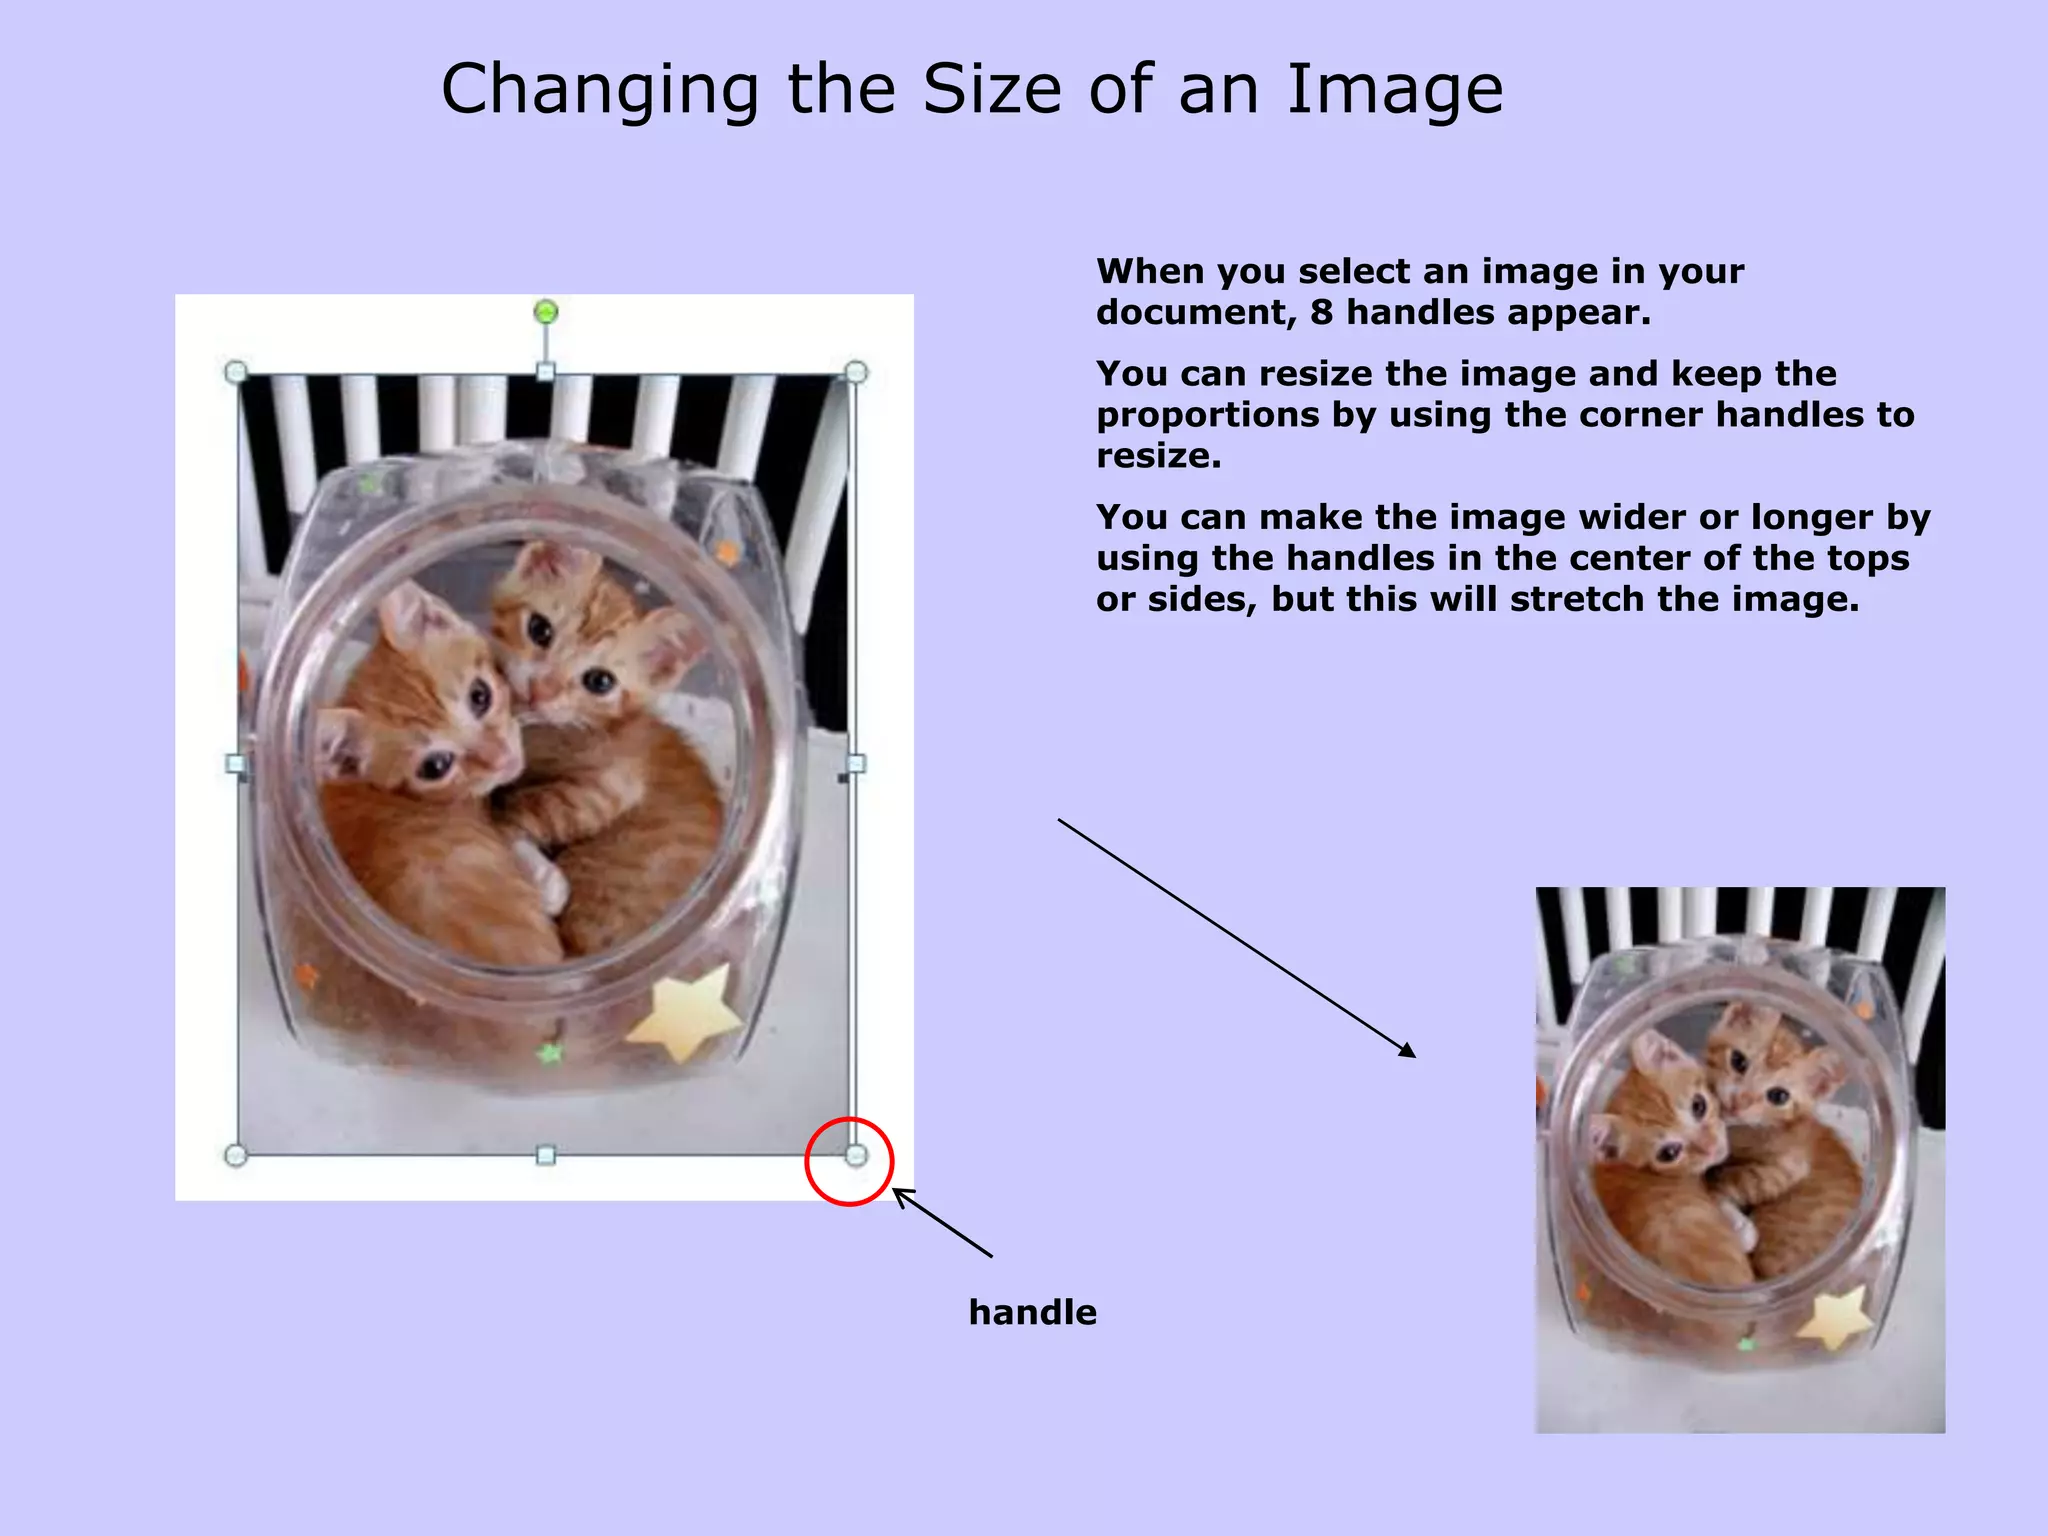
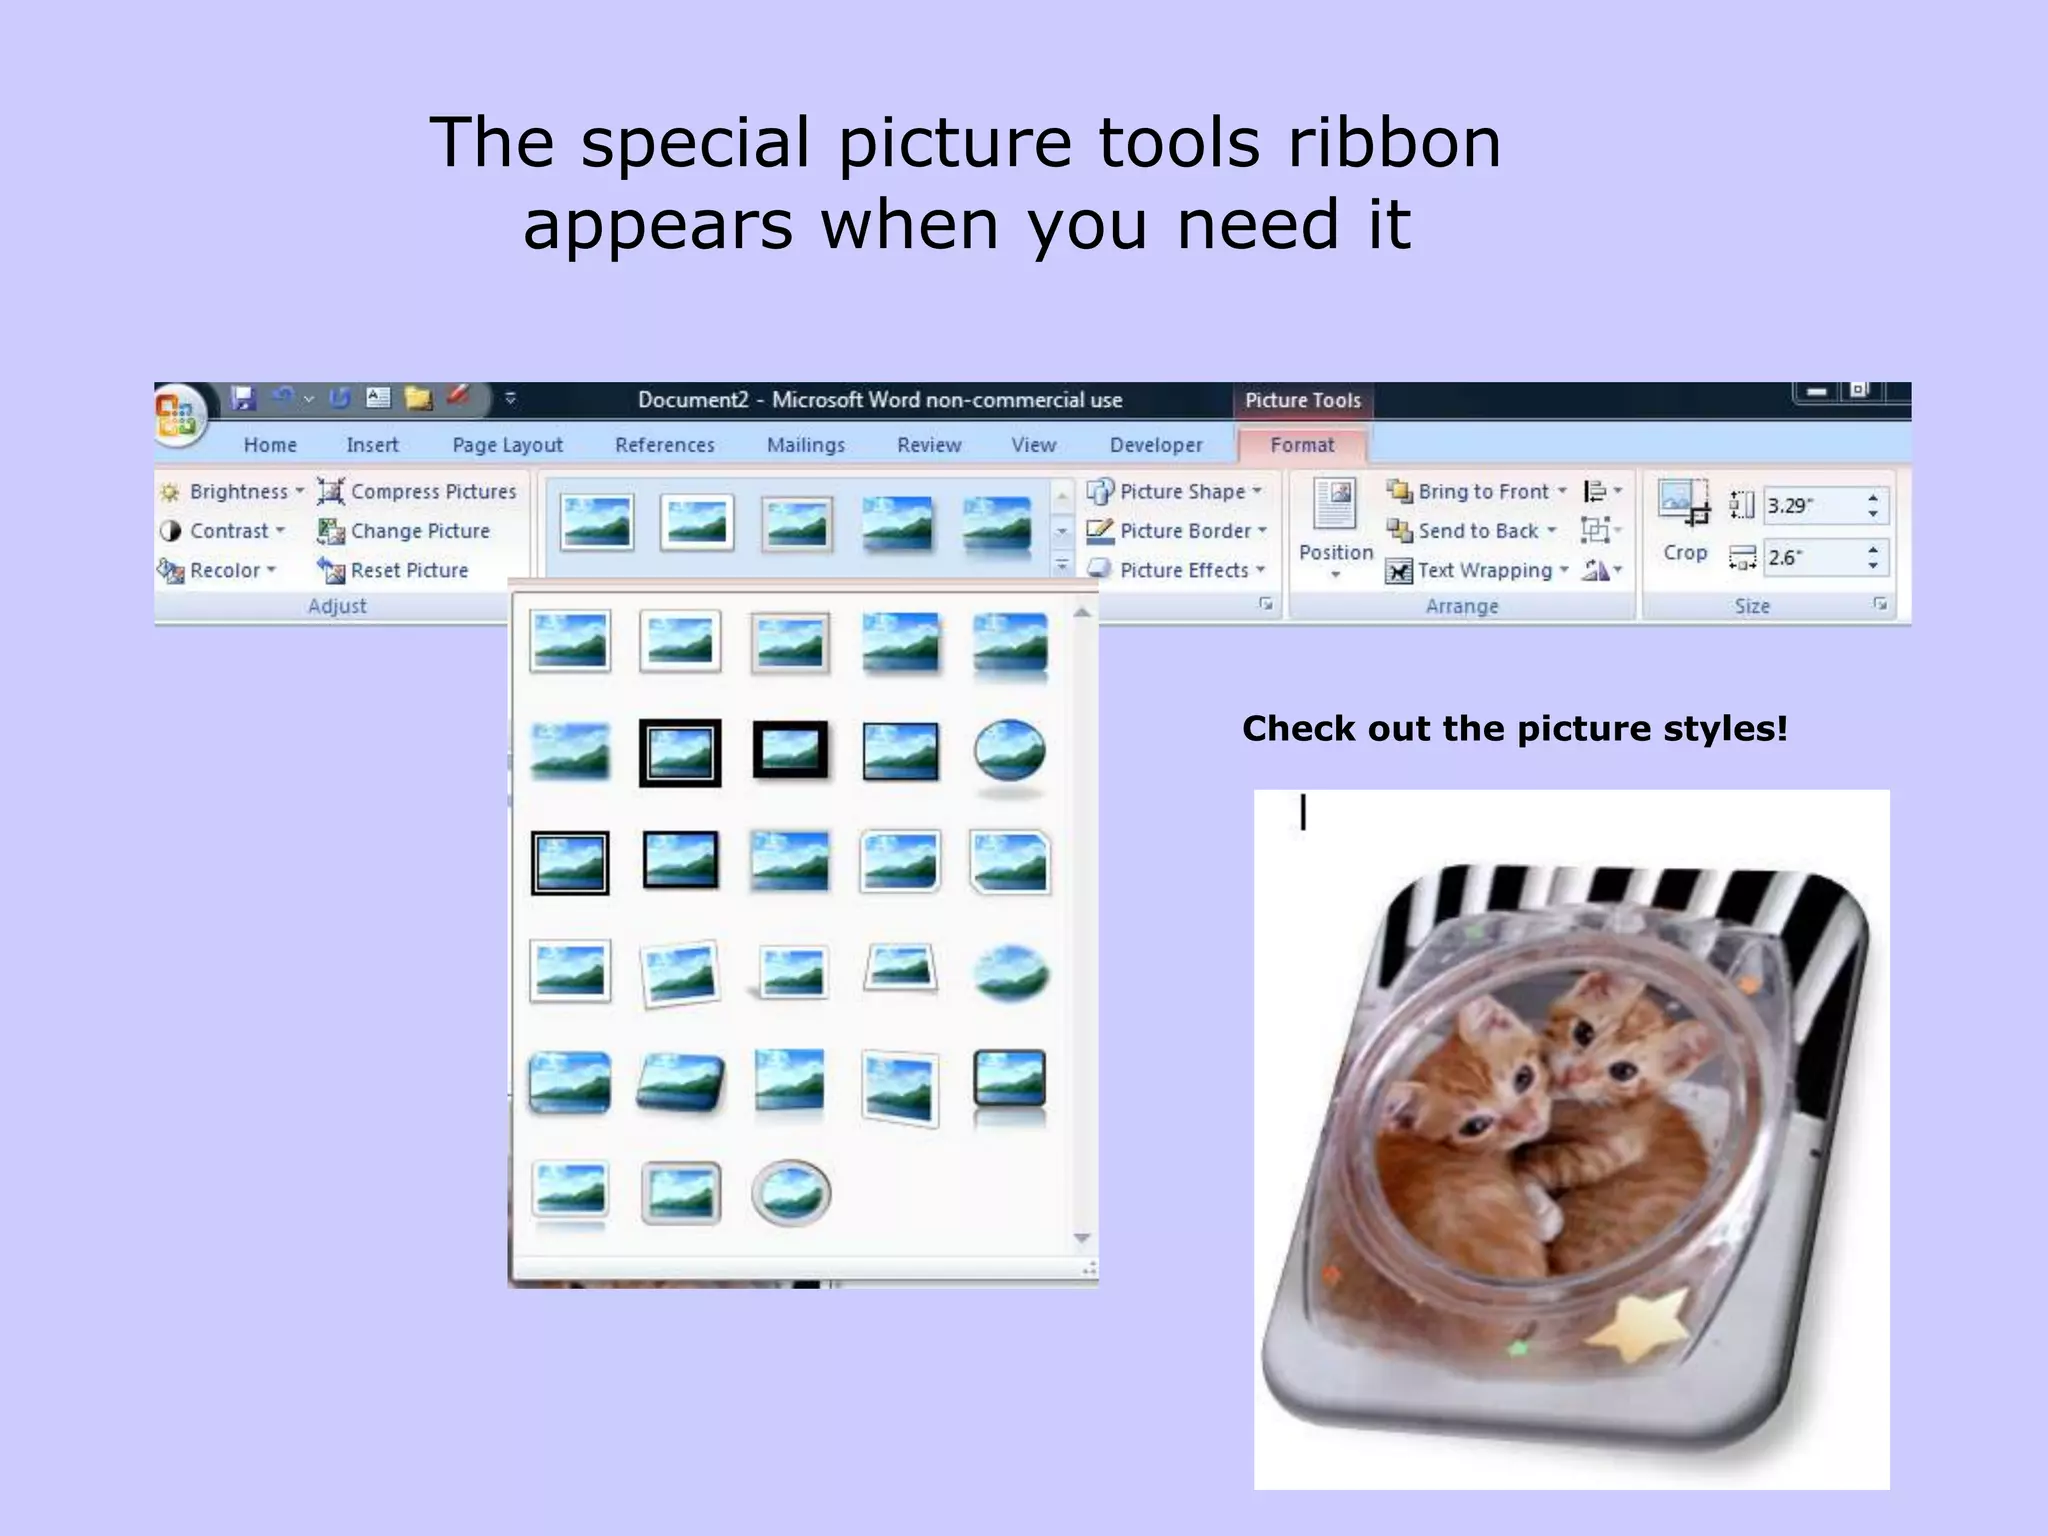
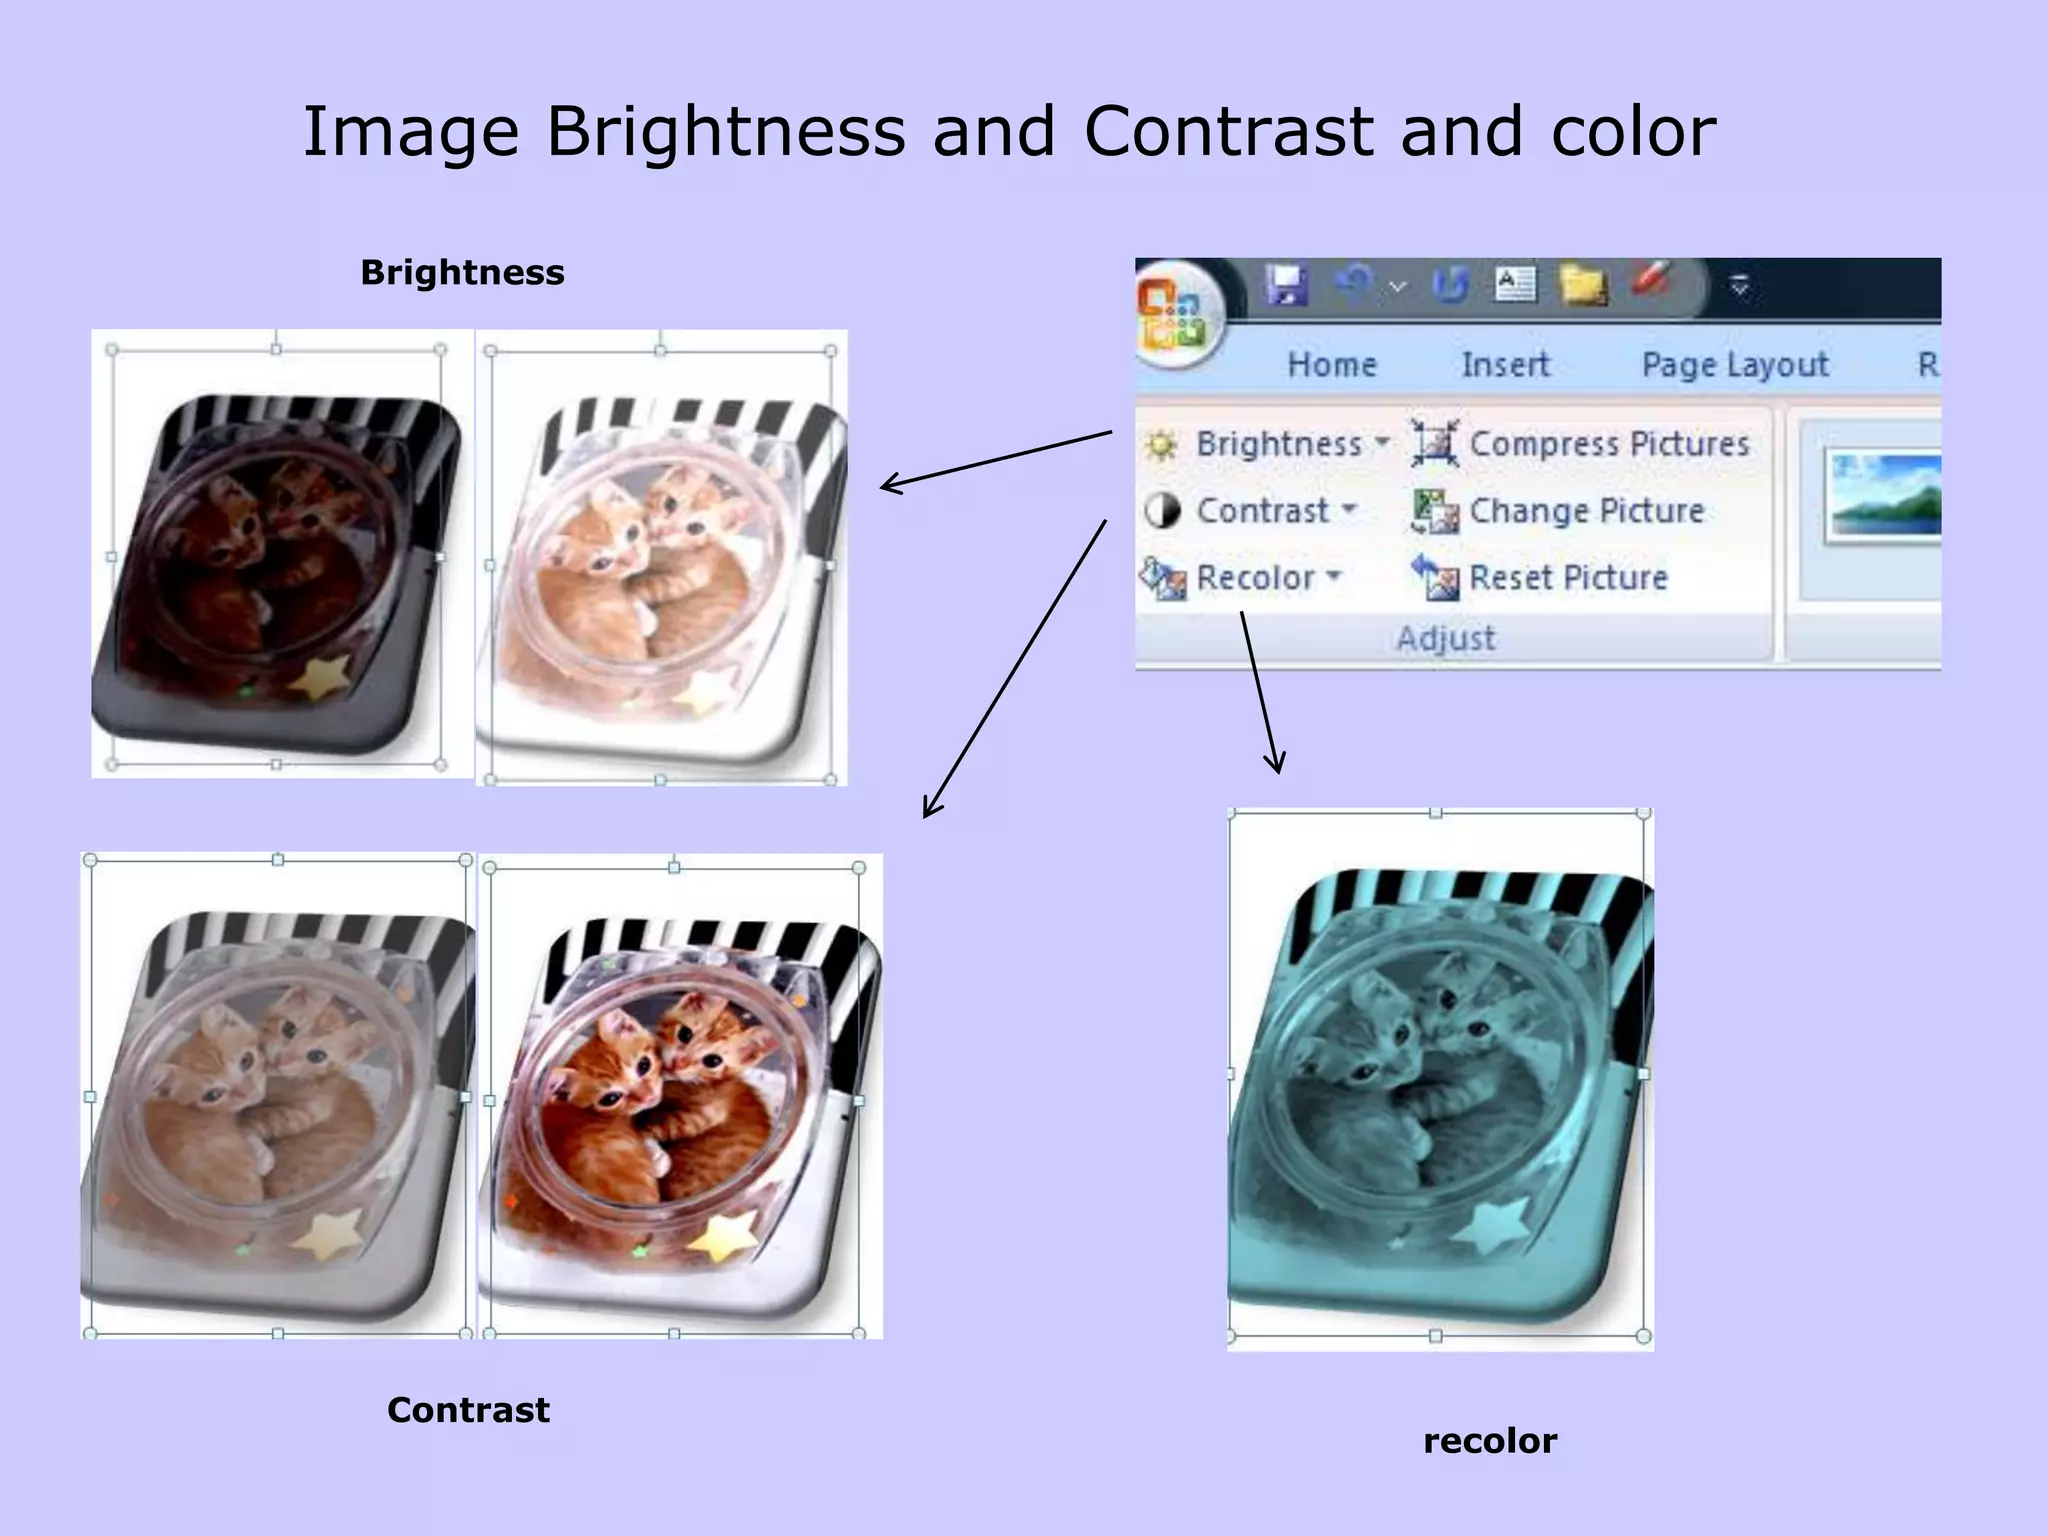
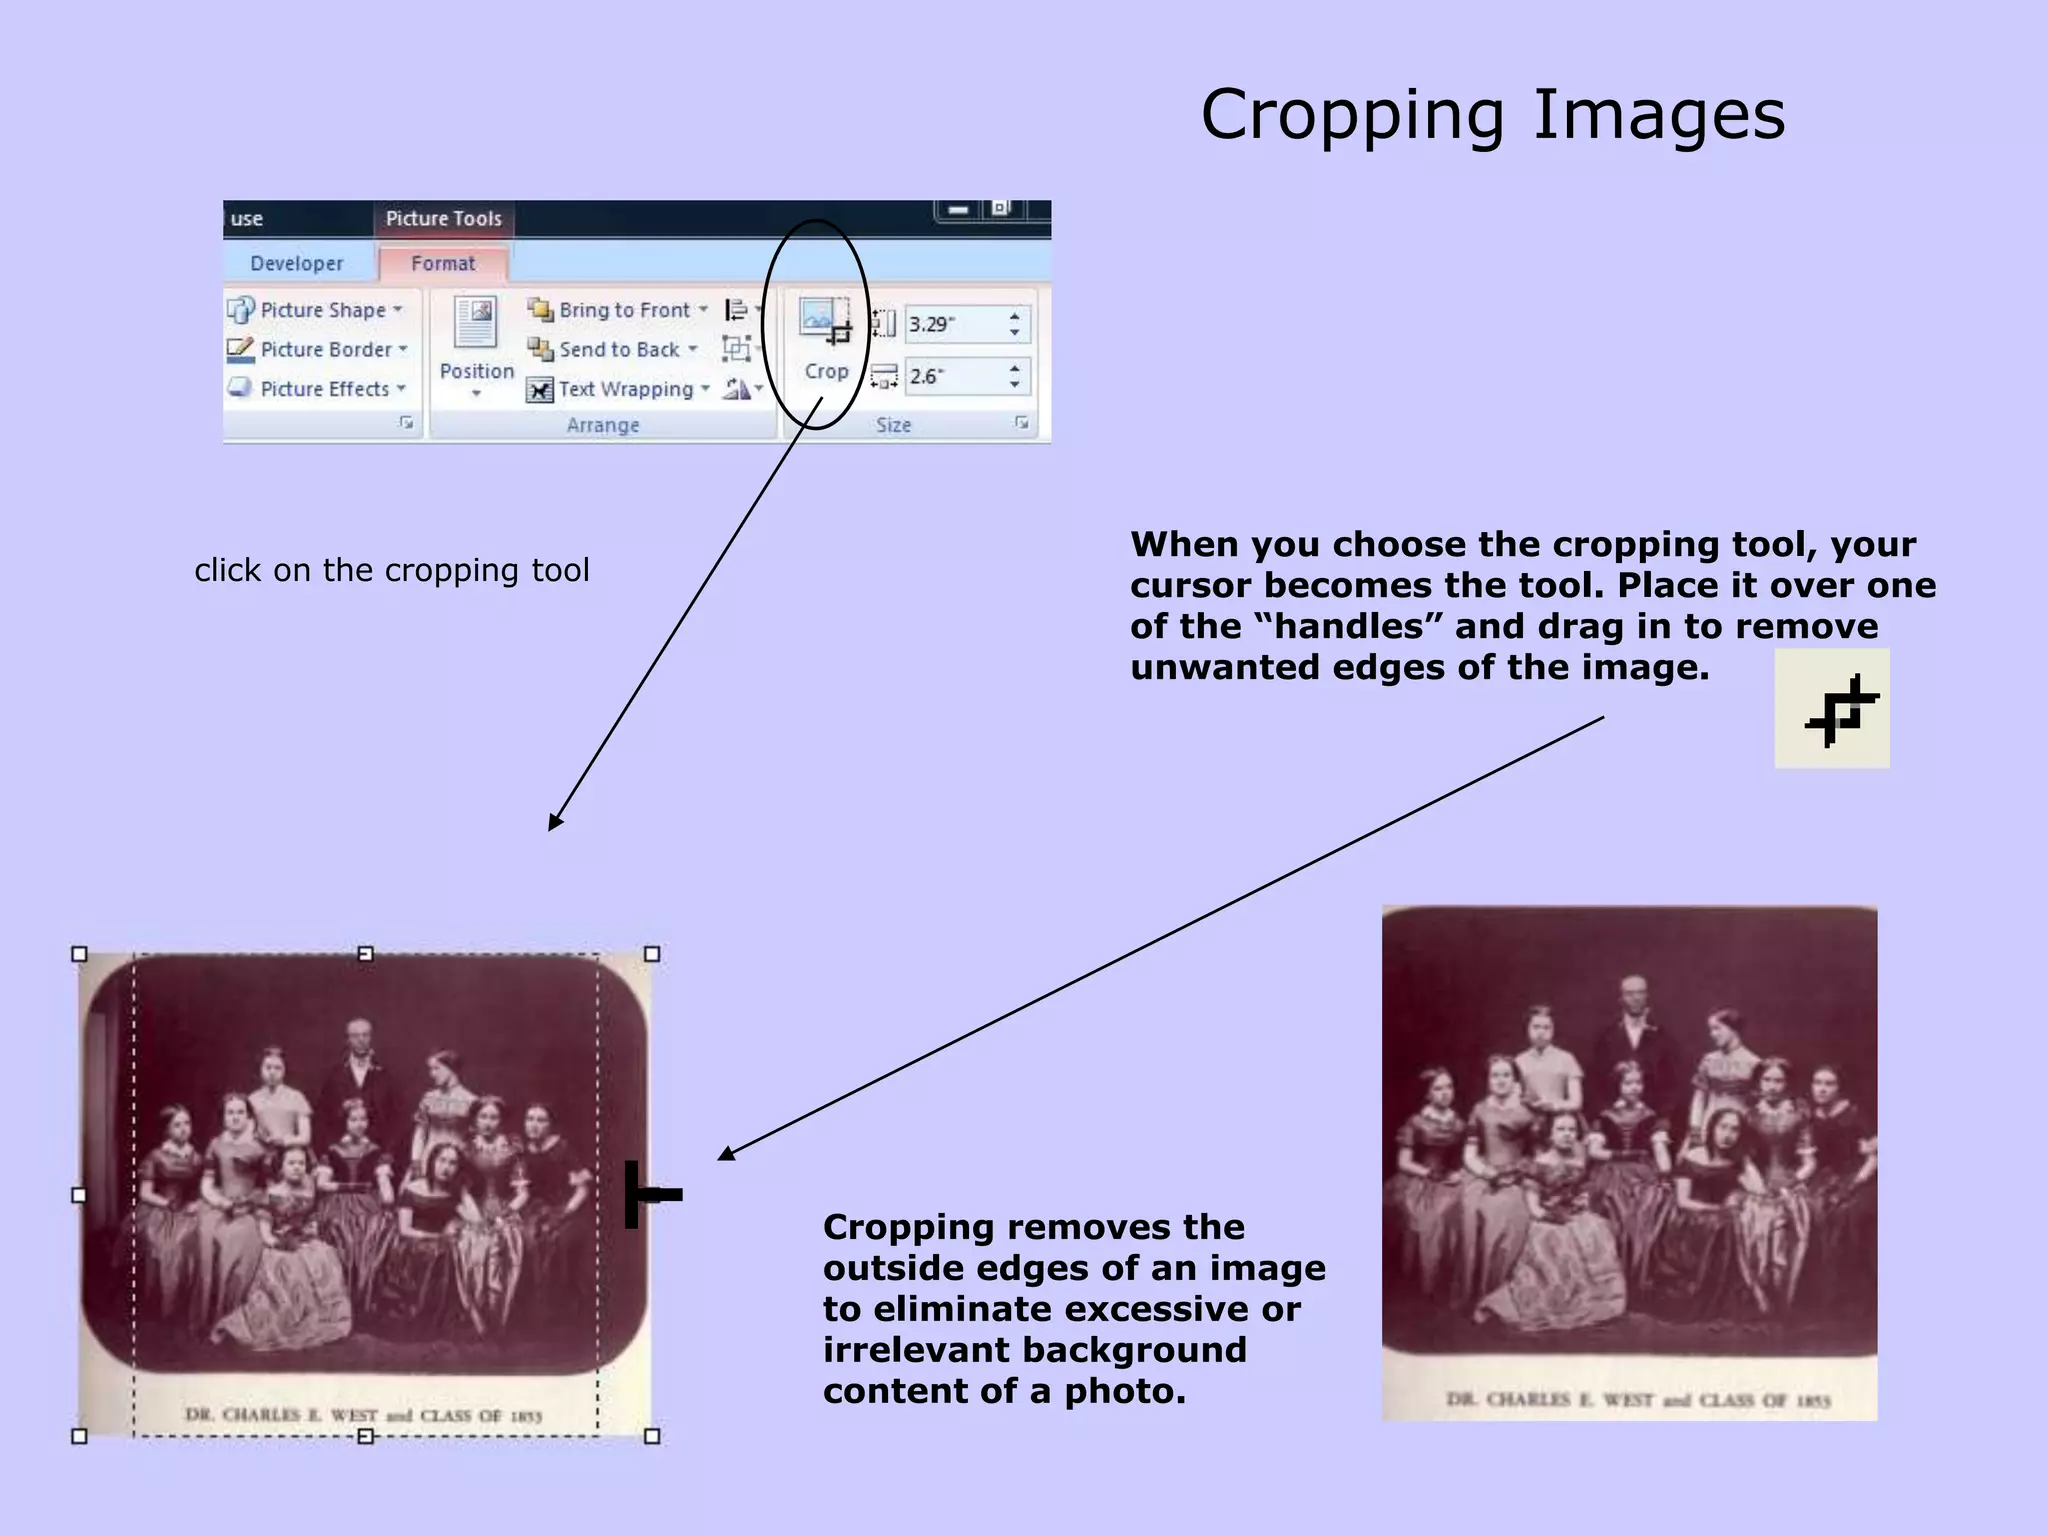
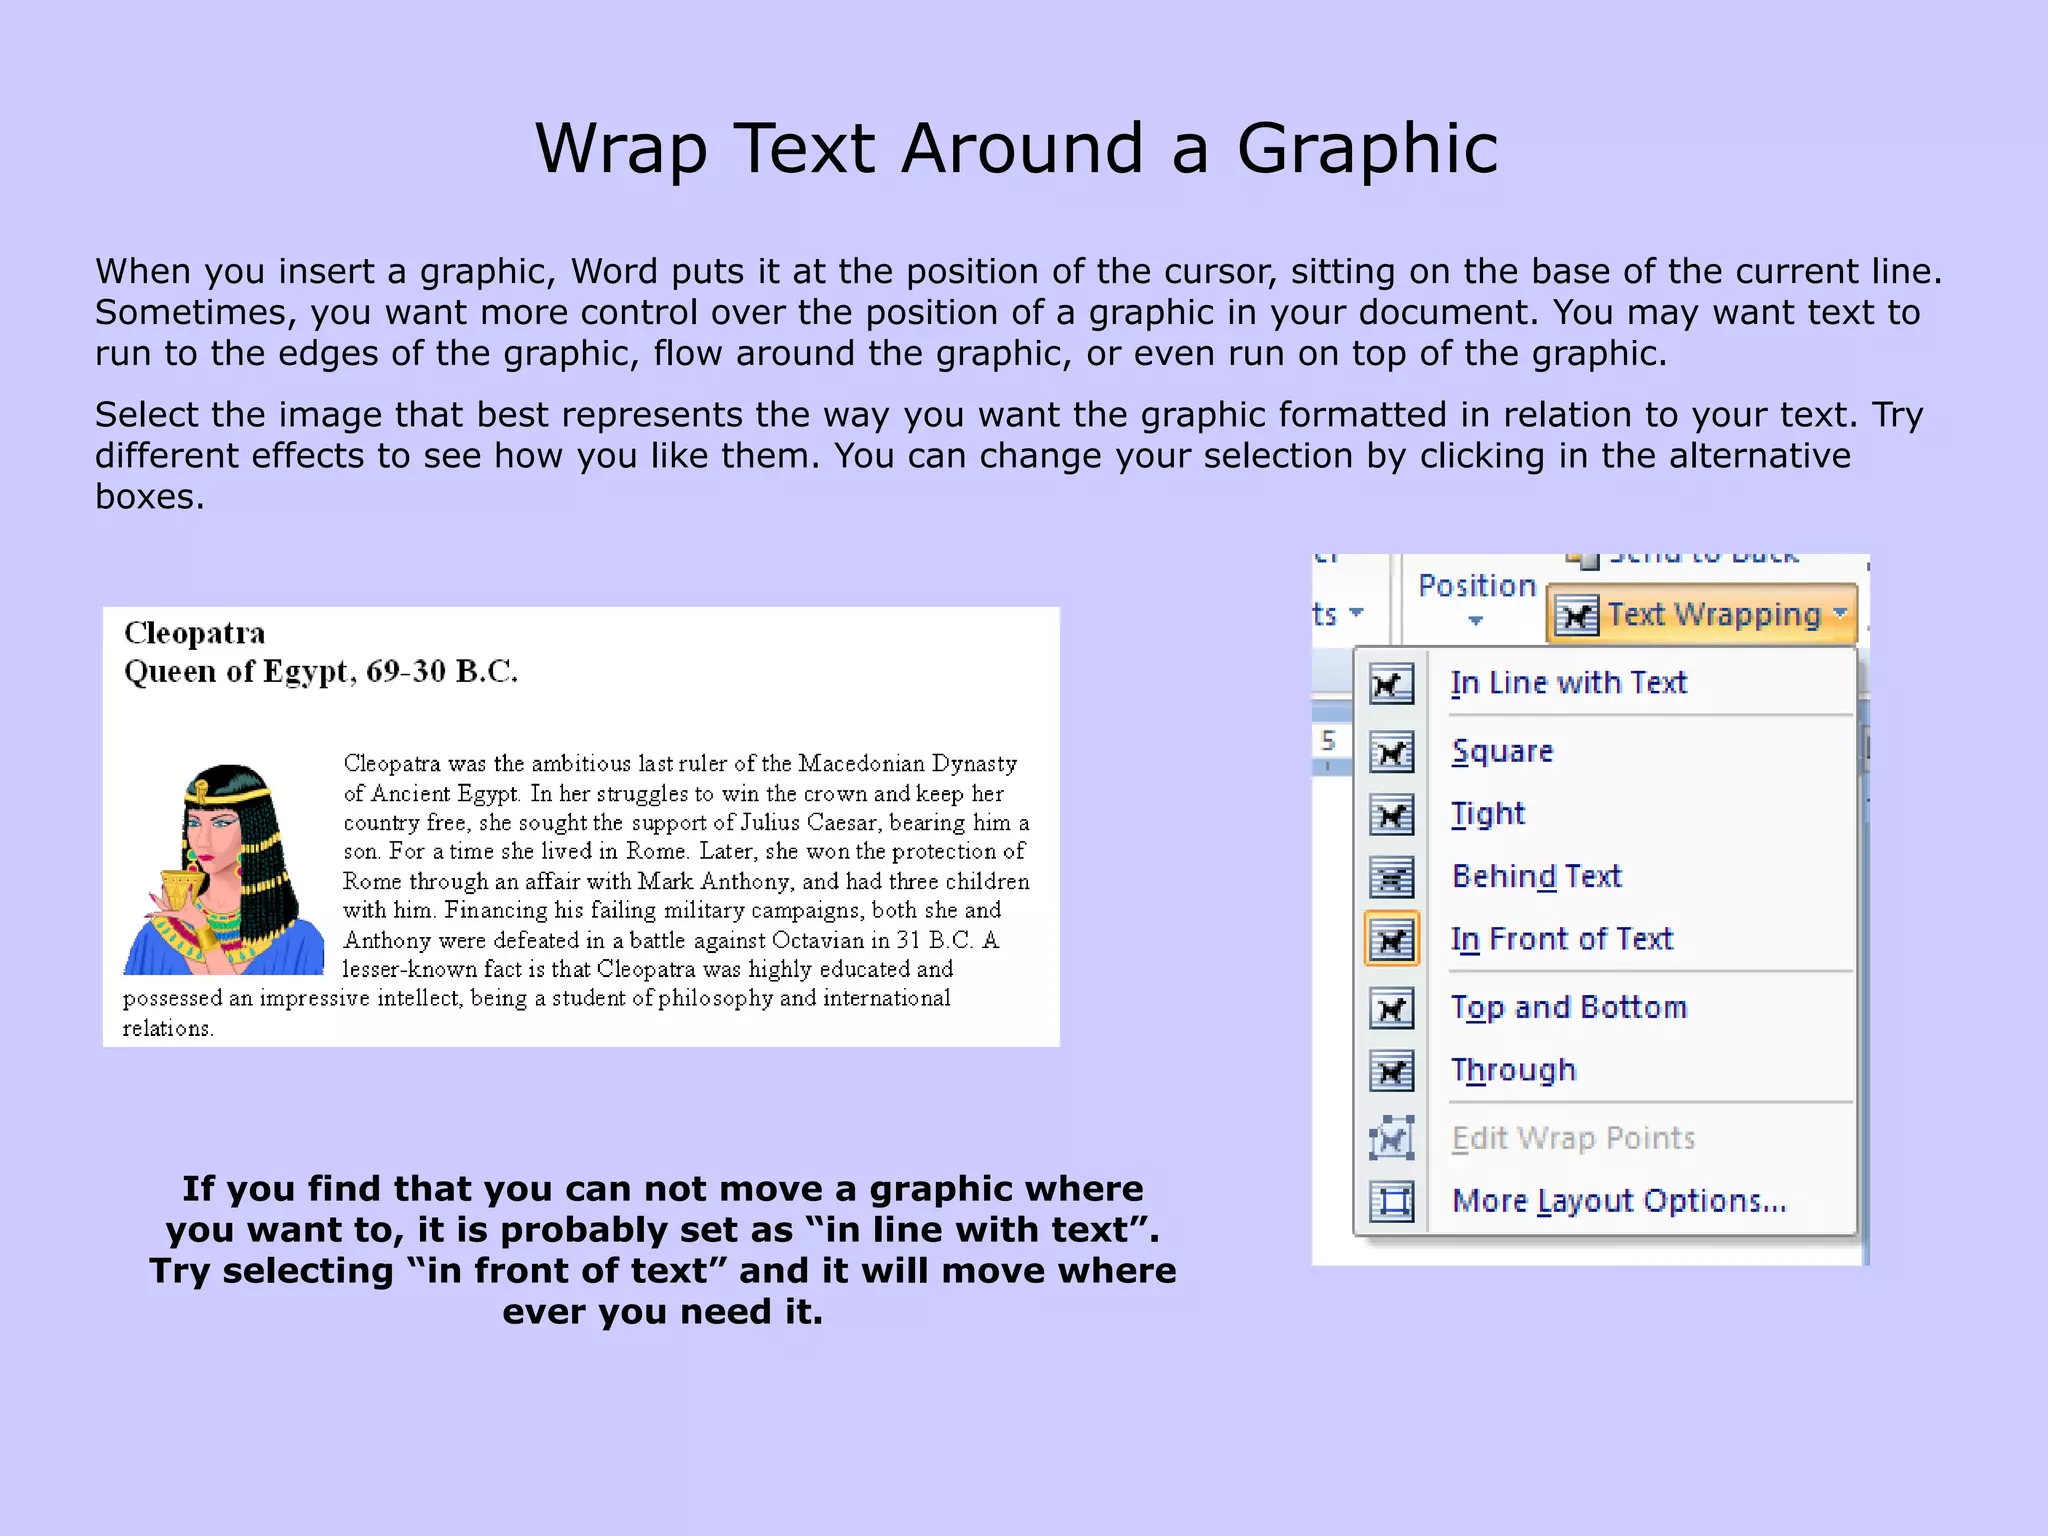
Graphics
Drawing toolsWord includes its own drawing program. While this program is not as powerful as most graphics programs on the market, it will enable you to create simple graphics without leaving your Word document. 1       2        3          4   5  6  7   8  9         10     The following is a quick reference for the Drawing toolbar buttons. Item 1: The Insert Shapefeature allows you to draw a shape with a couple of clicks. Select from an extensive list of pre-defined shapes. Select the shape you desire, then click and drag in your document where you want to put the shape.
Item 2: Edit a free form shape / insert a text box
Item 3: Add a style to your shape
Item 4:  Edit the fill color, line color, change the shape to another
Item 5: Add shadows to your shape
Item 6: Make your shape look 3 dimensional
Item 7: Auto position your shape on the page
Item 8: Position your shapes in relation to each other
Item 9: Align rotate or flip your shape
Item 10: Specify exact shape dimensionsInsert ShapesThis is the best place to begin your drawing, Word provides many ready-made shapes, called AutoShapes, that you can add to your document.  When you select a shape, the drawing tools ribbon will appear.You can choose the freeform tools and use your stylus to draw free-hand.Select the shape you desire, then click and drag in your document where you want to put the shape.
Manipulate your shapeWhen you move your mouse over the handle, it looks like this – now drag the drawing aroundYou can change the size by dragging one of the handles at the edges of your shape.RotateTo move the shape, place your cursor over it. When the cursor changes to a crosshair symbol, click and drag.
Format your ShapeCreate a shapeApply a styleOr change the fill and line colors
Add text to your shape
Make Your Shape 3D	Make your shapes more interesting by giving them a shadow or a 3-D format. Shadow3 - DBasic shapeThe best way to learn the graphic variations available in Word is to have lots of fun with the Drawing tools. Experiment! You will find many uses for it as you create new documents in Word.
GroupingOften times you use more than one shape or graphic to form an image or logo. Word lets you “GROUP” the components so that you don’t have to move each one separately when you need to reposition.3 Shapes3 shapes arrangedOnce the shapes are arranged the way you want them, select one, then select the other components by holding down the controlkey and clicking until they are all selected. Carefully right click in the center of one of the selected components and choose “GROUP”Now all three work as one and the entire image can be moved or resized.
Click “Bring to Front”2Right click on the heart1Now the heart is in front of the arrow.3Right ClickLayering GraphicsYou may want to put one shape in front or behind the other.  The default is that the image created last is on the top.  Word lets you change that by changing the “ORDER”This step has to be done before components are “grouped”
The Drawing CanvasWhen you create a drawing, you can choose to use a drawing canvas. The drawing canvas is an area on which you can draw multiple shapes. Because the shapes are contained within the drawing canvas, they can be moved or resized as a single unit.To use the drawing canvas click here before you add any shapes

2010 11 Graphics

  • 1.
  • 2.
    Drawing toolsWord includesits own drawing program. While this program is not as powerful as most graphics programs on the market, it will enable you to create simple graphics without leaving your Word document. 1 2 3 4 5 6 7 8 9 10 The following is a quick reference for the Drawing toolbar buttons. Item 1: The Insert Shapefeature allows you to draw a shape with a couple of clicks. Select from an extensive list of pre-defined shapes. Select the shape you desire, then click and drag in your document where you want to put the shape.
  • 3.
    Item 2: Edita free form shape / insert a text box
  • 4.
    Item 3: Adda style to your shape
  • 5.
    Item 4: Edit the fill color, line color, change the shape to another
  • 6.
    Item 5: Addshadows to your shape
  • 7.
    Item 6: Makeyour shape look 3 dimensional
  • 8.
    Item 7: Autoposition your shape on the page
  • 9.
    Item 8: Positionyour shapes in relation to each other
  • 10.
    Item 9: Alignrotate or flip your shape
  • 11.
    Item 10: Specifyexact shape dimensionsInsert ShapesThis is the best place to begin your drawing, Word provides many ready-made shapes, called AutoShapes, that you can add to your document. When you select a shape, the drawing tools ribbon will appear.You can choose the freeform tools and use your stylus to draw free-hand.Select the shape you desire, then click and drag in your document where you want to put the shape.
  • 12.
    Manipulate your shapeWhenyou move your mouse over the handle, it looks like this – now drag the drawing aroundYou can change the size by dragging one of the handles at the edges of your shape.RotateTo move the shape, place your cursor over it. When the cursor changes to a crosshair symbol, click and drag.
  • 13.
    Format your ShapeCreatea shapeApply a styleOr change the fill and line colors
  • 14.
    Add text toyour shape
  • 15.
    Make Your Shape3D Make your shapes more interesting by giving them a shadow or a 3-D format. Shadow3 - DBasic shapeThe best way to learn the graphic variations available in Word is to have lots of fun with the Drawing tools. Experiment! You will find many uses for it as you create new documents in Word.
  • 16.
    GroupingOften times youuse more than one shape or graphic to form an image or logo. Word lets you “GROUP” the components so that you don’t have to move each one separately when you need to reposition.3 Shapes3 shapes arrangedOnce the shapes are arranged the way you want them, select one, then select the other components by holding down the controlkey and clicking until they are all selected. Carefully right click in the center of one of the selected components and choose “GROUP”Now all three work as one and the entire image can be moved or resized.
  • 17.
    Click “Bring toFront”2Right click on the heart1Now the heart is in front of the arrow.3Right ClickLayering GraphicsYou may want to put one shape in front or behind the other. The default is that the image created last is on the top. Word lets you change that by changing the “ORDER”This step has to be done before components are “grouped”
  • 18.
    The Drawing CanvasWhenyou create a drawing, you can choose to use a drawing canvas. The drawing canvas is an area on which you can draw multiple shapes. Because the shapes are contained within the drawing canvas, they can be moved or resized as a single unit.To use the drawing canvas click here before you add any shapes
  • 19.
    Word ArtOn theINSERT tab in the TEXT groupThe gallery gives you shape optionsClick on the shape of your choiceSpecial Word Art Ribbon appearsNext enter your textExperiment and Have Fun !!
  • 20.
    Word’s Clip ArtINSERT tab – Illustrations groupSearch for your topicThis opens the task pane which connects to Word’s clipart gallery on the webTo insert one of these in your document, place your cursor where your want to insert it and then click on the picture.
  • 21.
    Inserting Pictures fromthe Web or a File One way to insert an image into a Word document is to paste it in. To do this, begin by opening the file that contains the picture you want to use. Right click on the picture. Choose  Copy to copy the picture to the Clipboard.Now switch to the Word document in which you want to paste the picture. You can also use the Insert menu to insert a picture from a file on disk. Begin by positioning the insertion point where you want the picture to appear. Then choose Insert  Picture  From File to display the Insert Picture dialog box. Use the dialog box to locate and select the picture file you want to insert.When you click the Insert button, the picture appears at the insertion point. http://www.artcyclopedia.com/
  • 22.
    Changing the Sizeof an ImageWhen you select an image in your document, 8 handles appear.You can resize the image and keep the proportions by using the corner handles to resize.You can make the image wider or longer by using the handles in the center of the tops or sides, but this will stretch the image.handle
  • 23.
    The special picturetools ribbon appears when you need itCheck out the picture styles!
  • 24.
    Image Brightness andContrast and colorBrightnessContrastrecolor
  • 25.
    Cropping ImagesWhen youchoose the cropping tool, your cursor becomes the tool. Place it over one of the “handles” and drag in to remove unwanted edges of the image.click on the cropping toolCropping removes the outside edges of an image to eliminate excessive or irrelevant background content of a photo.
  • 26.
    Wrap Text Arounda GraphicWhen you insert a graphic, Word puts it at the position of the cursor, sitting on the base of the current line. Sometimes, you want more control over the position of a graphic in your document. You may want text to run to the edges of the graphic, flow around the graphic, or even run on top of the graphic. Select the image that best represents the way you want the graphic formatted in relation to your text. Try different effects to see how you like them. You can change your selection by clicking in the alternative boxes. If you find that you can not move a graphic where you want to, it is probably set as “in line with text”. Try selecting “in front of text” and it will move where ever you need it.