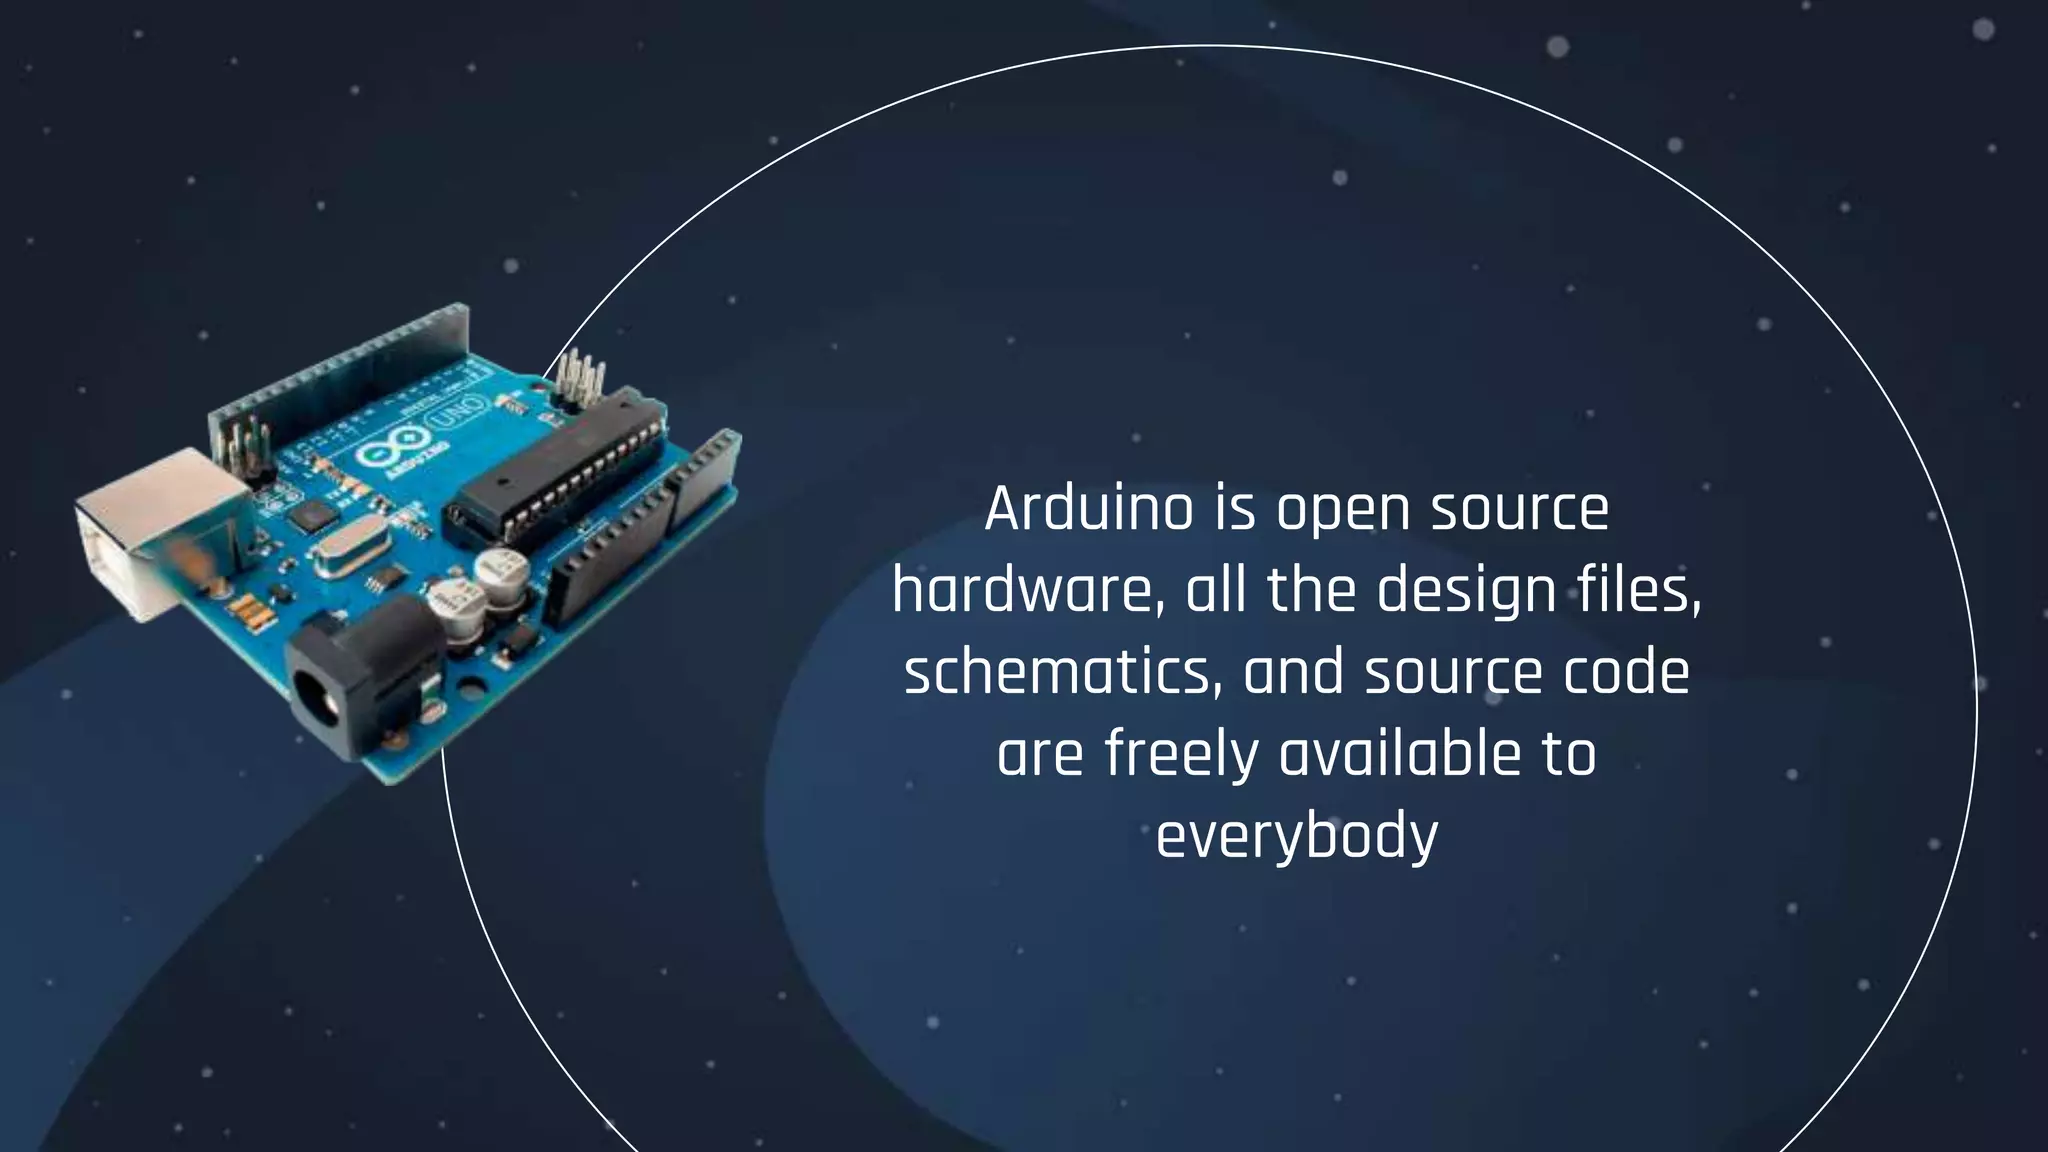
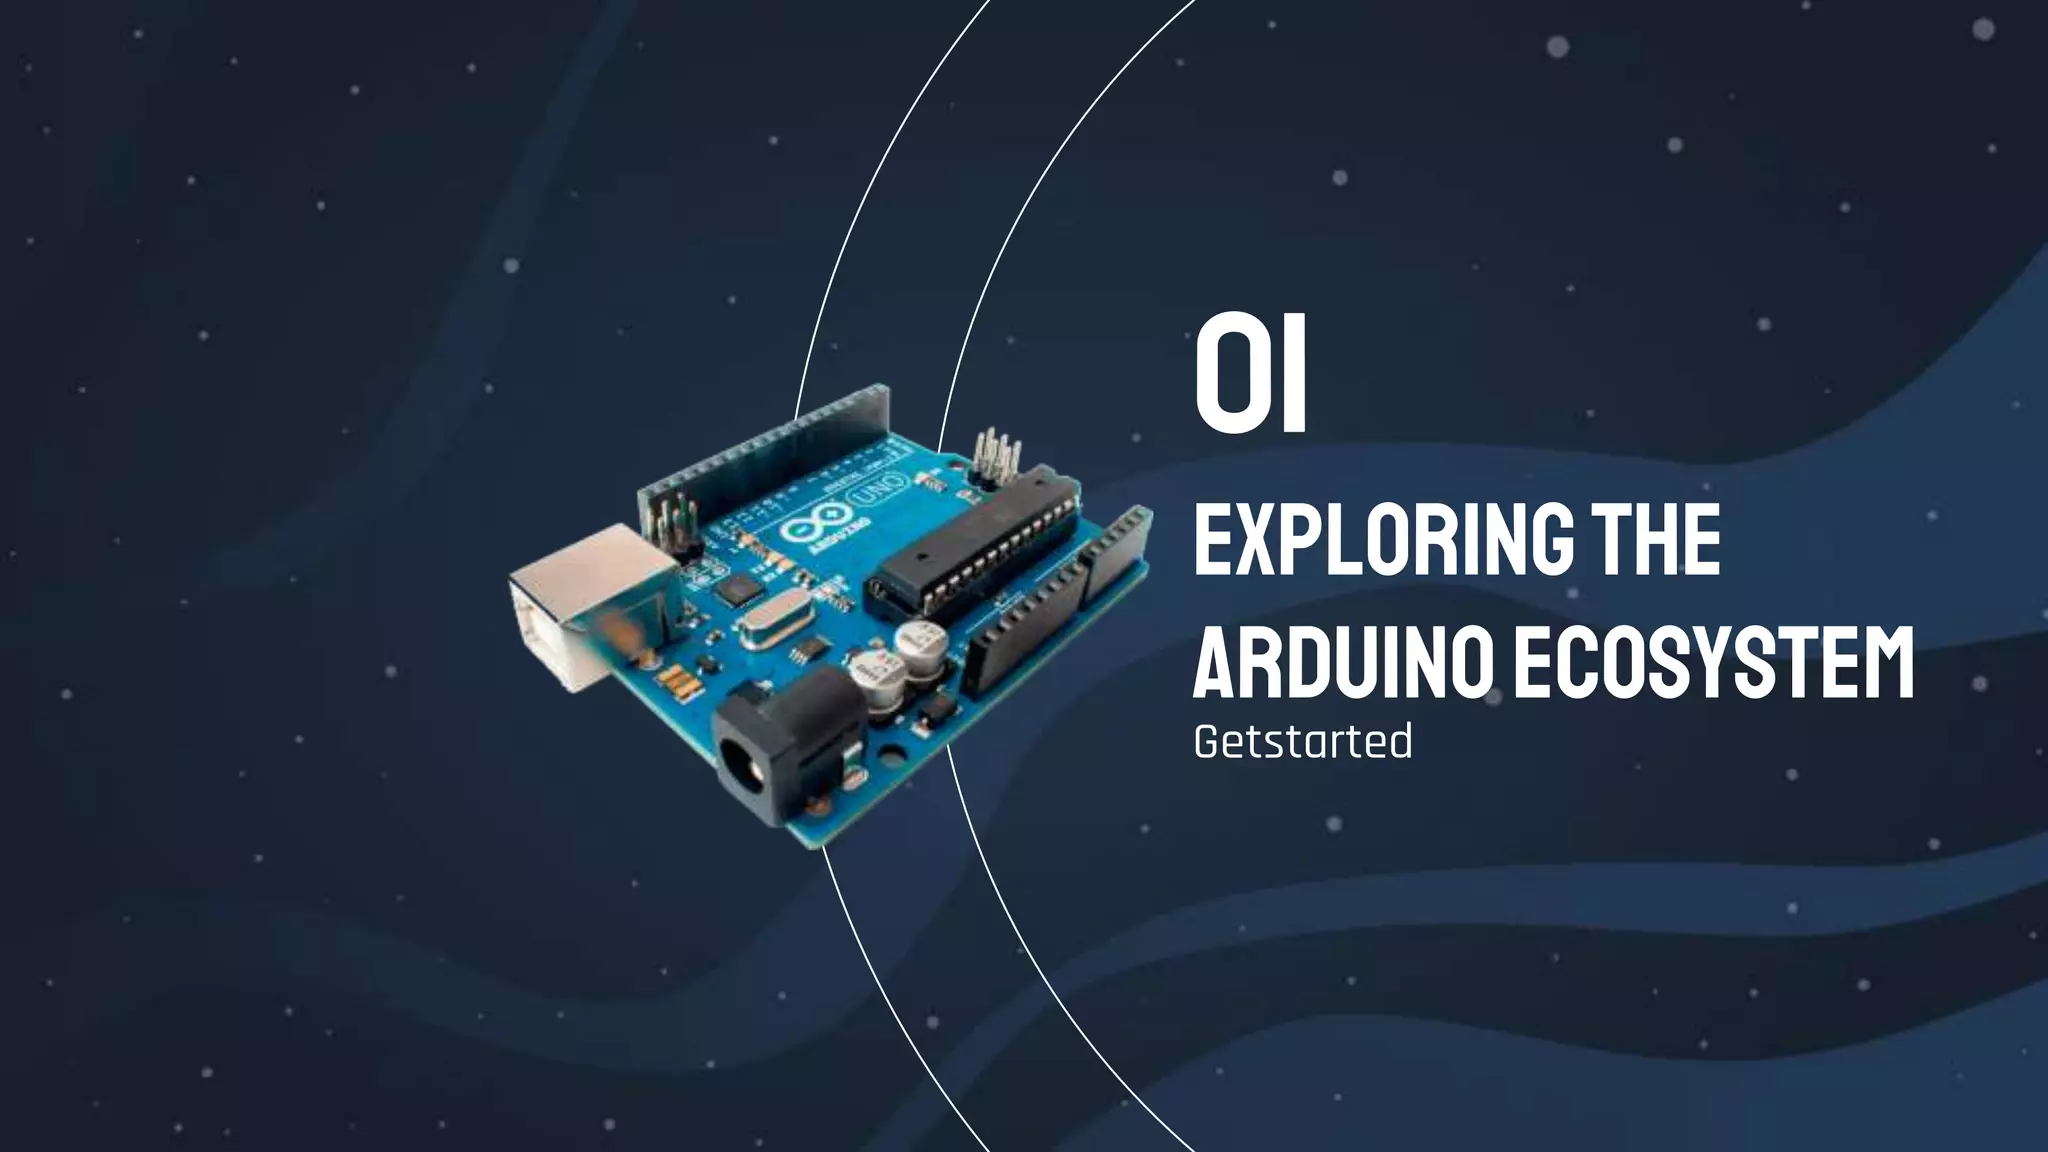
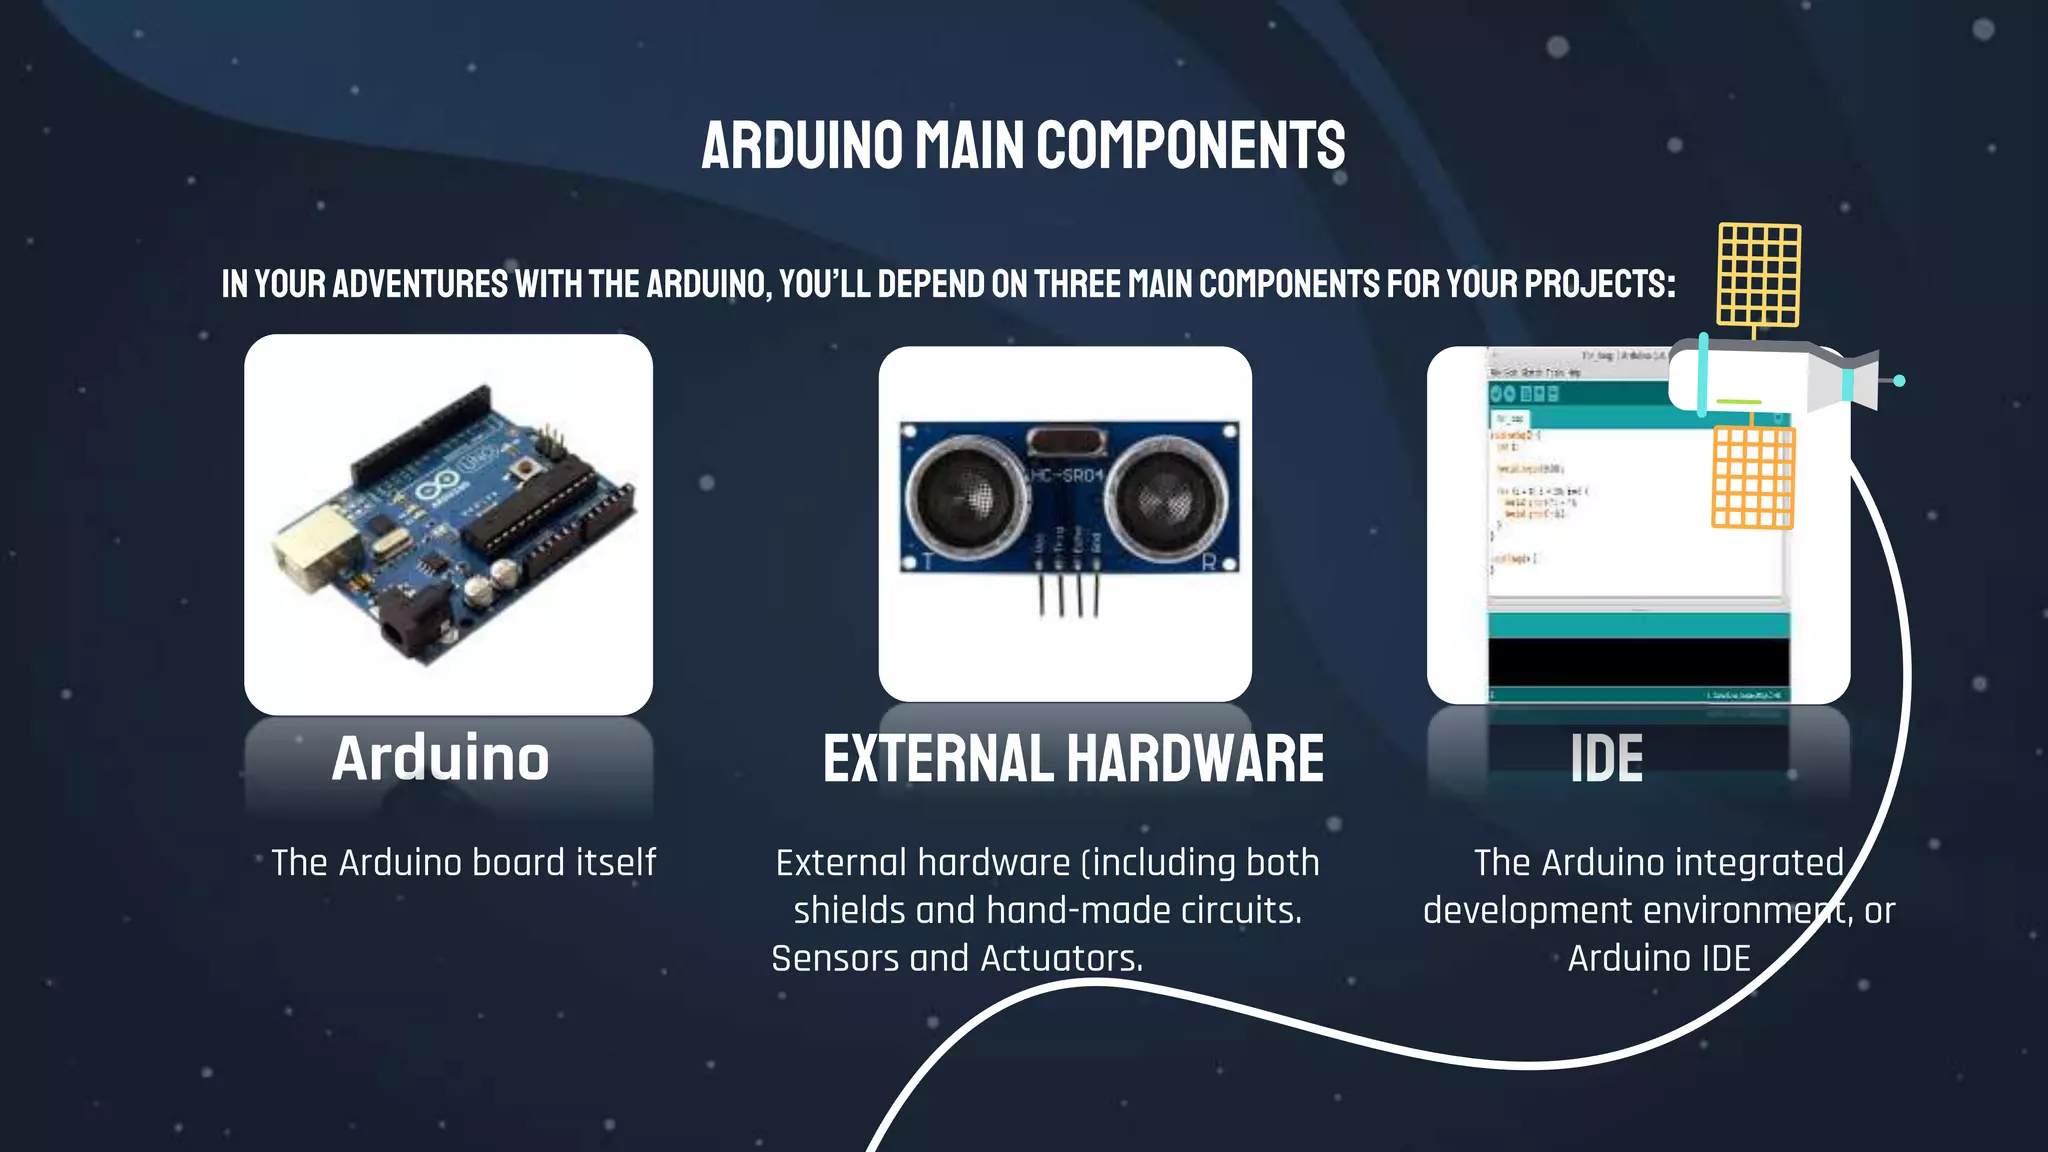
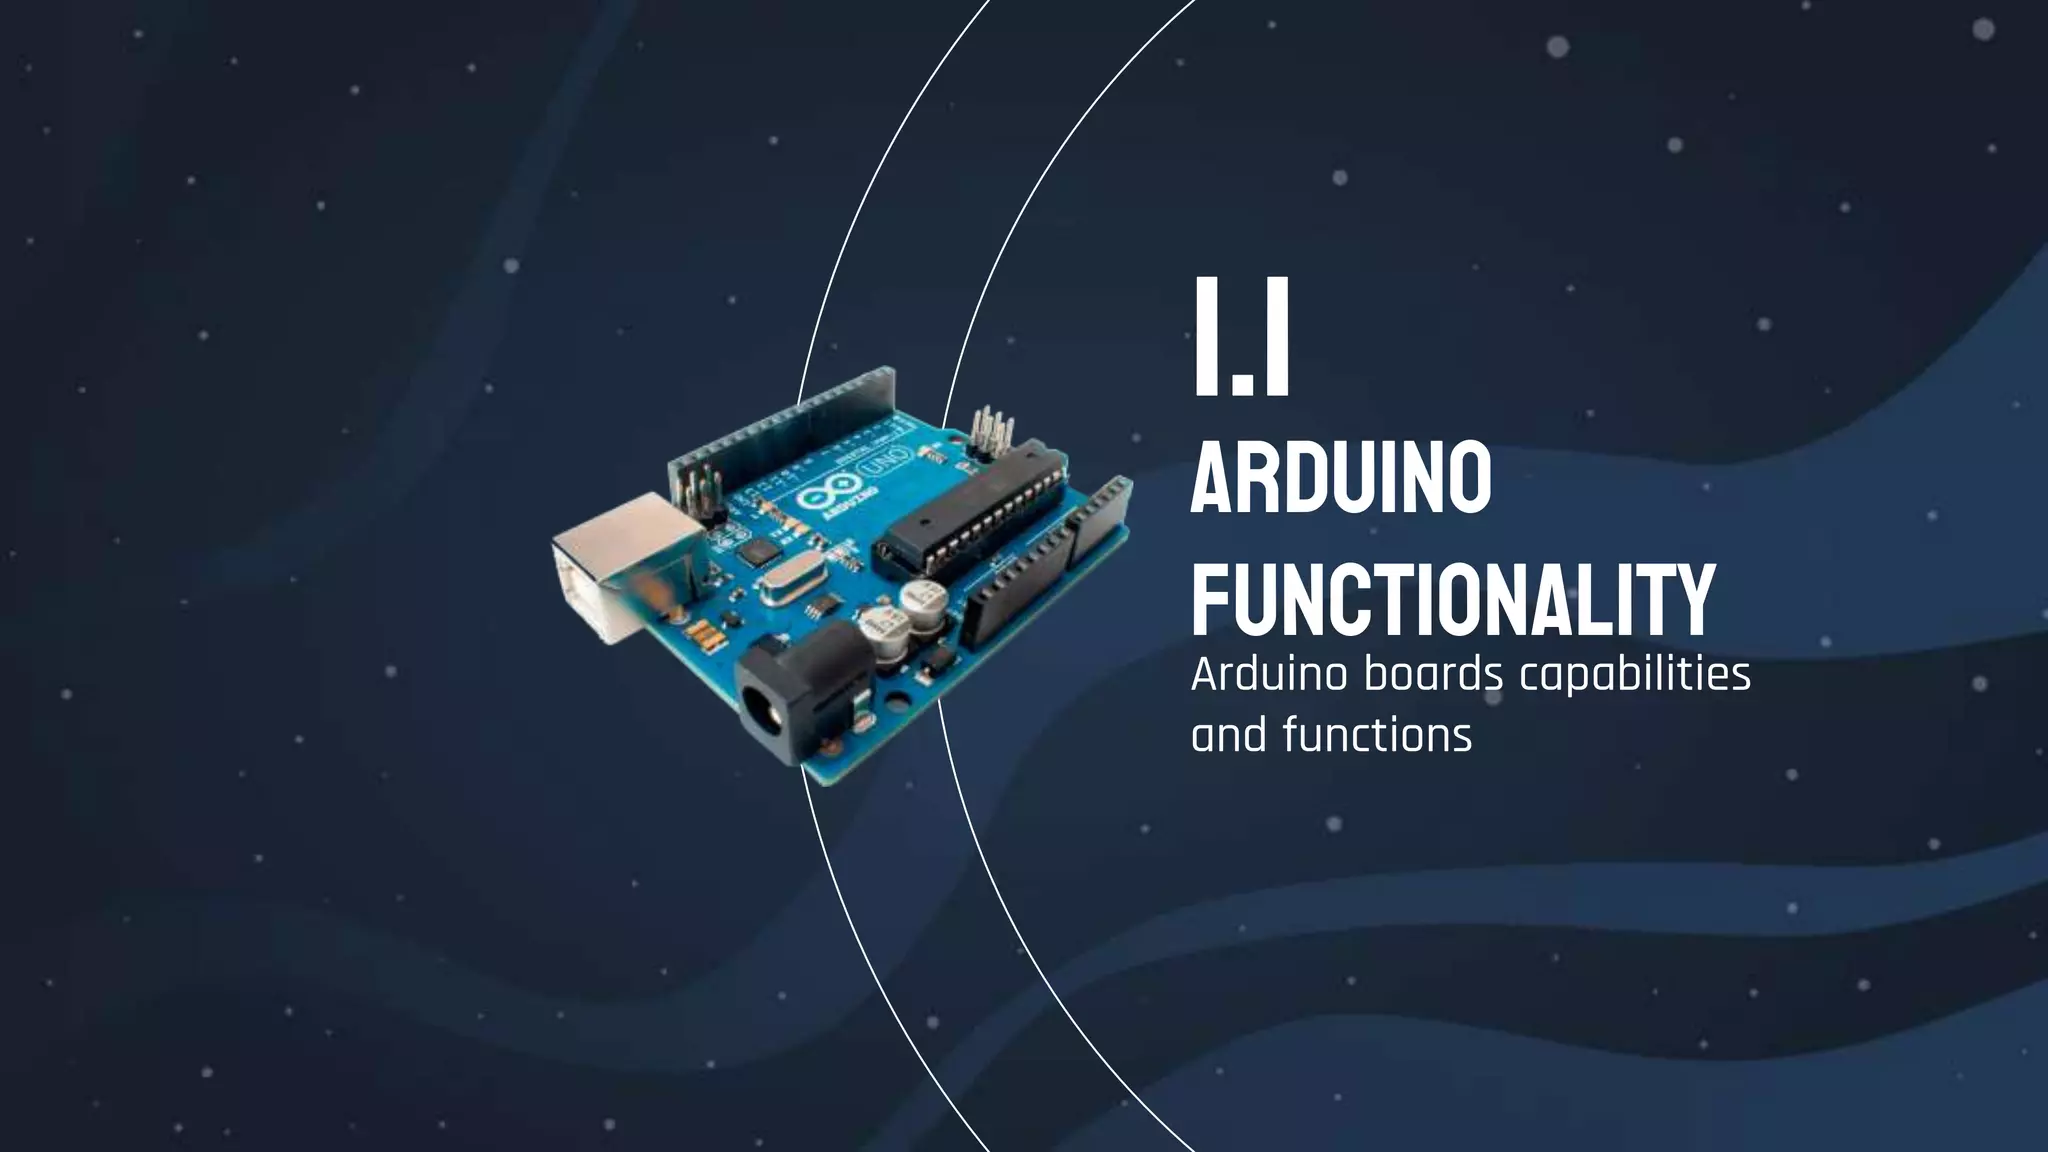
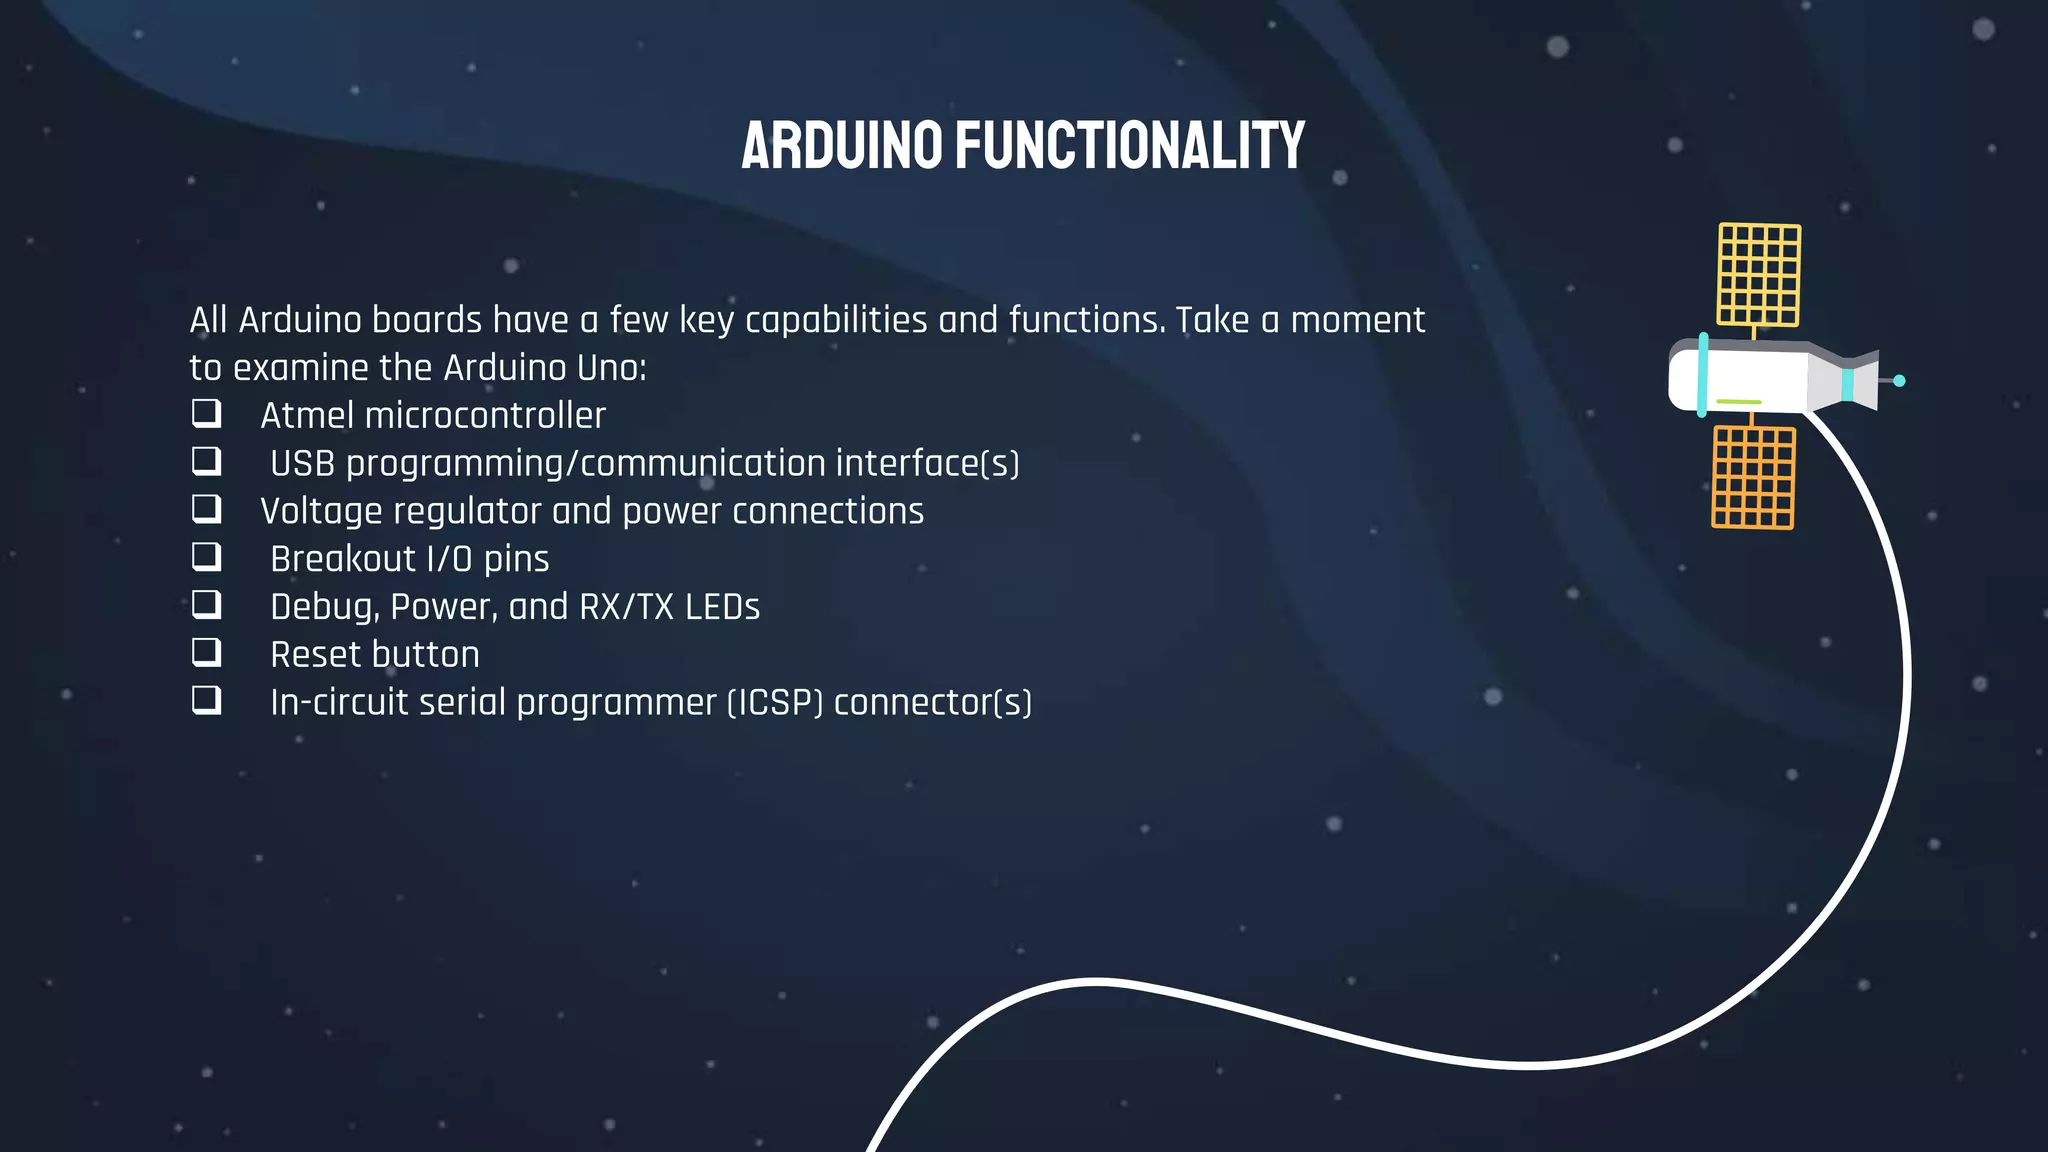
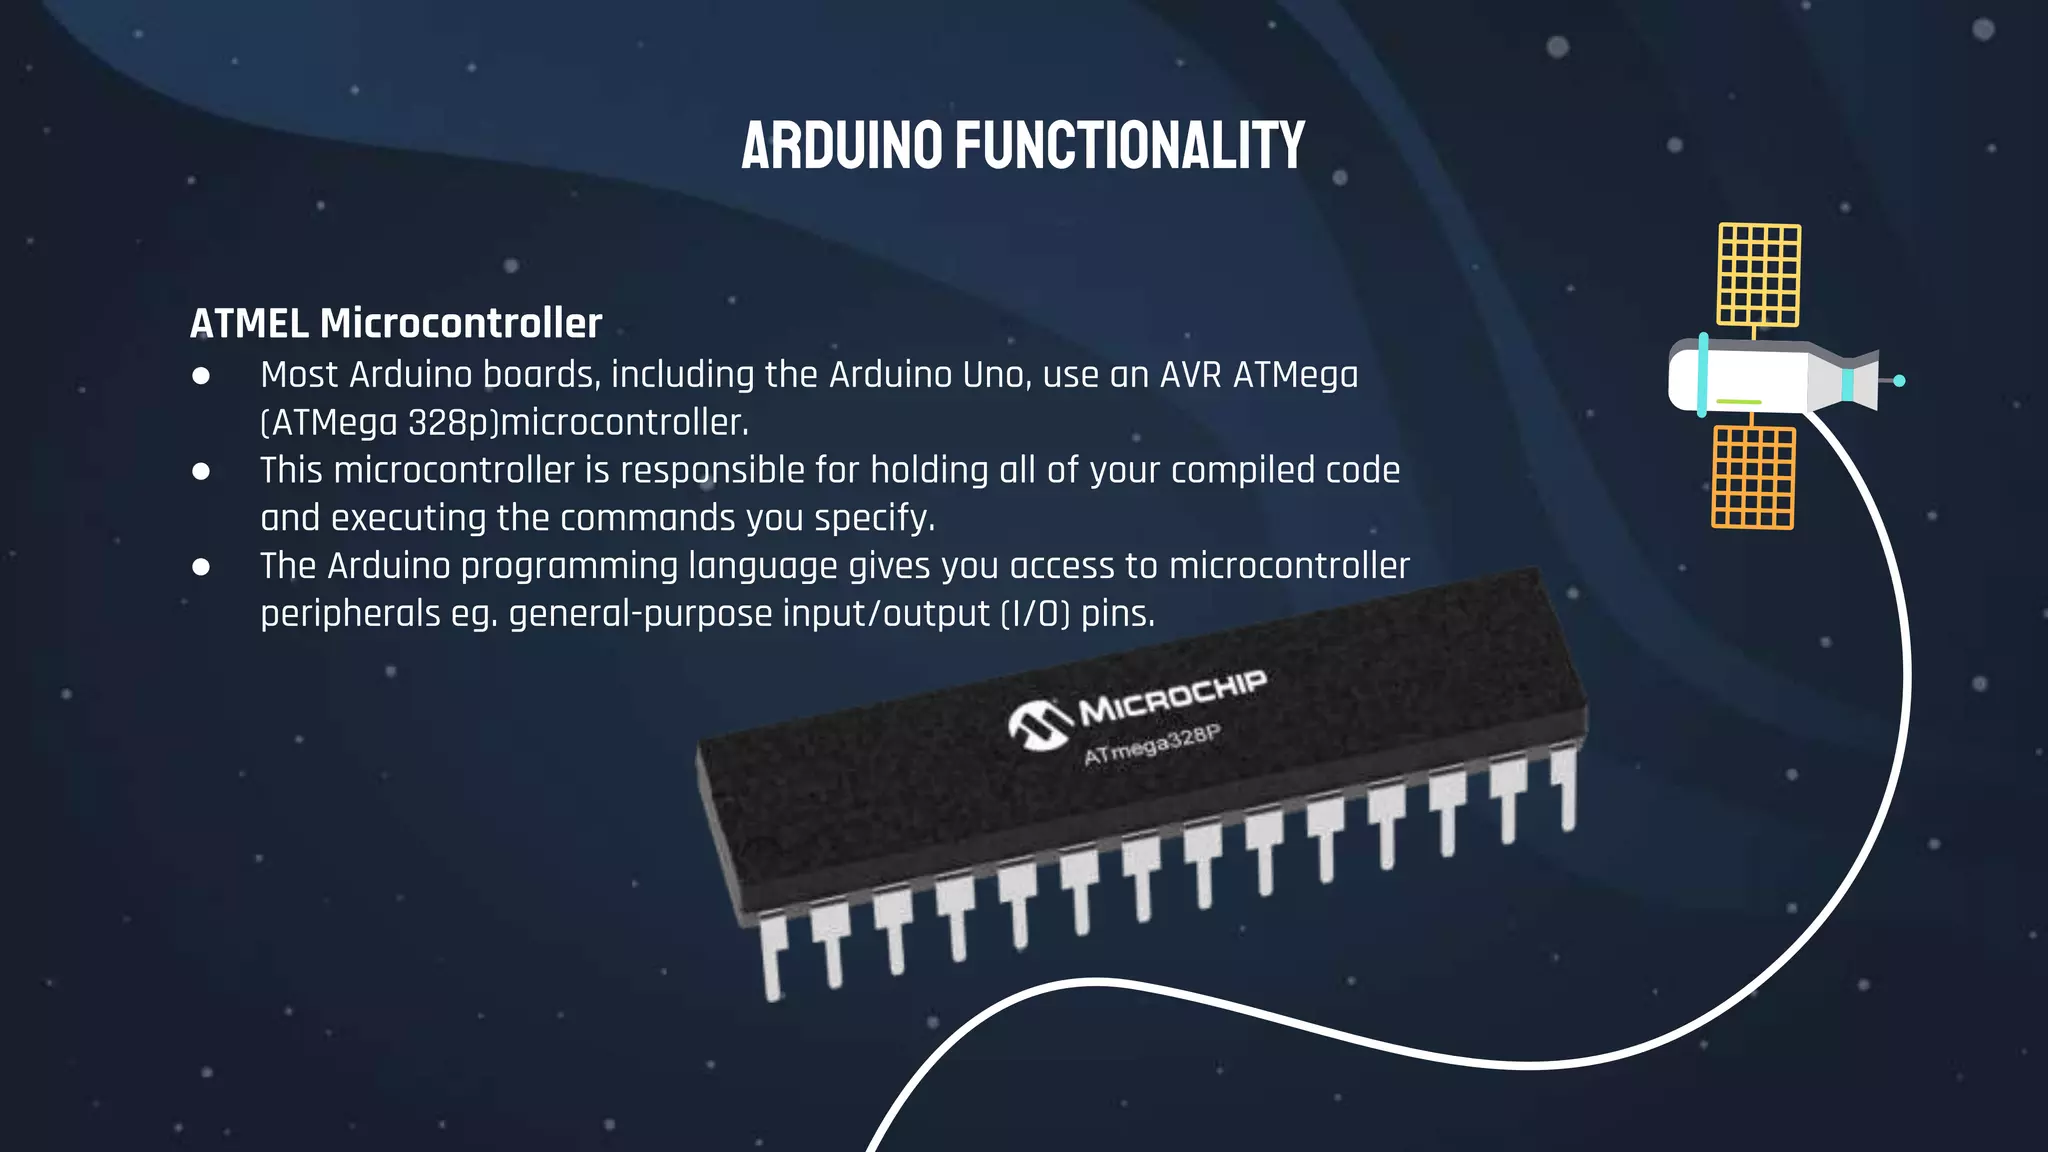
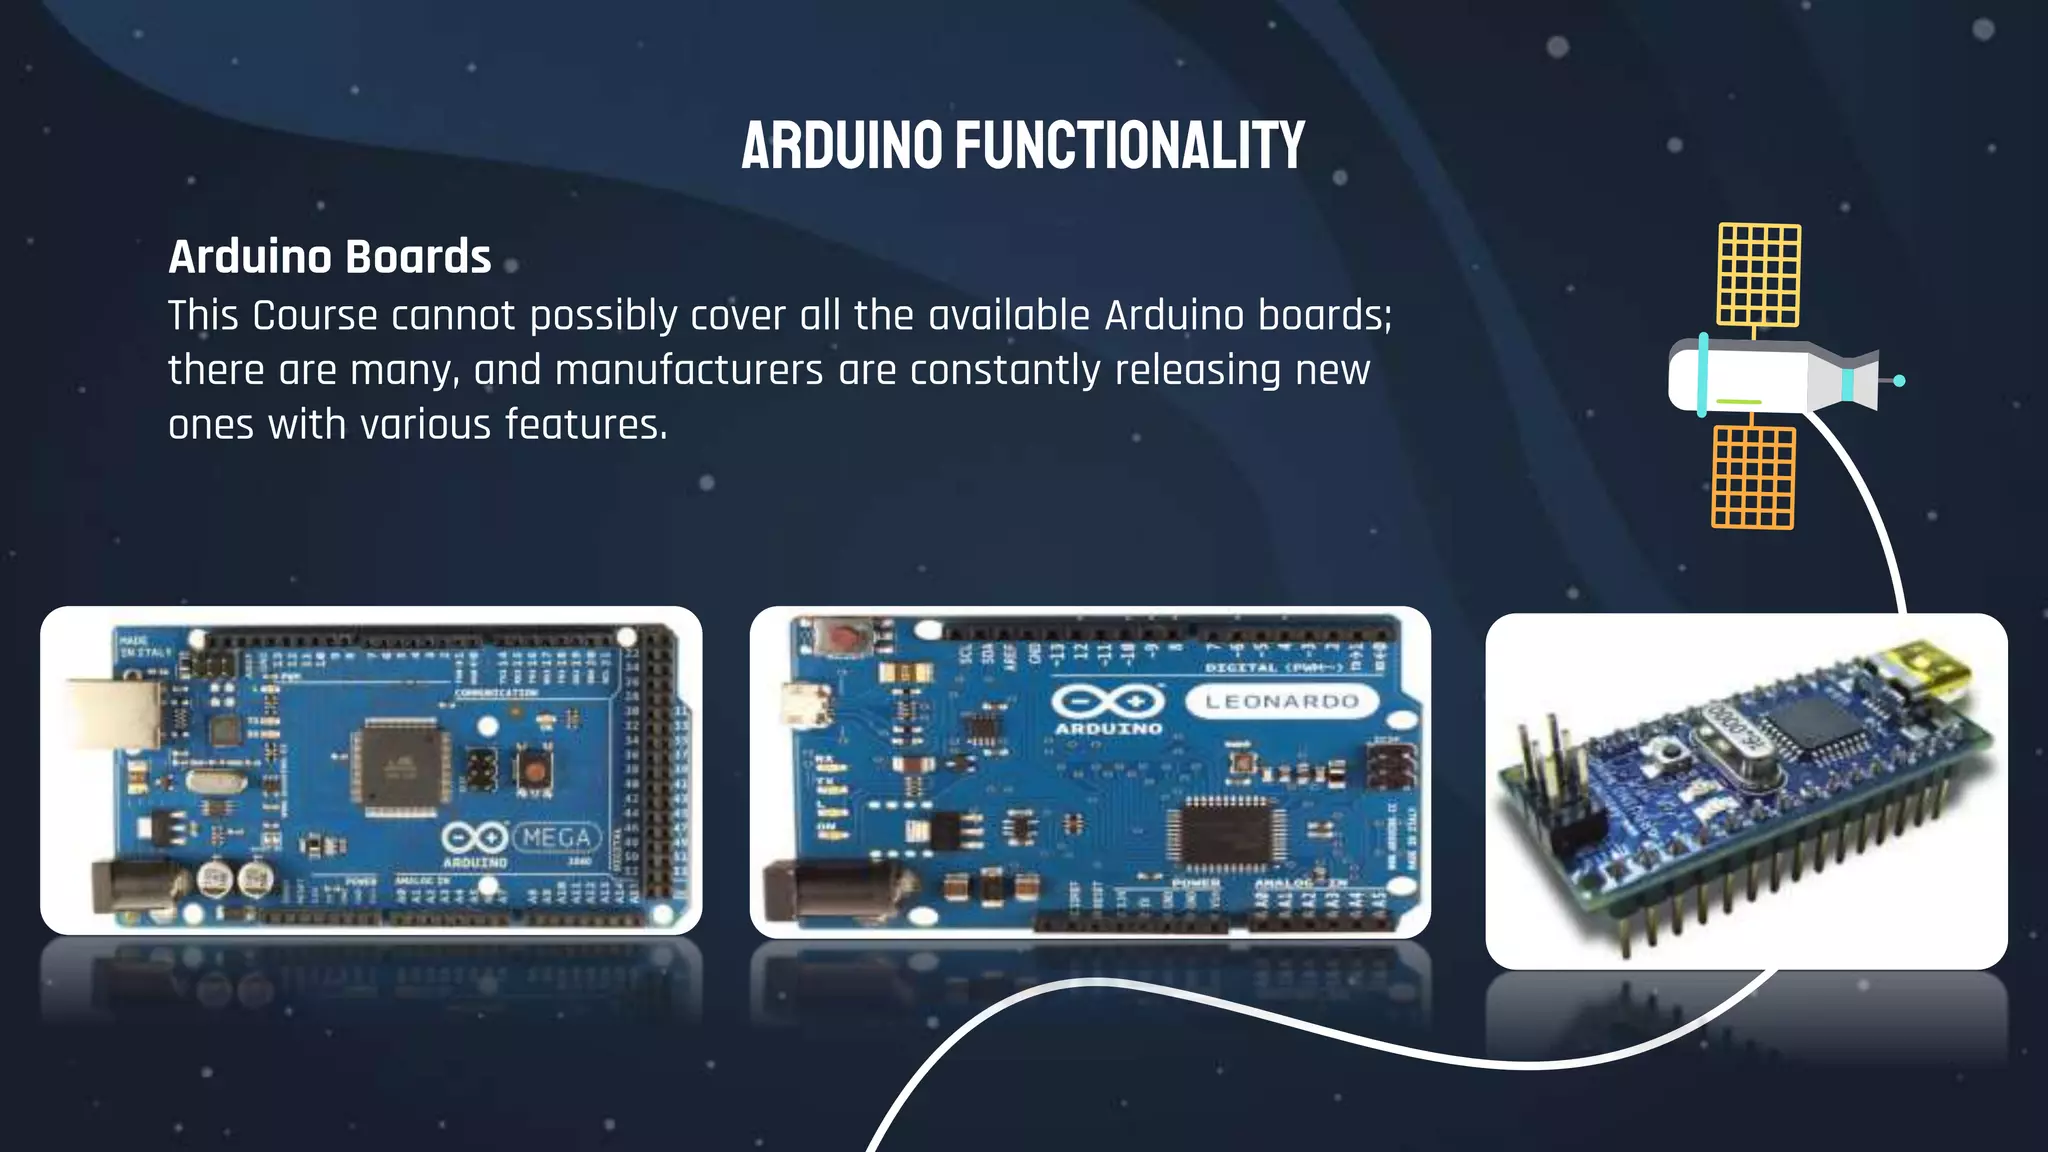
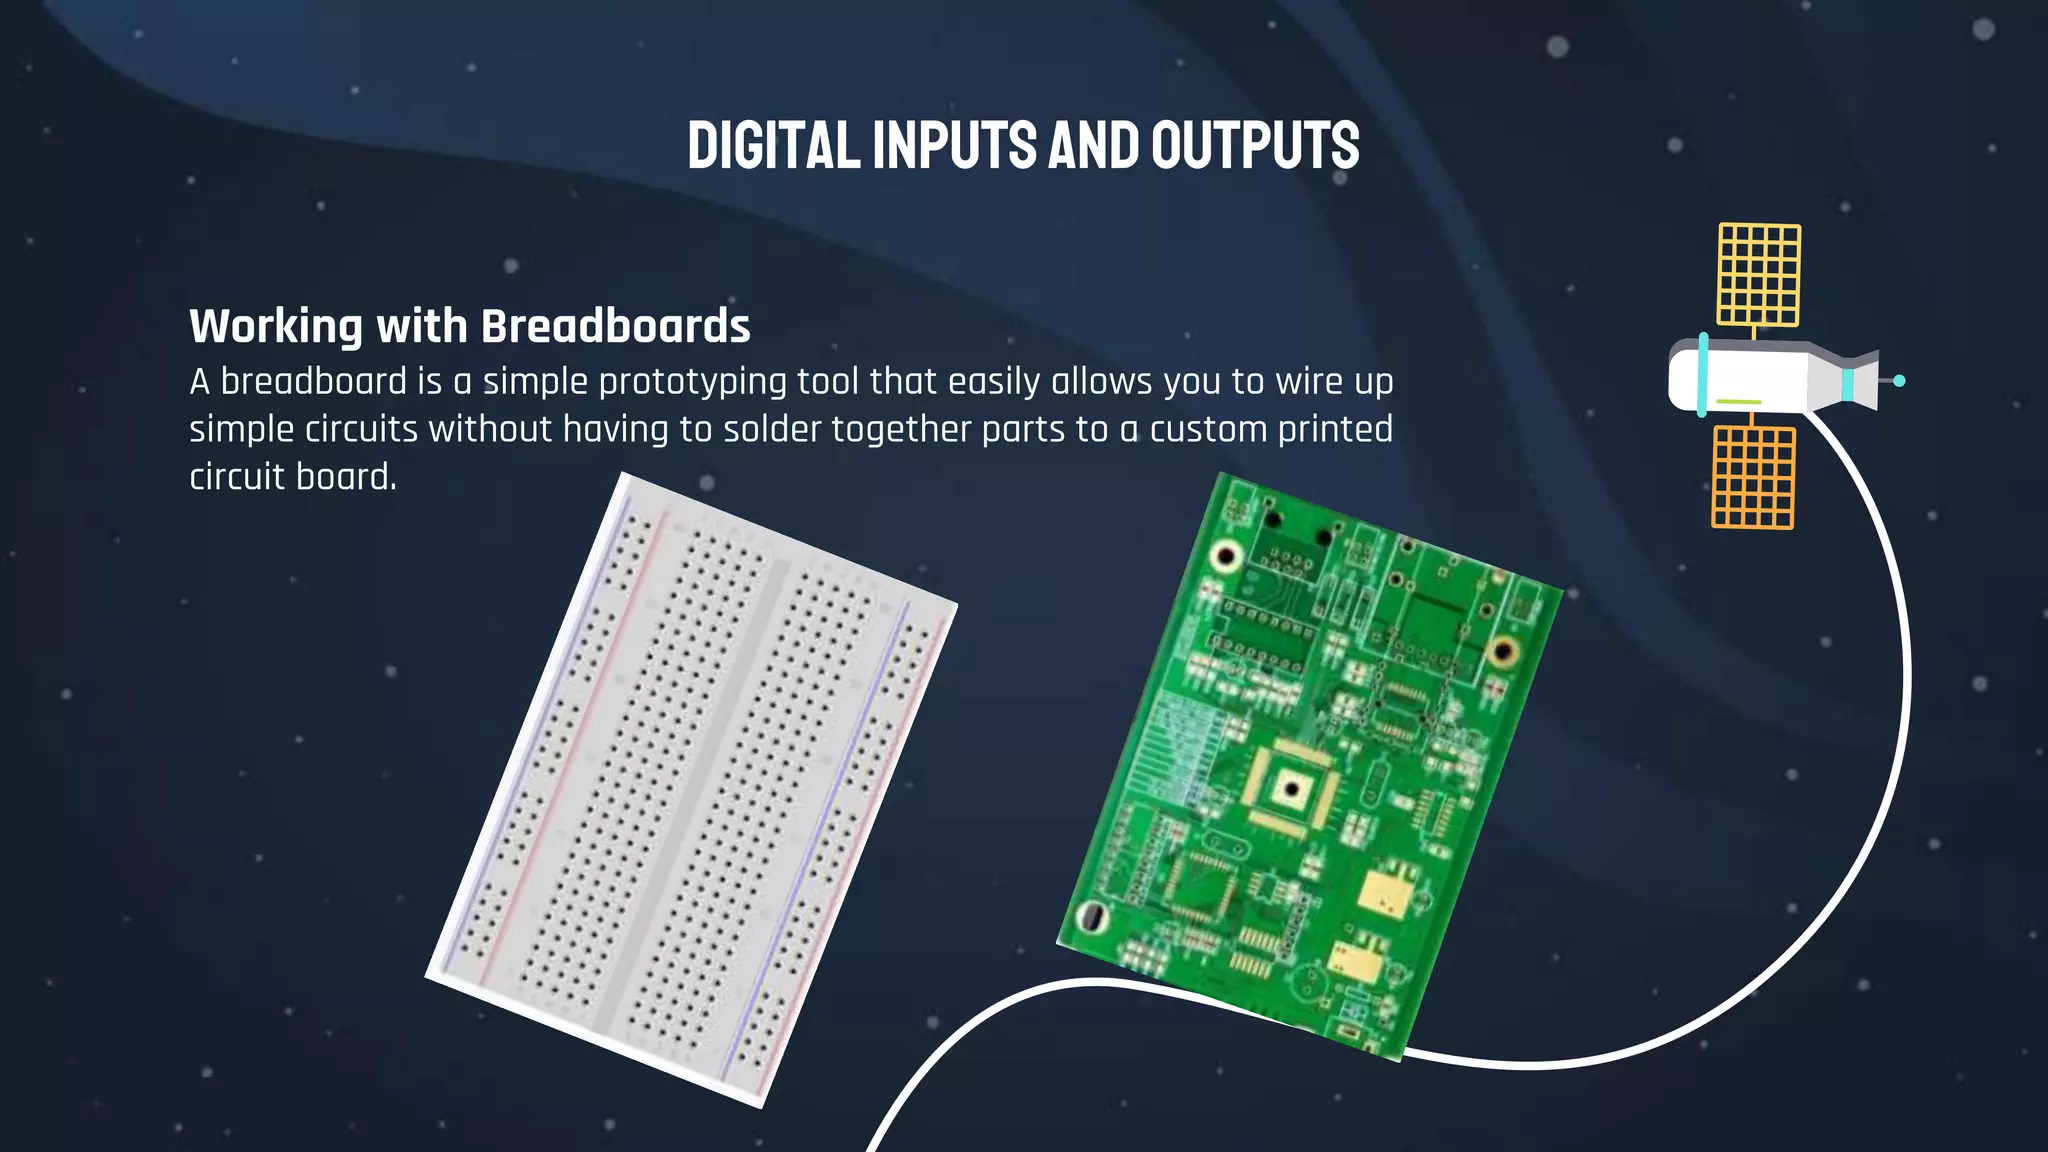
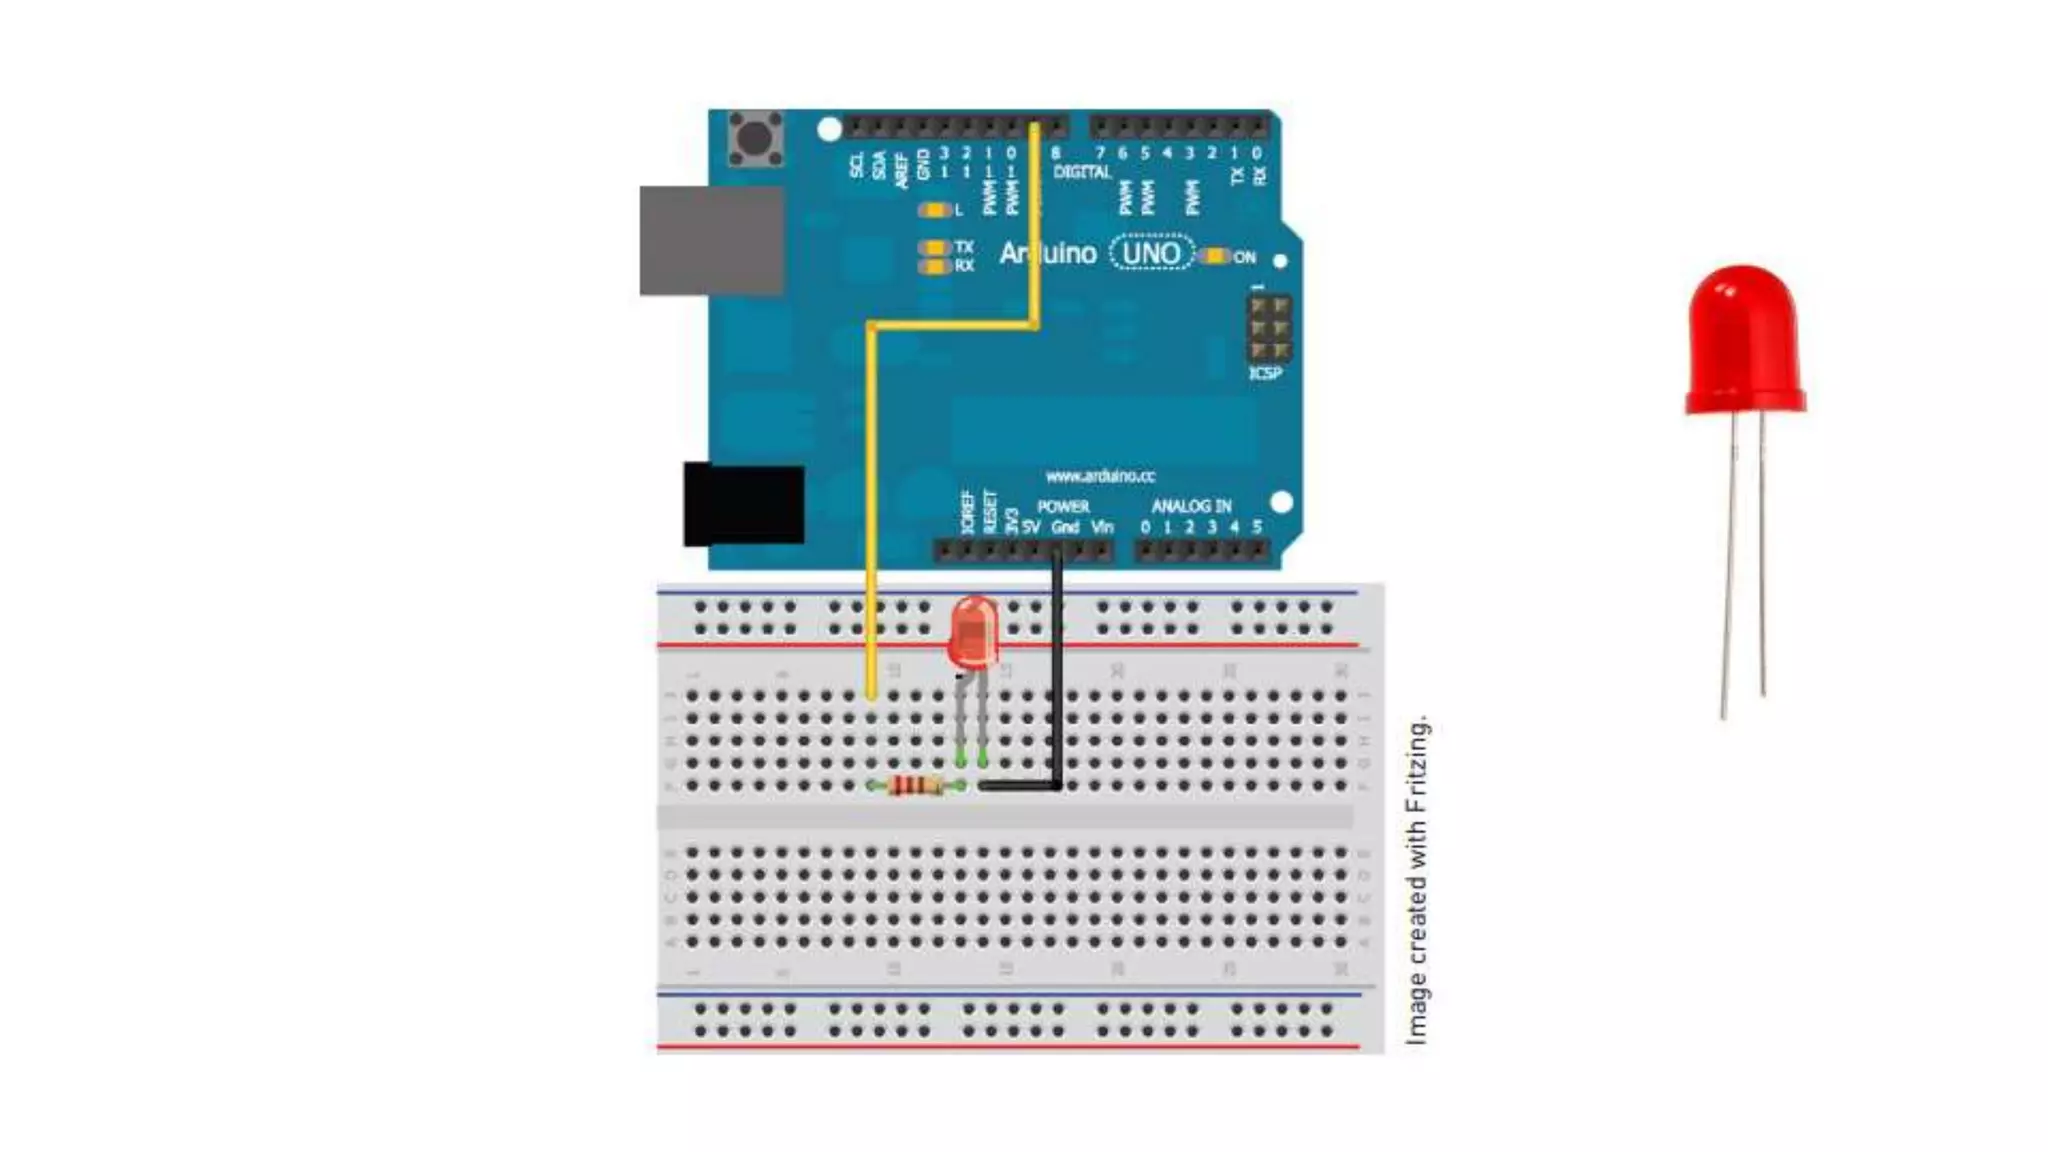
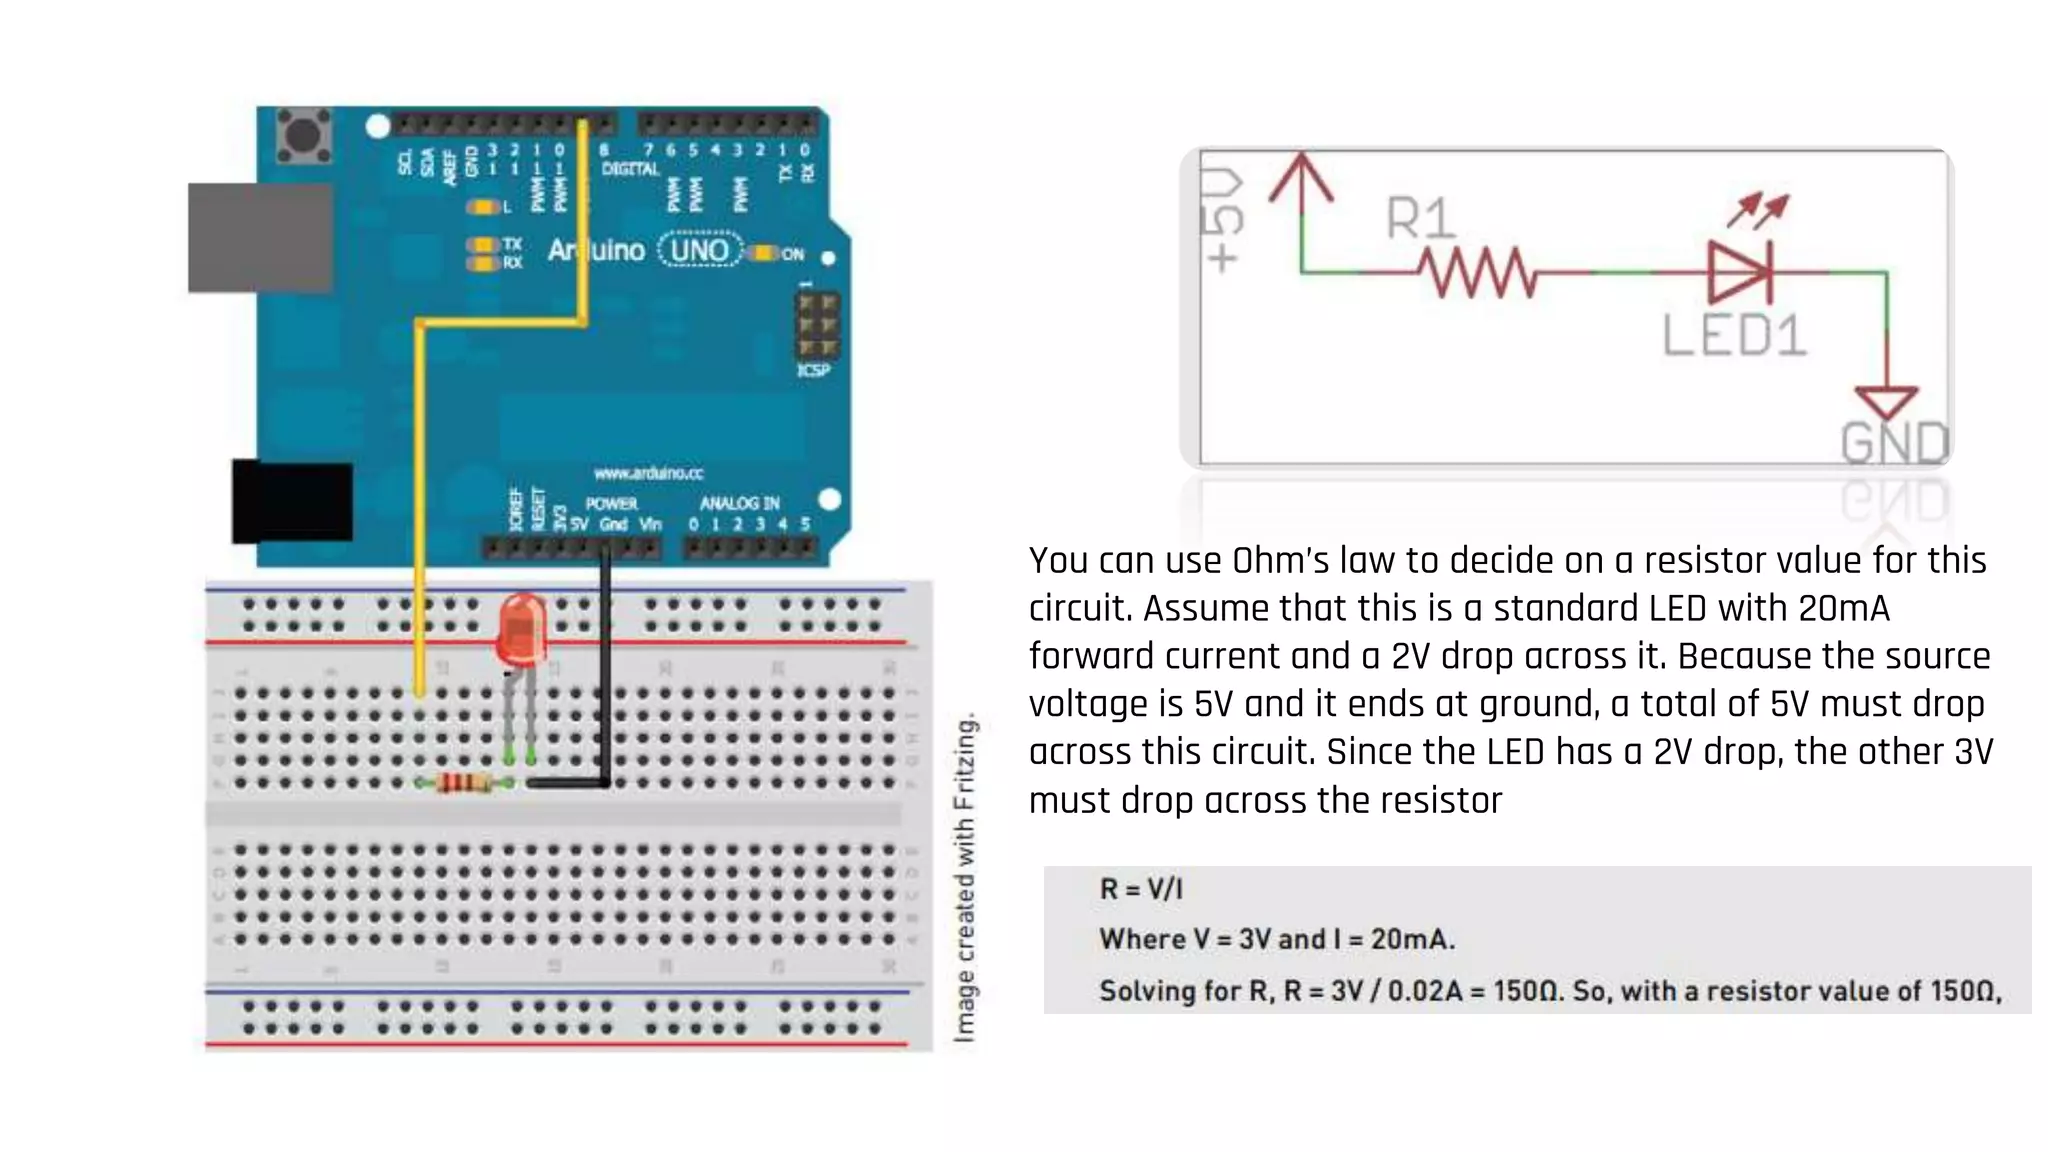
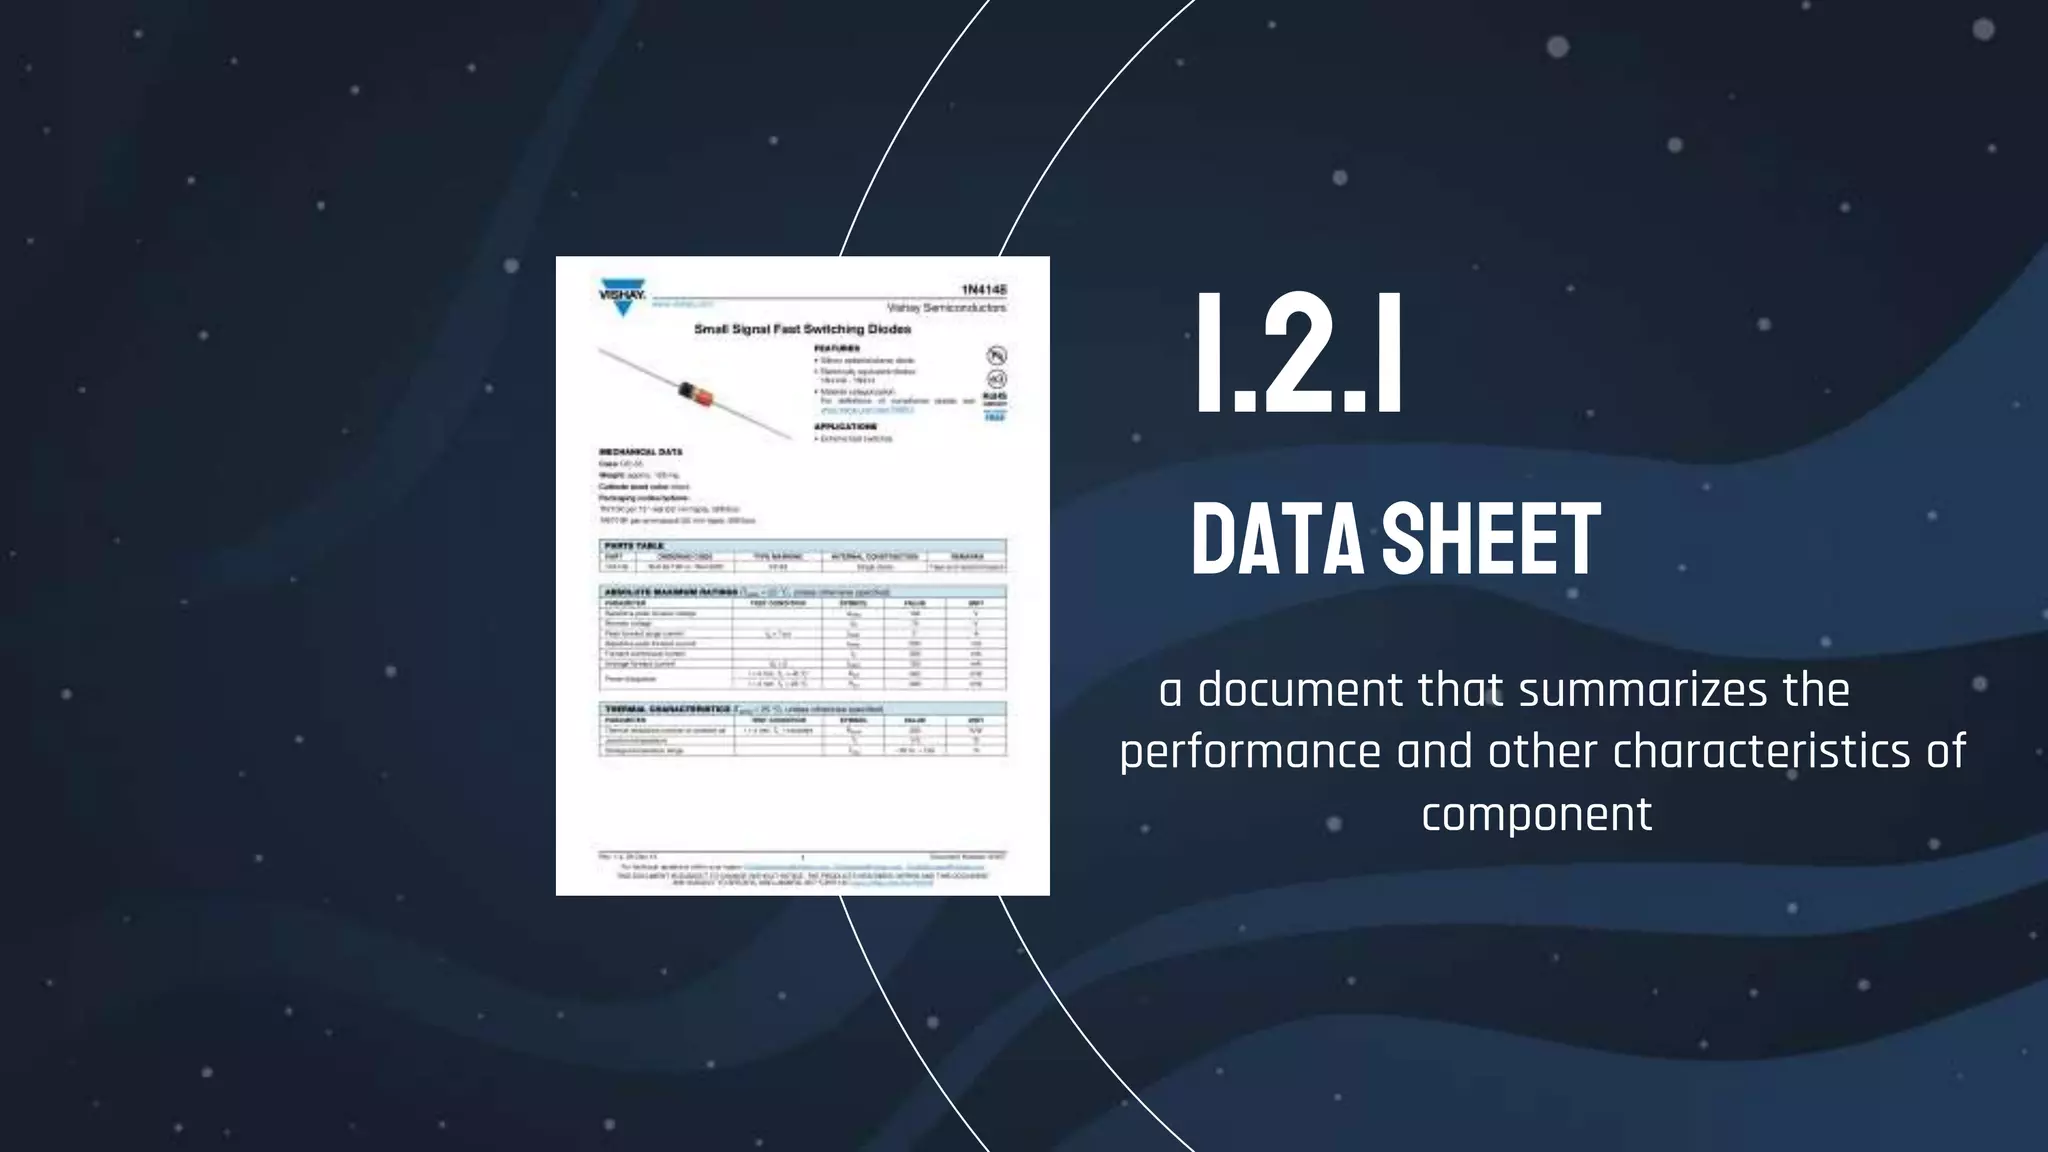
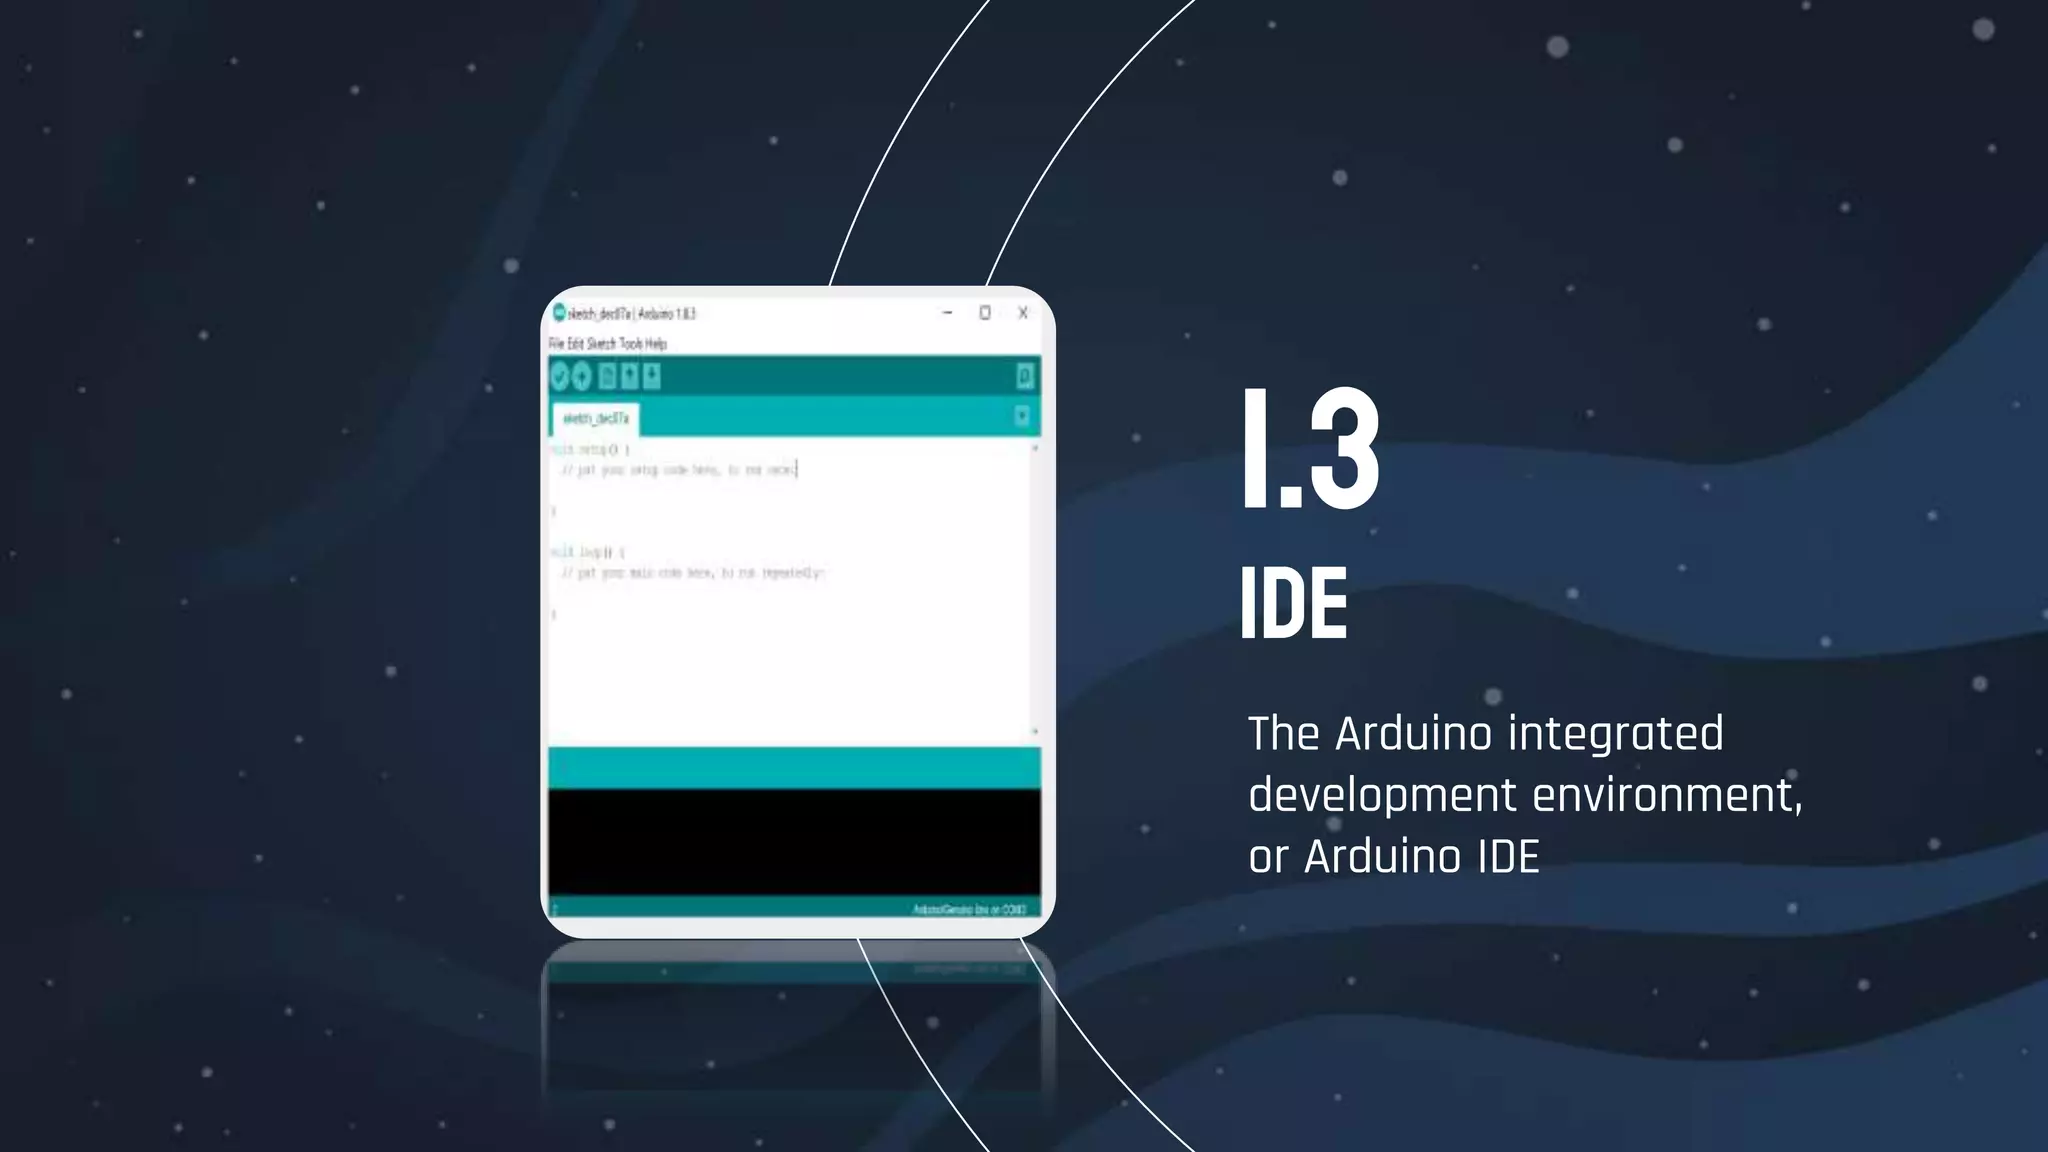
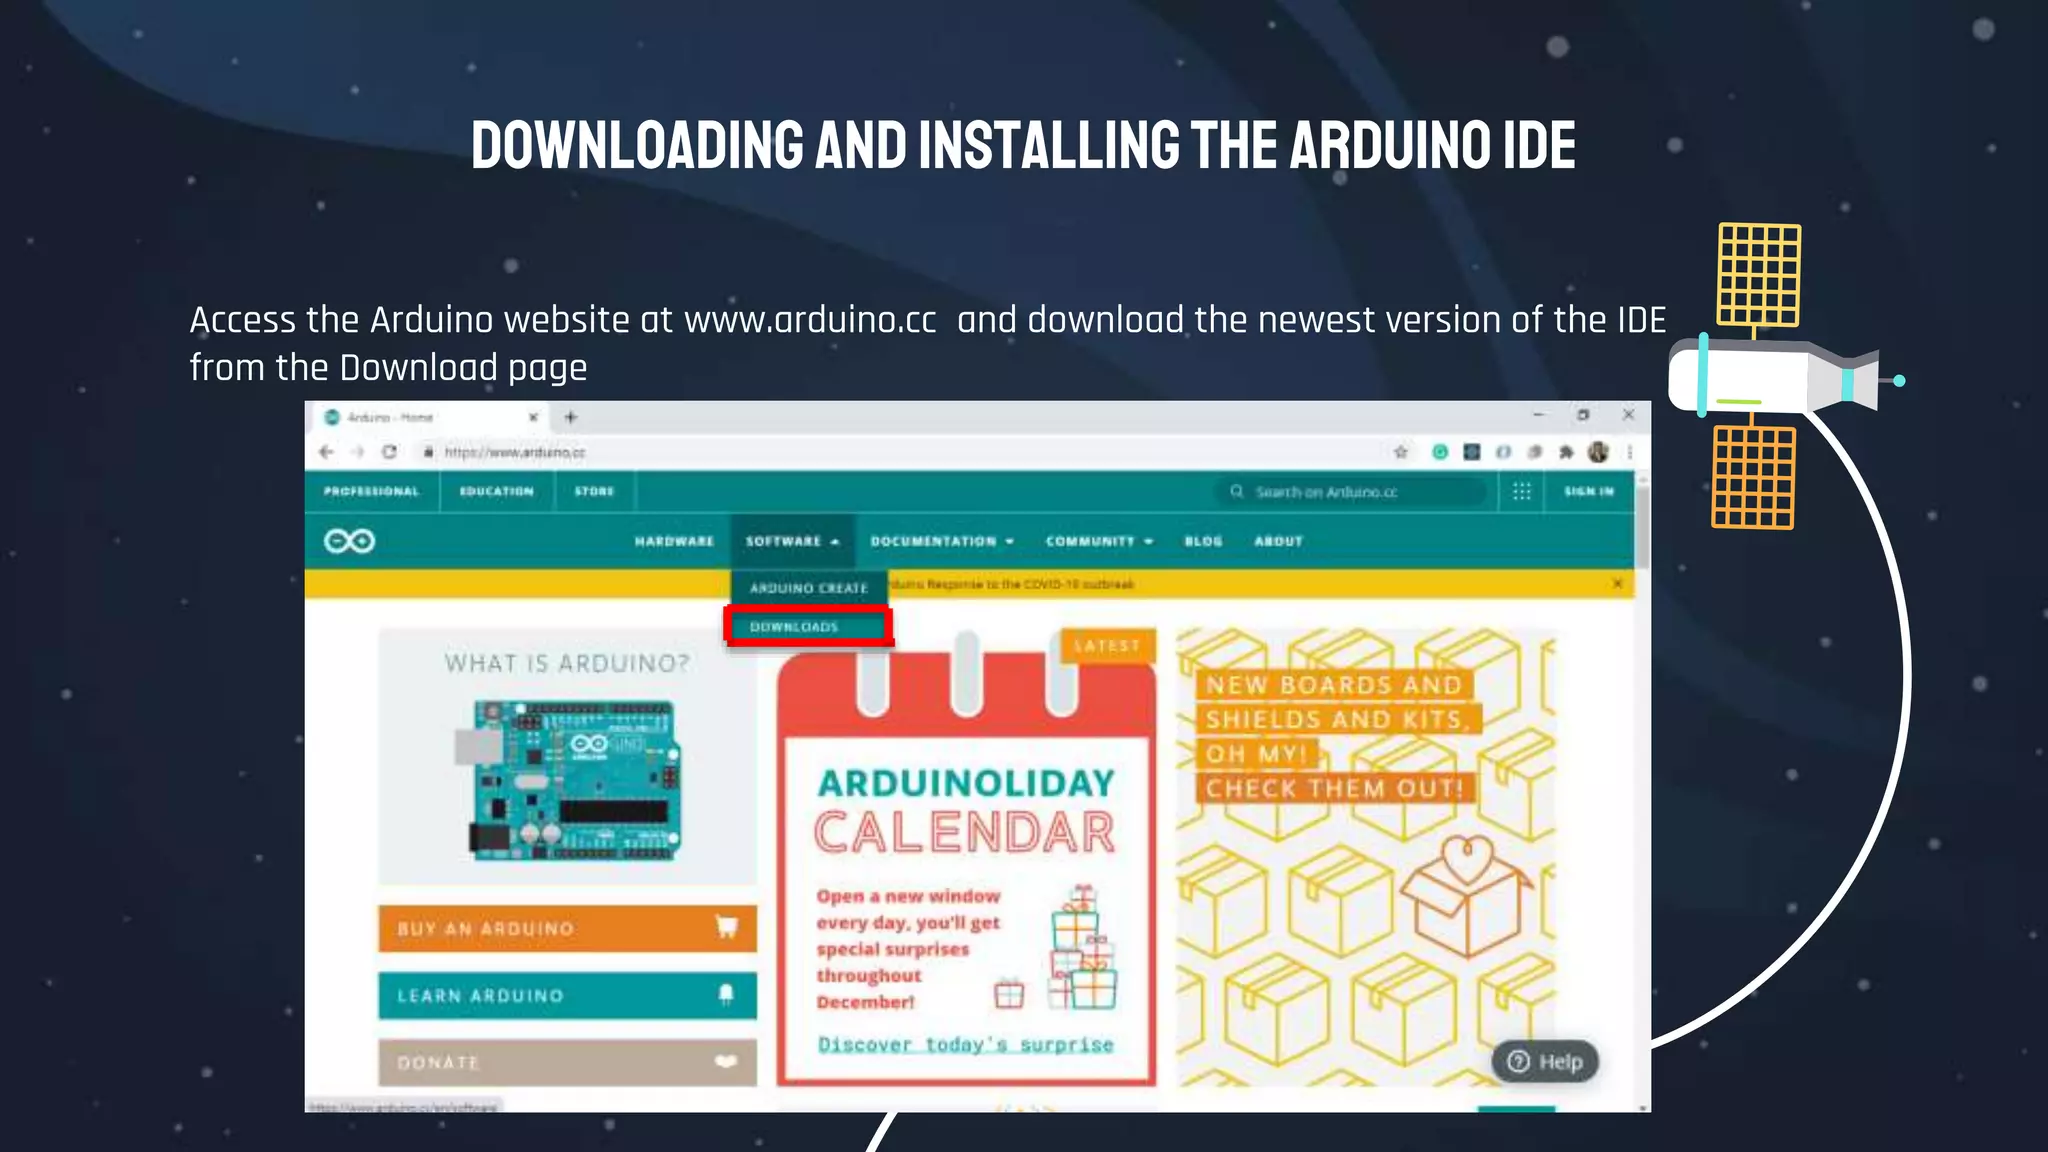
MillerOpenUniversity
What Arduino is
There’s what you’ll find in this section :
1. Arduino Functionality.
2. External Hardware.
3. Arduino IDE.
4. Build a blink project.
Overview
MillerOpenUniversity
The best part about the Arduino prototyping platform is that it’s
whatever you want it to be. The Arduino could be an automatic
plant-watering control system. It can be a web server. It could
even be a quadcopter autopilot. The Arduino is a microcontroller
development platform paired with an intuitive programming
language that you develop using the Arduino integrated
development environment (IDE). By equipping the Arduino with
sensors, actuators, lights, speakers, add-on modules (called
shields), and other integrated circuits, you can turn the Arduino
into a programmable “brain” for just about any control system.
…It’s impossible to cover everything that the Arduino is capable of,
because the possibilities are limited only by your imagination.
WhatisanArduino ?
Arduino is open source
hardware, all the design files,
schematics, and source code
are freely available to
everybody
Exploringthe
ArduinoEcosystem
Getstarted
01
Arduinomaincomponents
In your adventureswiththe Arduino, you’lldepend onthreemaincomponents foryour projects:
Arduino
The Arduino board itself
External Hardware IDE
The Arduino integrated
development environment, or
Arduino IDE
External hardware (including both
shields and hand-made circuits.
Sensors and Actuators.
Arduino
Functionality
Arduino boards capabilities
and functions
1.1
Arduino Functionality
All Arduino boards have a few key capabilities and functions. Take a moment
to examine the Arduino Uno:
 Atmel microcontroller
 USB programming/communication interface(s)
 Voltage regulator and power connections
 Breakout I/O pins
 Debug, Power, and RX/TX LEDs
 Reset button
 In-circuit serial programmer (ICSP) connector(s)
Arduino Functionality
ATMEL Microcontroller
● Most Arduino boards, including the Arduino Uno, use an AVR ATMega
(ATMega 328p)microcontroller.
● This microcontroller is responsible for holding all of your compiled code
and executing the commands you specify.
● The Arduino programming language gives you access to microcontroller
peripherals eg. general-purpose input/output (I/O) pins.
Arduino Functionality
Programming Interfaces
● Ordinarily, ATMega microcontroller programs are written in C or
Assembly and programmed via the ICSP interface using a dedicated
programmer.
● Perhaps the most important characteristic of an Arduino is that you can
program it easily via USB, without using a separate programmer.
Arduino Functionality
General I/O and ADCs
● The part of the Arduino that you’ll care the most about during your
projects is the general-purpose I/O and ADC pins.
● All of these pins can be individually addressed via the programs you’ll
write. All of them can serve as digital inputs and outputs.
● The ADC pins can also act as analog inputs that can measure voltages
between 0 and 5V.
Arduino Functionality
Power Supplies
● For the majority of your projects, you will simply use the 5V
power that is provided over your USB cable.
● However, when you’re ready to untether your project from a
computer, you have other power options. The Arduino can
accept between 6V and 20V (7-12V recommend) via the direct
current (DC) barrel jack connector, or into the Vin pin.
● The Arduino has built-in 5V and 3.3V regulators:
○ 5V is used for all the logic on the board. In other words,
when you toggle a digital I/O pin, you are toggling it
between 5V and 0V.
○ 3.3V is broken out to a pin to accommodate 3.3V shields
and external circuitry.
Arduino Functionality
Arduino Boards
This Course cannot possibly cover all the available Arduino boards;
there are many, and manufacturers are constantly releasing new
ones with various features.
DigitalInputsand
Outputs
what makes the Arduino so useful is
that the system is equipped with
both inputs and outputs
1.2
DigitalInputsandOutputs
Working with Breadboards
A breadboard is a simple prototyping tool that easily allows you to wire up
simple circuits without having to solder together parts to a custom printed
circuit board.
You can use Ohm’s law to decide on a resistor value for this
circuit. Assume that this is a standard LED with 20mA
forward current and a 2V drop across it. Because the source
voltage is 5V and it ends at ground, a total of 5V must drop
across this circuit. Since the LED has a 2V drop, the other 3V
must drop across the resistor
Datasheet
1.2.1
a document that summarizes the
performance and other characteristics of
component
IDE
The Arduino integrated
development environment,
or Arduino IDE
1.3
Downloading andInstallingthe Arduino IDE
Access the Arduino website at www.arduino.cc and download the newest version of the IDE
from the Download page

1.Arduino Ecosystem.pptx

  • 1.
  • 2.
    There’s what you’llfind in this section : 1. Arduino Functionality. 2. External Hardware. 3. Arduino IDE. 4. Build a blink project. Overview MillerOpenUniversity
  • 3.
    The best partabout the Arduino prototyping platform is that it’s whatever you want it to be. The Arduino could be an automatic plant-watering control system. It can be a web server. It could even be a quadcopter autopilot. The Arduino is a microcontroller development platform paired with an intuitive programming language that you develop using the Arduino integrated development environment (IDE). By equipping the Arduino with sensors, actuators, lights, speakers, add-on modules (called shields), and other integrated circuits, you can turn the Arduino into a programmable “brain” for just about any control system. …It’s impossible to cover everything that the Arduino is capable of, because the possibilities are limited only by your imagination. WhatisanArduino ?
  • 4.
    Arduino is opensource hardware, all the design files, schematics, and source code are freely available to everybody
  • 5.
  • 6.
    Arduinomaincomponents In your adventureswiththeArduino, you’lldepend onthreemaincomponents foryour projects: Arduino The Arduino board itself External Hardware IDE The Arduino integrated development environment, or Arduino IDE External hardware (including both shields and hand-made circuits. Sensors and Actuators.
  • 7.
  • 8.
    Arduino Functionality All Arduinoboards have a few key capabilities and functions. Take a moment to examine the Arduino Uno:  Atmel microcontroller  USB programming/communication interface(s)  Voltage regulator and power connections  Breakout I/O pins  Debug, Power, and RX/TX LEDs  Reset button  In-circuit serial programmer (ICSP) connector(s)
  • 10.
    Arduino Functionality ATMEL Microcontroller ●Most Arduino boards, including the Arduino Uno, use an AVR ATMega (ATMega 328p)microcontroller. ● This microcontroller is responsible for holding all of your compiled code and executing the commands you specify. ● The Arduino programming language gives you access to microcontroller peripherals eg. general-purpose input/output (I/O) pins.
  • 11.
    Arduino Functionality Programming Interfaces ●Ordinarily, ATMega microcontroller programs are written in C or Assembly and programmed via the ICSP interface using a dedicated programmer. ● Perhaps the most important characteristic of an Arduino is that you can program it easily via USB, without using a separate programmer.
  • 13.
    Arduino Functionality General I/Oand ADCs ● The part of the Arduino that you’ll care the most about during your projects is the general-purpose I/O and ADC pins. ● All of these pins can be individually addressed via the programs you’ll write. All of them can serve as digital inputs and outputs. ● The ADC pins can also act as analog inputs that can measure voltages between 0 and 5V.
  • 14.
    Arduino Functionality Power Supplies ●For the majority of your projects, you will simply use the 5V power that is provided over your USB cable. ● However, when you’re ready to untether your project from a computer, you have other power options. The Arduino can accept between 6V and 20V (7-12V recommend) via the direct current (DC) barrel jack connector, or into the Vin pin. ● The Arduino has built-in 5V and 3.3V regulators: ○ 5V is used for all the logic on the board. In other words, when you toggle a digital I/O pin, you are toggling it between 5V and 0V. ○ 3.3V is broken out to a pin to accommodate 3.3V shields and external circuitry.
  • 15.
    Arduino Functionality Arduino Boards ThisCourse cannot possibly cover all the available Arduino boards; there are many, and manufacturers are constantly releasing new ones with various features.
  • 16.
    DigitalInputsand Outputs what makes theArduino so useful is that the system is equipped with both inputs and outputs 1.2
  • 17.
    DigitalInputsandOutputs Working with Breadboards Abreadboard is a simple prototyping tool that easily allows you to wire up simple circuits without having to solder together parts to a custom printed circuit board.
  • 20.
    You can useOhm’s law to decide on a resistor value for this circuit. Assume that this is a standard LED with 20mA forward current and a 2V drop across it. Because the source voltage is 5V and it ends at ground, a total of 5V must drop across this circuit. Since the LED has a 2V drop, the other 3V must drop across the resistor
  • 21.
    Datasheet 1.2.1 a document thatsummarizes the performance and other characteristics of component
  • 22.
    IDE The Arduino integrated developmentenvironment, or Arduino IDE 1.3
  • 23.
    Downloading andInstallingthe ArduinoIDE Access the Arduino website at www.arduino.cc and download the newest version of the IDE from the Download page

Editor's Notes

  • #4 The intro of the filming video
  • #6 Start camstisia from here
  • #7 All these system components work in tandem to enable you do just about anything with your Arduino.
  • #12 This functionality is made possible by the Arduino bootloader. The bootloader is loaded onto the ATMega at the factory (using the ICSP header), which allows a serial USART (Universal Synchronous/Asynchronous Receiver/Transmitter) to load your program on the Arduino without using a separate programmer. In the case of the Arduino Uno and Mega 2560, a secondary microcontroller (an ATMega 16U2 or 8U2 depending on your revision) serves as an interface between a USB cable and the serial USART pins on the main microcontroller. The Arduino Leonardo, which uses an ATMega 32U4 as the main microcontroller, has USB baked right in, so a secondary microcontroller is not needed. In older Arduino boards, an FTDI brand USB-to-serial chip was used as the interface between the ATMega’s serial USART port and a USB connection.
  • #13 A bootloader is a chunk of code that lives in a reserved space in the program memory of the Arduino’s main MCU. In general, AVR microcontrollers are programmed with an ICSP, which talks to the microcontroller via a serial peripheral interface (SPI). Programming via this method is fairly straightforward, but necessitates the user having a hardware programmer such as an STK500 or an AVR ISP MKII programmer (see Figure 1-2). When you first boot the Arduino board, it enters the bootloader, which runs for a few seconds. If it receives a programming command from the IDE over the MCU’s UART (serial interface) in that time period, it loads the program that you are sending it into the rest of the MCU’s program memory. If it does not receive a programming command, it starts running your most recently uploaded sketch, which resides in the rest of the program memory. When you send an “upload” command from the Arduino IDE, it instructs the USB-to-serial chip (an ATMega 16U2 or 8U2 in the case of the Arduino Uno) to reset the main MCU, hence forcing it into the bootloader. Then, your computer immediately begins to send the program contents, which the MCU is ready to receive over its UART connection (facilitated by the USB-to-serial converter). Bootloaders are great because they enable simple programming via USB with no external hardware. However, they do have two downsides: ■ First, they take up valuable program space. If you have written a complicated sketch, the approximately 2KB of space taken up by the bootloader might be really valuable. ■ Second, using a bootloader means that your program will always be delayed by a few seconds at boot as the bootloader checks for a programming request. If you have a programmer (or another Arduino that can be programmed to act as a programmer), you can remove the bootloader from your ATMega and program it directly by connecting your programmer to the ICSP header and using the File d Upload Using Programmer command from within the IDE.
  • #17 A breadboard is a solderless device for temporary prototype with electronics and test circuit designs. Most electronic components in electronic circuits can be interconnected by inserting their leads or terminals into the holes and then making connections through wires where appropriate
  • #20 You can use Ohm’s law to decide on a resistor value for this circuit. Assume that this is a standard LED with 20mA forward current and a 2V drop across it. Because the source voltage is 5V and it ends at ground, a total of 5V must drop across this circuit. Since the LED has a 2V drop, the other 3V must drop across the resistor
  • #21 You can use Ohm’s law to decide on a resistor value for this circuit. Assume that this is a standard LED with 20mA forward current and a 2V drop across it. Because the source voltage is 5V and it ends at ground, a total of 5V must drop across this circuit. Since the LED has a 2V drop, the other 3V must drop across the resistor
  • #22 A breadboard is a solderless device for temporary prototype with electronics and test circuit designs. Most electronic components in electronic circuits can be interconnected by inserting their leads or terminals into the holes and then making connections through wires where appropriate