Download to read offline

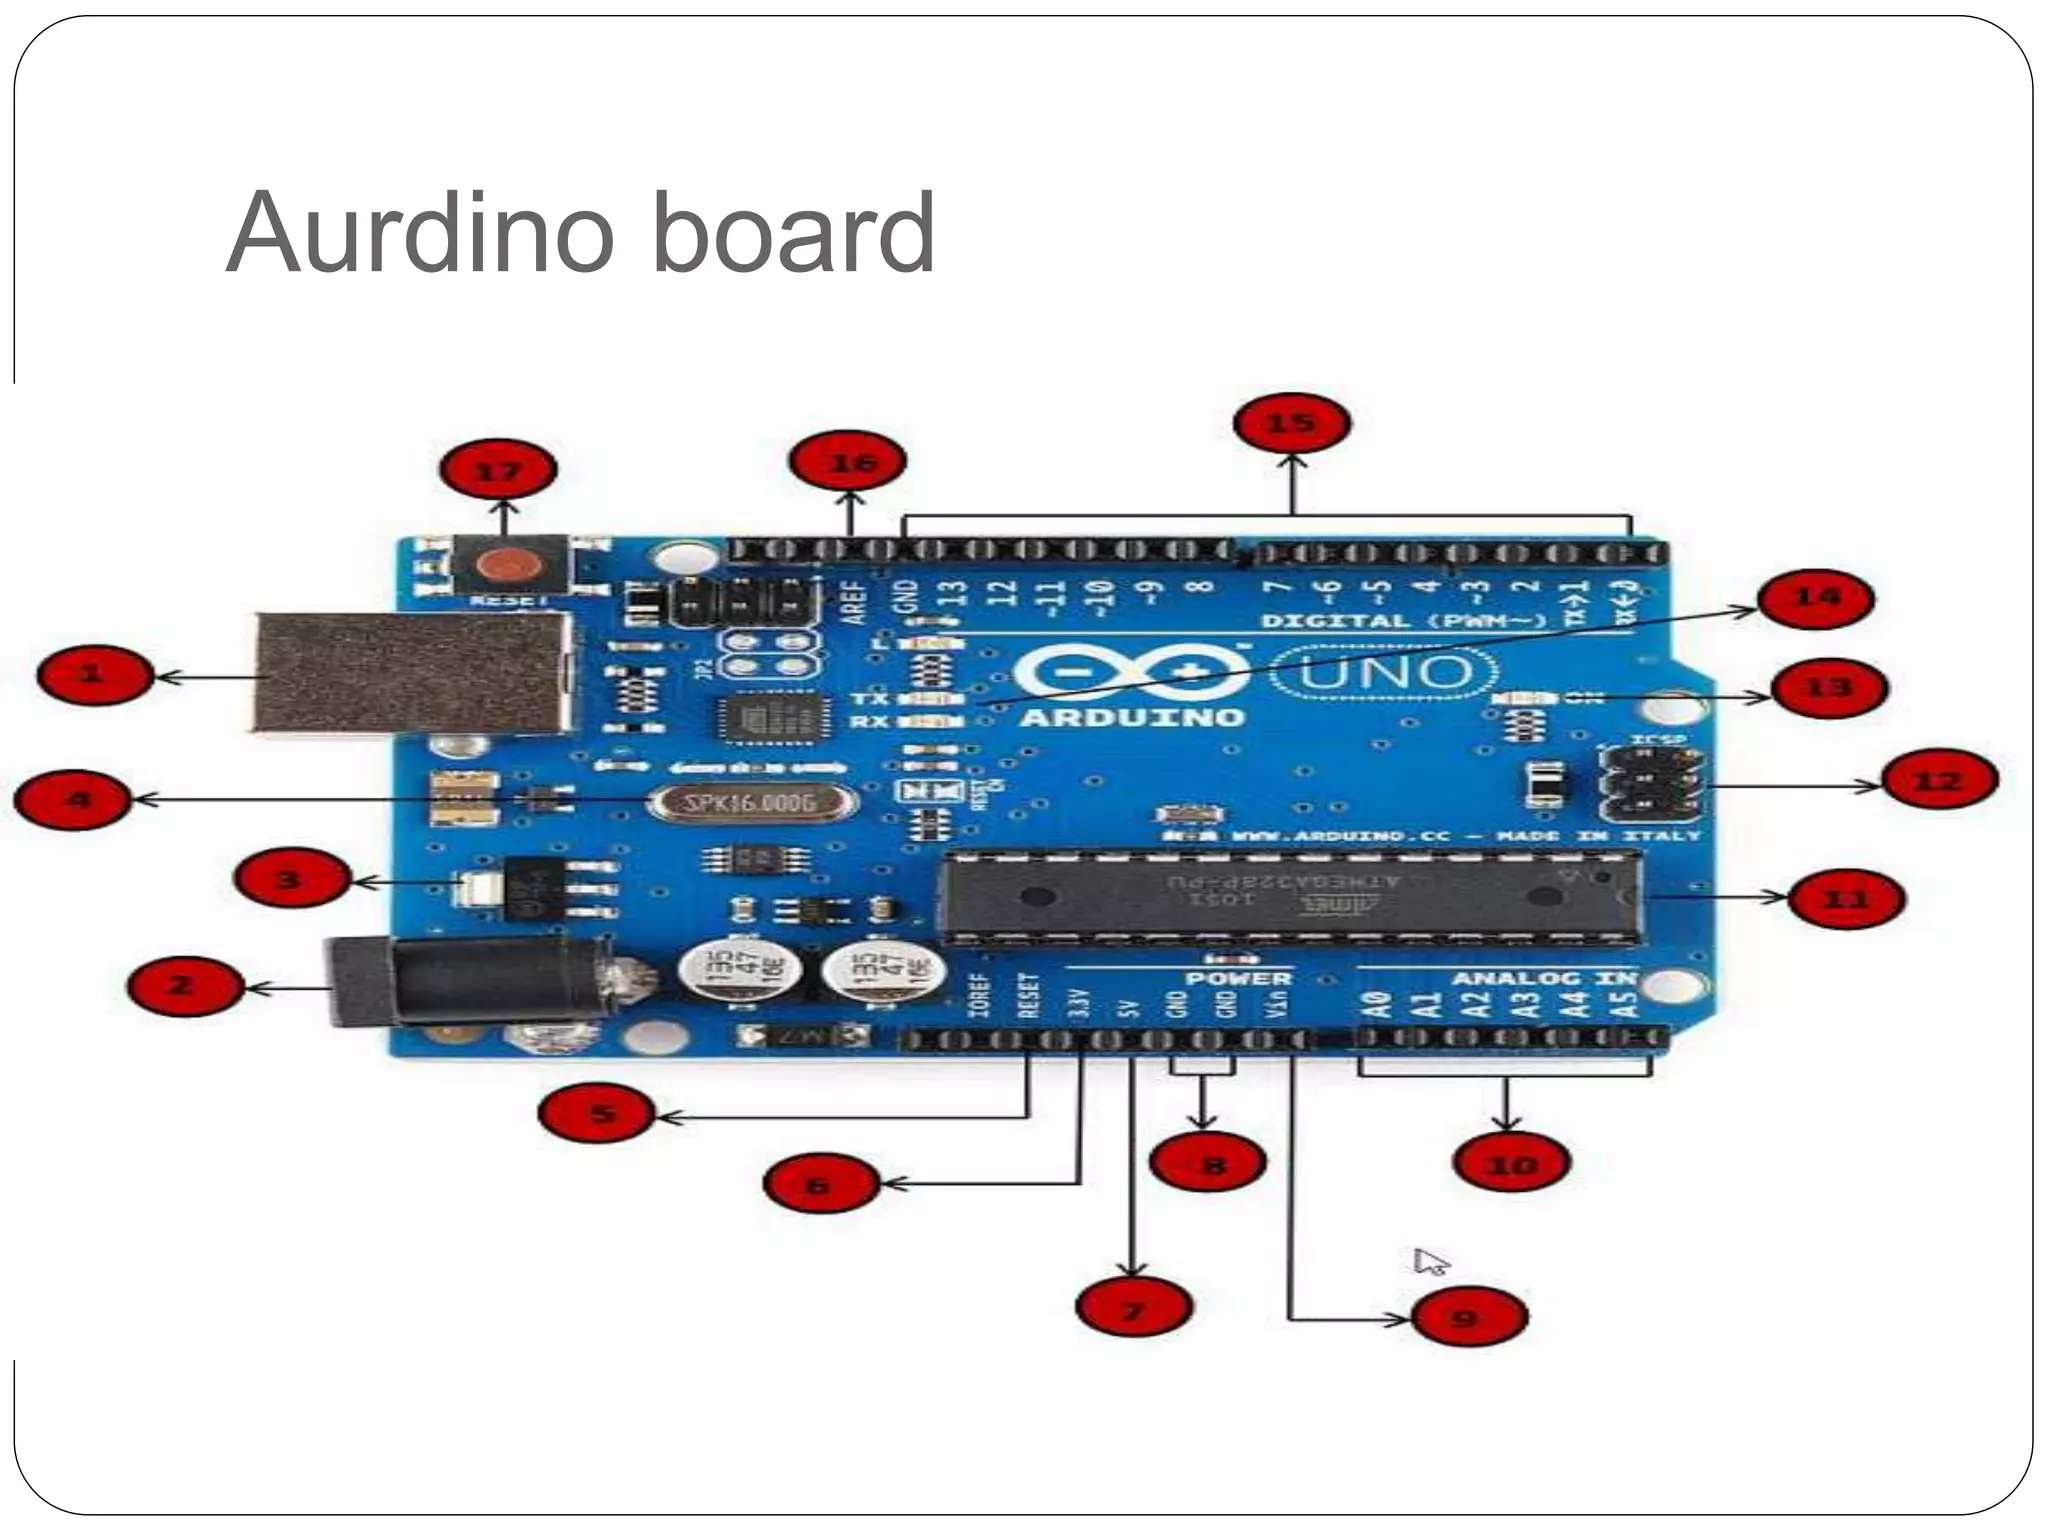
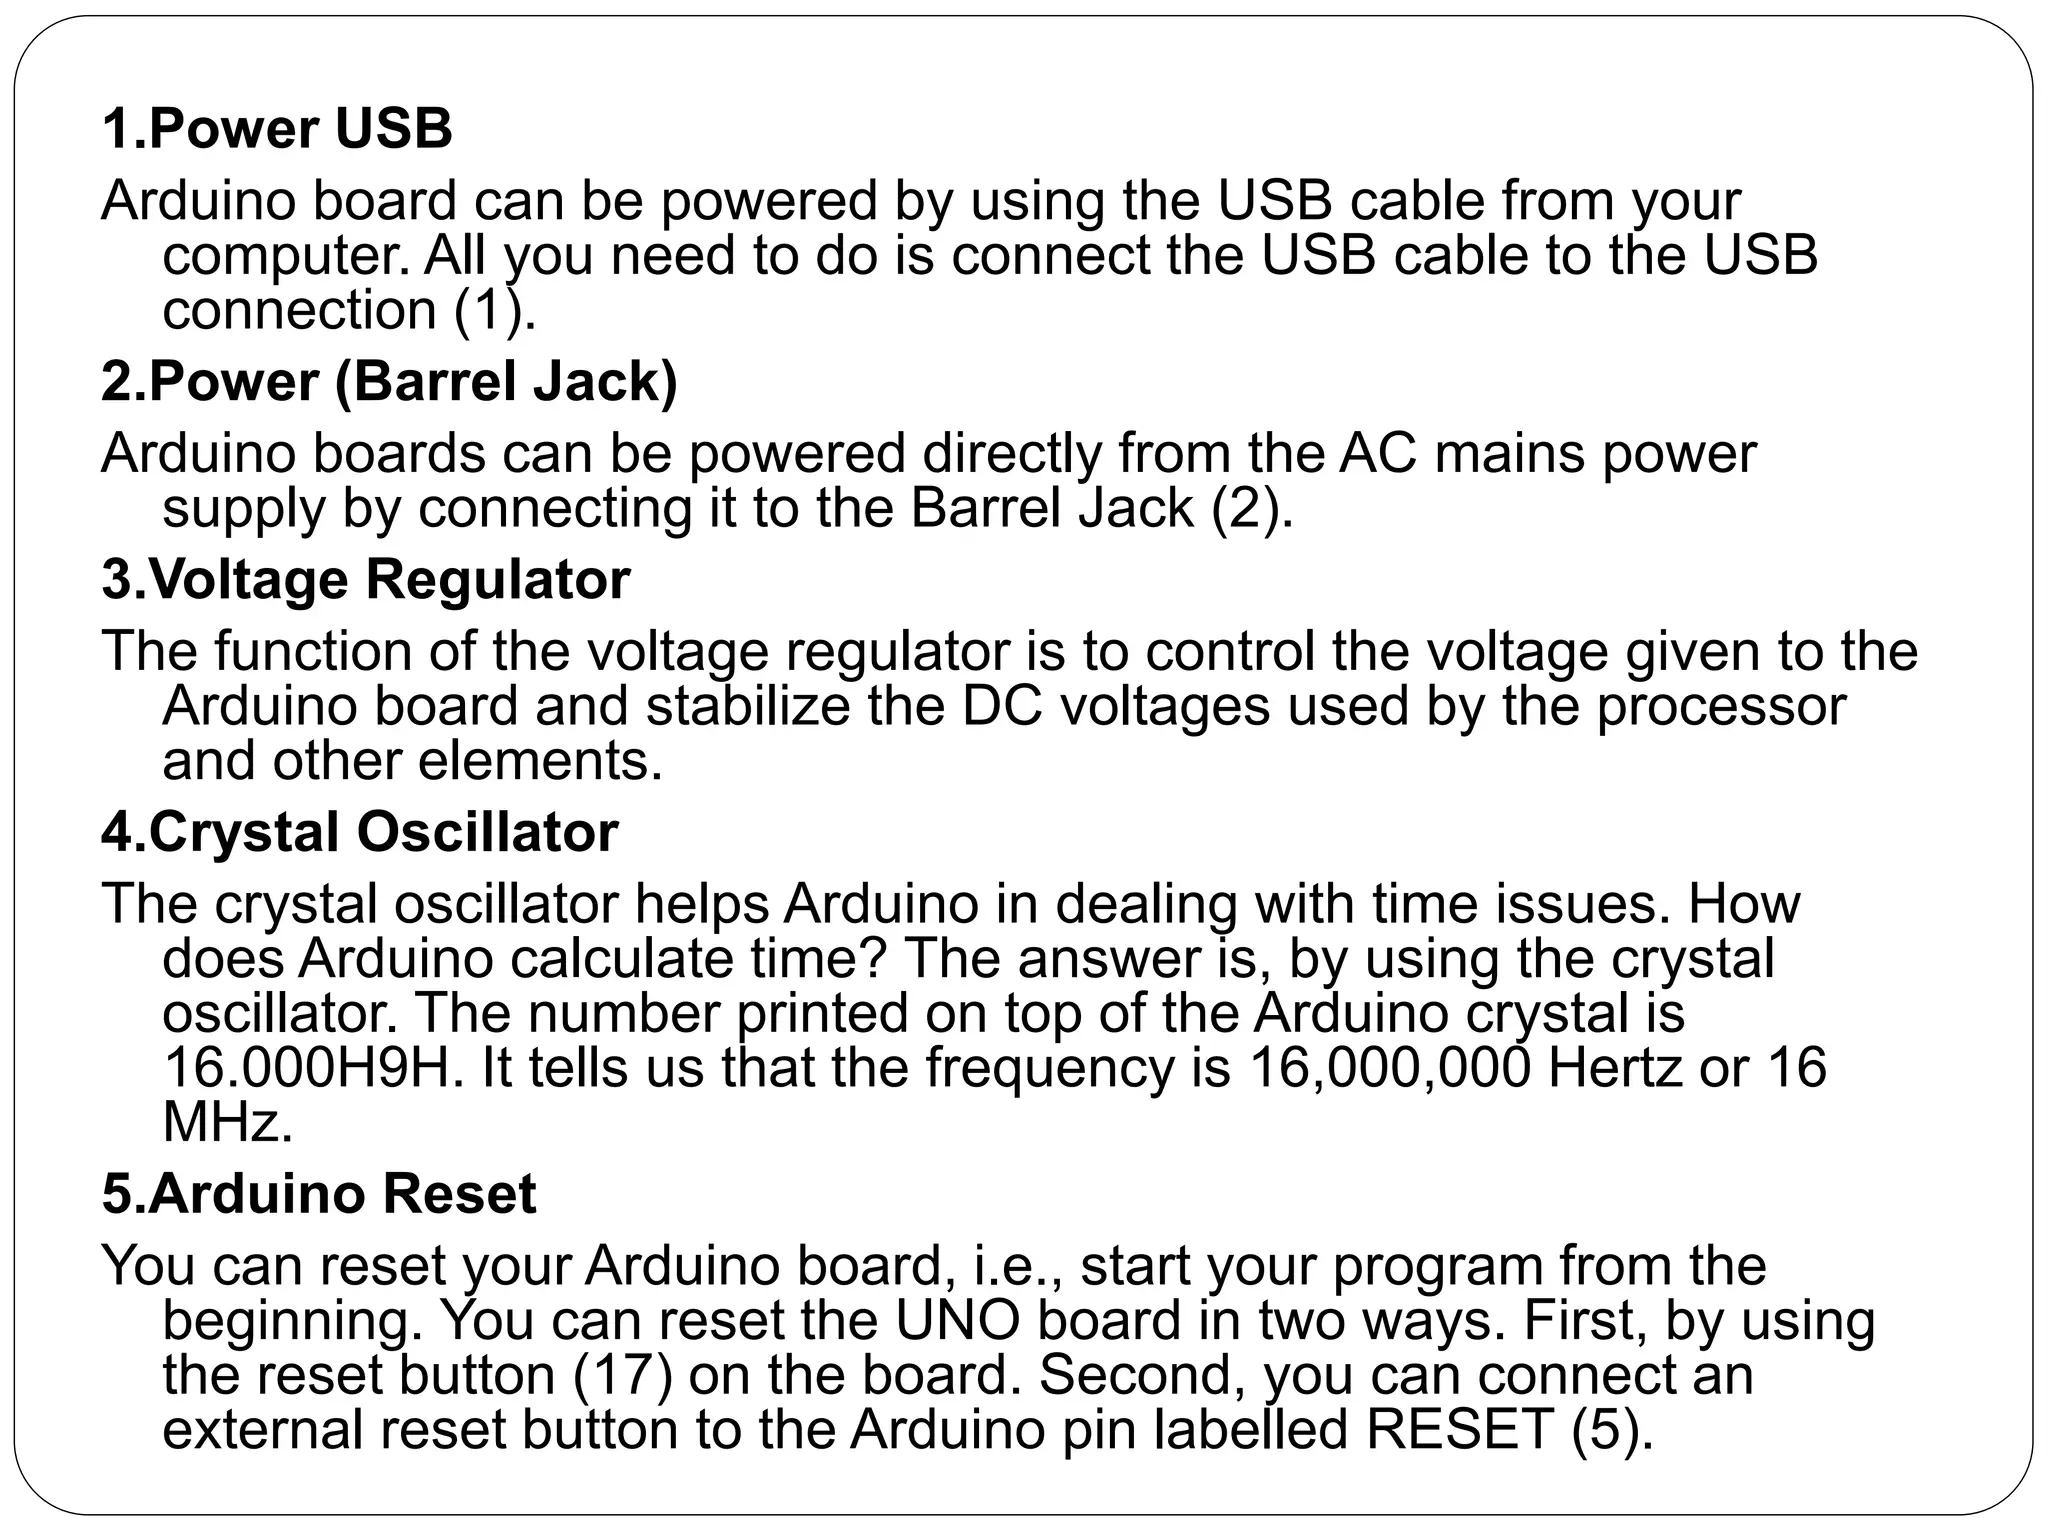
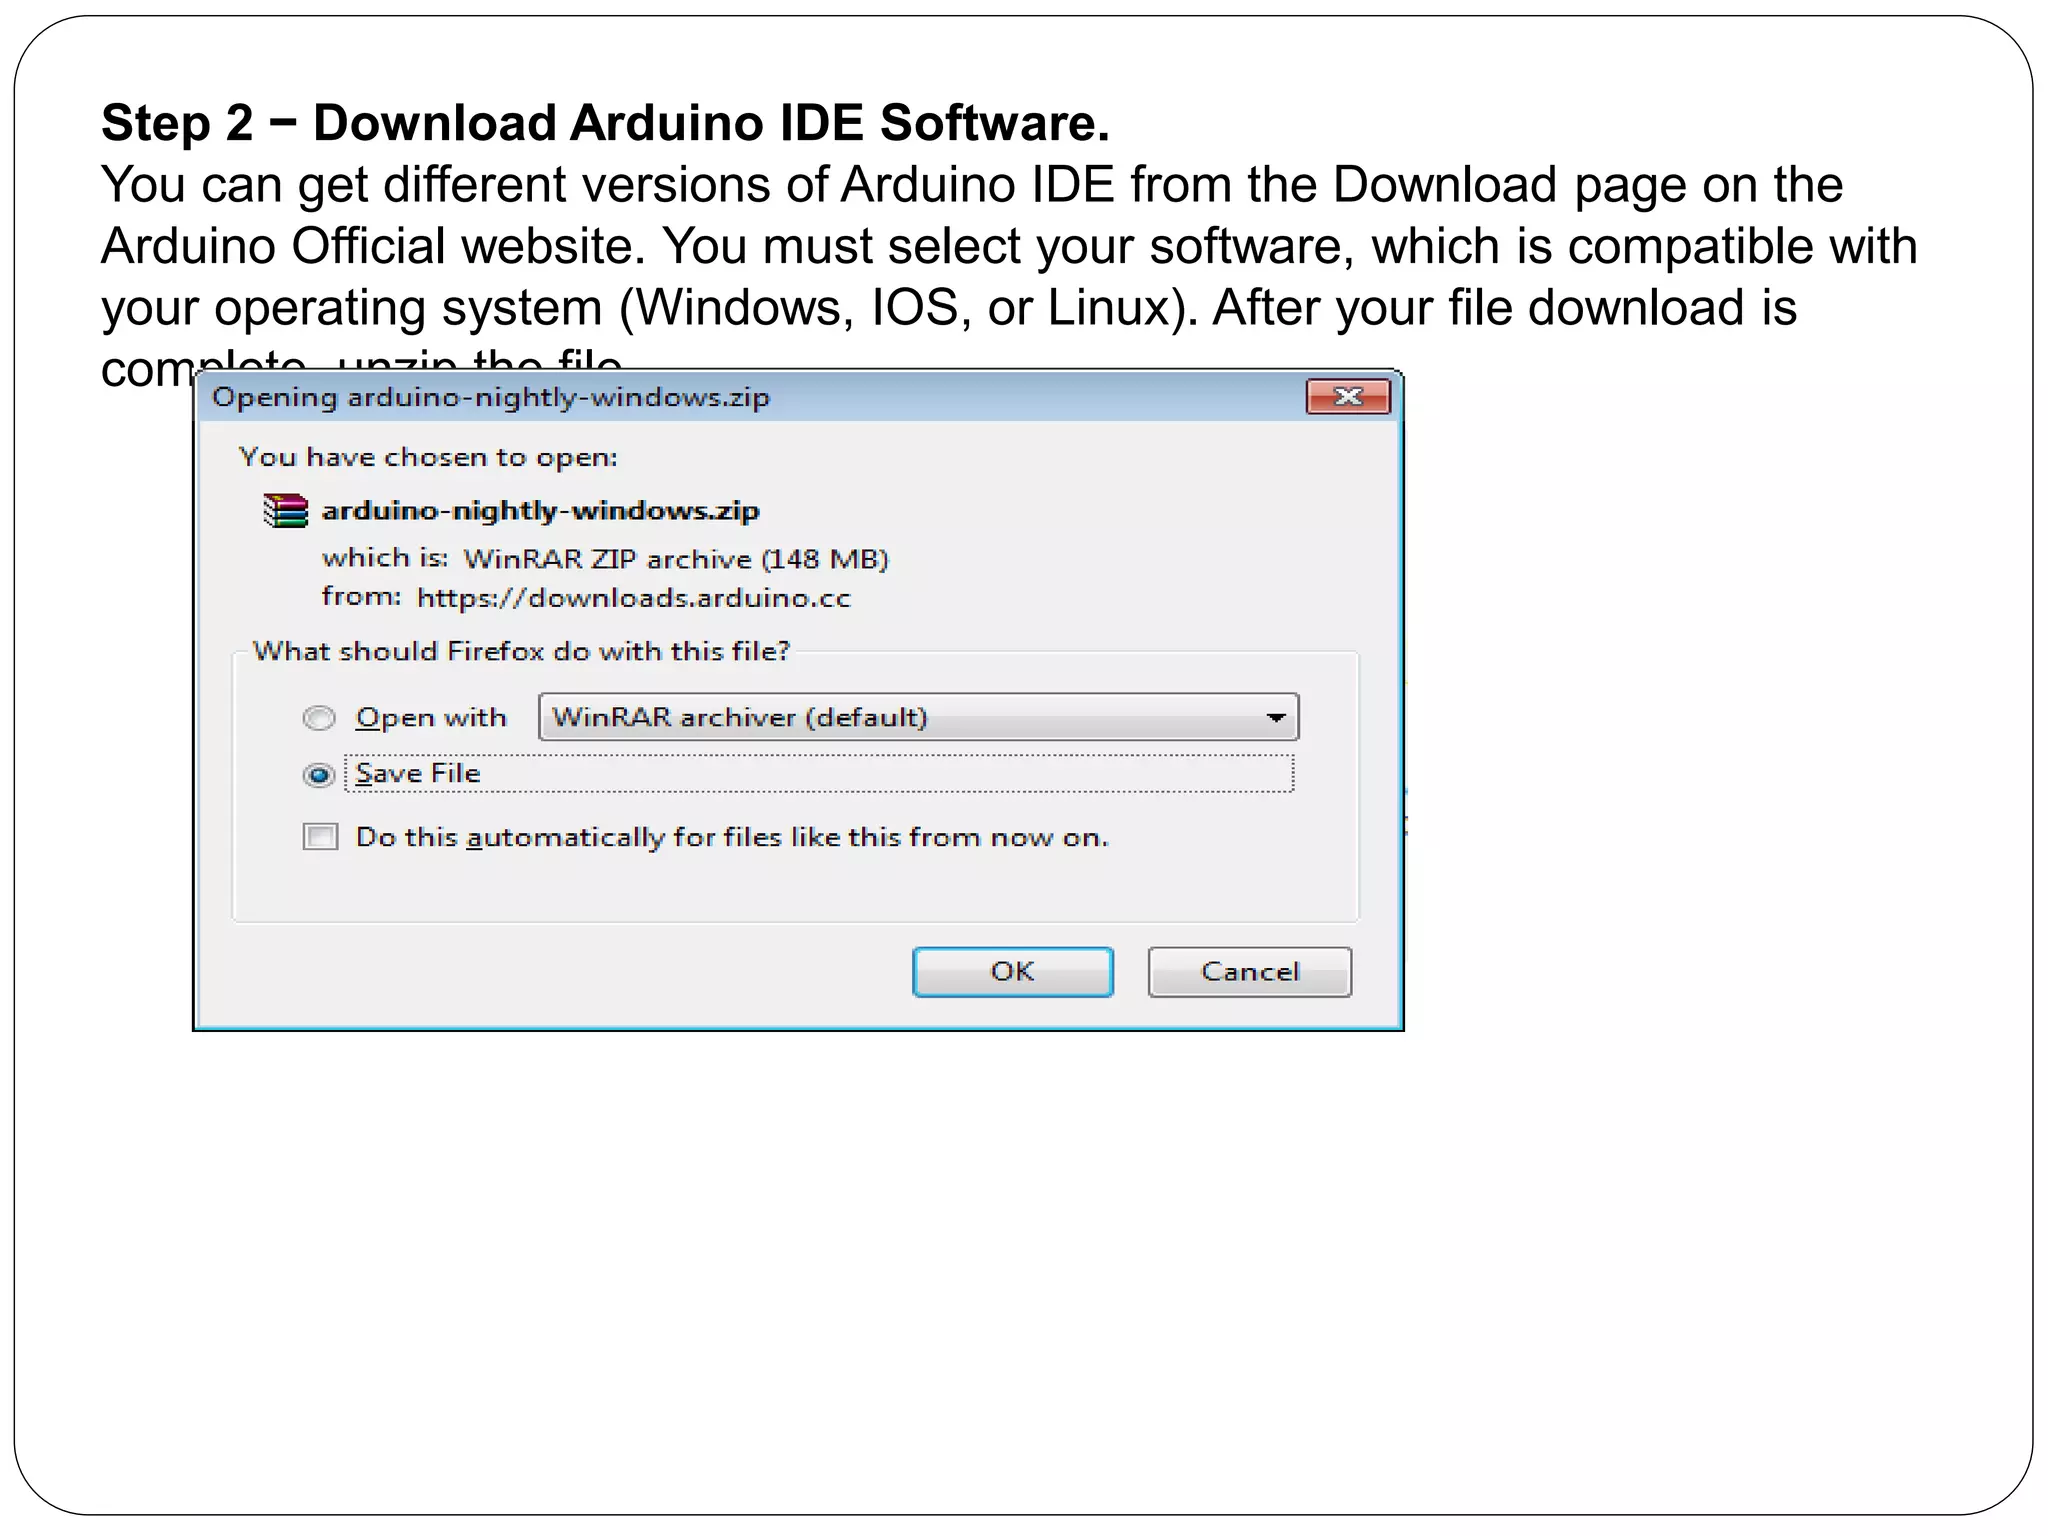
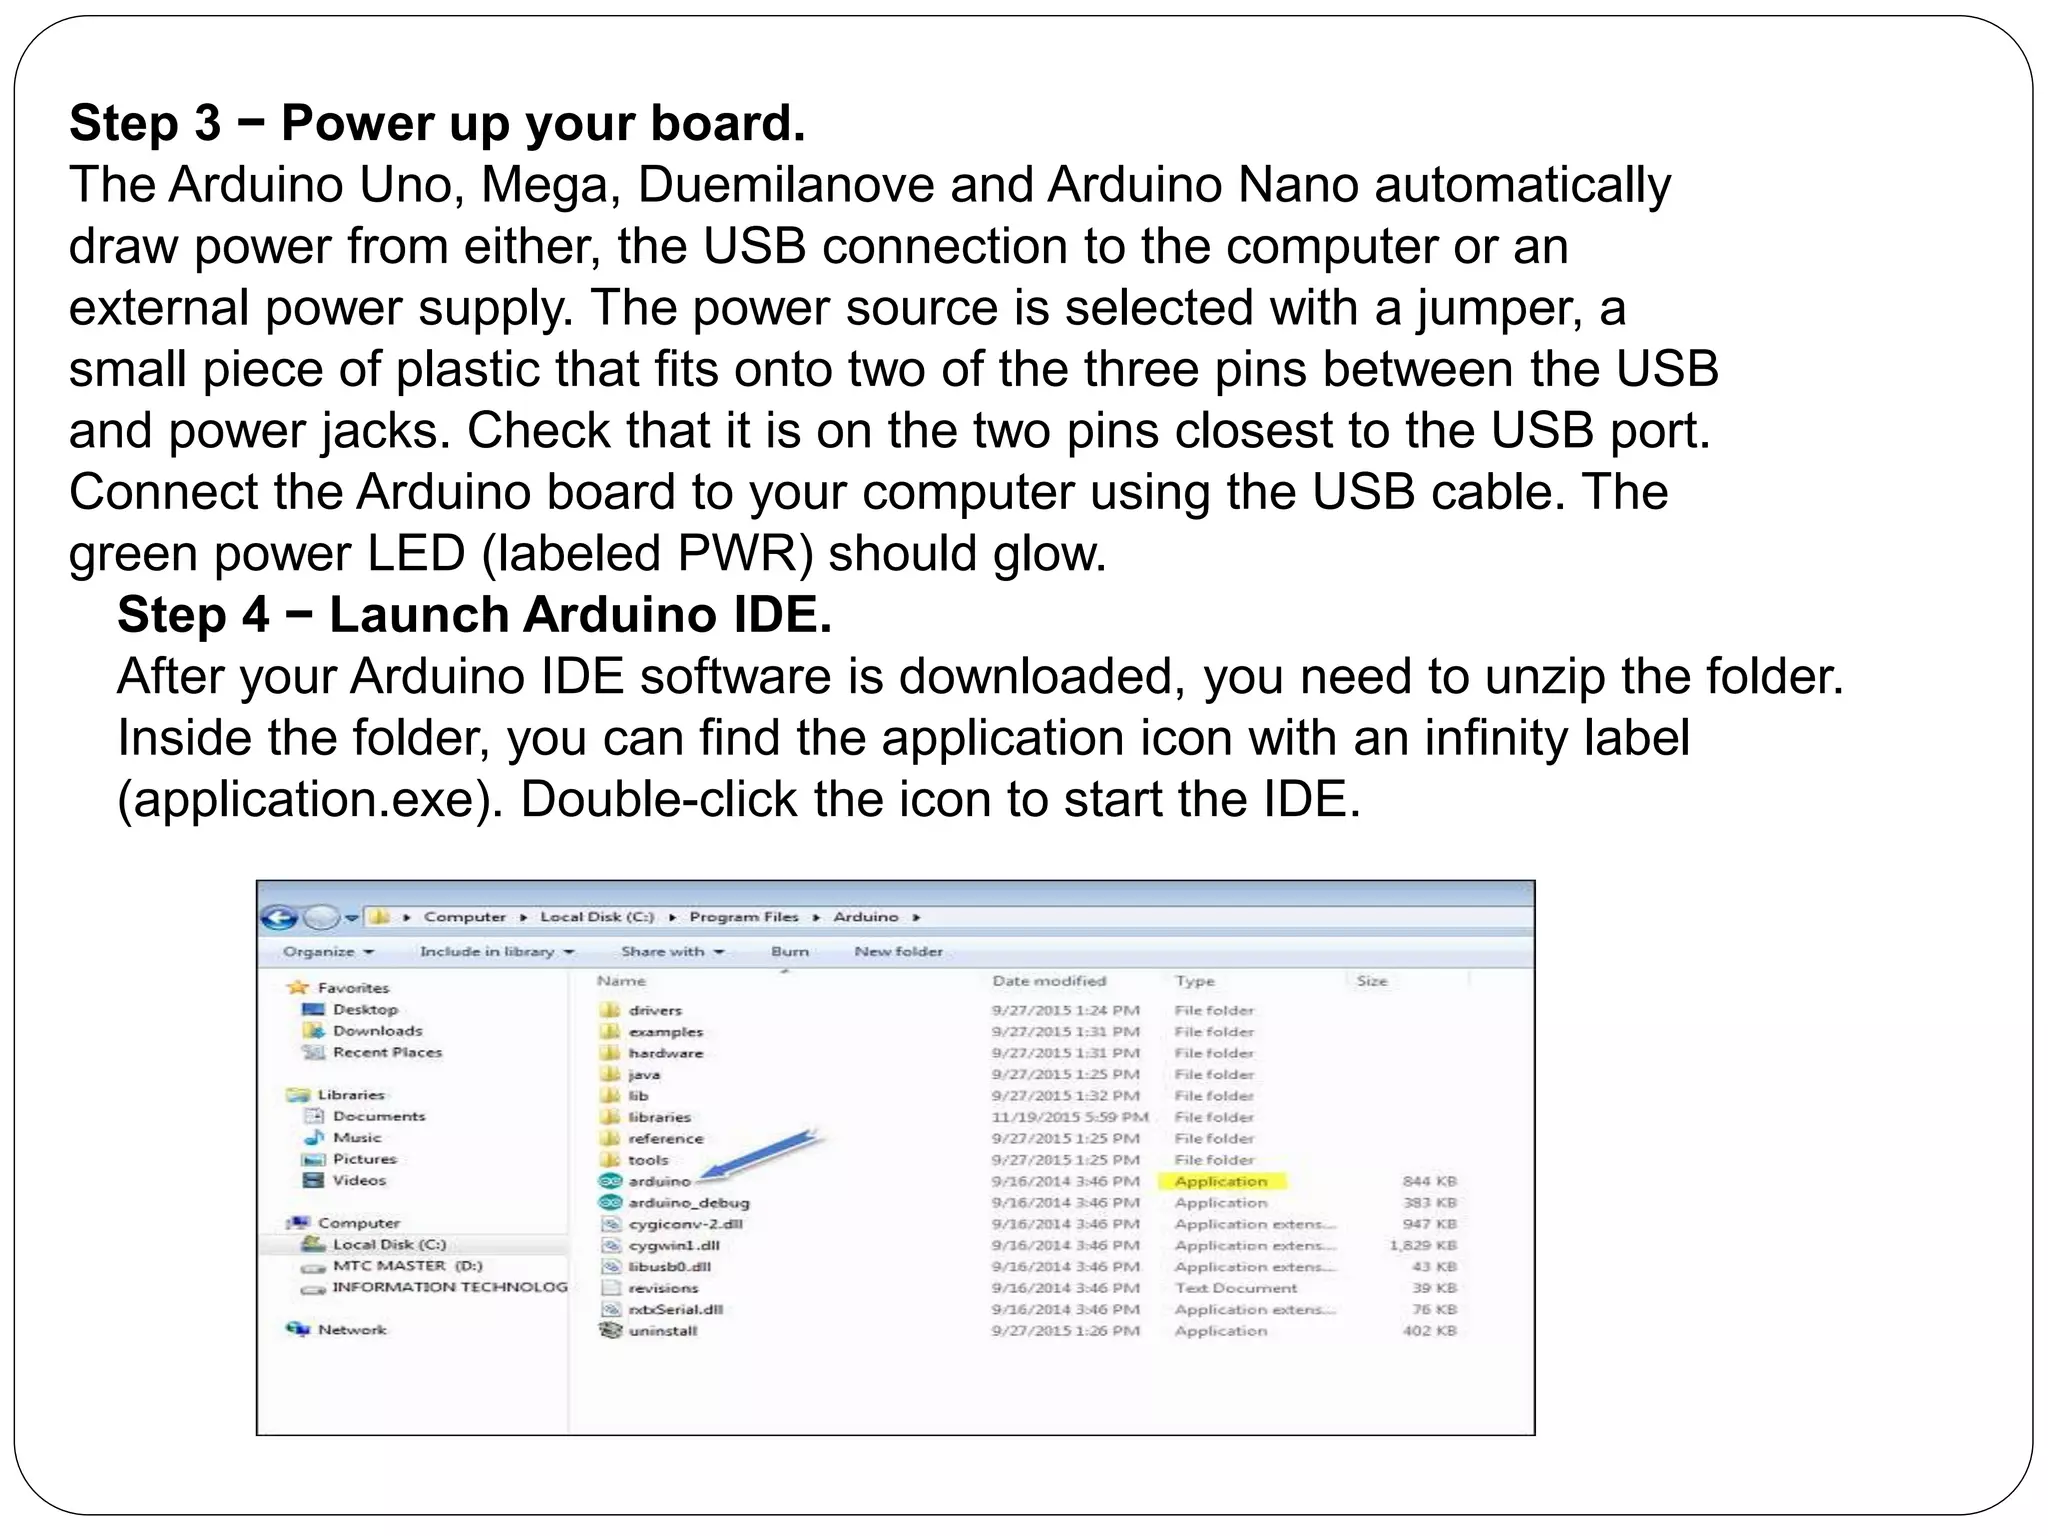
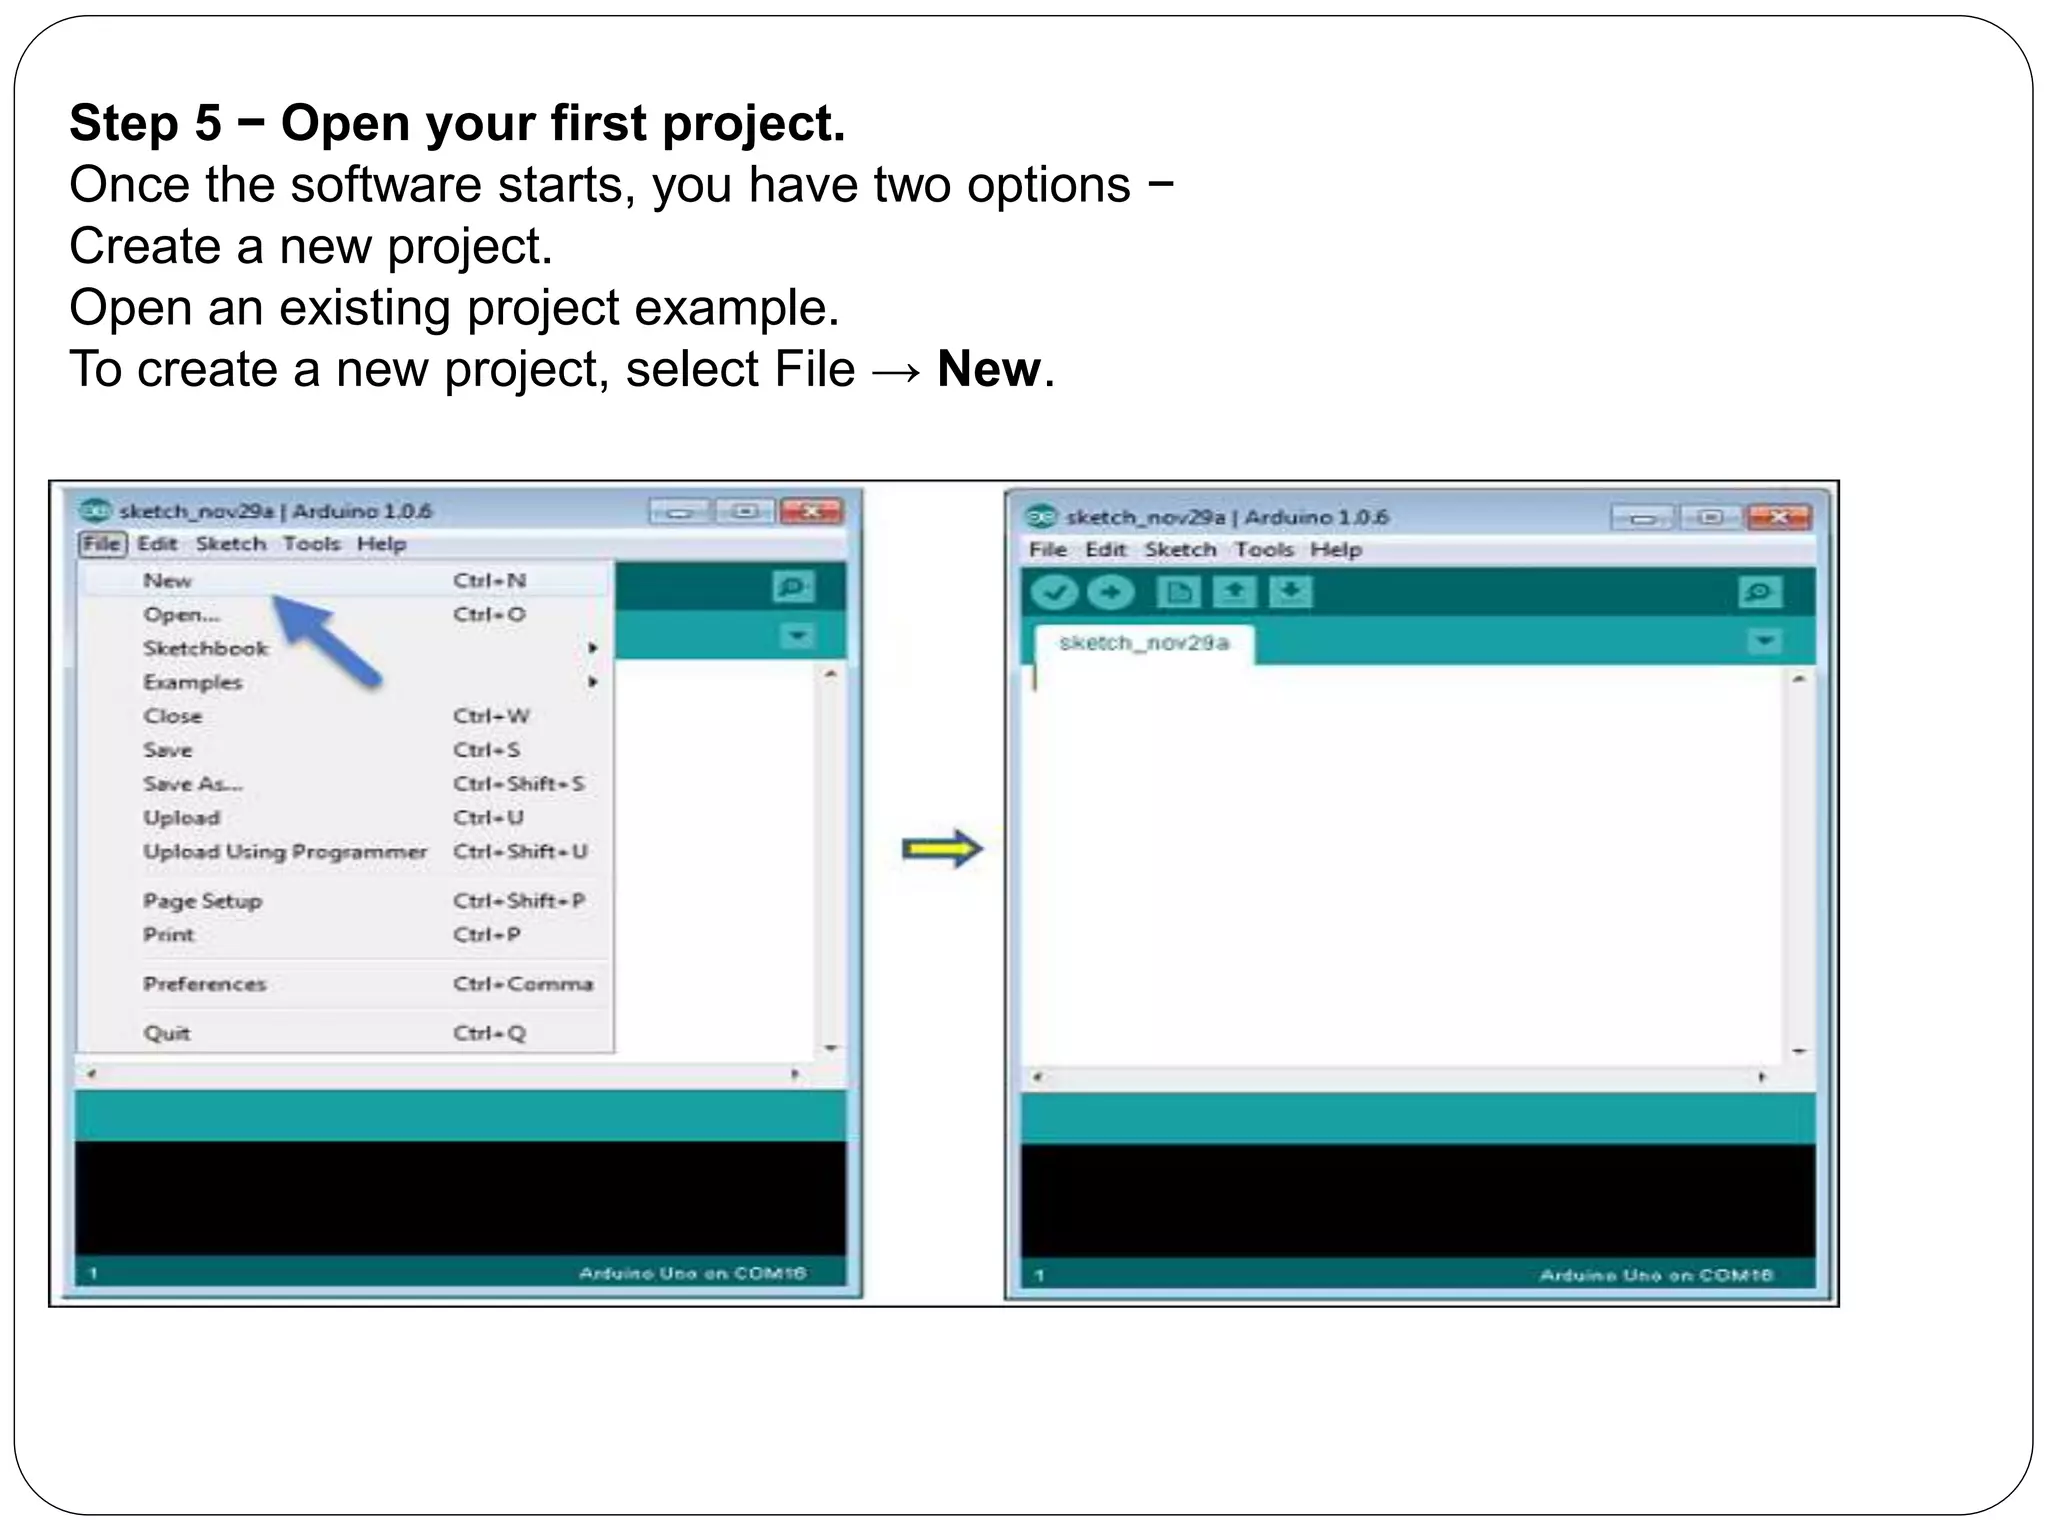
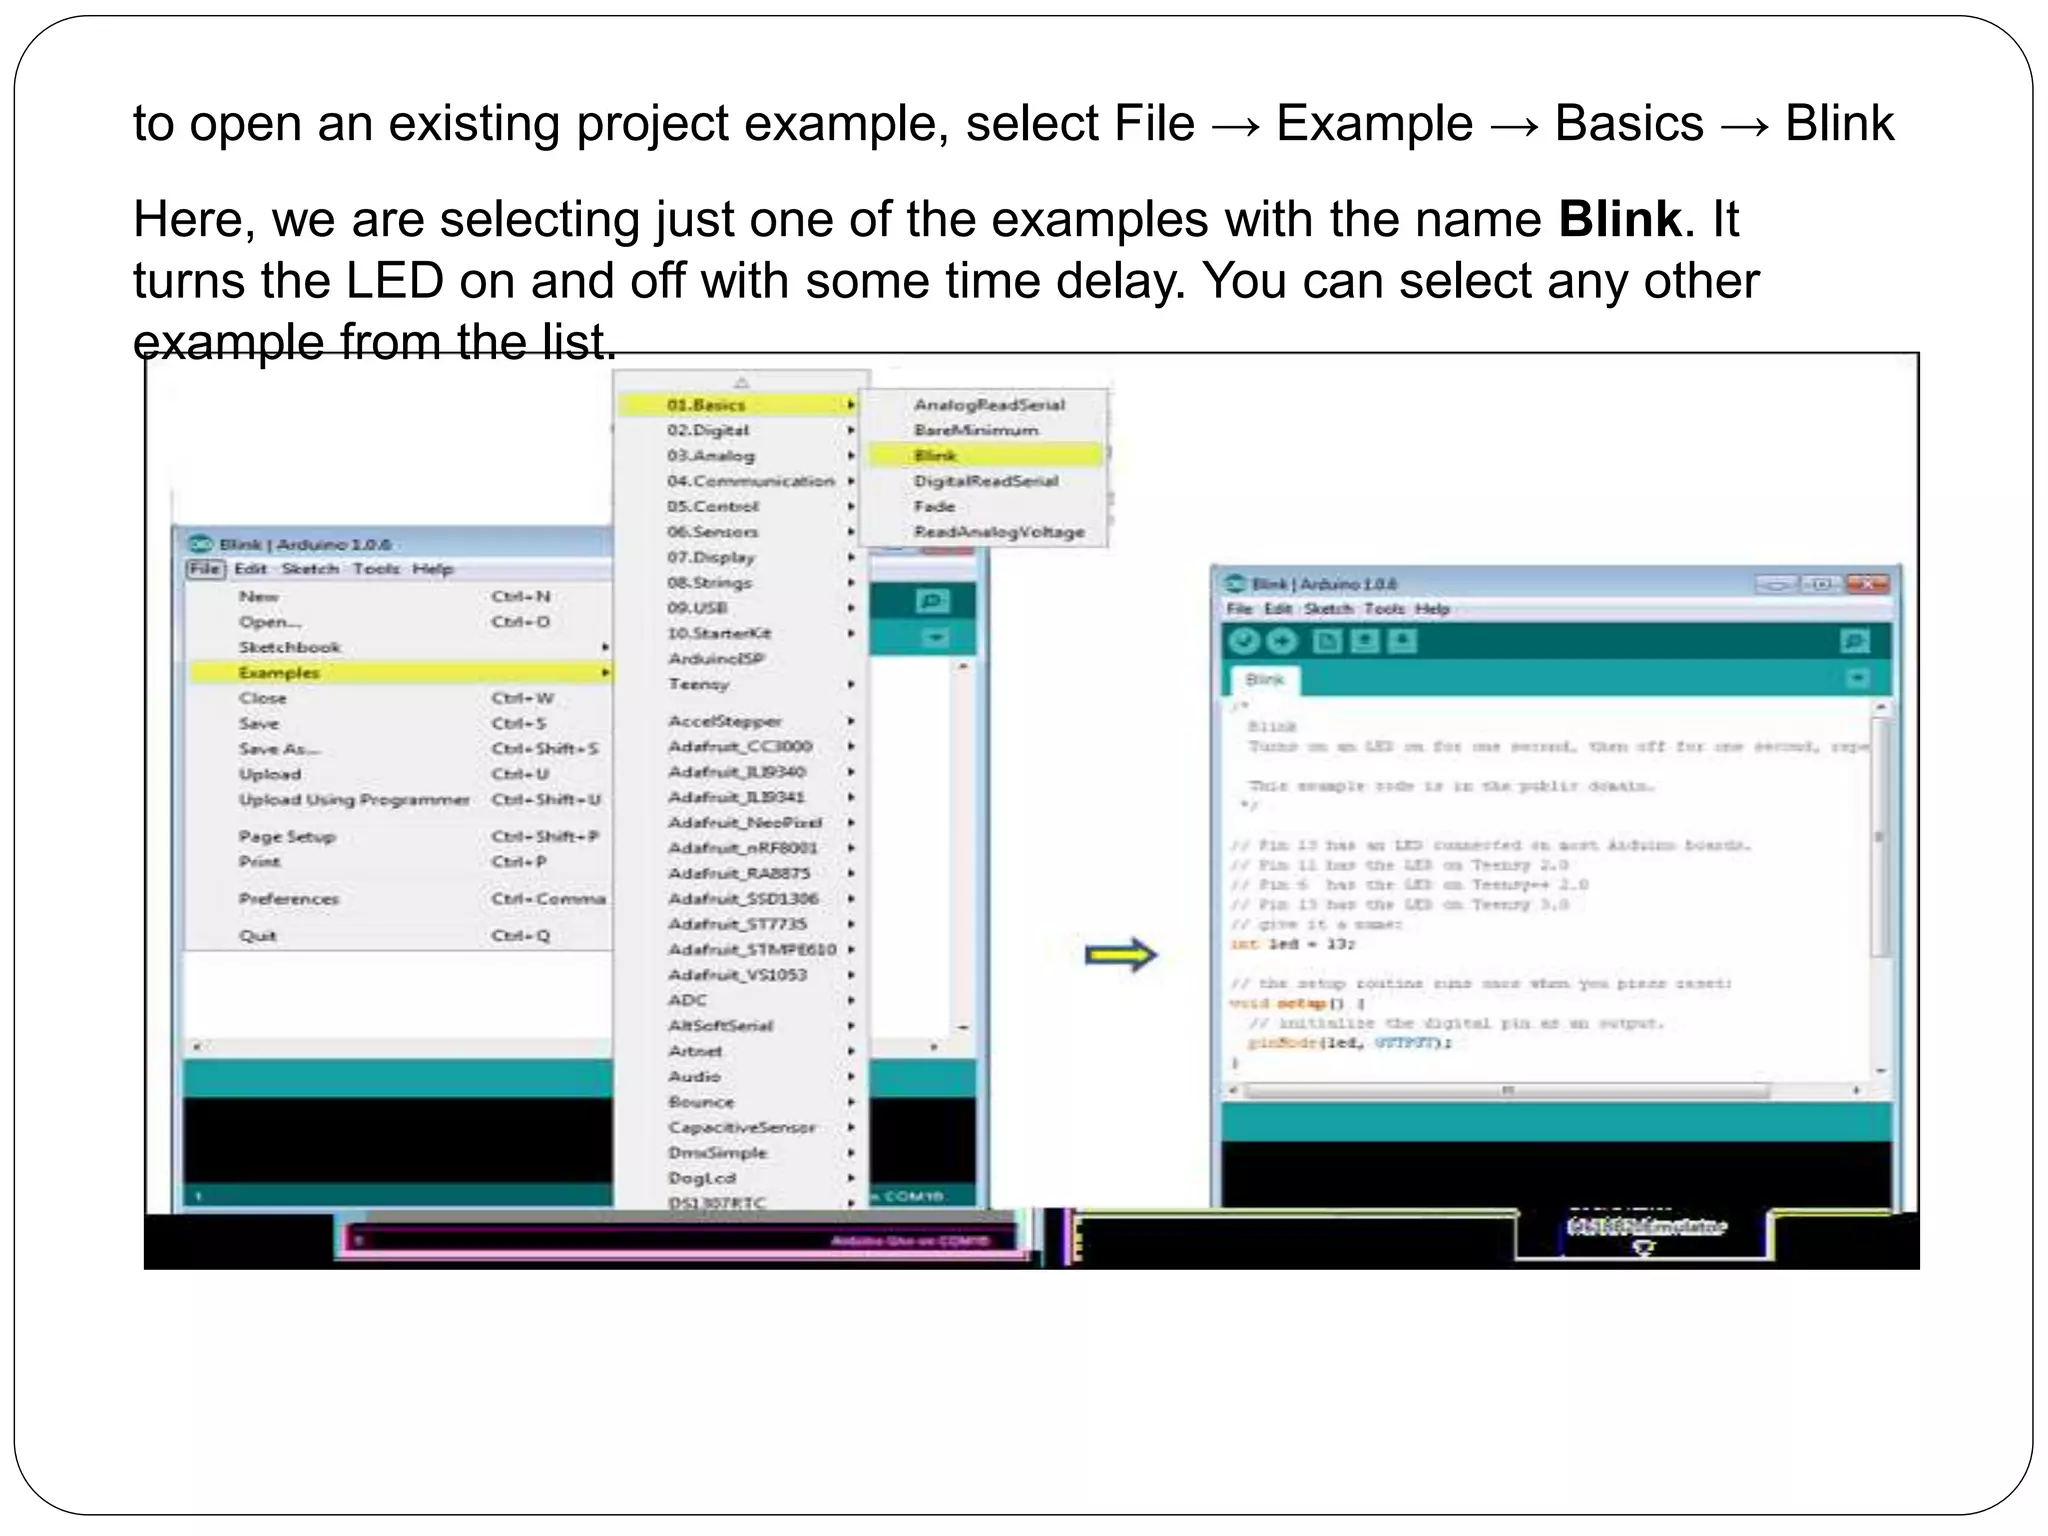
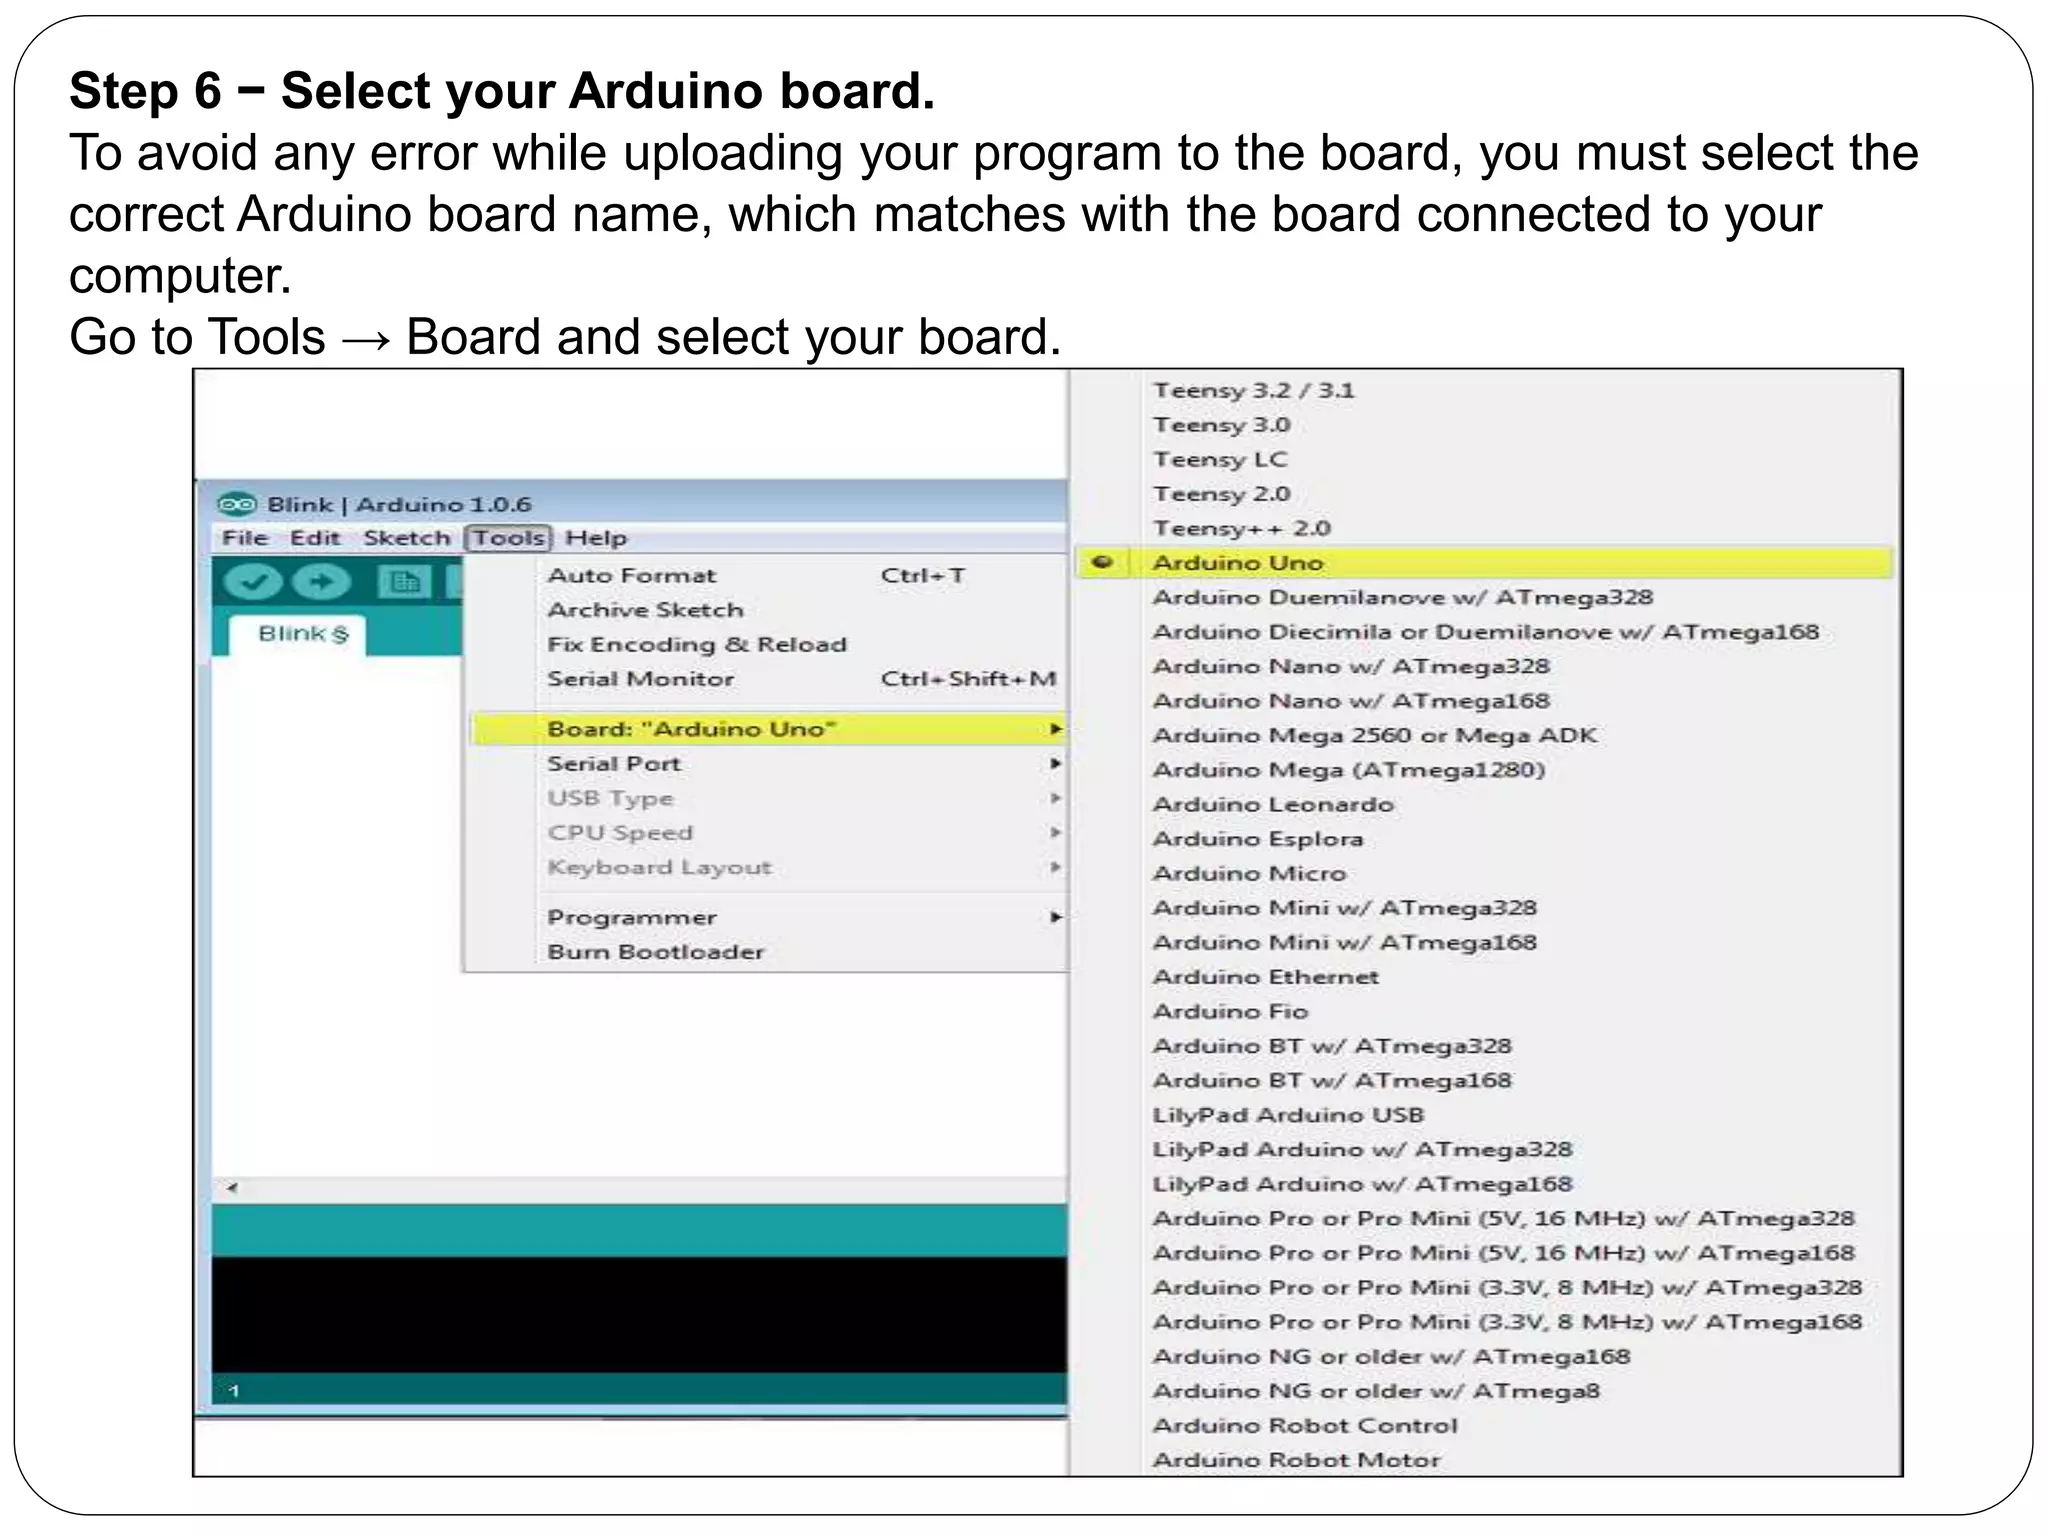
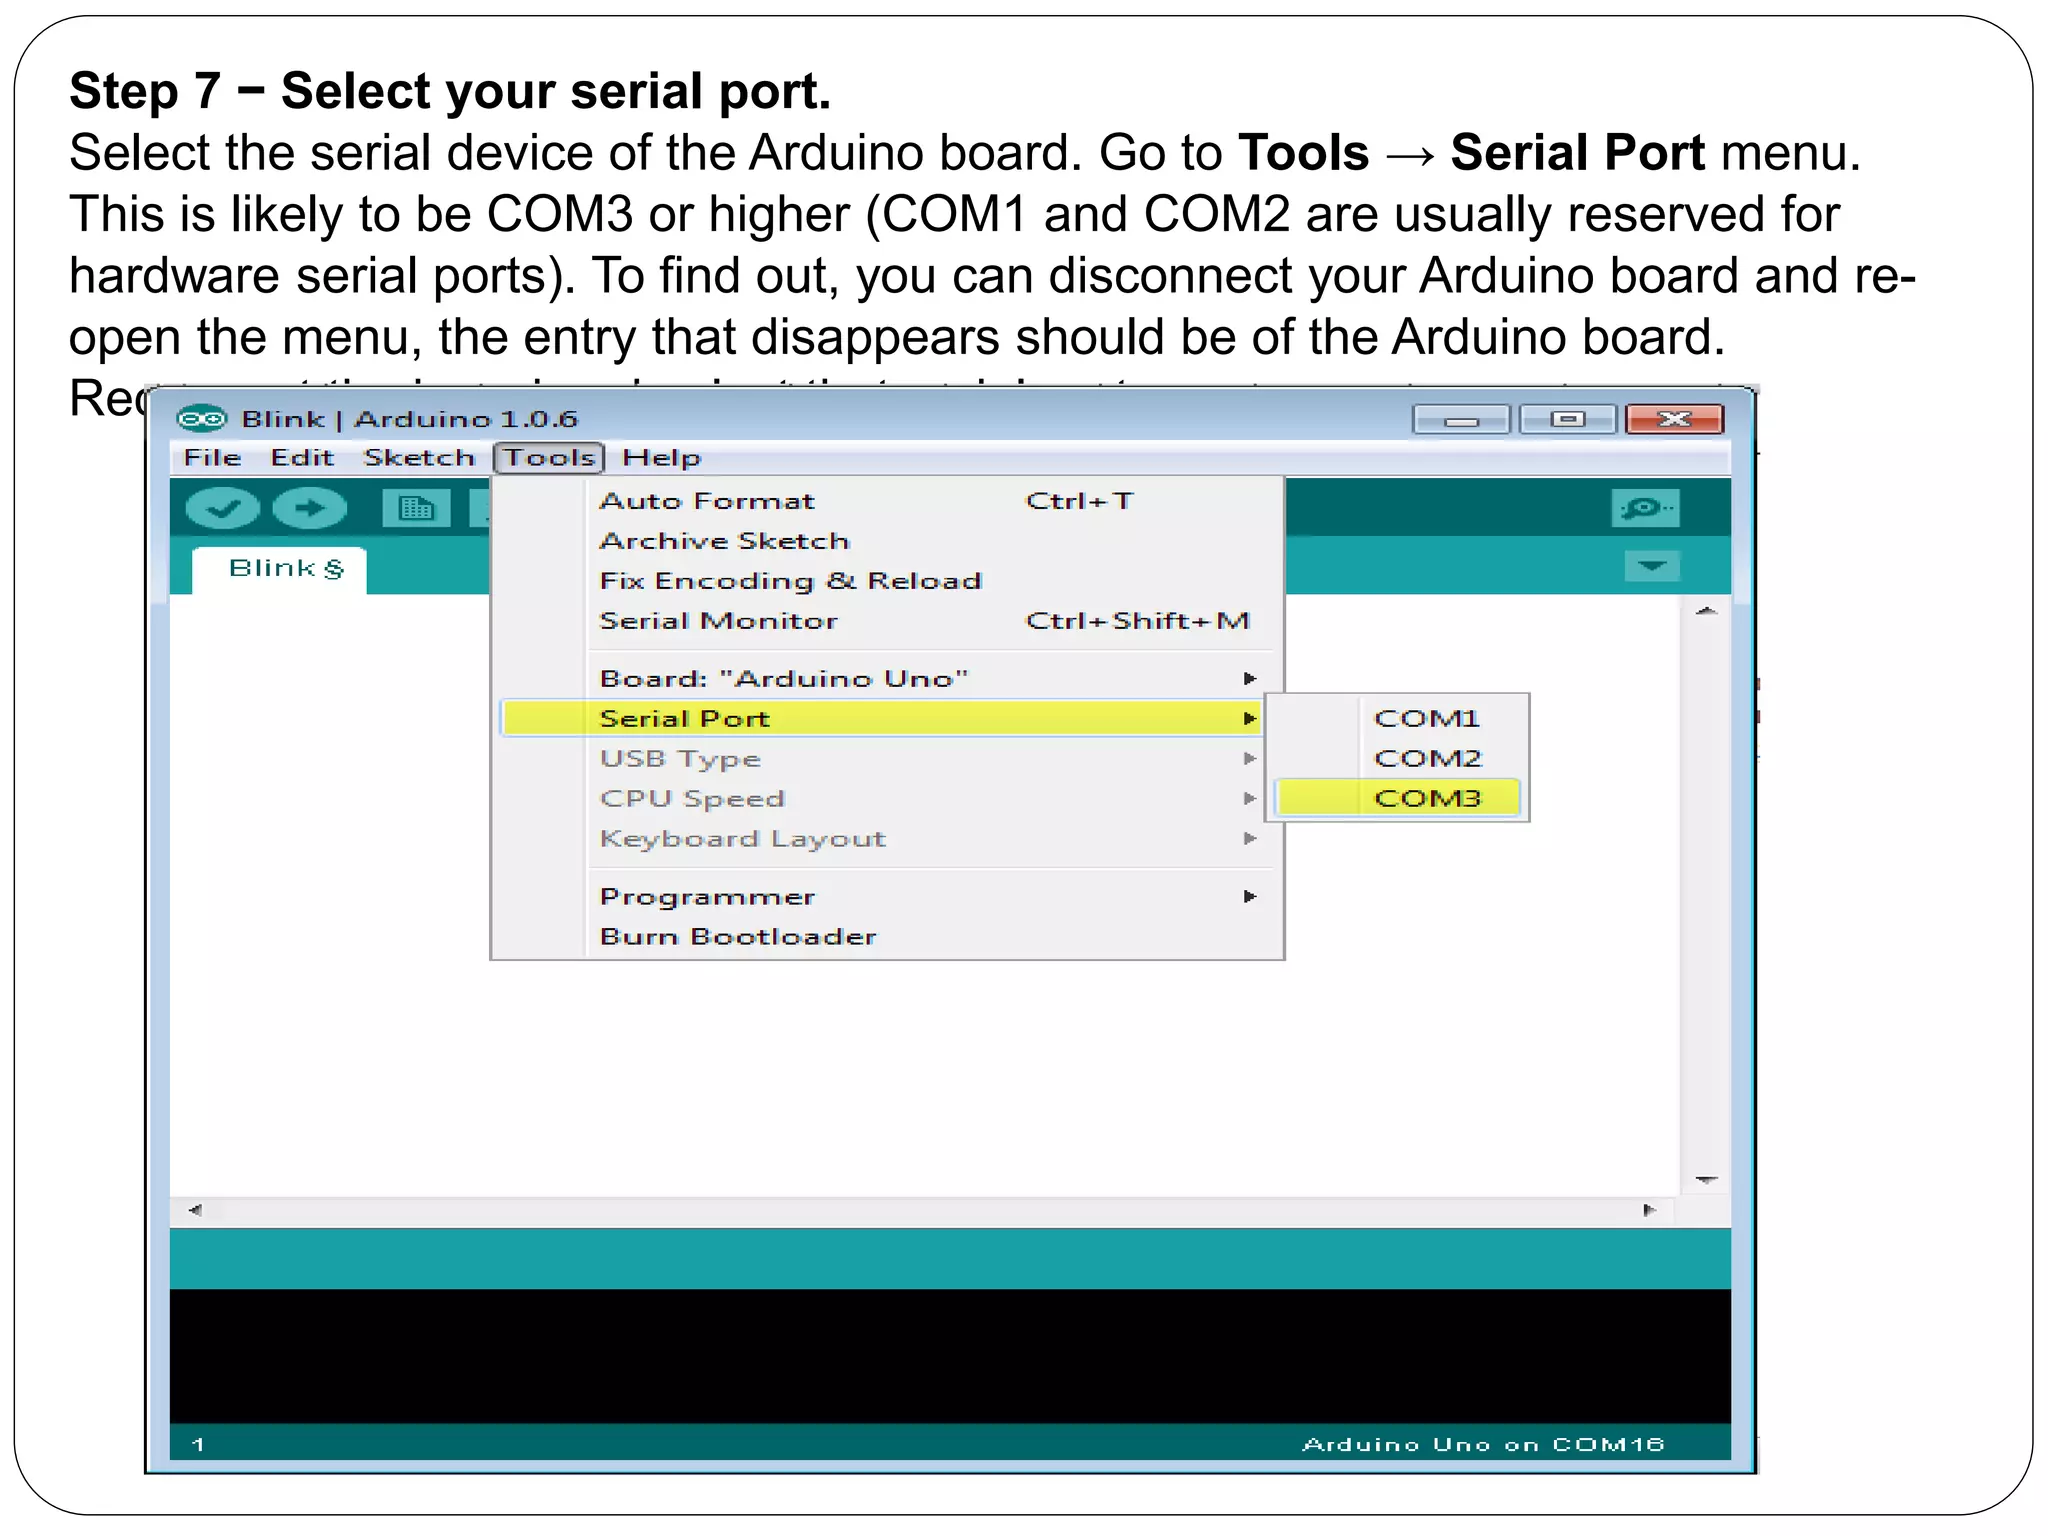
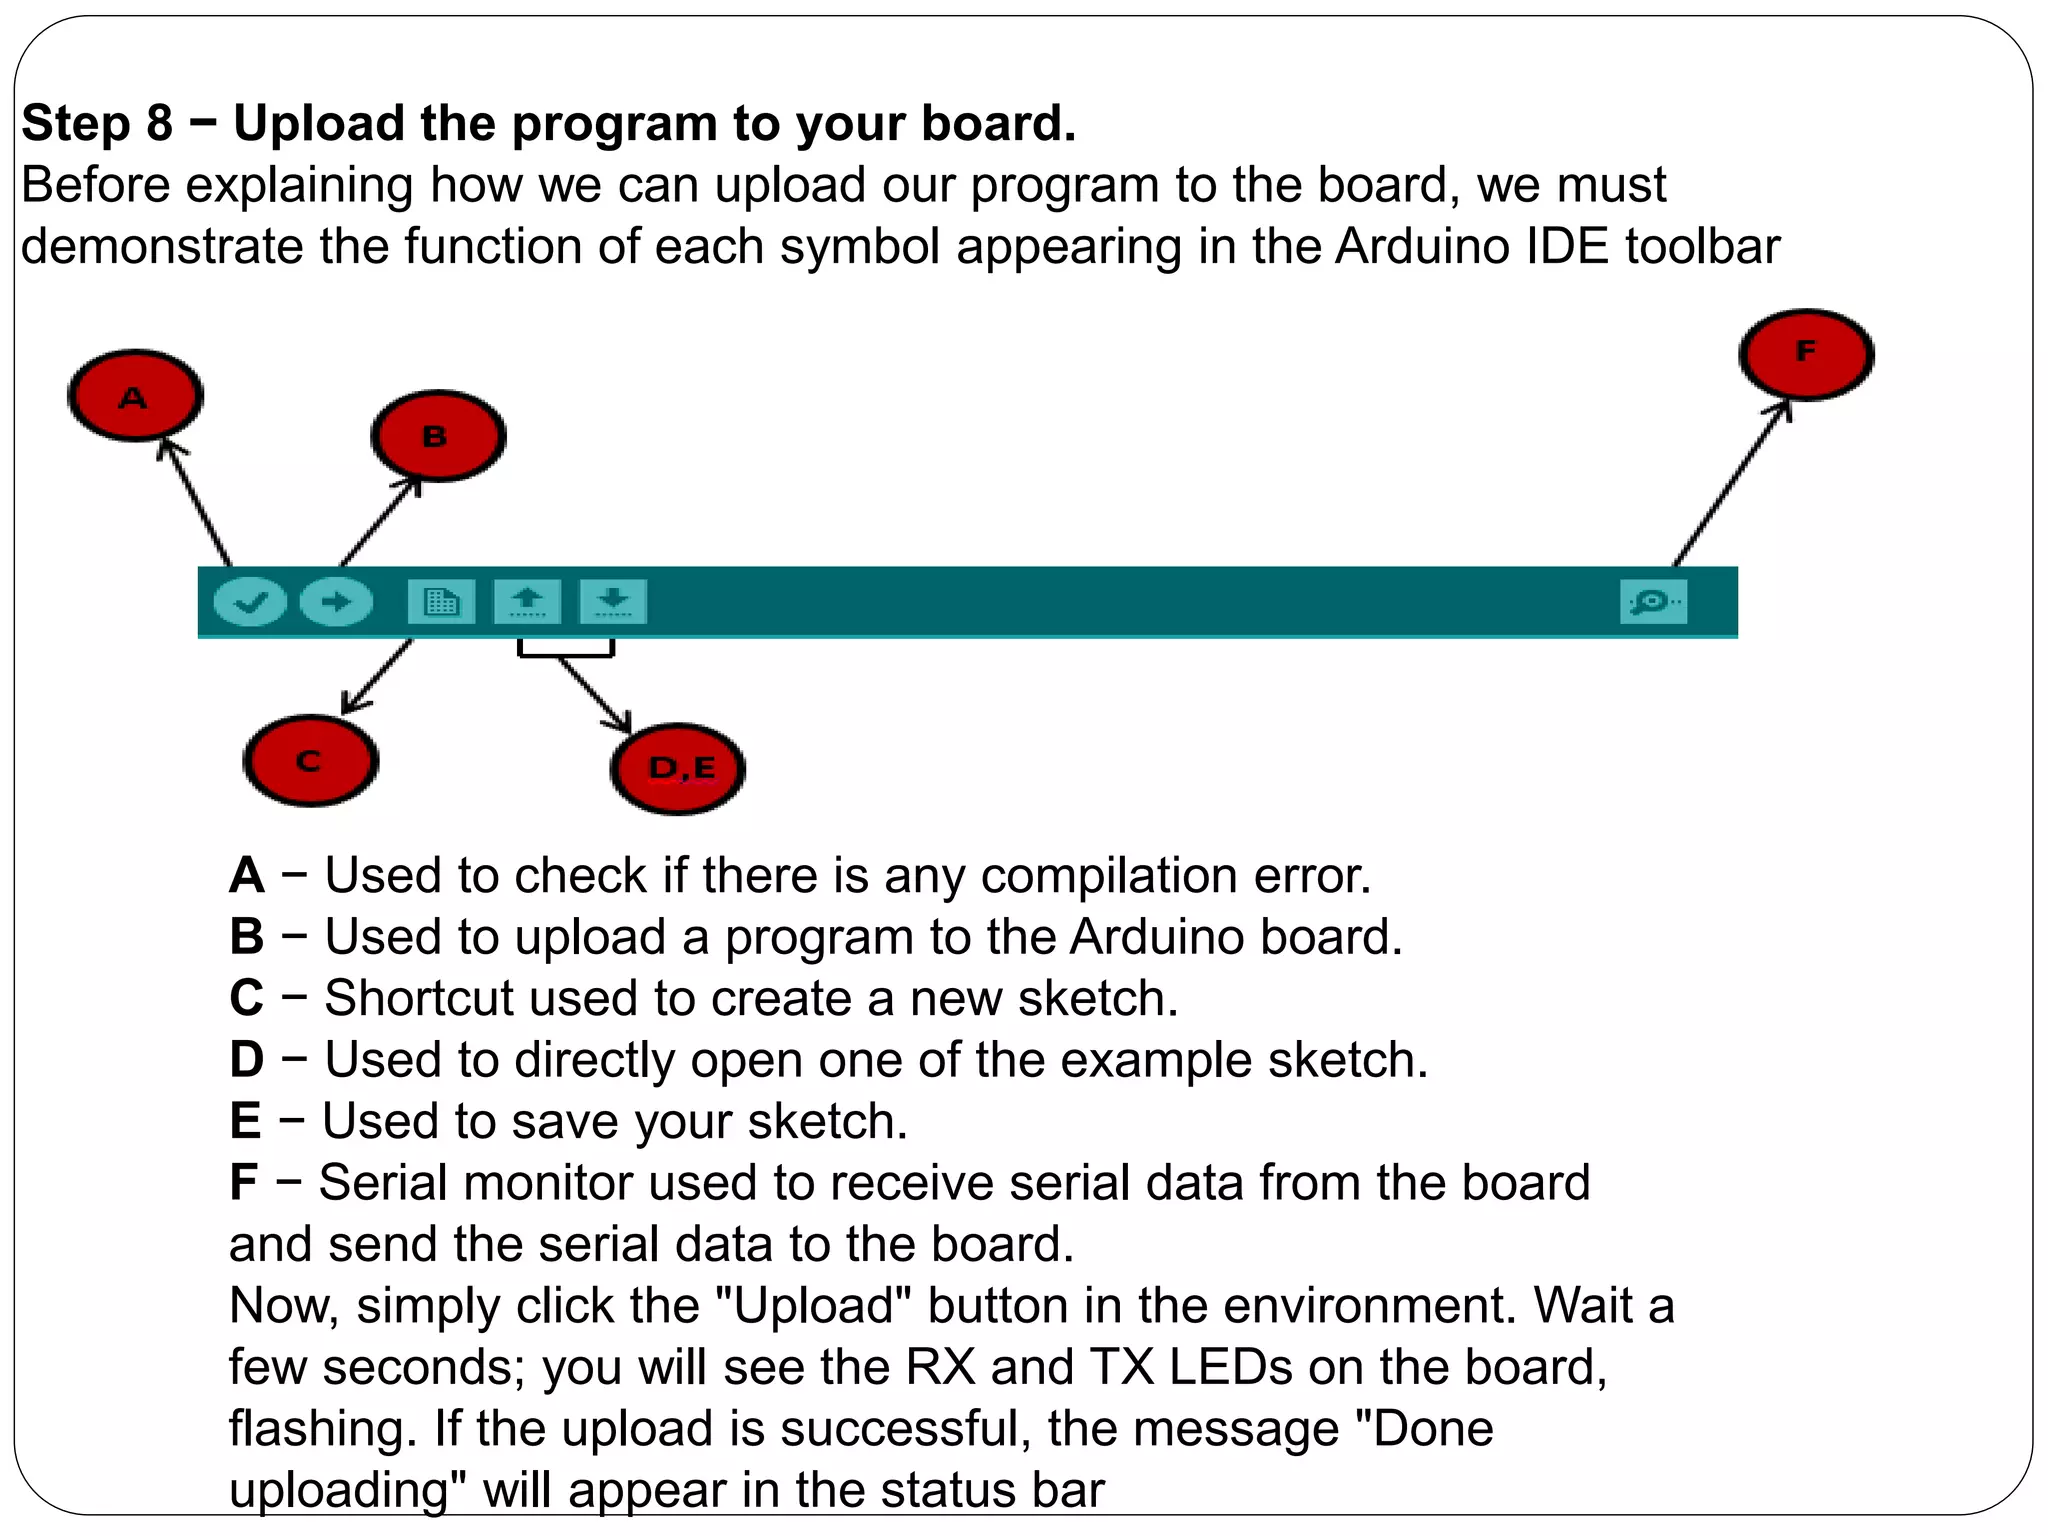
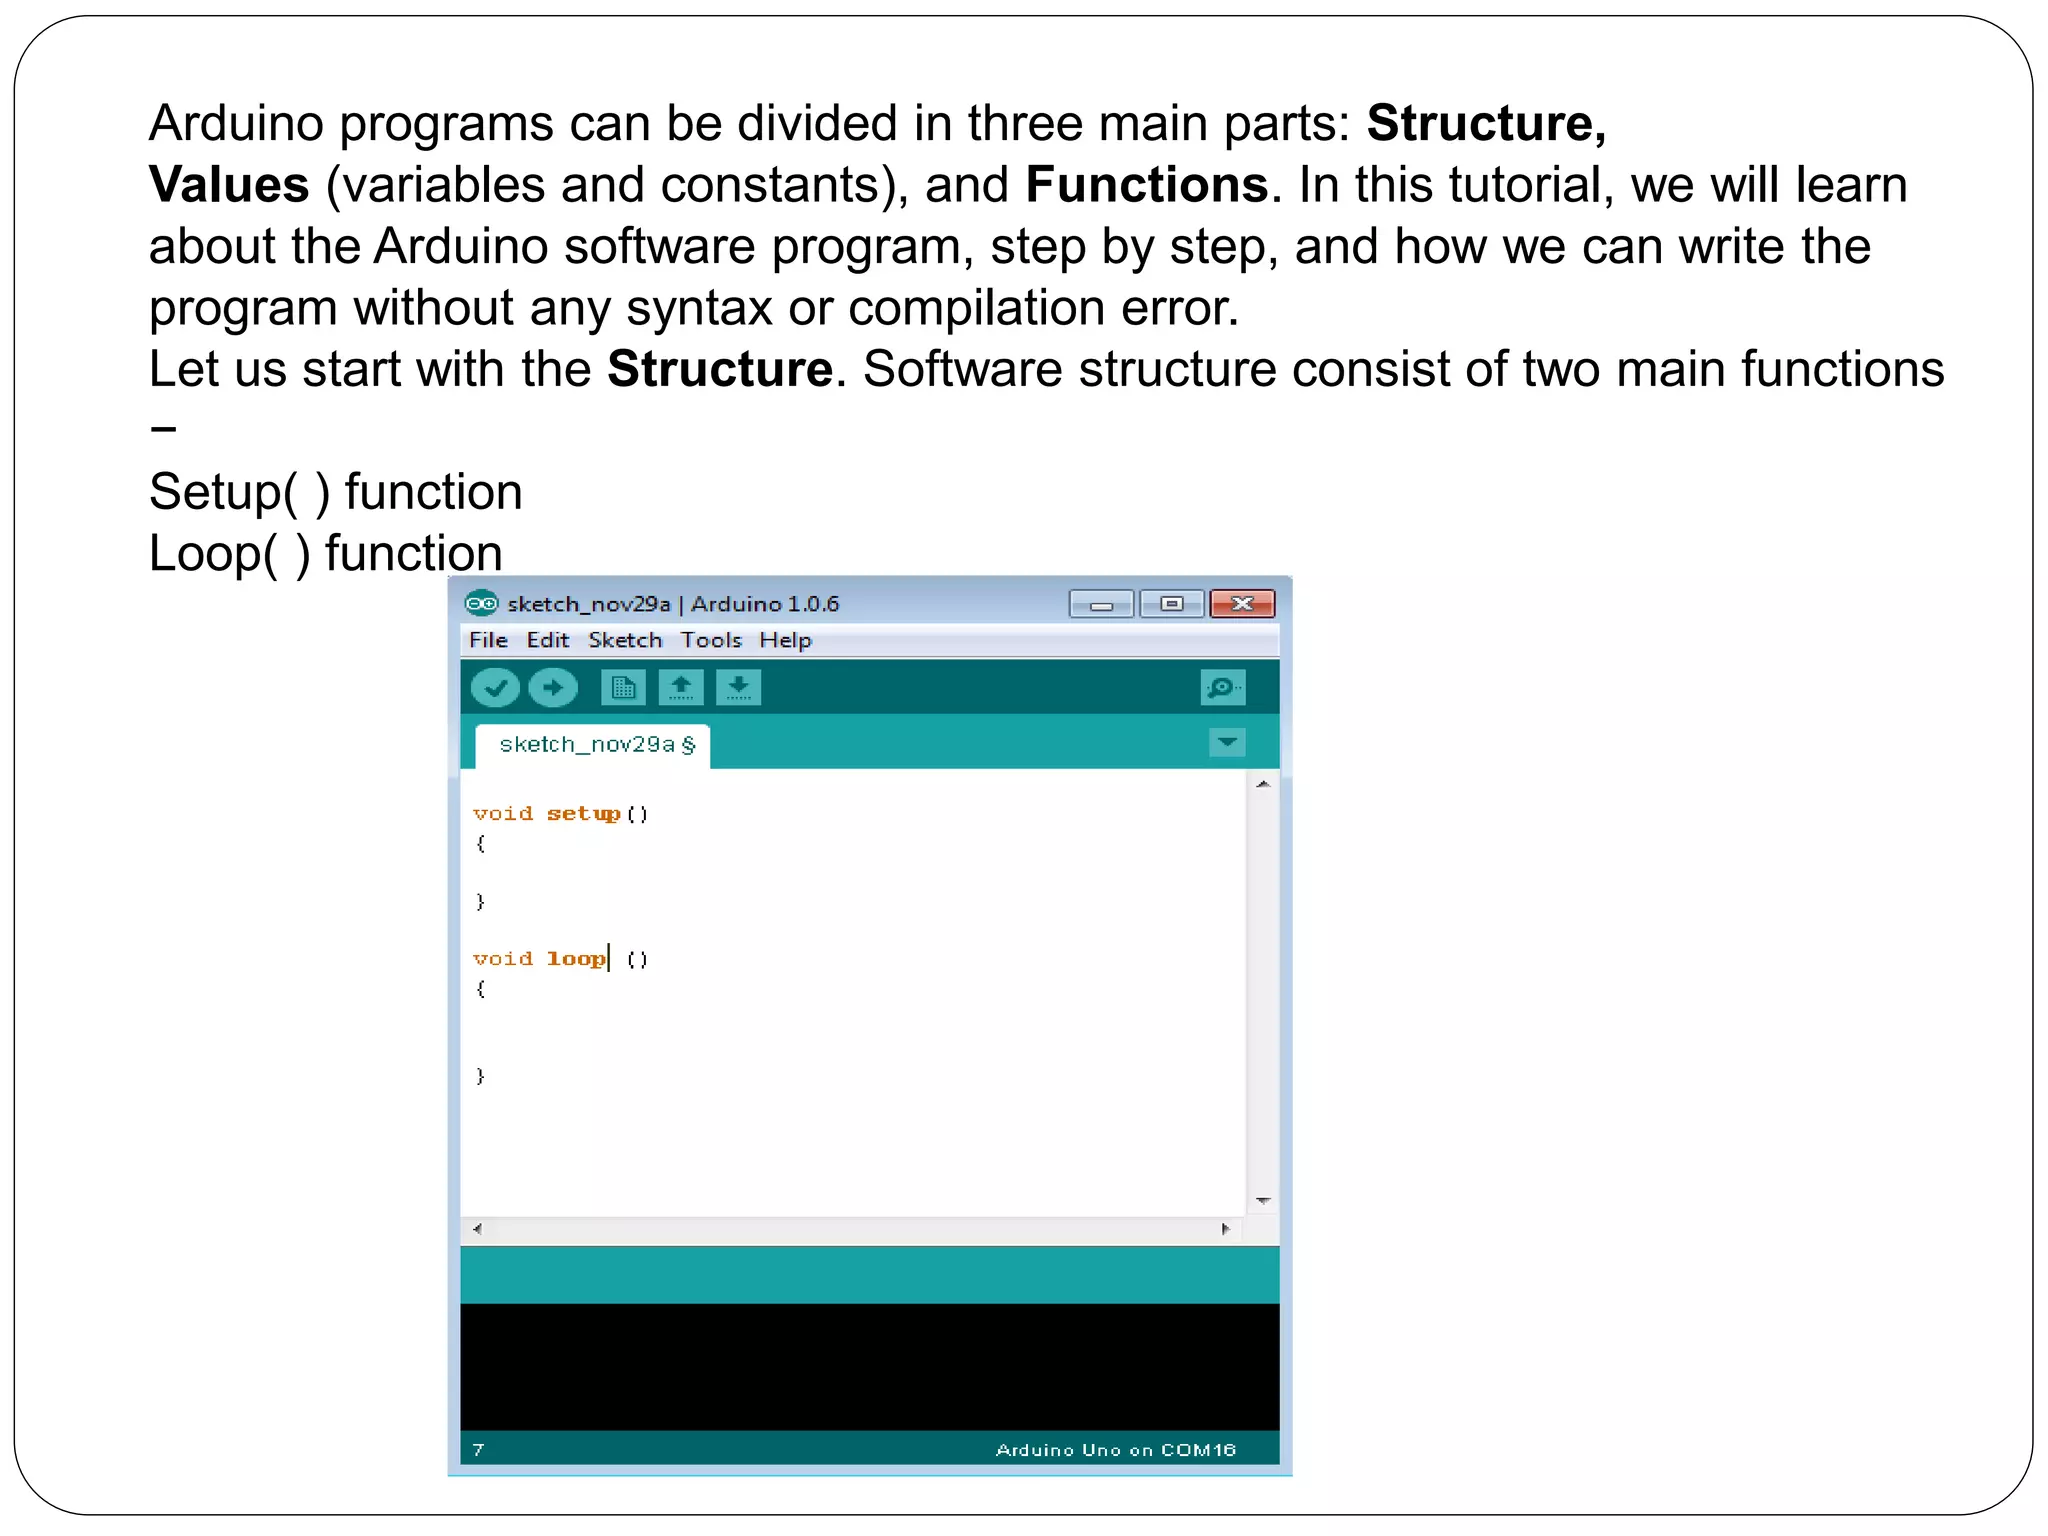

This document provides information about the Arduino hardware platform. It defines Arduino as an open-source hardware platform used for prototyping that consists of a programmable circuit board and IDE software. It then describes the key features of Arduino boards, including reading analog/digital sensor inputs and controlling outputs. The document proceeds to explain the components of a basic Arduino board and how to install and use the Arduino IDE software to write and upload programs.