
Recommended
More Related Content
What's hot
What's hot (20)
Similar to Film Poster Step By Step Process
Similar to Film Poster Step By Step Process (20)
More from Rebecca Withers
More from Rebecca Withers (20)
Recently uploaded
Recently uploaded (20)
Film Poster Step By Step Process
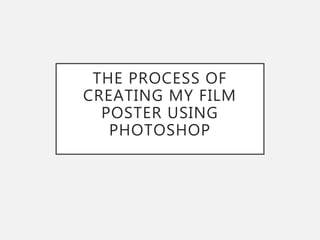
- 1. THE PROCESS OF CREATING MY FILM POSTER USING PHOTOSHOP
- 2. To create my poster, I started by opening Adobe Photoshop and then opening the image I want to use. I then selected the person at the front, who is Mia in the trailer, using the magnetic wand tool and created a new later using cut of just Sophie. I also did the same for the characters in the background. The previous stage allows me to change the brightness of each different section now. I wanted the background to be much darker than the original image but I need the people to be lighter so that they stand out as they are wearing darker clothes. Therefore, I adjusted the brightness of the background first so that I could then see how bright the people needed to be. Next, I adjusted the brightness of the people. I only adjusted the characters in the background slightly as I want them to be seen but the main focus to be on Mia at the front. I had to be careful when adjusting the brightness on Mia as if it was too bright, details began to be lost and it looked as if she’d been cropped into the image and was very out of place. I then used the burn tool to darken the wall behind where it was wet as it was very shiny and made the whole image feel lighter than it was. I also went around the edges of the wall to make it blend in more. Next, I felt that the characters should be more central in the poster. Therefore, I decided to crop the image down so that there was less at the top and the image was slimmer. This also made the image look darker as the grass outside the tunnel wasn’t as bright and We used cardboard for the actors to sit on when filming this part of the trailer as the ground was muddy and uneven with lots of rocks and we didn’t want them to sit straight onto the ground. However, I am now going to remove the cardboard using the spot healing tool. I also had to use the spot healing tool on the background so that none of the background could be seen and so that I could also remove the cardboard from under Mia’s legs. Even though I cropped out a lot of the opening and the greenery that came with it, I felt it was still too bright so I decided to use the magnetic wand tool to select the opening and then create a new layer by cutting that part of the background out.
- 3. I then used the brightness and contrast adjusters to changed the brightness which helped to darken the image. However, I feel this may be darkened further when the text is added to make it easier to read as I plan to use white text. As I changed the brightness on the background I also needed to adjust the brightness of the people so that they weren’t too bright and looked out of place. Using the text tool, I added in the title using the same font as we used in the trailer and also made sure it was white to match the trailer. Again, I used the same font and the text tool to add in the age certificate next to the title. I made this much smaller than as it tends to be a lot smaller than the title and any other text that is on the poster. I added in the tagline using the text tool. I used a caption that we included in the trailer as my tagline. Underneath the title, I added the main actors name so that people know who the main character is in the photo. Next, I used the text tool to write who directed the film and I positioned this next to the actors name and under the title. I also added in the award that the film won at the top. I made who is giving the award smaller than what the award is.
- 4. I started to create the review by adding in stars using the 5 point star polygon tool. I then duplicated the layer and lined them up so they were in a straight line and all the same distance apart. Using the text tool, I then finished the rest of the review, adding text around the stars. Next, I added the website link at the bottom of the poster so that people can watch the trailer and find out more about the trailer. Underneath the convergence, I put in the release date so people know when the film is due to be released. I also put it at the bottom as this is the standard convention. To create the credit block, I used PowerPoint as it is easier to move text and kept changing the formatting than on Photoshop. I used text boxes to create the correct format and a more condensed font so that it looked more realistic. I then saved it as an png file. I then inserted the credit block into Photoshop by opening the image and dragging the layer into a different tab and onto the poster. I used the same process to insert the logos for our production company ‘Skyline Productions’ and the distribution company ‘StudioCanal’. I felt that the image wasn’t positioned correctly so decided to move it up so that the people were framed between the writing in the gap. To do this without distorting and stretching the image, I duplicated the background layer and moved the original layer as well as the separate layer with the people in up. I then positioned the duplicated layer lower.
- 5. To blend the two background layers together, I started by hiding the text. I then used the rubber tool to erase part of the ground so that the two images blended together and didn’t look obviously different images. I then tried to fix the problem that you couldn’t read the white text at the top because of the brightness of the image. I started by adjusting the curve levels to make the image slightly darker. Next, I decided to edit the corner of the image where the sky and grass can be see. Therefore, I selected the existing grass on the image and created a new layer by copying it from the image. I then moved the layer above the existing greenery and blended the two together using the rubber tool. The wall was also too bright so I decided to adjust this. To only darken this part of the wall where the light was shining, I used the magnetic wand tool to select part of the wall and then copied it to create a new layer. I still wanted the image to be realistic and I needed this part of the wall to be slightly lighter than the rest to show the light shining onto it from outside. Therefore, I brightened it slightly but so still read the text.