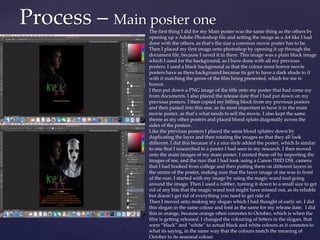
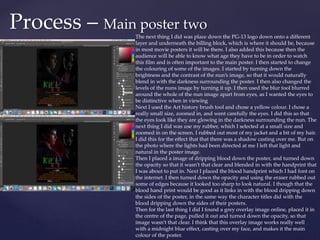
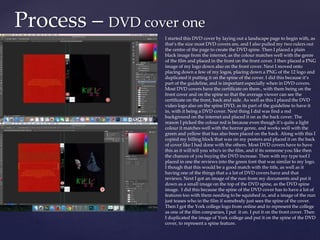
{
Production Reflection
George Wetton
Original images
For the location of where I took my photographs I booked the studio room and the kit such as the
lights, and the camera to use for my photographs. When It came to who I was going to have for
these photos I used myself as me as the character in the film and me in the nun costume as Valek
which I bought online, while a friend took the pictures for me. When It came to my character
costume I just wore my standard outfit that I was wearing for that day. In the studio room I used a
white backdrop because it was already there and I though it would be easier to edit and would
also be easier to capture a better image on as the lights project well of a white backdrop. When
using the studio lights I positioned the first two lights and a tall height but facing more away from
to have the shadow effect as its horror poster, and it has to look creepy. I then positioned the other
two that were on the side of where I was standing to be turned up a little brighter and turned
more towards me just so it can project more light towards me.
When using the white backdrop I used it to my advantage by being able to cast shadows across
my face by focusing more light towards the left side of my face and positioning the light away
from the right side of my face. This aesthetically was really pleasing because a lot of horror movie
posters I like this. They cast shadow towards the character, making the character look darker and
be easily recognisable as a horror poster. Also with lighting, various people use natural light for
the creepy effect as opposed to using a professional lighting like I've done here and edit it on
photoshop straight after.
How I took the photographs
for my poster?
 The main reason why I chose a mid-shot for almost all my posters as most of the these
posters were character posters and I wanted them all to have the same connection of the
angles being close ups. With clothes I just wore the costume I was going to wear that day.
 The main demographic of these films is usually someone whose a teenager or a young
adult as that’s what the film is aimed, so the audience that are watching the film can
relate to the characters in the film.
 The Nun
 For my costume I think its really effective and the eyes go well with the mask. With me
using photoshop I can edit the eyes to make them glow on Adobe Photoshop. The eyes
are creepy as the whole image of the nun is blurred but the eyes aren’t. Their very clear
and looks as if nun is looking at you.
Photoshoot angles and
shot types
The first thing I did was start off by opening up a Adobe Photoshop file, and set the poster on a size of A4 .
The reason I set in on A4 is because most common movie posters are this length. I set it on inches and put it
on a transparent background. Then I placed my first image onto photoshop by opening it up through the
document file. This image was a plain black image which I used for the background. I used a plain black
image for my background because it’s a dark colour that works well with dark horror aspect. I then put the
image of the nun in the centre of the poster because she will be main image of the poster, and changed its
brightness and contrast of the image. I did this so that the nun fits in with all the natural darkness and
shading of the background. I then changed the hue of the picture to make have a greyer effect and ill look,
because I wanted to make the nun appear as unsettling as possible. Then I changed the level of the image to
see what colour of the surrounding of the nun worked the best. I then turned down the opacity of the image
and then put it on soft light as a layer for the image I did so that the nun wouldn’t look very clear and had a
nice fade, which would boost the fear factor of the audience, as in the poster she’s not quite there but she is. I
then placed my title into a photoshop file and deleted the brick background using the magic want tool. I did
this because I feel like the background of the title which I had planned originally didn’t fit in with darkness
in the poster. I then selected the horizontal type tool and typed in “Coming this October in a font called
Berlin Sans FB Demi. I selected this font because its looks like the most recognisable font to use when I
looked at all the fonts and the reason I put in “Coming this October” is because I only wanted to tease the
audience, to get them excited for the film which is a really effective way of promoting a film. I then
duplicated the layer with the title on it and cropped out the letter k. Then having done that I rotated the
letter and resized, putting it directly in the middle as if it looks like someone has spray painted over the
poster. I did this because it was something that had influenced me from the SAW character posters and I
thought it would be a really nice idea when all the posters have been put together. Then to give it more of a
horror theme I put an image on it to overlay, a grungy type of image over the whole of the poster, set it as
soft light and turned the brightness down. The reason why I had put this overlay on was because its what
separates it from looking like a poster to an actual scary image, which encourages the audience even more to
watch the film. I then put in the blood splatter and duplicated the layer. Resizing and rotating it so that each
image looks different. After using six images of blood splatters I put them on the sides of poster, which is
where I wanted them. The reason I did this was because it would appear to be a very good design, and was
similar to another poster that inspired me where it too had blood stains rising up the poster. Then using a
font that I had downloaded off the internet called credit block I made my own credit block, typing up
random names and companies. I did this because all movie posters have this and it looks professional, along
with it giving more insight to whose in the film. I then put the date and credit in orange font colour as this
connotates to October and is a nice Easter egg to Halloween. I then put P-13 logo on a new layer and placed
just underneath the credit block, as this too is also professional to add to a poster, Then I resized the image of
the nun to be closer when I wasn’t happy with the size that the image was because it looked too far away to
create any actual emotion for the audience. The next thing I did was put the character title using the vertical
type tool onto the top of the poster, as I believed that this would be the best place for it. I put in “that scary
nun lady” as the title, used a dark red font as the colour, and then changed the font to a chiller because it will
look like blood which relates to the blood splatter design on the poster. I then just for final touches added a
another layer of a grungy overlay image to cover the whole thing to finish it off, as it would be covering the
whole image, and would be deemed a the main image colour.
Process – The Nun character poster
Process – Jigsaw character poster
Like I previously did before I started off by opening up a adobe Photoshop file, and set the image on a A4
image, as most movie posters are this size. I then placed a plain black image and expanded so that it was
going to cover the whole page as that was what I was having for my background. The reason I did this was
because most horror movie poster shave creepy dark background, as its natural for the genre. I then placed
the release date down which says ‘Coming this October’ in a font called Berlin Sans FB Demi and turned it
into an orange colour, as it connotates it to Halloween. I then placed a PNG of my title card that I had put
on a separate layer and placed it just above the release date, as that’s where it was for my previous poster. I
then moved onto the credit block that I had put on a different layer, so that I could move it separately, and
used the same font that I used for the previous poster, along with it also being orange like the release date,
as well as placing the PG-13 logo that used previously, keeping within the same theme of the poster. I kept
all my character posters the same theme because I though this was a effective way of promoting the movie
and shows the connection of the other posters along with it. I then moved onto the blood splatter, just like
before I kept on duplicating the same image and rotating them so that they looked different. I did this
because a previous poster I did in my research had done this and I thought it looked really well placed
along with the overlays of the posters. Then once the blood splatters were done, I placed an image of the
Billy the Puppet (Jigsaw character) on a separate layer, in the centre of the poster, as it’s the main image. I
started of by using the magic wand tool to draw around the background of the puppet and delete anything
that should be there. I then just went around the image of Billy the puppet with a rubber and rubbed out
any bit of background left off from the magic wand tool, as even though it’s a really useful tool, saving a lot
of time. It does however not get everything that has been selected. I then placed in the slogan which was
character like the others called ‘that puzzle guy’ and put in a burgundy colour so it represent blood as the
font that I and used for it was the same as the other posters, called chiller. I did this because the colour and
the font resembled blood, and that connected to the dripping blood on the sides of the poster. I then started
to experiment with the image of Billy the Puppet by changing the brightness/contrast and then changed the
levels of colour for it. I did all this because the doll looked to bright with the surroundings it was in, and
despite the image not being as dark as the first character poster, it is somewhat darker than it originally
was. I then using the image that I took previously of the nun doing bunny ears, I opened that up on a new
layer, and rubbed out the whole image except for the top part of the arm with the hand, so that the nun
wasn’t in the poster but her arm was. I then using the magic wand tool got rid of any unwanted
background and placed the layer underneath Billy the puppet, so that the arm was behind the image of the
doll. I thinks this works really well an was original idea of mine. The reason I think it works really well is
because it connects the nun and the jigsaw poster in a way that the others were connected and also add the
comedy element in the poster as well to remind people that this is also a comedy film. I then placed an
overlay image of grungy wallpaper on the top of the layers and turned the opacity down. I did this to
finalise the poster and add the main colour of the poster which was similar to the last one, so that it was in
the same style. I then finished off by duplicating my title, enlarging it and cropping the whole of it apart
from the letter “I” which I rotated . This is the letter in the title that connects the poster with all the other
posters. When all the character posters are put together its meant to spell the title. I like this because it it’s a
unique idea of peaking the interest of audience, by telling them that there is more than one character poster
from the way each letter is spelt out per poster. I also turned down the opacity of the letter, so that it would
look more like spray paint.
The first thing I did was open up a Adobe Photoshop file and set the page
on an A4 size, as most movie posters are this size.
I used a plain black image and expanded it to make it the background
image, as most horror movie poster have dark colours to match the genre.
Then I put in a new layer, and put the PNG title into it, as well as putting
down the cast and crew using the credit block font that I had already
downloaded. I then turned up the brightness of the billing block to make it
stand out more against the black background.
I inserted the photograph of the character (from My Documents) and
resized it to fit the area of the page that I wanted. I used opacity and
brightness / contrast to achieve a shadowing effect on the characters face to
make the image look more dramatic. Focusing on levels and increasing
these to sharpen the darker image. I like how I've darkened the image as it
shows the darkness of everything that is going on around him and how
exposed he is now to this new world where characters have come to life.
As with the other posters, I duplicated a blood splatter layer and put them
at different angles, so it didn’t look like the same image repeatedly, as I
think this is a good theme and style for each poster, which it being easier to
tell the character posters are linked with this design added in.
I then put in the release date called ‘Coming this October’ in a Font called
Berlin Sans FB Dem, and put the billing block and release date in a orange
colour so that it connotes to October for when its coming out. I used the
slogan for the poster of the character’s title calling it “the vlogger”, in a
dark red colour and a font called chiller. I think this effective way of
teasing the audience in what way the character represented in the film.
I lifted the title and duplicated it, cropping the duplicated version so that
there was just the l and resized, and rotated it, putting it at the centre of the
poster like I had done with the others. I have done this so that each letter
per title will be spelled out in each poster, showing the connection of each
character poster.
Adding in the PG-13 rating is part of the guidelines for movie posters and
the fact that all movie posters have this.
Process – George character poster
Process – Sam character poster
Like all the others I started off by making the poster an A4 size to
begin with, as most movie posters are this size and then put the
black background along with it, as that’s the colour that a lot of
horror movie posters have. Then on a different layer I placed in a
PNG of my title card and then on a new layer put in a credit block
that I had already downloaded the font for from previous posters.
I then put in the release date that said ‘Coming this October’ in a
font that I had already downloaded. Then I put the same PG-13
logo in on a new layer like I had done with all the previous
posters, as it one of the guidelines need for a movie poster. The
next thing I did was change the billing block and air date to
orange, so that it connotes to Halloween. I also tried to keep in the
same style as the other posters put in the blood splatter and
duplicate, whilst also rotating the images so that they all look
different. Then I put the slogan in a different layer and place the
words ’the back-up’ in a chiller font, so that it teasers tyhe4
characters well known identity slightly. After that I placed the
image of the character in the centre, as it’s the main image of the
poster and using the magic background tool I got rid of any
background that was not needed in the poster that was in the
photo. Then I used the rubber tool to get rid of any bits that
weren't done using the magic wand tool, as it’s a really effective
tool but doesn’t get rid of all the areas.
Then I darkened the main image of the poster by turning down the
brightness and then I turned up the levels. I decided to just keep
this image like this as I thought it looked better than adding any
blur, shadow, or turning up the opacity, as I tried these and they
didn’t look right. I think this was because I shot the other pictures
with a professional camera with lighting, but with the photo of
Sam I took just with a different camera I was using at the time.
Lastly I duplicated the logo and rubbed it all out apart from the
letter “l” with I resized and rotated it, putting it at the centre of the
page, so that it shows the connection with the other character
posters.
Process – Main poster one
The first thing I did for my Main poster was the same thing as the others by
opening up a Adobe Photoshop file and setting the image as a A4 like I had
done with the others, as that’s the size a common movie poster has to be.
Then I placed my first image onto photoshop by opening it up through the
document file, because I saved it in there. This image was a plain black image
which I used for the background, as I have done with all my previous
posters. I used a black background as that the colour most horror movie
posters have as there background because its got to have a dark shade to it
with it matching the genre of the film being presented, which for me is
horror.
I then put down a PNG image of the title onto my poster that had come my
from documents. I also placed the release date that I had put down on my
previous posters. I then copied my billing block from my previous posters
and then pasted into this one, as its most important to have it in the main
movie poster, as that’s what needs to sell the movie. I also kept the same
theme as my other posters and placed blood splats diagonally across the
sides of the posters.
Like the previous posters I placed the same blood splatter down by
duplicating the layer and then rotating the images so that they all look
different. I did this because it’s a nice style added the poster, which Is similar
to one that I researched in a poster I had seen in my research. I then moved
onto the main images of my main poster. I started these off by importing the
images of me, and the nun that I had took using a Canon 700D DSL camera
that I had booked from college and then putting them on different layers in
the centre of the poster, making sure that the layer image of me was in front
of the nun. I started with my image by using the magic wand tool going
around the image. Then I used a rubber, turning it down to a small size to get
rid of any bits that the magic wand tool might have missed out, as its reliable
but doesn’t get rid of everything you need to get ride of.
Then I moved onto making my slogan which I had thought of early on. I did
this slogan in the same colour and font as the same for my release date. I did
this in orange, because orange often connotes to October, which is when the
film is getting released. I changed the colouring of letters in the slogan, that
were “black” and “white” to actual black and white colours as it connotes to
what its saying, in the same way that the colours match the meaning of
October to its seasonal colour.
Process – Main poster two
The next thing I did was place down the PG-13 logo down onto a different
layer and underneath the billing block, which is where it should be, because
in most movie posters it will be there. I also added this because then the
audience will be able to know what age they have to be in order to watch
this film and is often important to the main poster. I then started to change
the colouring of some of the images. I started by turning down the
brightness and the contrast of the nun’s image, so that it would naturally
blend in with the darkness surrounding the poster. I then also changed the
levels of the nuns image by turning it up. I then used the blur tool blurred
around the whole of the nun image apart from eyes, as I wanted the eyes to
be distinctive when in viewing
Next I used the Art history brush tool and chose a yellow colour. I chose a
really small size, zoomed in, and went carefully the eyes. I did this so that
the eyes look like they are glowing in the darkness surrounding the nun. The
next thing I did was use my rubber, which I selected at a small size and
zoomed in on the screen. I rubbed out most of my jacket and a bit of my hair.
I did this for the effect that that there was a shadow casting over me. But on
the photo where the lights had been directed at me I left that light and
natural in the poster image.
Then I placed a image of dripping blood down the poster, and turned down
the opacity so that it wasn’t that clear and blended in with the handprint that
I was about to put in. Next I placed the blood handprint which I had font on
the internet. I then turned down the opacity and using the eraser rubbed out
some of edges because it looked too sharp to look natural. I though that the
blood hand print would be good as it links in with the blood dripping down
the sides of the poster, in the same way the character titles did with the
blood dripping down the sides of their posters.
Then for the last thing I did I found a grey overlay image online, placed it in
the centre of the page, pulled it out and turned down the opacity, so that
image wasn’t that clear. I think that this overlay image works really well
with a midnight blue effect, casting over my face, and makes it the main
colour of the poster.
Process – DVD cover one
I started this DVD cover by laying out a landscape page to begin with, as
that’s the size most DVD covers are, and I also pulled my two rulers out
the centre of the page to create the DVD spine. Then I placed a plain
black image from the internet, as the colour matches well with the genre
of the film and placed in the front on the front cover. I then placed a PNG
image of my logo down also on the front cover. Next I moved onto
placing down a few of my logos, placing down a PNG of the 12 logo and
duplicated it putting it on the spine of the cover. I did this because it’s
part of the guideline, and is important especially when in DVD covers.
Most DVD covers have the certificate on them , with them being on the
front cover and on the spine so that the average viewer can see the
certificate on the front, back and side. As well as this I placed the DVD
video logo also on the spine DVD, as its part of the guideline to have it
in, with it being a DVD cover. Next thing I did was find a red
background on the internet and placed it on as the back cover. The
reason I picked the colour red is because even though it’s quite a light
colour it matches well with the horror genre, and works well with the
green and yellow that has also been placed on the back. Along with this I
copied my billing block that was on my posters and placed it on the back
of cover like I had done with the others. Most DVD covers have to have
this as it will tell you who's in the film, and if its someone you like then
the chances of you buying the DVD increase. Then with my type tool I
placed in one the reviews into the green font that was similar to my logo.
I though that this would be a good match with the title, as well as it
having one of the things that a a lot of DVD covers have and that
reviews. Next I got an image of the nun from my documents and put it
down as a small image on the top of the DVD spine, as the DVD spine
image. I did this because the spine of the DVD cover has to have a lot of
features too with them needing to be squished in, and a image of the nun
just teases who in the film if somebody just sees the spine of the cover.
Then I got the York college logo from online and to represent the college
as one of the film companies, I put it on. I put it on the front cover. Then
I duplicated the image of York college and put it on the spine of the DVD
cover, to represent a spine feature.
Process – DVD cover two
Next I moved onto the front cover itself by opening the image of Billy The Puppet and the Nun from my
documents into the front cover. I decided to use these to characters as they are the most important and
most eye catching when it comes to the selling in the cover. After that I decided to type up my summary
of the movie using the horizontal type tool with the green font so that I would match the title and the
reviews. The summary is a very important part of the DVD cover and you have to the sell the movie as
much as possible in order for someone to buy it. Then I placed the cast’s names on the top of the front of
the DVD cover, using the horizontal type tool. I changed the colour of the top lettering to green and
changed the bottom names to pink. The reason I did this because the colours match well with the title
and makes the cast names stand out more. The next thing I did was find a PNG of yellow box, which I
placed on the back of the cover, so that I can be used for box where the special features go in for them to
be outlined. Then after that I got the horizontal type tool and typed the words “special features” in a
yellow font. I then got another text box and typed In what the special features were in a white font. I did
this so that the title of the box would separate with what they actually were. The next thing I did was
put down a white box that I found online and pulled it out so it was for the bottom, for the DVD
technical details. The reason I chose white is because white is a very basic straight forward colour which
is often used when you see other DVDs with their technical qualities at the bottom. For the technical
qualities at the bottom, I first started off by opening up a barcode image that I saved into my
documents, as this is a way of purchasing the item, with every purchasing item needing a barcode. Then
from seeing what I saw on another DVD, I put the barcode code number under the barcode, along with
with the DVD code number at the bottom of the DVD spine, under the DVD logo, which I put all this in
italics. I also put in the second certificate logo on, which is the blue film censors office. I added the
second certificate because a lot the DVD covers that I had researched I had seen two certificates that
were the same as these. I then duplicated that logo and put it on the spine of the DVD, adding as a spine
feature. The next thing I did was duplicate the York College logo, using it for third time by putting in in
the white box and the Dolby logo which I put right next to each other. I put these in in a as companies
that had relation to the film. Then I pasted in a random DVD information box I had got off Google, and
also put in a paramount pictures logo on top of the other two logos. The DVD information box includes
such things a run time, aspect ratio, language and other things as well. Then the next thing I did was
put in the other reviews using the horizontal type too, keeping it the same colour as the other review so
that they match. Along with this I also opened a new image from my documents of five gold stars to
represent how many stars the paper are giving them. This sells the movie to anyone who isn’t sure
about the film with it having such a high rating.
Underneath the credit block I also put the film website name along with the York College website to show the
company that is representing it, putting these websites on at a typing tool size of six so that it was very small but
you could still see. I did this because I didn't want it getting in the way of the billing block and was less
important. For the main image of the DVD I resized of jigsaw and the Nun and open a image of me as I thought
it would look good on the cover with the other two images, because of the lighting placed on my face in the
photo, and the looks as if I'm looking behind me. So I'm facing the other characters on the cover. I then put a
grey grungy overlay wallpaper over the main poster and turned down the opacity so that it blended in with
what was happening. Then I opened up two more certificates which were the blue and red ones, put them in
textboxes and put information I found online into the boxes. Then finally I put in a textbox full of copyright
information of the film that would not be allowed, as legally most DVD covers have to have this.
Process – trailer: part one
For this trailer I used a software called Movavi. So the first
thing I did was open up a new editing file and uploaded the
video clips that I had imported into the computer using a USB
stick. Then I imported each individual clip, with me looking at
various clips and stabilising the shaky clips. I did this by
going on audio and turn up the volume in some clips that
need turn up on. Then I did the music, which I found on
YouTube called “it is coming by David Fesliyan”. With this
clip I downloaded it from YouTube, imported it and then put
it on the line underneath so It’s running all the way through
clips. With the music I split and duplicate chorus to keep the
same sound of music, because it was the most suspenseful
part of the song. So once I have split several times, I put the all
the choruses together, so it sounded like it was playing over
and over again. When I came down to colouring I went
animation and decreased the brightness a little bit of each clip,
so it had that morbid effect it being a horror. I also changed
the opacity of several clips as well, as I though they might
work better in that way. I think this changes make the trailer
not just look like natural film, and have a more darker edge to
them,
Process – trailer: part two
When I came to making the title cards I made them on Adobe
photoshop, with making them landscape and setting a dark burgundy
wallpaper on a new layer. I design the lettering in a font called Berlin
Sans FB Demi. I then duplicated this layer rotated it, put it in a different
position and then turned the opacity down so that it was clear enough,
but clear enough to make out that it was a reflection. I made five of
these posters with the first having the word “encounter”, the second
being “the” and the third being “impossible”. I then made the poster for
the title of the title card which is similar to the others but instead of
using the font of the others I opened a PNG of my logo, put in a new
layer and put in a blood handprint behind it on which I moved the
layer down. I then turned the opacity down on the image so it didn’t
looks so clear. Then for my final title card I similarly wrote down the
same font and exported all these as JPEGS through to my document. I
then imported these images onto trailer and put them in order of where
they should be in. For the third title card I used my video tool and used
my fade area where I faded the third title card. With this title cards they
were pulled in so I exaggerated them (pulled them out) and made sure
they were the right length, matching the rest of the trailer. Then for the
final scenes, I found these clips on YouTube that featured Billy the
puppet’s eyes and another clip with his laugh. I downloaded these
clips off YouTube and imported them into the software that I was using
to edit my trailer. Once I did that I put the clip with jigsaw eyes on the
main line and cut it so it was just a few seconds of those eyes and not
the whole two minute clip. Then I put in the second clip of Billy the
Puppet’s laugh which I put on the second line, just after the music
stopped playing, and around the time the dolls eyes light up.
Process: exporting and sending
When it came down to exporting I
clicked on file on the top left corner.
Then I clicked export and went on
export as. This tab popped up (the
image on the left) when I clicked it
and so next to format I changed the
image from a PNG to a JPEG. I then
clicked export all and waited a few
minutes for it to export because the
file was too large. I repeated the
process with all my other posters and
sent them over through email to my
lecturer. With my trailer even though
it was a different software, using a
software called Movavi. It was
however the same process. I went file,
export, and export as. However when
I exported it this time, I exported it as
MP4. when I exported it I sent it
through email to my lecturer.
 A tool that I could have used to manage time better would be to
using the exposure panel when focusing on the image. This is a
better tool when comparing it to the opacity as you don’t have to
change the brightness and levels as much when you use this tool
 Another tool I could have used from Photoshop that would have
made my posters a little bit better is to use the blur tool more. I look
back at the character posters and I think they would have worked
better if I used the blur tool just blur the characters. I think it would
work really well as well because its only teasing the characters so it
wont be clear image, but still good quality and you’ll still be able to
see them.
 The last tool would have used would be smudge tool as it a lot
quicker to go around the edges with it then the blur tool. Its also
effective way of distorting the image in a similar way to the blur
tool.
What other tools might have made it
better/managed time better?
 Exposure panel tool
 Strength - A strength of the exposure panel tool is that makes the thing that you want in the image to
stand out, stand out more.
 Weakness – A weakness of the exposure panel tool is that it that its not very time consuming when
editing, when comparing it to the opacity tool.
 Blur tool
 Strength - A strength of the blur tool is in a safe way it blurs the character so that it only tease the
character, which strengths the encouragement for the viewer watching the film.
 Weakness - A weakness of the blur tool is that when you use the Gaussian blur tool, you need to place
exactly where it you want the blur in the image, and you cant pinpoint where you want the blur in two
different positions.
 Opacity tool
 Strength – A strength of using the opacity tool is that is a basic way of distorting the image way from the
public eye, and when doing a genre like I've done which is horror, its really useful.
 Weakness – A weakness of using the opacity tool is that it all depends on what filter you have already
used on the in image, because if you’ve already turned the brightness down of the image then it might not
work with the opacity turned down as well.
 Magic wand tool
 Strength – A strength of using the magic wand tool is that it saves a lot of time and focuses really well on
precision getting every corner of the image that you’ve selected.
 Weakness – A weakness of using a the magic wand tool is that sometimes it doesn’t get rid of everything
you want in the image and sometimes leaves areas messy as it doesn’t select everything you want.
Strengths and Weakness of
tools

6. FMP Production Reflection

  • 1.
  • 2.
  • 3.
    For the locationof where I took my photographs I booked the studio room and the kit such as the lights, and the camera to use for my photographs. When It came to who I was going to have for these photos I used myself as me as the character in the film and me in the nun costume as Valek which I bought online, while a friend took the pictures for me. When It came to my character costume I just wore my standard outfit that I was wearing for that day. In the studio room I used a white backdrop because it was already there and I though it would be easier to edit and would also be easier to capture a better image on as the lights project well of a white backdrop. When using the studio lights I positioned the first two lights and a tall height but facing more away from to have the shadow effect as its horror poster, and it has to look creepy. I then positioned the other two that were on the side of where I was standing to be turned up a little brighter and turned more towards me just so it can project more light towards me. When using the white backdrop I used it to my advantage by being able to cast shadows across my face by focusing more light towards the left side of my face and positioning the light away from the right side of my face. This aesthetically was really pleasing because a lot of horror movie posters I like this. They cast shadow towards the character, making the character look darker and be easily recognisable as a horror poster. Also with lighting, various people use natural light for the creepy effect as opposed to using a professional lighting like I've done here and edit it on photoshop straight after. How I took the photographs for my poster?
  • 4.
     The mainreason why I chose a mid-shot for almost all my posters as most of the these posters were character posters and I wanted them all to have the same connection of the angles being close ups. With clothes I just wore the costume I was going to wear that day.  The main demographic of these films is usually someone whose a teenager or a young adult as that’s what the film is aimed, so the audience that are watching the film can relate to the characters in the film.  The Nun  For my costume I think its really effective and the eyes go well with the mask. With me using photoshop I can edit the eyes to make them glow on Adobe Photoshop. The eyes are creepy as the whole image of the nun is blurred but the eyes aren’t. Their very clear and looks as if nun is looking at you. Photoshoot angles and shot types
  • 5.
    The first thingI did was start off by opening up a Adobe Photoshop file, and set the poster on a size of A4 . The reason I set in on A4 is because most common movie posters are this length. I set it on inches and put it on a transparent background. Then I placed my first image onto photoshop by opening it up through the document file. This image was a plain black image which I used for the background. I used a plain black image for my background because it’s a dark colour that works well with dark horror aspect. I then put the image of the nun in the centre of the poster because she will be main image of the poster, and changed its brightness and contrast of the image. I did this so that the nun fits in with all the natural darkness and shading of the background. I then changed the hue of the picture to make have a greyer effect and ill look, because I wanted to make the nun appear as unsettling as possible. Then I changed the level of the image to see what colour of the surrounding of the nun worked the best. I then turned down the opacity of the image and then put it on soft light as a layer for the image I did so that the nun wouldn’t look very clear and had a nice fade, which would boost the fear factor of the audience, as in the poster she’s not quite there but she is. I then placed my title into a photoshop file and deleted the brick background using the magic want tool. I did this because I feel like the background of the title which I had planned originally didn’t fit in with darkness in the poster. I then selected the horizontal type tool and typed in “Coming this October in a font called Berlin Sans FB Demi. I selected this font because its looks like the most recognisable font to use when I looked at all the fonts and the reason I put in “Coming this October” is because I only wanted to tease the audience, to get them excited for the film which is a really effective way of promoting a film. I then duplicated the layer with the title on it and cropped out the letter k. Then having done that I rotated the letter and resized, putting it directly in the middle as if it looks like someone has spray painted over the poster. I did this because it was something that had influenced me from the SAW character posters and I thought it would be a really nice idea when all the posters have been put together. Then to give it more of a horror theme I put an image on it to overlay, a grungy type of image over the whole of the poster, set it as soft light and turned the brightness down. The reason why I had put this overlay on was because its what separates it from looking like a poster to an actual scary image, which encourages the audience even more to watch the film. I then put in the blood splatter and duplicated the layer. Resizing and rotating it so that each image looks different. After using six images of blood splatters I put them on the sides of poster, which is where I wanted them. The reason I did this was because it would appear to be a very good design, and was similar to another poster that inspired me where it too had blood stains rising up the poster. Then using a font that I had downloaded off the internet called credit block I made my own credit block, typing up random names and companies. I did this because all movie posters have this and it looks professional, along with it giving more insight to whose in the film. I then put the date and credit in orange font colour as this connotates to October and is a nice Easter egg to Halloween. I then put P-13 logo on a new layer and placed just underneath the credit block, as this too is also professional to add to a poster, Then I resized the image of the nun to be closer when I wasn’t happy with the size that the image was because it looked too far away to create any actual emotion for the audience. The next thing I did was put the character title using the vertical type tool onto the top of the poster, as I believed that this would be the best place for it. I put in “that scary nun lady” as the title, used a dark red font as the colour, and then changed the font to a chiller because it will look like blood which relates to the blood splatter design on the poster. I then just for final touches added a another layer of a grungy overlay image to cover the whole thing to finish it off, as it would be covering the whole image, and would be deemed a the main image colour. Process – The Nun character poster
  • 6.
    Process – Jigsawcharacter poster Like I previously did before I started off by opening up a adobe Photoshop file, and set the image on a A4 image, as most movie posters are this size. I then placed a plain black image and expanded so that it was going to cover the whole page as that was what I was having for my background. The reason I did this was because most horror movie poster shave creepy dark background, as its natural for the genre. I then placed the release date down which says ‘Coming this October’ in a font called Berlin Sans FB Demi and turned it into an orange colour, as it connotates it to Halloween. I then placed a PNG of my title card that I had put on a separate layer and placed it just above the release date, as that’s where it was for my previous poster. I then moved onto the credit block that I had put on a different layer, so that I could move it separately, and used the same font that I used for the previous poster, along with it also being orange like the release date, as well as placing the PG-13 logo that used previously, keeping within the same theme of the poster. I kept all my character posters the same theme because I though this was a effective way of promoting the movie and shows the connection of the other posters along with it. I then moved onto the blood splatter, just like before I kept on duplicating the same image and rotating them so that they looked different. I did this because a previous poster I did in my research had done this and I thought it looked really well placed along with the overlays of the posters. Then once the blood splatters were done, I placed an image of the Billy the Puppet (Jigsaw character) on a separate layer, in the centre of the poster, as it’s the main image. I started of by using the magic wand tool to draw around the background of the puppet and delete anything that should be there. I then just went around the image of Billy the puppet with a rubber and rubbed out any bit of background left off from the magic wand tool, as even though it’s a really useful tool, saving a lot of time. It does however not get everything that has been selected. I then placed in the slogan which was character like the others called ‘that puzzle guy’ and put in a burgundy colour so it represent blood as the font that I and used for it was the same as the other posters, called chiller. I did this because the colour and the font resembled blood, and that connected to the dripping blood on the sides of the poster. I then started to experiment with the image of Billy the Puppet by changing the brightness/contrast and then changed the levels of colour for it. I did all this because the doll looked to bright with the surroundings it was in, and despite the image not being as dark as the first character poster, it is somewhat darker than it originally was. I then using the image that I took previously of the nun doing bunny ears, I opened that up on a new layer, and rubbed out the whole image except for the top part of the arm with the hand, so that the nun wasn’t in the poster but her arm was. I then using the magic wand tool got rid of any unwanted background and placed the layer underneath Billy the puppet, so that the arm was behind the image of the doll. I thinks this works really well an was original idea of mine. The reason I think it works really well is because it connects the nun and the jigsaw poster in a way that the others were connected and also add the comedy element in the poster as well to remind people that this is also a comedy film. I then placed an overlay image of grungy wallpaper on the top of the layers and turned the opacity down. I did this to finalise the poster and add the main colour of the poster which was similar to the last one, so that it was in the same style. I then finished off by duplicating my title, enlarging it and cropping the whole of it apart from the letter “I” which I rotated . This is the letter in the title that connects the poster with all the other posters. When all the character posters are put together its meant to spell the title. I like this because it it’s a unique idea of peaking the interest of audience, by telling them that there is more than one character poster from the way each letter is spelt out per poster. I also turned down the opacity of the letter, so that it would look more like spray paint.
  • 7.
    The first thingI did was open up a Adobe Photoshop file and set the page on an A4 size, as most movie posters are this size. I used a plain black image and expanded it to make it the background image, as most horror movie poster have dark colours to match the genre. Then I put in a new layer, and put the PNG title into it, as well as putting down the cast and crew using the credit block font that I had already downloaded. I then turned up the brightness of the billing block to make it stand out more against the black background. I inserted the photograph of the character (from My Documents) and resized it to fit the area of the page that I wanted. I used opacity and brightness / contrast to achieve a shadowing effect on the characters face to make the image look more dramatic. Focusing on levels and increasing these to sharpen the darker image. I like how I've darkened the image as it shows the darkness of everything that is going on around him and how exposed he is now to this new world where characters have come to life. As with the other posters, I duplicated a blood splatter layer and put them at different angles, so it didn’t look like the same image repeatedly, as I think this is a good theme and style for each poster, which it being easier to tell the character posters are linked with this design added in. I then put in the release date called ‘Coming this October’ in a Font called Berlin Sans FB Dem, and put the billing block and release date in a orange colour so that it connotes to October for when its coming out. I used the slogan for the poster of the character’s title calling it “the vlogger”, in a dark red colour and a font called chiller. I think this effective way of teasing the audience in what way the character represented in the film. I lifted the title and duplicated it, cropping the duplicated version so that there was just the l and resized, and rotated it, putting it at the centre of the poster like I had done with the others. I have done this so that each letter per title will be spelled out in each poster, showing the connection of each character poster. Adding in the PG-13 rating is part of the guidelines for movie posters and the fact that all movie posters have this. Process – George character poster
  • 8.
    Process – Samcharacter poster Like all the others I started off by making the poster an A4 size to begin with, as most movie posters are this size and then put the black background along with it, as that’s the colour that a lot of horror movie posters have. Then on a different layer I placed in a PNG of my title card and then on a new layer put in a credit block that I had already downloaded the font for from previous posters. I then put in the release date that said ‘Coming this October’ in a font that I had already downloaded. Then I put the same PG-13 logo in on a new layer like I had done with all the previous posters, as it one of the guidelines need for a movie poster. The next thing I did was change the billing block and air date to orange, so that it connotes to Halloween. I also tried to keep in the same style as the other posters put in the blood splatter and duplicate, whilst also rotating the images so that they all look different. Then I put the slogan in a different layer and place the words ’the back-up’ in a chiller font, so that it teasers tyhe4 characters well known identity slightly. After that I placed the image of the character in the centre, as it’s the main image of the poster and using the magic background tool I got rid of any background that was not needed in the poster that was in the photo. Then I used the rubber tool to get rid of any bits that weren't done using the magic wand tool, as it’s a really effective tool but doesn’t get rid of all the areas. Then I darkened the main image of the poster by turning down the brightness and then I turned up the levels. I decided to just keep this image like this as I thought it looked better than adding any blur, shadow, or turning up the opacity, as I tried these and they didn’t look right. I think this was because I shot the other pictures with a professional camera with lighting, but with the photo of Sam I took just with a different camera I was using at the time. Lastly I duplicated the logo and rubbed it all out apart from the letter “l” with I resized and rotated it, putting it at the centre of the page, so that it shows the connection with the other character posters.
  • 9.
    Process – Mainposter one The first thing I did for my Main poster was the same thing as the others by opening up a Adobe Photoshop file and setting the image as a A4 like I had done with the others, as that’s the size a common movie poster has to be. Then I placed my first image onto photoshop by opening it up through the document file, because I saved it in there. This image was a plain black image which I used for the background, as I have done with all my previous posters. I used a black background as that the colour most horror movie posters have as there background because its got to have a dark shade to it with it matching the genre of the film being presented, which for me is horror. I then put down a PNG image of the title onto my poster that had come my from documents. I also placed the release date that I had put down on my previous posters. I then copied my billing block from my previous posters and then pasted into this one, as its most important to have it in the main movie poster, as that’s what needs to sell the movie. I also kept the same theme as my other posters and placed blood splats diagonally across the sides of the posters. Like the previous posters I placed the same blood splatter down by duplicating the layer and then rotating the images so that they all look different. I did this because it’s a nice style added the poster, which Is similar to one that I researched in a poster I had seen in my research. I then moved onto the main images of my main poster. I started these off by importing the images of me, and the nun that I had took using a Canon 700D DSL camera that I had booked from college and then putting them on different layers in the centre of the poster, making sure that the layer image of me was in front of the nun. I started with my image by using the magic wand tool going around the image. Then I used a rubber, turning it down to a small size to get rid of any bits that the magic wand tool might have missed out, as its reliable but doesn’t get rid of everything you need to get ride of. Then I moved onto making my slogan which I had thought of early on. I did this slogan in the same colour and font as the same for my release date. I did this in orange, because orange often connotes to October, which is when the film is getting released. I changed the colouring of letters in the slogan, that were “black” and “white” to actual black and white colours as it connotes to what its saying, in the same way that the colours match the meaning of October to its seasonal colour.
  • 10.
    Process – Mainposter two The next thing I did was place down the PG-13 logo down onto a different layer and underneath the billing block, which is where it should be, because in most movie posters it will be there. I also added this because then the audience will be able to know what age they have to be in order to watch this film and is often important to the main poster. I then started to change the colouring of some of the images. I started by turning down the brightness and the contrast of the nun’s image, so that it would naturally blend in with the darkness surrounding the poster. I then also changed the levels of the nuns image by turning it up. I then used the blur tool blurred around the whole of the nun image apart from eyes, as I wanted the eyes to be distinctive when in viewing Next I used the Art history brush tool and chose a yellow colour. I chose a really small size, zoomed in, and went carefully the eyes. I did this so that the eyes look like they are glowing in the darkness surrounding the nun. The next thing I did was use my rubber, which I selected at a small size and zoomed in on the screen. I rubbed out most of my jacket and a bit of my hair. I did this for the effect that that there was a shadow casting over me. But on the photo where the lights had been directed at me I left that light and natural in the poster image. Then I placed a image of dripping blood down the poster, and turned down the opacity so that it wasn’t that clear and blended in with the handprint that I was about to put in. Next I placed the blood handprint which I had font on the internet. I then turned down the opacity and using the eraser rubbed out some of edges because it looked too sharp to look natural. I though that the blood hand print would be good as it links in with the blood dripping down the sides of the poster, in the same way the character titles did with the blood dripping down the sides of their posters. Then for the last thing I did I found a grey overlay image online, placed it in the centre of the page, pulled it out and turned down the opacity, so that image wasn’t that clear. I think that this overlay image works really well with a midnight blue effect, casting over my face, and makes it the main colour of the poster.
  • 11.
    Process – DVDcover one I started this DVD cover by laying out a landscape page to begin with, as that’s the size most DVD covers are, and I also pulled my two rulers out the centre of the page to create the DVD spine. Then I placed a plain black image from the internet, as the colour matches well with the genre of the film and placed in the front on the front cover. I then placed a PNG image of my logo down also on the front cover. Next I moved onto placing down a few of my logos, placing down a PNG of the 12 logo and duplicated it putting it on the spine of the cover. I did this because it’s part of the guideline, and is important especially when in DVD covers. Most DVD covers have the certificate on them , with them being on the front cover and on the spine so that the average viewer can see the certificate on the front, back and side. As well as this I placed the DVD video logo also on the spine DVD, as its part of the guideline to have it in, with it being a DVD cover. Next thing I did was find a red background on the internet and placed it on as the back cover. The reason I picked the colour red is because even though it’s quite a light colour it matches well with the horror genre, and works well with the green and yellow that has also been placed on the back. Along with this I copied my billing block that was on my posters and placed it on the back of cover like I had done with the others. Most DVD covers have to have this as it will tell you who's in the film, and if its someone you like then the chances of you buying the DVD increase. Then with my type tool I placed in one the reviews into the green font that was similar to my logo. I though that this would be a good match with the title, as well as it having one of the things that a a lot of DVD covers have and that reviews. Next I got an image of the nun from my documents and put it down as a small image on the top of the DVD spine, as the DVD spine image. I did this because the spine of the DVD cover has to have a lot of features too with them needing to be squished in, and a image of the nun just teases who in the film if somebody just sees the spine of the cover. Then I got the York college logo from online and to represent the college as one of the film companies, I put it on. I put it on the front cover. Then I duplicated the image of York college and put it on the spine of the DVD cover, to represent a spine feature.
  • 12.
    Process – DVDcover two Next I moved onto the front cover itself by opening the image of Billy The Puppet and the Nun from my documents into the front cover. I decided to use these to characters as they are the most important and most eye catching when it comes to the selling in the cover. After that I decided to type up my summary of the movie using the horizontal type tool with the green font so that I would match the title and the reviews. The summary is a very important part of the DVD cover and you have to the sell the movie as much as possible in order for someone to buy it. Then I placed the cast’s names on the top of the front of the DVD cover, using the horizontal type tool. I changed the colour of the top lettering to green and changed the bottom names to pink. The reason I did this because the colours match well with the title and makes the cast names stand out more. The next thing I did was find a PNG of yellow box, which I placed on the back of the cover, so that I can be used for box where the special features go in for them to be outlined. Then after that I got the horizontal type tool and typed the words “special features” in a yellow font. I then got another text box and typed In what the special features were in a white font. I did this so that the title of the box would separate with what they actually were. The next thing I did was put down a white box that I found online and pulled it out so it was for the bottom, for the DVD technical details. The reason I chose white is because white is a very basic straight forward colour which is often used when you see other DVDs with their technical qualities at the bottom. For the technical qualities at the bottom, I first started off by opening up a barcode image that I saved into my documents, as this is a way of purchasing the item, with every purchasing item needing a barcode. Then from seeing what I saw on another DVD, I put the barcode code number under the barcode, along with with the DVD code number at the bottom of the DVD spine, under the DVD logo, which I put all this in italics. I also put in the second certificate logo on, which is the blue film censors office. I added the second certificate because a lot the DVD covers that I had researched I had seen two certificates that were the same as these. I then duplicated that logo and put it on the spine of the DVD, adding as a spine feature. The next thing I did was duplicate the York College logo, using it for third time by putting in in the white box and the Dolby logo which I put right next to each other. I put these in in a as companies that had relation to the film. Then I pasted in a random DVD information box I had got off Google, and also put in a paramount pictures logo on top of the other two logos. The DVD information box includes such things a run time, aspect ratio, language and other things as well. Then the next thing I did was put in the other reviews using the horizontal type too, keeping it the same colour as the other review so that they match. Along with this I also opened a new image from my documents of five gold stars to represent how many stars the paper are giving them. This sells the movie to anyone who isn’t sure about the film with it having such a high rating. Underneath the credit block I also put the film website name along with the York College website to show the company that is representing it, putting these websites on at a typing tool size of six so that it was very small but you could still see. I did this because I didn't want it getting in the way of the billing block and was less important. For the main image of the DVD I resized of jigsaw and the Nun and open a image of me as I thought it would look good on the cover with the other two images, because of the lighting placed on my face in the photo, and the looks as if I'm looking behind me. So I'm facing the other characters on the cover. I then put a grey grungy overlay wallpaper over the main poster and turned down the opacity so that it blended in with what was happening. Then I opened up two more certificates which were the blue and red ones, put them in textboxes and put information I found online into the boxes. Then finally I put in a textbox full of copyright information of the film that would not be allowed, as legally most DVD covers have to have this.
  • 13.
    Process – trailer:part one For this trailer I used a software called Movavi. So the first thing I did was open up a new editing file and uploaded the video clips that I had imported into the computer using a USB stick. Then I imported each individual clip, with me looking at various clips and stabilising the shaky clips. I did this by going on audio and turn up the volume in some clips that need turn up on. Then I did the music, which I found on YouTube called “it is coming by David Fesliyan”. With this clip I downloaded it from YouTube, imported it and then put it on the line underneath so It’s running all the way through clips. With the music I split and duplicate chorus to keep the same sound of music, because it was the most suspenseful part of the song. So once I have split several times, I put the all the choruses together, so it sounded like it was playing over and over again. When I came down to colouring I went animation and decreased the brightness a little bit of each clip, so it had that morbid effect it being a horror. I also changed the opacity of several clips as well, as I though they might work better in that way. I think this changes make the trailer not just look like natural film, and have a more darker edge to them,
  • 14.
    Process – trailer:part two When I came to making the title cards I made them on Adobe photoshop, with making them landscape and setting a dark burgundy wallpaper on a new layer. I design the lettering in a font called Berlin Sans FB Demi. I then duplicated this layer rotated it, put it in a different position and then turned the opacity down so that it was clear enough, but clear enough to make out that it was a reflection. I made five of these posters with the first having the word “encounter”, the second being “the” and the third being “impossible”. I then made the poster for the title of the title card which is similar to the others but instead of using the font of the others I opened a PNG of my logo, put in a new layer and put in a blood handprint behind it on which I moved the layer down. I then turned the opacity down on the image so it didn’t looks so clear. Then for my final title card I similarly wrote down the same font and exported all these as JPEGS through to my document. I then imported these images onto trailer and put them in order of where they should be in. For the third title card I used my video tool and used my fade area where I faded the third title card. With this title cards they were pulled in so I exaggerated them (pulled them out) and made sure they were the right length, matching the rest of the trailer. Then for the final scenes, I found these clips on YouTube that featured Billy the puppet’s eyes and another clip with his laugh. I downloaded these clips off YouTube and imported them into the software that I was using to edit my trailer. Once I did that I put the clip with jigsaw eyes on the main line and cut it so it was just a few seconds of those eyes and not the whole two minute clip. Then I put in the second clip of Billy the Puppet’s laugh which I put on the second line, just after the music stopped playing, and around the time the dolls eyes light up.
  • 15.
    Process: exporting andsending When it came down to exporting I clicked on file on the top left corner. Then I clicked export and went on export as. This tab popped up (the image on the left) when I clicked it and so next to format I changed the image from a PNG to a JPEG. I then clicked export all and waited a few minutes for it to export because the file was too large. I repeated the process with all my other posters and sent them over through email to my lecturer. With my trailer even though it was a different software, using a software called Movavi. It was however the same process. I went file, export, and export as. However when I exported it this time, I exported it as MP4. when I exported it I sent it through email to my lecturer.
  • 16.
     A toolthat I could have used to manage time better would be to using the exposure panel when focusing on the image. This is a better tool when comparing it to the opacity as you don’t have to change the brightness and levels as much when you use this tool  Another tool I could have used from Photoshop that would have made my posters a little bit better is to use the blur tool more. I look back at the character posters and I think they would have worked better if I used the blur tool just blur the characters. I think it would work really well as well because its only teasing the characters so it wont be clear image, but still good quality and you’ll still be able to see them.  The last tool would have used would be smudge tool as it a lot quicker to go around the edges with it then the blur tool. Its also effective way of distorting the image in a similar way to the blur tool. What other tools might have made it better/managed time better?
  • 17.
     Exposure paneltool  Strength - A strength of the exposure panel tool is that makes the thing that you want in the image to stand out, stand out more.  Weakness – A weakness of the exposure panel tool is that it that its not very time consuming when editing, when comparing it to the opacity tool.  Blur tool  Strength - A strength of the blur tool is in a safe way it blurs the character so that it only tease the character, which strengths the encouragement for the viewer watching the film.  Weakness - A weakness of the blur tool is that when you use the Gaussian blur tool, you need to place exactly where it you want the blur in the image, and you cant pinpoint where you want the blur in two different positions.  Opacity tool  Strength – A strength of using the opacity tool is that is a basic way of distorting the image way from the public eye, and when doing a genre like I've done which is horror, its really useful.  Weakness – A weakness of using the opacity tool is that it all depends on what filter you have already used on the in image, because if you’ve already turned the brightness down of the image then it might not work with the opacity turned down as well.  Magic wand tool  Strength – A strength of using the magic wand tool is that it saves a lot of time and focuses really well on precision getting every corner of the image that you’ve selected.  Weakness – A weakness of using a the magic wand tool is that sometimes it doesn’t get rid of everything you want in the image and sometimes leaves areas messy as it doesn’t select everything you want. Strengths and Weakness of tools

Editor's Notes

  • #6 Discuss the tools and processes used in your production. Log your thoughts and feelings about your work.
  • #7 Discuss the tools and processes used in your production. Log your thoughts and feelings about your work.
  • #8 Discuss the tools and processes used in your production. Log your thoughts and feelings about your work.
  • #18 why/how is that the best method and assess (personal opinion) strengths and weaknesses of that process.