2. Here I am adding the brightness and contrast effect on to the image.
Here I am adjusting the brightness and contrast to see what fits well and
make the image stand out more with ruining the quality of the image.
3. Here I used the polygonal lasso tool to select a part of the image I wanted to use to cover up the
light in the image.
Here I am copying the selected part I wanted to use so I can paste it and move it over the light.
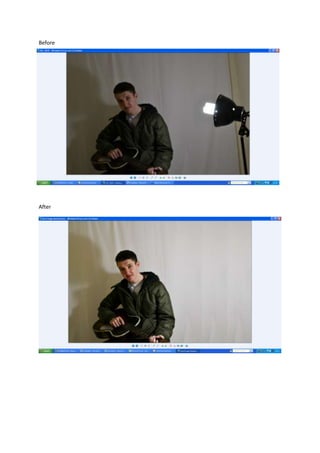
4. So overall I increased the brightness a lot because when I took the picture it was in a dull lighting
which isn’t what I wanted, so by brightening it up it makes the image standout more which was
wanted. I also got rid of the light on the right, as this was a mistake and one of the first photos that I
took. So I got rid of the light by copying a layer over the light until it disappeared.
Here I am moving the layer from the image over the light so that it covers it up.
This screen shot shows the outcome of moving all the layers over the light.