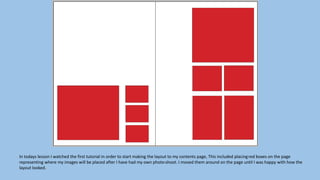
2. In todays lesson I watched the first tutorial in order to start making the layout to my contents page, This included placingred boxes on the page
representing where my images will be placed after I have had my own photo-shoot. I moved them around on the page until I was happy with how the
layout looked.
3. In todays lesson I placed in where the columns of text will be on the contents page. I labelled them with headings so that I can eventually place my sell lines
in when finished. I also placed the title, date and issue number in position on the page. However I still need to change the fonts and colours of these. Next
lesson I will start to replace the red boxes with pictures and empty columns with real sell lines.
4. In todays lesson I replaced the red boxes on the page with pictures from google. I chose these specific pictures because they are similar to the ones that I
will take myself and use. They are all of RnB artists as my magazine specifies in this particular music genre, I also included pictures of festivals as I want to
recreate this theme when I take my own pictures.
5. This shows when I started to add my own pictures in to my contents page and fill up the text box with contents that were relevant to
my magazine. I included red boxes for features such as subscription and social media because I thought these certain features should
draw in more attention.
6. This was the final result of my contents page for my finished magazine, I think that it looks a lot better than the previous drafts and
stages as it looks more full and there are no gaps, it also includes a variety of different models rather than including the one same
model that was featured in my contents page. I also included captions to every photo to inform the reader what pages these photos
were linked too.