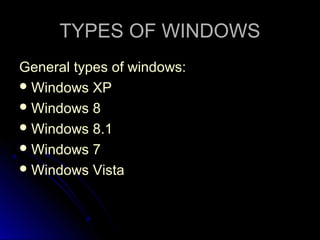
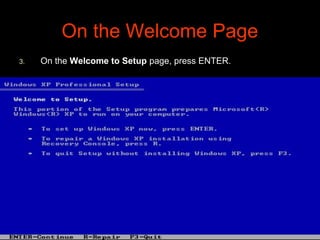
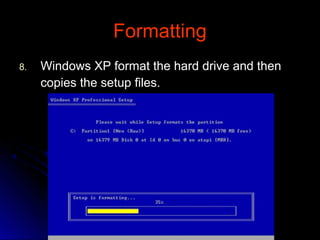
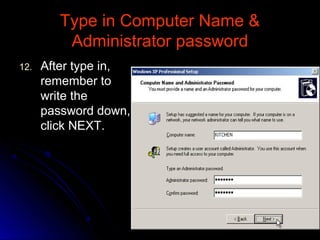
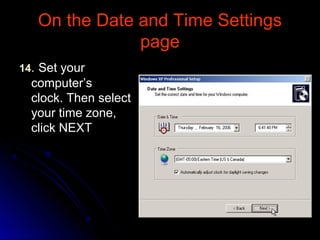
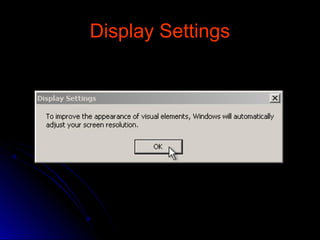
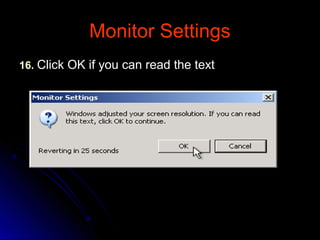
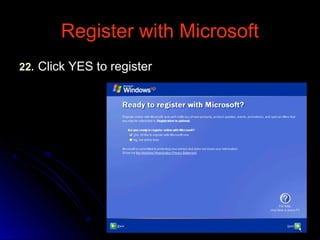
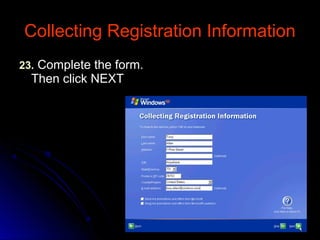
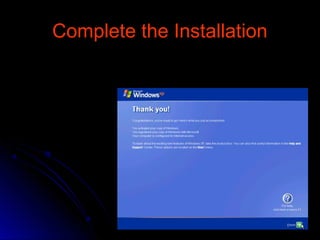
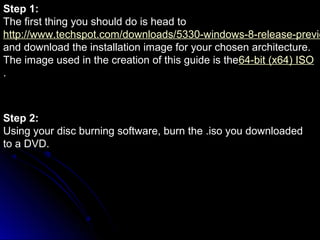
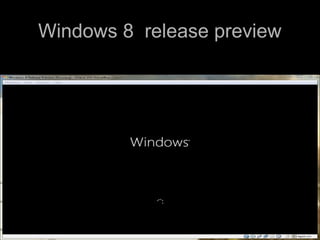
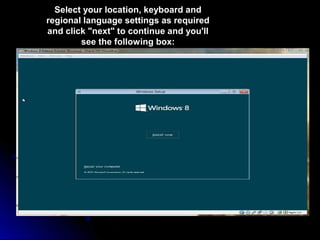
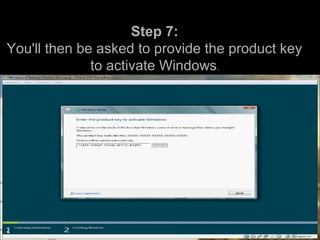
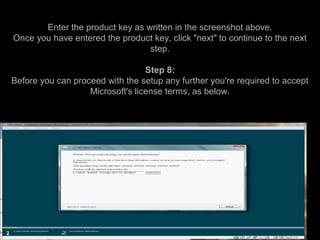
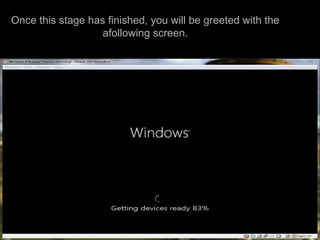
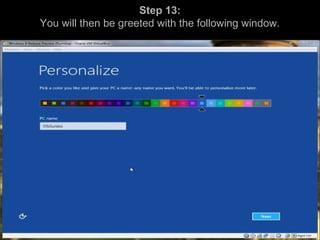
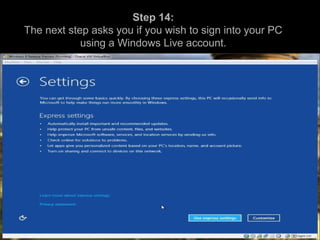
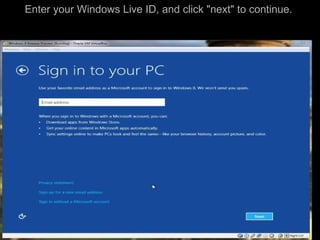
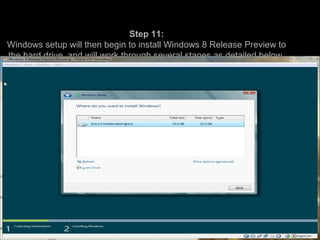
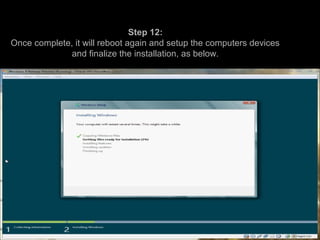
WindoW sWindoW s
installationinstallation
byby
14-arid-206914-arid-2069
14-arid-203014-arid-2030
14-arid-205214-arid-2052
TYPES OF WINDOWSTYPES OF WINDOWS
General types of windows:General types of windows:
 Windows XPWindows XP
 Windows 8Windows 8
 Windows 8.1Windows 8.1
 Windows 7Windows 7
 Windows VistaWindows Vista
WINDOWS XPWINDOWS XP
INSTALLATIONINSTALLATION
Begin the InstallationBegin the Installation
1.1. Insert the WindowsInsert the Windows
XP CD and restartXP CD and restart
your computer.your computer.
2.2. If prompted to startIf prompted to start
from the CD, pressfrom the CD, press
SPACEBAR.SPACEBAR.
On the Welcome PageOn the Welcome Page
3.3. On theOn the Welcome to SetupWelcome to Setup page, press ENTER.page, press ENTER.
On theOn the Licensing AgreementLicensing Agreement
pagepage
 On theOn the LicensingLicensing
AgreementAgreement page,page,
read the licensingread the licensing
agreement. Thenagreement. Then
press F8.press F8.
Delete the existing partitionDelete the existing partition
5.5. Press D, and then press L when prompted toPress D, and then press L when prompted to
deletes your existing data.deletes your existing data.
FormattingFormatting
8.8. Windows XP format the hard drive and thenWindows XP format the hard drive and then
copies the setup files.copies the setup files.
Select Regional and LanguageSelect Regional and Language
OptionsOptions
9.9. After select,After select,
click NEXT.click NEXT.
Personalize your Win XPPersonalize your Win XP
10.10. Type your name and your organization name,Type your name and your organization name,
click NEXTclick NEXT..
Type in your Product KeyType in your Product Key
11.11. Find yourFind your
product keyproduct key
from thefrom the
CD case,CD case,
type in andtype in and
click NEXT.click NEXT.
Type in Computer Name &Type in Computer Name &
Administrator passwordAdministrator password
12.12. After type in,After type in,
remember toremember to
write thewrite the
password down,password down,
click NEXT.click NEXT.
On the Date and Time SettingsOn the Date and Time Settings
pagepage
1414.. Set yourSet your
computer’scomputer’s
clock. Then selectclock. Then select
your time zone,your time zone,
click NEXTclick NEXT
Display SettingsDisplay Settings
Monitor SettingsMonitor Settings
1616.. Click OK if you can read the textClick OK if you can read the text
Welcome to Microsoft WindowsWelcome to Microsoft Windows
pagepage
1717.. Click NEXTClick NEXT
Protect your PCProtect your PC
1818.. Help protect my PC by turning on AutomaticHelp protect my PC by turning on Automatic
Updates nowUpdates now. Click. Click NextNext
Check the Internet ConnectionCheck the Internet Connection
MethodMethod
Activate WindowsActivate Windows
2121.. ClickClick Yes,Yes, if you are connected to the Internet.if you are connected to the Internet.
Neither Click No.Neither Click No.
Register with MicrosoftRegister with Microsoft
2222.. Click YES to registerClick YES to register
Collecting Registration InformationCollecting Registration Information
2323.. Complete the form.Complete the form.
Then click NEXTThen click NEXT
Type in User’s NameType in User’s Name
Complete the InstallationComplete the Installation
WINDOWS 8 INSTALLATIONWINDOWS 8 INSTALLATION
Windows 8Windows 8
Steps of installationSteps of installation
Step 1:
The first thing you should do is head to
http://www.techspot.com/downloads/5330-windows-8-release-previe
and download the installation image for your chosen architecture.
The image used in the creation of this guide is the64-bit (x64) ISO
.
Step 2:
Using your disc burning software, burn the .iso you downloaded
to a DVD.
Step 4:
Ensure you have a network cable connected,
restart your computer, and boot from the DVD
drive.
Step 5:
The DVD will begin to load up, and you'll be
presented by the following screen as the installer
starts.
Windows 8 release previewWindows 8 release preview
Step 6:
Once loaded you will see the following screen.
Select your location, keyboard and
regional language settings as required
and click "next" to continue and you'll
see the following box:
Select your location, keyboard and regional
language settings as required and click "next"
to continue and you'll see the following box:
Step 7:
You'll then be asked to provide the product key
to activate Windows.
Enter the product key as written in the screenshot above.
Once you have entered the product key, click "next" to continue to the next
step.
Step 8:
Before you can proceed with the setup any further you're required to accept
Microsoft's license terms, as below.
tick the "I accept the license terms" box, and click "next" to continue to the next step.
Once this stage has finished, you will be greeted with the
afollowing screen.
Step 13:
You will then be greeted with the following window.
a
Step 14:
The next step asks you if you wish to sign into your PC
using a Windows Live account.
Enter your Windows Live ID, and click "next" to continue.
Step 11:
Windows setup will then begin to install Windows 8 Release Preview to
the hard drive, and will work through several stages as detailed below.
Step 12:
Once complete, it will reboot again and setup the computers devices
and finalize the installation, as below.
Step 13:
The setup will then continue and start the disk
manager as below.
You will then be asked for your password for
your Windows Live account. Click "next" to
continue.
Step 14:
Windows 8 Release Preview will then complete its final
configuration.
Step 15:
Windows 8 Release Preview will then complete its
final configuration.
Once complete, it will then boot into Windows
for the first time, as below.
Installation is now complete, and you can enjoy your
new OS and begin exploring its features.
ANYANY
Windows installation it presentation

Windows installation it presentation

  • 2.
  • 3.
    TYPES OF WINDOWSTYPESOF WINDOWS General types of windows:General types of windows:  Windows XPWindows XP  Windows 8Windows 8  Windows 8.1Windows 8.1  Windows 7Windows 7  Windows VistaWindows Vista
  • 4.
  • 5.
    Begin the InstallationBeginthe Installation 1.1. Insert the WindowsInsert the Windows XP CD and restartXP CD and restart your computer.your computer. 2.2. If prompted to startIf prompted to start from the CD, pressfrom the CD, press SPACEBAR.SPACEBAR.
  • 6.
    On the WelcomePageOn the Welcome Page 3.3. On theOn the Welcome to SetupWelcome to Setup page, press ENTER.page, press ENTER.
  • 7.
    On theOn theLicensing AgreementLicensing Agreement pagepage  On theOn the LicensingLicensing AgreementAgreement page,page, read the licensingread the licensing agreement. Thenagreement. Then press F8.press F8.
  • 8.
    Delete the existingpartitionDelete the existing partition 5.5. Press D, and then press L when prompted toPress D, and then press L when prompted to deletes your existing data.deletes your existing data.
  • 9.
    FormattingFormatting 8.8. Windows XPformat the hard drive and thenWindows XP format the hard drive and then copies the setup files.copies the setup files.
  • 10.
    Select Regional andLanguageSelect Regional and Language OptionsOptions 9.9. After select,After select, click NEXT.click NEXT.
  • 11.
    Personalize your WinXPPersonalize your Win XP 10.10. Type your name and your organization name,Type your name and your organization name, click NEXTclick NEXT..
  • 12.
    Type in yourProduct KeyType in your Product Key 11.11. Find yourFind your product keyproduct key from thefrom the CD case,CD case, type in andtype in and click NEXT.click NEXT.
  • 13.
    Type in ComputerName &Type in Computer Name & Administrator passwordAdministrator password 12.12. After type in,After type in, remember toremember to write thewrite the password down,password down, click NEXT.click NEXT.
  • 14.
    On the Dateand Time SettingsOn the Date and Time Settings pagepage 1414.. Set yourSet your computer’scomputer’s clock. Then selectclock. Then select your time zone,your time zone, click NEXTclick NEXT
  • 15.
  • 16.
    Monitor SettingsMonitor Settings 1616..Click OK if you can read the textClick OK if you can read the text
  • 17.
    Welcome to MicrosoftWindowsWelcome to Microsoft Windows pagepage 1717.. Click NEXTClick NEXT
  • 18.
    Protect your PCProtectyour PC 1818.. Help protect my PC by turning on AutomaticHelp protect my PC by turning on Automatic Updates nowUpdates now. Click. Click NextNext
  • 19.
    Check the InternetConnectionCheck the Internet Connection
  • 20.
    Check the InternetConnectionCheck the Internet Connection MethodMethod
  • 21.
    Activate WindowsActivate Windows 2121..ClickClick Yes,Yes, if you are connected to the Internet.if you are connected to the Internet. Neither Click No.Neither Click No.
  • 22.
    Register with MicrosoftRegisterwith Microsoft 2222.. Click YES to registerClick YES to register
  • 23.
    Collecting Registration InformationCollectingRegistration Information 2323.. Complete the form.Complete the form. Then click NEXTThen click NEXT
  • 24.
    Type in User’sNameType in User’s Name
  • 25.
  • 26.
  • 27.
    Windows 8Windows 8 Stepsof installationSteps of installation
  • 28.
    Step 1: The firstthing you should do is head to http://www.techspot.com/downloads/5330-windows-8-release-previe and download the installation image for your chosen architecture. The image used in the creation of this guide is the64-bit (x64) ISO . Step 2: Using your disc burning software, burn the .iso you downloaded to a DVD.
  • 29.
    Step 4: Ensure youhave a network cable connected, restart your computer, and boot from the DVD drive. Step 5: The DVD will begin to load up, and you'll be presented by the following screen as the installer starts.
  • 30.
    Windows 8 releasepreviewWindows 8 release preview
  • 31.
    Step 6: Once loadedyou will see the following screen.
  • 32.
    Select your location,keyboard and regional language settings as required and click "next" to continue and you'll see the following box:
  • 33.
    Select your location,keyboard and regional language settings as required and click "next" to continue and you'll see the following box:
  • 34.
    Step 7: You'll thenbe asked to provide the product key to activate Windows.
  • 35.
    Enter the productkey as written in the screenshot above. Once you have entered the product key, click "next" to continue to the next step. Step 8: Before you can proceed with the setup any further you're required to accept Microsoft's license terms, as below.
  • 36.
    tick the "Iaccept the license terms" box, and click "next" to continue to the next step.
  • 37.
    Once this stagehas finished, you will be greeted with the afollowing screen.
  • 38.
    Step 13: You willthen be greeted with the following window. a
  • 39.
    Step 14: The nextstep asks you if you wish to sign into your PC using a Windows Live account.
  • 40.
    Enter your WindowsLive ID, and click "next" to continue.
  • 41.
    Step 11: Windows setupwill then begin to install Windows 8 Release Preview to the hard drive, and will work through several stages as detailed below.
  • 42.
    Step 12: Once complete,it will reboot again and setup the computers devices and finalize the installation, as below.
  • 43.
    Step 13: The setupwill then continue and start the disk manager as below.
  • 44.
    You will thenbe asked for your password for your Windows Live account. Click "next" to continue.
  • 45.
    Step 14: Windows 8Release Preview will then complete its final configuration.
  • 46.
    Step 15: Windows 8Release Preview will then complete its final configuration. Once complete, it will then boot into Windows for the first time, as below.
  • 47.
    Installation is nowcomplete, and you can enjoy your new OS and begin exploring its features.
  • 48.