Download as PDF, PPTX


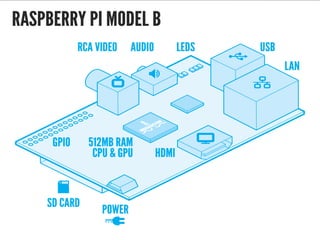
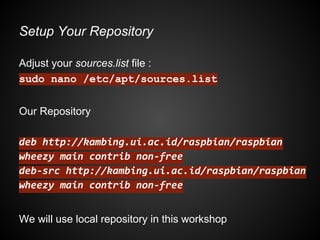
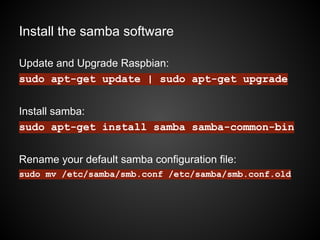
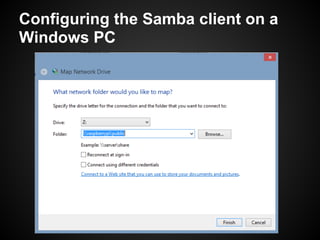
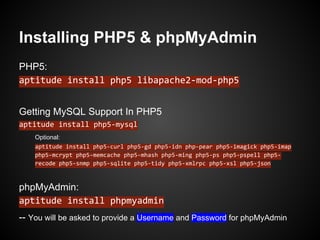
![Configure Samba Server
[global]
create mode = 664
workgroup = RASPBERRYPI
security = SHARE
usershare allow guest = yes](https://image.slidesharecdn.com/raspberrypi-101-130501051620-phpapp02/85/Raspberry-Pi-101-18-320.jpg)
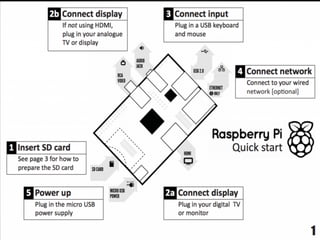
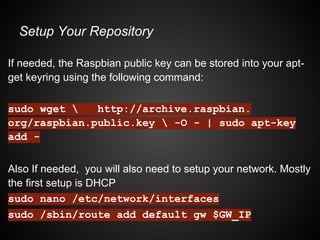
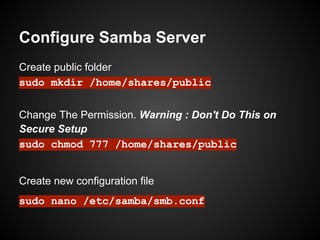
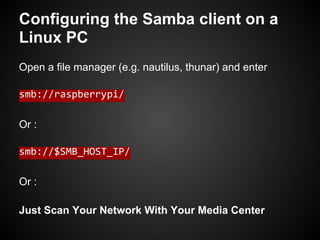
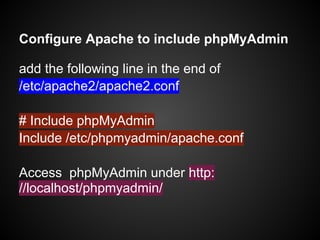
![Configure Samba Server
[public]
comment = shared
path = /home/shares/public
guest ok = yes
read only = no
public = yes
writeable = yes](https://image.slidesharecdn.com/raspberrypi-101-130501051620-phpapp02/85/Raspberry-Pi-101-19-320.jpg)
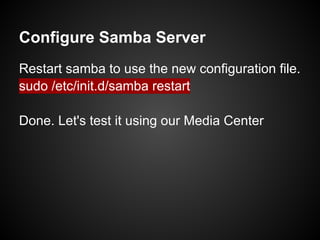
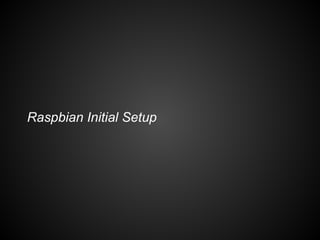
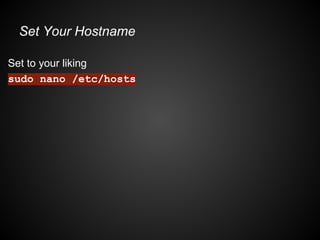
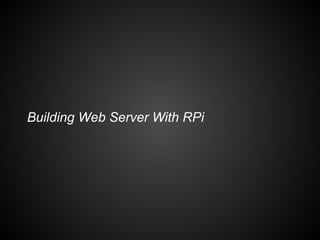
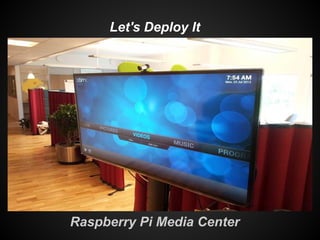
![Adding USB Storage
Check device drive:
dmesg | tail
You should see some lines like this:
usb 2-6: New USB device found, idVendor=0718, idProduct=0077
scsi 30:0:0:0: Direct-Access Imation USB Flash Drive 0.00 PQ: 0 ANSI: 2
sd 30:0:0:0: [sdb] 7897088 512-byte hardware sectors (4043 MB)
See the [sdb] above, that means this device appeared as /dev/sdb.
Mounting Disk:
sudo mkdir /home/shares/public/disk1
sudo mount /dev/sdxx /home/shares/public/disk1
Where sdxx is where your drive is in the file system's device hierarchy. i.e.
/dev/sdb or /dev/sda1](https://image.slidesharecdn.com/raspberrypi-101-130501051620-phpapp02/85/Raspberry-Pi-101-21-320.jpg)

This document provides an overview of a workshop on using Raspberry Pi for creative open source software projects in Indonesia. It introduces the PeenTar team organizing the workshop and covers topics that will be discussed including using Raspberry Pi as a media server, file server, and web server. It includes steps for installing and configuring software like Raspbian, Samba, Apache, MySQL, and PHP as well as deploying the Raspbmc media center disk image and using an XBMC remote to control the media center.


![First Responder Course - Session 10 - Static Evidence Collection [2004]](https://cdn.slidesharecdn.com/ss_thumbnails/publiccopy-10-staticevidencecollection-130419072255-phpapp02-thumbnail.jpg?width=640&height=640&fit=bounds)