1. Students completed a studio photo shoot in class, producing 6 black and white portrait images showing different facial features and angles.
2. As homework, students were assigned to complete the same photo shoot at home to produce another 6 images, for a total of 12 edited portraits.
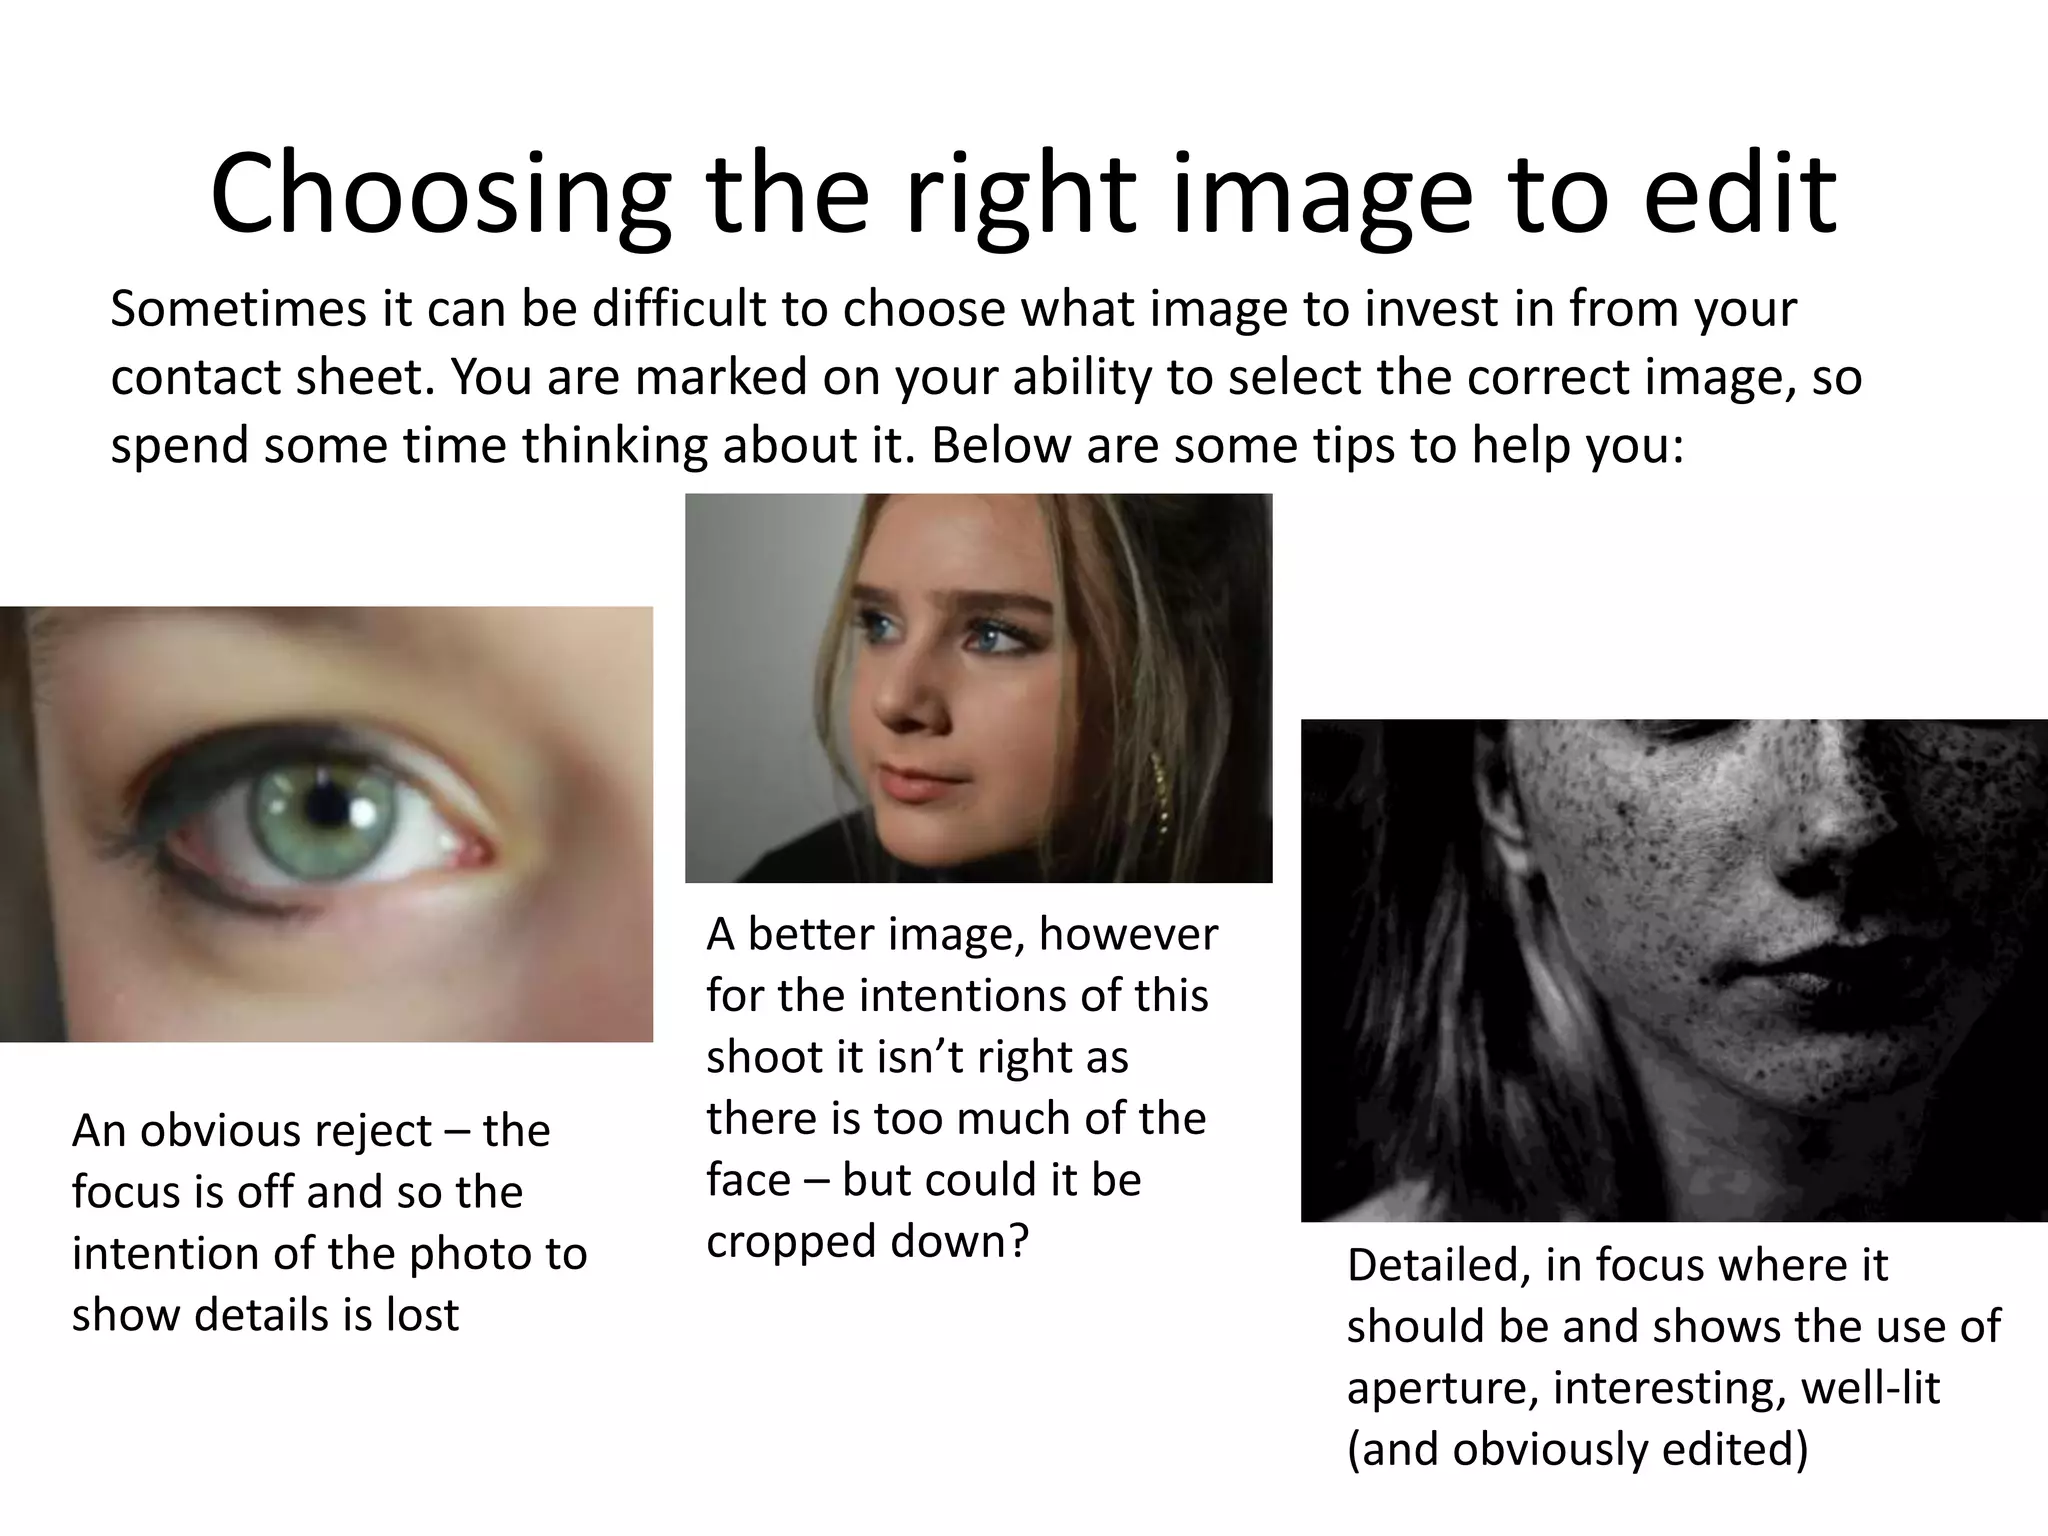
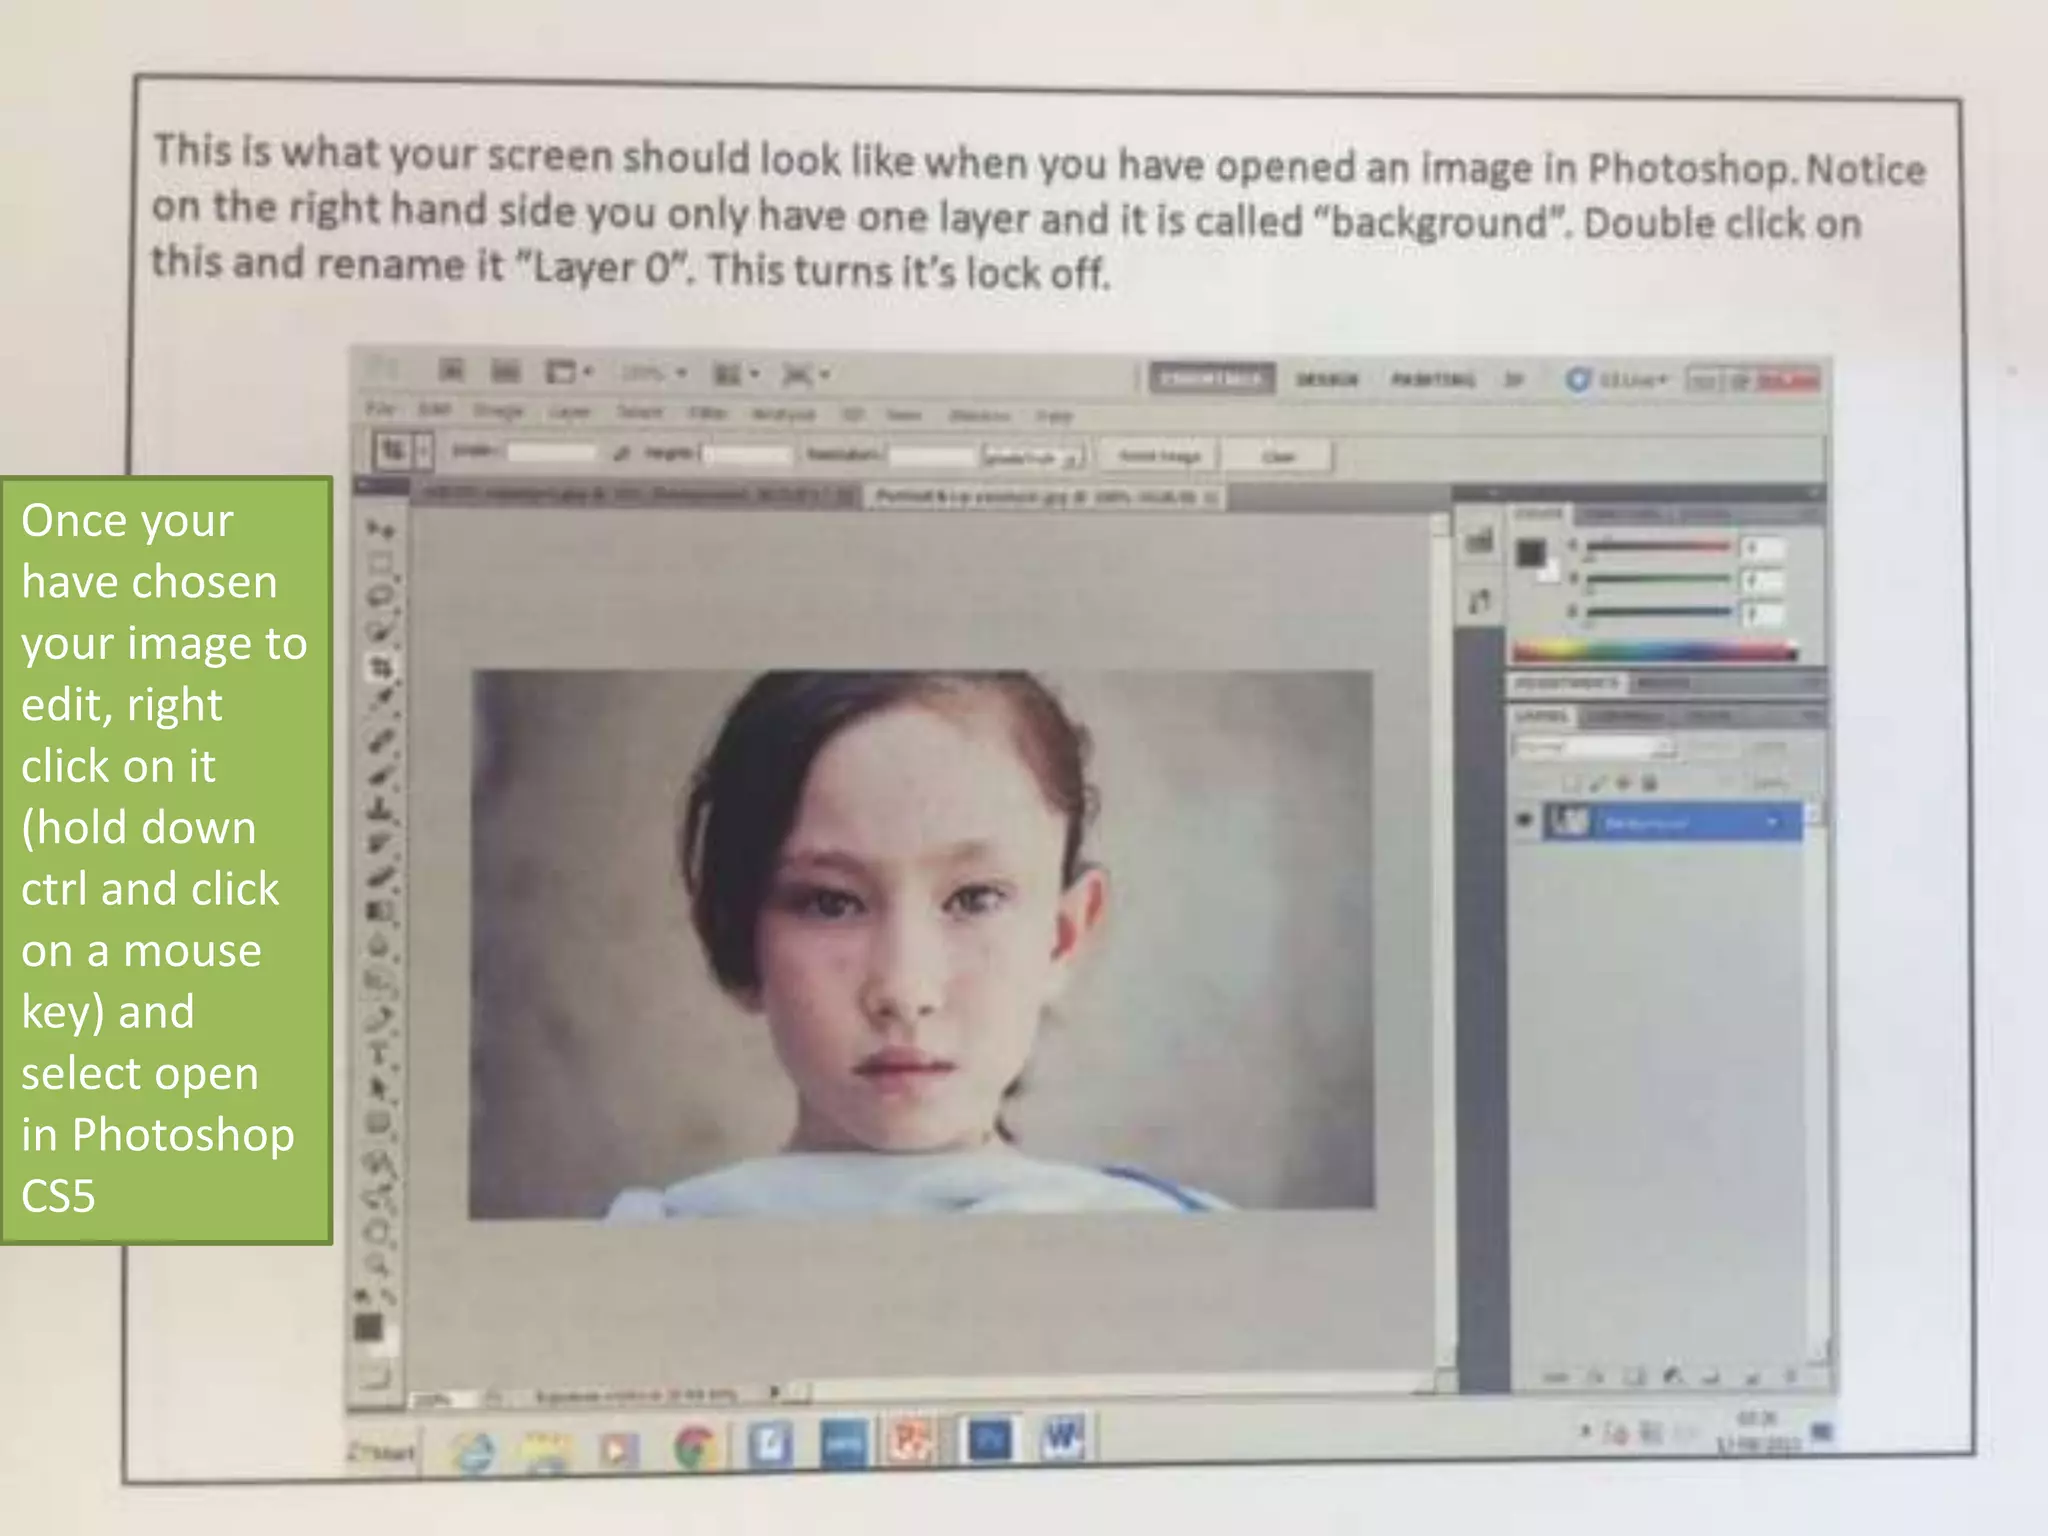
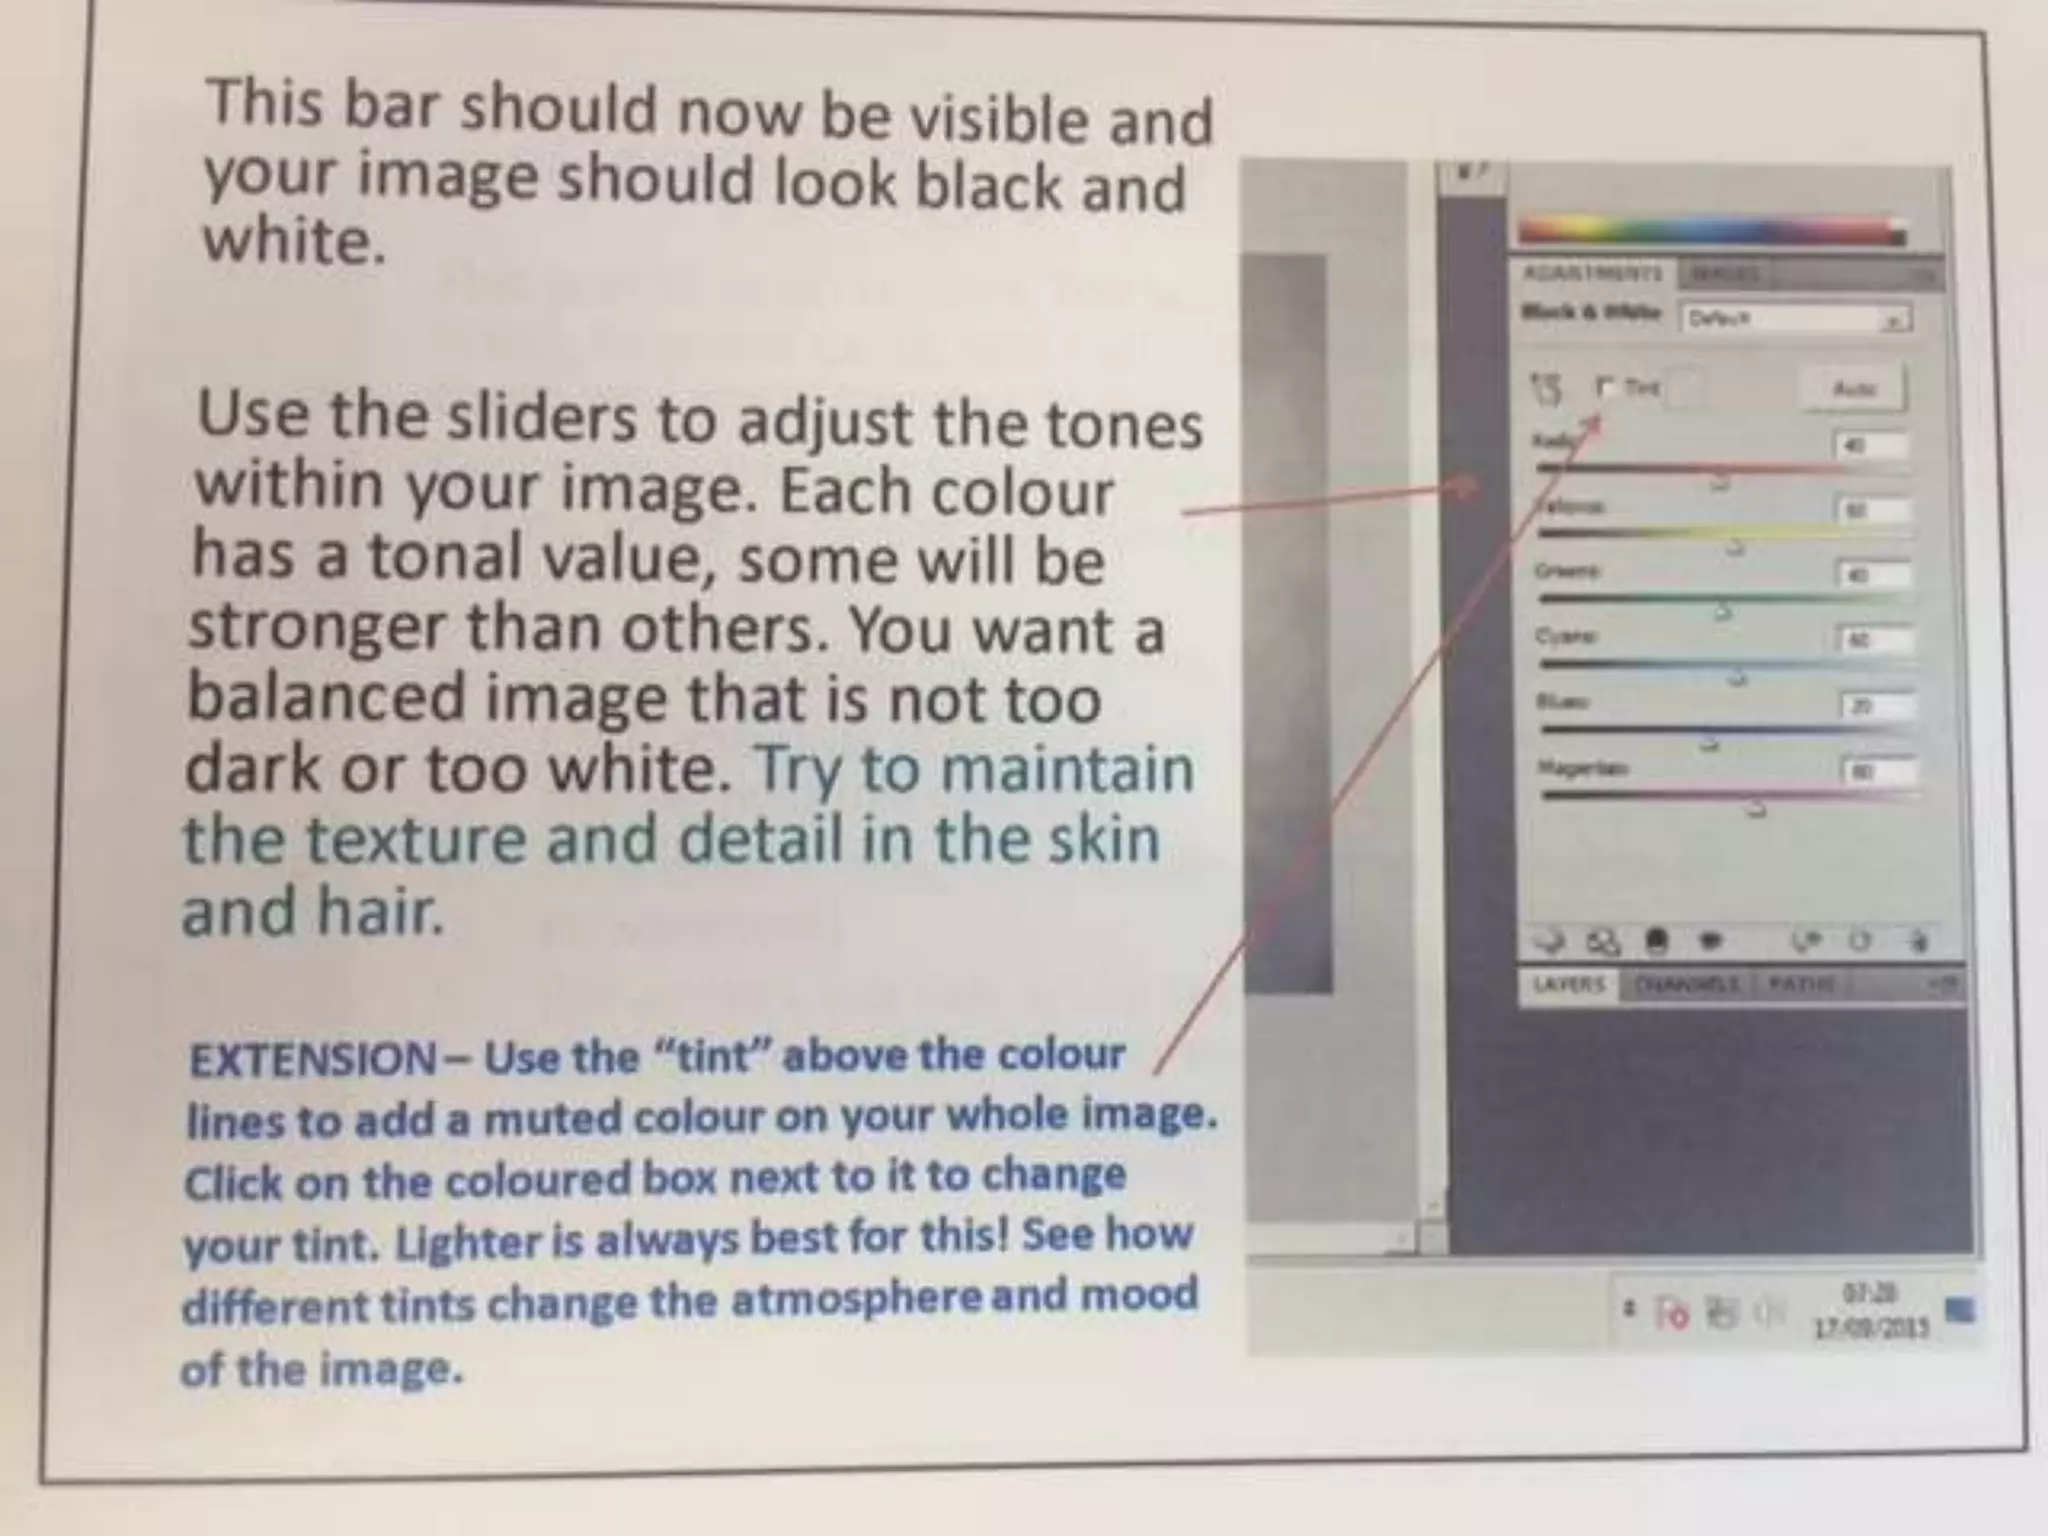
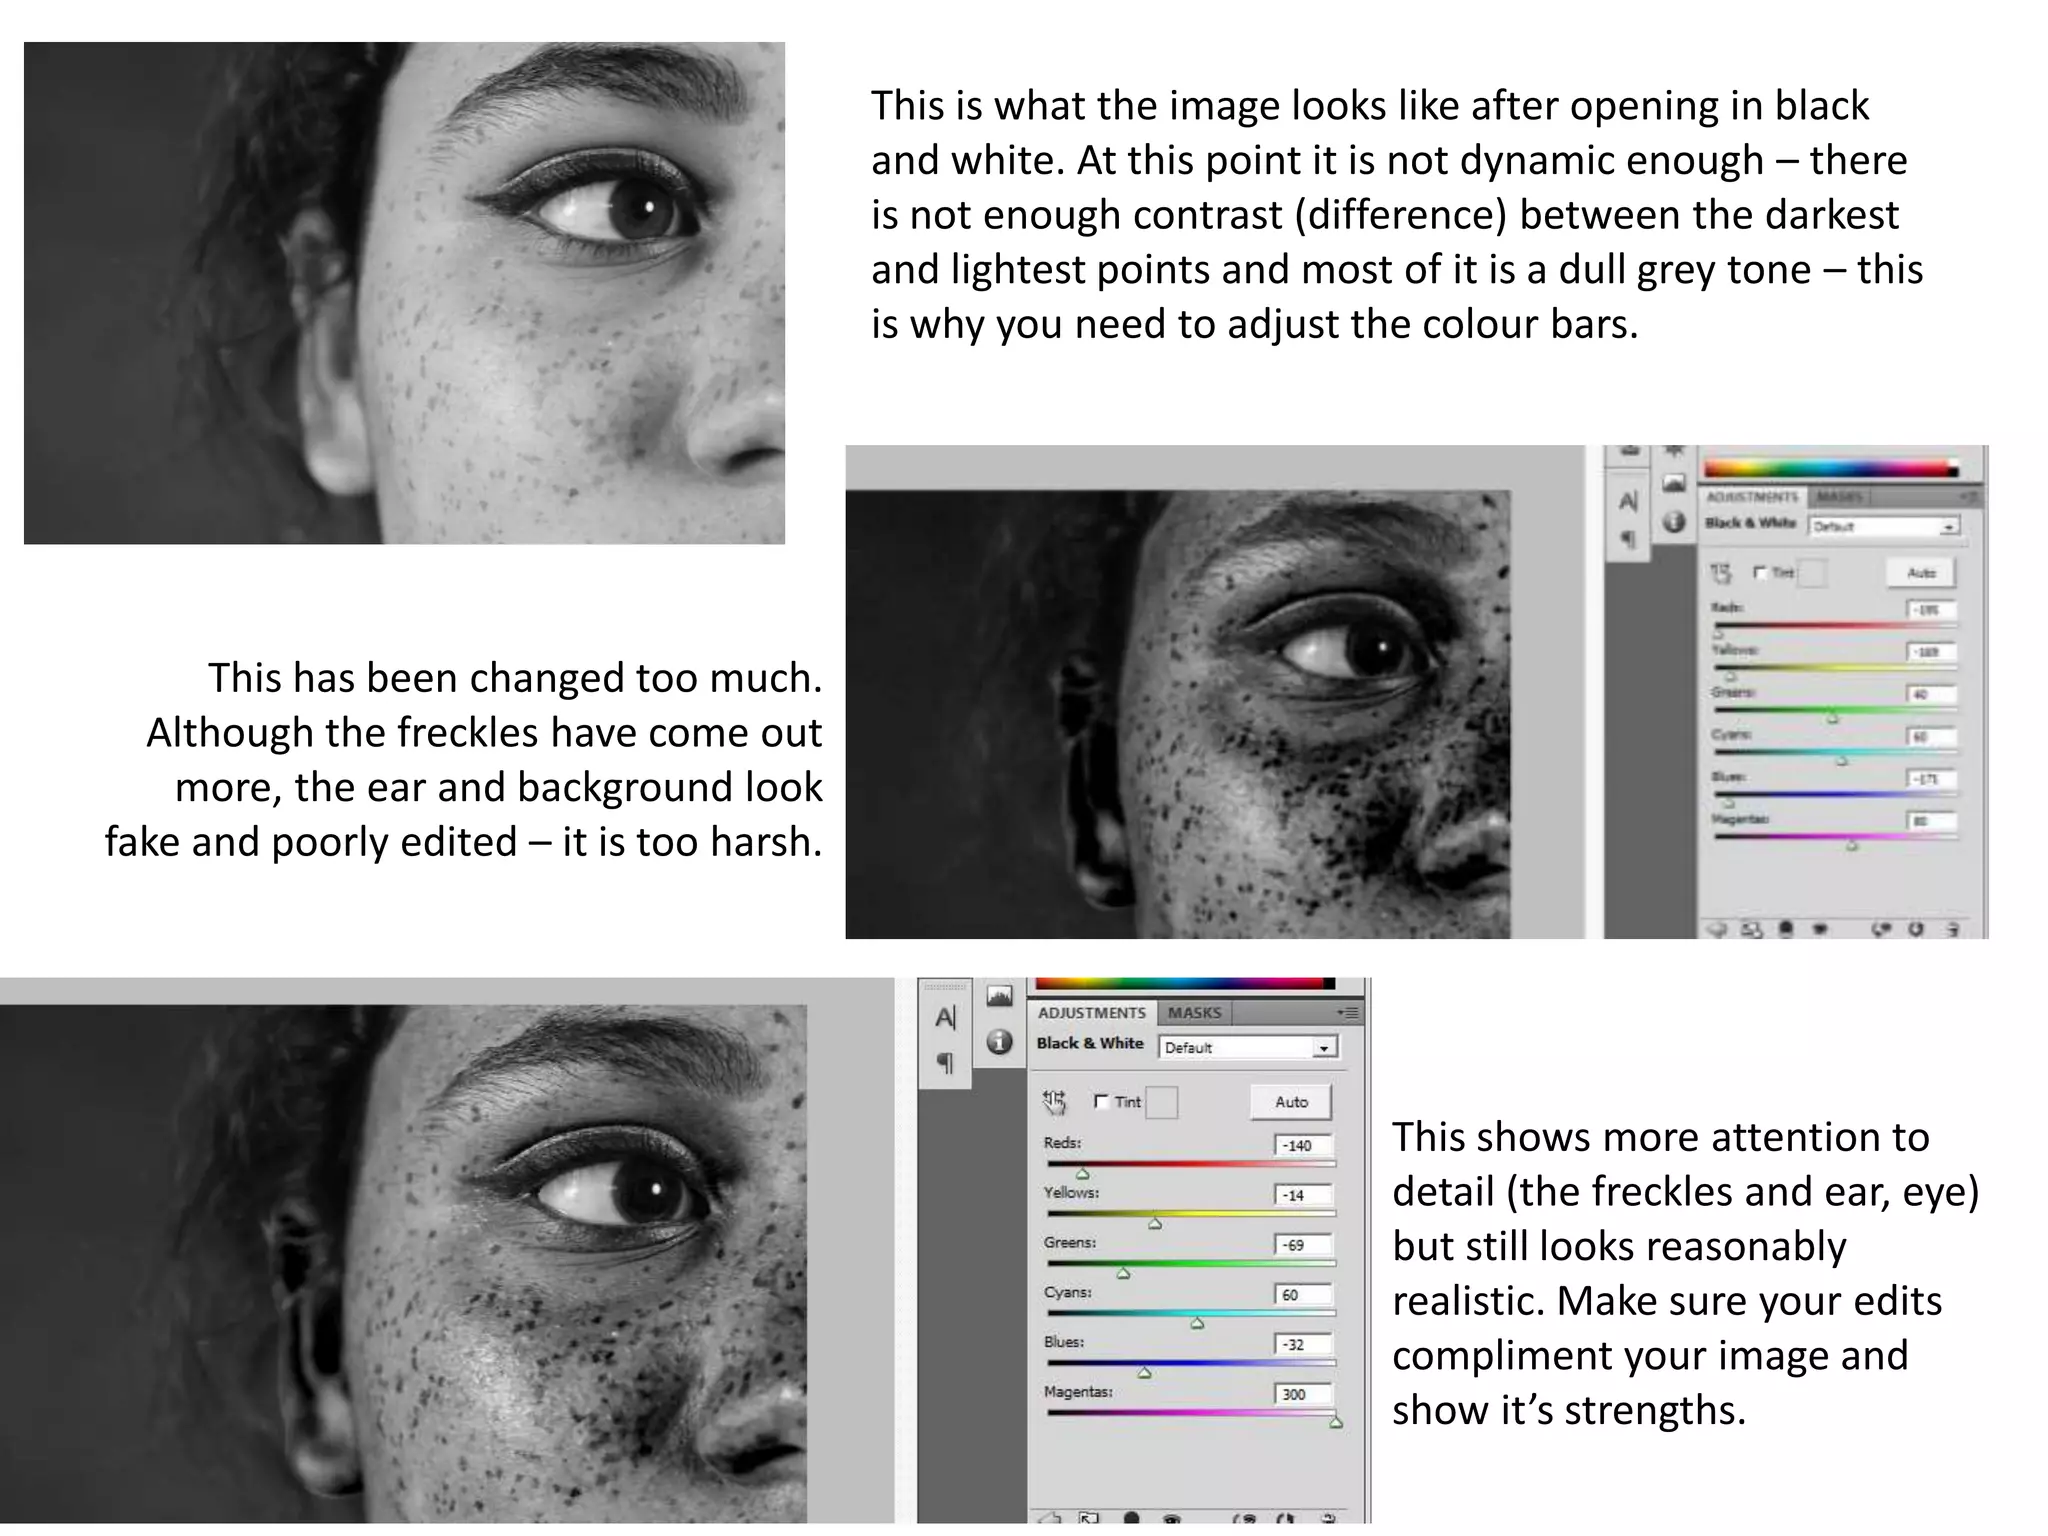
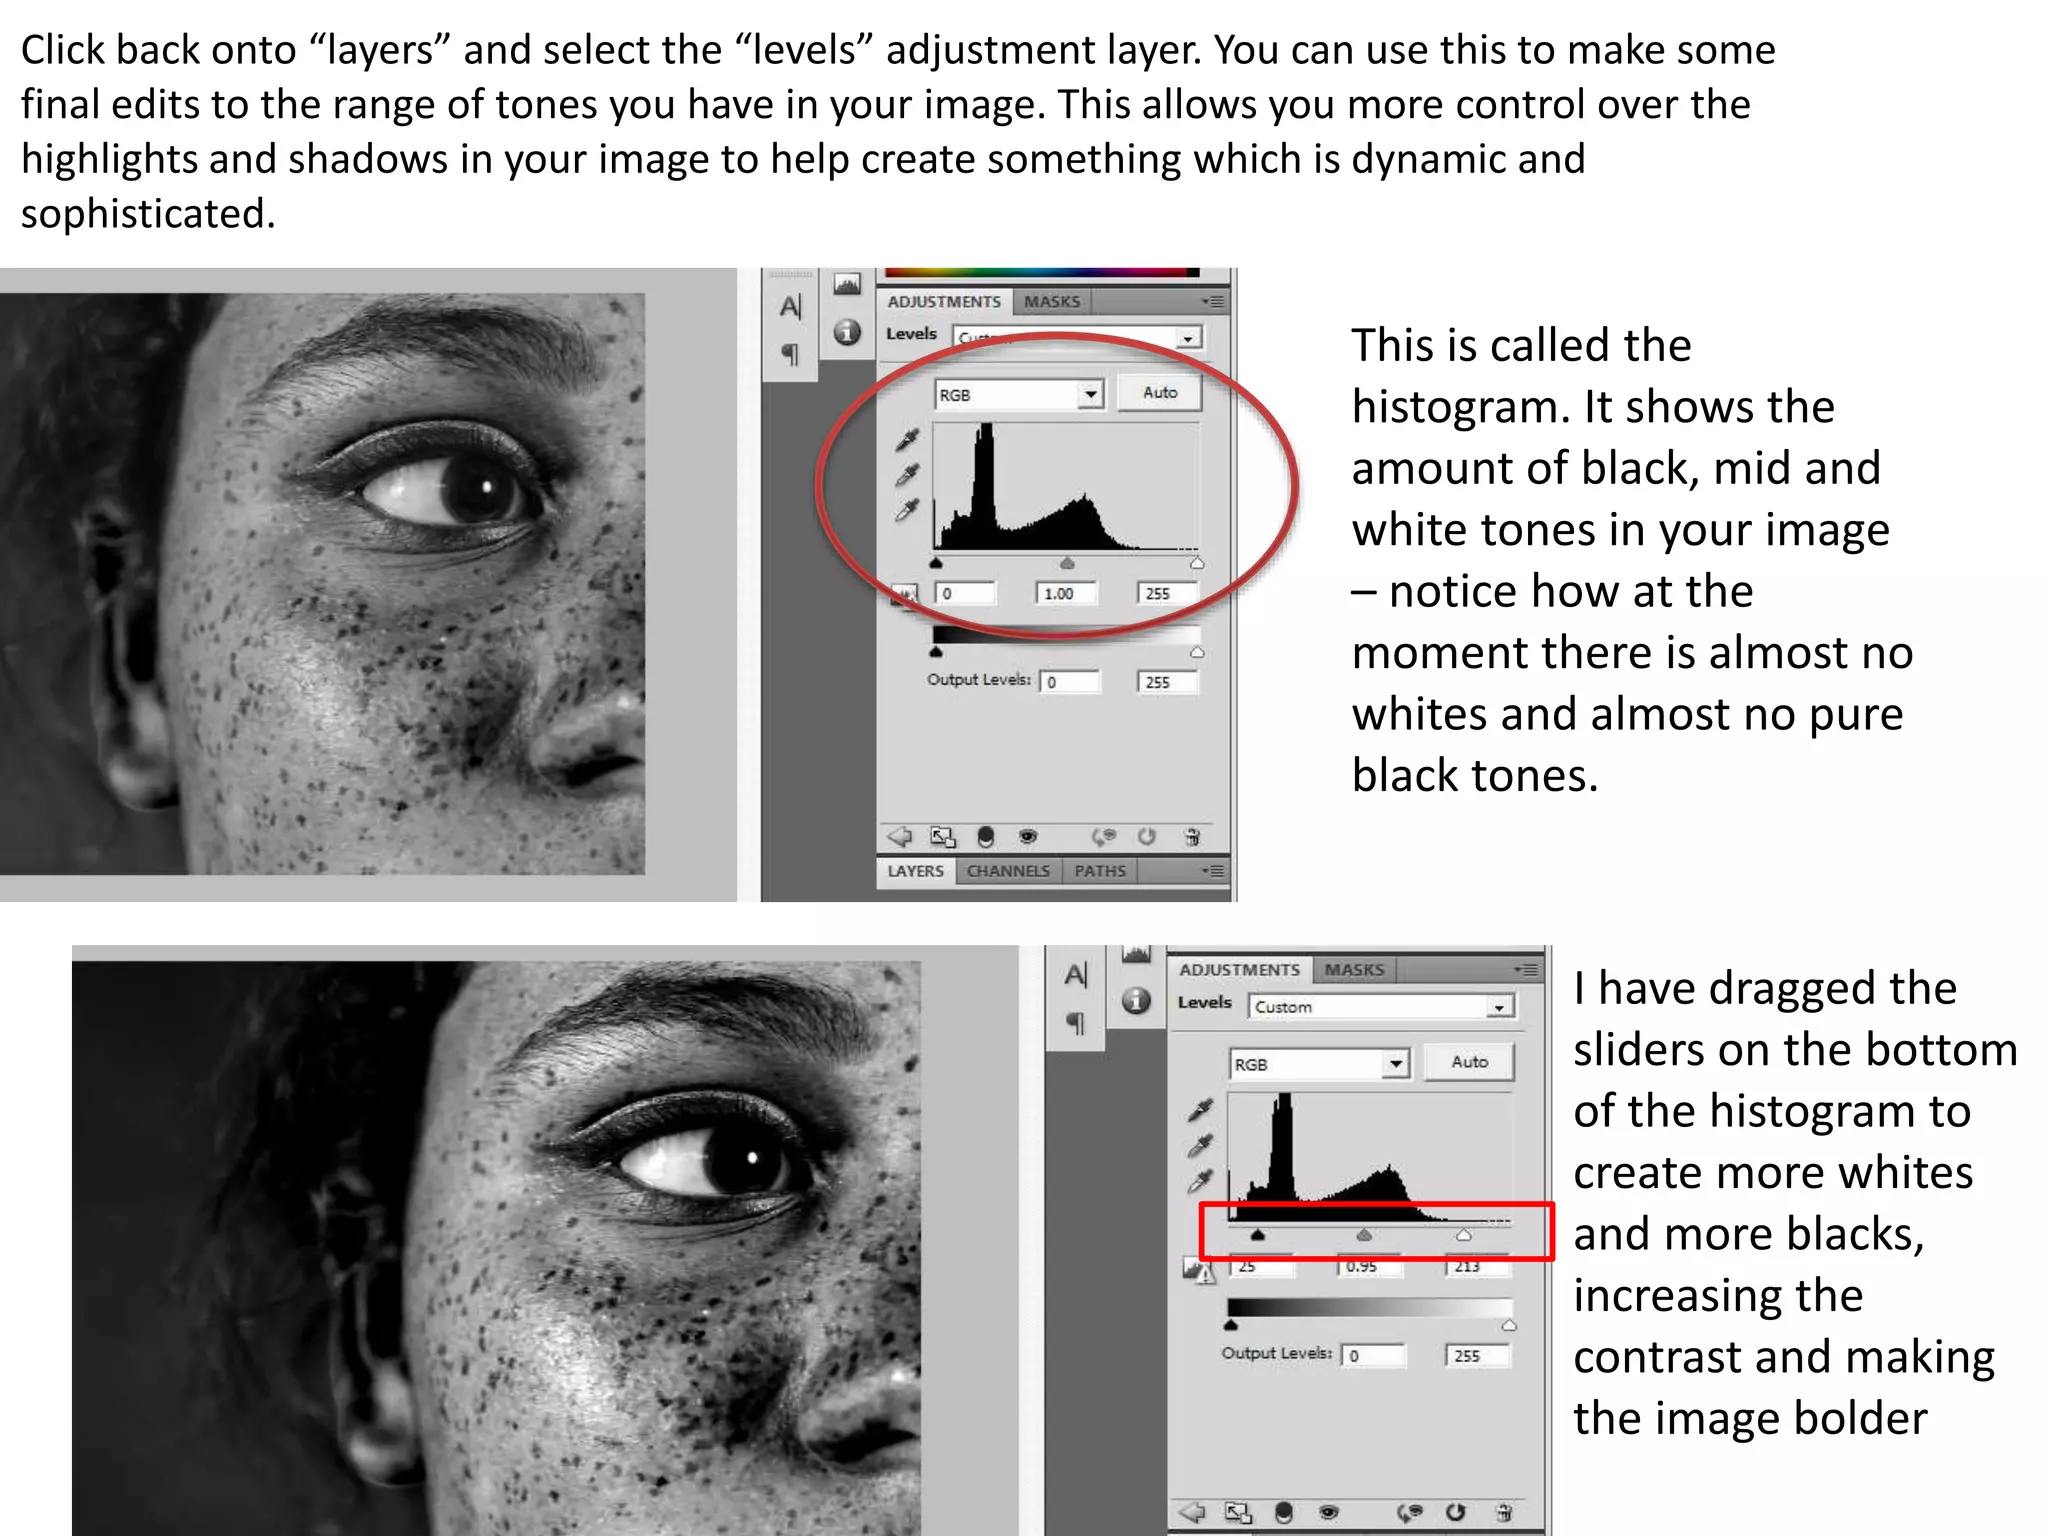
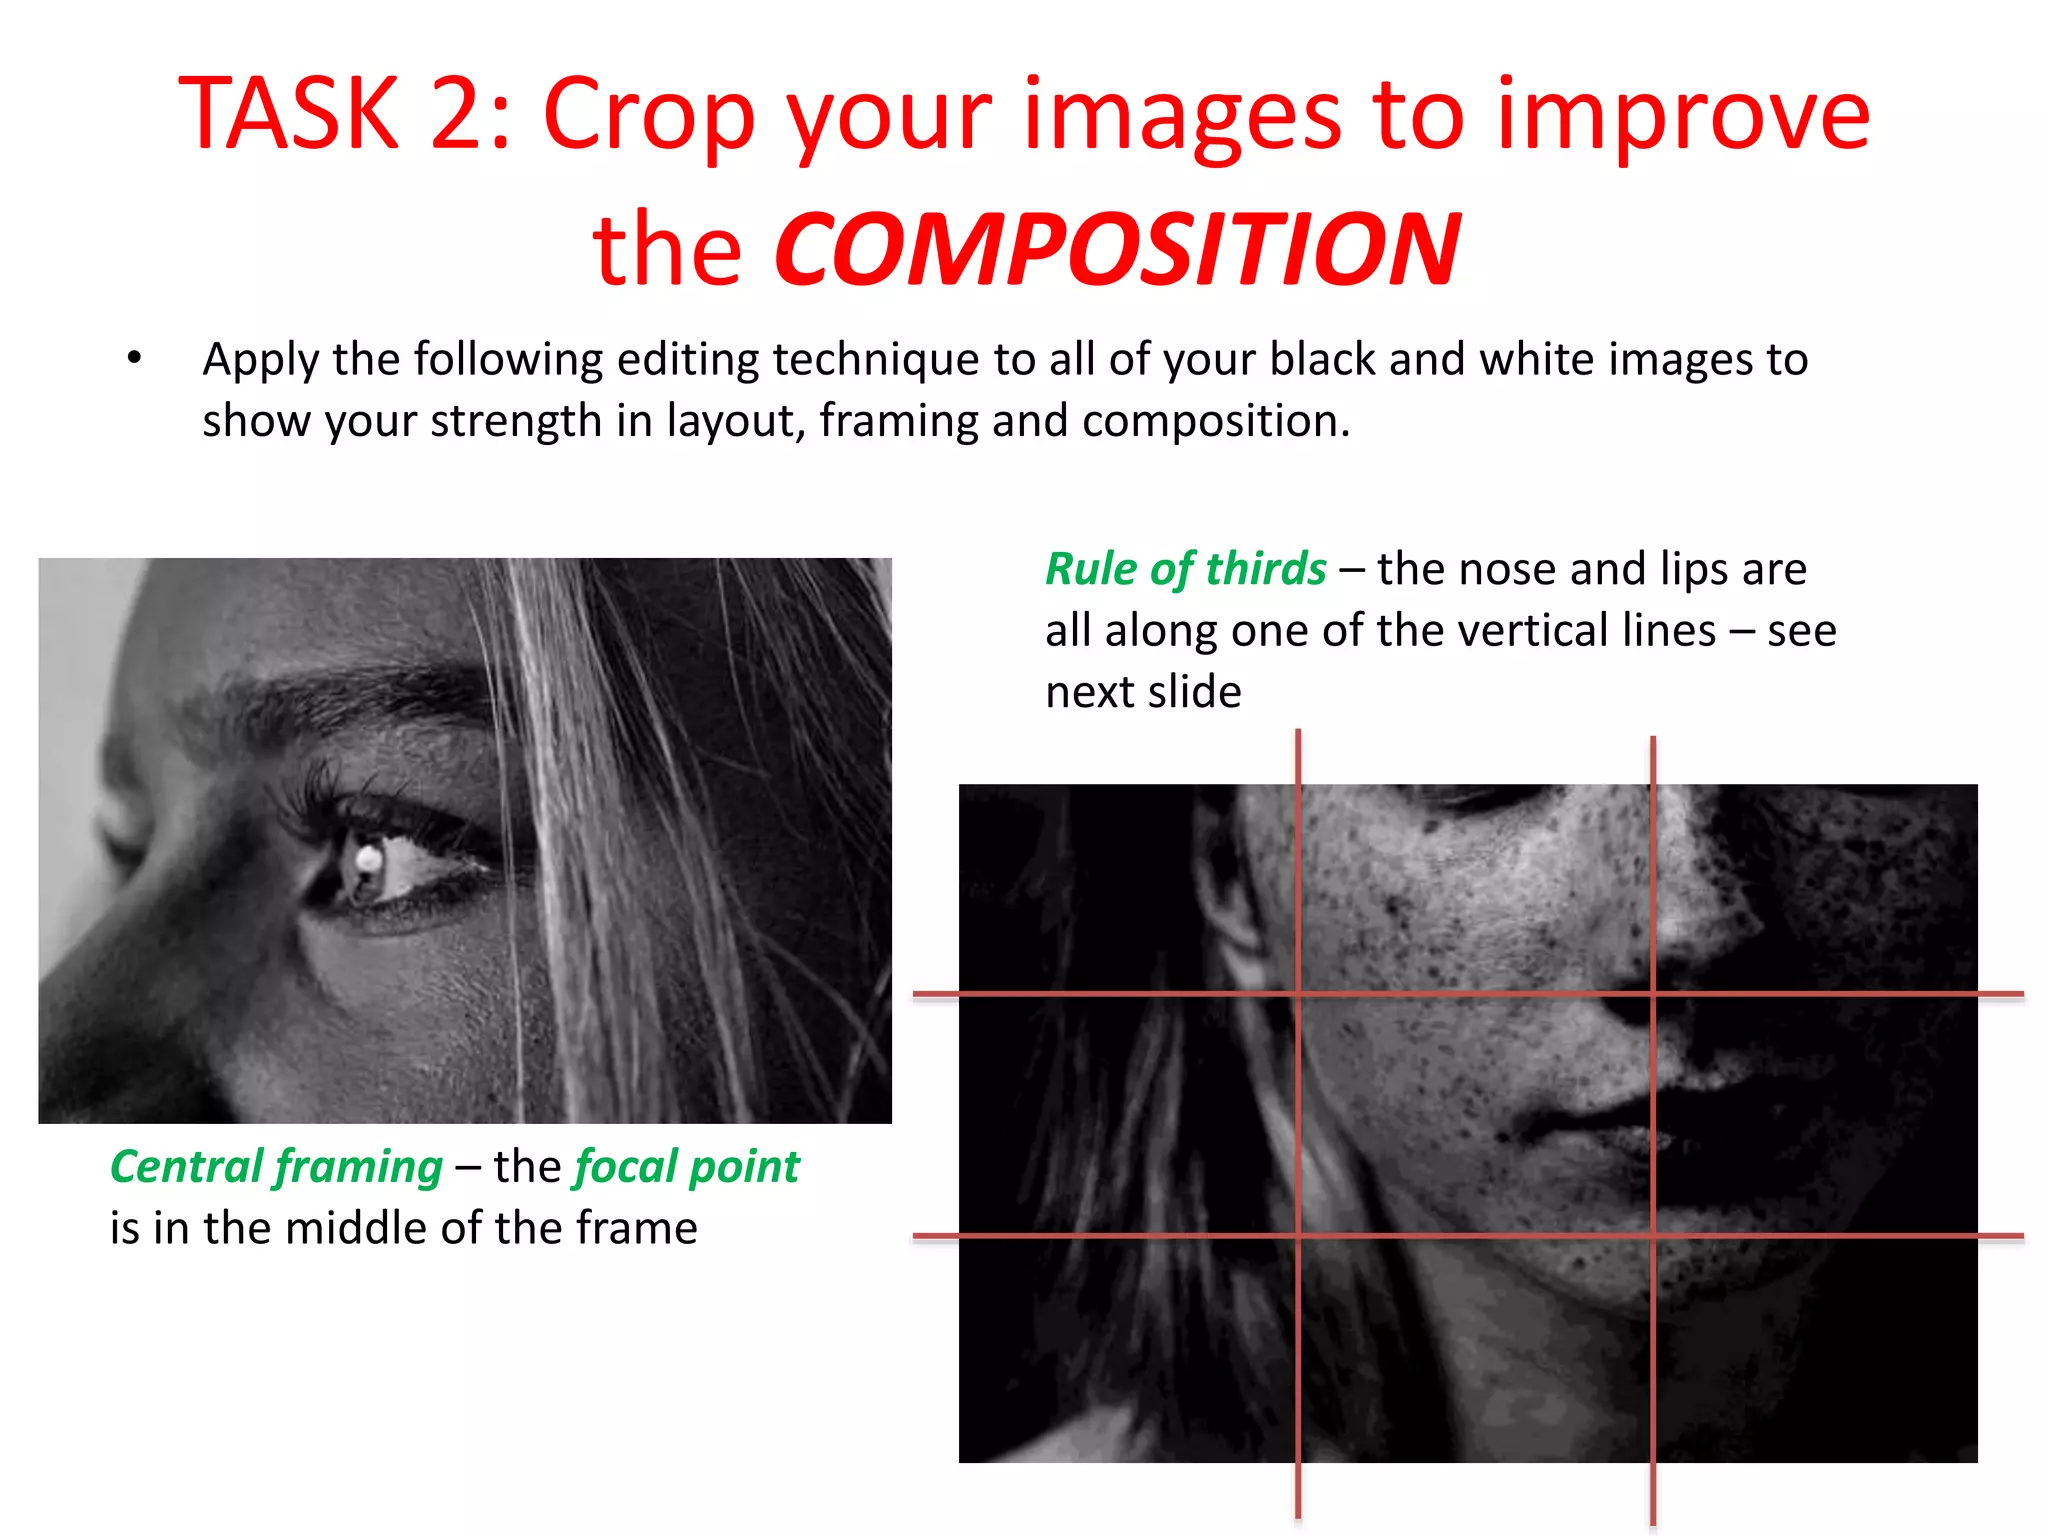
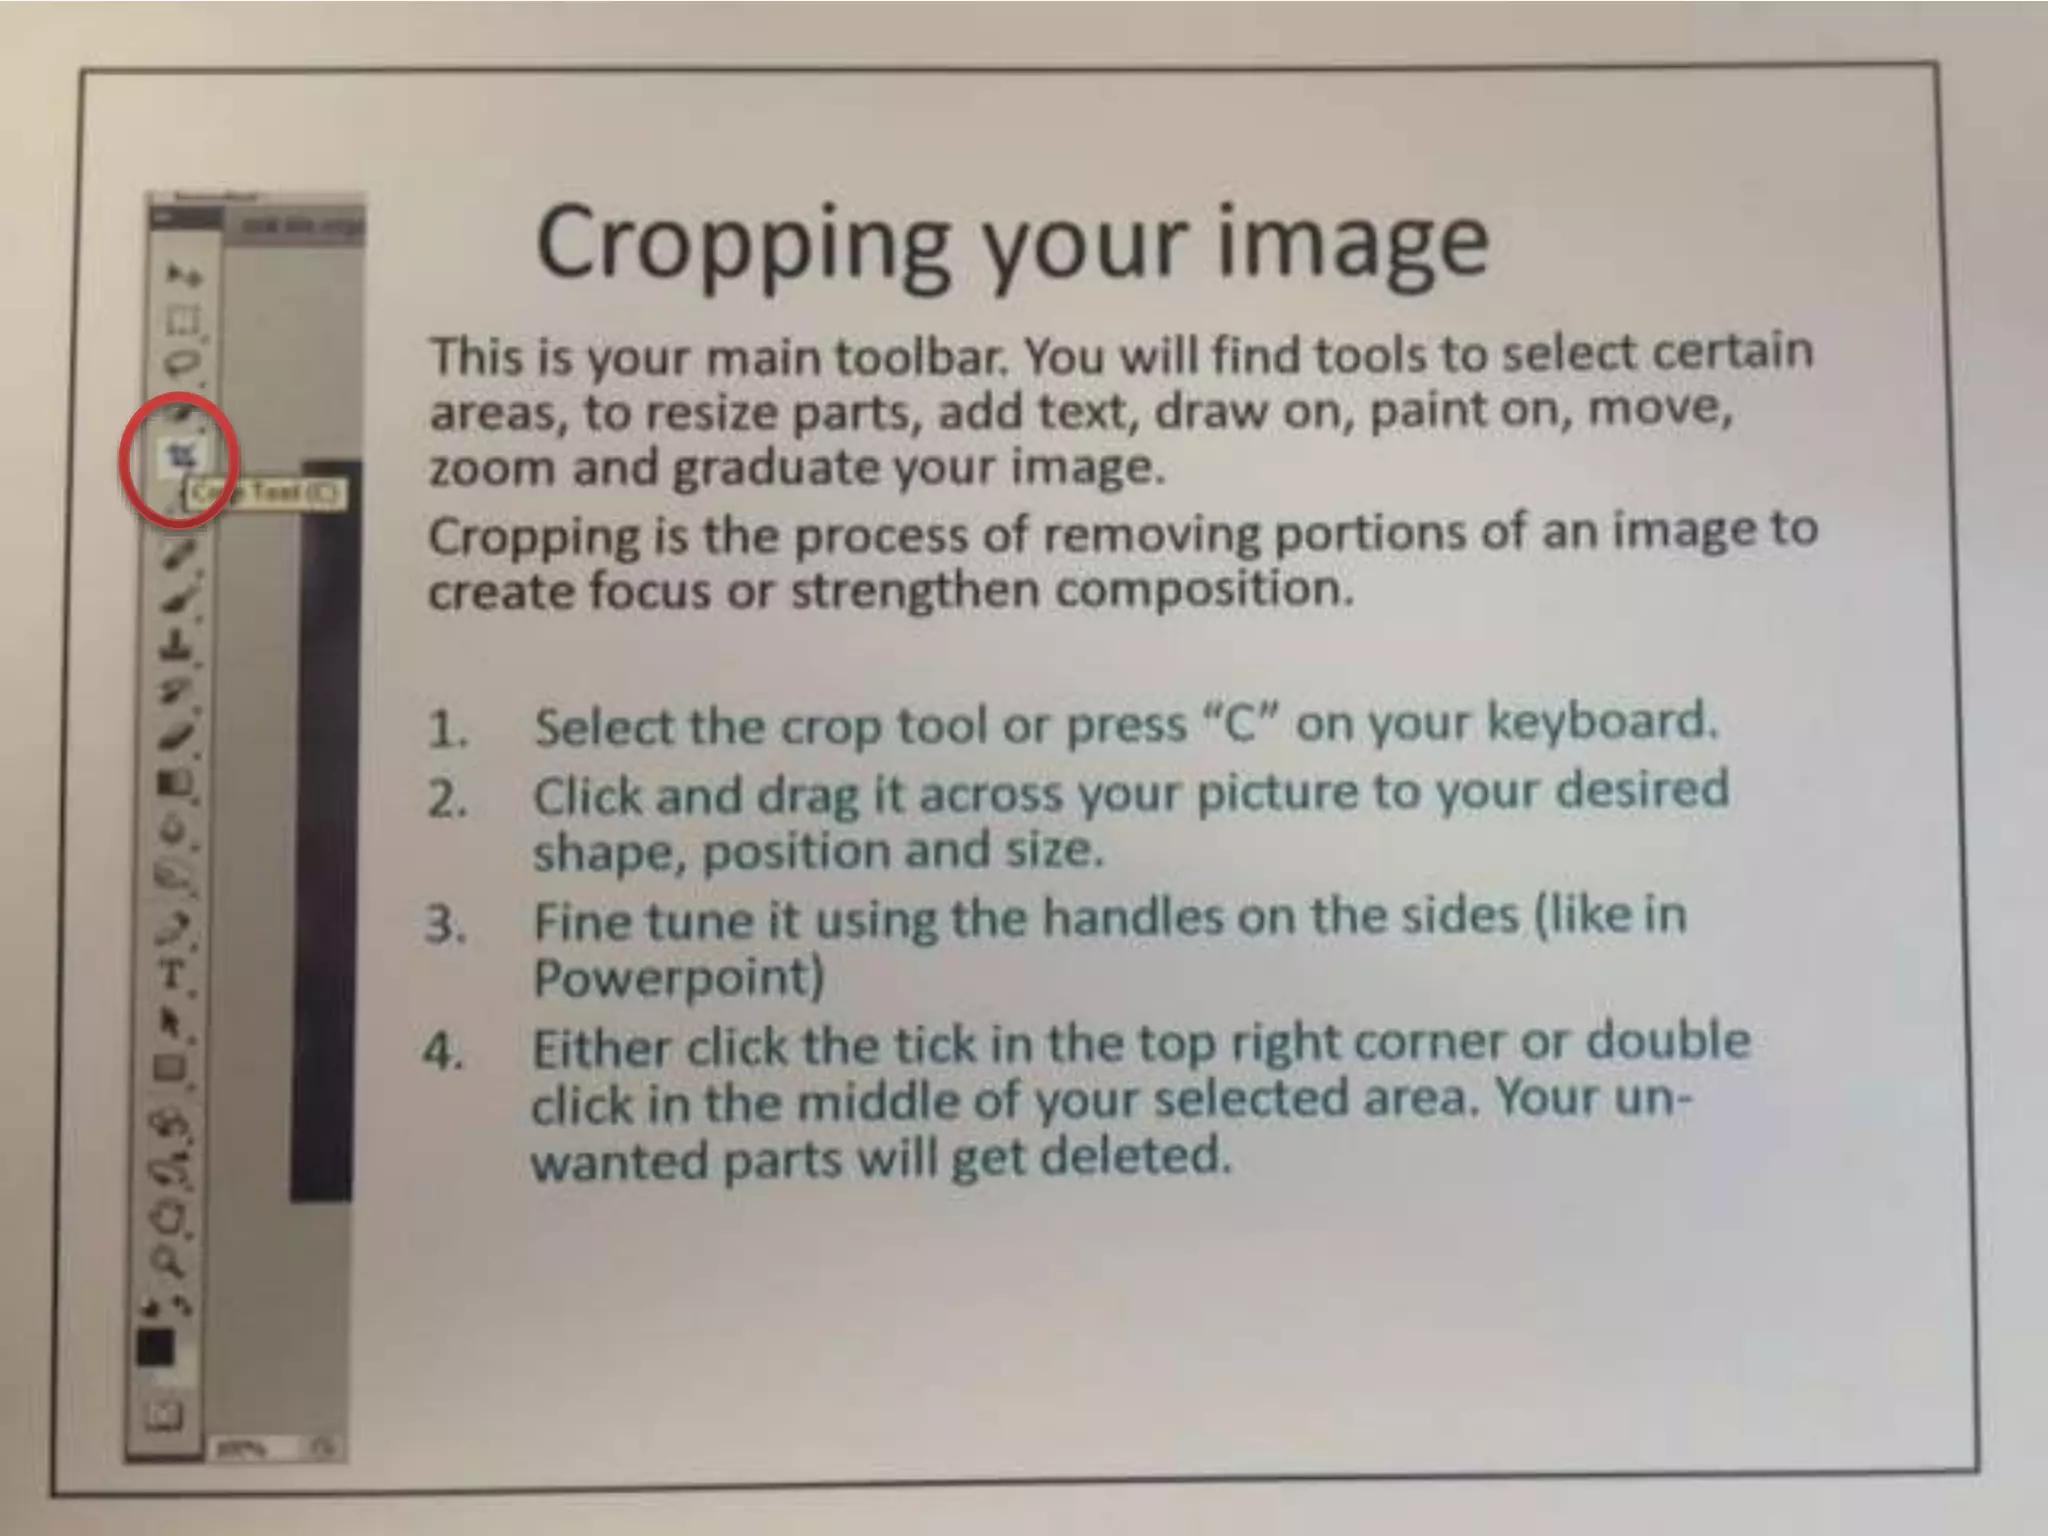
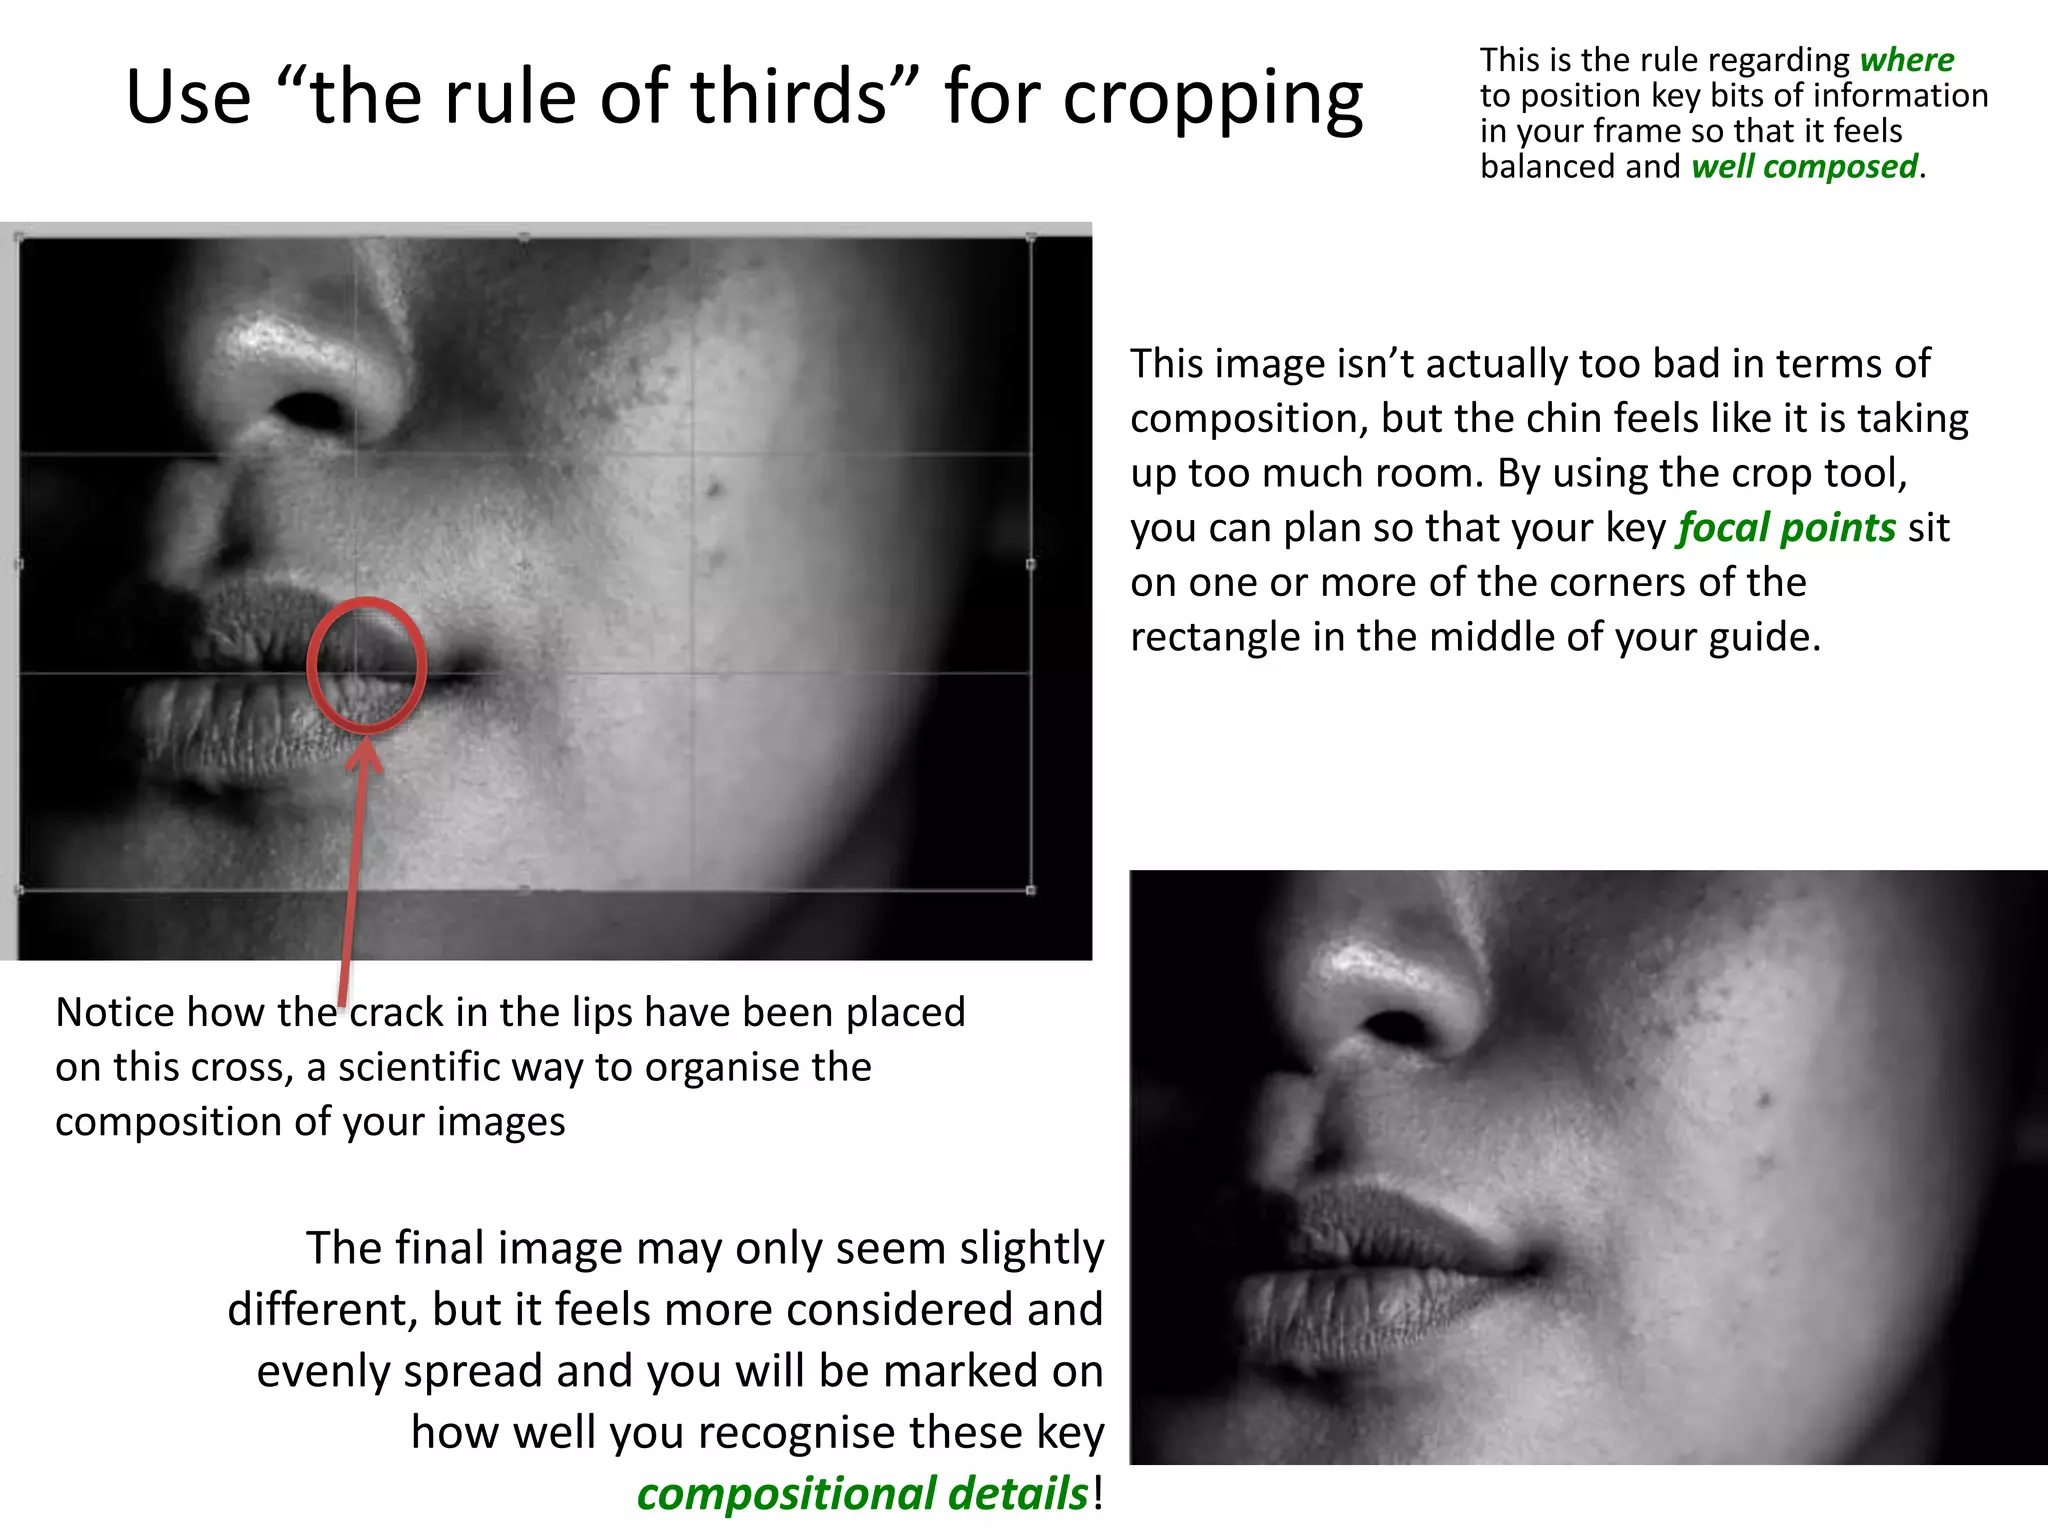
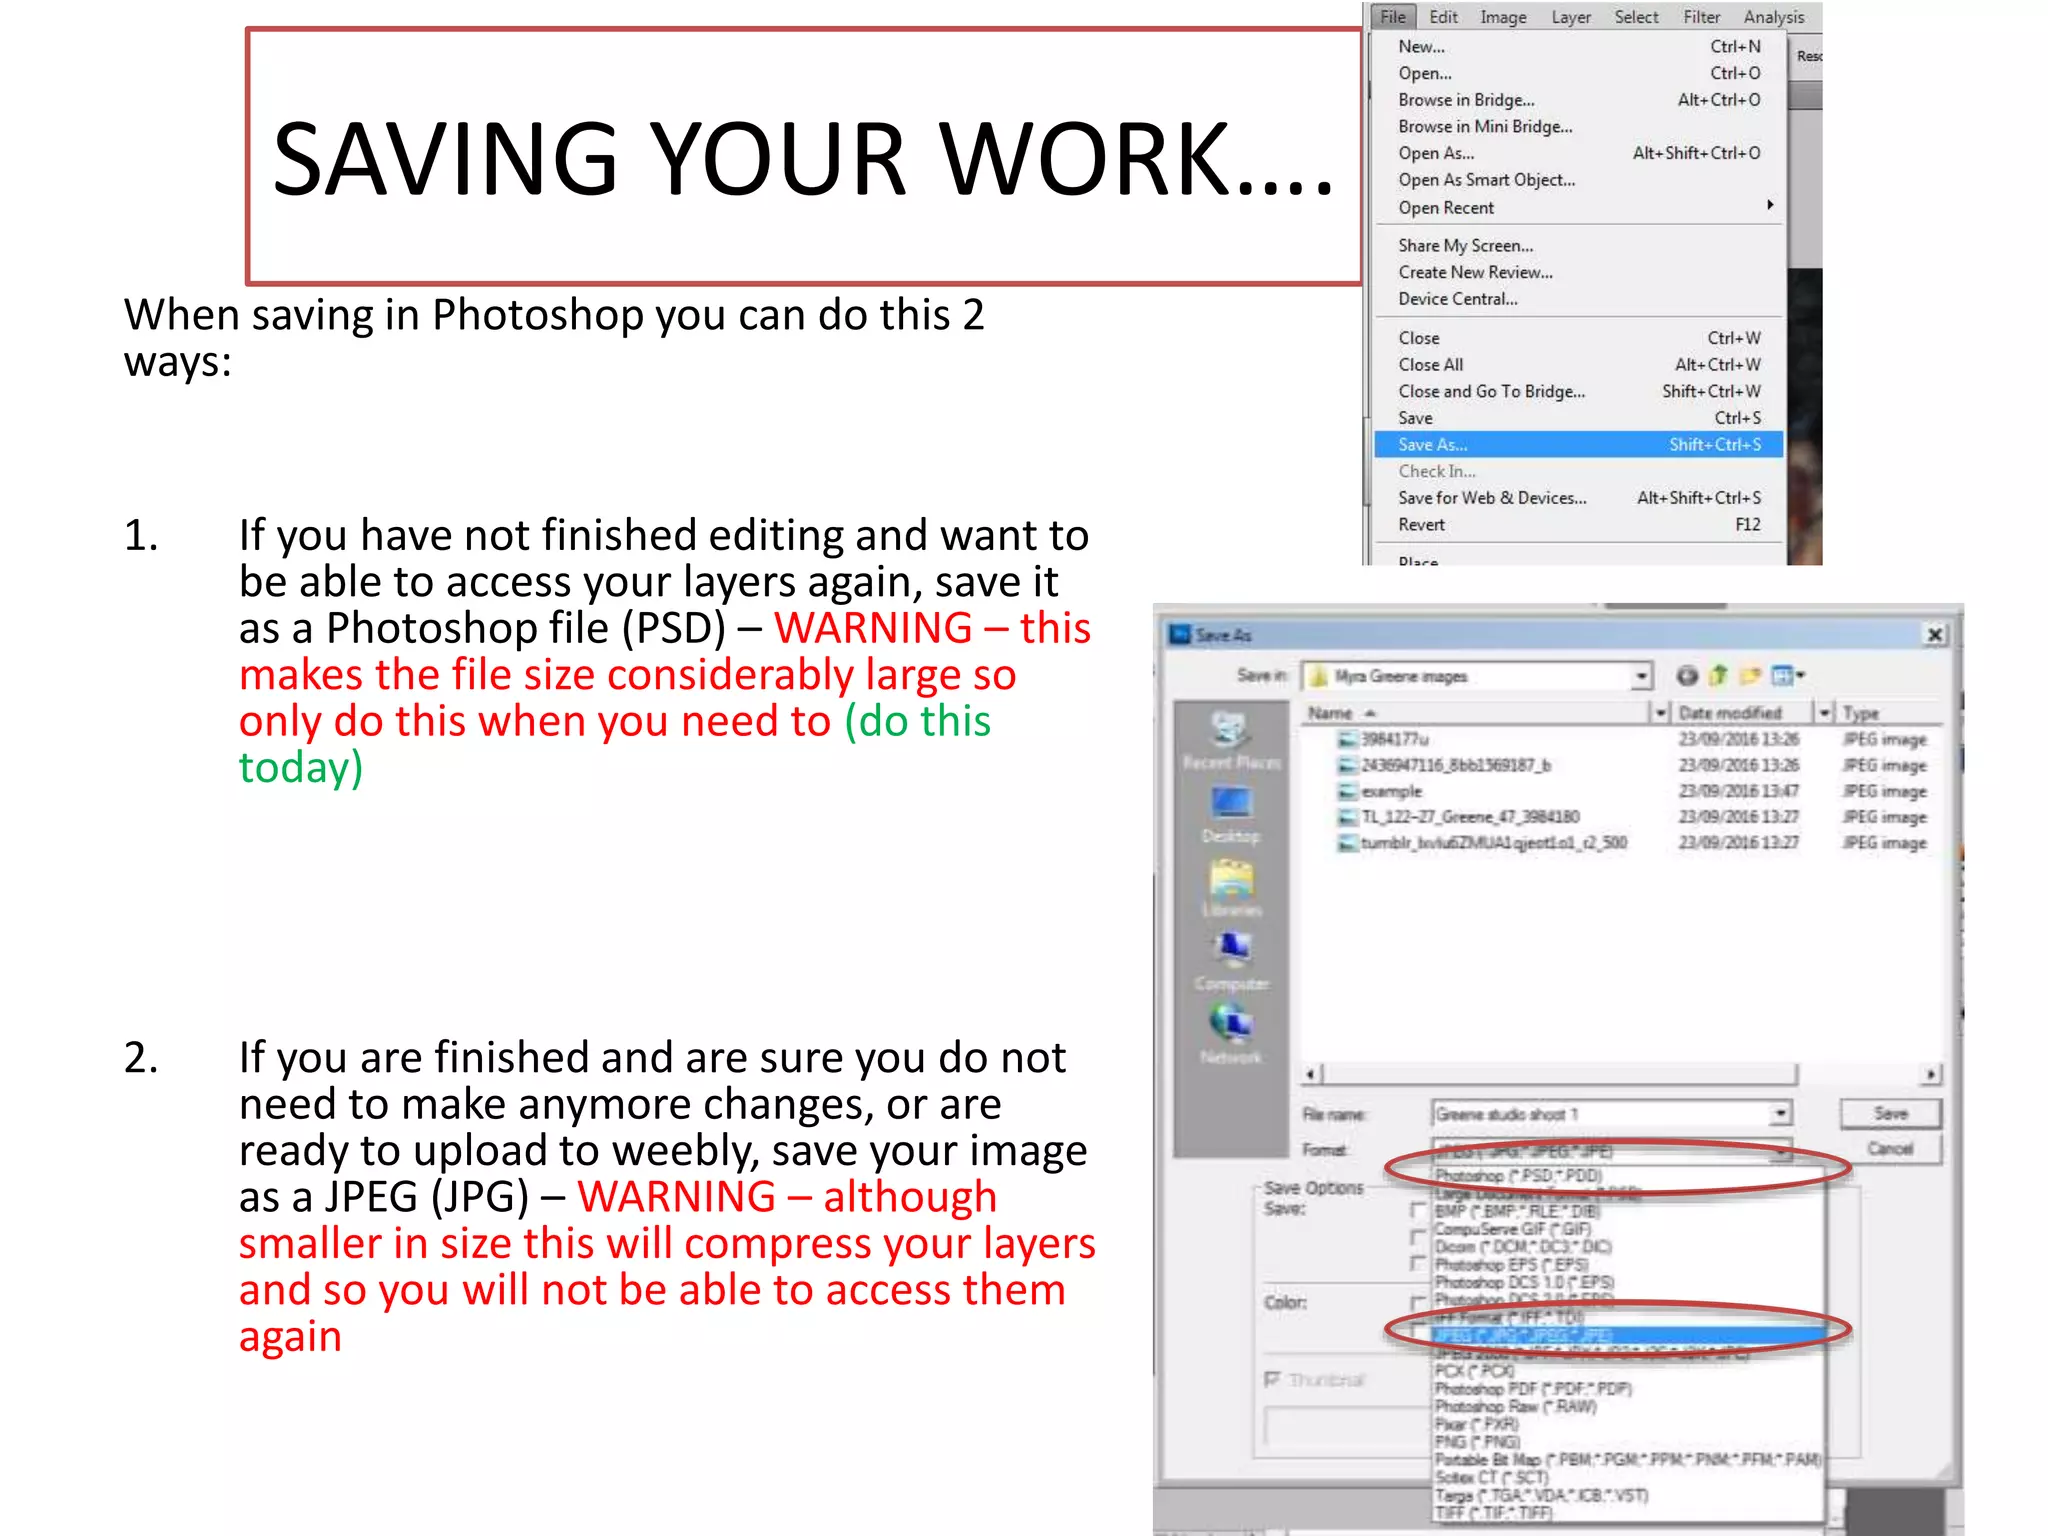
3. The document provides guidance on choosing images to edit, using tools like levels adjustment and cropping to refine compositions according to techniques like the rule of thirds, and saving work in formats like PSD and JPEG.